
Bold sleeves look great in photos and terrible after a bad consultation. Too many half sleeves start with a trendy single-needle reference image that does not match the arm it lands on. Pick a design that follows muscle flow, plan an outline-first session, and bring the right clothes for access. Do that and the piece you show your artist will read clean at six months and still read well at year three.
1. Japanese Irezumi: Koi, Dragon and Flowing Waves
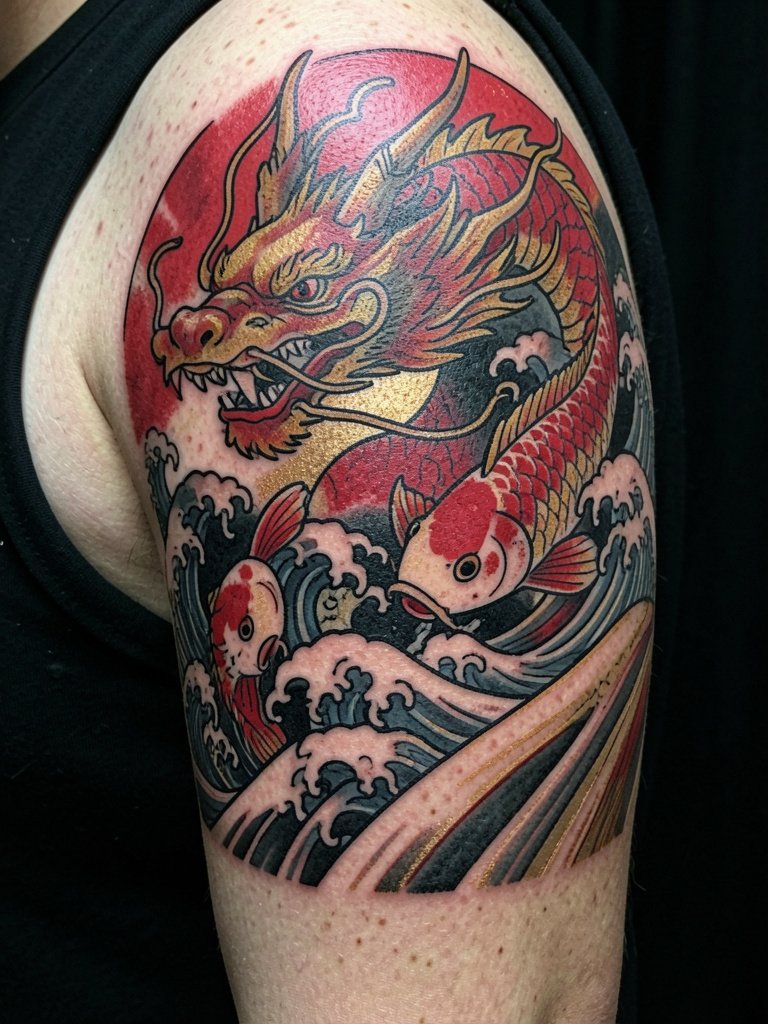
This classic wrap uses organic shapes so the design survives muscle growth and gains. I recommend the focal creature on the outer bicep with waves extending vertically toward the elbow to avoid a horizontal cut that shortens the arm. During consultation bring full-size references that show line weight and color balance so the artist can scale elements to the arm. A common mistake is asking for tiny, densely packed motifs that turn into visual noise after healing. For show-off wear, roll a linen short sleeve shirt in cream or olive to expose the full shoulder-to-elbow flow.
2. Black & Grey Realism: Portrait or Animal Hero
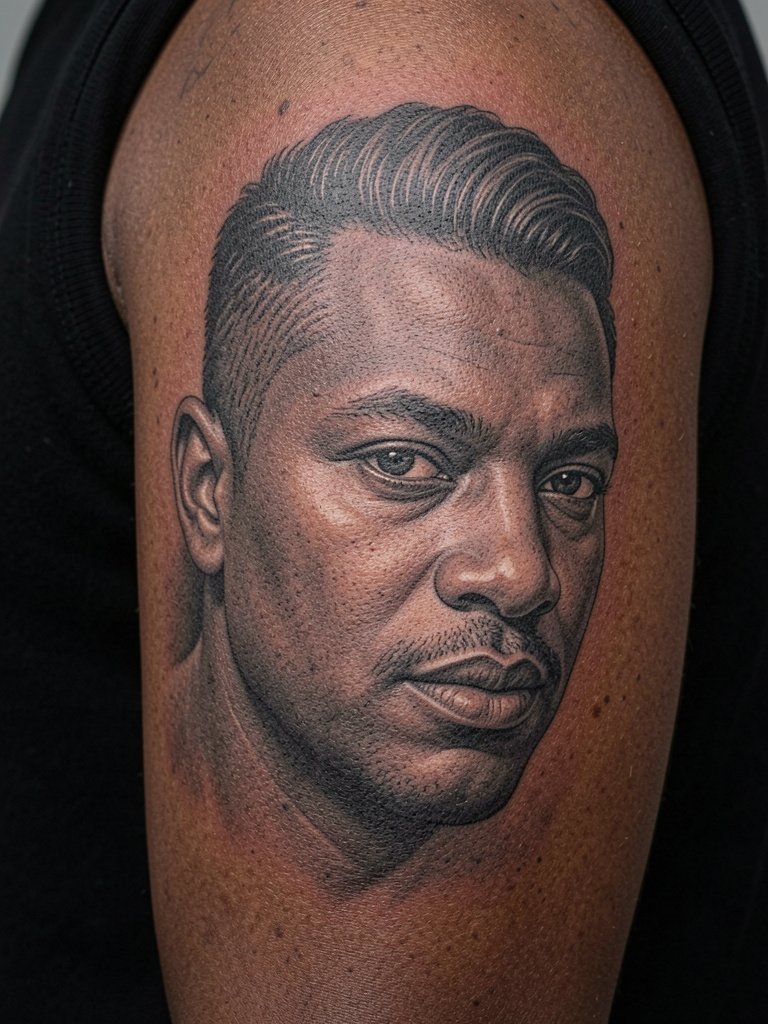
Portraits demand distance and contrast to age well. Place the subject on the outer bicep and include background shading to prevent isolated faces from stretching with muscle changes. Expect multi-hour sessions where the shading can feel like a constant tapping sensation. Some artists accept numbing for long realism sessions and others refuse it outright. One camp says numbing cream is a legitimate tool to keep clients on the table for multi-hour fills. The other camp warns it alters skin texture and can make ink uptake patchy. If you plan to use numbing, ask for a small test patch during the outline to check uptake.
3. Neo-Traditional Floral Band: Peony, Chrysanthemum, Thorns
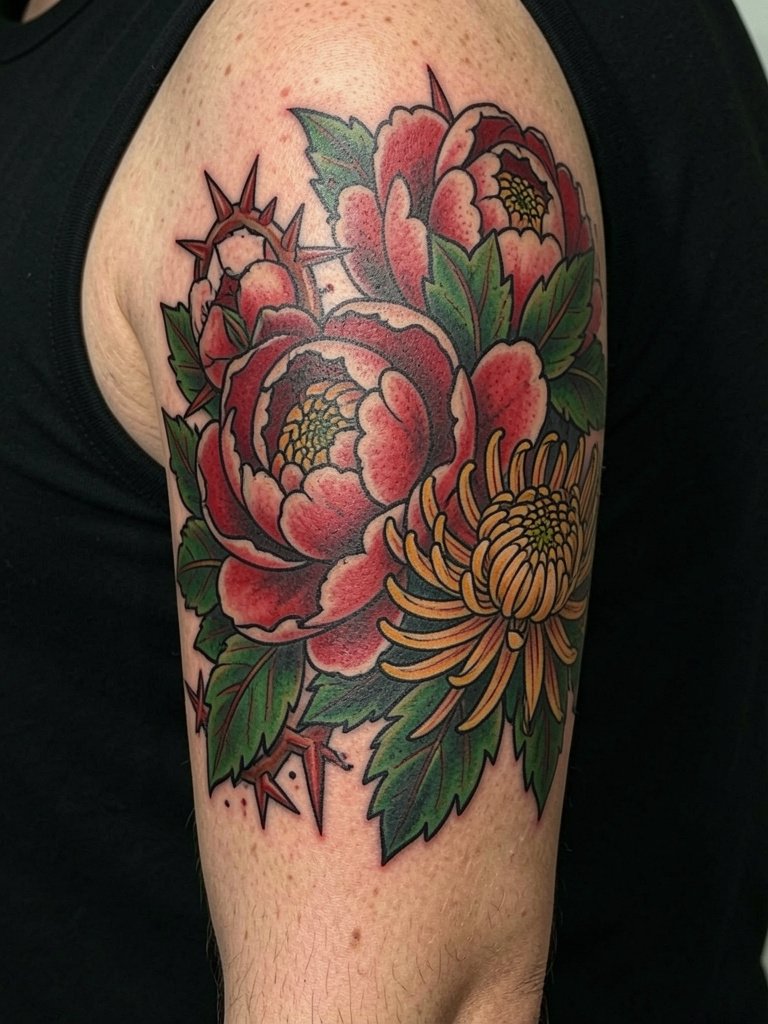
This style balances bold linework and color pop so it reads from across a room and survives six to 24 months better than tiny fine-line florals. The session time is moderate, usually two sessions for outline and color blocking. A common aging issue is over-detailing small petals. Ask for simplified petal shapes and thicker linework in tight areas. For showing it off, pair the band with a cream button down shirt with sleeves rolled to the mid-bicep so the colors and outlines stay visible.
4. Biomechanical Blackwork: Gears That Follow Muscle Lines
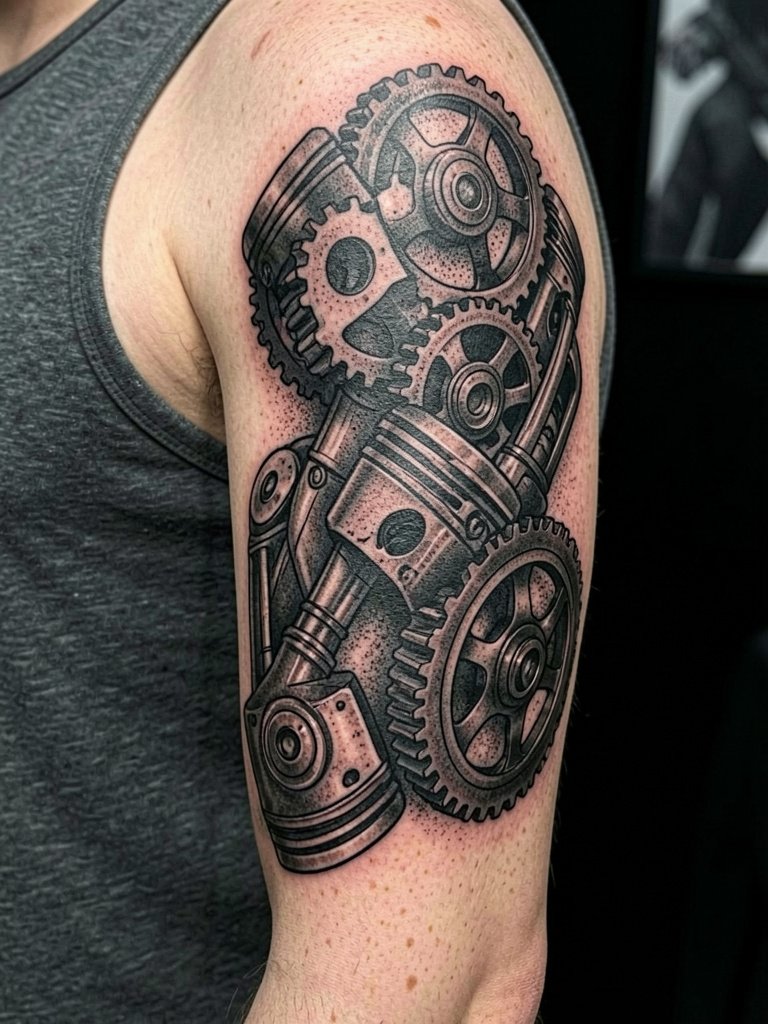
This design enhances muscle definition by following natural anatomy and keeping elements vertical. The biggest mistake is forcing rigid boxes or precise geometry across a flexing surface. Instead ask your artist to map the major gears along the bicep peak and let softer mechanical elements fall into the inner arm. Sessions are contrast-heavy and can feel like a brisk abrasion as the machine shading builds. For the session wear, bring a black tank top so the artist has full arm access without tight seams pressing on fresh ink.
5. Geometric Ornamental Mandala Wrap
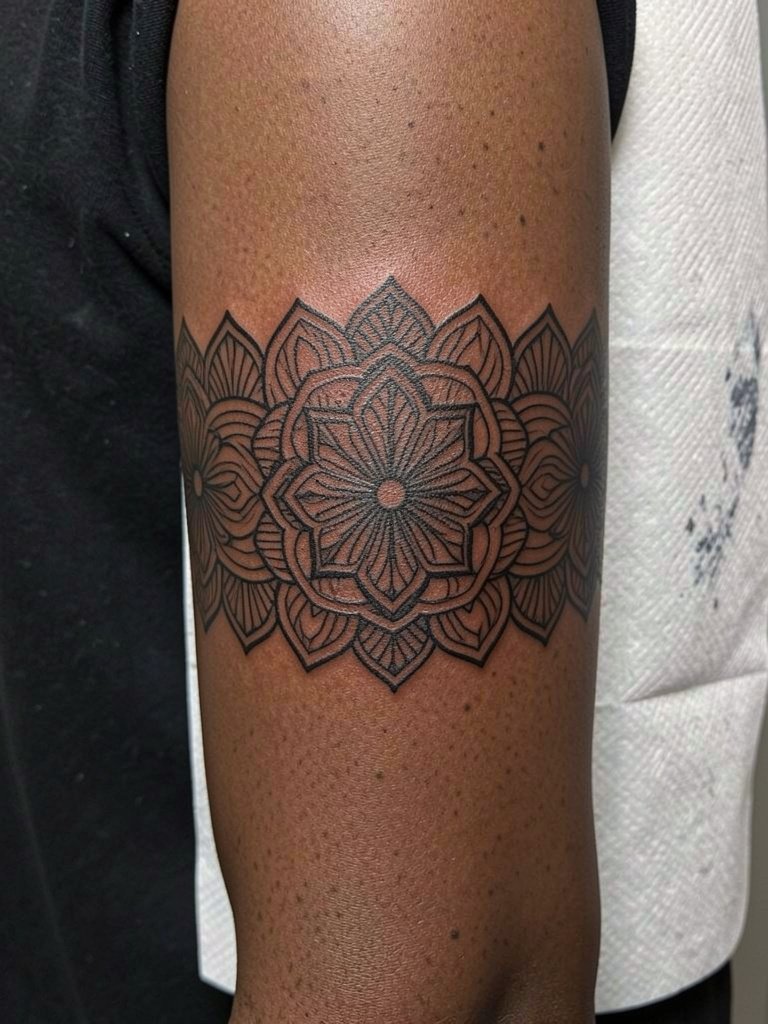
Mandala wraps look clean when given room to breathe. The fatal error is making motifs too small. Fine line mandalas can blur on the outer bicep. Artists split into two camps on this. One group says fine-line mandalas on the upper arm blur within two years because skin stretches and small lines coalesce. The other group says with correct needle depth and slightly wider spacing they can hold for years. If you want crisp ornament, ask for slightly bolder spacing than your reference photo so the pattern reads after healing. For outfits, open-collar linen shirts in neutral tones complement the band. Use an open collar linen shirt to reveal the full circumference.
6. Hannya Mask with Wind Bars and Waves
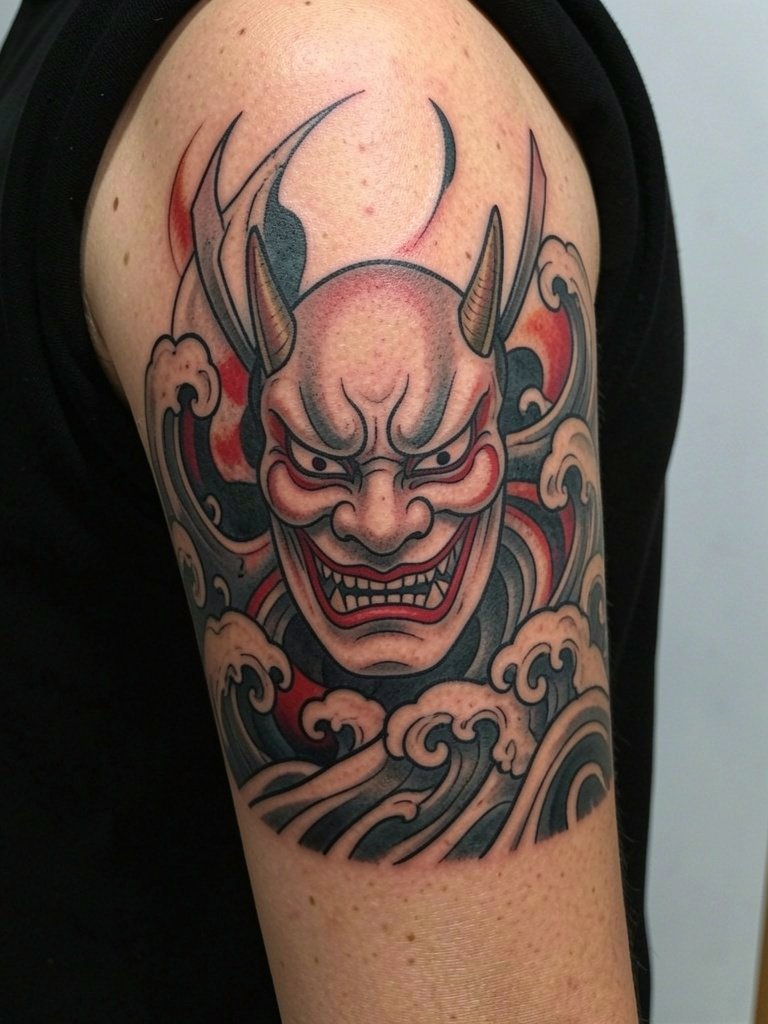
Hannya masks work as a strong central focal point paired with full background fills to avoid patchy negative space. The session can be uncomfortable in tighter areas, but the bold outlines shorten chair time compared with single-needle work. A common mistake is requesting tiny facial detail inside the mask. Keep facial carving bold and let wind bars and waves provide flow. Culturally this motif comes from Japanese tradition. Acknowledge the origin when briefing the artist and avoid mixing unrelated iconography that flattens the cultural meaning.
Heal Smart
That Japanese wrap, the portrait and the neo-traditional florals above all benefit from careful first-week supplies and gentler cleansers.
-
Kirei Tattoo Aftercare Balm. A thinner Japanese-style balm that people swap to after Aquaphor clogs, helpful for large color areas that need less grease.
-
Hush Soap Tattoo Wash. A gentle Australian-style soap recommended by users for sensitive skin when washing a new sleeve, reduces irritation without stripping ink.
-
Ink Fix Tattoo Serum. Users report it reduces heavy scabbing on larger pieces and keeps texture even across shaded backgrounds.
-
Hustle Butter Original. A popular specialty balm that soaks in without the heavy occlusive feel, useful when color saturation needs support during the first two weeks.
-
Saniderm Second Skin. Artist-applied protective film that some studios use for the initial 3–5 days to reduce scabbing and protect the piece after long sessions.
7. Tiger, Peony and Cloud Flow
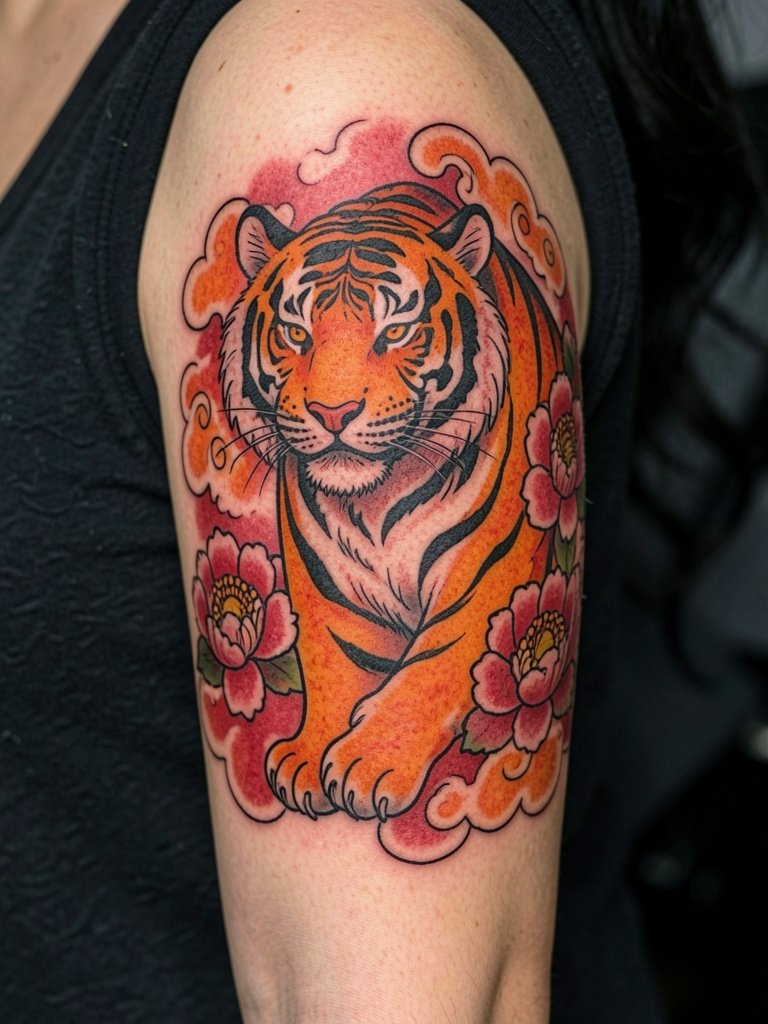
The tiger is a great hero subject that pairs naturally with florals to soften the silhouette. Place the tiger face or stripe lines on the bicep peak so it reads while you move. The usual mistake is tight facial detail that loses impact once the arm flexes. This design ages well because large color blocks hold saturation longer than tiny cross-hatching. For showing it off, a rolled-cuff linen shirt in olive highlights the warm tones and gives the sleeve room to breathe.
8. Clock, Roses and Hourglass: Memento Mori
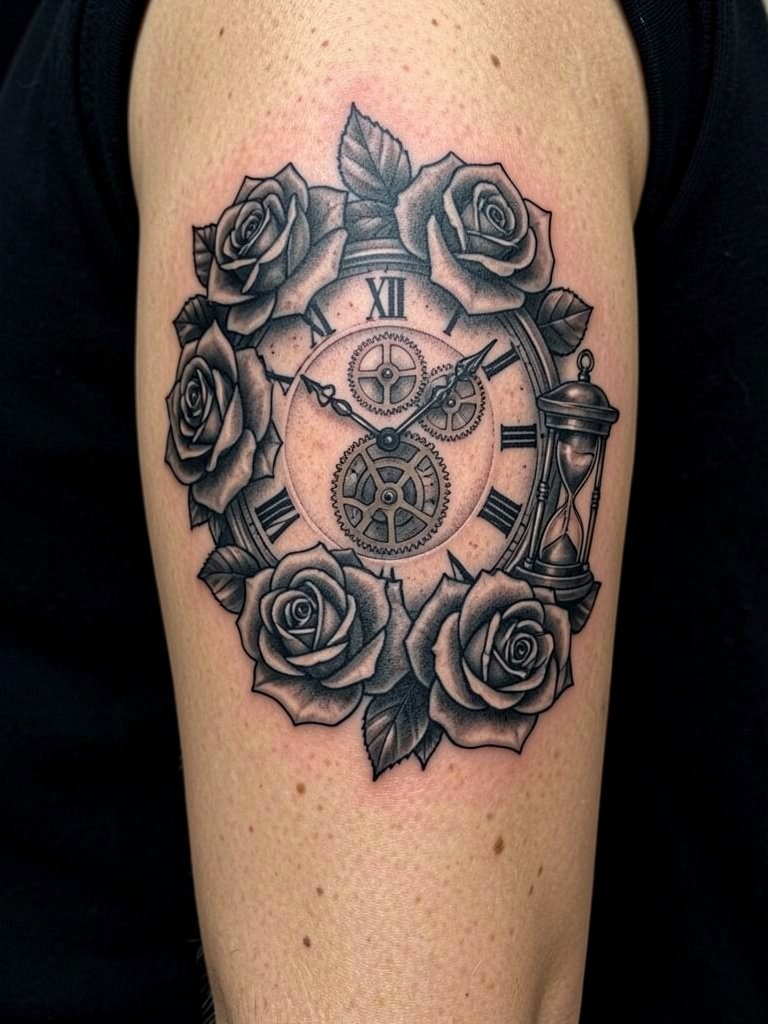
Time pieces work best as a central hero with softer florals to anchor edges. Tell the artist exactly where you want the clock hands and how large the gear detailing should be. Tight gear teeth under heavy shading can lose crispness at two years if placed over muscle expansion zones. Typical touch-up needs are at six to 12 months for the fine teeth. Session time is medium. For evenings out, solid dark crew necks keep the portrait-style shading prominent.
9. Chrysanthemum and Dragon Pairing
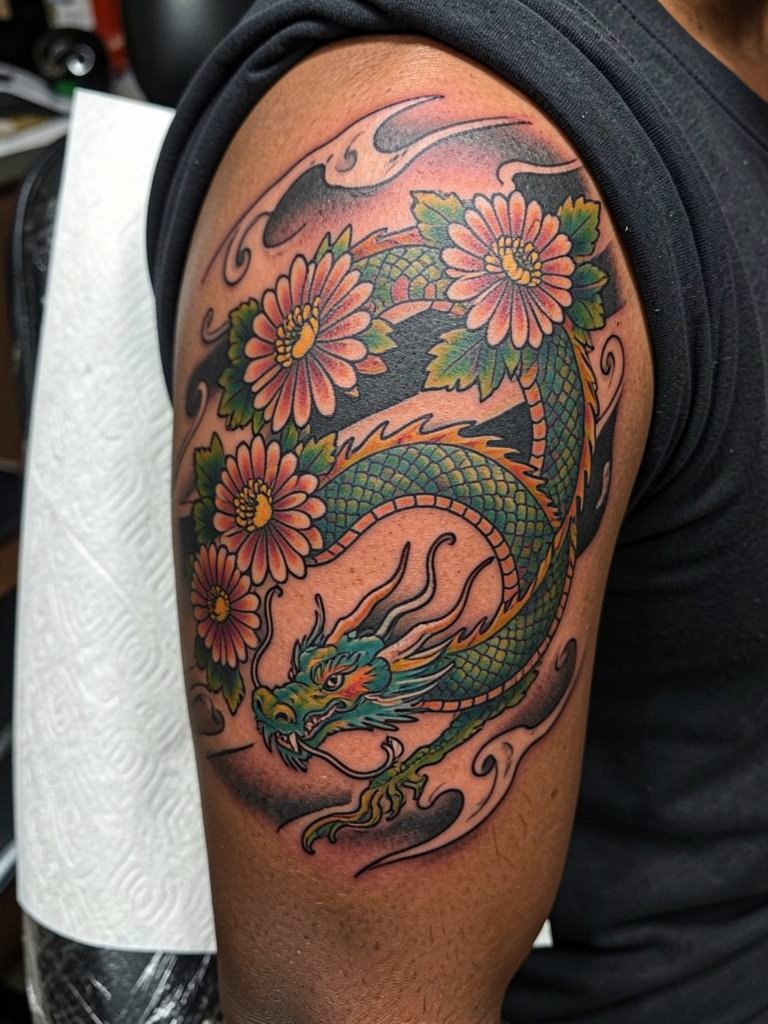
This pairing marries power with decorative flow. Ask the artist to scale the chrysanthemum petals larger than your reference so texture does not clog after healing. The dragon should curve with the natural spiral of the arm. A typical mistake is placing the dragon head on the inner arm where movement and friction blur fine detail. Keep the head on the outer surface and use clouds and wind bars for inner-arm fill.
10. Architectural Sketch: Columns, Arches, Depth
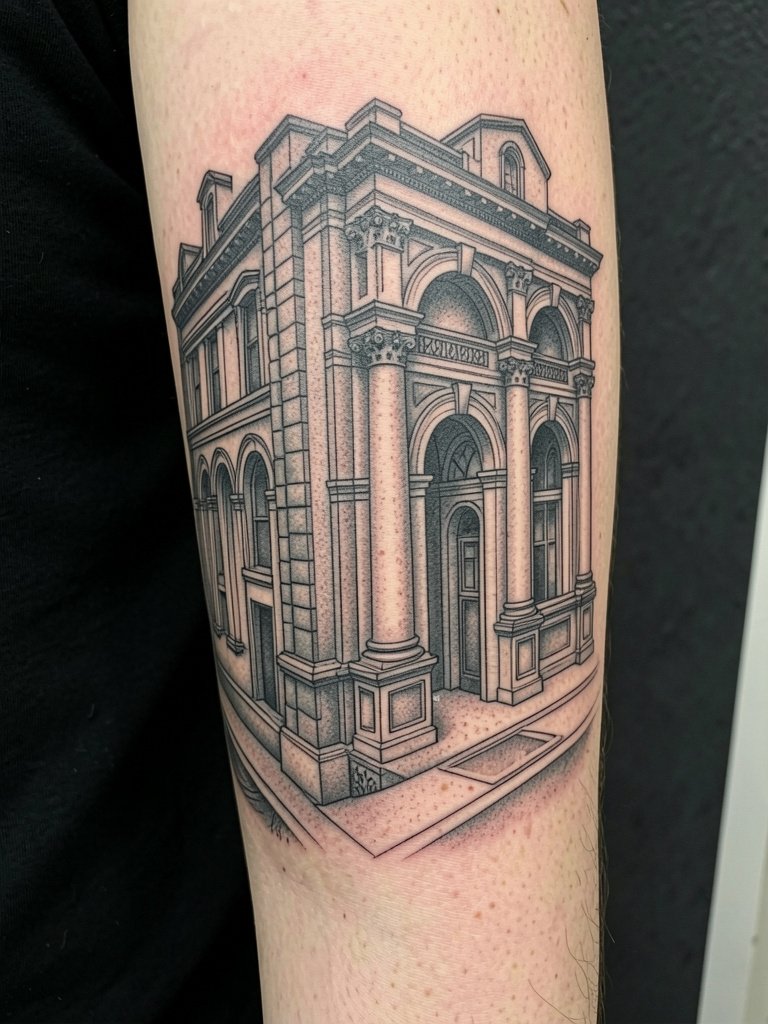
Architecture reads as a refined sleeve when the artist uses perspective to follow arm curvature. The main risk is vertical lines that meet at the elbow and look skewed when the arm bends. Request sketches that show how the columns will sit when your arm is relaxed and extended. Session time varies depending on detail. For a simple way to let the piece pop, wear a minimalist men bracelet on the opposite wrist.
11. Snake and Skull Gothic Realism
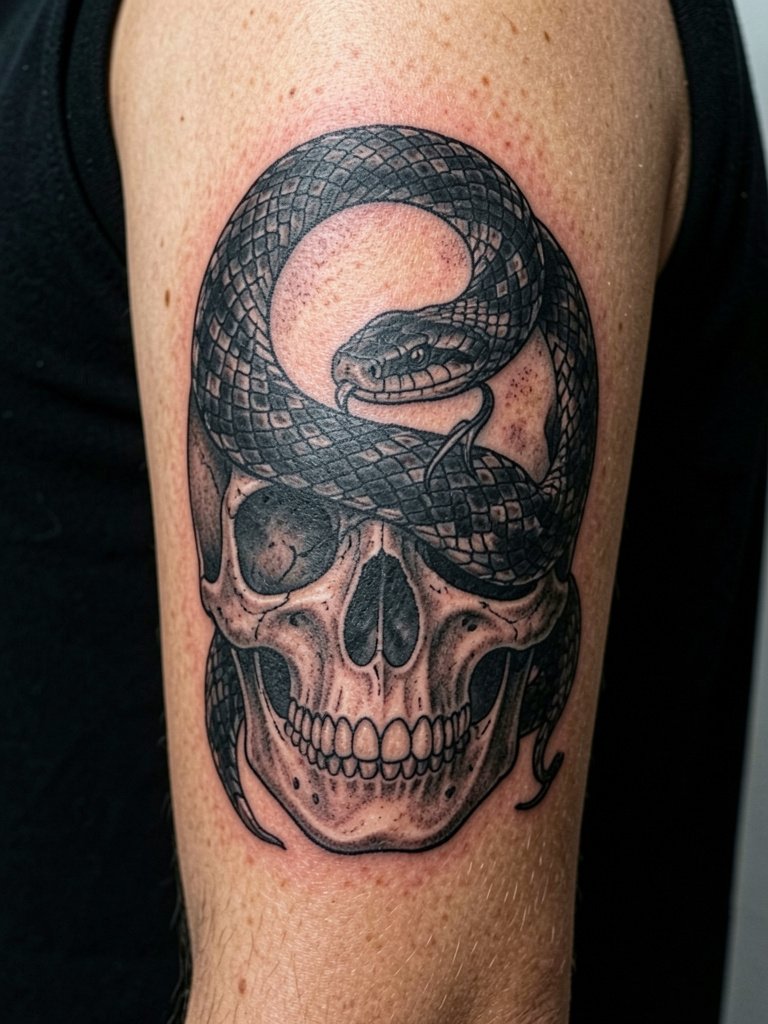
Dark pieces thrive with clear focal hierarchy. Put the skull at the bicep peak and let the snake wrap upward toward the shoulder or downward toward the elbow. Beware of overly tight scale patterns in the first session. Those can blur into a tone instead of readable texture. Most folks plan one touch-up after six to 12 months to deepen contrast in the scales and clean the jawline edges.
12. Waves and Storm Clouds: Japanese Nautical Flow
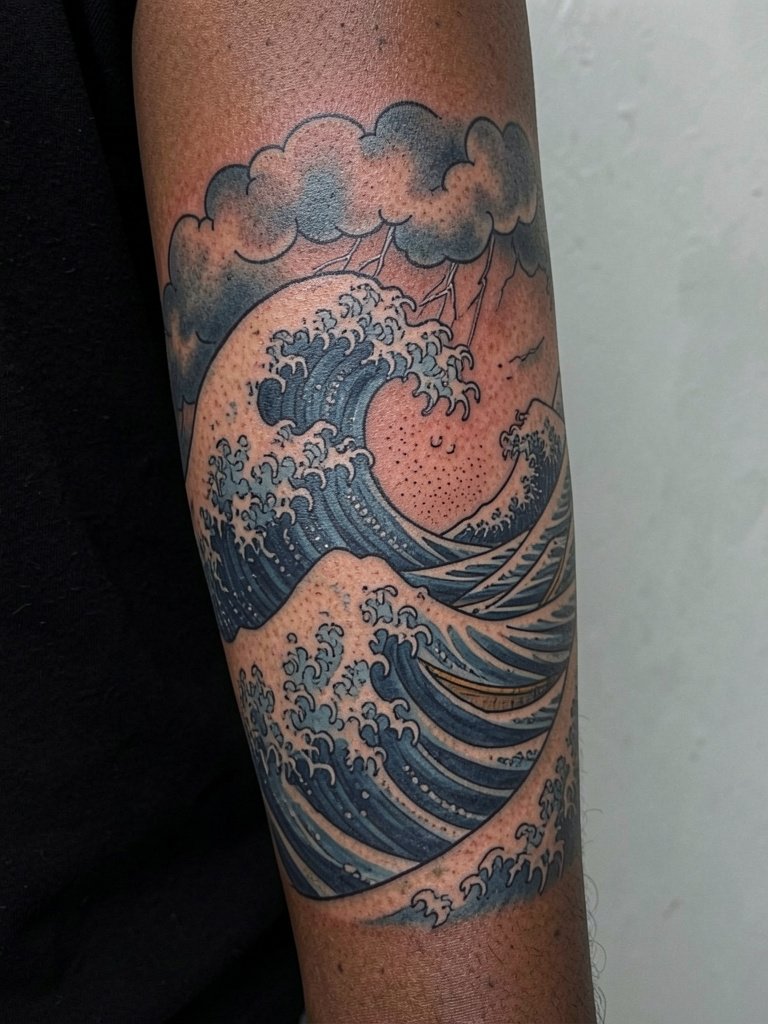
A background-only sleeve is underrated. This approach lets future hero pieces sit on top without fighting composition. The design should avoid horizontal bands that split the arm visually. A common error is placing too many uniform waves at the same scale. Ask for size variation so the eye travels naturally. Two shorter sessions often work better than one marathon appointment for these backgrounds.
13. Ornamental Band with Thorns
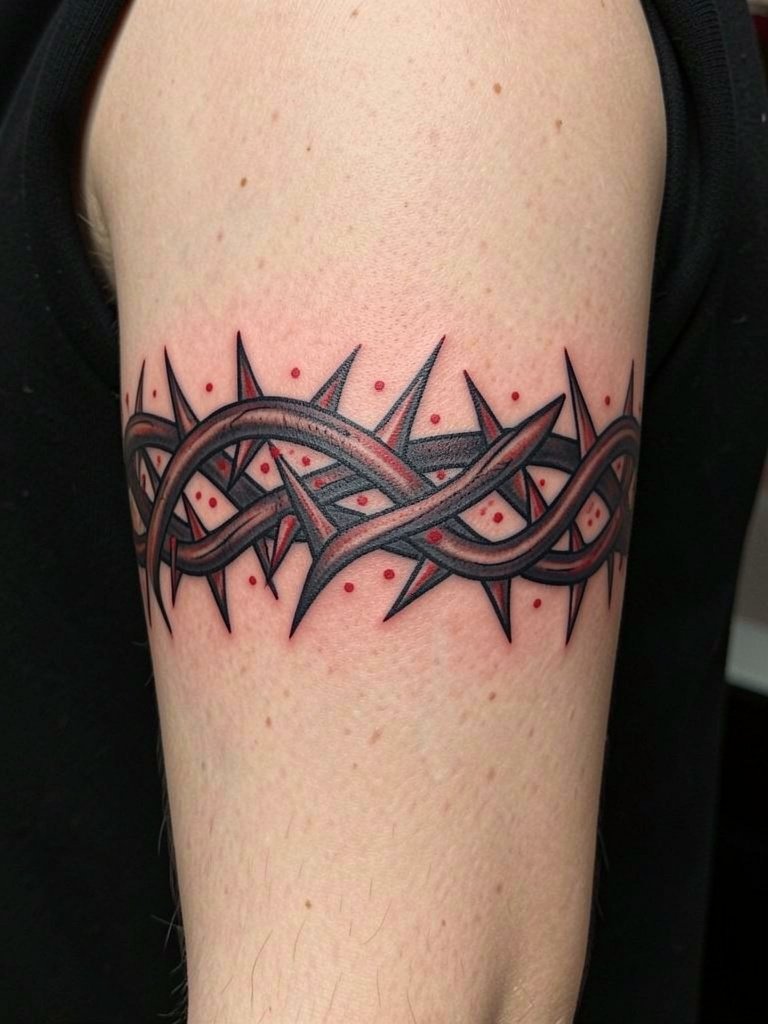
Bands with organic thorns read well when scaled to the arm’s circumference. Small thorn motifs get lost over time, so ask for slightly larger spacing and thicker outlines than a reference photo might show. Session times are usually short per pass, and many artists do the band in two sittings to test how it settles. For a casual look, pair it with a dark charcoal crew neck t shirt and minimal jewelry.
14. Koi Fish Swimming Upstream
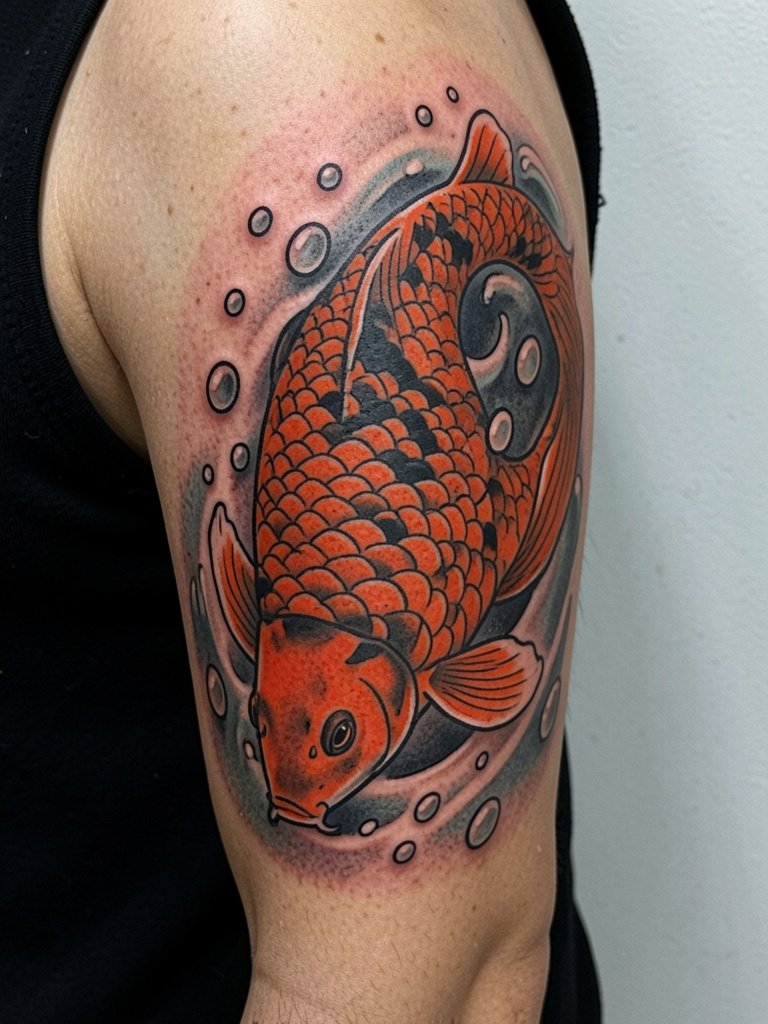
Koi motifs symbolize perseverance and look great with motion built into the composition. Place the fish on the mid-bicep with water lines that move vertically to suggest upward motion. The common error is a small koi whose scale pattern blurs into texture. Ask for fewer, larger scales and strong contrast in the fins for longevity. Expect two to three sessions for full color saturation. A neutral linen shirt keeps the color pop readable.
15. Abstract Smoke with Geometric Anchors
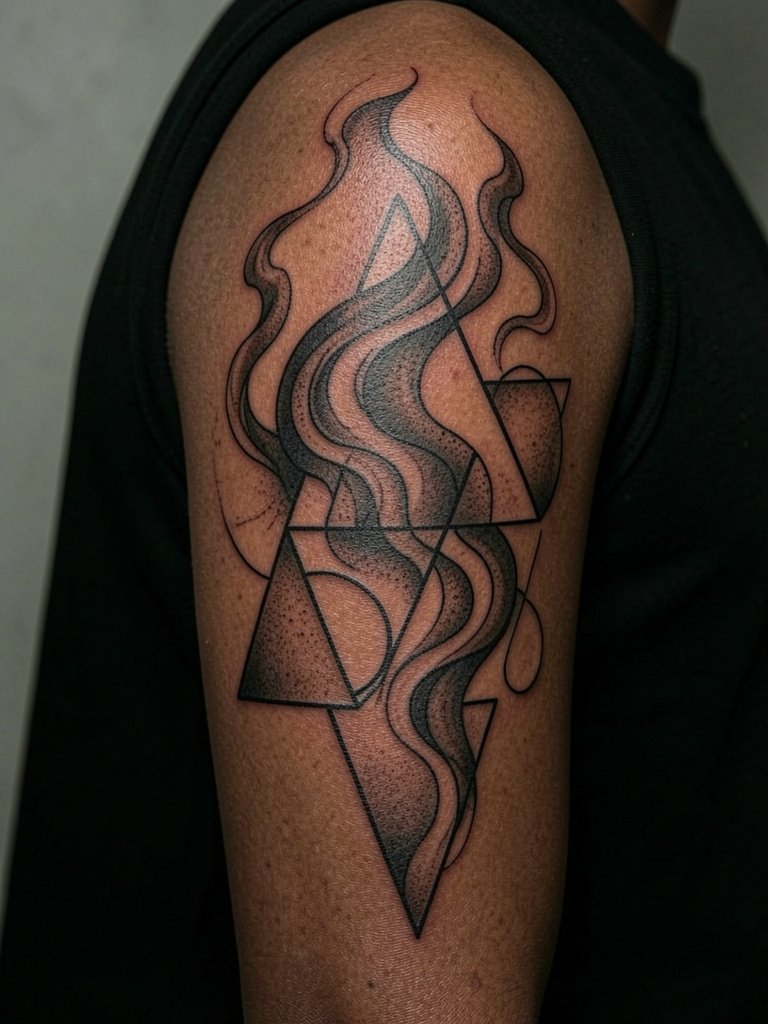
This hybrid plays organic and rigid against each other for modern visual tension. The design that ages better uses softer smoke edges and larger geometric negative spaces. Fine rigid grids that are too tight will warp with muscle growth. For session wear and showing off, a dark gray t shirt keeps contrast clear without competing with the shapes.
16. Stipple Shaded Mountain Range
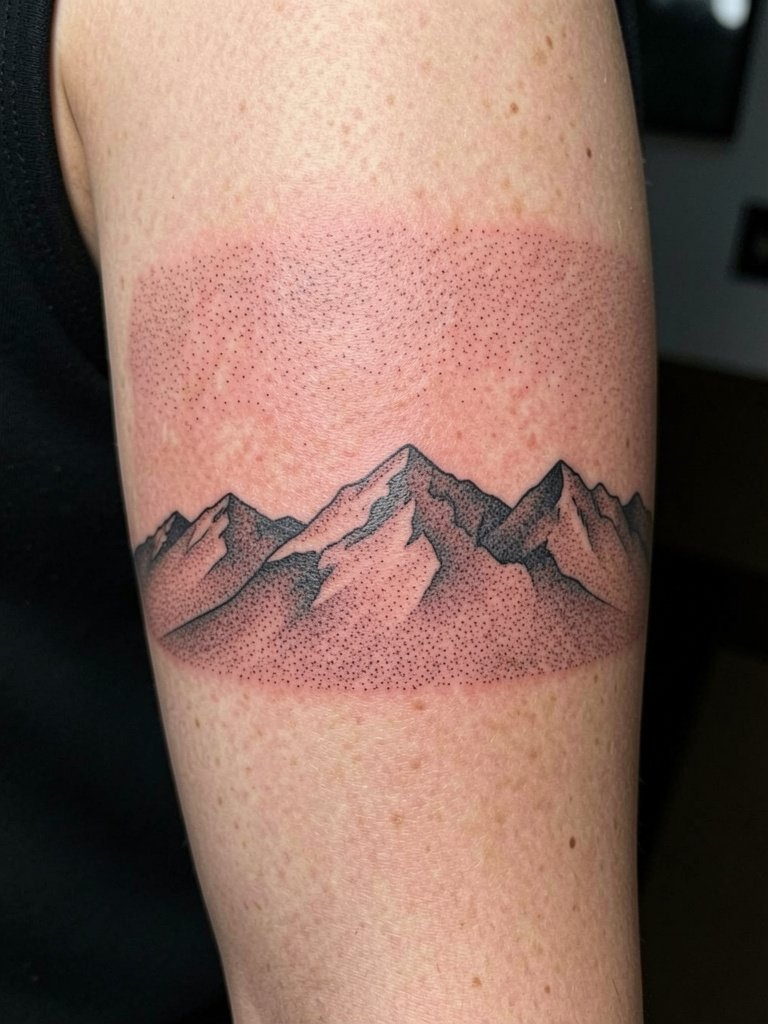
Stipple landscapes read as subtle texture and require enough surface area to avoid dot bleeding. The pitfall is compressing a detailed scene into a small band that later looks like a grey smudge. Book the outline and one shading session, then plan a touch-up at six months to restore any softened dots. For the appointment, wear a loose short-sleeve shirt so the artist can roll sleeves without pressure on the fresh ink.
17. Celtic Knotwork Wrap
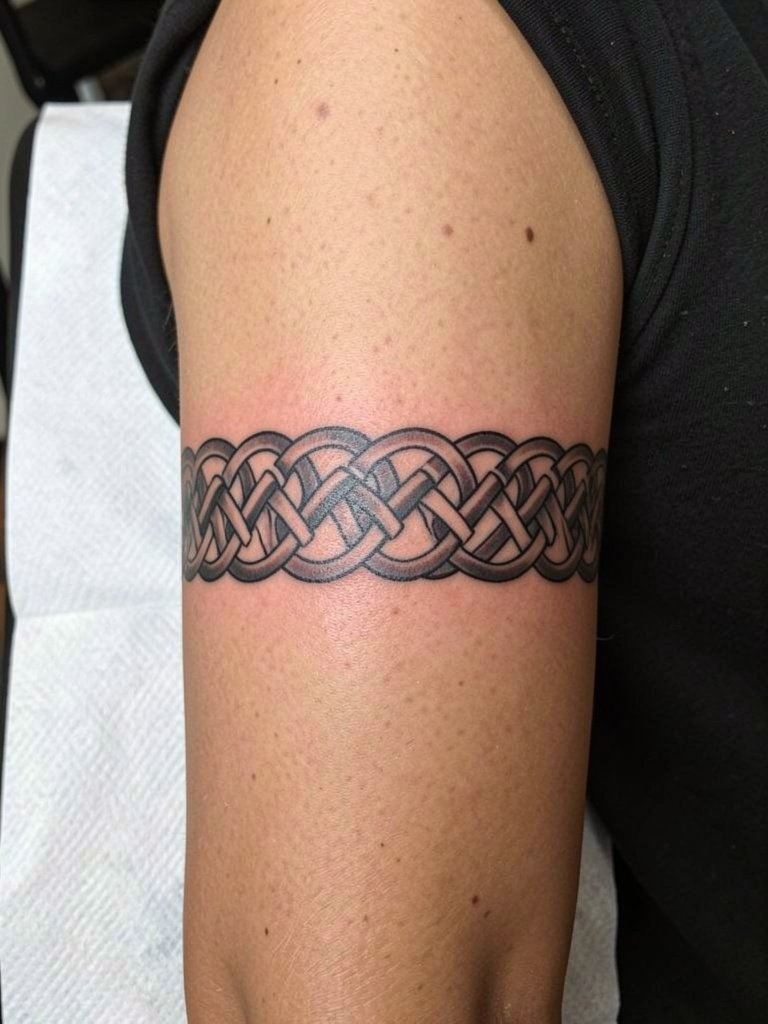
Knotwork demands clear spacing and consistent line weight. The biggest mistake is asking for micro-detail knots that become unreadable in a year. Request larger loops and slightly heavier linework for surface tension that survives movement. If you want a wrap that connects to a future sleeve, ask the artist how edge elements will blend into color or blackwork so you do not get a hard stop at the elbow.
18. Mythic Chimera in Neo-Traditional Style
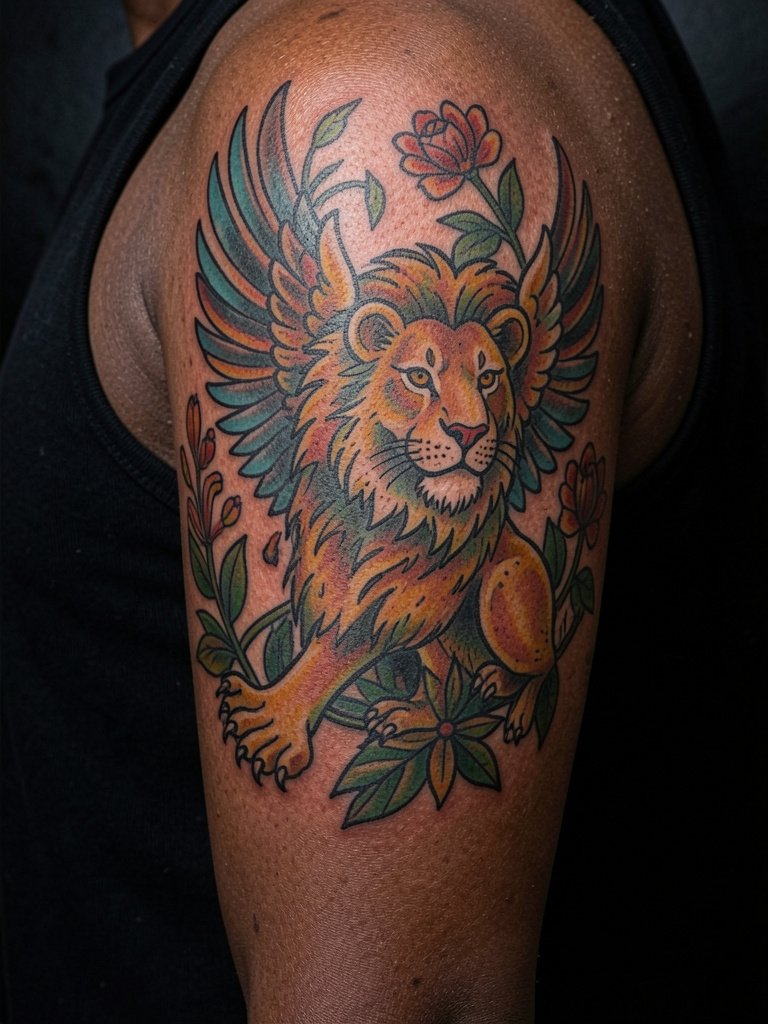
Mythic beasts are custom pieces that reward a clear hero placement and simplified secondary motifs. Tell the artist which elements must remain prominent at all sizes so they can plan silhouette and negative space. Overworking small feathers and fur lines is a common regret. For sessions and photos, a solid black crew neck tee keeps the creature’s linework visible without distractions.
19. Travel Sleeve: Map Fragment, Compass and Coordinates
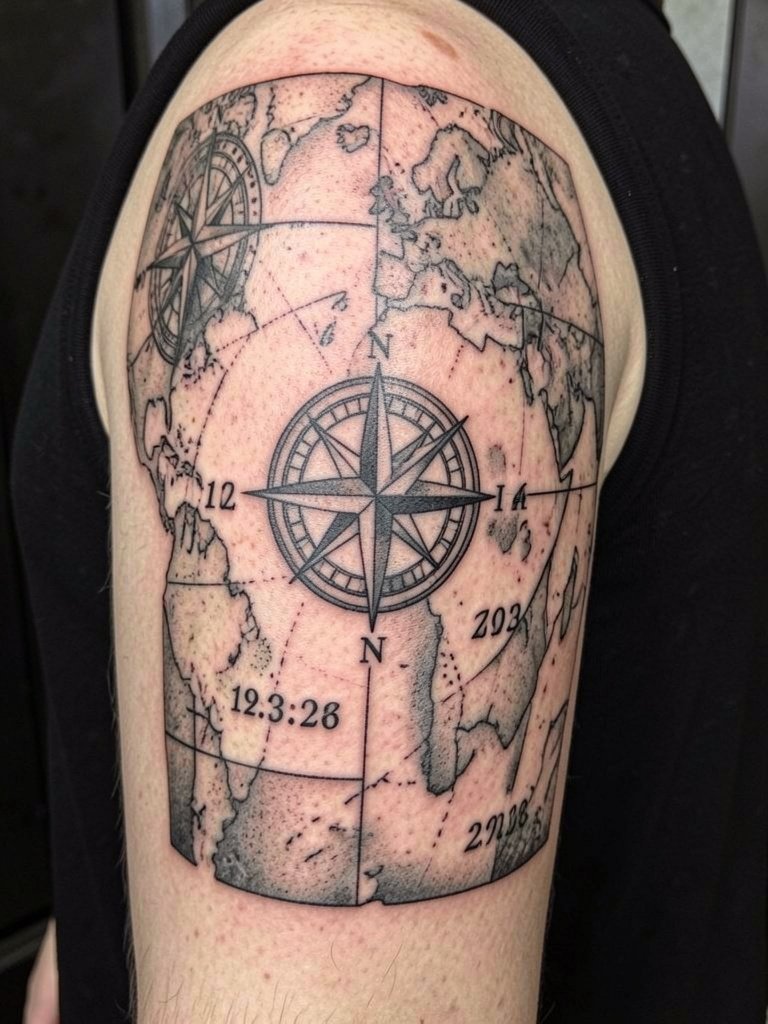
Maps and coordinates make personal sleeves that rely on readable typography and clear edges. The number design must be sized for legibility after healing. A common mistake is choosing a script that looks pretty in a photo but blurs at close view. Ask for the exact font and for sample stencils at two different scales. Touch-ups for small numerals are common at the six-month mark. For showing off travel pieces, a simple rolled-sleeve button-down keeps focus on the arm.
Frequently Asked Questions
Q: How much should I budget for an upper half sleeve?
A: Expect a range rather than a fixed price. Most upper half sleeves land in the one thousand five hundred to three thousand dollar range depending on color, detail, and the artist’s hourly rate. Tip norms in the United States usually fall between fifteen and twenty percent of the total, with some clients tipping higher for multi-session projects.
Q: What is the typical healing and touch-up timeline for a half sleeve?
A: Surface healing is two to three weeks and deeper skin settling takes three to four months. Many sleeves benefit from a touch-up at six to twelve months to refresh saturation and clean fine edges. If you lift weights frequently, expect altered ink distribution and plan touch-ups sooner. For the first week keep cleansing gentle and follow the product routine your studio recommends.
Q: Saniderm or dry healing, which is better for a large sleeve?
A: Artists and clients are split into two camps on this. One camp prefers Saniderm or second-skin applied by the studio for three to five days because it locks in moisture and reduces scabbing. The other camp favors dry healing with a thin specialty balm because it avoids trapping bacteria and can feel safer on sensitive or large areas. Choose based on your skin history and any allergy concerns, and tell your artist what previous methods have worked or failed for you.
Q: How do I find artists who do Japanese Irezumi or black and grey realism near me without naming people?
A: Search style-specific hashtags like #halfsleeveformen, #irezumi, #blackgreyrealism and filter by location on Instagram or TikTok. Use Tattoodo or Inked App to search by keywords such as "Japanese half sleeve" and "realism upper arm." Browse Reddit threads in r/tattoos and r/tattooadvice for peer-shared healed shots and travel recommendations.
Q: Will fine line hold up on my outer bicep?
A: That question splits artists into clear camps. One group says the outer bicep is a high-movement zone and fine line blurs within two years due to constant stretching. The other group argues that with correct needle depth and slightly wider spacing fine line can settle well and point to healed examples. If longevity is your top priority, opt for slightly heavier line weight than your favorite Instagram reference.
Q: What should I wear to the session so the artist has full access?
A: Match your clothes to the placement. For shoulder-to-elbow wraps choose a loose short-sleeve or tank top that the artist can easily roll without tight cuffs. For outer bicep portraits a fitted sleeveless top or crew neck that pulls up comfortably works best. Avoid tight cuffs and heavy accessories that press on the area after the session.
