
Someone I know spent months comparing compass designs and then froze at the studio chair, not because of commitment but because they had not asked the right questions. After visiting five shops across Brooklyn and talking with an artist who focuses on fine line work, I learned which matching compass setups actually hold detail and which fade into a blur. These examples show practical matching layouts, what to tell your artist, and realistic expectations for healing and touch-ups.
1. Fine line matching compasses on opposite inner forearms
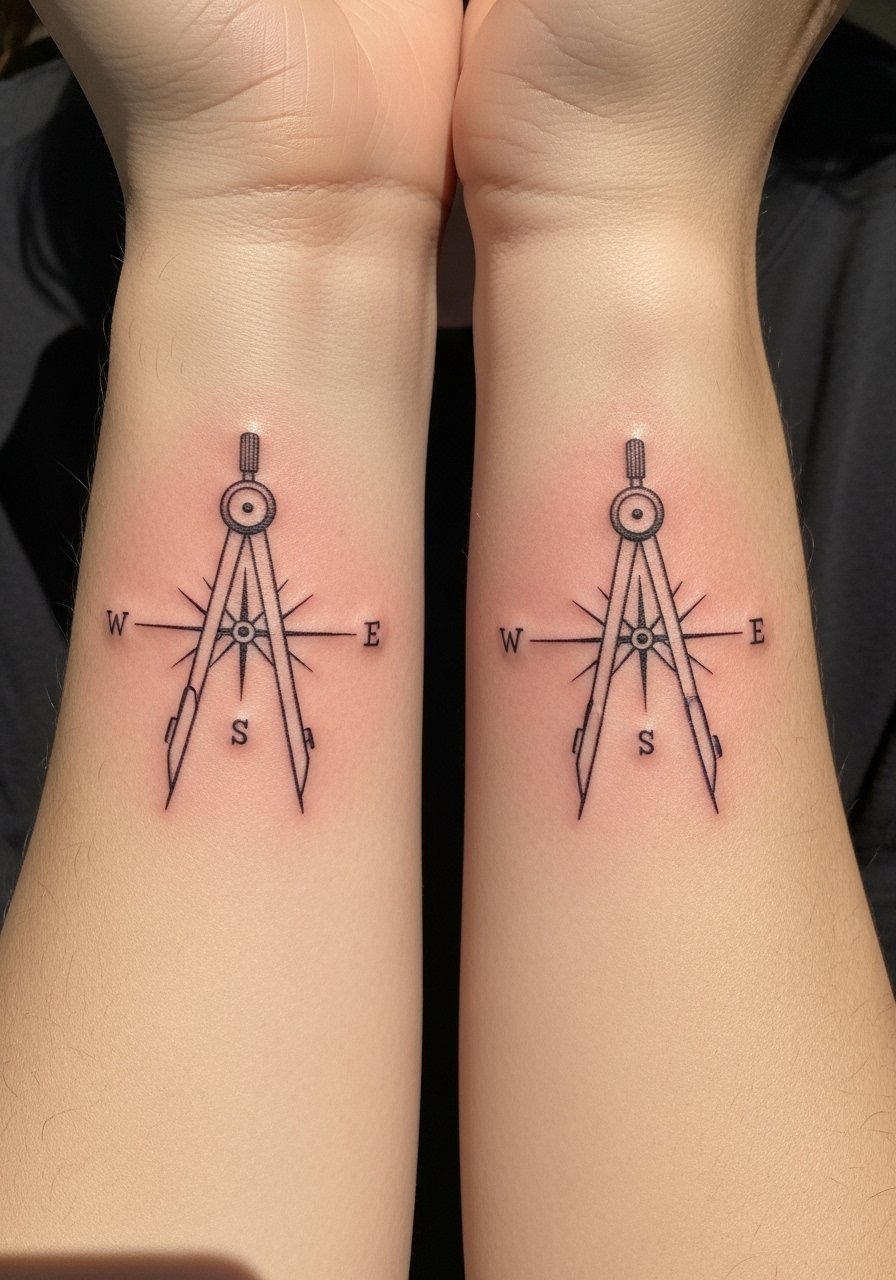
Someone I know first saw this on a friend's forearms and booked the same placement. Forearms let the compasses face one another while staying visible when you want them seen. Tell your artist you want slightly heavier outer linework with lighter inner points so the rose reads at a distance. Common mistake is shrinking the design below three inches. That causes the cardinal markers to soften within a year. Expect a single session around 45 to 90 minutes. Pain is moderate. Blowout risk is low on the forearm but increases if the artist tattoos too shallow or too deep. Plan a touch-up around year two if your lifestyle includes heavy sun exposure.
2. Minimalist wrist outlines for subtle matching reminders
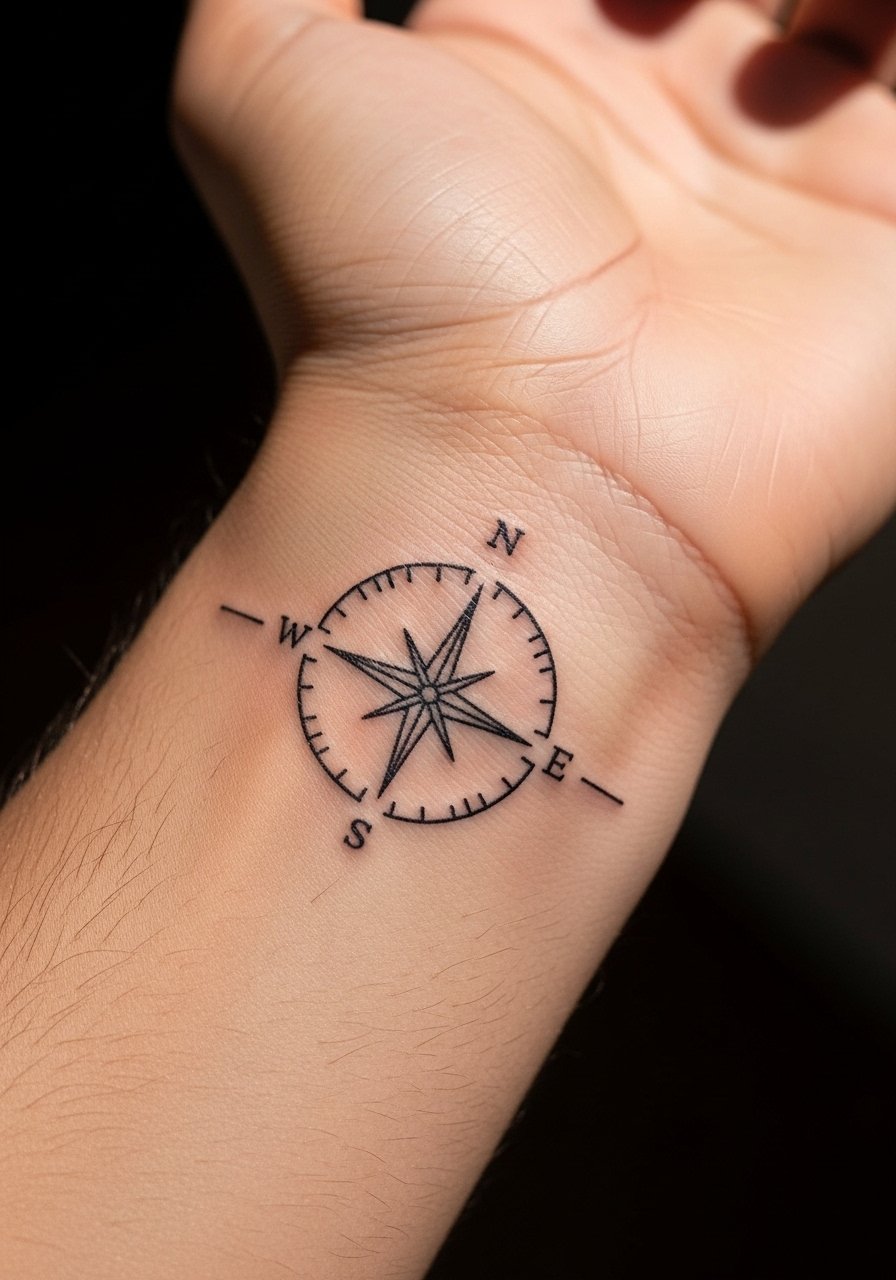
When someone asks for a first matching piece, the wrist wins for discretion. Ask the artist to leave a small gap between spokes so the lines do not merge as the ink settles. The big mistake is asking for ultra-fine single-needle lines at less than 1.5 inches. Those often blur on wrists, which flex and move a lot. Session time is short, often under 45 minutes. Pain is higher near the bone on the inner wrist. Healed at six months the outline should be crisp. At year three expect softening and a likely touch-up if you want the lines to stay stark.
3. Small compass with coordinates on the collarbone
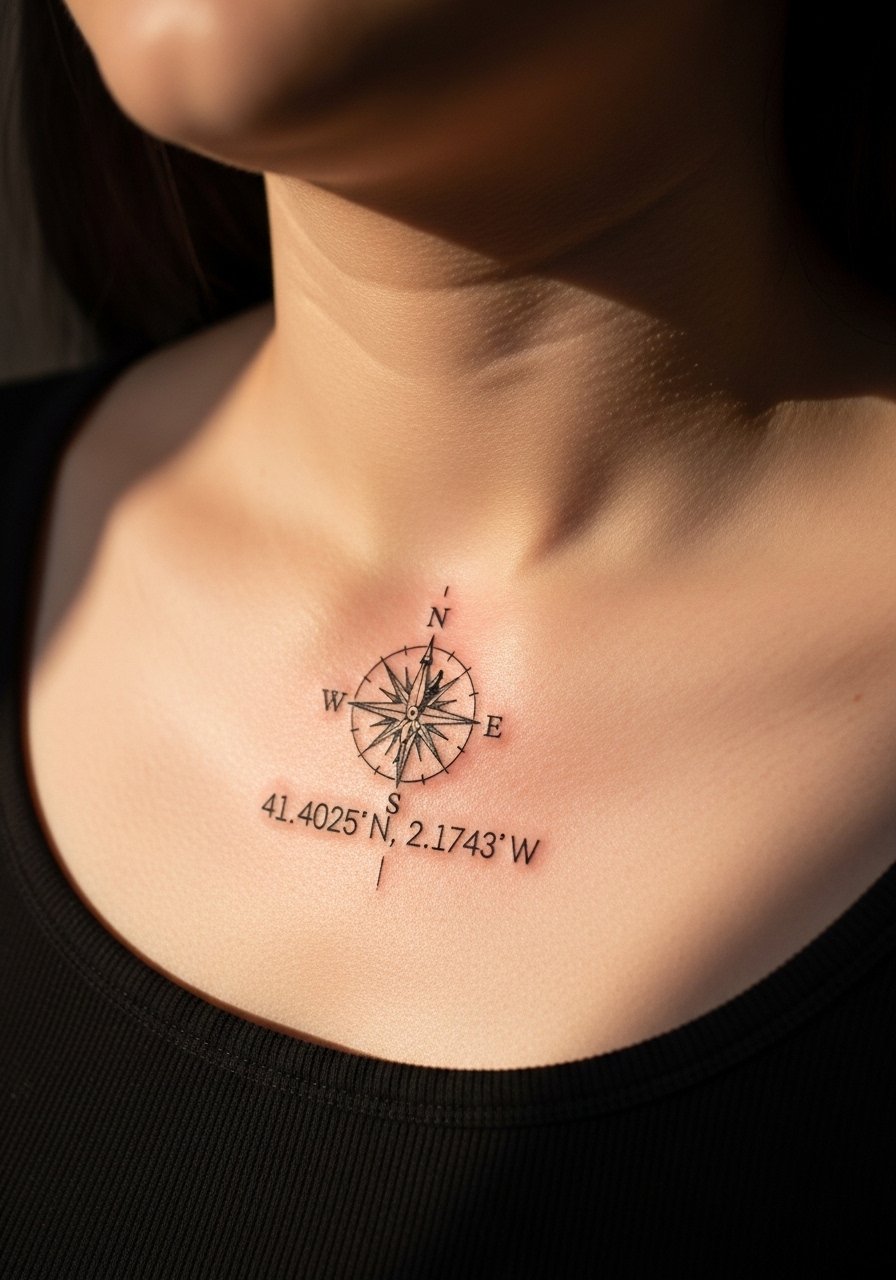
Collarbones are great when you want a matching compass paired with a location. Bring exact coordinates and the font you want. Tell the artist you want the numerals in fine monospace so they remain legible. A common error is squeezing too many digits into a small band under the compass. That ruins clarity after healing. The collarbone can be a 6 out of 10 on pain scales. Expect one session. Over two to five years the numerals may need a touch-up sooner than the compass itself. If you both travel together, matching coordinates can feel specific without vague phrasing.
4. Matching broken compass halves on inner ankles
If your goal is symbolism tied to shared history, ankle matches can be literal without being loud. A mistake I see is drawing both halves in different scales. Ask the artist to stencil both designs from the same template so they align when you stand together. Ankles are tender, so pain is higher. Session time is usually short. Blowout risk rises if the artist uses too tight a needle angle near bone. Healed after six months, the halves look clean. Expect that repeated friction from shoes may fade low ankle work faster than forearm pieces.
5. Traditional compass with anchor pair on calves
Calf placement buys size and detail while staying easy to conceal. For matching sets, choose identical color accents and consistent saturation levels. Tell the artist you want the anchor matching in scale and hue. A frequent mistake is letting partners pick different color palettes on impulse. Calves tolerate longer sessions and are lower on pain. Over the years, color saturation can dull, so plan for a touch-up at two to four years if you want the hues refreshed. This placement works well if you prefer traditional linework and bold fills.
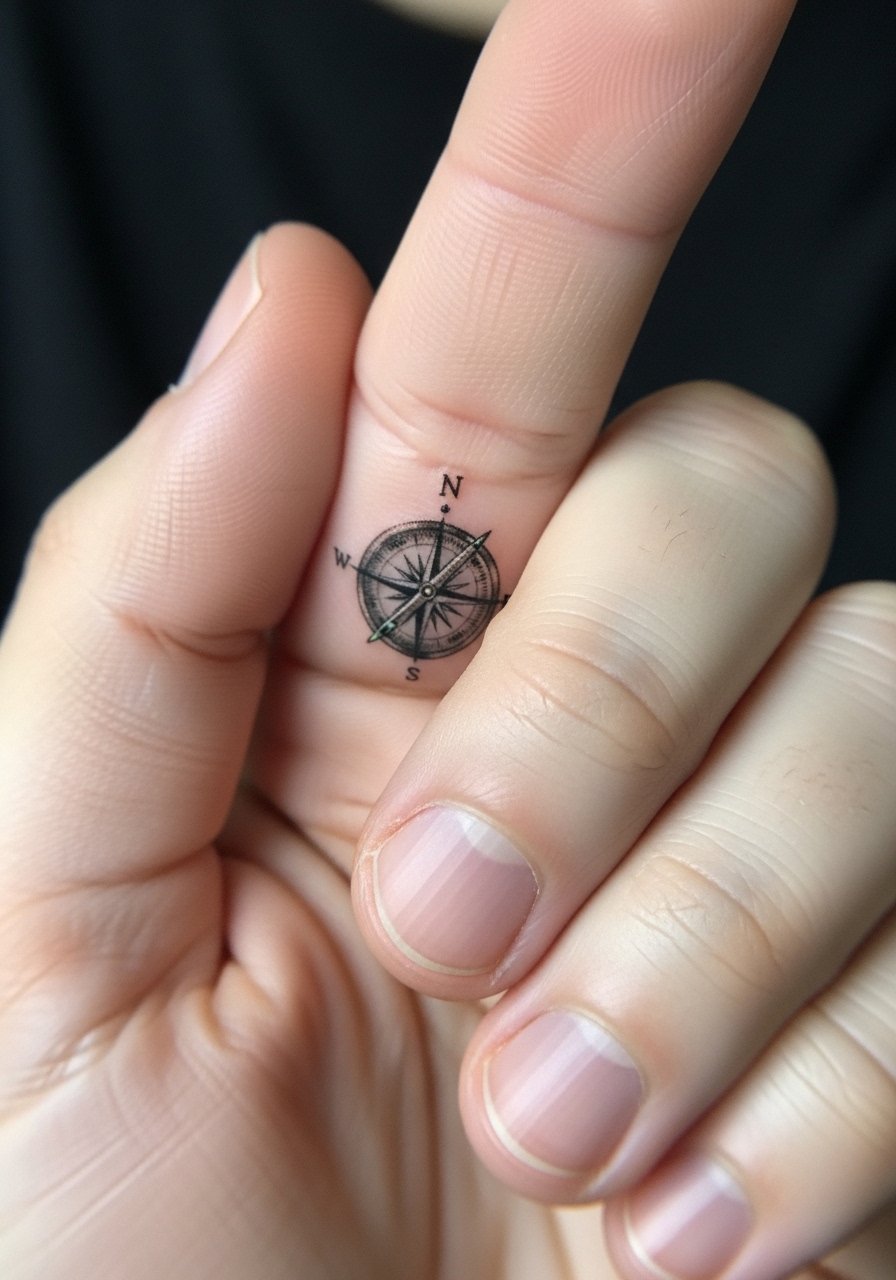
6. Micro compass on side of finger for discreet pairs
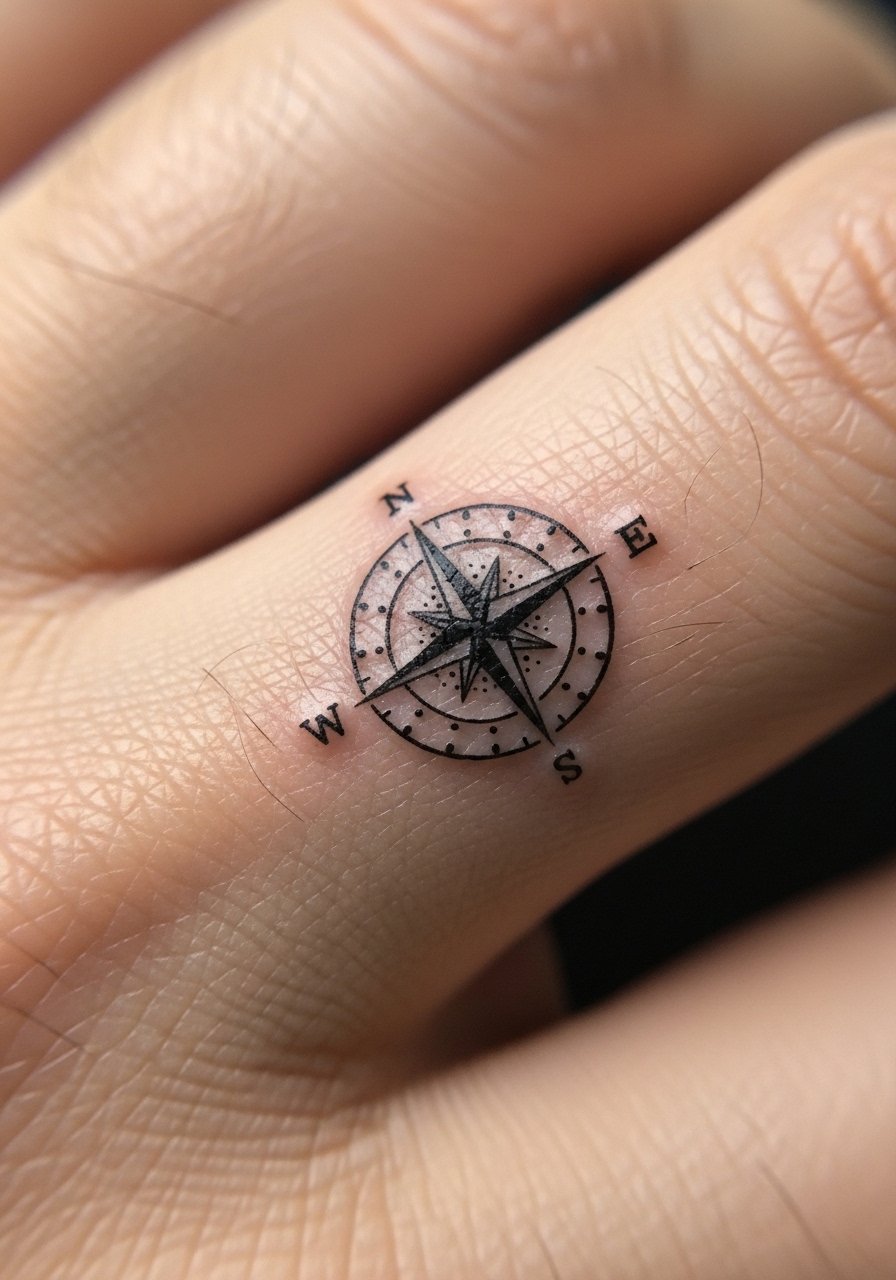
Finger work is quick but demands realistic expectations. Someone I know wanted a 0.5 inch compass and ended up needing a thicker outline after three months because the smallest lines spread. Ask for dot work shading instead of single-needle spokes to minimize blur. Hands and fingers have high wear. Pain is sharp and sessions are short. Touch-ups are common within the first year for clarity. Also think about career implications. Hand tattoos still affect hiring in some industries, so plan placement accordingly.
7. Compass rose with nautical rope border on upper arm
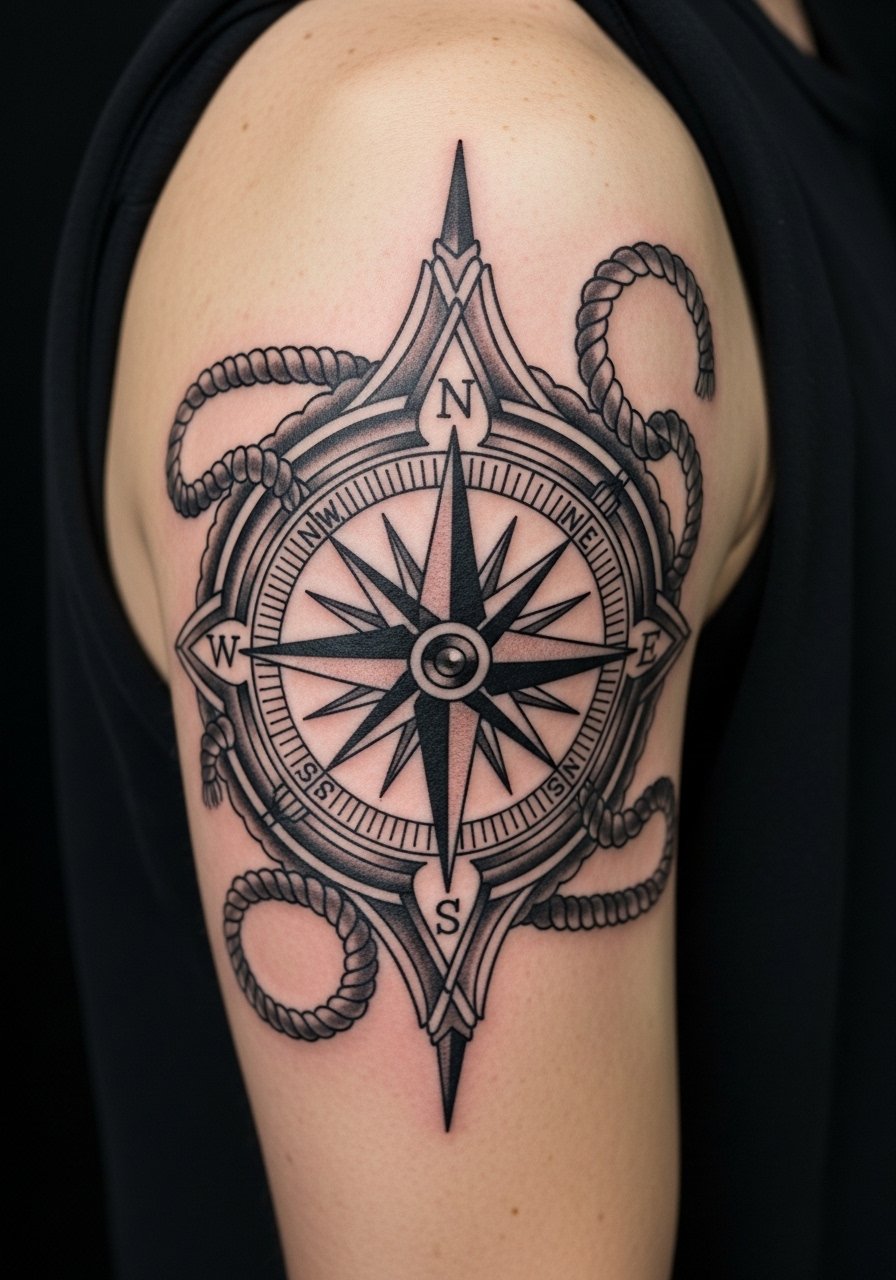
This version looks intentional on rounded areas like the upper arm. When matching, keep the rope direction consistent so pairs mirror correctly. The common error is over-detailing the rope on a design smaller than four inches. Ask your artist for weightier rope lines that read after healing. Pain is low to moderate. Sessions usually take one to two hours. At two years healed, fine rope details can soften. If you want longevity, increase scale slightly to preserve the texture.
8. Blackwork geometric compass as a sleeve starter
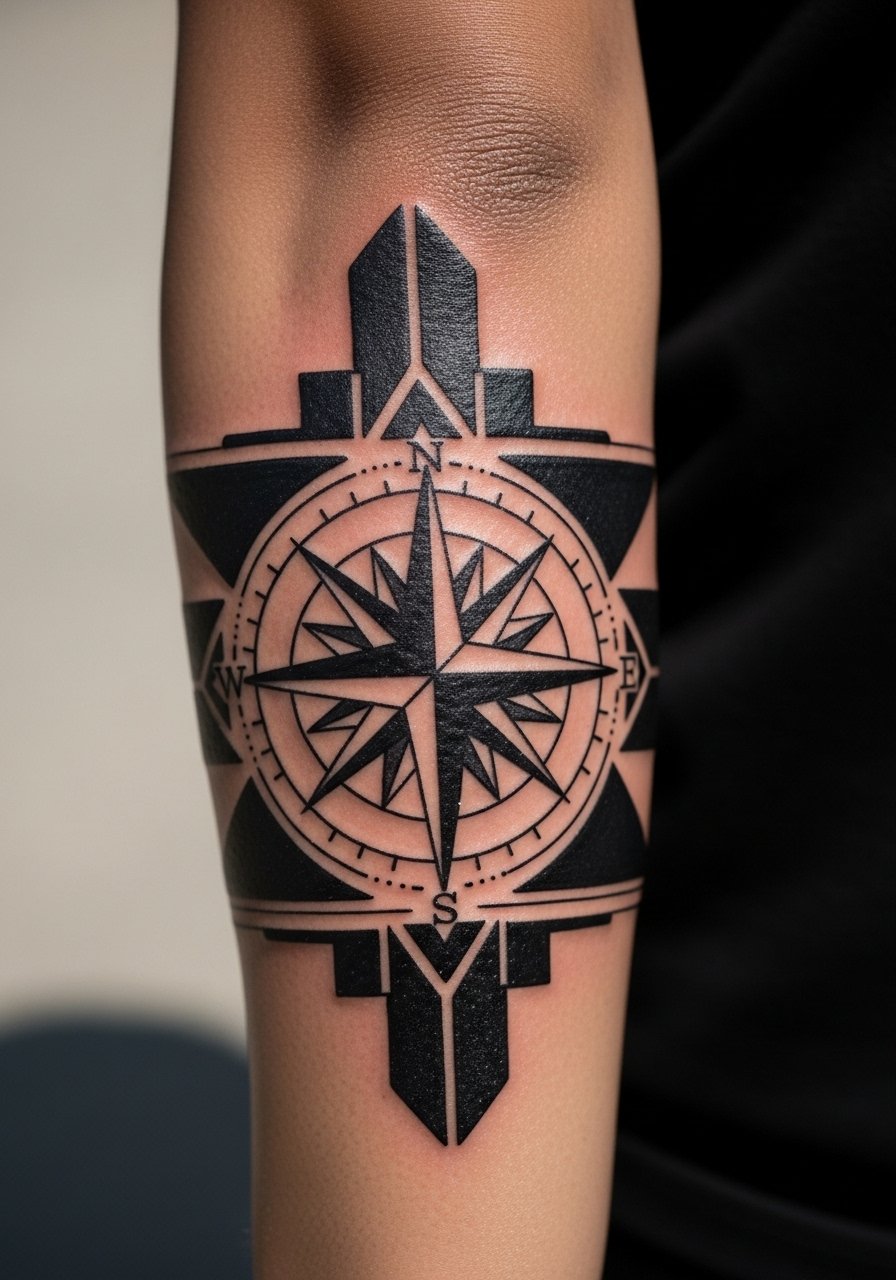
Bold blackwork makes a matching statement that scales into a sleeve. Tell the artist you want heavy saturation and clear negative space so future pieces can integrate. A mistake is leaving too little negative space between elements. Expect two sessions for a dense panel. Pain is moderate. Blackwork tends to age well visually because saturation hides small softening. Touch-ups are less frequent, but exposure and skin stretch still matter. If you plan a full sleeve, discuss how the compass will anchor future motifs.
9. Watercolor compass with horizon line on the ribcage
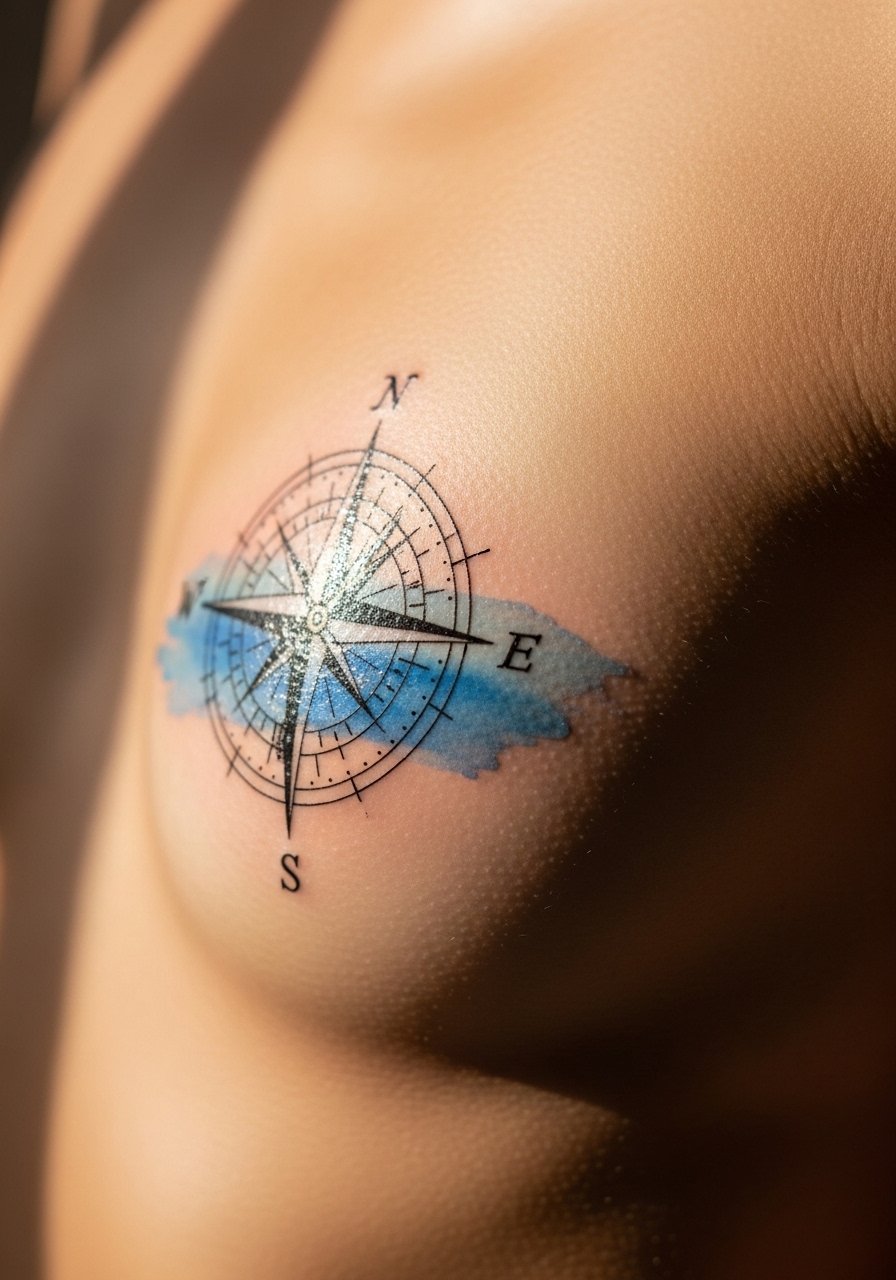
Fair warning: ribs are often a 7 out of 10 for pain. Watercolor here reads like a soft scene on contoured skin. Artists split on fine line detail on ribs. One camp argues the stretching and thinner skin blurs thin lines within two years. The other camp says with correct depth and spacing, fine line can hold. Ask your artist which approach they prefer and why. Watercolor needs gentle aftercare to avoid scabbing that ruins washes. Expect a single longer session. Healed at six months the wash will soften, and colors may need a touch-up earlier than black linework.
10. Ignorant style compass with wave scribbles on the ankle
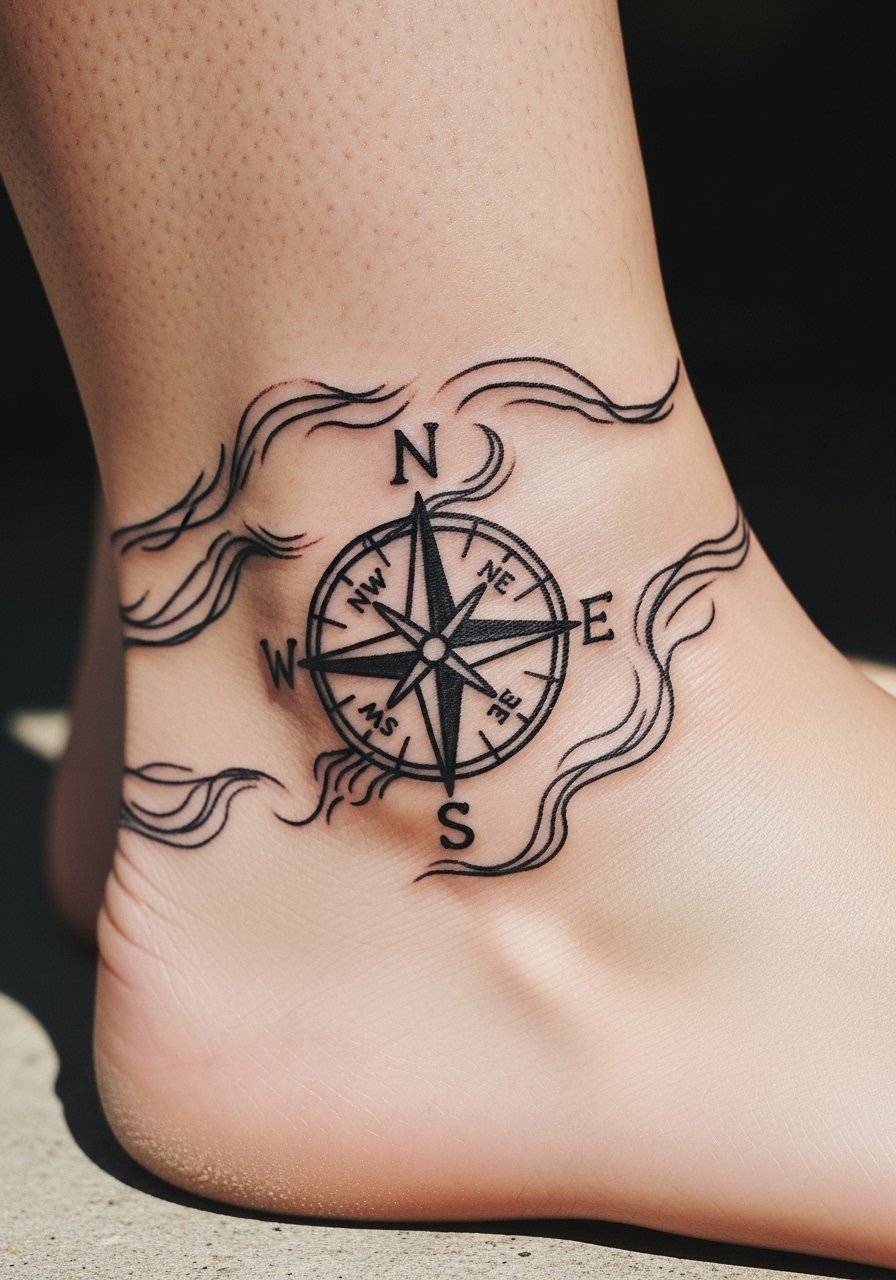
Ignorant style thrives on imperfection. If you want that raw aesthetic, tell the artist to avoid over-cleaning your reference. The mistake is requesting a perfect replica of a scribble. That kills the vibe. Ankles are sensitive so pain is moderate. Session time is usually under an hour. Because the lines are intentionally uneven, minor spreading can enhance the aesthetic. Still, if you want longevity, ask for slightly bolder guide lines. Also consider that footwear friction can affect low ankle pieces over time.
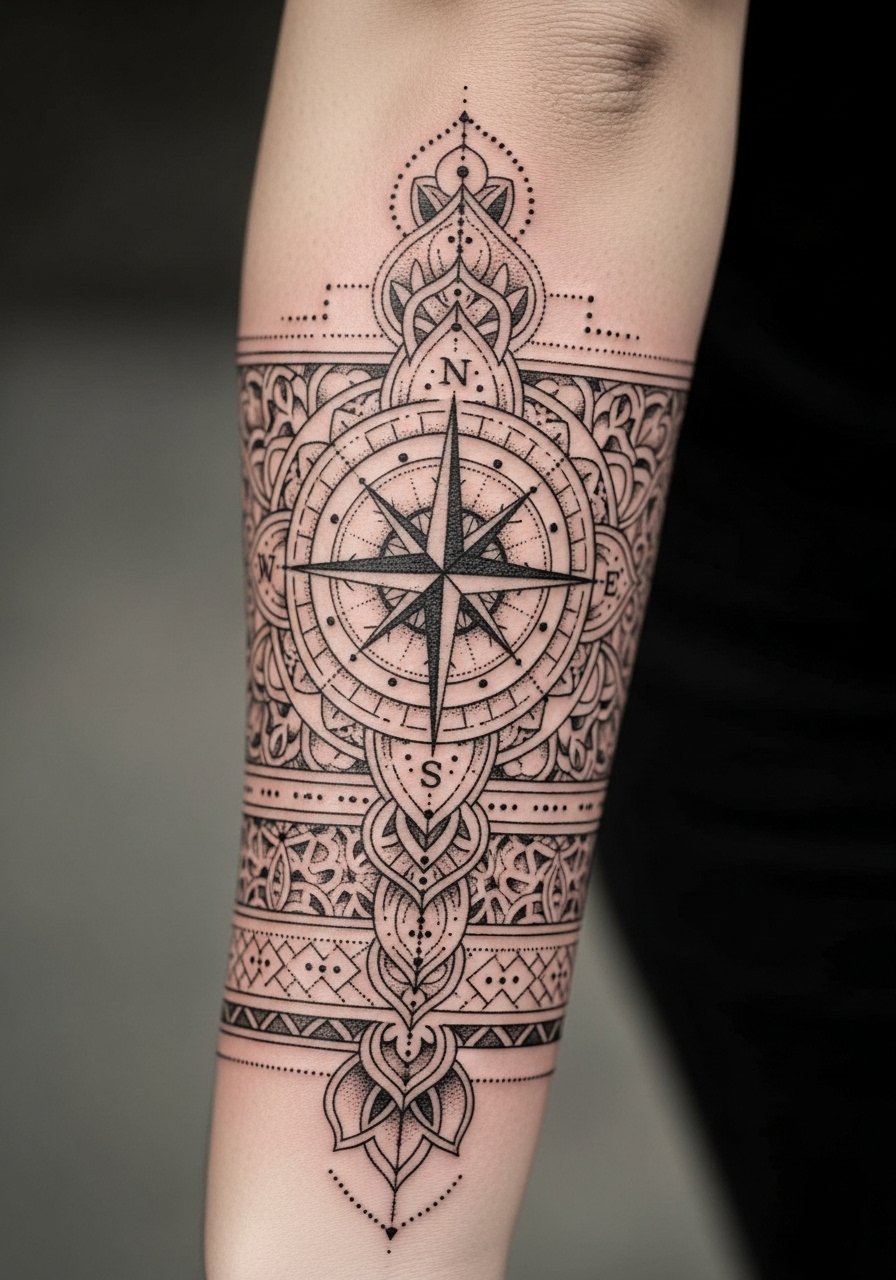
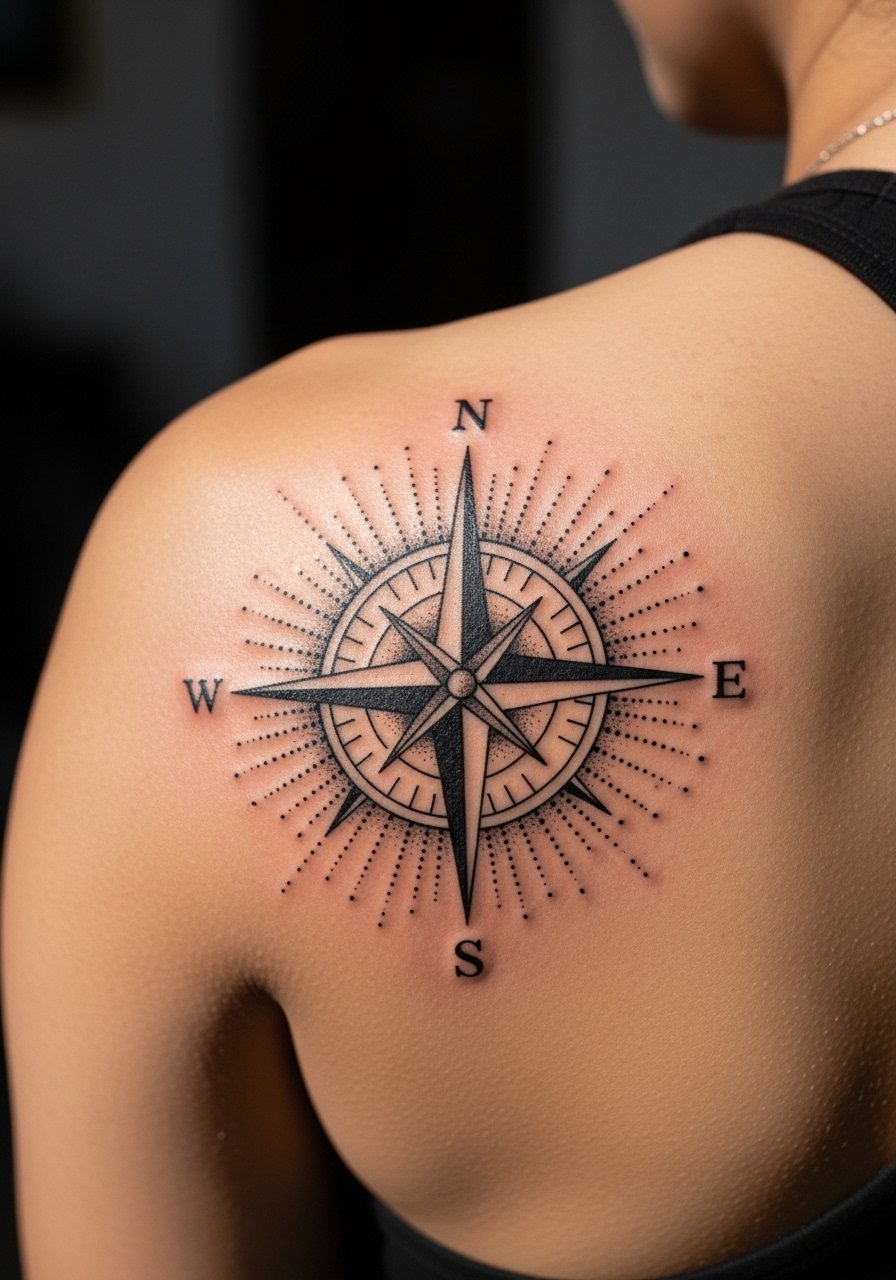
11. Ornamental compass mandala on the shoulder blade
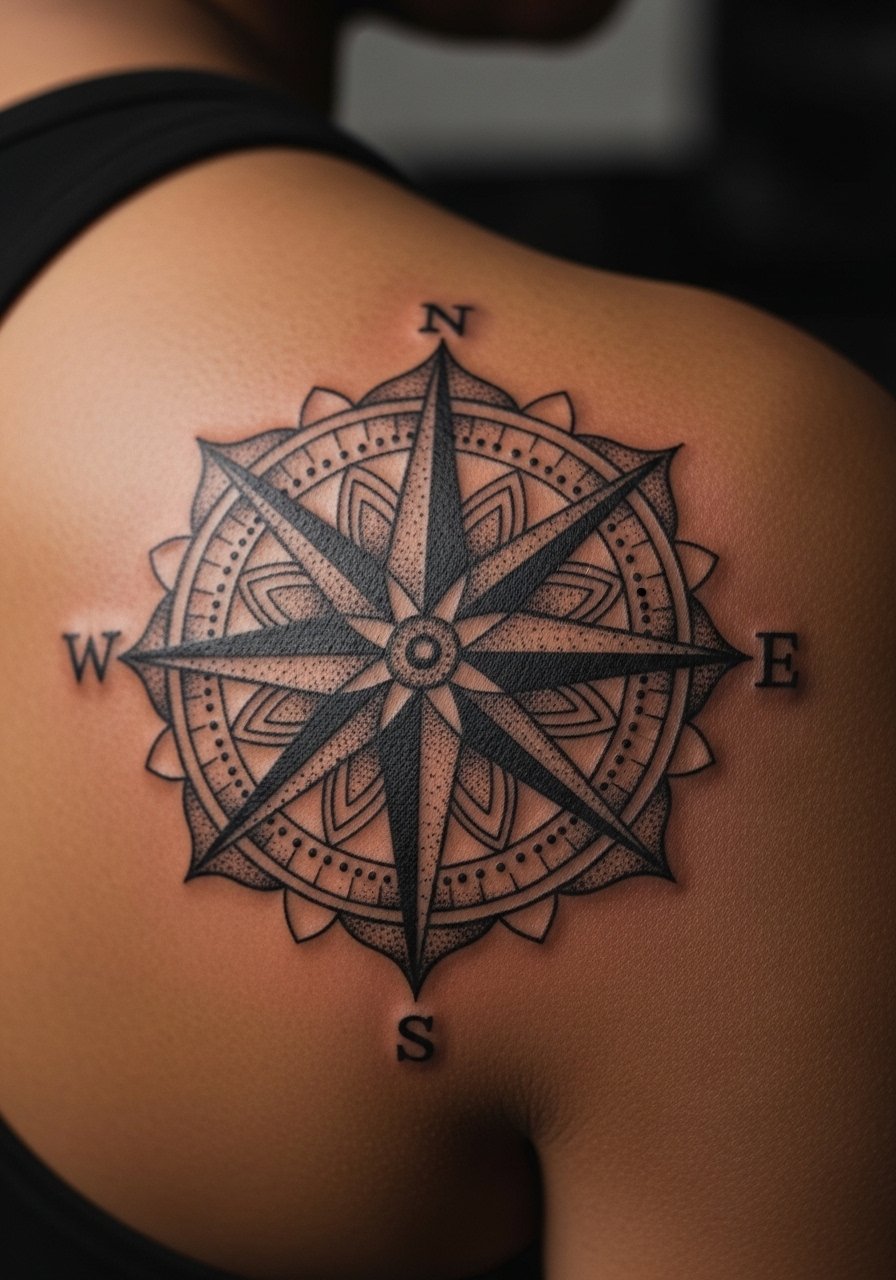
Shoulder blades give room for circular symmetry to breathe. For matching mandalas, pick a central compass element and vary outer petals for subtle individuality. A common mistake is compressing mandalas into too-small diameters. Ask for a three to five inch scale so stipple and whip shading retain texture after healing. Pain is moderate. Sessions often take two hours. Over several years, stipple can soften but mandala geometry remains readable if the initial spacing is generous. Respect cultural origin if your pattern draws from specific traditions by adapting rather than copying sacred motifs.
12. Micro-realism compass on the side of the finger pad
Micro-realism on fingers can look surprisingly crisp right after healing. The downside is high fade due to constant use and washing. Tell the artist you accept probable touch-ups and want a slightly bolder base than the initial photo. The usual mistake is expecting permanence without maintenance. Sessions are quick but painful. Healed at six months the piece may already show loss in fine shaded areas. For matching, understand both partners likely need touch-ups within one to three years.
13. Matching compass chest pieces that mirror each other
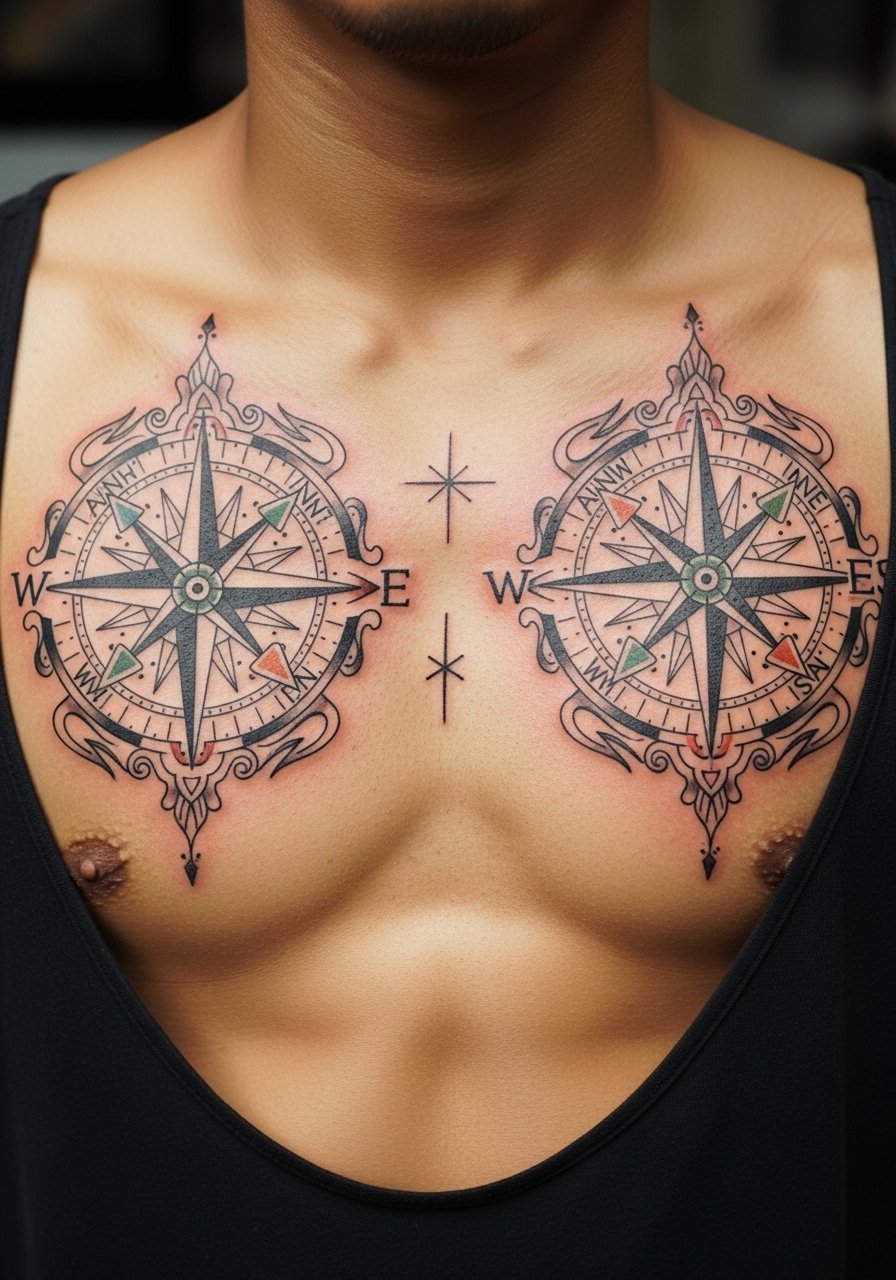
Chest compasses look cohesive when both designs mirror the body's centerline. When you consult, ask the artist to align the roses with the sternum axis so they read as a pair from a distance. Big mistake is uneven scale between the two pieces. Chest work tolerates longer sessions and is moderate on pain. For detailed compass roses expect multi-session work. Over time, chest tattoos can shift slightly with weight change. Plan a touch-up window at six months and again at two to four years to maintain saturation.
14. Matching broken compass pair behind the ears for hidden sentiment
Behind-the-ear placements are intimate and subtle. A practical mistake is underestimating how wind or hair affects visibility. Tell your artist you want consistent negative space and a slightly heavier outline so the halves still read when healing softens the lines. Pain is sharp and brief. Sessions are very short. Expect faster fade because of constant exposure to shampoo and friction. Also consider that behind-ear work can be sensitive in professional settings for some people.
15. Geometric compass integrated into a sleeve cuff
If you plan a sleeve, a compass integrated into a cuff anchors the composition. Discuss with the artist how the compass will sit with future panels and whether the geometry will be a focal point. A common error is leaving no breathing space around the cuff, which makes future additions cramped. Sessions may be staged across two visits. Pain is moderate. Geometric blackwork tends to age well if the artist prioritizes clean linework and solid fills. Touch-ups are rarely needed in the first few years unless exposure is extreme.
16. Stipple-shaded compass on the back of the shoulder
Dot work adds texture without heavy saturation. When matching, keep stipple density consistent across both pieces. The mistake is asking for ultra-dense stippling in a too-small area. That can blur into a gray patch as dots settle. Sessions are moderate in length. Pain is manageable. Stipple ages gracefully when spacing is correct. Ask for photographs of healed stipple work from your artist so you can judge how their dot density settles over time.
17. Watercolor horizon compasses on ribcage matching at tilt
When matching across the ribcage, coordinate the tilt so the horizon lines complement your body's curve. The ribs are a contentious spot for fine line detail. One camp worries about blurring from skin movement. The other camp trusts careful spacing and depth for longevity. Ask which side the artist favors. Watercolor needs a cautious touch to prevent scab-heavy healing. Sessions can be long. Expect the washes to soften within a year and consider a color refresh if you want the hues strong long-term.
18. Compass rose merged with floral elements on the forearm

Combining a compass with plants personalizes matching sets without saying the same thing twice. Tell the artist which flowers matter to you and ask for mirrored placement so the florals read as companions. A frequent mistake is packing too many petals into a small radius which turns into a muddle after healing. Sessions are one hour or more depending on detail. Forearms are a forgiving canvas and age well with regular SPF. Expect minor softening at the edges after several years.
19. Neo-traditional large compass chest centerpiece for matching statements
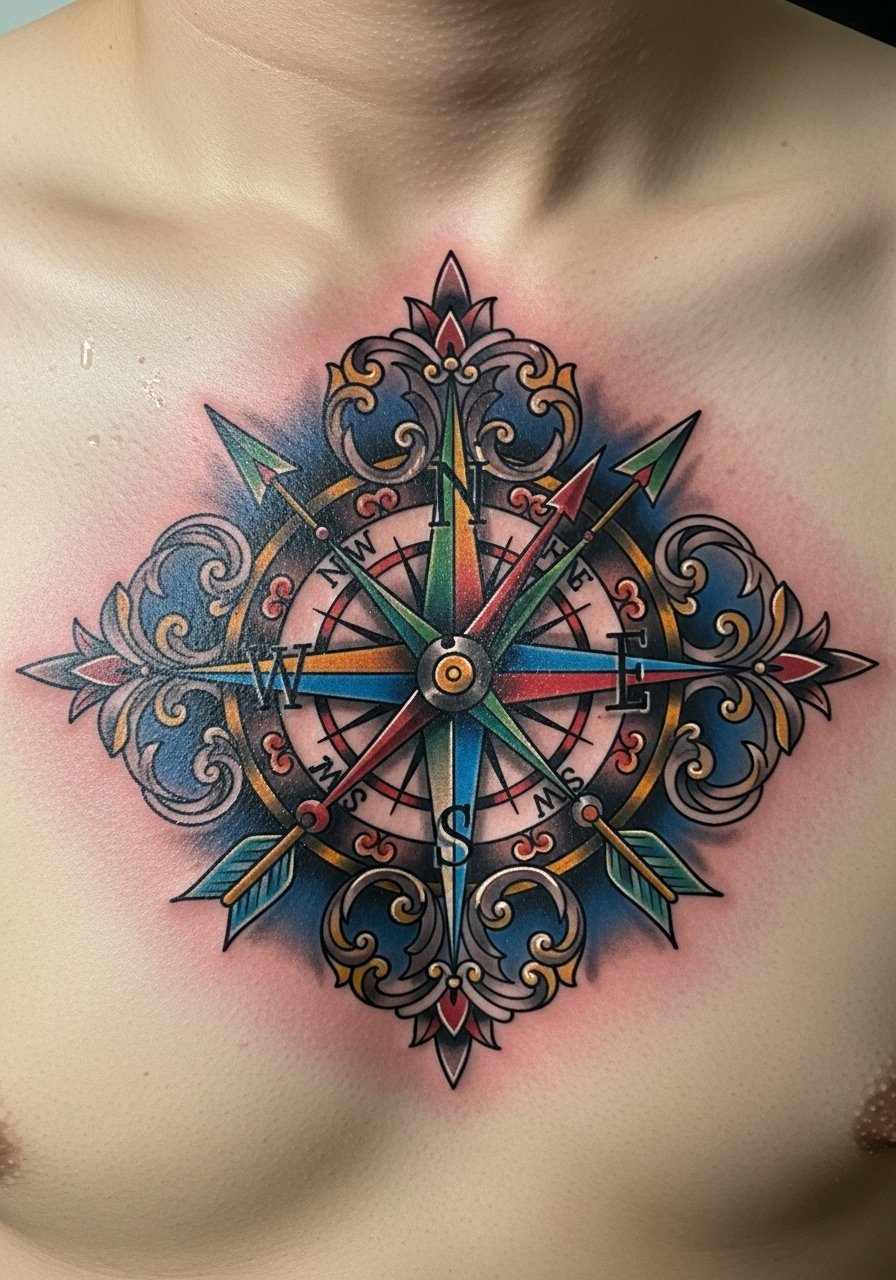
If you both want a statement, a large chest compass gives room for arrow color and strong linework. Tell your artist you want even saturation across both pieces and matched arrow colors. Mistake to avoid is having one partner choose a palette the other dislikes later. Sessions are multiple and pain varies across the chest. Over time saturated colors may fade differently depending on skin tone and exposure. Schedule touch-ups within a few years to restore vibrancy if you both want the same visual weight years down the line.
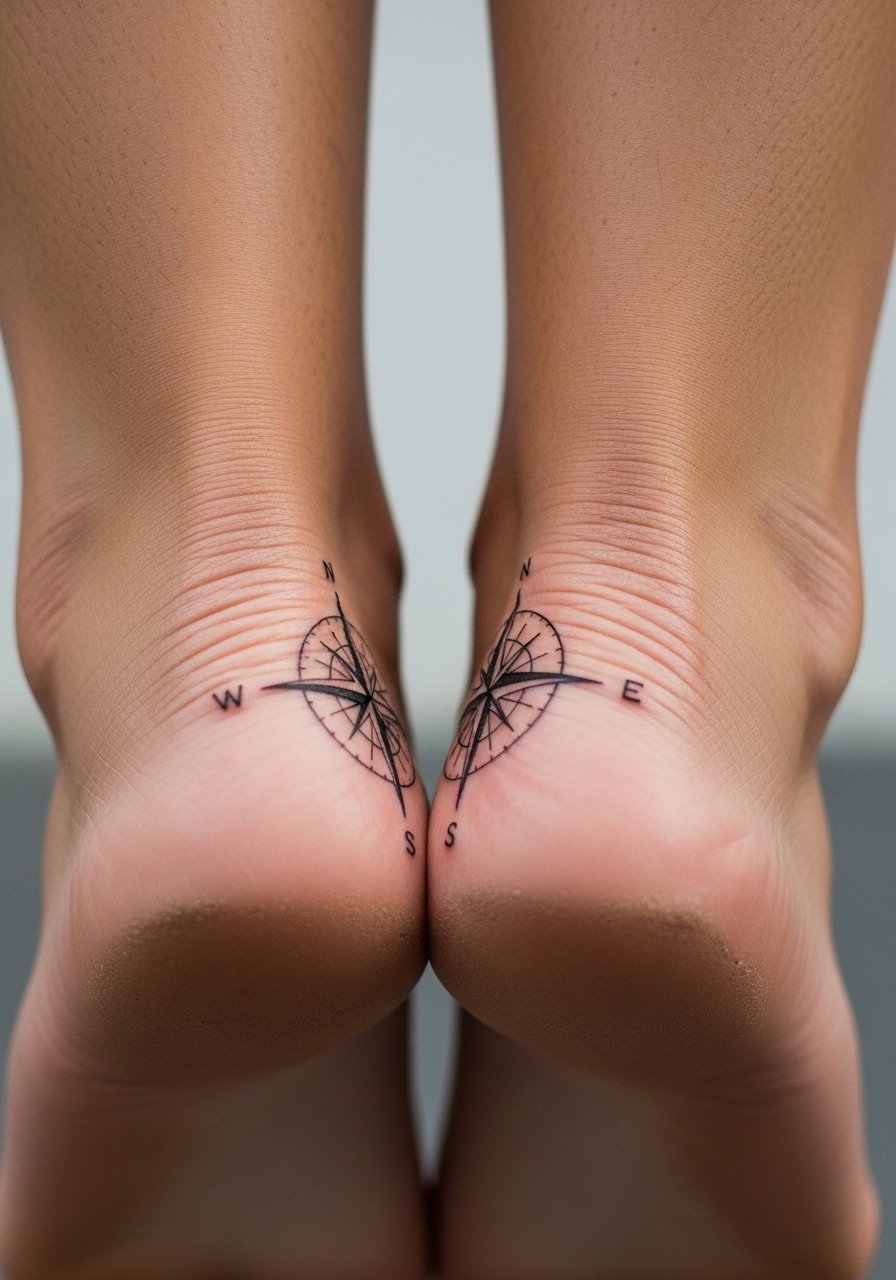
20. Tiny micro dot compass behind the ankle bone for low-key pairs
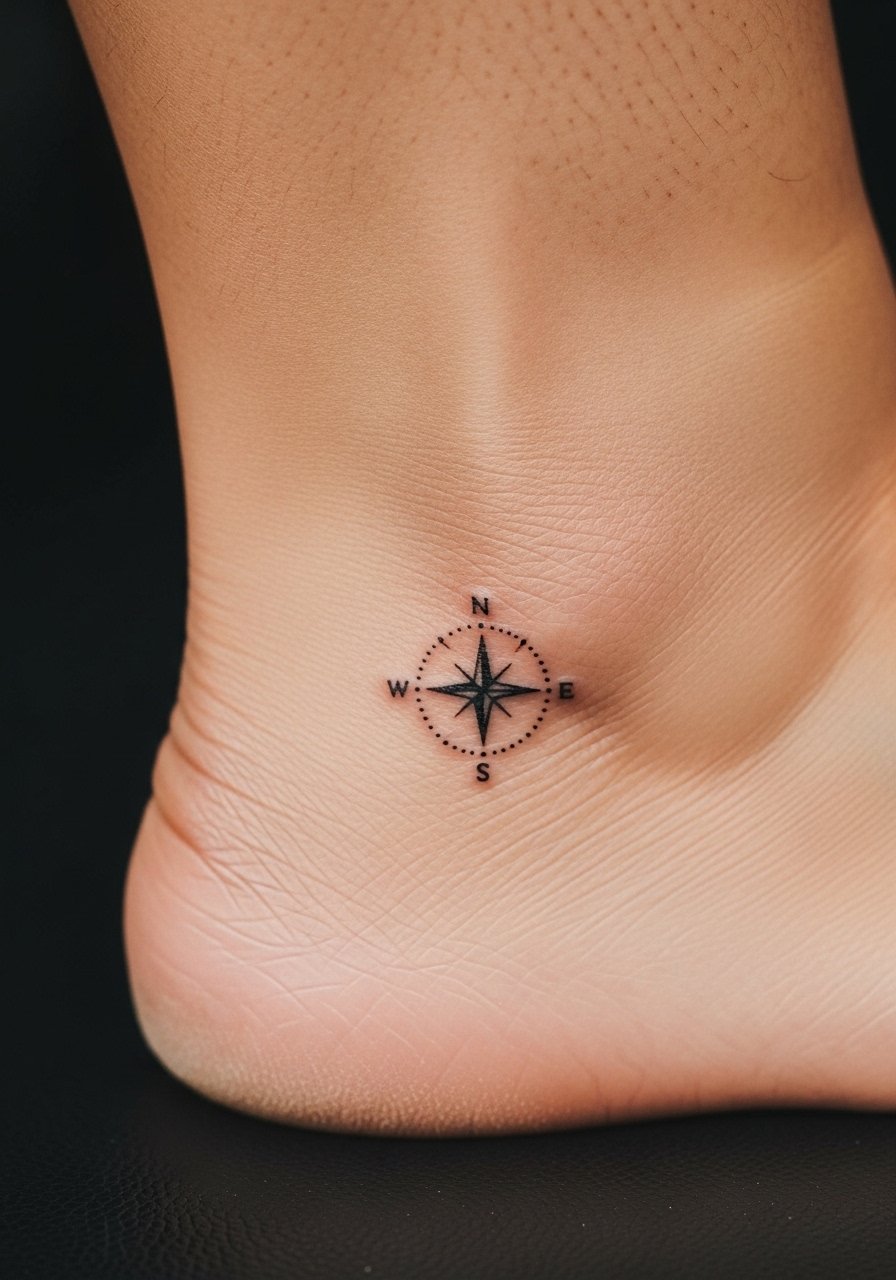
The ankle bone offers a low-key spot for matching micro pieces. The main error is pushing too much detail into a tiny area. Ask for a simplified compass with clear negative space. Pain is higher near the bone. Sessions are short. Expect fade faster than on arm or calf because of friction from shoes and socks. Plan for a touch-up in the first year if you want crisp dots to remain. For discreet matching, a behind-ankle micro compass reads personal without being obvious.
Tattoo Prep and Aftercare Essentials
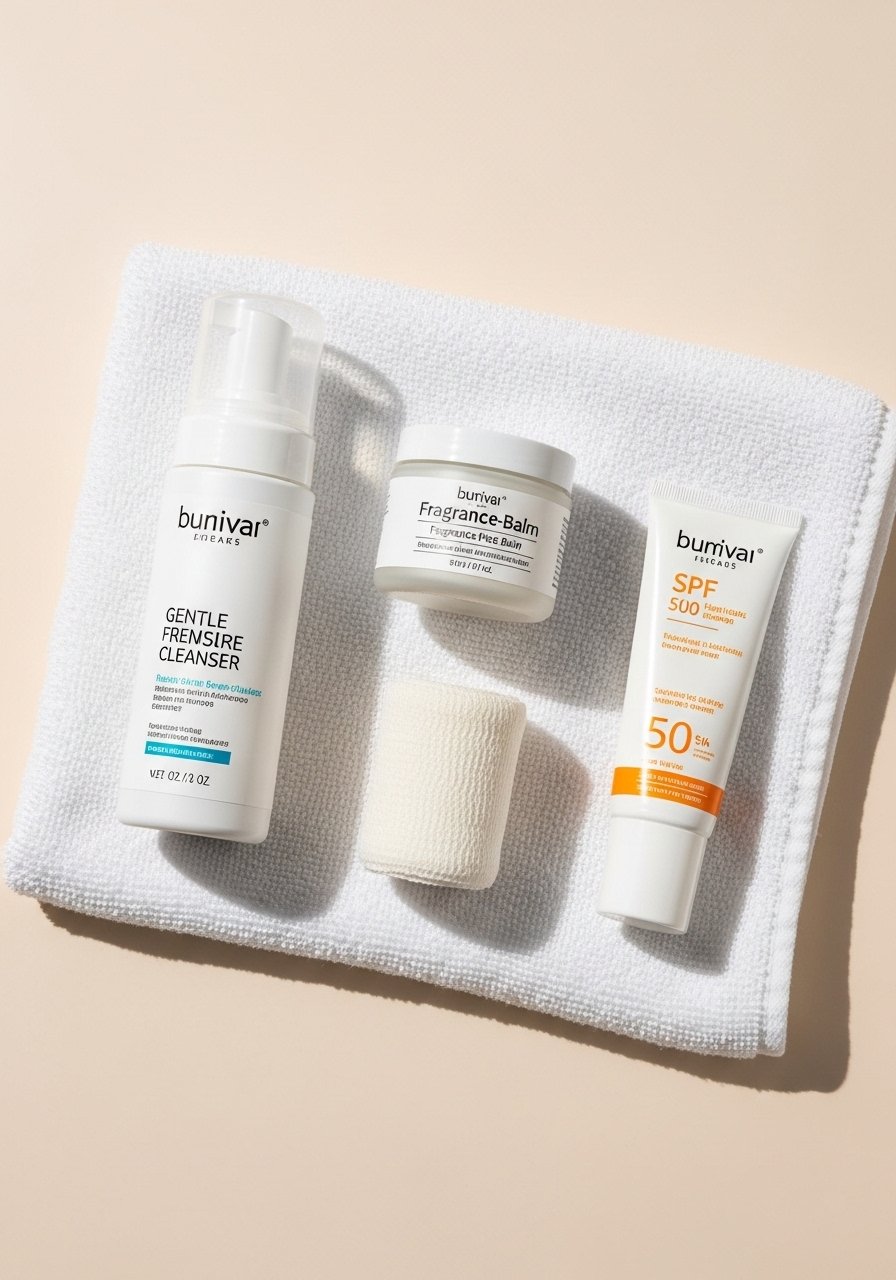
Fragrance-free gentle foaming cleanser. Use during the first week for twice-daily cleansing. A non-irritating foaming formula removes excess plasma without stripping the scab, which helps even healing.
Lightweight fragrance-free balm. Apply a thin layer after cleansing to keep the area moisturized without suffocating the skin. Ideal for daily short-term care.
Medical-grade second skin bandage, single-use sheets. Good for covering high-friction placements during the first 24 to 48 hours. It reduces rubbing and keeps contaminants out.
Breathable gauze and paper tape pack. Handy for studio pickup or if you prefer traditional dressing over occlusive. Use only as your artist instructs.
SPF 50 mineral sunscreen stick. After healing, daily sun protection slows fading. A stick is easy for touch-ups on the go once the tattoo is fully healed.
Fragrance-free moisturizing lotion for long-term care. Use daily after the tattoo is healed to maintain skin hydration and support saturation.
Aquaphor Healing Ointment. This is the one mainstream product included. Use sparingly if your artist recommends it during the initial healing week. It creates an occlusive layer that some people prefer for short periods.
Medical adhesive bandage strips, small. Useful for protecting small placements from snagging on clothing during the first few days.
Every tattoo is different. Always follow your artist's specific aftercare instructions. Consult a dermatologist if you have skin concerns or unusual healing issues.
Frequently Asked Questions
Q: Will fine line matching compasses blur if we place them on ribcages?
A: It depends on technique and spacing. Artists are split. One group says ribs stretch and thin skin makes thin lines blur within two years. The other group says careful depth and slightly increased spacing helps fine line hold. Ask the artist to explain how they handle ribs and ask for healed photos of their rib work.
Q: How should we coordinate color choices for neo-traditional matching compasses to age evenly?
A: Match your base palette and saturation level rather than exact hues. Ask the artist to use the same ink batches when possible and to document their mix for both pieces. Also plan a touch-up window at two to four years to rebalance any uneven fading.
Q: Do watercolor compass tattoos need different aftercare than line-work compasses?
A: From what I've gathered, watercolor washes benefit from gentle cleansing and minimal rubbing while healing. Avoid heavy ointments that trap moisture and can cause color migration. Use a lightweight fragrance-free balm and keep sun exposure minimal after healing.
Q: Can tiny finger or ankle compasses last without touch-ups?
A: Expect maintenance. Fingers and low ankle spots are high-wear areas. Many people get a touch-up within the first year. If you want less maintenance, pick a slightly bolder base or choose a placement with less daily friction.
Q: How much will a matching compass cost and how many sessions should we expect?
A: Costs vary by size and style. For small fine line wrist or ankle pieces expect a single short session. Larger neo-traditional or chest pieces often need multiple visits. Discuss session estimates and touch-up policies when you book.
