
I spent months curating planet tattoo ideas because I kept seeing gorgeous photos that later looked soft and blurry on healed skin. The difference usually came down to style and placement—not just the art. These 22 planet tattoo ideas pull from geometric alignments, realism portraits, and tiny talisman pieces I’ve tracked in artist portfolios. Pick one that fits how you want the ink to feel and age.
This list leans on geometric, realism, watercolor, and minimalist vibes. I focus on placements that work for small pieces through sleeves. From my experience, geometric planet tattoos and small Saturn rings are trending for longevity and everyday wear, while watercolor pieces need more upkeep to stay vivid.
1. Geometric Planet Alignment Sleeve on Outer Forearm
Style/Technique: Geometric / Blackwork
Pain Level: Medium (4/10)
Session Time: Multiple sessions, buildable
Best For: Sleeve starters, symbolic narratives
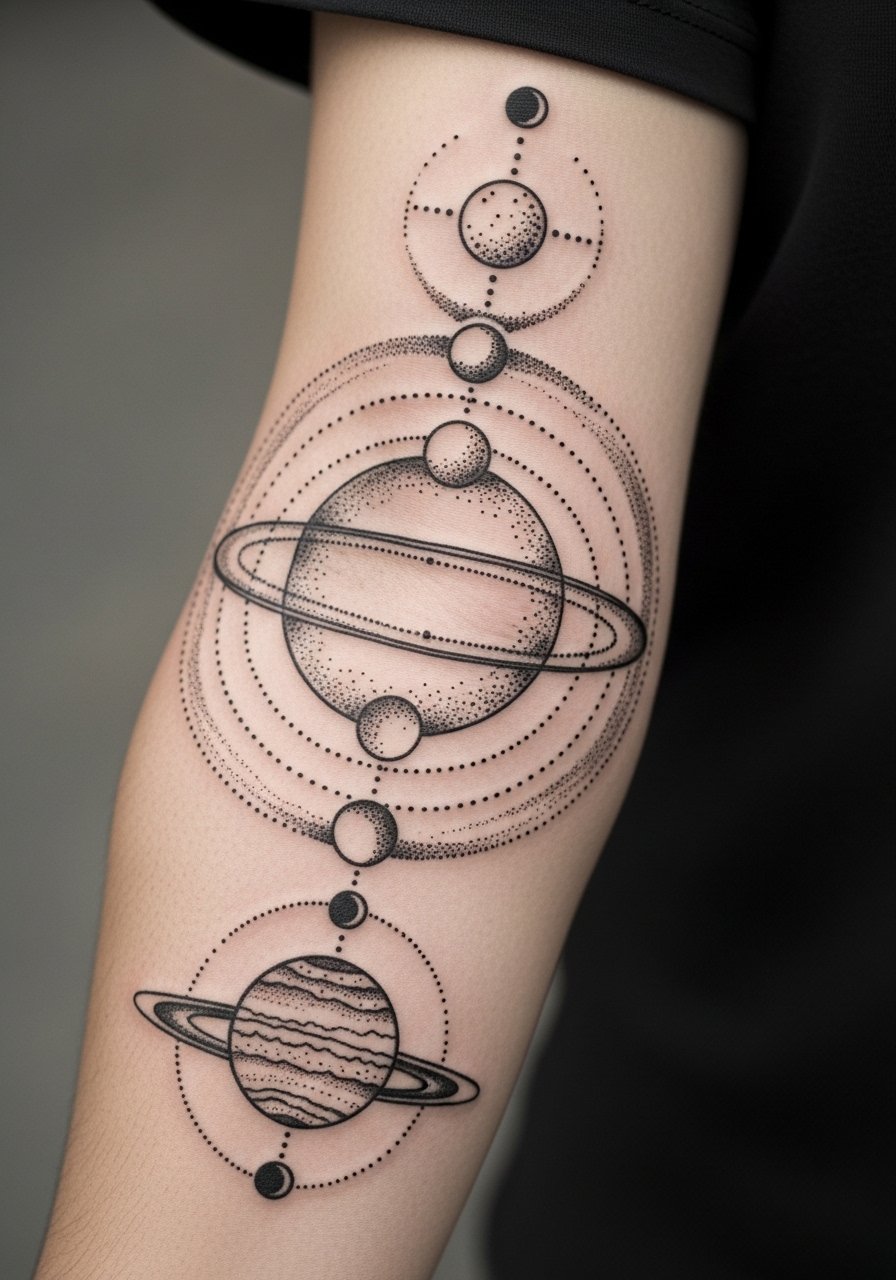
I love geometric planet sleeves because they read like a map of intent—ordered orbits, repeated shapes, and measured spacing keep the composition readable as it ages. This placement lets the artist flow orbits around musculature so the planets sit naturally when the arm moves. Pain is moderate; the outer forearm tolerates long sessions well. Healed geometric work usually stays crisp longer than watercolor because solid black lines resist spreading. The common mistake is over-detailing tiny orbs—ask your artist to simplify small planets and use negative space to separate shapes. Mention you want a clear hierarchy in the design and request portfolio examples of geometric planet tattoos or AI mockups from tools like BlackInk AI or Procreate sketches during consultation.
2. Saturn Ringed Finger Band (Minimalist)
Style/Technique: Fine Line / Minimalist
Pain Level: Low-Medium (3-5/10)
Session Time: Single short session
Best For: First tattoos, subtle daily wear
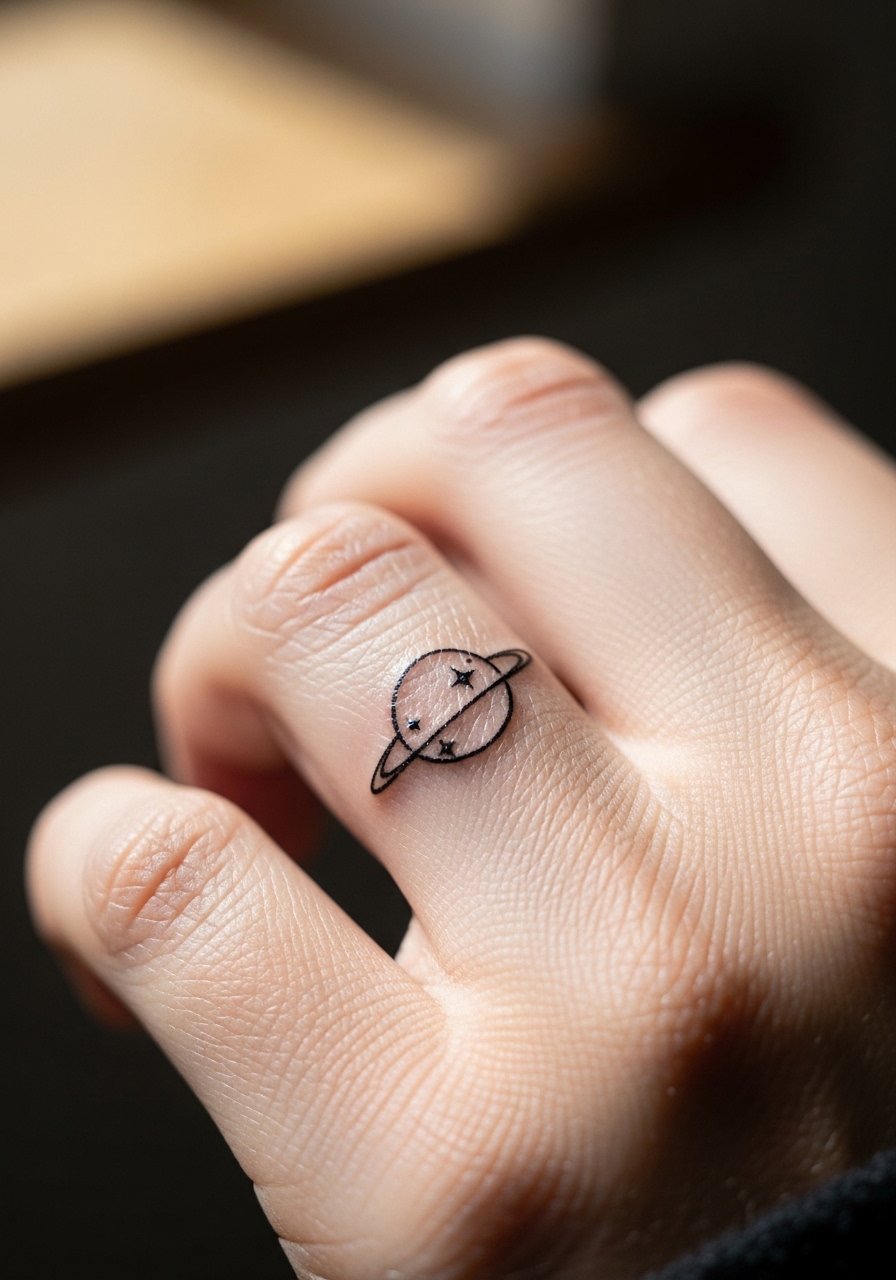
A tiny Saturn on the finger reads like a piece of jewelry and is great if you want subtle planet symbolism. Fingers are low in surface area but high in movement, so fine lines soften over time—expect some blurring. Pain varies; the bony fingers can feel scratchy but sessions are short. For longevity, request slightly bolder lines than a hairline and know touch-ups are common. I’ve seen artists recommend blackwork for finger planets because color fades faster in that spot. Avoid tiny, intricate textures on ringed planets; keep the ring simple and pair it with minimal stars for context. Test placement with temporary transfers or Tatship virtual try-on before committing.
3. Venus with Stars on Shoulder Cap (Watercolor Realism)
Style/Technique: Watercolor / Realism
Pain Level: Low-Medium (3-4/10)
Session Time: Single to two sessions
Best For: Visible but coverable statement
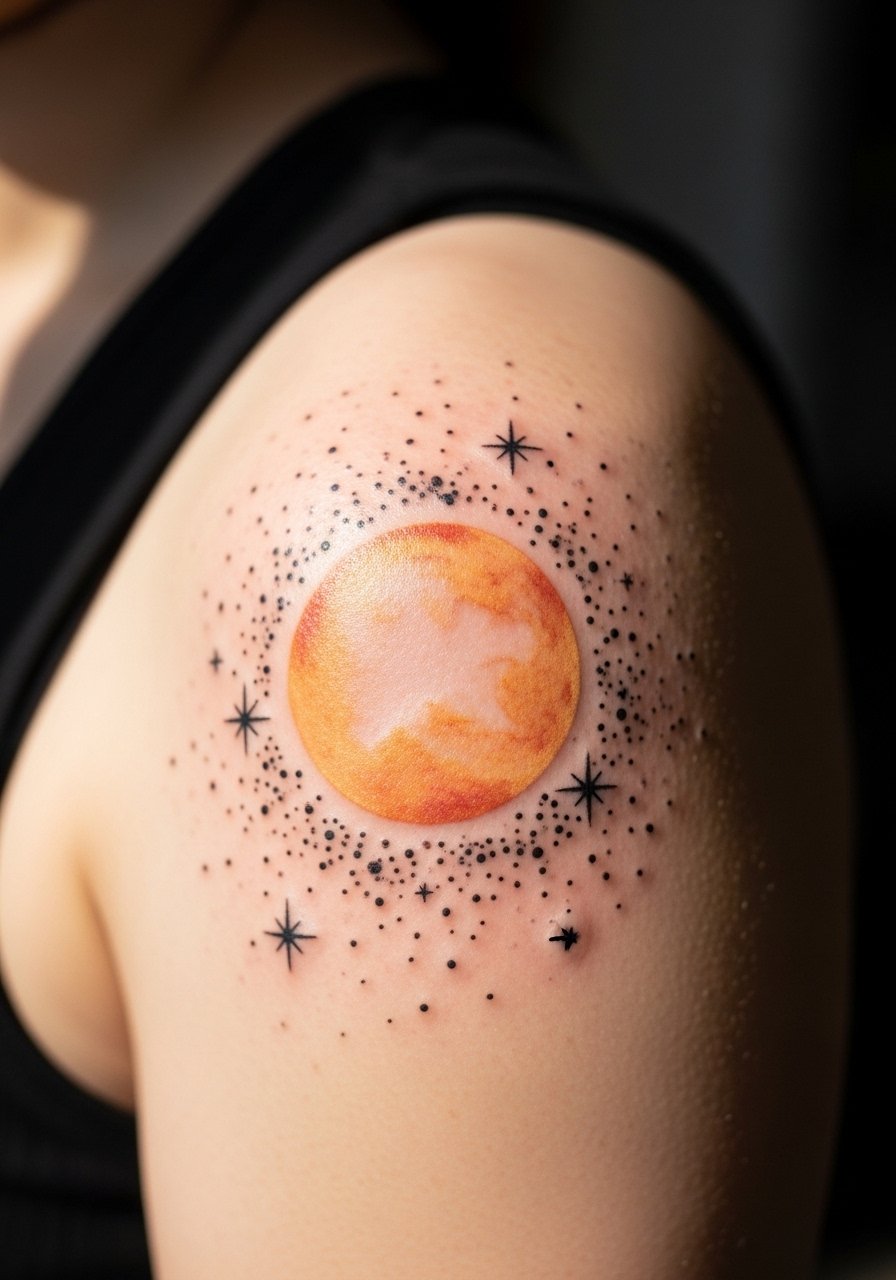
Venus makes a visually poetic tattoo when rendered in watercolor realism—warm tones and soft highlights suggest love and beauty. The shoulder cap is forgiving during healing and ages gently since it avoids constant friction. Watercolor needs more care: colors can look muted when healed unless saturation is planned by your artist. Pain is manageable and sessions are relatively quick. A frequent mistake is overusing white highlights; they can disappear over time, so ask for strategic contrast rather than heavy white ink. From what I’ve gathered, artists who excel at watercolor planets will show healed photos on various skin tones—ask to see those and request a Procreate mock to preview color interactions.
4. Neptune Dream Portrait on Upper Arm (Illustrative Realism)
Style/Technique: Illustrative / Realism
Pain Level: Medium (4/10)
Session Time: 1–2 sessions
Best For: Spiritual, introspective pieces
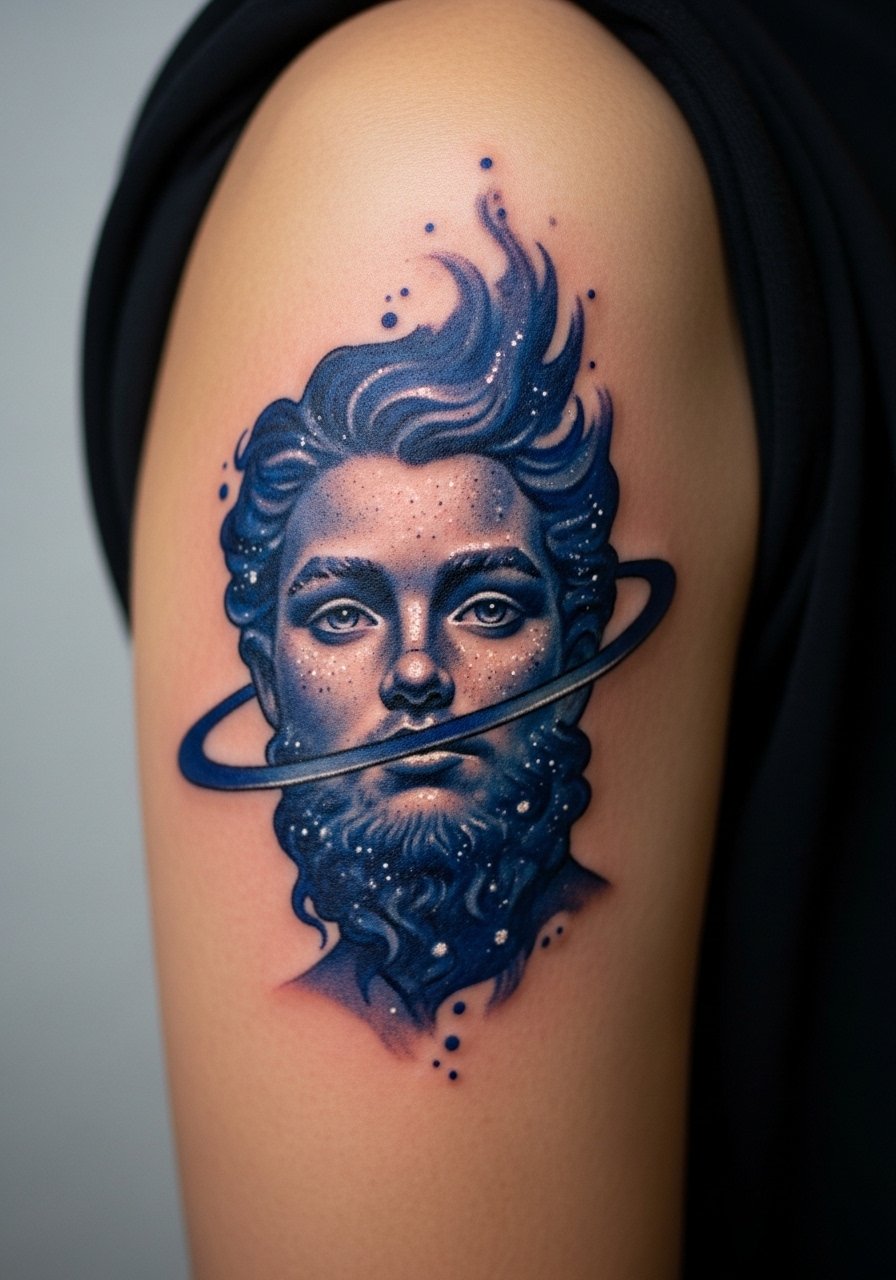
Neptune tattoos read as inward journeys—mists of blue and soft highlights that suggest intuition. The upper arm gives enough canvas for layered atmospheric shading without excessive pain. Healed blues can look muted, so artists will often build contrast with deep outlines or dotwork. Watch out for over-blending; too-smooth transitions can flatten once the skin settles. I like to ask artists for a layered approach: a core realism planet, surrounding illustrative stars, and dotwork accents. If you want this as a talisman for inner voice, pair it with subtle script or a crescent moon. Many tattoo communities I follow recommend planning touch-ups for blues to keep that dreamy quality over time.
5. Earth Landform Detail on Ribcage (Realism)
Style/Technique: Realism / Color
Pain Level: High (7-8/10)
Session Time: Single long session or two shorter ones
Best For: Environmental statements, private art
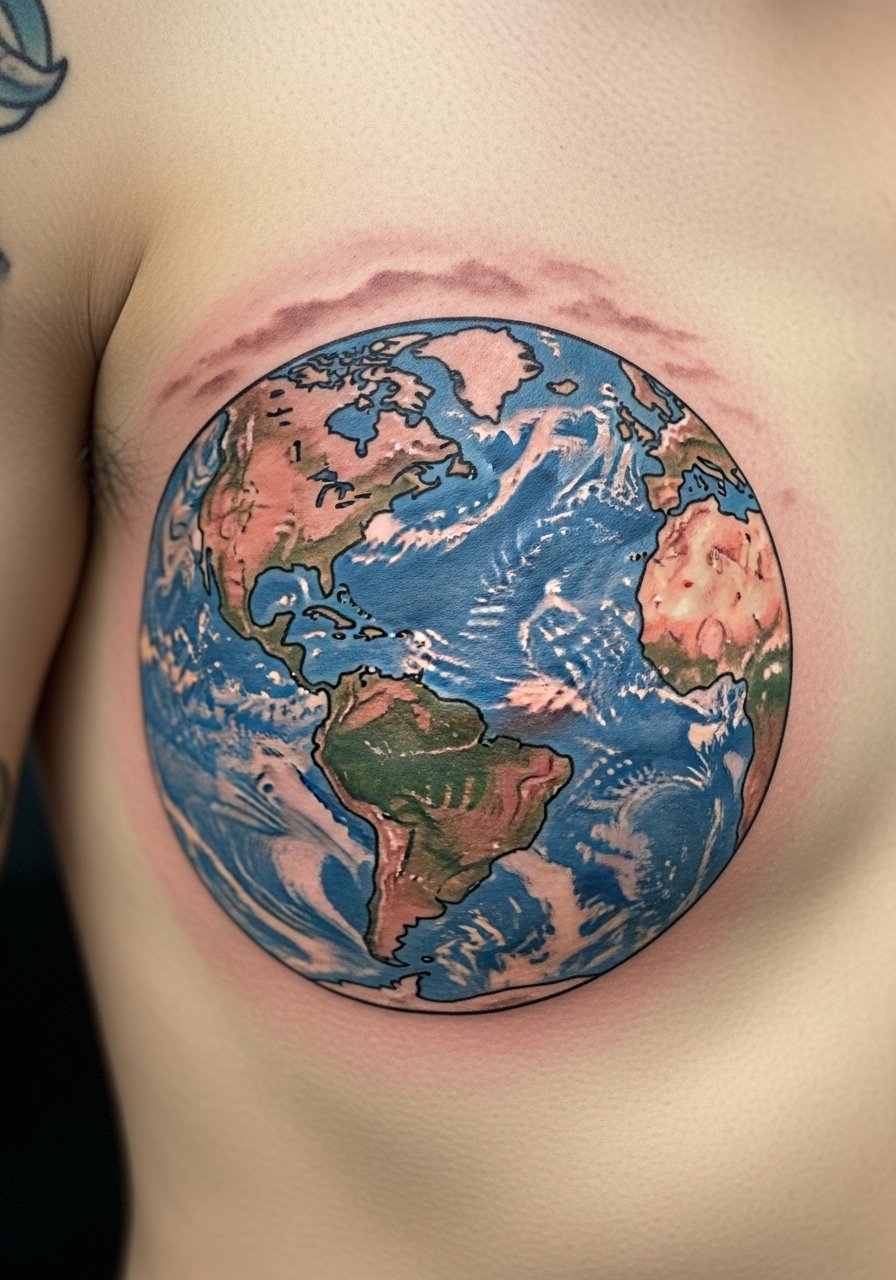
An Earth portrait with landform detail feels personal and activist-minded. Rib placement gives a curved backdrop that flatters globe shapes but is one of the more painful spots. Healing can be trickier due to clothing friction; expect longer surface healing. Color contrast between oceans and land needs strong saturation and careful planning for how pigments settle on your skin tone—artists experienced with diverse clients can advise which hues will remain distinct. A common slip-up is cramming too many small map details into a compact orb; larger rib placements work best. I’ve seen portfolios where artists use fine white highlights sparingly to suggest clouds rather than heavy white ink, which often fades. Bring reference photos and ask for healed examples on similar skin tones.
6. Mercury Speed Symbol on Inner Forearm (Geometric Linework)
Style/Technique: Geometric / Linework
Pain Level: Low (2-3/10)
Session Time: Single session
Best For: Communication talismans, visible but low-pain
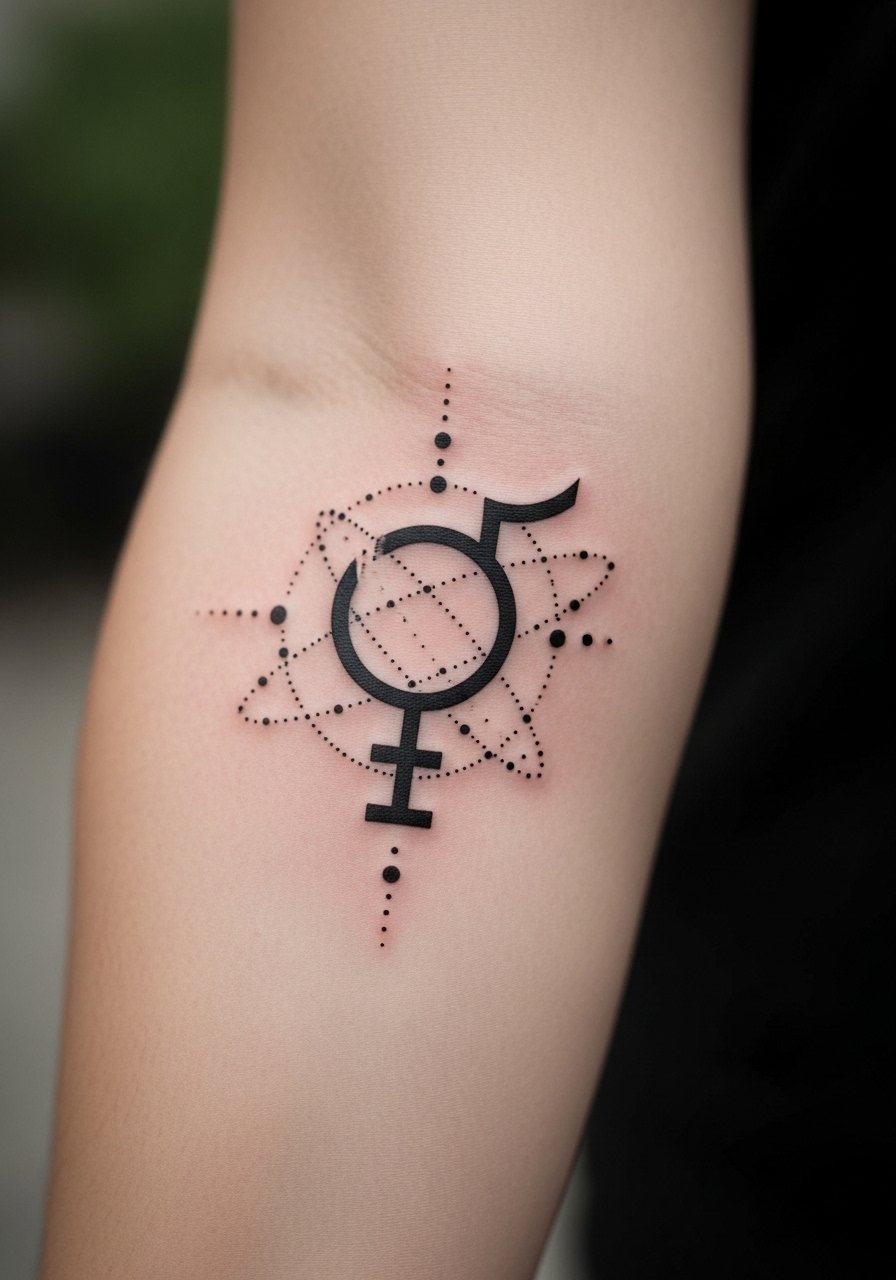
A Mercury-inspired planet or symbol on the inner forearm reads as a daily reminder of quick thinking. The inner forearm is forgiving and a first-timer friendly spot. Geometric linework here should be bold enough to survive natural softening; very thin lines can blur. The design can be compact but still detailed if the artist spaces the elements thoughtfully. Watch for cramped composition—ask your artist to add small gaps or dotwork separation so the design breathes. From chatting with artists, Mercury pieces often pair well with tiny script or constellation lines. Use virtual try-on tools like Tatship to preview how a forearm alignment will look when you bend your arm.
7. Mars Courage Bicep Emblem (Neo-Traditional)
Style/Technique: Neo-Traditional / Bold Color
Pain Level: Low-Medium (3-4/10)
Session Time: Single to two sessions
Best For: Talismanic, bold statements
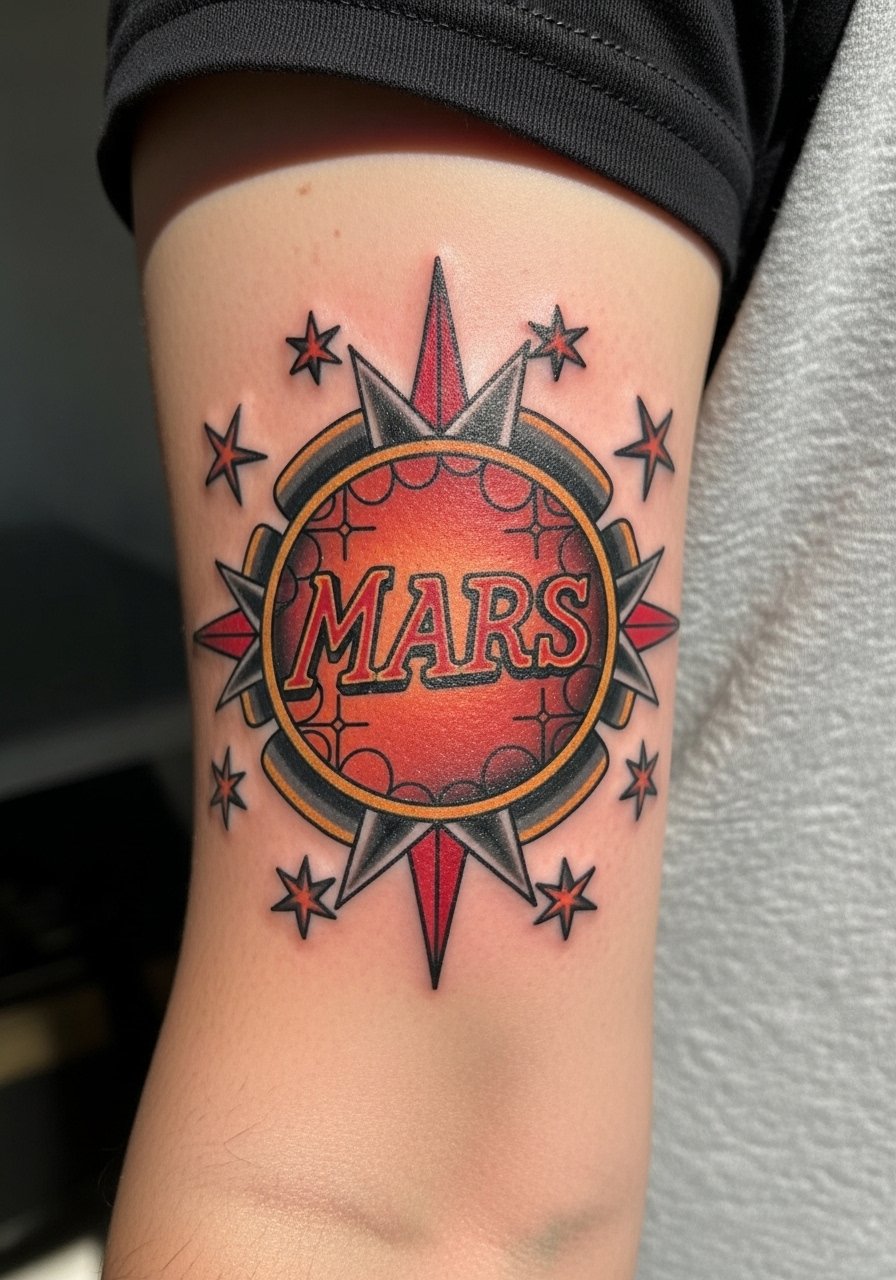
Mars makes a great bold emblem for courage when executed in neo-traditional style—strong outlines and saturated reds read clearly as they age. The outer bicep is low pain and perfect for showing off or hiding under sleeves. Colors like red tend to settle; a skilled artist will plan saturation and contrast so the piece keeps its presence when healed. The mistake I often see is relying on tiny textural details that disappear; prefer bold shapes and layered color fields. Ask to see healed neo-traditional pieces and request a sketch that demonstrates how shading will hold after healing. This placement also adapts well into half-sleeve planetary narratives.
8. Jupiter Expansion Thigh Piece (Watercolor / Large)
Style/Technique: Watercolor / Illustrative
Pain Level: Low (3/10)
Session Time: Multiple sessions depending on size
Best For: Large, coverable cosmic work
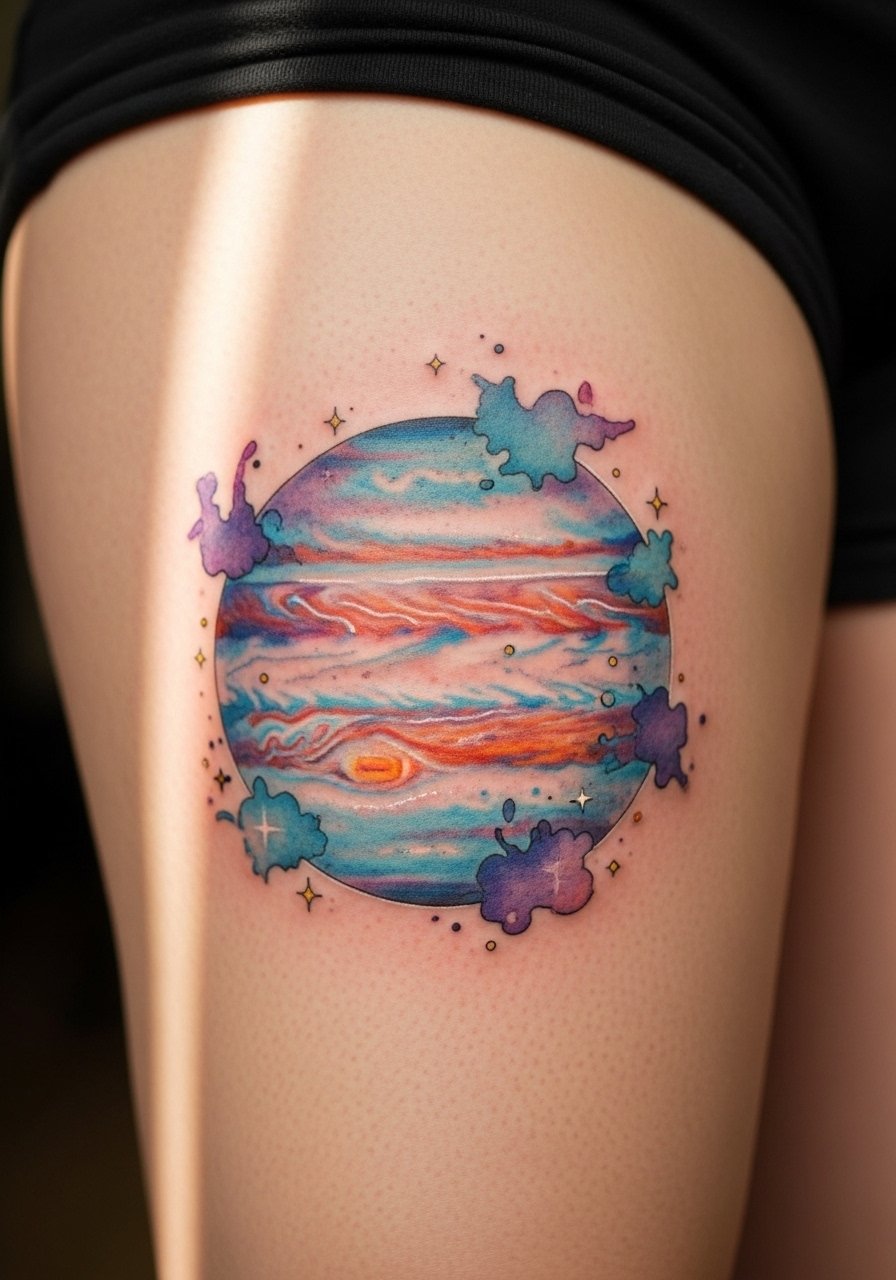
The thigh is ideal for a large watercolor Jupiter—there’s room for sweeping clouds and layered color that reads like motion. Thigh placement sees less sun and abrasion, which helps keep watercolor vibrancy longer. Healing is easier compared to rib or ankle placements but still needs diligent aftercare. Watercolor planets age by softening; ask your artist how they plan saturation and where they’ll use black anchors to prevent total washout. Also consider how the piece will look with clothing; compression can affect healing. I've noticed artists who integrate subtle geometric elements into watercolor pieces create compositions that remain readable as pigment migrates.
9. Realism Planet Galaxy Scene on Back
Style/Technique: Realism / Full Color
Pain Level: Medium-High (5-7/10)
Session Time: Multiple long sessions
Best For: Dramatic, photoreal tribute
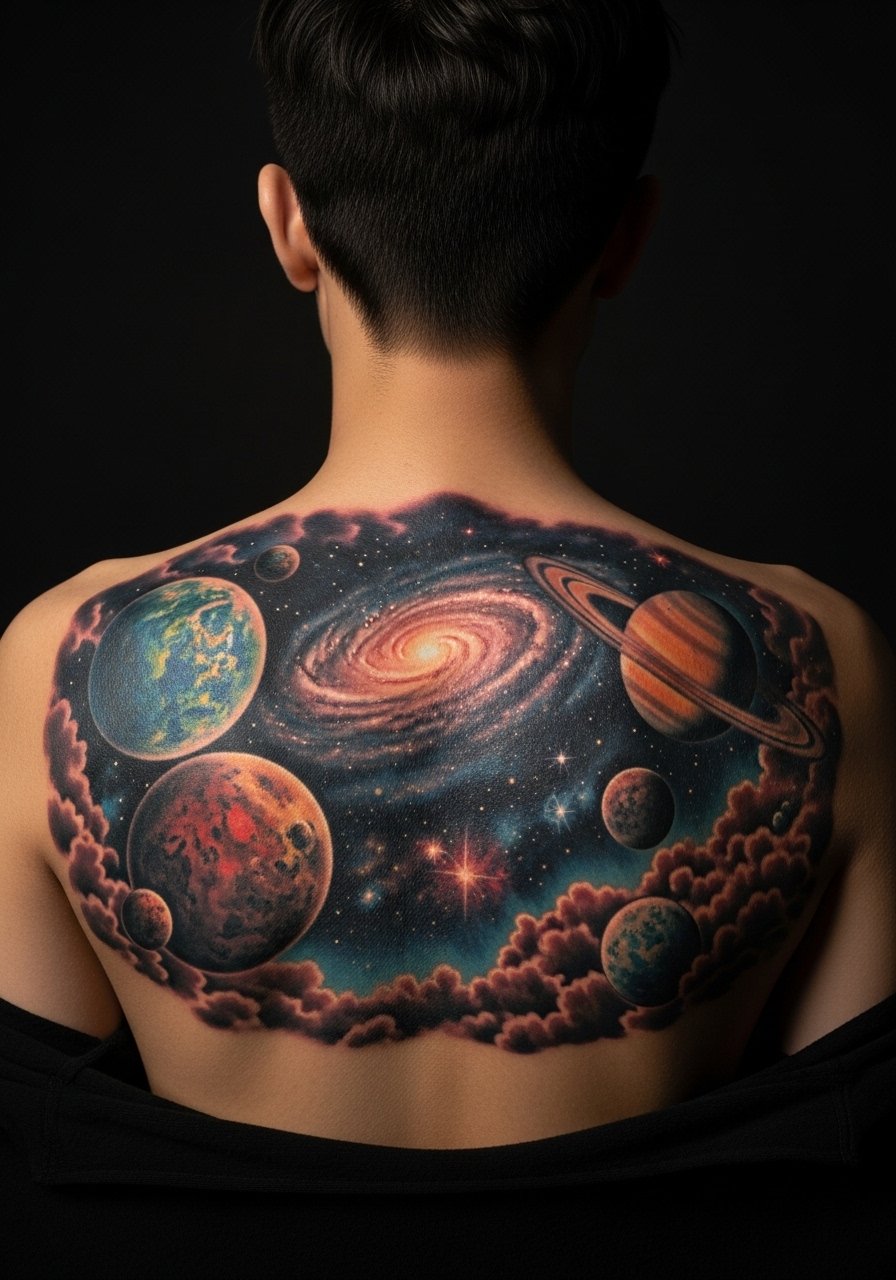
A back galaxy scene gives maximum space for photoreal planets, nebulae, and stars. It’s a commitment but the payoff is a cinematic piece. Expect multiple sessions and a realistic healing timeline. Realism needs careful contrast planning—without black anchors, small details can wash out. One common error is cramming too many tiny elements into a single plane; depth and scale are everything. Ask artists for healed gallery shots of large realism space pieces. From what I’ve seen, these are best handled by artists who specialize in photorealism rather than generalists. Consider how the piece will interact with spine curvature and shoulder movement during design planning.
10. Watercolor Abstract Planets on Wrist Cluster
Style/Technique: Watercolor / Abstract
Pain Level: Low (2-4/10)
Session Time: Single session
Best For: Wrist statements, colorful accents
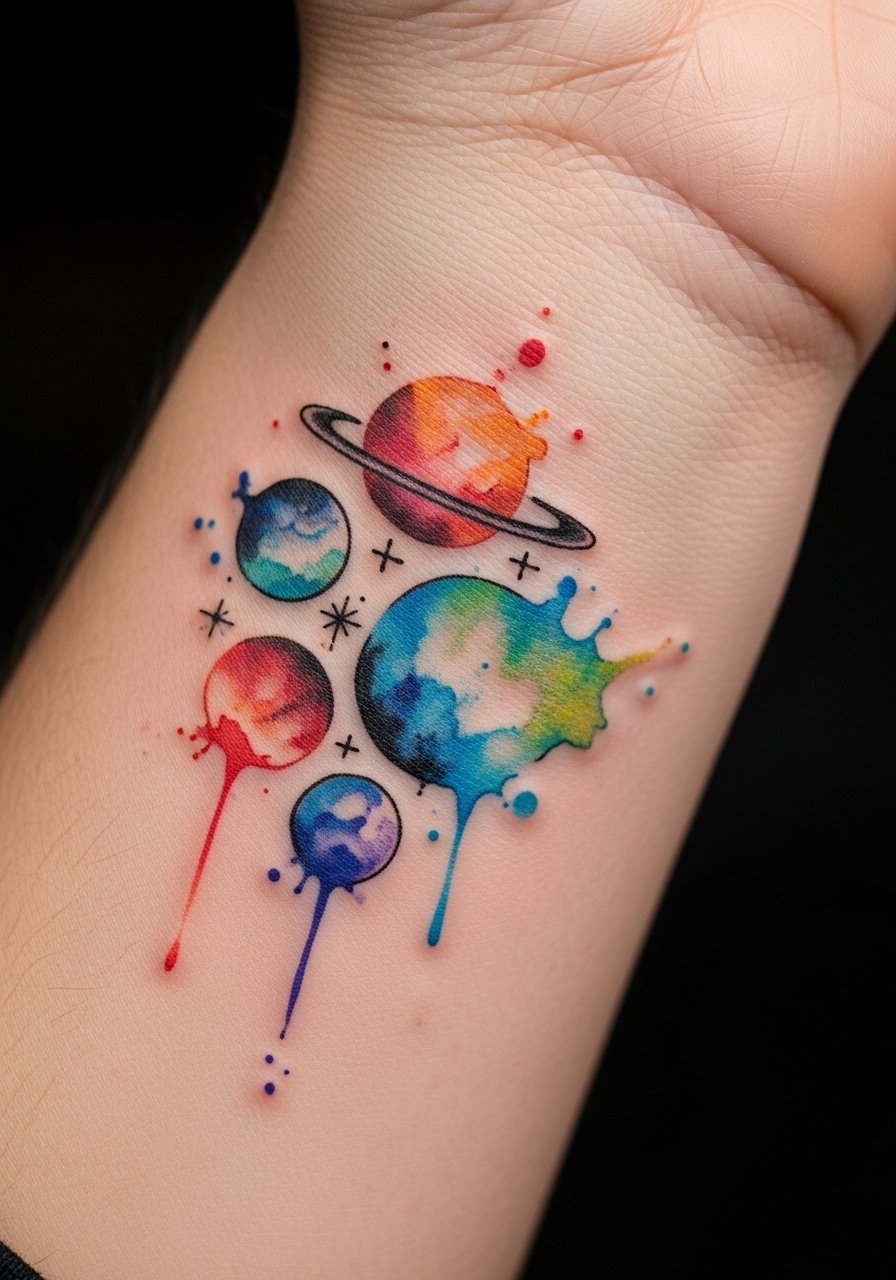
Wrist clusters are charming for small watercolor planets, but the wrist is exposed to sun and frequent washing, making color maintenance key. Watercolor here creates a dreamy, artistic vibe, especially when combined with micro-stars. Pain is manageable. The common oversight is expecting the same saturation as on thigh or back—ask for richer initial saturation and plan for touch-ups. Black anchors or tiny outlines can help the planets hold definition. I’ve noticed wrist watercolor looks best with simple composition and a few bold accents rather than many blended layers.
11. Minimalist Planet Outline Behind Ear (Tiny Talisman)
Style/Technique: Minimalist / Single Line
Pain Level: Low (2-3/10)
Session Time: Quick single session
Best For: Tiny, private symbolism
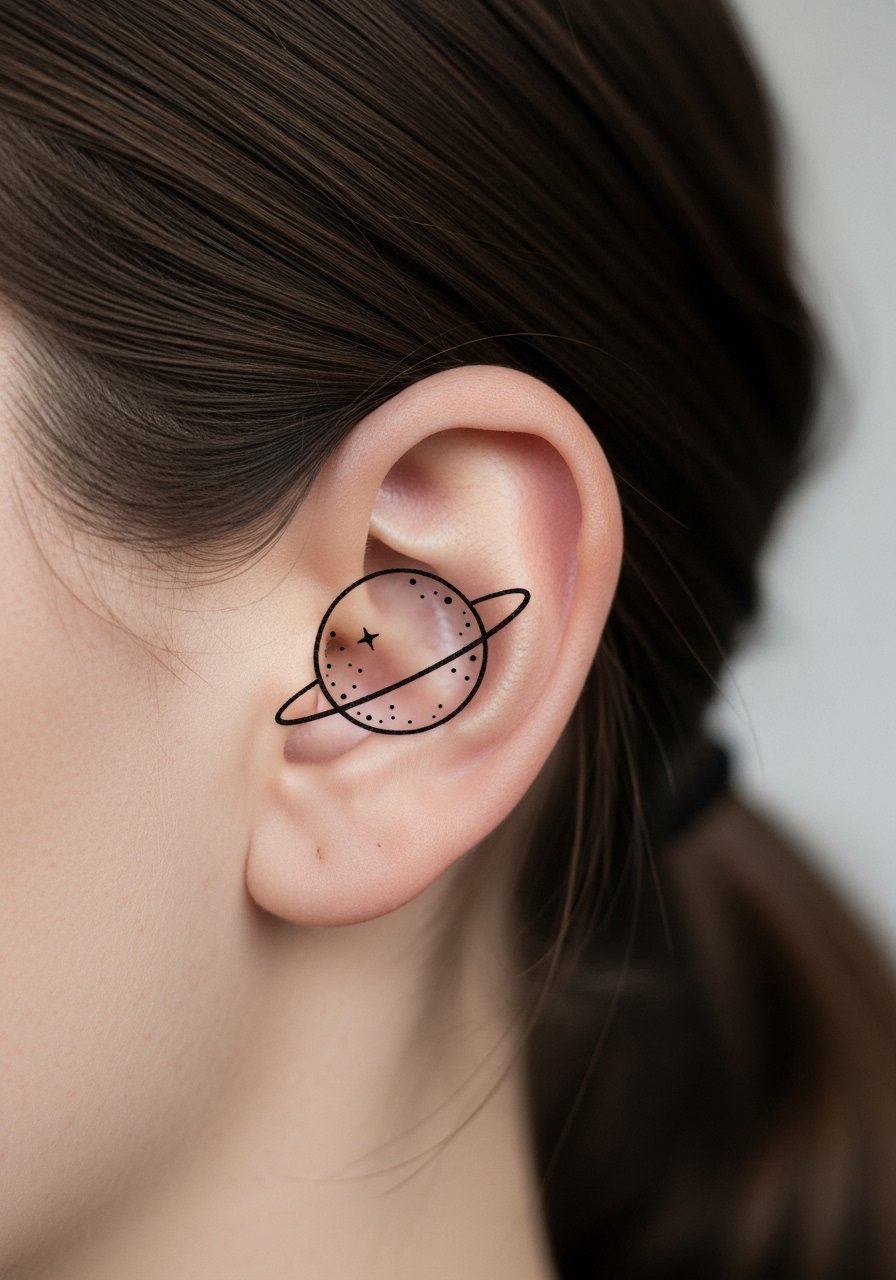
Behind-ear planets are a quiet choice—easy to hide with hair and a great spot for a personal talisman. Fine line outlines here should be slightly bolder than micro-hairlines to prevent quick bleed. Pain is low but placement can feel ticklish during the session. Healed results depend on how much the artist adjusts for the skin’s elasticity; ask to see healed examples on similar placements. Avoid tiny internal textures; the simplicity of a clean orbit and a dot is often more effective. If cultural symbolism is a concern, I recommend discussing the design with your artist to ensure respectful depiction.
12. Saturn with Celestial Elements on Forearm (Geometric/Ornamental)
Style/Technique: Geometric / Ornamental
Pain Level: Medium (4/10)
Session Time: 1–2 sessions
Best For: Forearm sleeves, expandable designs
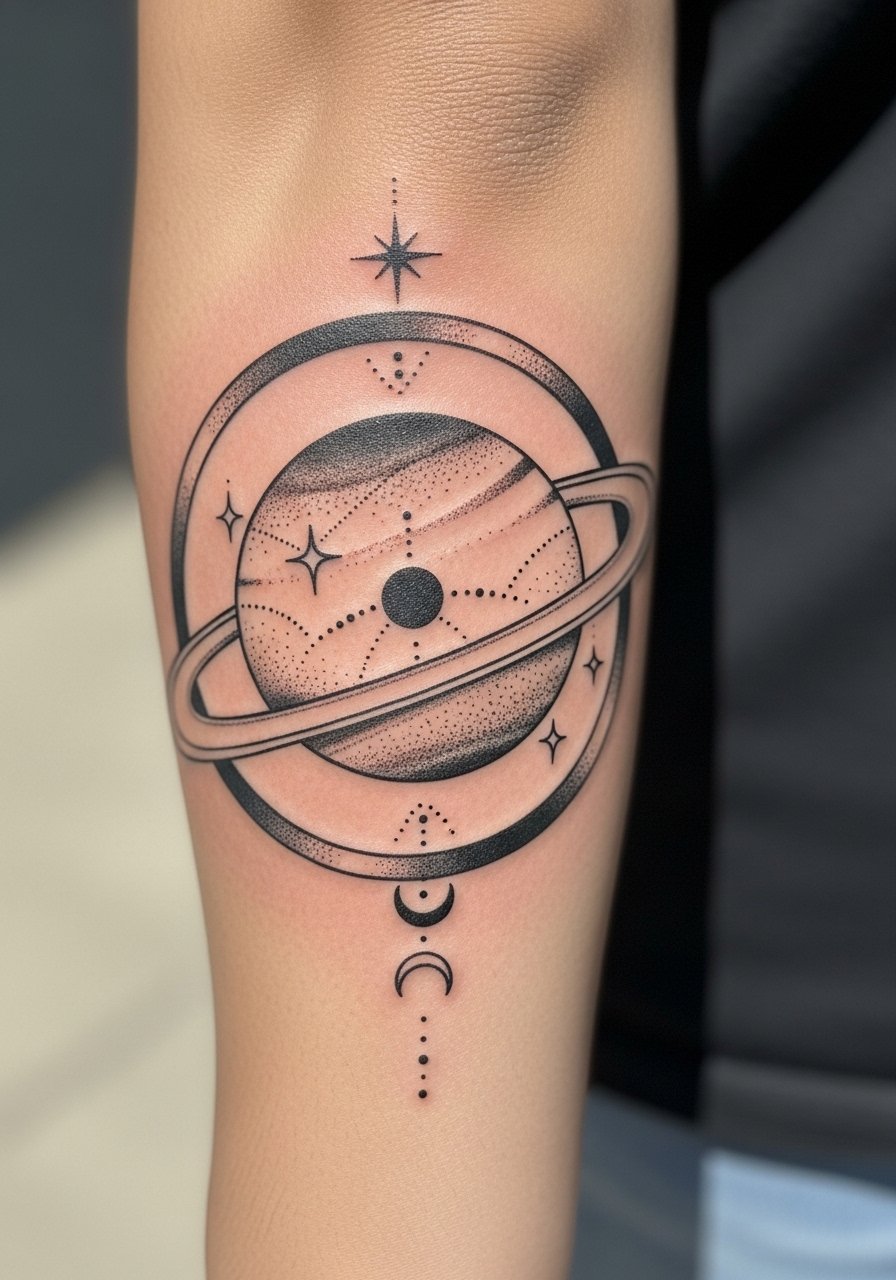
Combining Saturn with ornamental geometry creates a balanced narrative piece that reads well as either a standalone or part of a sleeve. Forearm placement allows for expansion into other planetary elements later. The piece ages well if the artist avoids too-fine filigree that can blur. Pain is moderate and sessions are straightforward. The usual mistake is overcrowding ornaments; leave negative space to keep each element distinct. Many artists now use dotwork to add texture without risking heavy blur—ask for examples of healed dotwork on forearms. Mention interest in planetary alignment themes if you want a sequence of planets added over time.
13. Uranus Dotwork Calf Piece (Blackwork Stippling)
Style/Technique: Dotwork / Blackwork
Pain Level: Medium (4/10)
Session Time: 1–2 sessions
Best For: Edgy, tactile texture
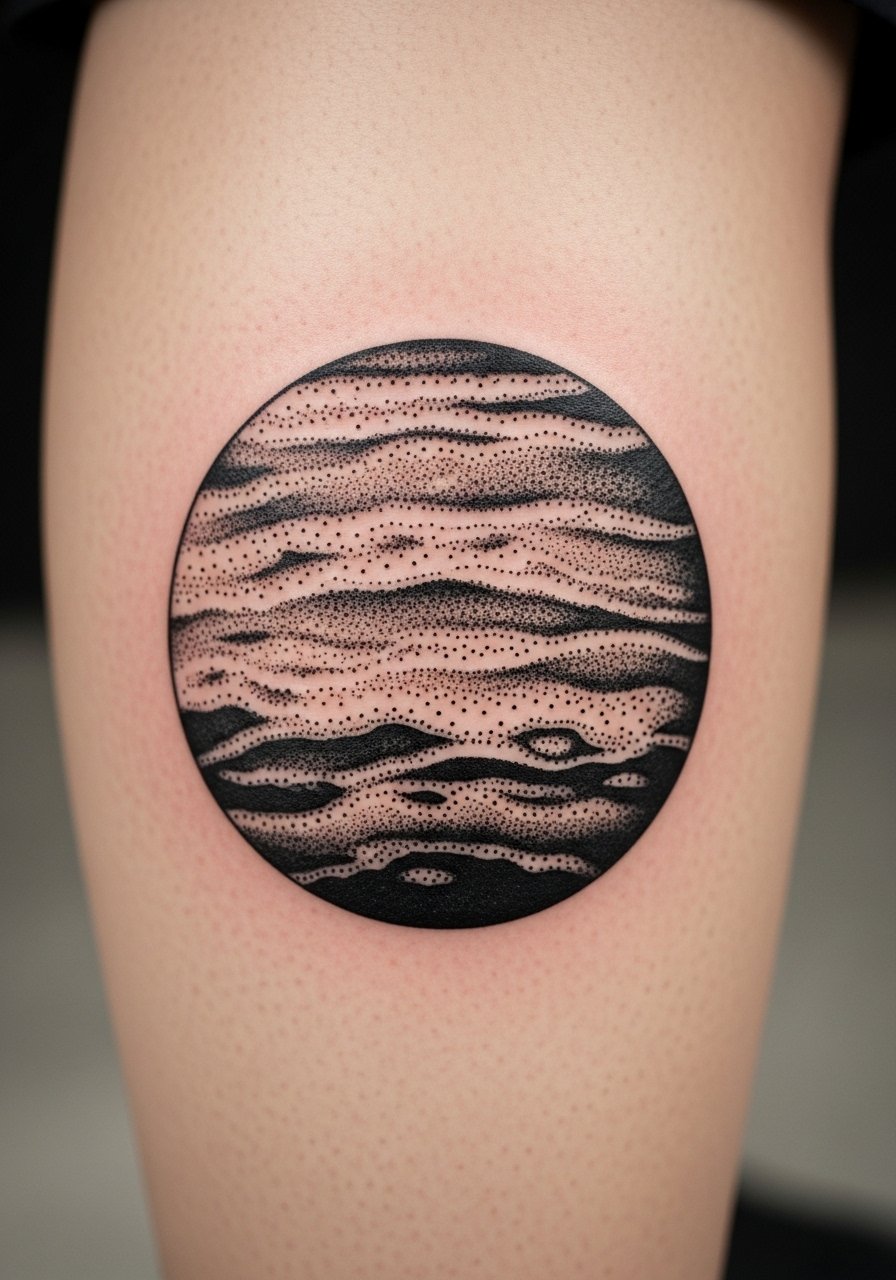
Uranus in dotwork creates a tactile, modern feel. Calf placement tolerates stippling well and shows off gradients without constant sun exposure. Dotwork reads well healed if the dots are spaced correctly—too tight and they merge, too sparse and the gradient looks patchy. Pain is moderate but manageable over larger areas. One pitfall is asking for extremely fine stippling on very small planets; stick to medium scales for optimal longevity. Artists experienced in blackwork can design stipple gradients that remain pleasing for years. Consider combining with thin-line orbital rings or small script for a contemporary talisman.
14. Tiny Planet Constellation on Collarbone (Micro-Realism)
Style/Technique: Micro-Realism / Fine Line
Pain Level: Low-Medium (3-4/10)
Session Time: Single short session
Best For: Visible elegant accents
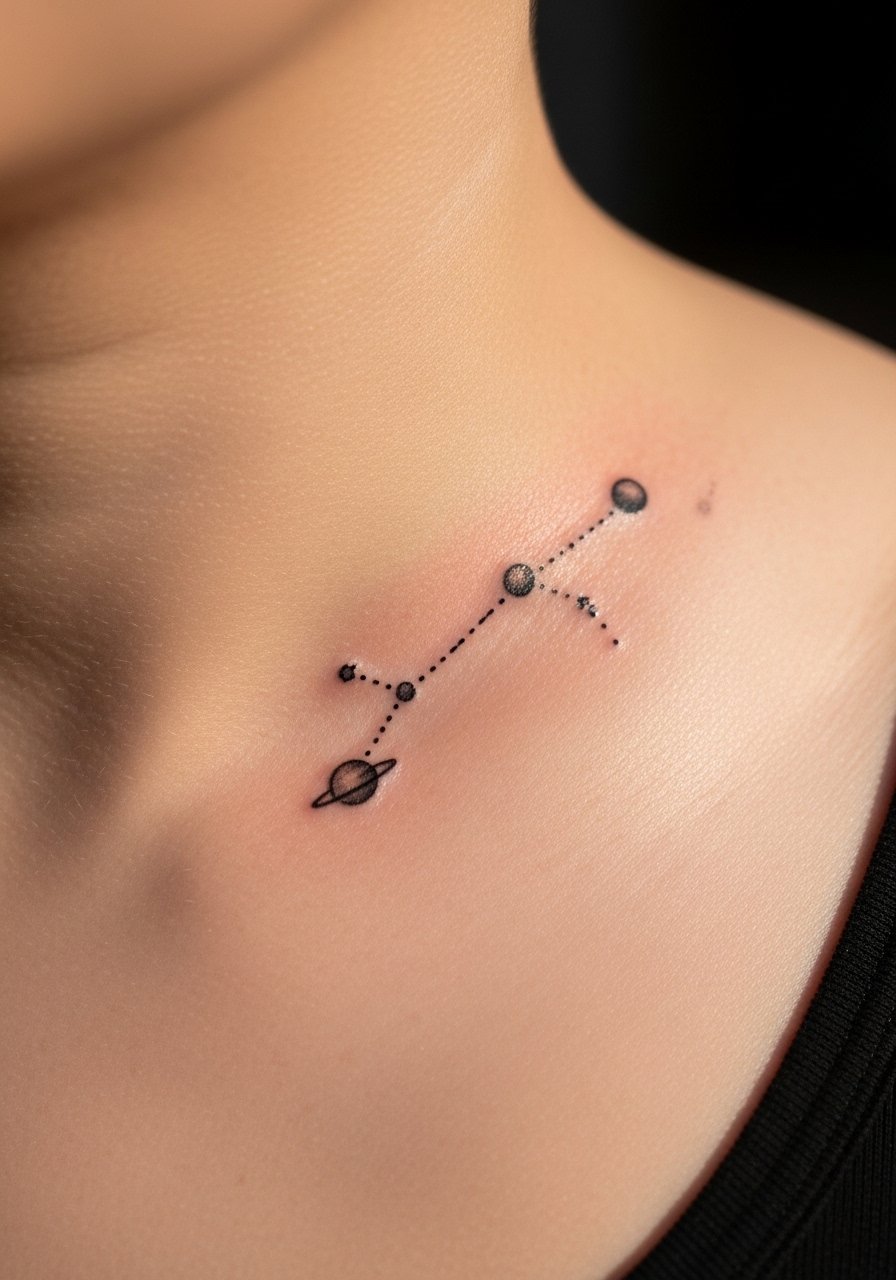
A micro-realism constellation across the collarbone reads delicate and personal. Collarbone pieces are visible and flattering but can be sensitive during the session due to bone proximity. Healed micro-shading can look soft and lovely when the artist balances line weight. Avoid over-detailing—micro pieces need clarity at small scale. I suggest asking for slight boldening of key outlines and keeping background elements minimal. From what I’ve seen, artists who work frequently on collarbones will show healed shots that reveal how lines settle—ask to see those before booking.
15. Handpoke Minimal Planet on Ankle (Handpoke/Indie Aesthetic)
Style/Technique: Handpoke / Minimalist
Pain Level: Low (2-3/10)
Session Time: Short, single sitting
Best For: DIY vibe, subtle placements
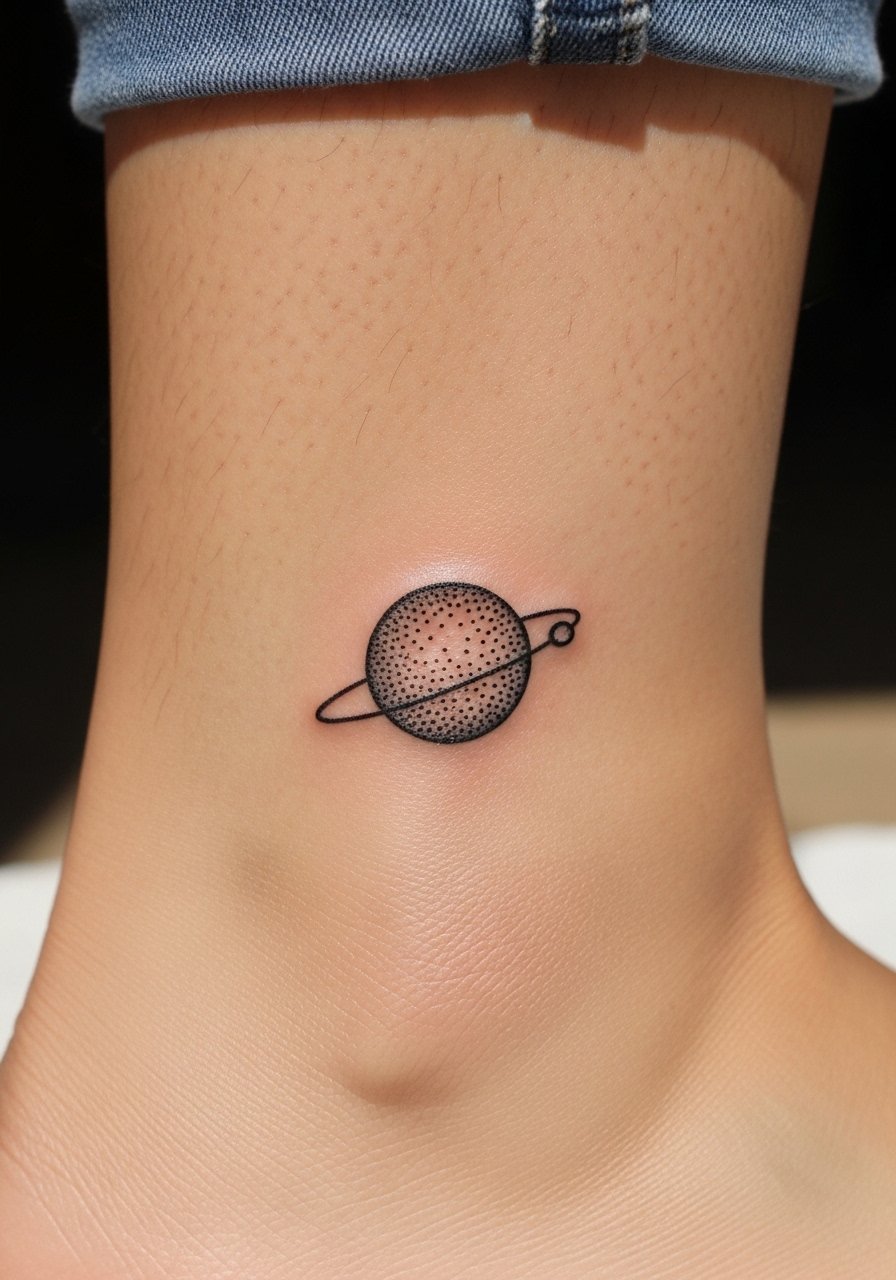
Handpoke planets have an intimate, indie feel and work well on ankles. Handpoke healing differs slightly—dots may heal with a softer edge and require touch-ups for consistency. Pain is generally low at the ankle but watch for bone proximity. The most common mistake is underestimating the need for aftercare; handpoke dots can scab more noticeably if not cared for. If you want an organic texture and a quieter aesthetic, handpoke can be a nice choice. Ask your practitioner about their healed gallery and how they handle saturation for handpoke color if you plan more than blackwork.
16. Renaissance Astronomy Tribute on Upper Chest (Illustrative)
Style/Technique: Illustrative / Historical Motifs
Pain Level: Medium (4-6/10)
Session Time: Multiple sessions depending on detail
Best For: Art history lovers, narrative pieces
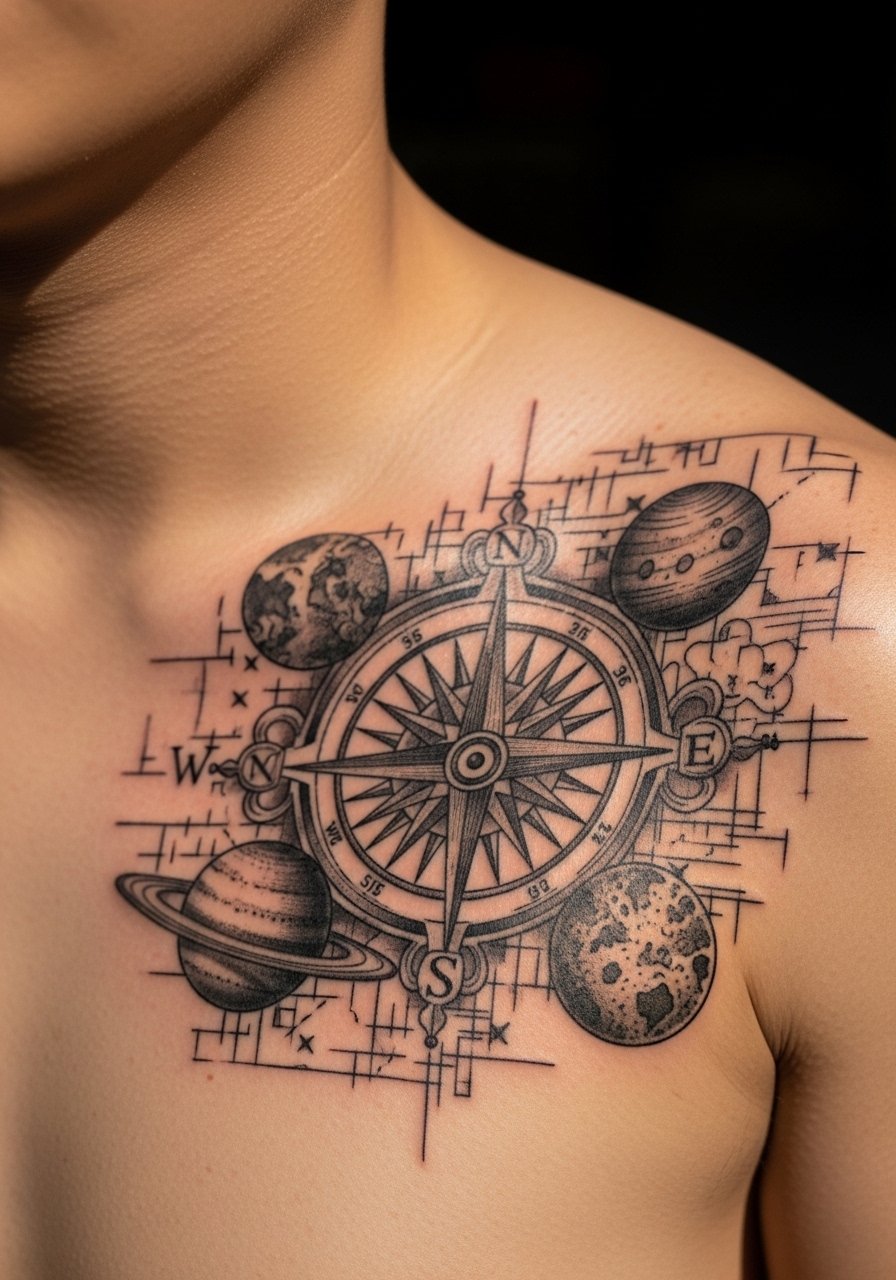
A Renaissance-inspired planet tattoo blends historical engraving aesthetics with modern ink. Upper chest placement allows for symmetrical compositions and reads like a personal emblem. Pain can be moderate near the sternum. Because the style uses fine hatching, ask for slightly stronger line weight so the engraving remains readable as it heals. A frequent error is requesting excessive micro-hatching in small areas—scale up detail to preserve the deliberate aged look. If you love astronomy history, bring reference plates and ask artists to adapt engravings into tattoo-friendly linework.
17. Solar System Orbit Band Around Thigh (Geometric Sequence)
Style/Technique: Geometric / Sequence
Pain Level: Low-Medium (3-4/10)
Session Time: Multiple short sessions
Best For: Thematic continuity, expandable art
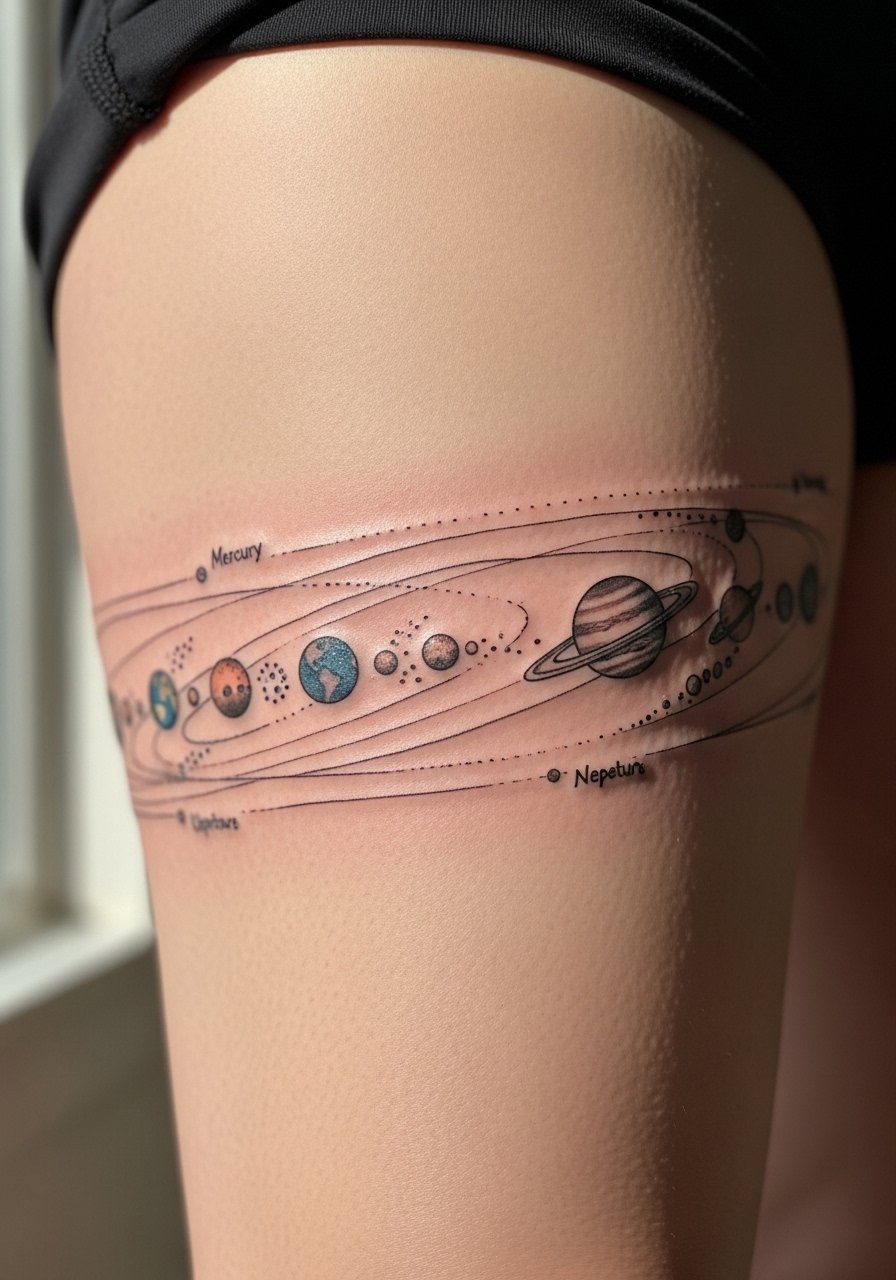
A thigh orbit band gives you a wearable diagram of planets—great for telling a personal planetary story. Thigh skin tolerates sessions well, and the band can be expanded into a larger leg piece later. Healed sequence work benefits from consistent spacing and bold orbits that won’t merge. Avoid tiny planetary details that get lost around curvature; use clear silhouettes. In my experience, artists who plan with mockups or Procreate wraps produce the best results. Consider asking about how the band will sit when you walk or sit to ensure alignment survives movement.
18. Mercury + Constellation on Inner Wrist (Minimalist Talisman)
Style/Technique: Minimalist / Linework
Pain Level: Low (2-3/10)
Session Time: Short session
Best For: Daily reminders, simple statements
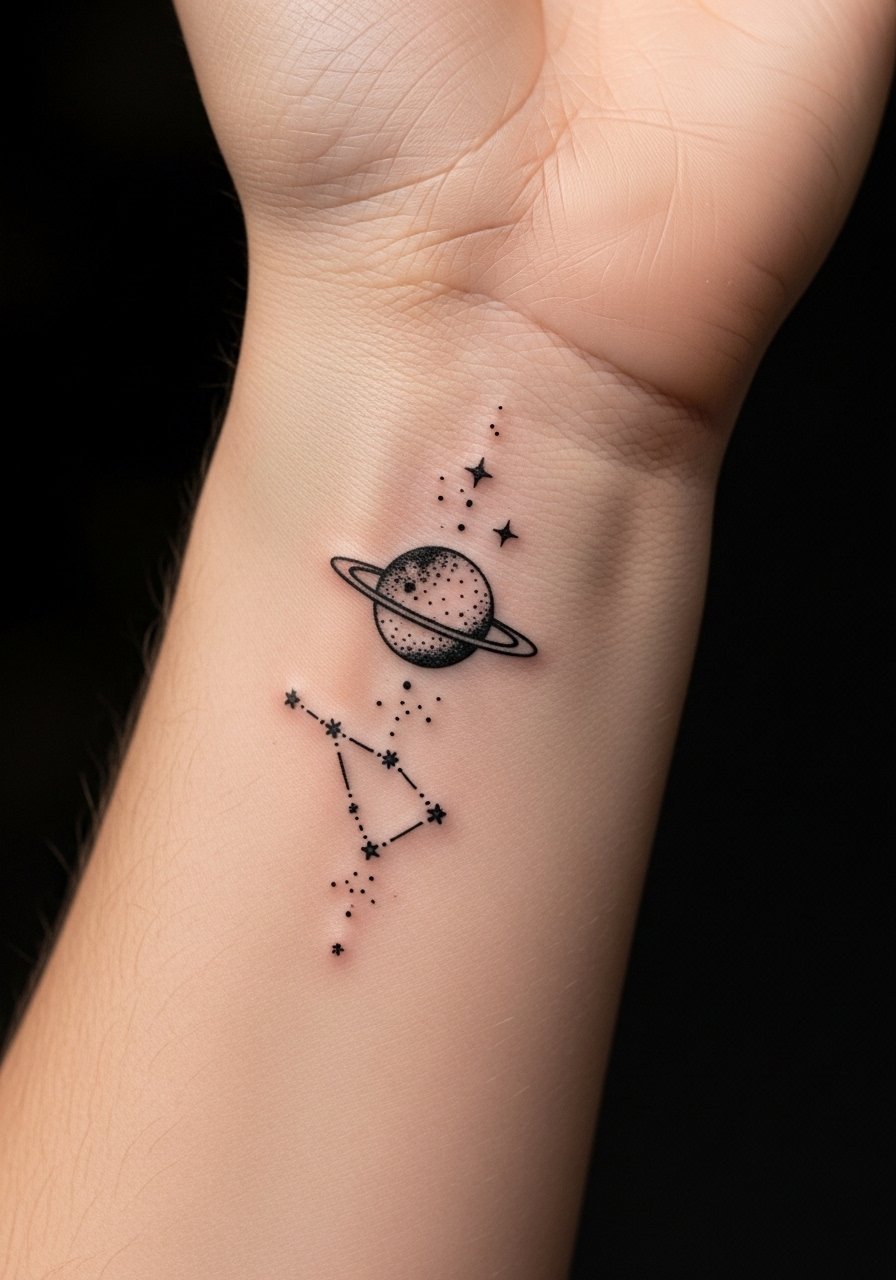
Putting Mercury with a tiny constellation on the inner wrist is a simple way to carry a communication talisman. The wrist is visible and prompts interaction, so choose a composition that won’t be overworked. Fine lines must be bold enough to account for washing and sun exposure. One common slip is packing too many stars into a small area—less is more. I recommend getting a small stencil and living with it for a week to ensure you like the constant visibility. Many artists will offer a temporary transfer for this reason.
19. Neptune Inner Voice Calf Band (Illustrative/Dreamy)
Style/Technique: Illustrative / Soft Shading
Pain Level: Medium (4/10)
Session Time: 1–2 sessions
Best For: Introspective, leg statements

A Neptune band around the calf reads as a quiet symbol of intuition. Calf skin holds shaded blues well if the artist uses strong contrast. Healing is generally smooth but shading needs planned contrast to stay legible. Don’t ask for overly subtle mid-tones without black anchors—those midtones can flatten. I like designs that add a small phrase or dotwork accent to personalize the theme. From what I’ve gathered, calf bands show well in healed photos and are easy to add to later if you want a full leg cosmic sleeve.
20. Personalized Planet with Birthdate on Inner Bicep (Micro-Realism + Script)
Style/Technique: Micro-Realism / Script
Pain Level: Medium (4/10)
Session Time: Single session
Best For: Commemorative, personal talisman
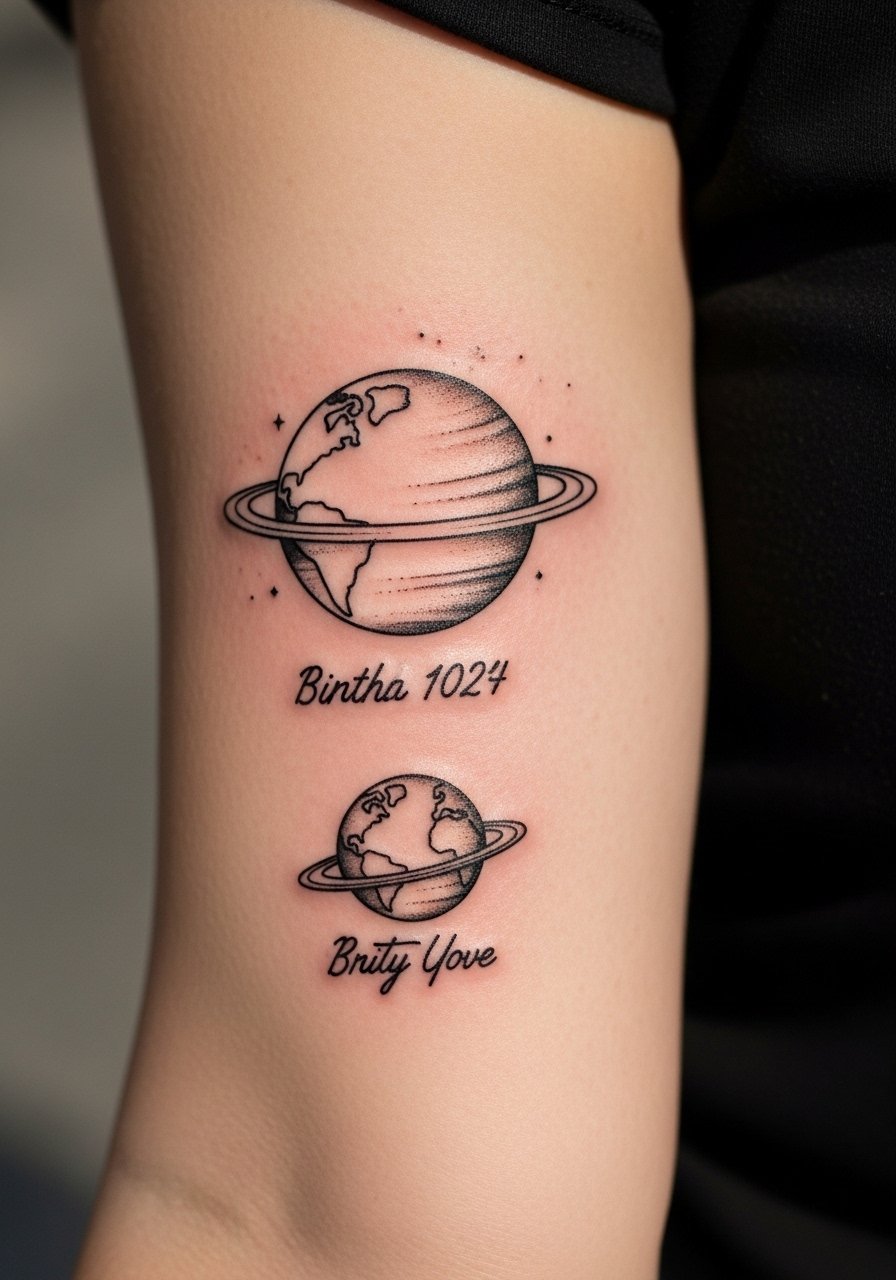
A bespoke planet with a date makes for a quiet, meaningful tattoo. The inner bicep gives privacy and decent pain tolerance. Script combined with micro-realism should be planned carefully—the script needs readable letterforms and the planet needs simplified shading to hold. Avoid extremely thin script; choose a clear, slightly bolder hand. Artists who specialize in micro-realism can show healed pieces where both script and tiny portraits remain legible—ask to see those. If you want a personal talisman, include a small constellation or star for context.
21. Multi-Planet Spine Column (Blackwork + Geometric)
Style/Technique: Blackwork / Geometric Column
Pain Level: High (6-8/10)
Session Time: Multiple sessions
Best For: Dramatic vertical statements
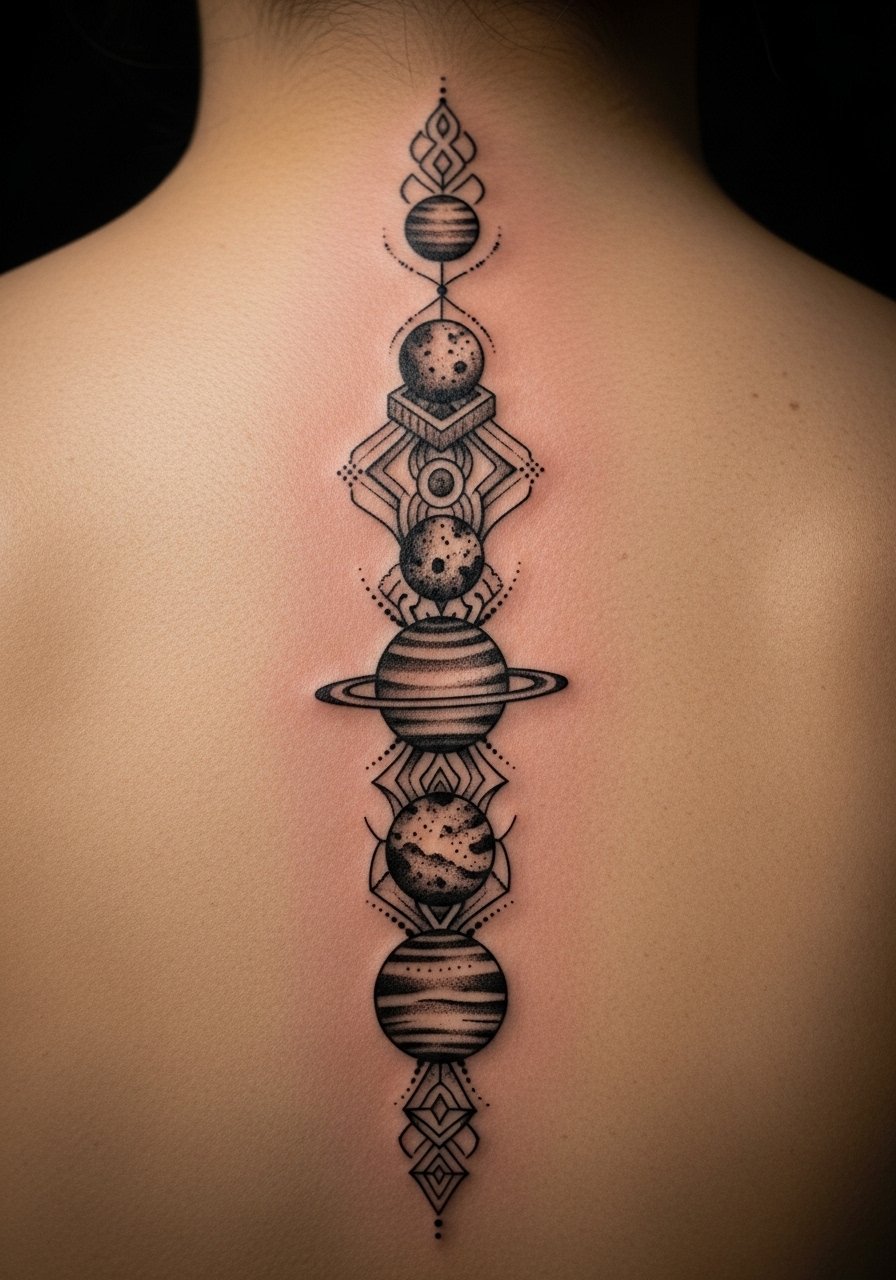
A stacked planet column down the spine is bold and architectural. Spine tattoos can be painful but the vertical format is striking and allows each planet to breathe. Blackwork and geometric separators help each planet remain distinct as skin moves. Plan for multiple sessions and discuss session length with your artist—spinal sessions can be intense. One mistake is cramming too many planets into a short vertical span; give each element space or the column will blur together. If you like the dramatic look, plan to build the column slowly and ask about healed photos from other spine projects.
22. Earth and Moon Ring on Back of Hand (Micro-Realism / Small)
Style/Technique: Micro-Realism / Fine Line
Pain Level: Medium (4-6/10)
Session Time: Single short session
Best For: Visible, symbolic small pieces
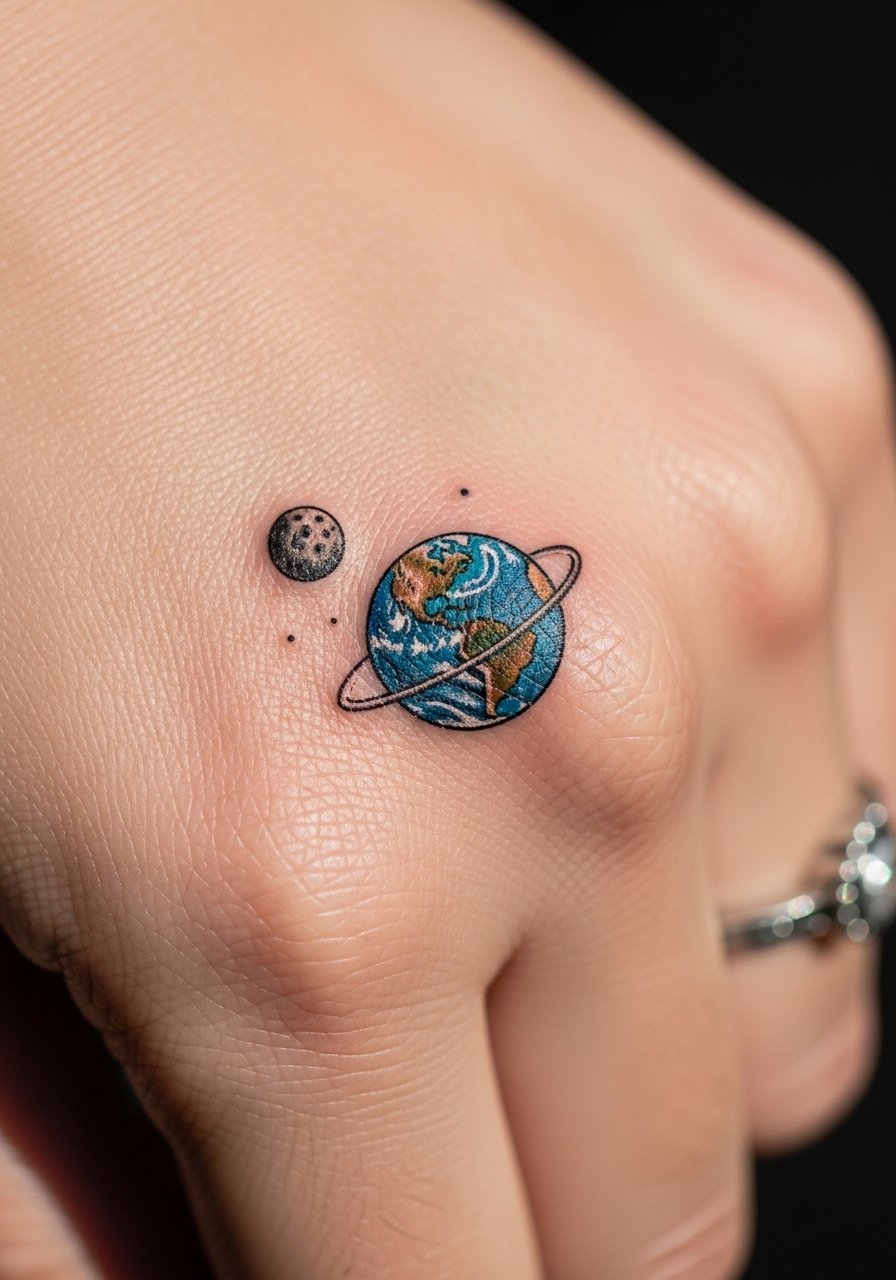
The back of the hand is highly visible and ages differently than other areas—ink there often blurs more quickly due to exposure and frequent washing. An Earth and Moon pairing yields a readable micro-realism piece if the artist uses clear silhouettes and conservative fine shading. Expect touch-ups down the road and be prepared for a slightly softer healed look than fresh photos suggest. If you want this placement, ask your artist for healed hand examples and discuss how to preserve edges. From what I’ve seen, black-and-gray micro work holds better on hands than bright color washes.
Tattoo Prep and Aftercare Essentials
Aftercare Essentials: Healing & Daily Care
- Aquaphor Healing Ointment, 14oz tube — Recommended first 3–5 days for moist healing
- Saniderm Transparent Adhesive Bandage, 6-inch roll — Second-skin method for the first 24–48 hours
- CeraVe Fragrance-Free Moisturizing Lotion, 12oz — For days 4–14 to keep skin hydrated
- Dr. Bronner's Unscented Castile Soap, 32oz — Gentle cleanser for the first week
Before Your Appointment
- Tattoo Numbing Cream with 5% Lidocaine (Tube) — Apply 30–45 minutes prior if your artist approves
- Tattoo Stencil Transfer Paper, Pack — For test transfers if doing custom at home
Long-Term Maintenance
- SPF 50+ Sunscreen Stick for Tattoos (Travel Size) — Daily protection to slow fading
- Mad Rabbit Tattoo Balm, 2oz — Keeps healed ink vibrant for maintenance touch-ups
- Hustle Butter Deluxe, 8oz — Vegan aftercare option for ongoing skin health
Optional Comfort & Repair
- Tattoo Numbing Spray — For touch-ups or very sensitive spots
- Hydrocolloid Bandages (Pack) — For small spots that scab or blister
From what I’ve gathered, artists commonly recommend Aquaphor and Saniderm early, then a fragrance-free lotion afterward. Sunscreen is non-negotiable for long-term color retention.
Frequently Asked Questions
Q: How bad does a tattoo actually hurt?
A: Pain depends on placement and your tolerance. Outer arm or thigh usually feels like mild scratching (around 3/10). Ribcage or spine can be intense (6–8/10). It’s more of an irritating, persistent feeling than sudden sharp pain. For sensitive spots, consider a numbing cream with 5% lidocaine if your artist agrees.
Q: How long does a planet tattoo take to heal?
A: Surface healing is about 2–3 weeks; deeper layers can take a couple months. The first week is critical—clean gently with a mild soap like Dr. Bronner's Unscented Castile Soap and use Aquaphor for initial moisture. Expect peeling around days 3–7 and resist picking.
Q: Will watercolor planets fade faster than blackwork?
A: From what I’ve seen, yes—watercolor relies on midtones and soft blends that can look muted over time. Blackwork and geometric pieces generally keep stronger contrast. If you want watercolor, plan for periodic touch-ups and strict sunscreen use like an SPF 50+ sunscreen stick.
Q: I’m worried about cultural sensitivity with celestial symbols—what should I do?
A: I always ask artists about cultural meanings and bring references. If a planet or symbol has significance in a faith you don’t belong to, discuss respectful depiction with your artist and consider altering details to avoid appropriation.
Q: Can I exercise after getting inked?
A: Wait 48–72 hours for low-friction areas; longer for flex points like knees or elbows. Sweating can irritate fresh skin and increase infection risk. Keep the area clean and avoid heavy sweating for the first week.
Q: Do tattoos look different on darker skin tones?
A: Yes. Black and gray show reliably across tones. Bright colors may appear more muted on deeper skin, and white ink can be subtle or near-invisible. Ask to see healed examples on similar skin tones and discuss color saturation and contrast with the artist.
Q: What’s a common design mistake to avoid with planet tattoos?
A: Cramping too much detail into a tiny orb. Planets read best with clear silhouettes and a few distinct features—save micro-texture for larger pieces.
Q: What products do artists actually recommend versus hype?
A: Most artists I know favor Aquaphor or Saniderm early, then a fragrance-free lotion like CeraVe for longer-term healing. Hustle Butter and Mad Rabbit are popular for routine maintenance but check healed examples before committing to heavy color use.
