
I spent months pinning phoenix tattoo ideas and talking to artists before I realized the real decision wasn't the bird itself. It was picking a style that would hold meaning and age well on my skin. These 28 phoenix designs mix what I love (and what artists keep recommending) so you can pick a rebirth tattoo that fits your story.
This list focuses on styles that read well healed—black & grey realism, traditional flames, watercolor flow, and fine line minimalism. Placements range from wrists to full backs. From what I've seen, artists in 2026 favor ember details and customizable stories over cookie-cutter birds.
1. Fine Line Phoenix Outline Behind Ear
Style/Technique: Fine Line / Minimalist
Pain Level: Low (2-3/10)
Session Time: 30–90 minutes
Best For: First tattoo, subtle symbolism
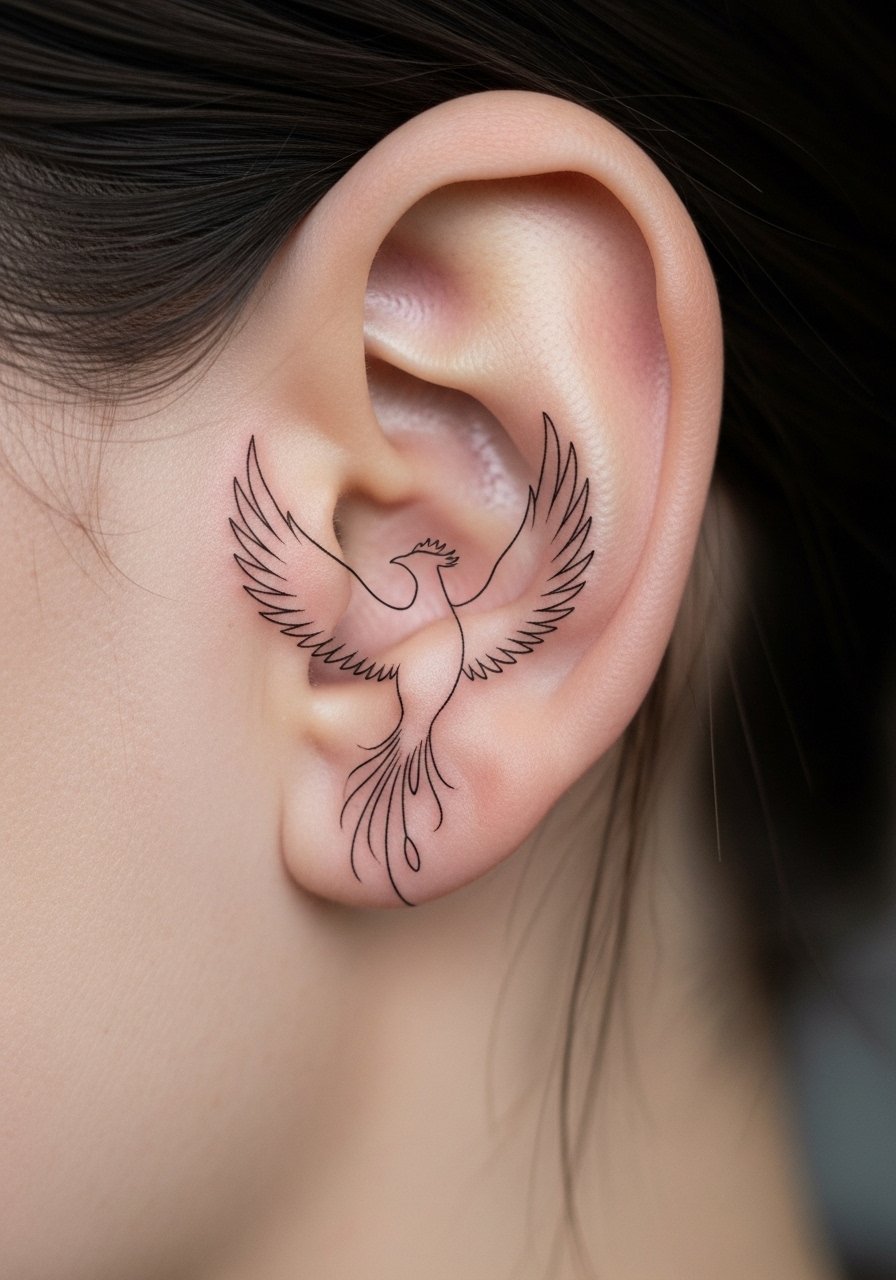
I picked a version like this years ago to mark a quiet restart. Fine line phoenix tattoos read elegant and discreet. Behind the ear is low-visibility and low commitment. Pain is mild, but watch for sensitivity from hairline rubbing. Heals fast—expect surface healing in two weeks. Avoid tiny feather detail that will blur; ask for slightly bolder single lines so the symbol stays readable. If you want to test the idea, try a temporary stencil first.
2. Traditional Phoenix With Flames on Upper Back
Style/Technique: Traditional / Bold Color
Pain Level: Medium (4/10)
Session Time: Multiple sessions for large pieces
Best For: Statement back piece, high impact

This is the classic “rising from the ashes.” I’ve seen these age well because of high-contrast outlines. Upper back gives room for wings and embers. Expect longer sessions but less day-to-day pain than ribs. Color needs sun care—use SPF regularly. Common mistake: cramming tiny details; insist on large, clean shapes so the flames still pop after years. Look for artists strong in American traditional linework.
3. Neo-Traditional Phoenix Wings on Shoulder Blade
Style/Technique: Neo-Traditional / Color Gradients
Pain Level: Low-Medium (3-4/10)
Session Time: 2–4 sessions
Best For: Medium statement, easy to hide
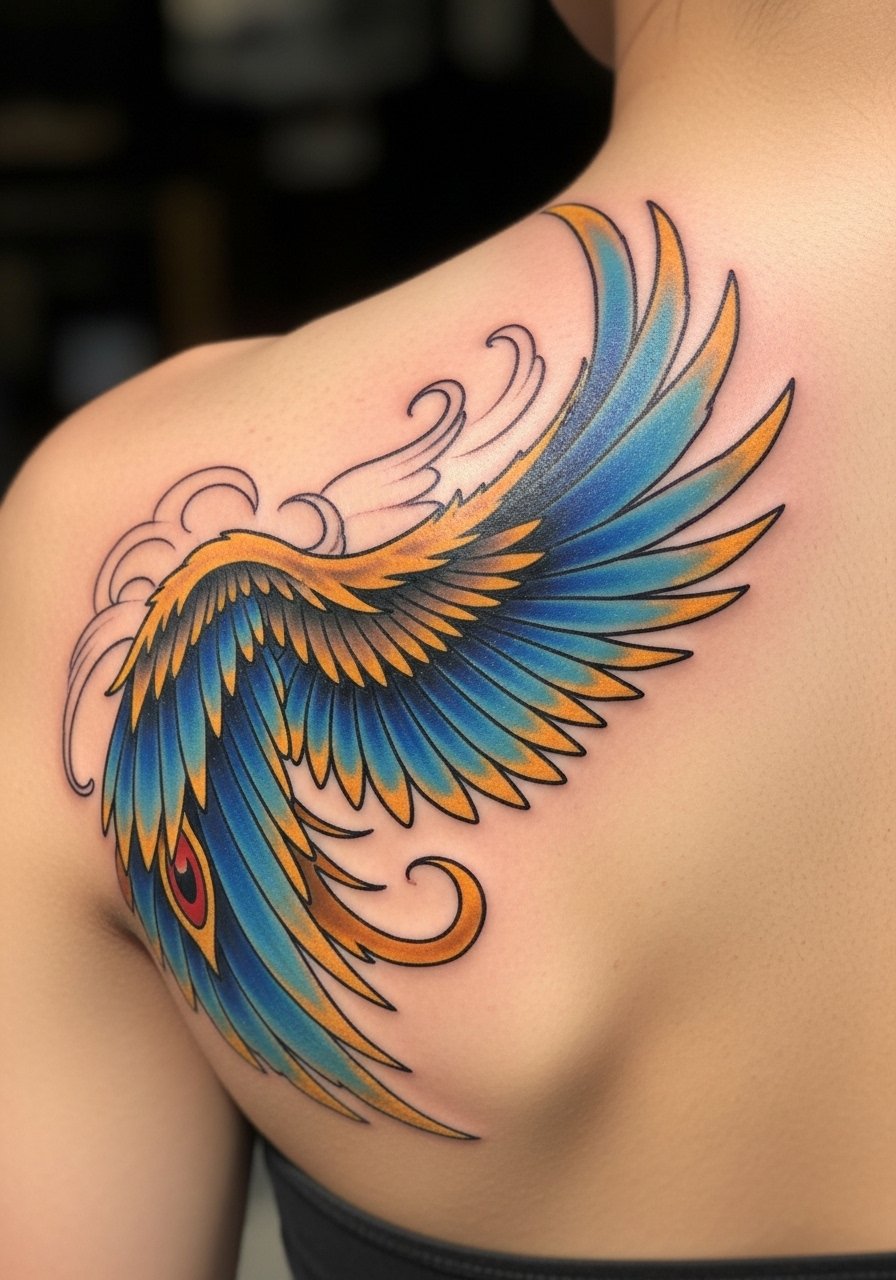
Neo-traditional brings ornate feathers and dramatic color without going photoreal. Shoulder blade is a forgiving spot—movement is minimal so healing stays simple. I like asking artists for jewel-tone palettes (blues/purples/gold) to avoid expected red/orange flames. Watch for overly fine shading that can muddle—ask for deliberate color blocks and strong outlines.
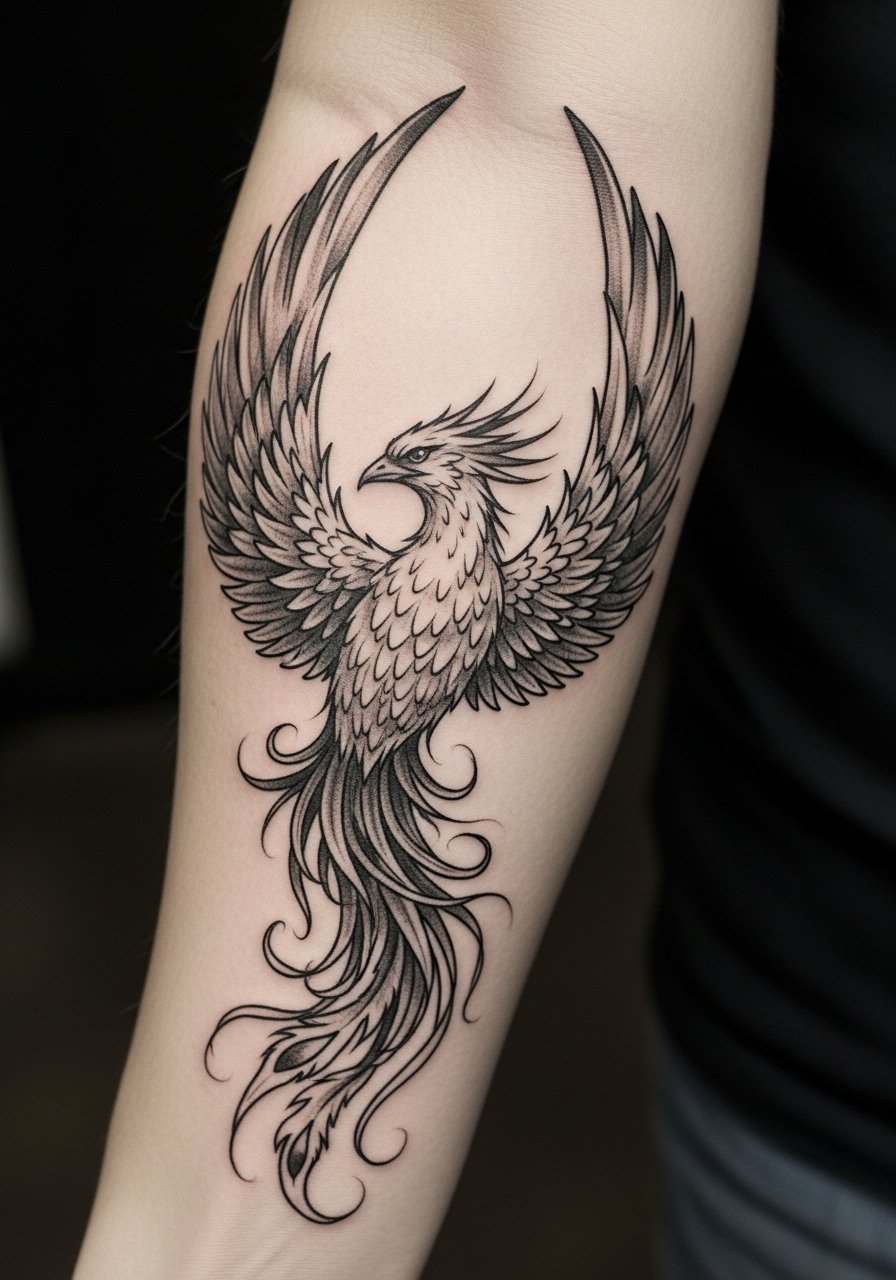
4. Watercolor Phoenix in Flight on Forearm
Style/Technique: Watercolor / Painterly
Pain Level: Low-Medium (3-4/10)
Session Time: 1–3 sessions
Best For: Artistic forearm piece, visible inspiration
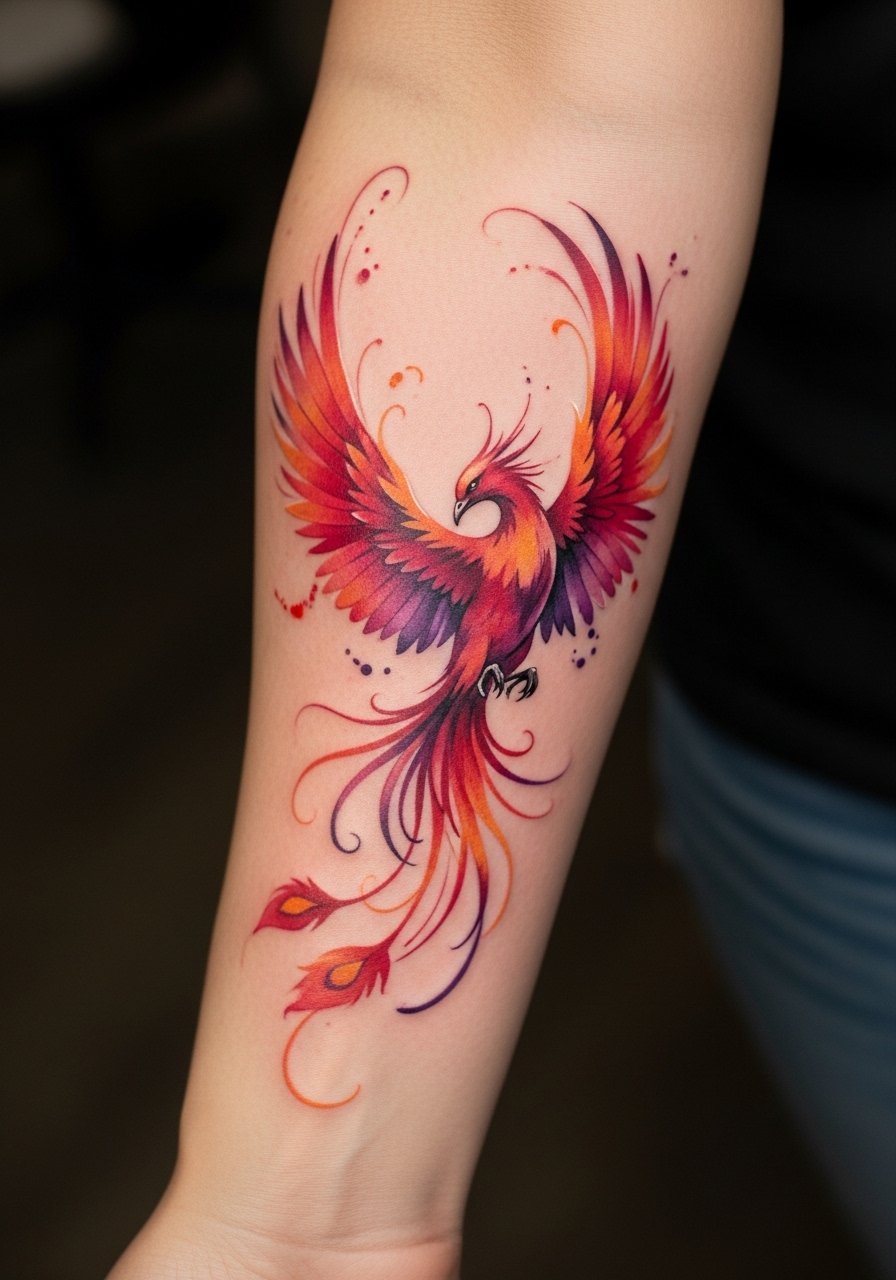
I love watercolor phoenix tattoos for their motion. Forearm placement shows off sweeping wings. The catch: watercolor can fade faster and needs careful aftercare. From what I’ve seen, artists who layer pigment and keep contrast near edges help longevity. Pain is manageable. Ask for subtle outline anchors so the image maintains form when colors soften.
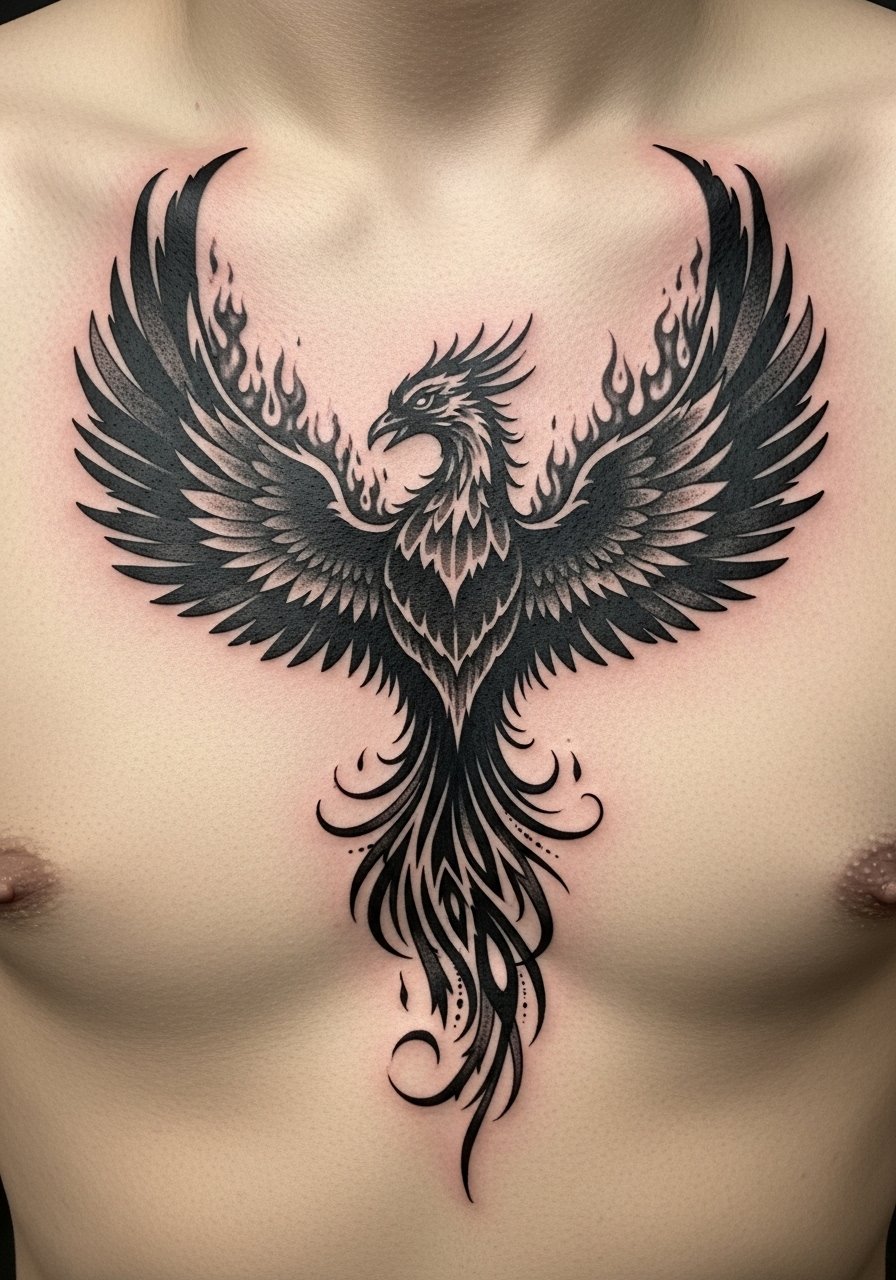
5. Black and Grey Realism Phoenix Rising Full Back
Style/Technique: Black & Grey Realism
Pain Level: Medium-High (5-7/10)
Session Time: Multiple long sessions
Best For: Timeless statement, dramatic detail
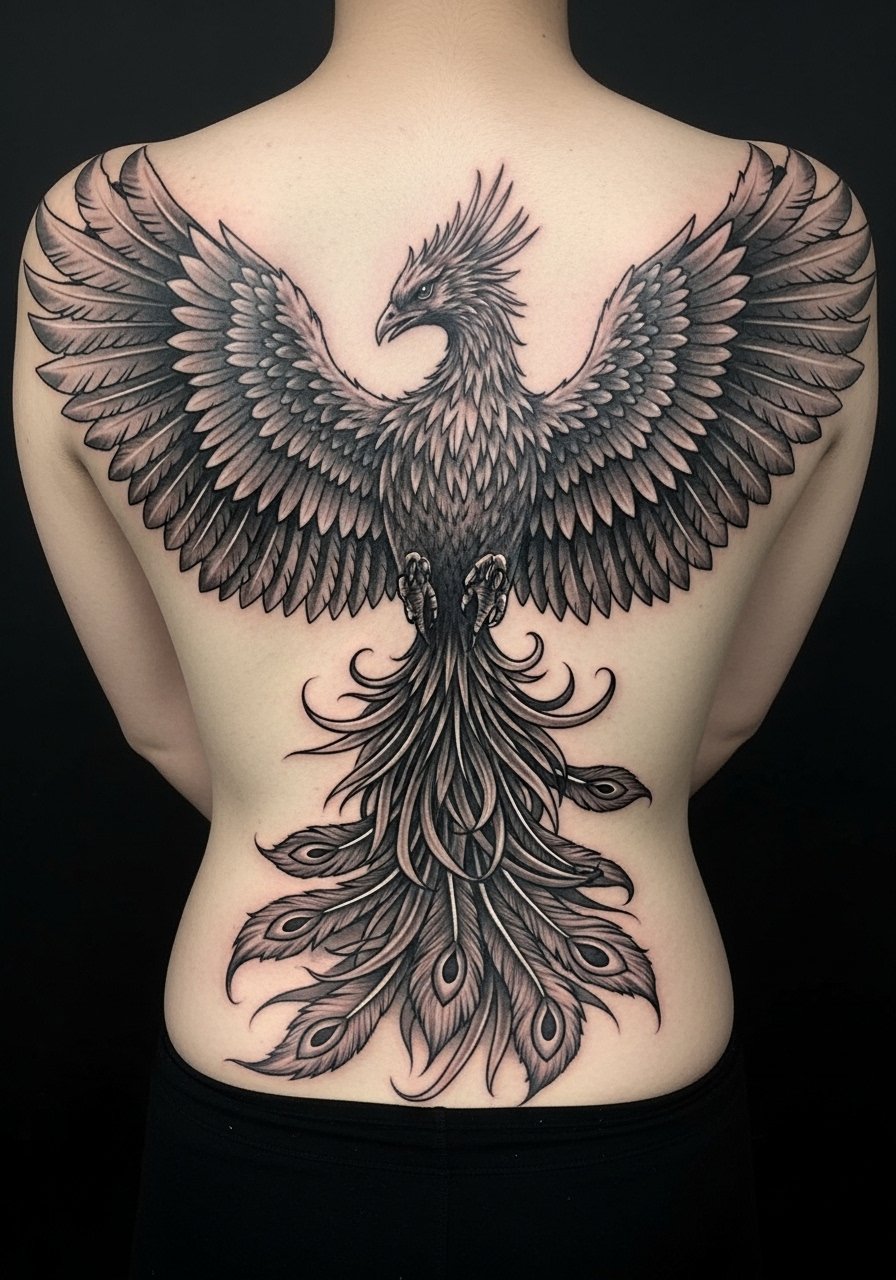
This is my top pick if you want a timeless rebirth symbol. Black and grey holds up wonderfully. A full back lets an artist render feathers and embers with depth. Expect longer sessions and some soreness, especially near the spine. Heals into a dramatic, photograph-like image. Common mistake: choosing an artist without solid realism samples—look at healed work, not just fresh photos.
6. Geometric Dotwork Phoenix Down Spine
Style/Technique: Geometric / Dotwork
Pain Level: High (6-8/10)
Session Time: Several sessions
Best For: Modern abstract, spine focal point
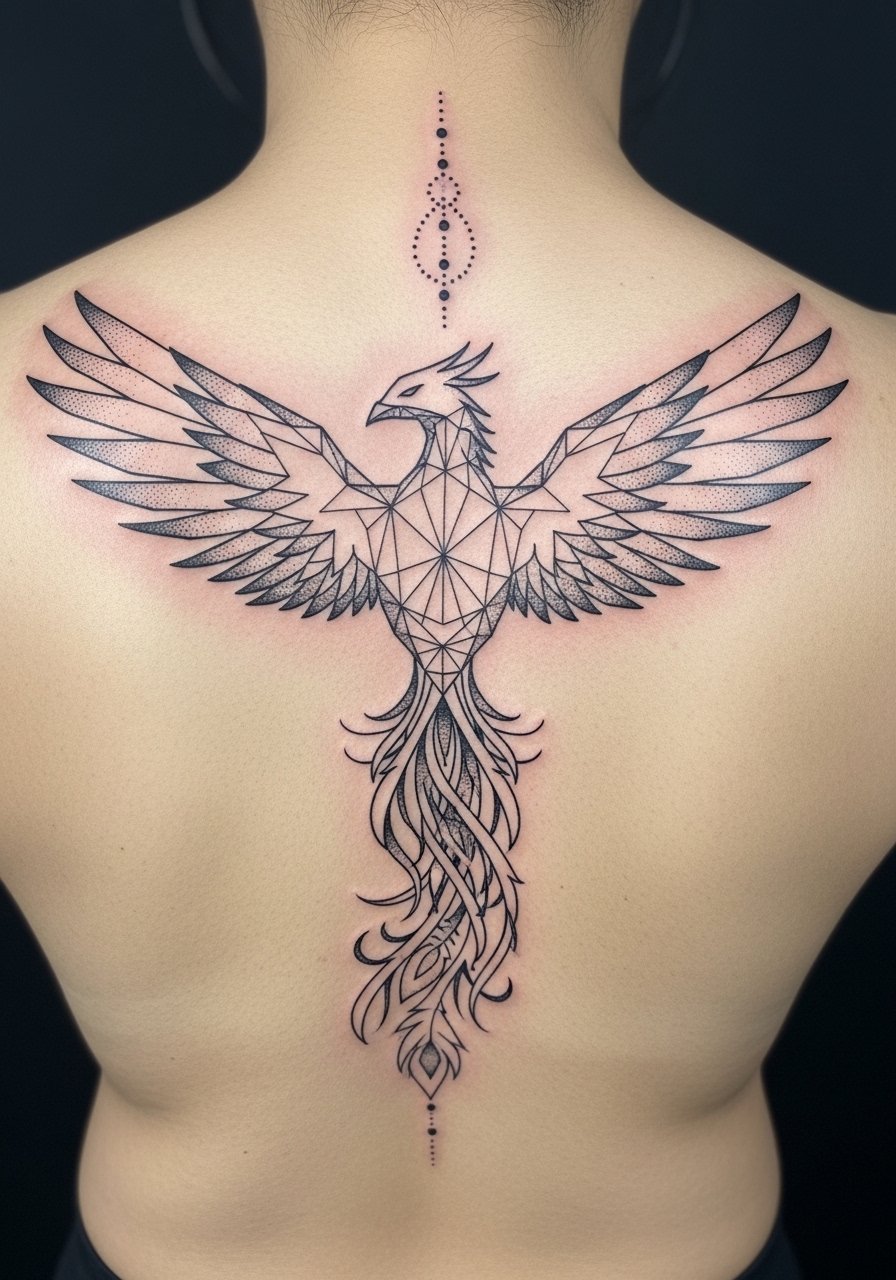
Dotwork phoenix tattoos read symbolic and modern. Spine placements create a vertical “rising” feel. Pain is higher near bone, so plan sessions accordingly. Dotwork ages well if dots are spaced for longevity—ask about needle size and spacing. I recommend a portfolio of healed dotwork before booking. This style is great if you want more suggestion than literal bird.
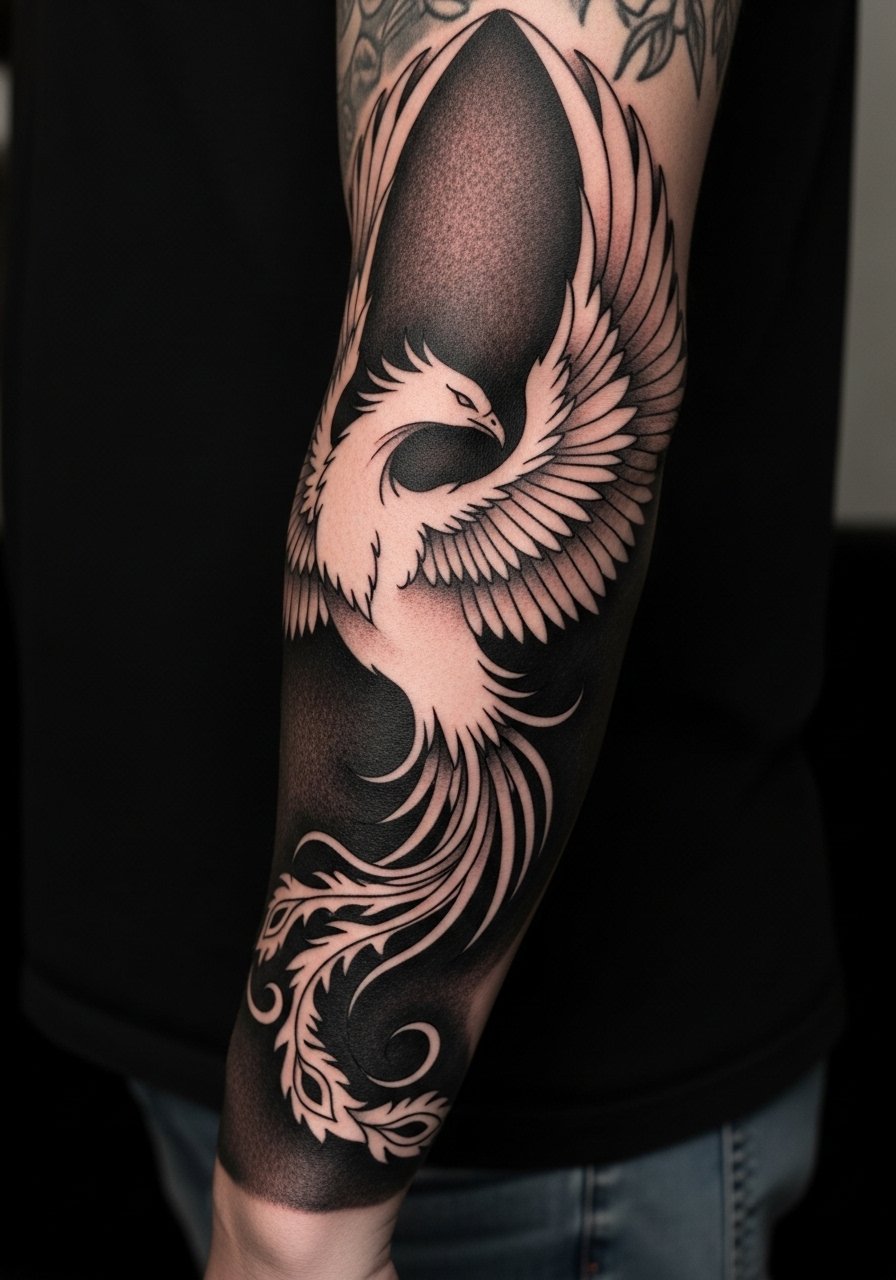
7. Phoenix With Flames And Embers Full Sleeve
Style/Technique: Realism / Elemental Flames
Pain Level: Medium-High (6/10)
Session Time: Multiple sessions over months
Best For: Story-driven sleeve, recovery symbolism
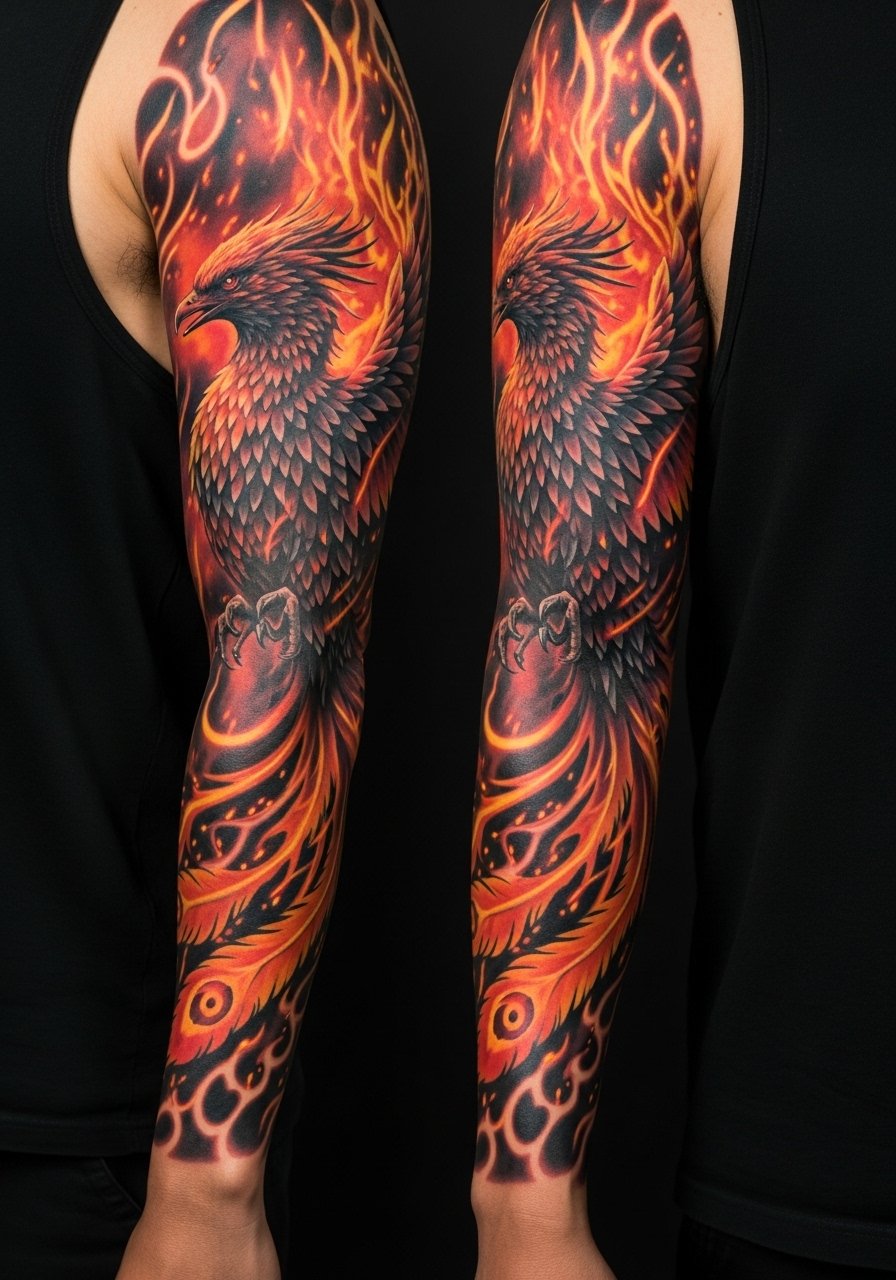
Sleeves let you tell a full rebirth story—feathers, flames, and ashes. I’ve seen sleeves shine when artists integrate negative space so the tattoo breathes. Pain is cumulative across sessions, but most areas are manageable. Healing requires patience—avoid friction from clothing. A common error: cramming too many motifs. Keep the phoenix the star and use flames as movement.
8. Fine Line Phoenix Anklet Wrap
Style/Technique: Fine Line / Minimalist Wrap
Pain Level: Medium (3-5/10)
Session Time: 1–2 hours
Best For: Feminine anklet, delicate symbol

Ankle wraps are intimate and move nicely with steps. Fine line works if you accept slight softening over years. Pain can spike near bone. I advise slightly thicker lines than your ideal sketch so the anklet doesn’t vanish. Aftercare is key—ankles rub against socks and shoes during healing.
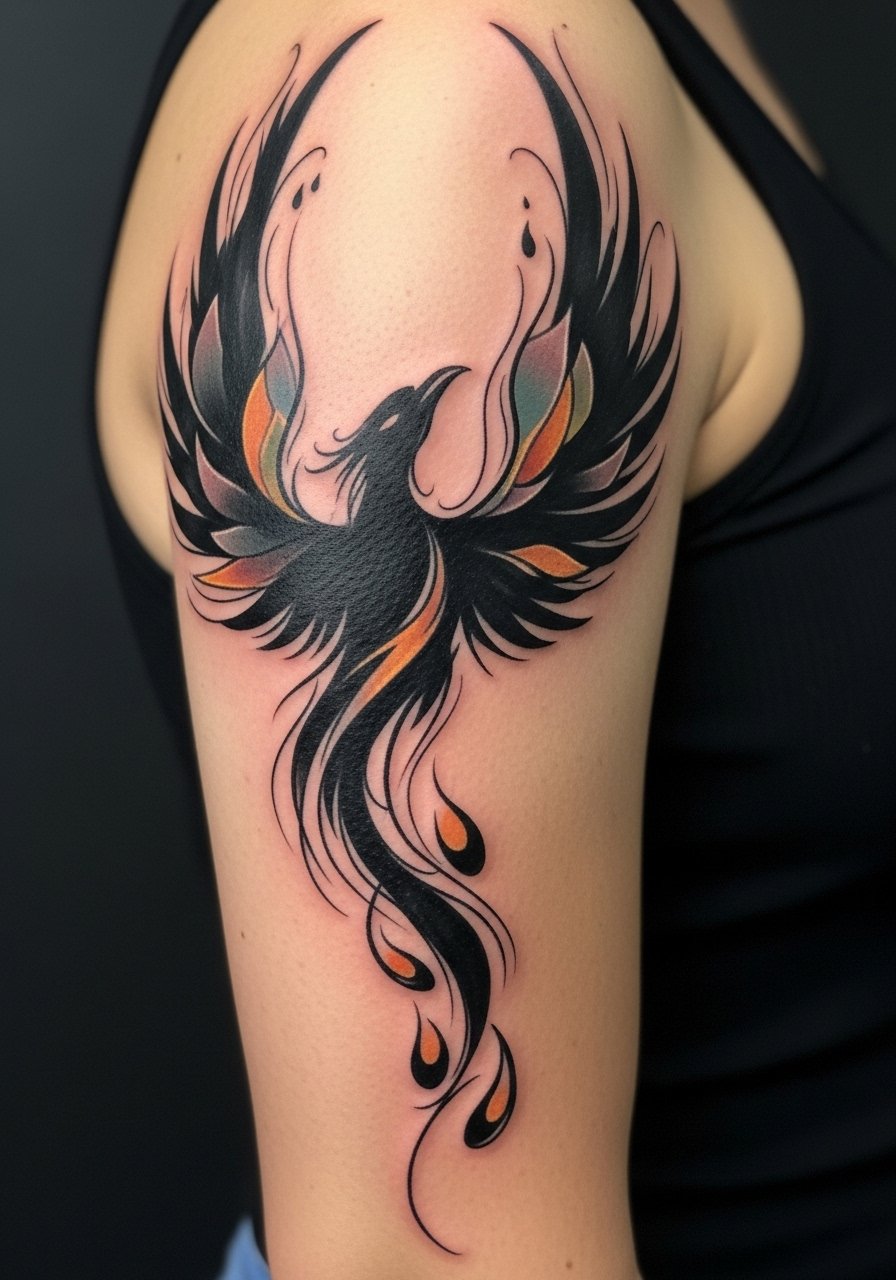
9. Blue Phoenix Soaring On Shoulder
Style/Technique: Illustrative / Blue Palette
Pain Level: Low-Medium (3-4/10)
Session Time: 2–3 hours
Best For: Unique color choice, shoulder display
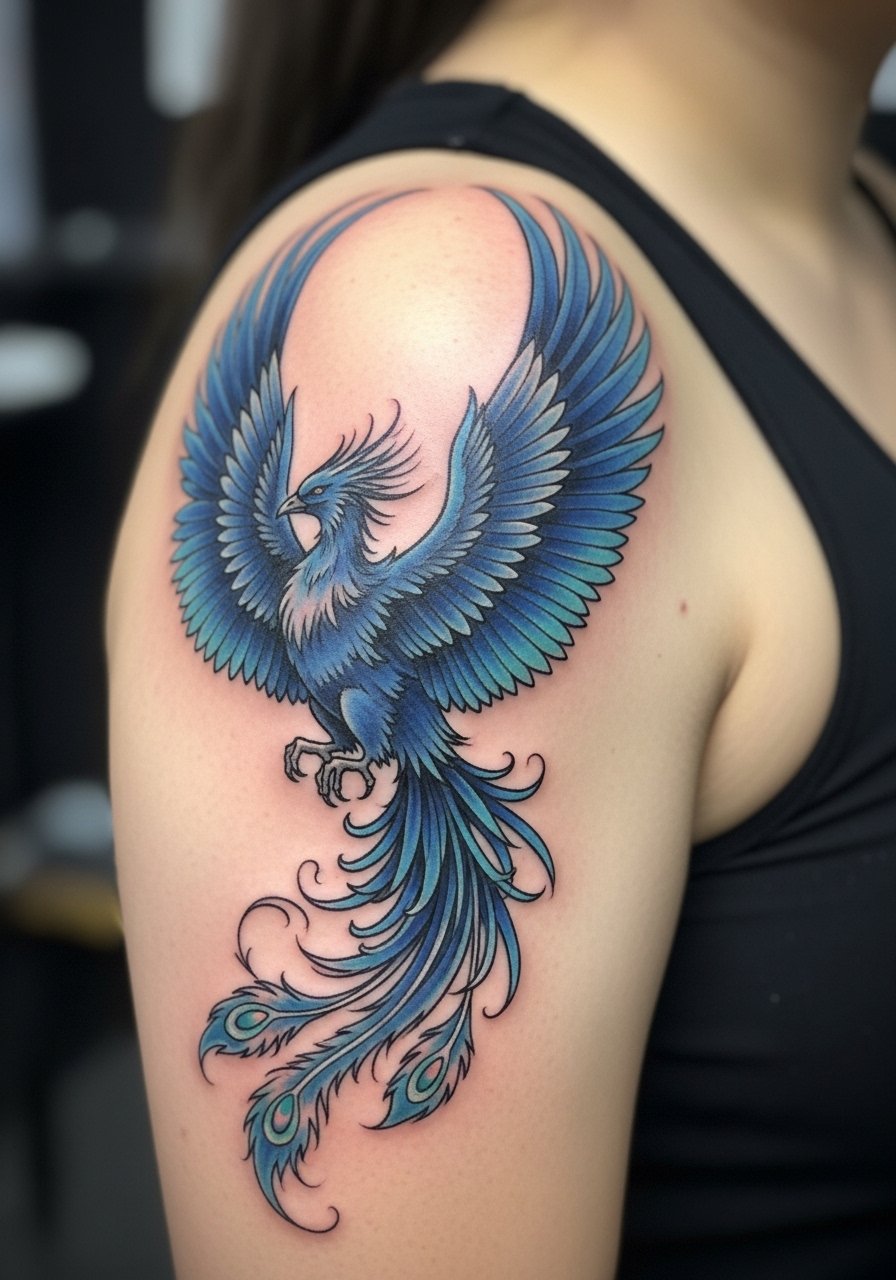
A blue phoenix avoids cliché flames and reads as calm wisdom rather than fiery rebirth. I first noticed this in a tattoo gallery and loved its serene vibe. Shoulder placement keeps motion and visibility balanced. Blues can look muted on darker tones, so discuss saturation with your artist. This is a fresh take if you want rebirth without fire.
10. Tribal Phoenix Armband On Upper Arm
Style/Technique: Tribal / Blackwork
Pain Level: Low-Medium (3-4/10)
Session Time: 1–2 sessions
Best For: Bold graphic statement, cultural patterning
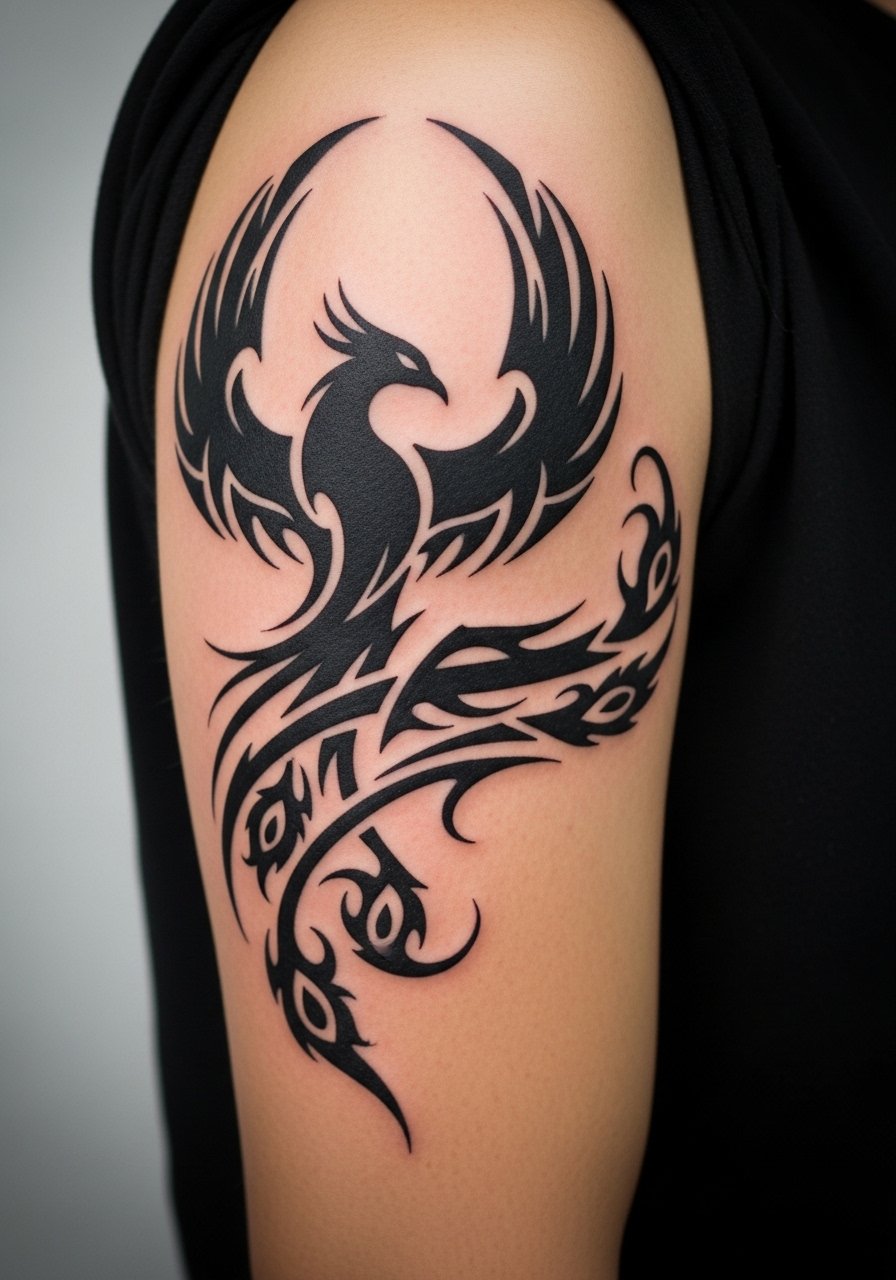
Tribal patterns create striking phoenix silhouettes. The upper arm is forgiving and shows bold lines well. I like them for people wanting symbolic designs without color. Avoid appropriating specific cultural motifs—talk to your artist about respectful design. Solid black ages well but needs touch-ups if ink is thin.
11. Minimalist Phoenix Finger Line
Style/Technique: Minimalist / Micro Line
Pain Level: Medium (4-6/10)
Session Time: 30–60 minutes
Best For: Subtle, very small symbol
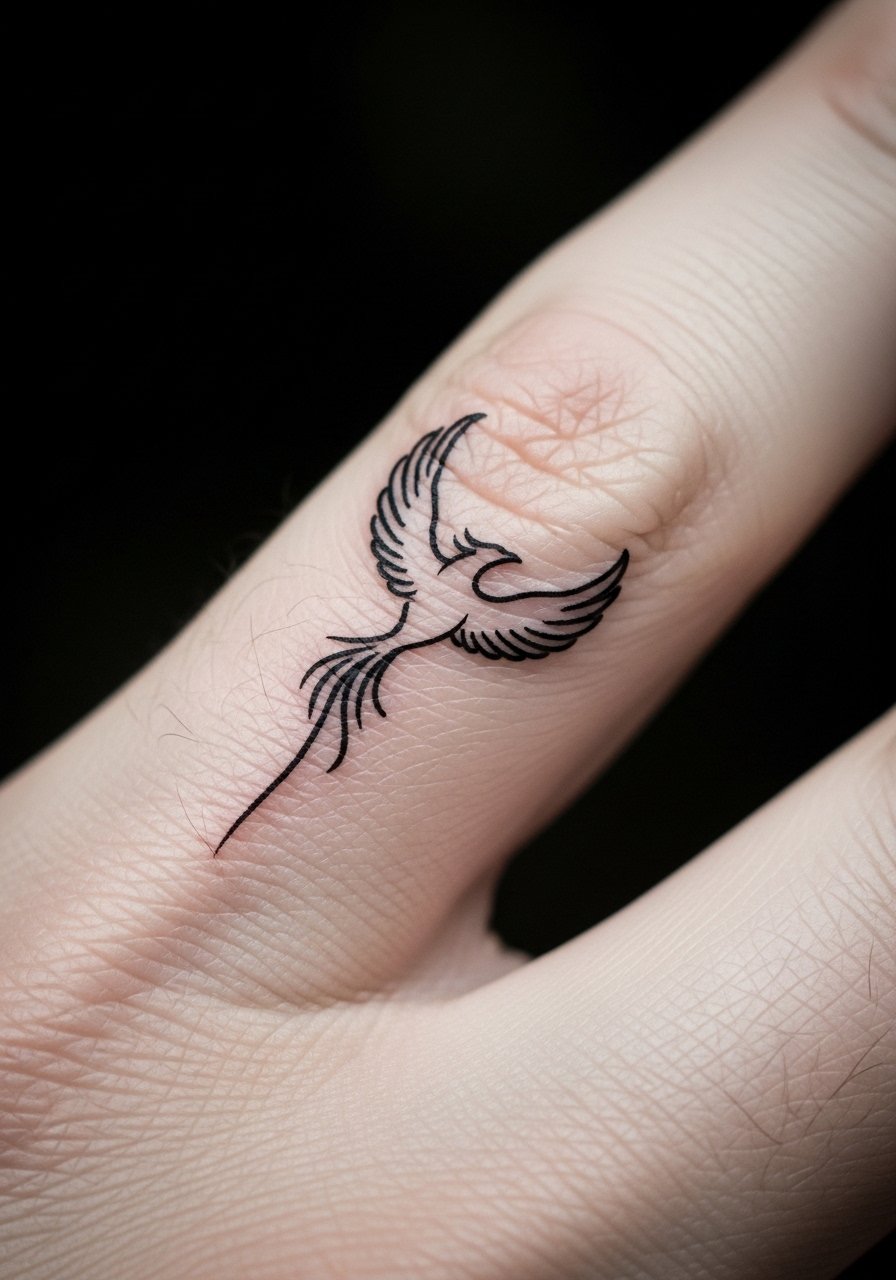
Finger tattoos are tempting but fade faster. I tell friends: get it only if you accept touch-ups. The minimalist phoenix reads personal and discreet. Pain is sharp but brief. Expect quicker fading—use good sun protection and moisturizing. Artists may suggest slightly thicker lines to improve longevity.
12. Graphic Pencil-Sketch Phoenix On Forearm
Style/Technique: Graphic / Sketch-Style Blackwork
Pain Level: Medium (4-5/10)
Session Time: 2–4 sessions
Best For: Masculine sketch feel, forearm storytelling
I noticed pencil-sketch phoenix tattoos on portfolios and they stood out as masculine and raw. Forearm suits the narrative flow. This style looks great healed if the artist masters textured shading. Avoid too-fine hatchwork that blurs; ask for intentional contrast. This option reads like a drawing turned permanent.
13. Abstract Phoenix Associations On Ribcage
Style/Technique: Abstract / Suggestive Shapes
Pain Level: High (7-8/10)
Session Time: 2–3 sessions
Best For: Encrypted meaning, personal symbolism
Abstract phoenix tattoos hint at rebirth without a literal bird. Ribcage is intimate but painful. I recommend this if you want an encrypted story only you—or close friends—understand. Healing can be slower due to movement with breathing; plan downtime and Saniderm usage if your artist approves. This is a creative way to keep meaning private.
14. Scar Cover-Up Phoenix With Flame Motif
Style/Technique: Cover-Up / Flame Integration
Pain Level: Varies (3-7/10)
Session Time: Multiple sessions depending on scar tissue
Best For: Scar camouflage, personal healing story
I’ve supported friends getting scar cover-ups with phoenix motifs. Flames and layered feathers can mask texture and create narrative healing. Scar tissue takes ink differently; expect touch-ups and longer healing. Find an artist experienced with scar camouflage. This is a meaningful way to mark overcoming trauma without clinical language.
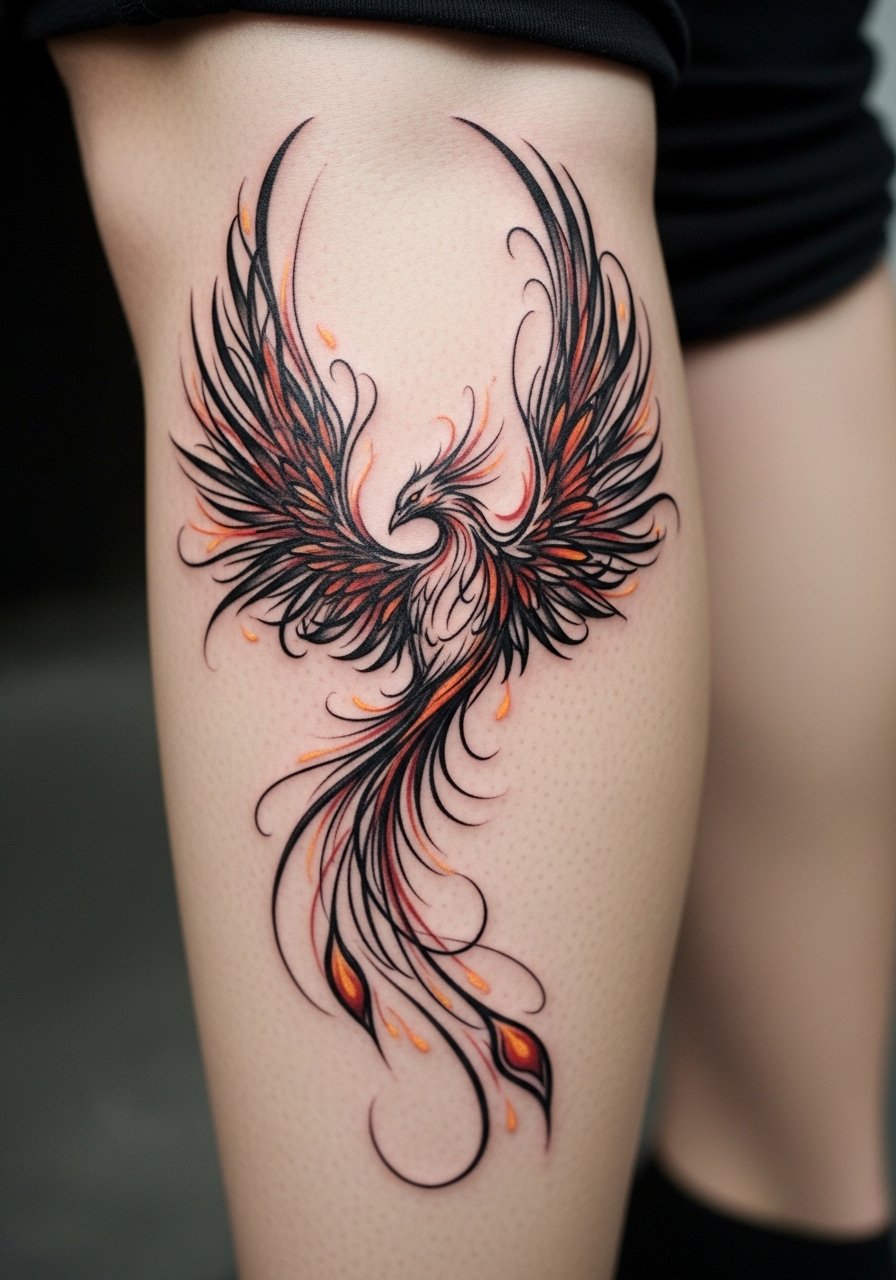
15. Fire Phoenix With Vibrant Flames On Calf
Style/Technique: Traditional / Bold Flame Colors
Pain Level: Medium (4/5/10)
Session Time: 2–3 sessions
Best For: Calf display, energetic statement
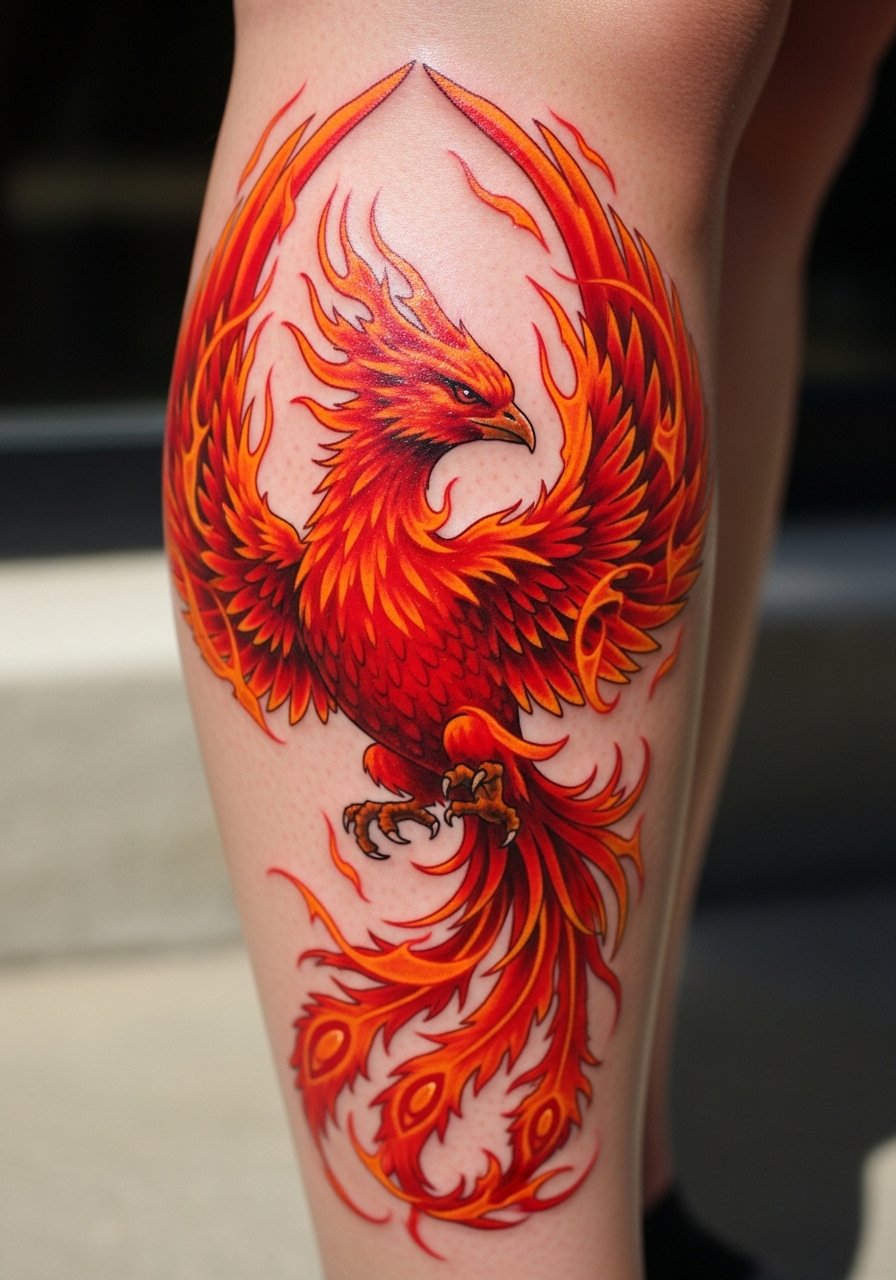
Calf placement shows off vertical motion and is easy to cover. I like vibrant flame palettes for high-energy statements. Colors need sun protection. Pain is moderate but manageable. Avoid too many tiny flame details; large shapes read better at a distance and once healed.
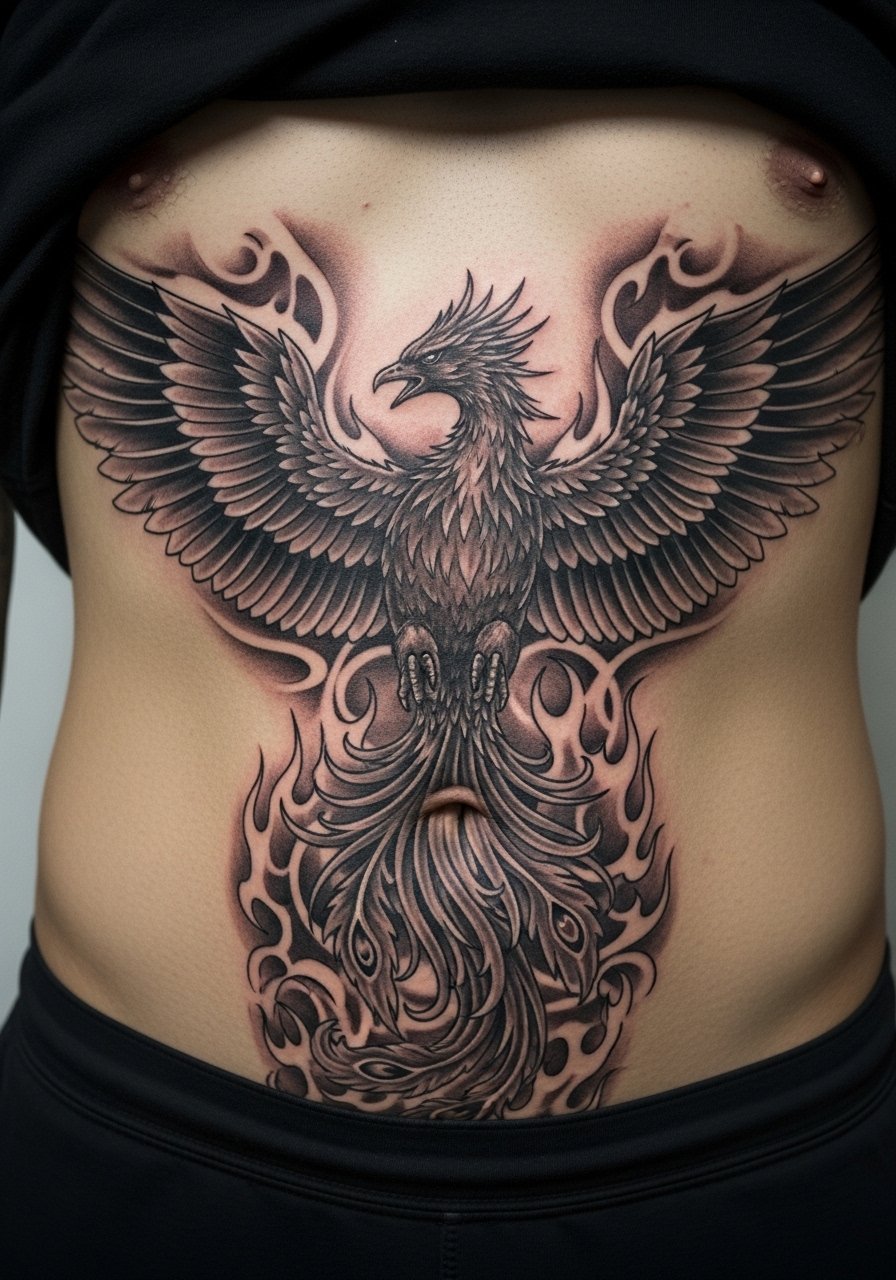
16. Ornamental Phoenix Chest Piece With Filigree
Style/Technique: Illustrative / Ornamental
Pain Level: High (6-8/10)
Session Time: Multiple sessions
Best For: Centerpiece, meaningful chest placement
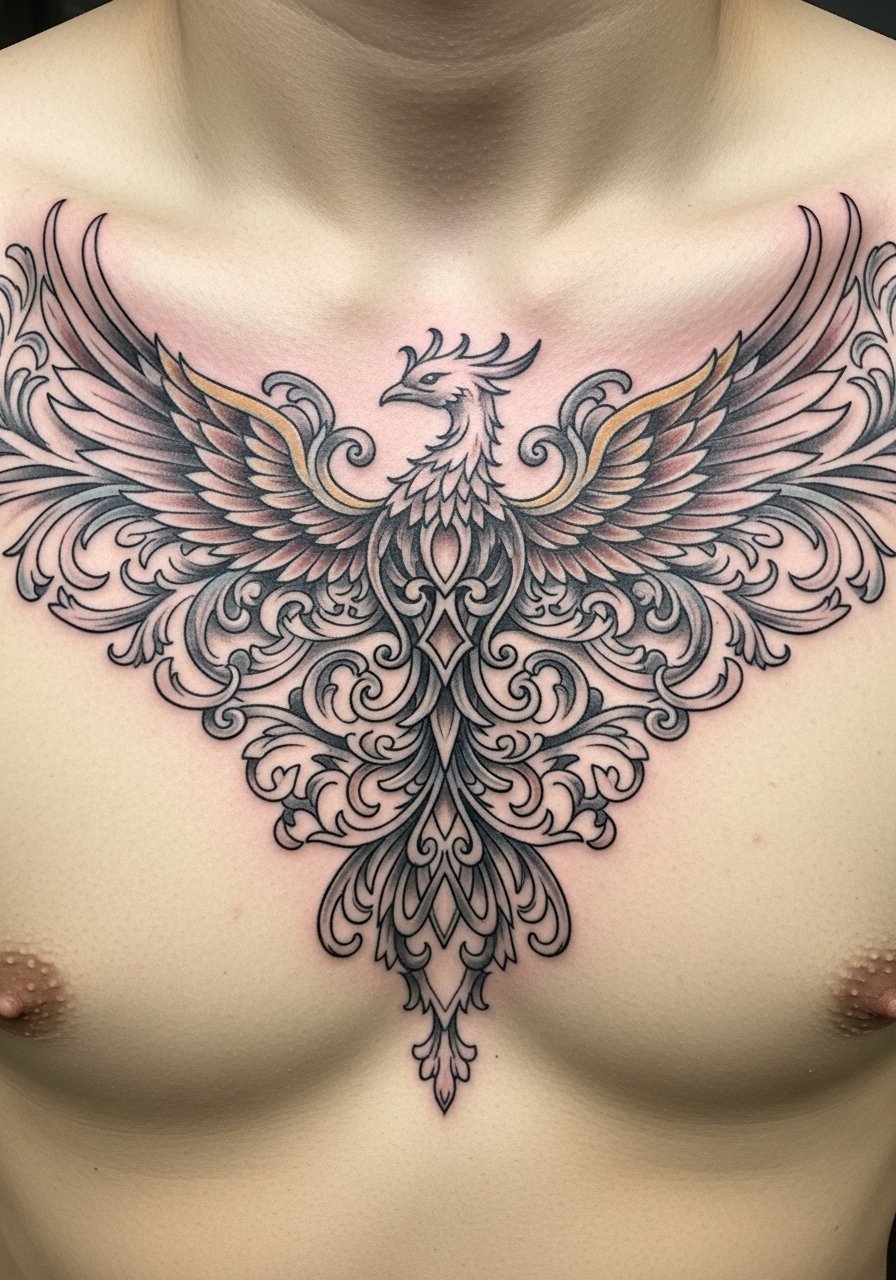
Chest pieces feel personal and powerful. Filigree and ornamental lines frame the phoenix for a jewelry-like look. Expect soreness near sternum. Heals into a strong visual if the artist balances detail with negative space. I recommend staged sessions to manage pain and to let you evaluate progress.
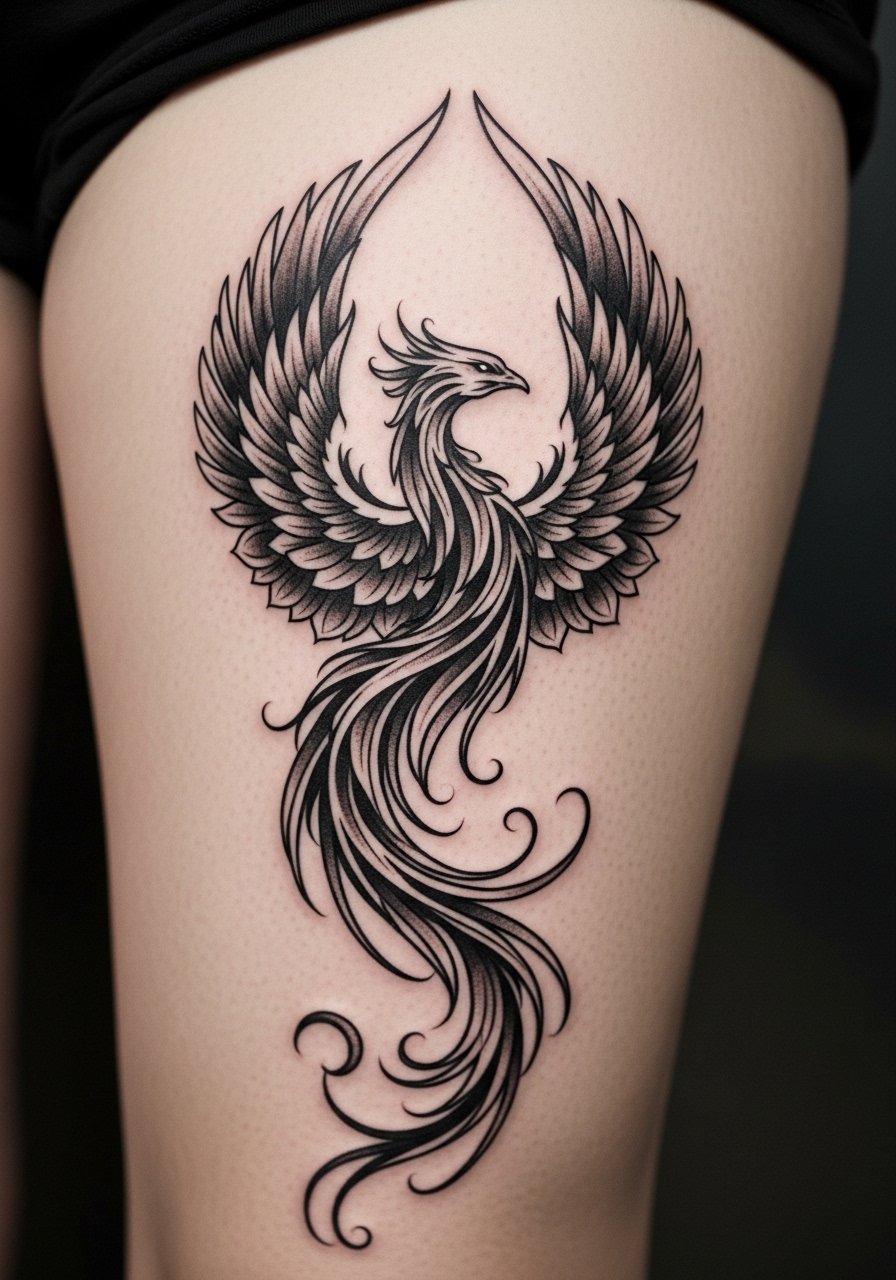
17. Phoenix Head With Crown On Thigh
Style/Technique: Illustrative / Portrait-Style
Pain Level: Low-Medium (3-4/10)
Session Time: 2–3 hours
Best For: Thigh cover, personal empowerment
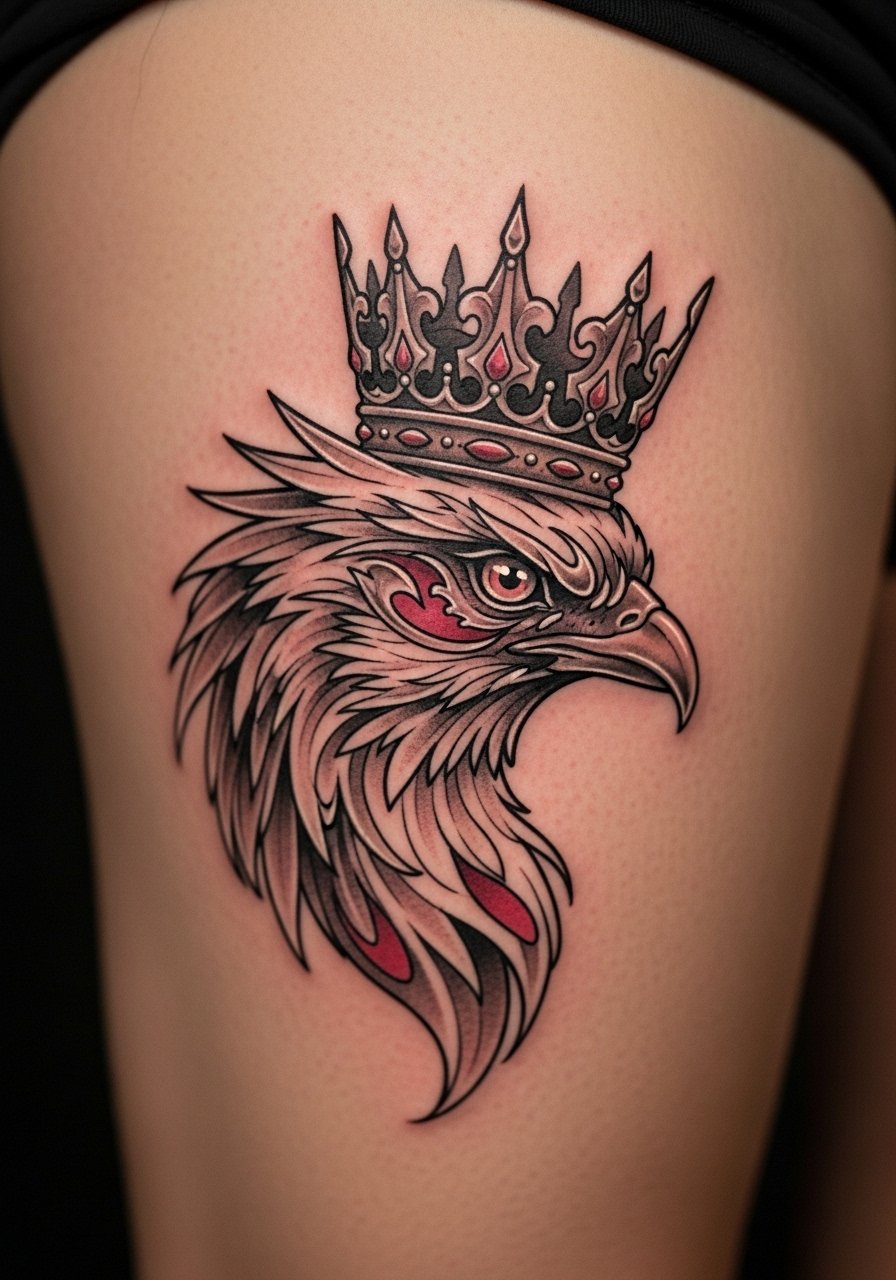
Thighs are forgiving for larger portraits and hold detail well. A crowned phoenix reads as reclaiming strength. Pain is modest, and healing is easy since clothing can be adjusted to avoid rubbing. I’ve seen these age well when shading is balanced and outlines are solid.
18. Minimalist Phoenix Silhouette On Rib Cage Edge
Style/Technique: Minimalist / Silhouette
Pain Level: High (7/10)
Session Time: 1–2 hours
Best For: Hidden symbolism, subtle rebirth
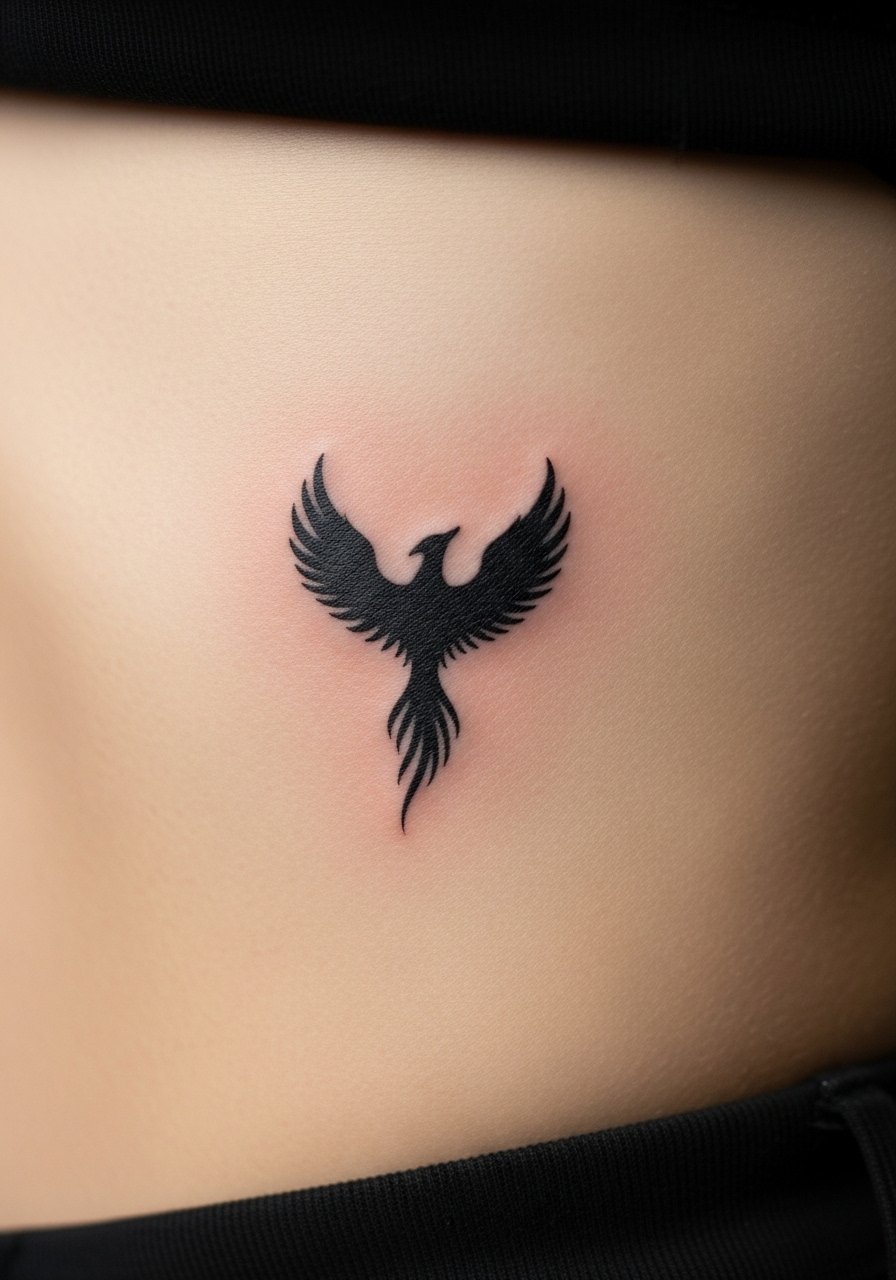
Rib cage placements show commitment. Minimalist silhouettes are striking but the area is painful. If you want a discreet reminder of rebirth, this works. I advise testing placement with a stencil because the curve of ribs changes how silhouettes sit. Healing needs care—no heavy activity for a few days.
19. Phoenix With Floral Accents On Forearm
Style/Technique: Illustrative / Mixed Motifs
Pain Level: Low-Medium (3-4/10)
Session Time: 2 sessions
Best For: Feminine storytelling, visible forearm art
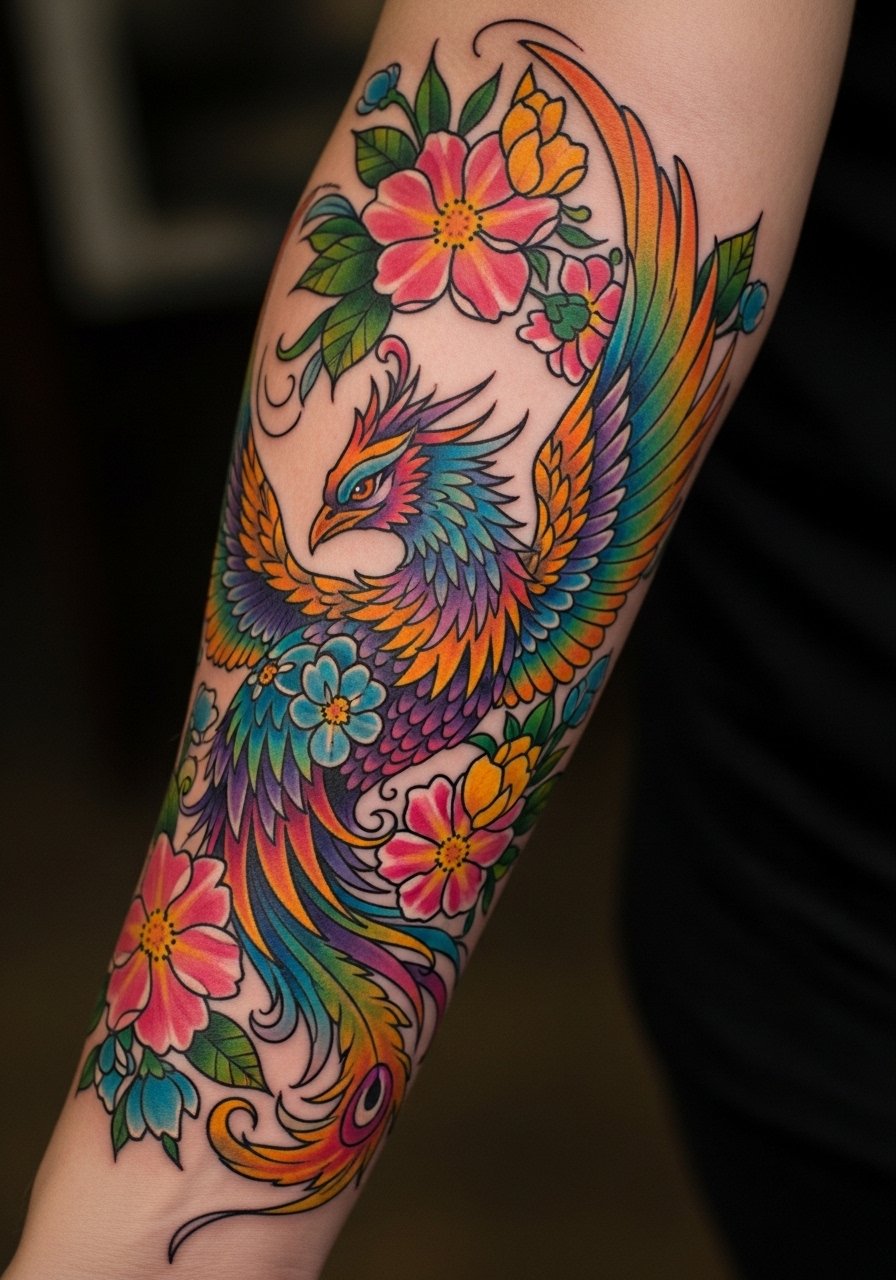
Combining florals softens the phoenix motif and adds personal symbolism—birth, growth, or loved ones. Forearm is a great display spot. I like how flowers provide natural negative space so the bird doesn’t overwhelm. Keep petal details bold enough to survive years and discuss color choices with your artist.
20. Monochrome Ember Phoenix On Sternum
Style/Technique: Blackwork / Ember Texture
Pain Level: High (7-8/10)
Session Time: 2–3 sessions
Best For: Centered chest statement, dramatic vibe
A monochrome phoenix using ember texture is dramatic and ages well. Sternum work is intense during sessions but looks powerful healed. I’ve noticed blackwork keeps its drama as skin ages. Discuss symmetry and breathing during the session—tiny movements affect placement.
21. Feathered Phoenix Collarbone Accent
Style/Technique: Fine Line / Delicate Feathers
Pain Level: Medium (4-6/10)
Session Time: 1–2 hours
Best For: Collarbone highlight, visible elegance
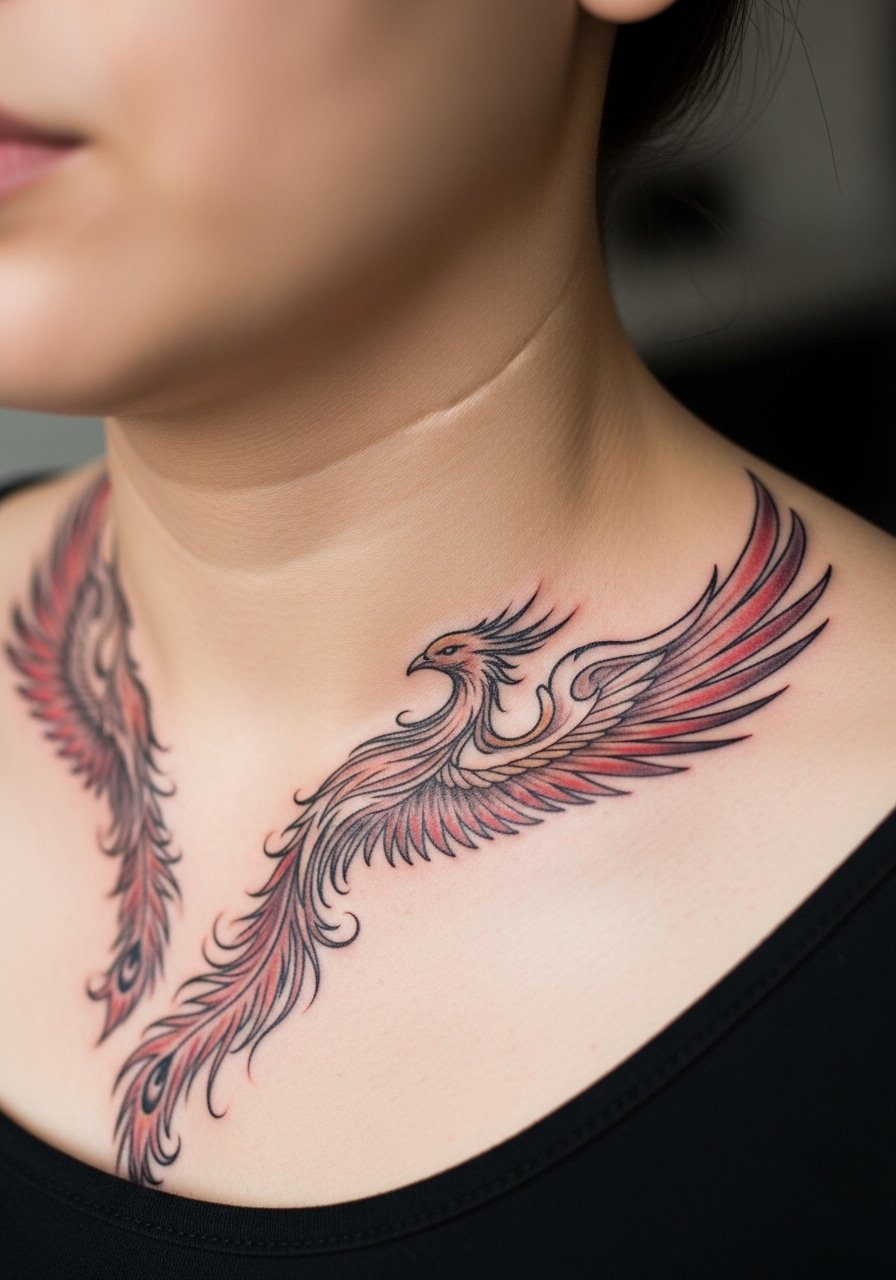
Collarbones photograph well and feel intimate. Feather accents across the collarbone give movement without huge commitment. Pain can spike near bone. Ask for slightly thicker feather quills so lines don’t vanish over time. This placement pairs well with necklaces and is easy to show or hide.
22. Phoenix Mandala On Upper Thigh
Style/Technique: Blackwork / Mandala Fusion
Pain Level: Low-Medium (3-4/10)
Session Time: 2–3 sessions
Best For: Decorative thigh piece, balanced symmetry
Merging mandala geometry with phoenix imagery creates a meditative rebirth symbol. Thighs handle large symmetric patterns well. Pain is modest and healing is private. This is great if you want balance between abstraction and representational art. Make sure the artist shows healed mandala examples.
23. Tiny Phoenix Nape Of Neck
Style/Technique: Minimalist / Micro Tattoo
Pain Level: Medium (4/6/10)
Session Time: 30–60 minutes
Best For: Hidden small symbol, easy to conceal with hair
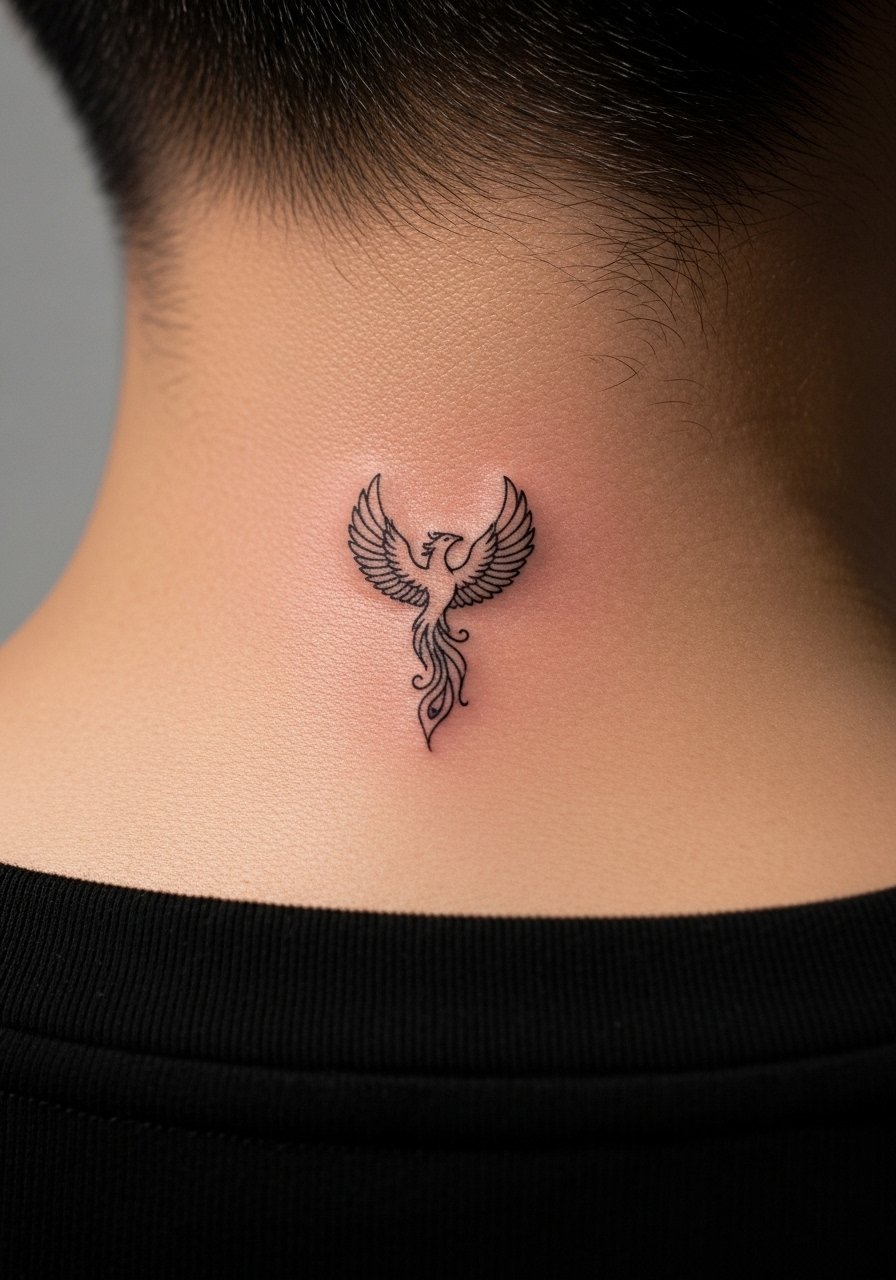
Nape tattoos peek out with updos. Tiny phoenixes are intimate and quick. Pain varies with neck sensitivity. Expect some fading; plan for touch-ups if you want crispness. I recommend a slightly bolder outline than in the sketch to preserve the tiny image as skin shifts.
24. Phoenix Rising From Geometric Ashes On Thigh
Style/Technique: Geometric + Illustrative Mix
Pain Level: Low-Medium (3-4/10)
Session Time: 2–3 sessions
Best For: Artistic thigh piece, modern symbolism
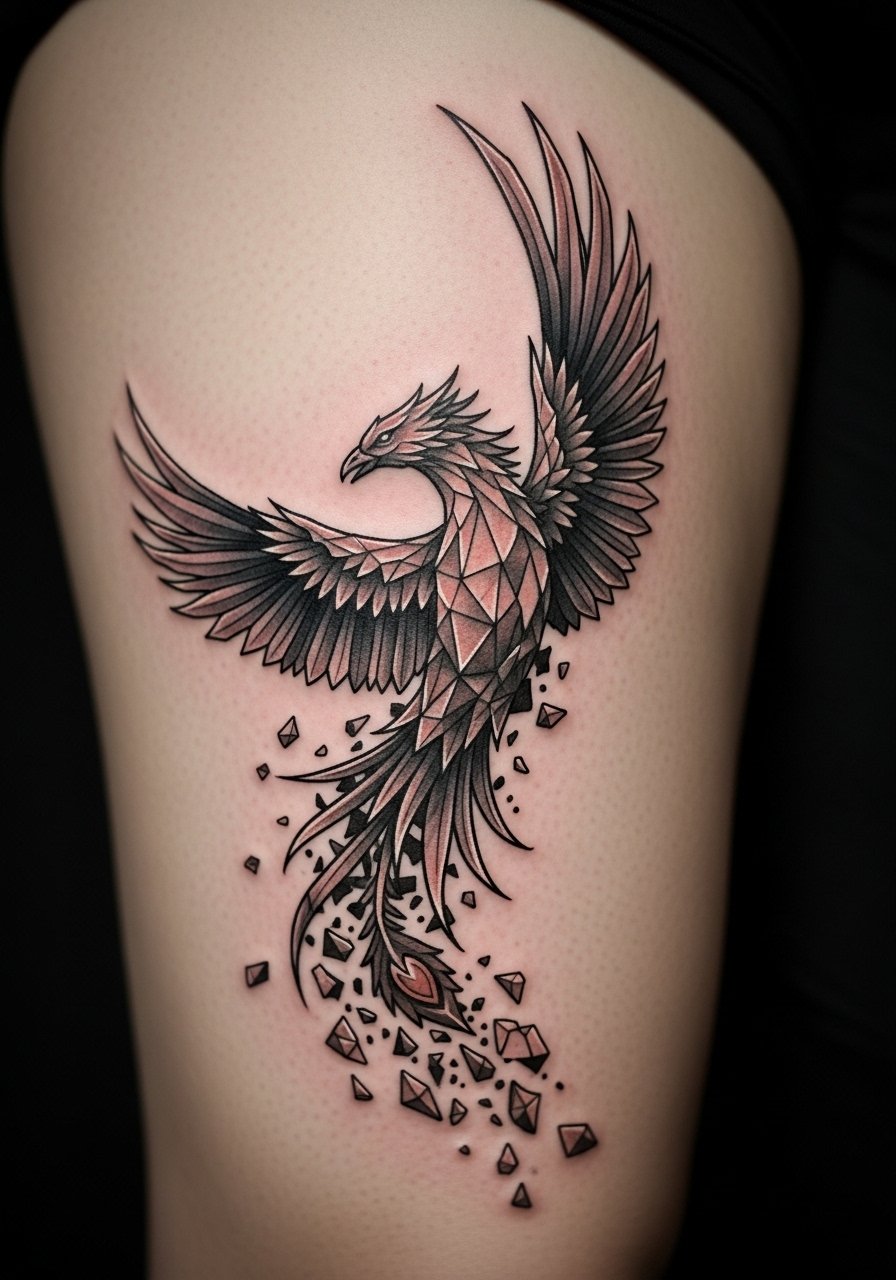
Combining geometry for ashes with a flowing phoenix gives a modern contrast. I like how shards ground the movement. Thigh placement allows scale and detail. Ask artists to balance hard edges and soft feathers so both read healed. This mix is a fresh alternative to classic flames.
25. Sleeve Half-Phoenix With Negative Space
Style/Technique: Blackwork / Negative Space Design
Pain Level: Medium-High (5-6/10)
Session Time: Multiple sessions
Best For: Bold sleeve accents, high-contrast art
Negative space sleeves let the skin form part of the design. Wings appear to emerge from emptiness—very symbolic. I’ve seen these hold up well because contrast is intentional. Pain management across sessions matters; pace yourself and plan healing between sessions.
26. Watercolor Ember Chest Accent
Style/Technique: Watercolor / Ember Washes
Pain Level: High (6-7/10)
Session Time: 1–2 sessions
Best For: Painterly chest detail, soft expression

A watercolor chest accent reads poetic and free. Expect the color to mellow; keep realistic expectations about longevity. I favor subtle outlines beneath watercolor to anchor the image. Chest heals slower if you sleep on your side; adjust sleeping positions early.
27. Blackwork Phoenix On Ribcage With Script
Style/Technique: Blackwork + Script
Pain Level: High (7-8/10)
Session Time: 2 sessions
Best For: Personal motto plus symbol, intimate placement
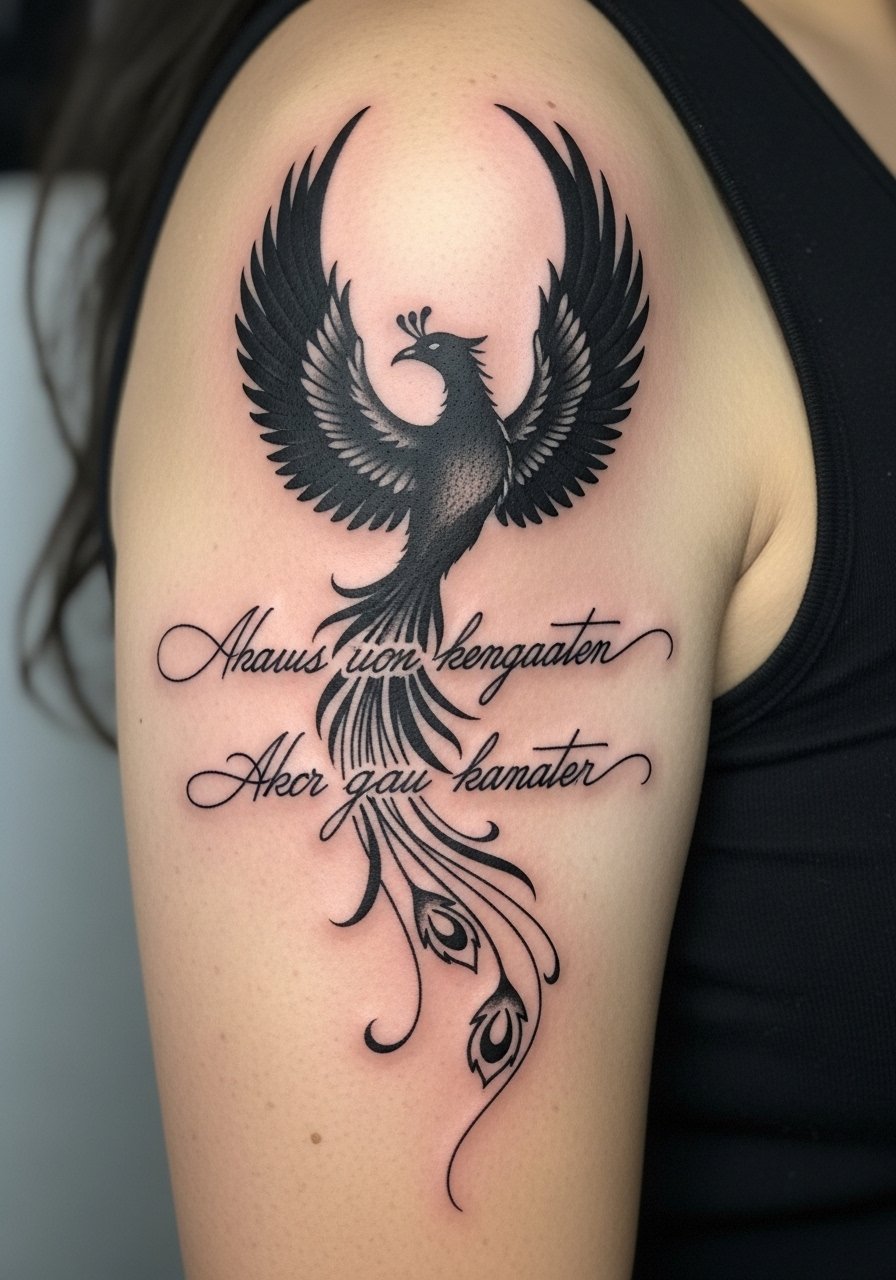
Combining script with a phoenix adds a verbal layer to the rebirth story. Ribcage placement is private and meaningful but painful. Keep script large enough to read when healed. I suggest practicing wording for months to avoid regret—this is the sort of piece you’ll live with every day.
28. Abstract Ember Lines On Calf
Style/Technique: Abstract / Ember Linework
Pain Level: Low-Medium (3-4/10)
Session Time: 1–2 hours
Best For: Modern calf accent, subtle motion
Abstract ember lines suggest a phoenix without showing a bird. Calf placement gives motion and is easy to conceal. I like this for people who want the idea of rebirth without literal imagery. It heals cleanly if lines are bold and spaced for longevity.
Tattoo Prep and Aftercare Essentials
Aftercare Essentials:
- Aquaphor Healing Ointment, 14oz tube — For first 3–5 days of active healing
- Saniderm Transparent Adhesive Bandage, 6-inch roll — Second-skin protection during early healing
- Hustle Butter Deluxe, 16oz — Vegan long-term moisturizer artists recommend
Cleaning & Moisturizing:
- Dr. Bronner's Unscented Castile Soap, 32oz — Gentle clean for week one
- CeraVe Fragrance-Free Moisturizing Lotion, 12oz — Daily moisturizing after peeling
- Mad Rabbit Tattoo Balm, 1oz — Keeps healed tattoos vibrant
Before Your Appointment:
- Tattoo Numbing Cream with Lidocaine, 5% — Use only after checking with your artist
- Tattoo Stencil Transfer Paper, Pack — For mockups at home or during consults
Long-Term Protection & Maintenance:
- SPF 50 Sunscreen Stick for Tattoos — Daily sun protection to prevent fading
- Hydrocolloid Bandages, Large — For spot protection during active healing
- Hustle Butter Deluxe Travel Size — Convenient for touch-ups on the go
I suggest asking your artist which product they prefer—every pro I’ve talked to has slightly different favorites. Saniderm works well for busy people. Aquaphor is a simple, trusted staple for first days.
Frequently Asked Questions
Q: How bad does a tattoo actually hurt?
A: Pain depends on placement and tolerance. Outer arm/thigh = lower range. Ribcage/shaft of bone = higher. It’s more persistent scratching than sudden sharp pain. For sensitive spots, consider a numbing cream with lidocaine but check with your artist first.
Q: What if I regret the design later?
A: Sit with the design for months and consider hidden placements if unsure. Minimal or small phoenix ideas can be covered or expanded later. Laser removal exists but is long, so I prefer designing for meaning now instead of impulse.
Q: How do I keep my phoenix tattoo from fading?
A: Sunscreen is non-negotiable. From what I’ve gathered, UV exposure fades color first. Use an SPF 50 sunscreen stick on visible pieces and moisturize regularly with a fragrance-free lotion.
Q: Can I work out after getting a tattoo?
A: Wait at least 48–72 hours before strenuous workouts. Sweat and friction slow healing. For tattoos in flex areas, give it a week or more. Keep the area clean and follow your artist’s aftercare, using gentle soap and Aquaphor or Saniderm as recommended.
Q: Should I get a small tattoo first to test my pain tolerance?
A: Only if you actually want a small permanent piece. Pain varies by placement, not just size. A tiny wrist tattoo can hurt more than a big outer arm piece. Try a temporary design first if you’re unsure.
Q: How long does a phoenix tattoo take to heal fully?
A: Surface healing is 2–3 weeks. Full settling can take a few months. Colors look muted during healing and then brighten slightly after skin renews. Use Saniderm or Aquaphor in the early phase and switch to a gentle lotion.
Q: Do tattoos look different on different skin tones?
A: Yes. Black and grey holds up across tones. Bright colors can read differently on deeper skin. Talk to an artist who regularly tattoos your skin tone and ask to see healed photos. They’ll adjust saturation for the best healed look.
