
I spent months diving into manga references and tattoo portfolios before I realized my hang-up: clean linework and sharp detail are the only things that make manga tattoos read well once they heal. These 23 ideas focus on crisp lines, screentone textures, and placements that let detail breathe—so your ink looks like a panel lifted straight from a favorite volume, even years from now.
This list centers on clean, sharp-detail manga tattoos: fine line portraits, screentone dotwork, speed-line compositions, and minimalist chibi pieces. Most placements shown work well for both first-timers and collectors—forearm, upper arm, thigh, and ribcage. From what I’ve seen in 2026 trends, crisp linework and negative space are what age best for manga-style pieces.
1. Fine Line Manga Character Portrait on Upper Arm
Style/Technique: Fine Line / Illustrative
Pain Level: Low-Medium (3-4/10)
Session Time: 2-4 hours, single session for small-medium
Best For: First tattoo, portrait collectors, visible but easy to hide
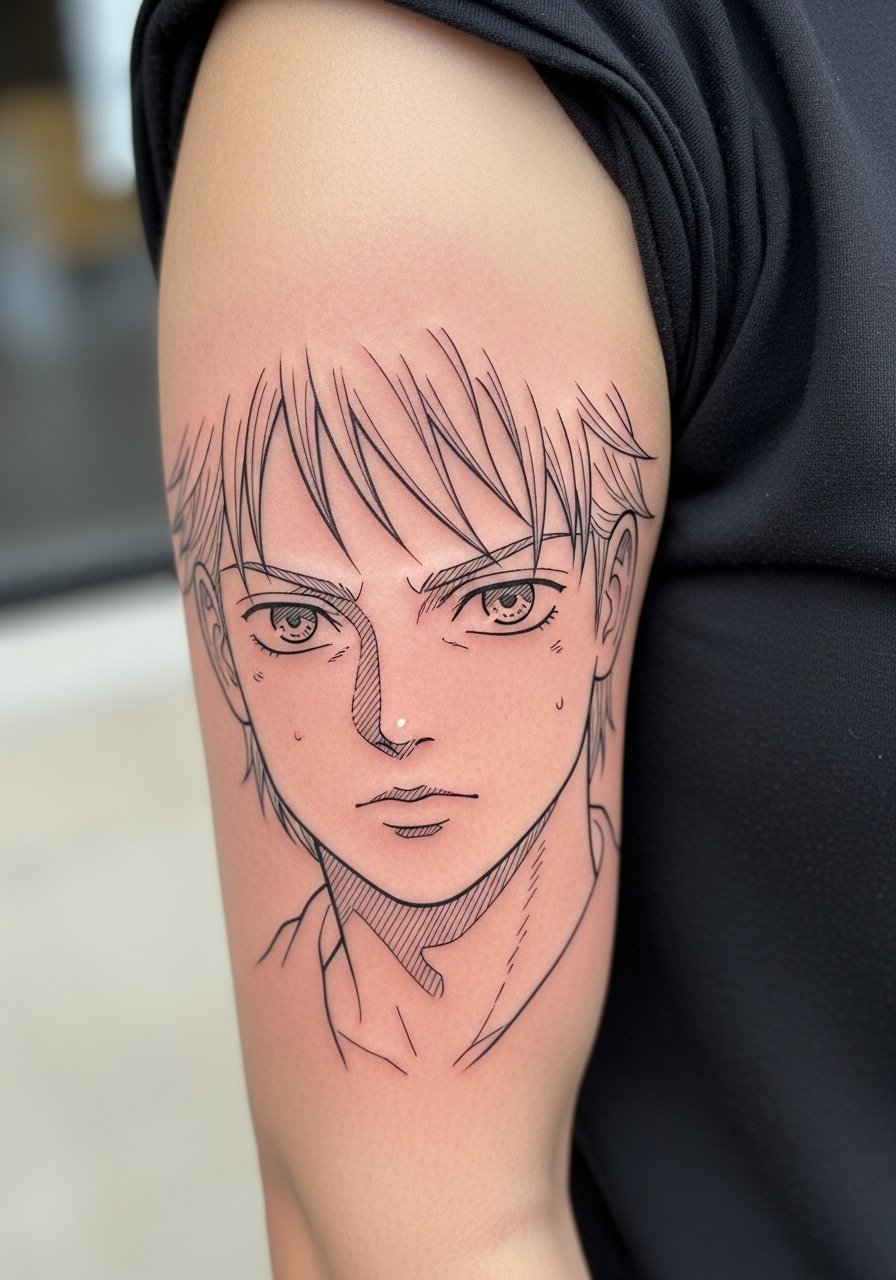
I picked this because clean portraits are the backbone of manga tattoos. When artists nail thin, even lines and tight expressions, the piece reads like a panel rather than a doodle. The upper arm gives enough flat canvas for facial detail without the curve problems of ribs. Expect moderate discomfort—skin here is forgiving. Healing is straightforward: 2–3 weeks surface heal, full settle at 2–3 months. Fine lines require careful aftercare; I’ve noticed they blur faster if you pick or let scabs persist. Ask your artist about slightly thicker primary lines around the face to preserve contrast as it heals. Avoid over-saturating tiny details; clarity now beats hyper-detail that mashes later.
2. Clean Chibi Wrist Tattoo in Minimalist Linework
Style/Technique: Minimalist / Fine Line
Pain Level: Medium (4/10)
Session Time: 30–90 minutes
Best For: First-time, discreet, playful ink

Chibi designs translate well into tiny, readable tattoos when executed with confident lines. The wrist is ideal for showing off expression without needing large shading fields. Pain is higher than the forearm because of thin skin and movement. Healing takes about 2–3 weeks but expect extra care—wrist tattoos rub on clothing and watches. From my experience, artists who use simple negative-space for highlights keep chibi tattoos crisp longer. A common mistake is overcrowding detail in a tiny chibi; pick one strong facial feature or pose instead of trying to copy a full panel. For lasting contrast, choose bold single-line anchors around the design.
3. Manga Panel Sleeve on Outer Forearm With Bold Blackwork
Style/Technique: Blackwork / Panel Layout
Pain Level: Medium (4-5/10)
Session Time: Multiple sessions, 3–6 hours each
Best For: Statement sleeve, visible art, collectors
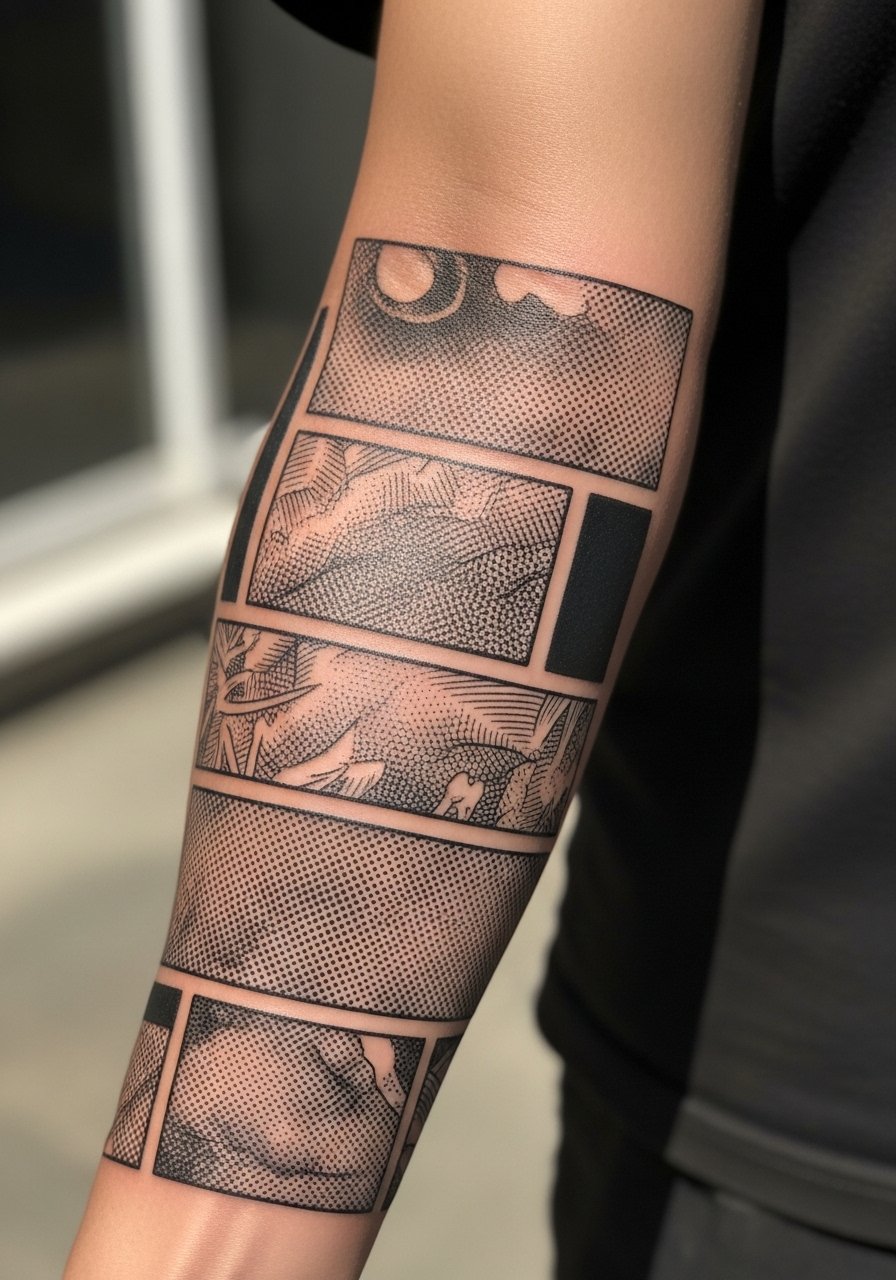
A panel sleeve mimics comic layout. Bold borders and large black shapes help the composition read from a distance. I’ve seen this layout hold up well because strong black anchors resist fading. Forearm placement moves with your arm but offers a flatter surface than the inner elbow. Expect several sessions. Pain is manageable but can spike near the wrist. For longevity, ask for clean negative-space gutters between panels—this prevents ink merging over time. Avoid tiny, unreadable panels; fewer, larger panels keep narratives legible once healed. Artists who understand screentone halftoneing will reproduce that printed texture beautifully.
4. Micro-Realism Anime Eye on Nape
Style/Technique: Micro-Realism / Fine Line
Pain Level: High (6/10)
Session Time: 1–3 hours
Best For: Subtle statement, personal meaning, hidden placement
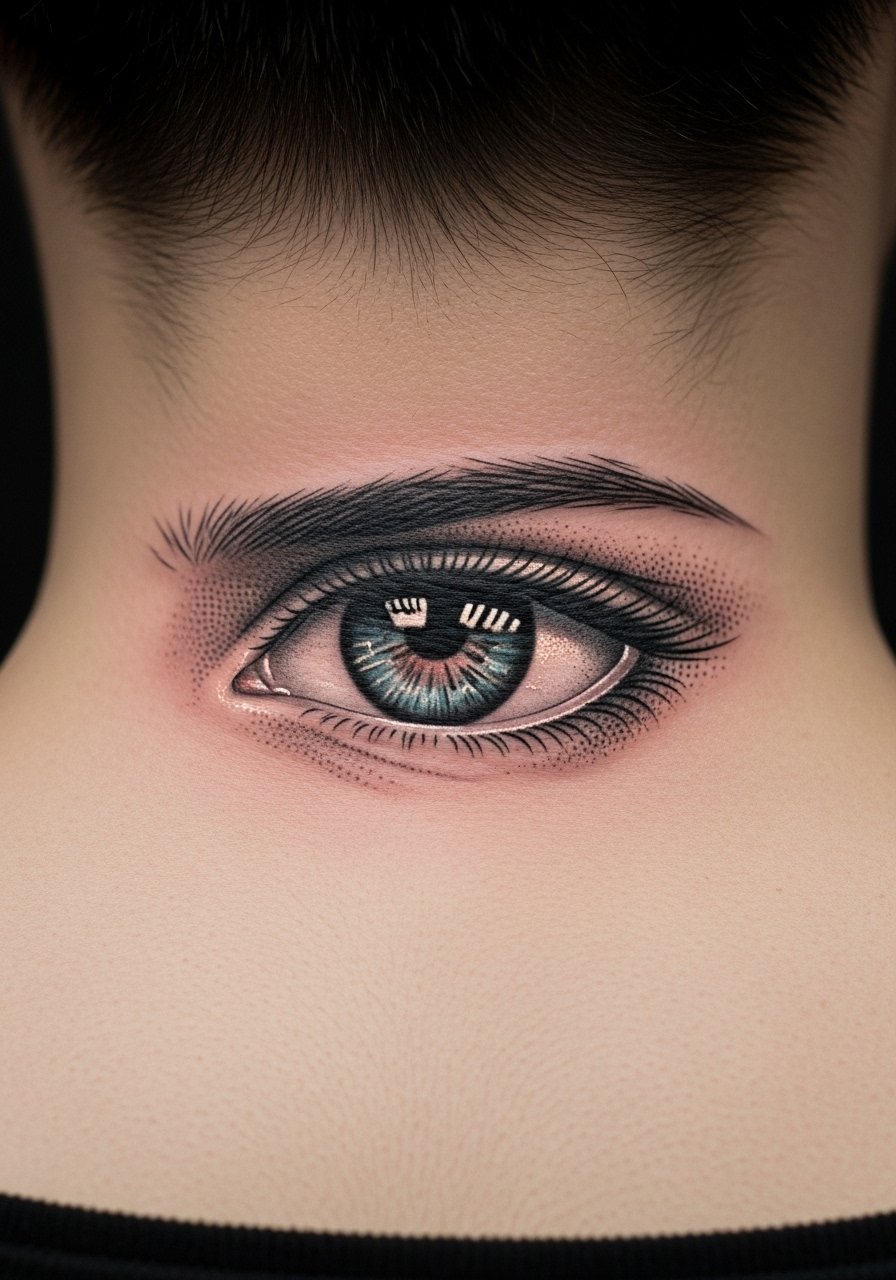
An isolated anime eye can be hauntingly expressive. Micro-realism demands extreme precision. The nape has thin skin and movement, so expect higher pain and a delicate healing period. From what I’ve learned, healed eyes look best when artists balance detail with slight bold outlines to prevent the iris from turning into a blur. Keep sessions short if you’re sensitive. I recommend discussing how the eye will age with your artist and choosing slightly larger scale than you first imagine to preserve tiny highlights.
5. Neo-Traditional Manga Oni on Thigh
Style/Technique: Neo-Traditional / Bold Colors
Pain Level: Medium (4/10)
Session Time: 2–4 hours
Best For: Statement piece, color longevity, easy to hide
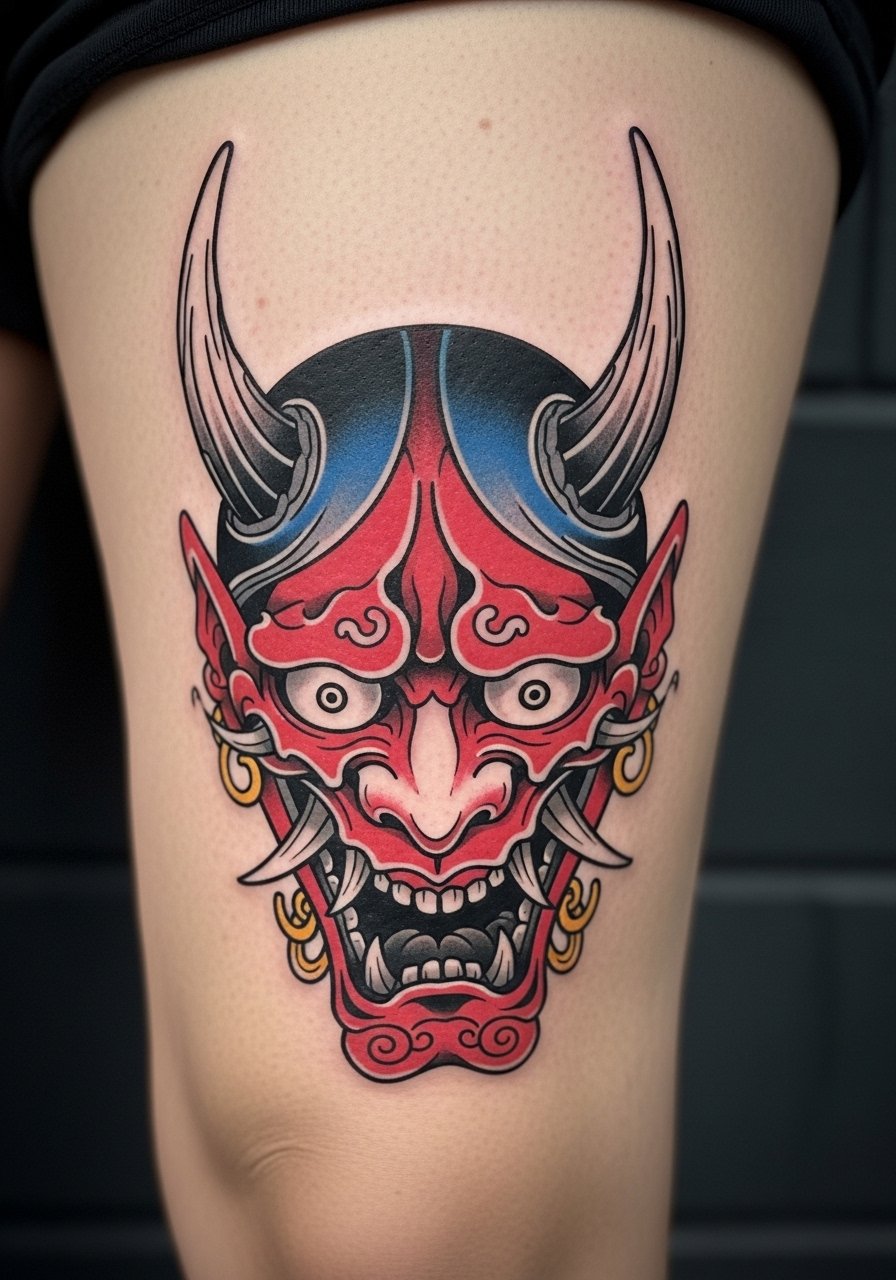
Combining neo-traditional weight with manga expression creates bold, readable character tattoos. The thigh accepts color well and hides easily during healing. Pain is moderate because of fleshiness. Color choices matter: darker tones hold best. I’ve noticed artists who use clean line separation between colors prevent colors from muddying as the skin settles. Common mistake: over-detailing horns or scales at tiny scales; keep decorative elements larger so the design retains silhouette strength.
6. Blackwork Speed Lines Ribcage Burst
Style/Technique: Blackwork / Dynamic Linework
Pain Level: High (7-8/10)
Session Time: 1–3 hours, possibly multiple for large pieces
Best For: Dramatic placement, bold motion pieces
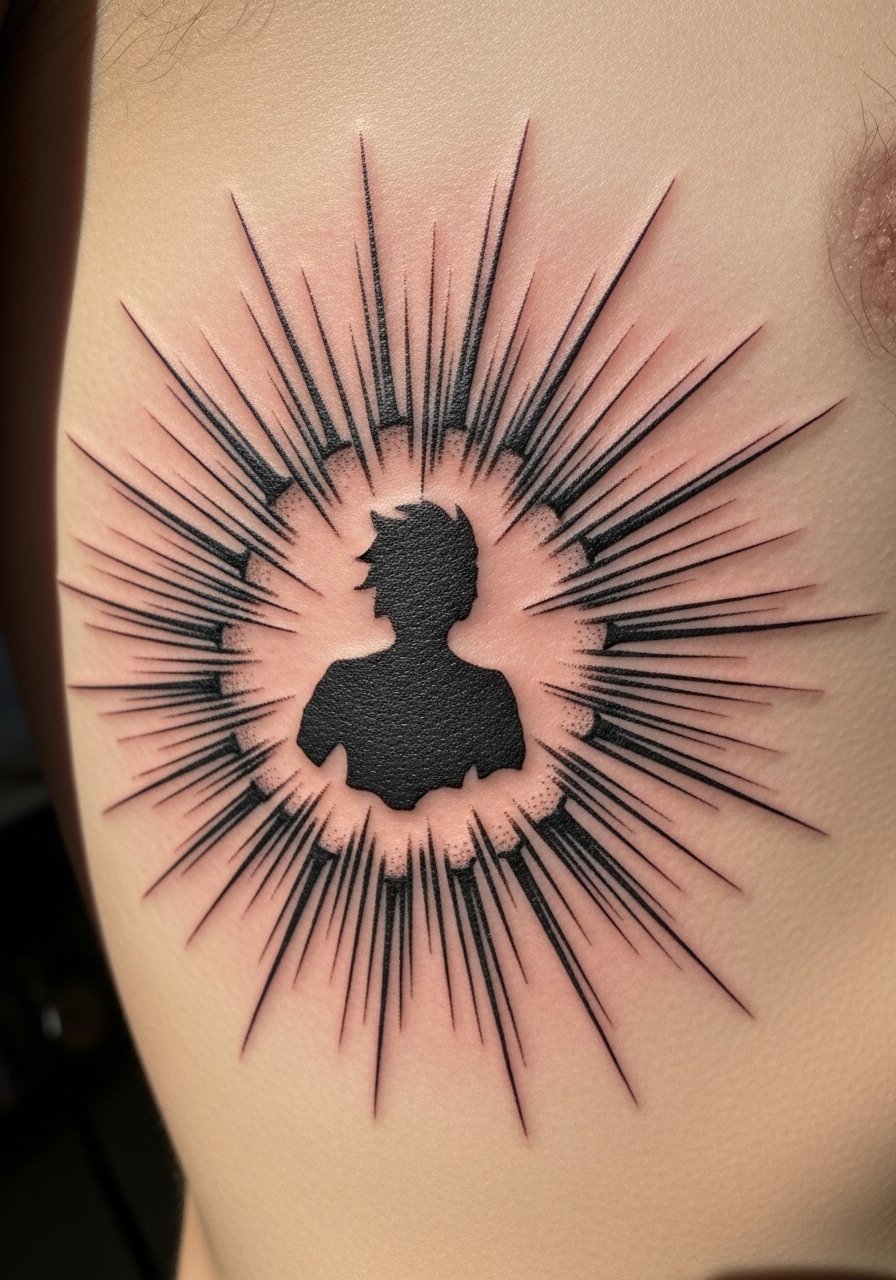
Speed lines are a manga staple for motion and drama. Ribcage placement reads cinematic but hurts—expect intense pain and longer healing. Blackwork is forgiving though; heavy black ages predictably. From my experience, artists who plan line direction with body movement make speed lines feel natural. Avoid placing too many thin parallel lines on ribs—skin stretches and can cause lines to blur together. Let negative space do work here; it enhances the sense of motion and keeps the piece legible.
7. Minimalist Kanji Behind Ear
Style/Technique: Minimalist / Single-Line
Pain Level: High (6/10)
Session Time: 30–60 minutes
Best For: Hidden message, subtle cultural nods
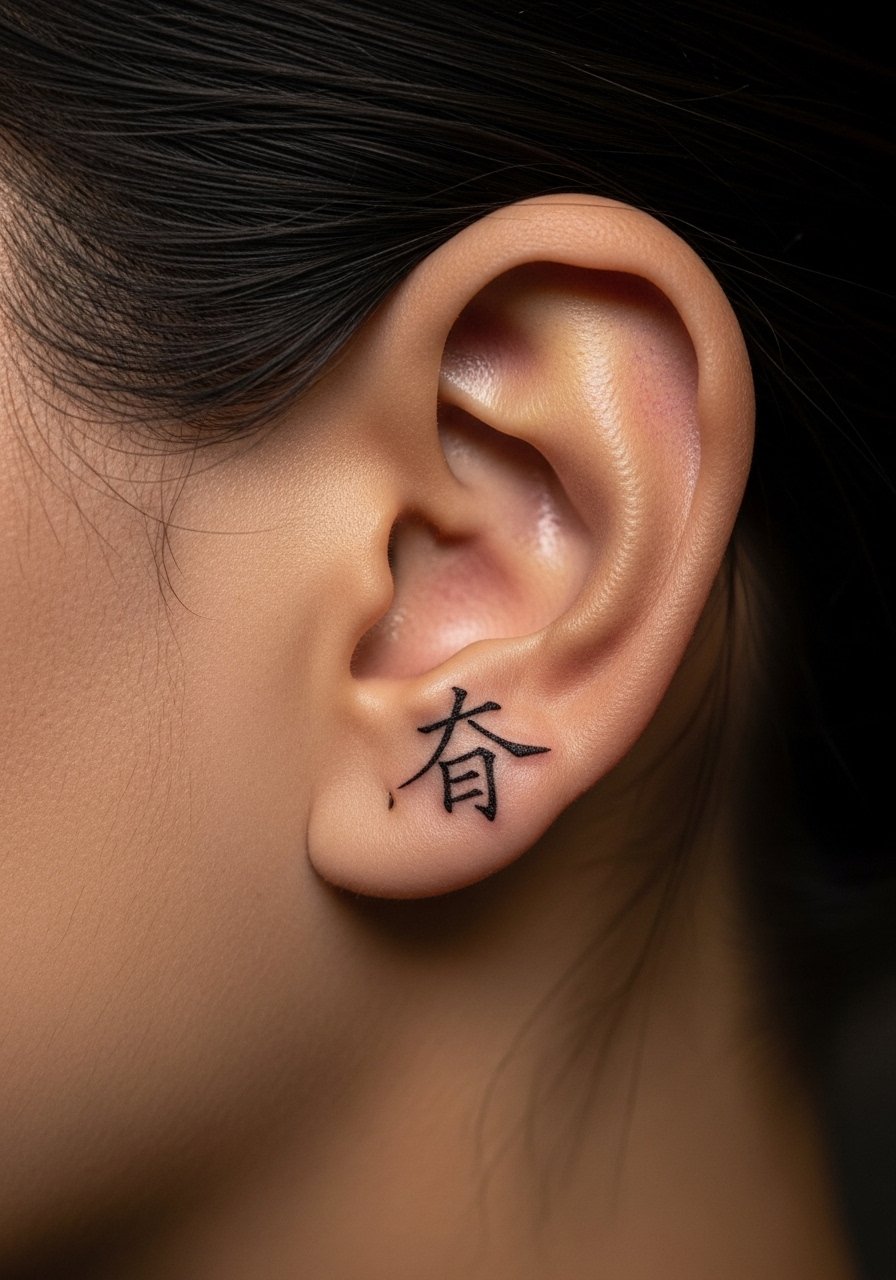
Small kanji can be powerful when executed cleanly. Behind the ear is discreet but sensitive; pain is sharp and brief. From what I’ve seen, solid, confident strokes are essential—a shaky line ruins legibility. Discuss character meaning with your artist and double-check translation. Tiny kanji should be slightly larger than you think to prevent merging. Aftercare must avoid friction from hair and collars during the first two weeks.
8. Watercolor Manga Splash on Shoulder Blade
Style/Technique: Watercolor / Line-and-Color Hybrid
Pain Level: Low-Medium (3-4/10)
Session Time: 1–3 hours
Best For: Painterly manga vibes, artistic statement
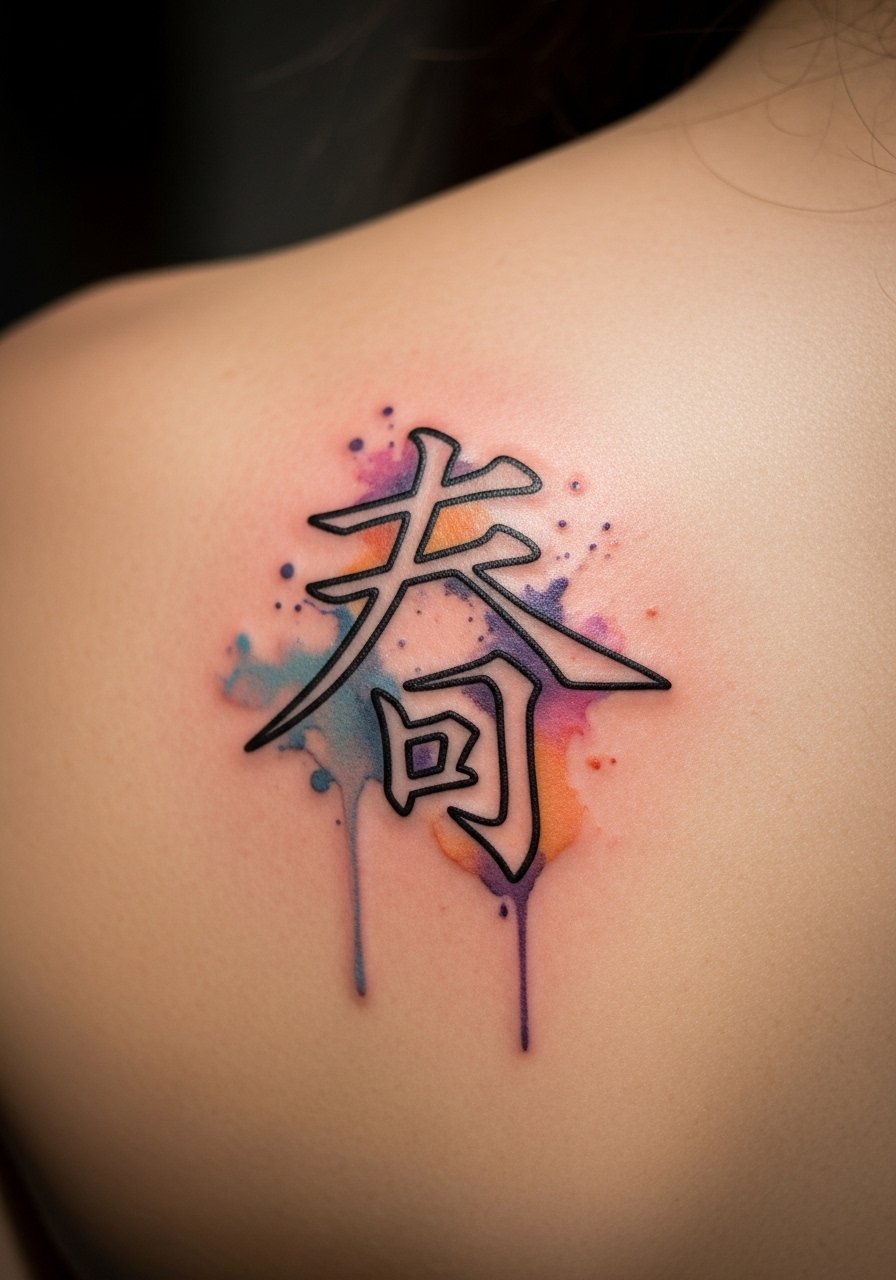
Watercolor effects can add emotion to a manga character. Shoulder blade sits flat and shows off color washes well. Expect easier pain and straightforward healing. I’ve noticed watercolor needs strong line anchors; otherwise, colors look like smudges when healed. Ask your artist to plan color saturation and to leave breathing room around linework to prevent colors invading fine lines. This style needs touch-ups more often than pure blackwork.
9. Manga Panel Chest Piece With Negative Space
Style/Technique: Linework / Negative Space
Pain Level: High (6-7/10)
Session Time: Multiple sessions, 3–5 hours each
Best For: Dramatic storytelling, chest visibility
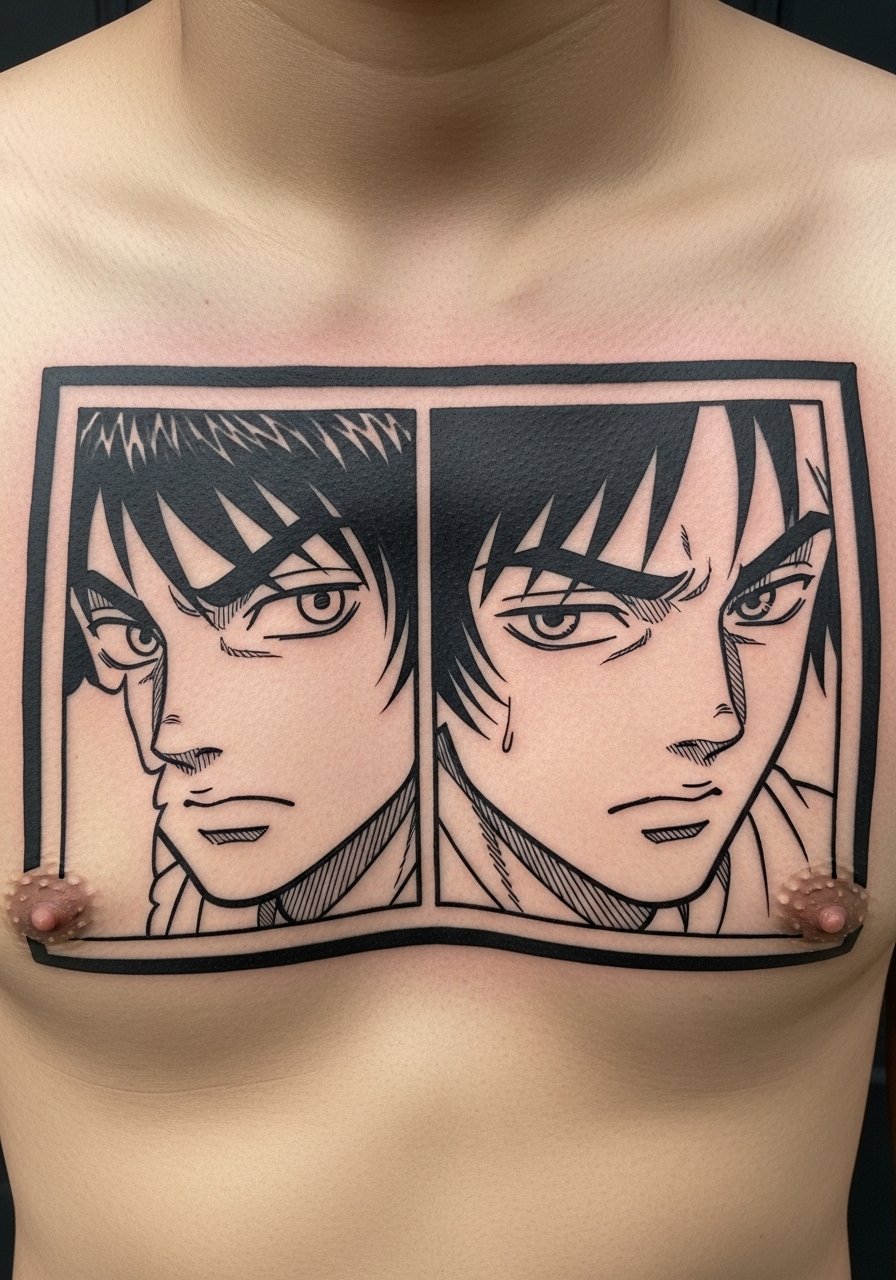
Chest panels let you tell a short story across the sternum and pec. Pain is higher near the sternum and collarbone. Negative space preserves contrast and prevents the chest from becoming visually cluttered. From conversations with artists I follow, leaving skin gaps between panels is critical for legibility and aging. A frequent mistake is packing too many micro-panels into the chest—keep the language bold and readable.
10. Fine Line Shojo Eyes on Ankle
Style/Technique: Fine Line / Shojo-Inspired
Pain Level: High (6-7/10)
Session Time: 1–2 hours
Best For: Feminine aesthetic, delicate detail
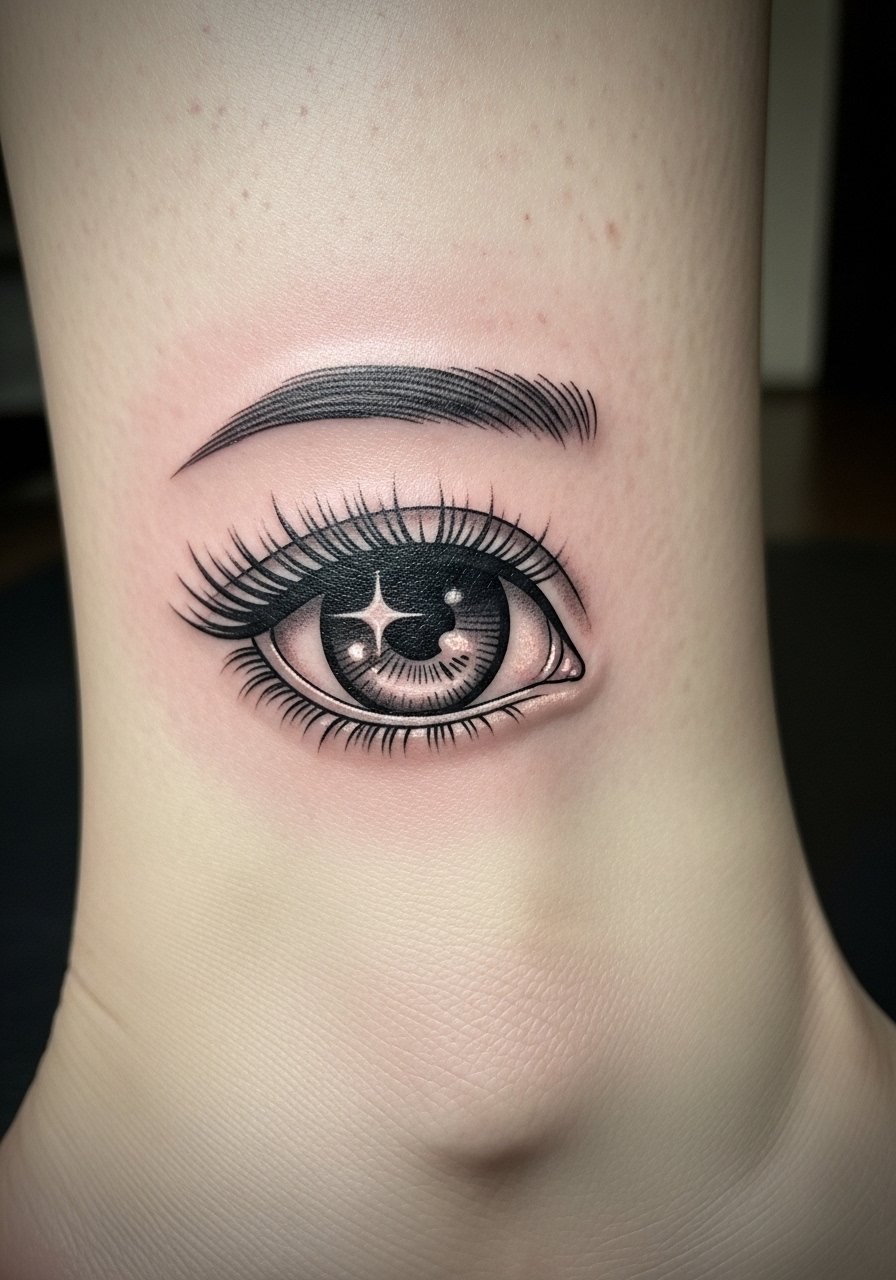
Shojo eyes rely on sparkle and clean lashes. The ankle is a tricky spot—thin skin, lots of movement, and footwear rubbing—so healing needs care. Pain is notable. I’ve seen shojo eyes lose some sparkle if highlights are too tiny. Ask for slightly bolder catchlight shapes and restrained tiny lashes. Keep scale proportional to the ankle’s canvas; too small, and lashes become a smear.
11. Halftone Dotwork Portrait on Calf
Style/Technique: Dotwork / Halftone
Pain Level: Medium (4-5/10)
Session Time: 2–4 hours
Best For: Strong graphic texture, readable at distance

Halftone dotwork mimics manga printing. The calf gives a vertical canvas and heals well. Dots can remain crisp if the artist spaces them correctly. From my observation, dotwork ages well because it doesn’t rely on delicate single lines. However, improper dot density causes muddy gray blocks later. Ask your artist about dot scale and spacing. Avoid trying to reproduce photographic detail with halftone at tiny scales.
12. Clean Line Action Pose on Side Rib
Style/Technique: Linework / Dynamic Pose
Pain Level: Very High (8-9/10)
Session Time: 1–3 hours, may need breaks
Best For: Dramatic motion pieces, bold silhouettes
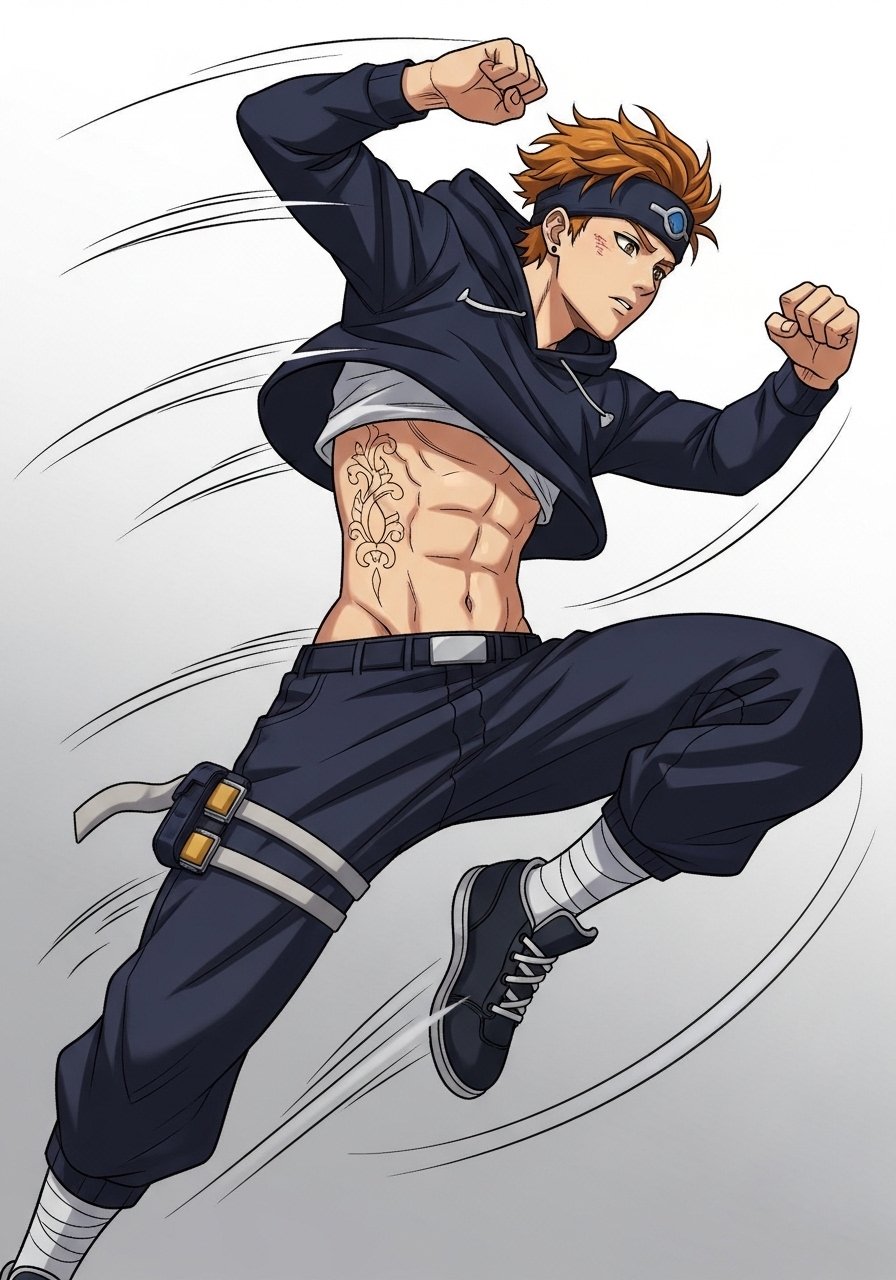
Side ribs show motion beautifully but are intensely painful. Clean silhouettes and confident line direction sell action better than tiny interior detail. Expect long-term clarity if lines are bold and not overly tight. I’ve learned that clients who break sessions and use numbing options recover better emotionally and physically. Avoid crowding the torso curve with too many tiny limbs; keep the pose open and readable.
13. Tiny Iconic Manga Symbol on Finger
Style/Technique: Minimalist / Single-Line
Pain Level: High (6-7/10)
Session Time: 15–45 minutes
Best For: Micro symbols, secret meanings
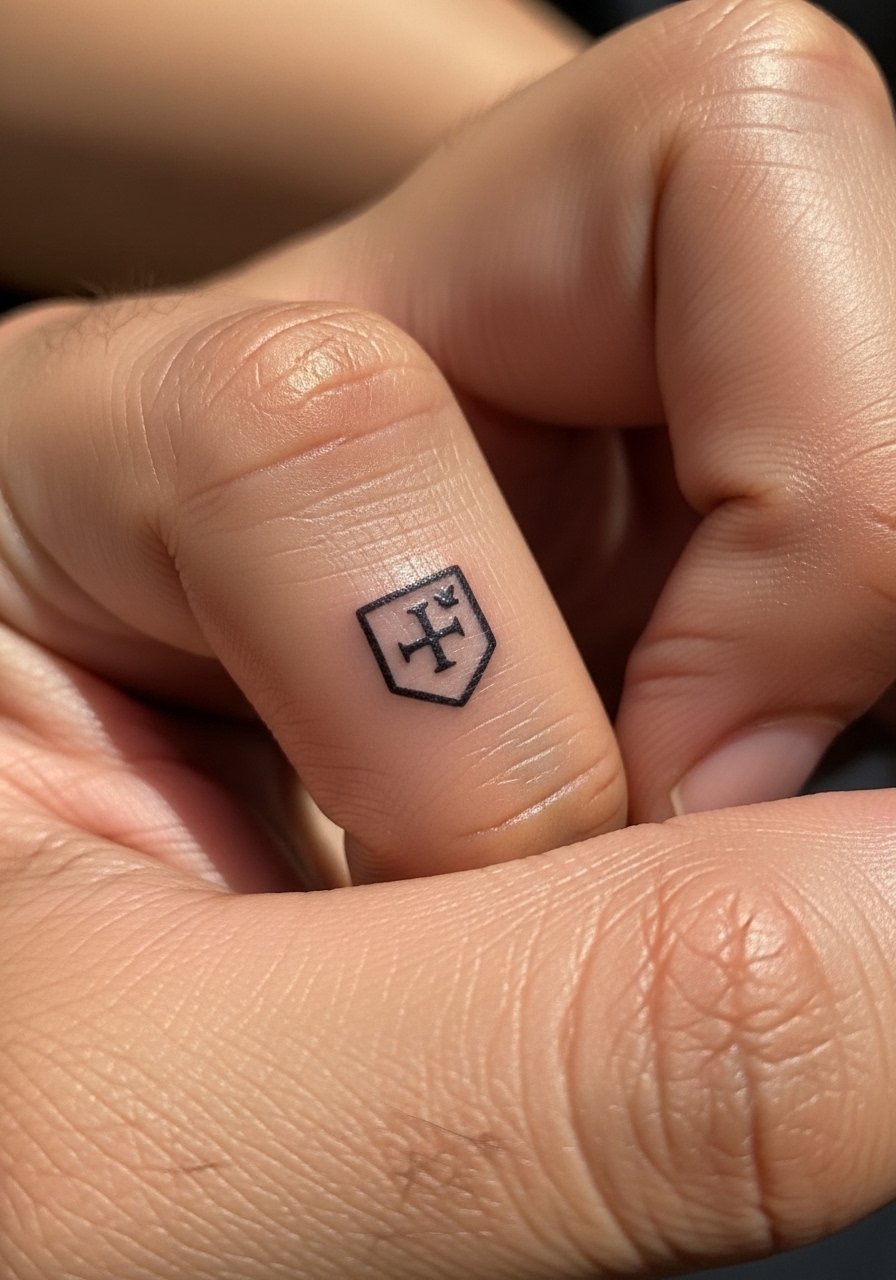
Finger tattoos are trendy but notorious for fading and blowout. A tiny manga symbol can work if lines are bold and the design is simple. Expect touch-ups down the road. From what I’ve seen, artists recommend thicker single-line logos and avoiding filled color on fingers. Protect this area during healing; it contacts everything. Don’t expect a finger tattoo to last untouched for years.
14. Detailed Mecha Arm Band Around Forearm
Style/Technique: Mechanical Linework / Neo-Futuristic
Pain Level: Medium (4-5/10)
Session Time: 2–4 hours
Best For: Sci-fi manga fans, wrap-around designs
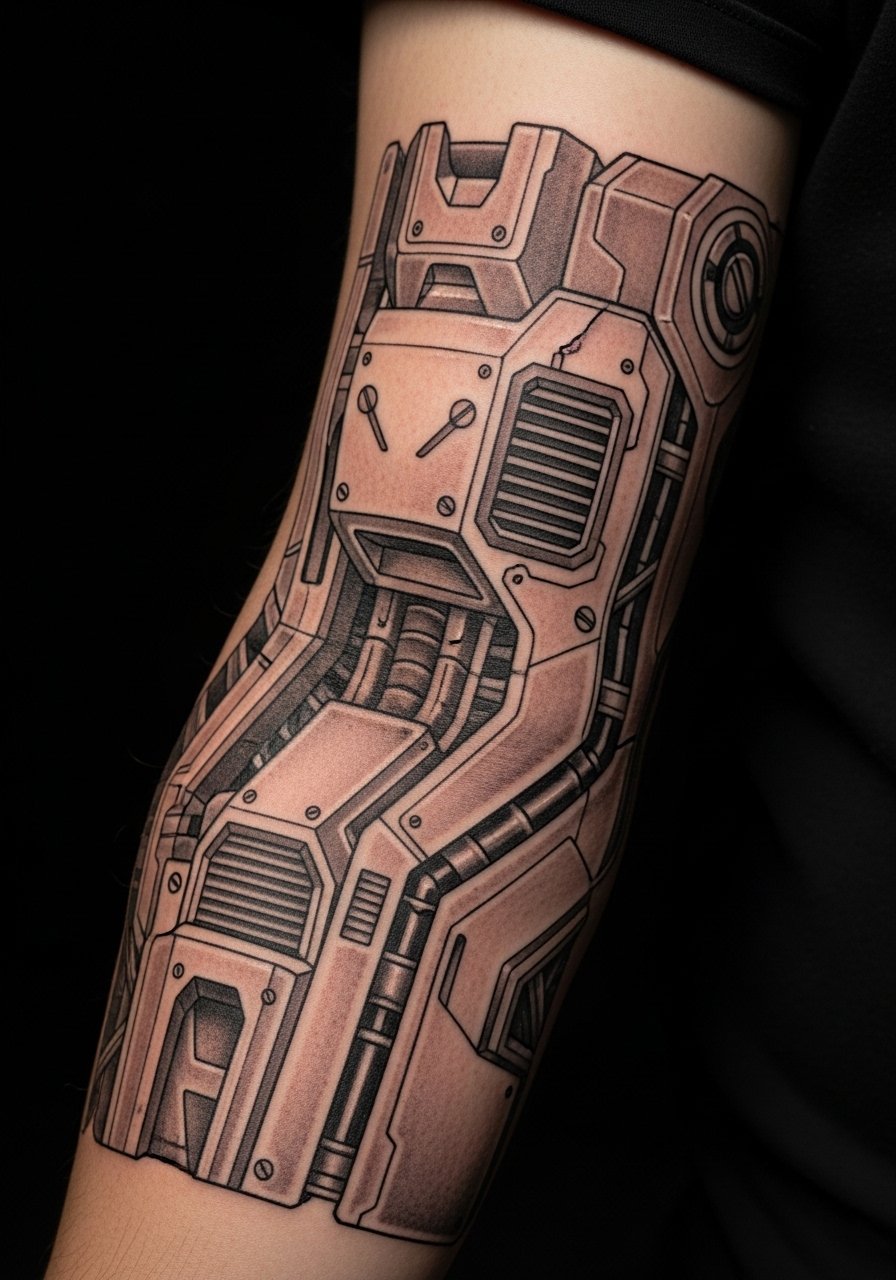
Mecha bands look technical and crisp when artists use clean, confident geometry. The forearm’s cylinder suits wrap designs. Expect a few hours per session. I’ve noticed that small mechanical details need breathing room; otherwise the design becomes a gray area as skin settles. Ask for strong outer lines and simplified inner tech lines. Keep the band width consistent so it reads as intentional and not patchy.
15. Screentone Texture Mandala On Sternum
Style/Technique: Dot/Shading Screentone / Decorative
Pain Level: High (7/10)
Session Time: 2–4 hours
Best For: Decorative manga texture, central chest focus
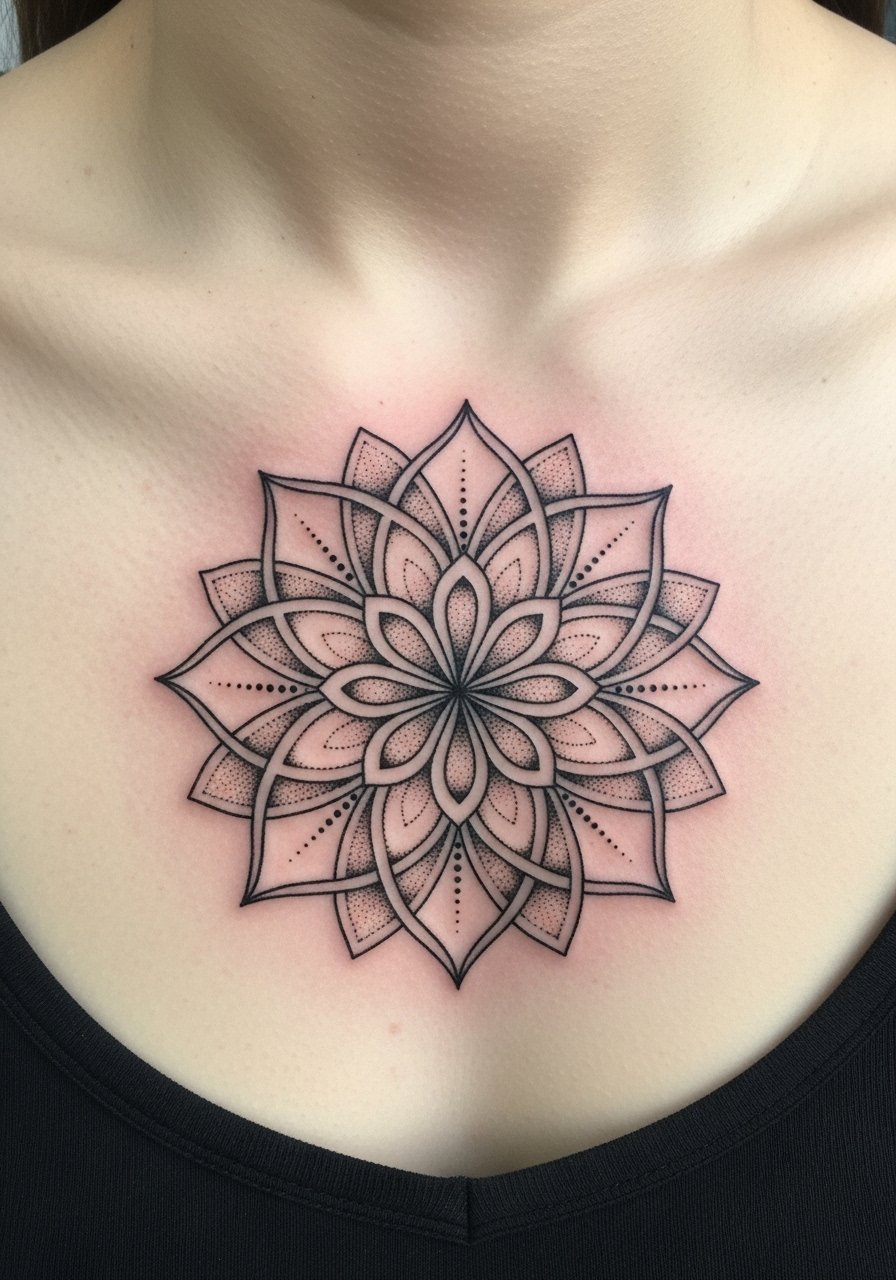
A mandala rendered with screentone-like dots gives a printed-manga feel. The sternum is sensitive; expect pain and heavy aftercare. In my experience, dot gradients hold well when artists space dots progressively. Avoid overly dense center dots that can turn into patches. This style pairs well with thin surrounding linework to frame the mandala.
16. Micro-Realism Pet In Manga Style on Thigh
Style/Technique: Micro-Realism / Characterized Realism
Pain Level: Low-Medium (3-4/10)
Session Time: 2–3 hours
Best For: Personal pet tribute, larger canvas
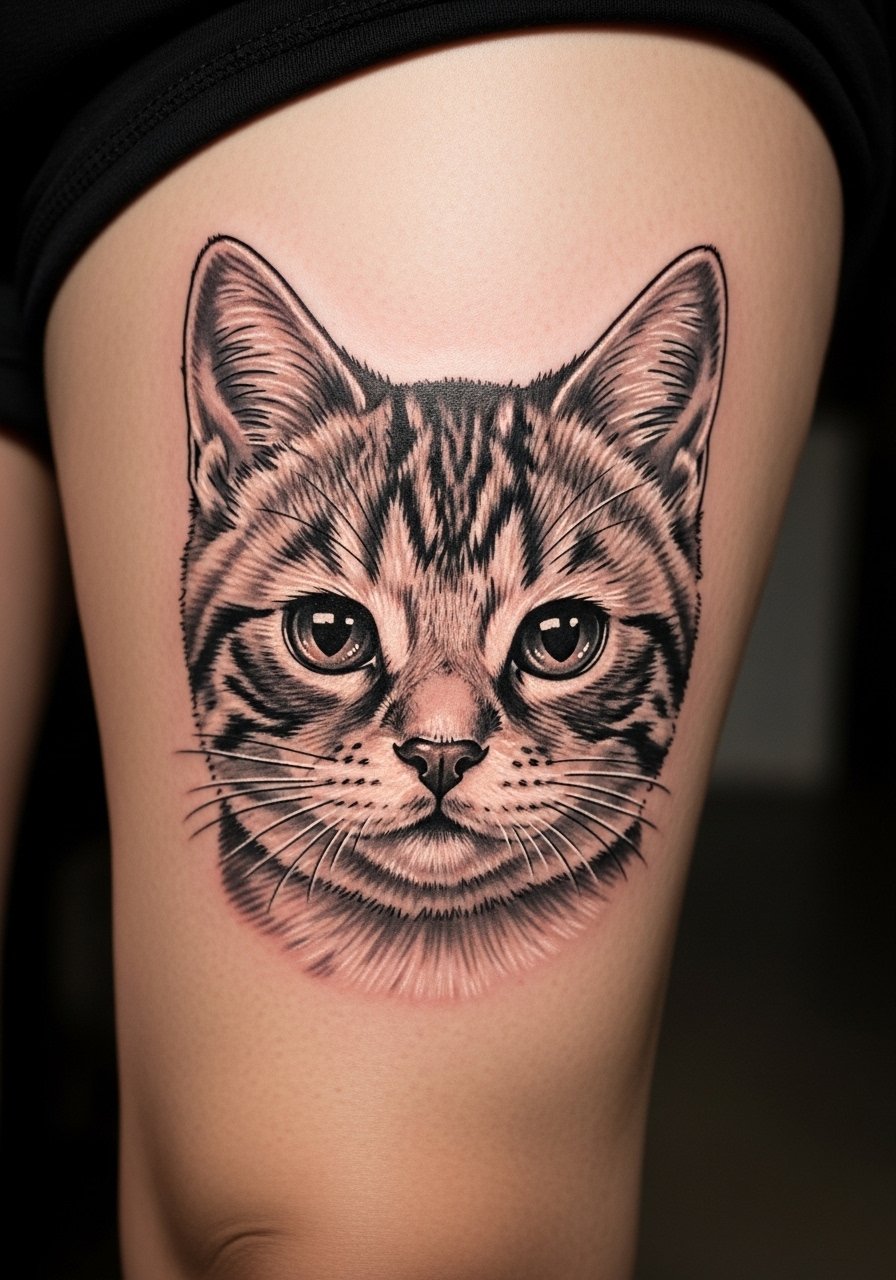
Mixing micro-realism and manga styling for a pet portrait creates emotional pieces. Thigh placement is forgiving and hides easily. I’ve noticed artists who slightly exaggerate eyes and expressions keep the manga vibe while honoring realism. Healing is smooth if you avoid tight clothing during the first week. Don’t cram tiny fur lines—let larger strokes suggest texture for longevity.
17. Minimal Panel Collage Behind Upper Arm
Style/Technique: Minimalist / Collage Layout
Pain Level: Low-Medium (3-4/10)
Session Time: 1–3 hours
Best For: Subtle storytelling, hidden art
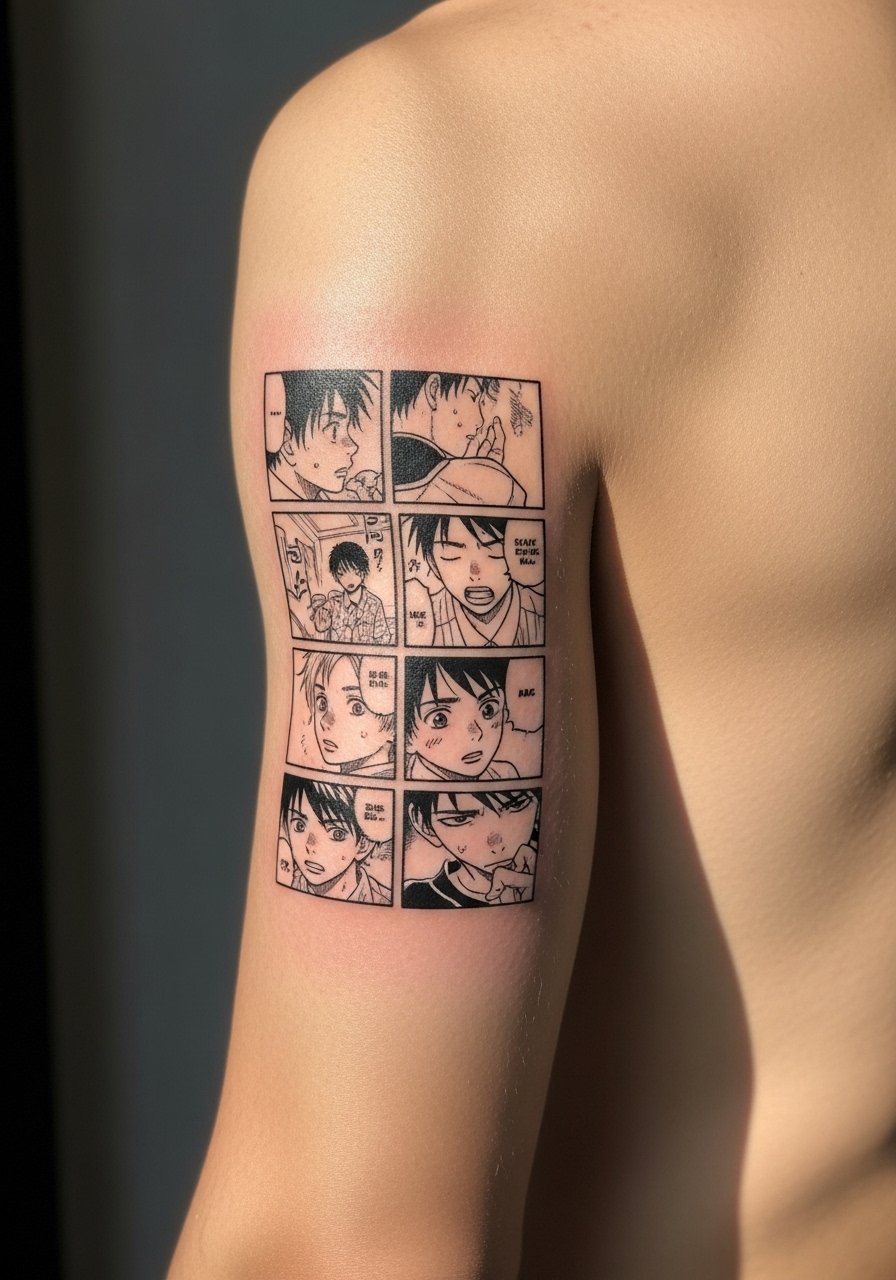
A compact collage behind the upper arm reads like a private set of panels. Placement hides with short sleeves. I find this works best with limited elements—one face, one object, one word bubble. Keep gutters roomy. Overcrowding is the usual trap. Opt for slight variation in line weight to suggest depth.
18. Neo-Traditional Character Bust On Upper Back
Style/Technique: Neo-Traditional / Bold Outline & Color
Pain Level: Medium (4-5/10)
Session Time: 2–5 hours
Best For: Large readable character work, longevity
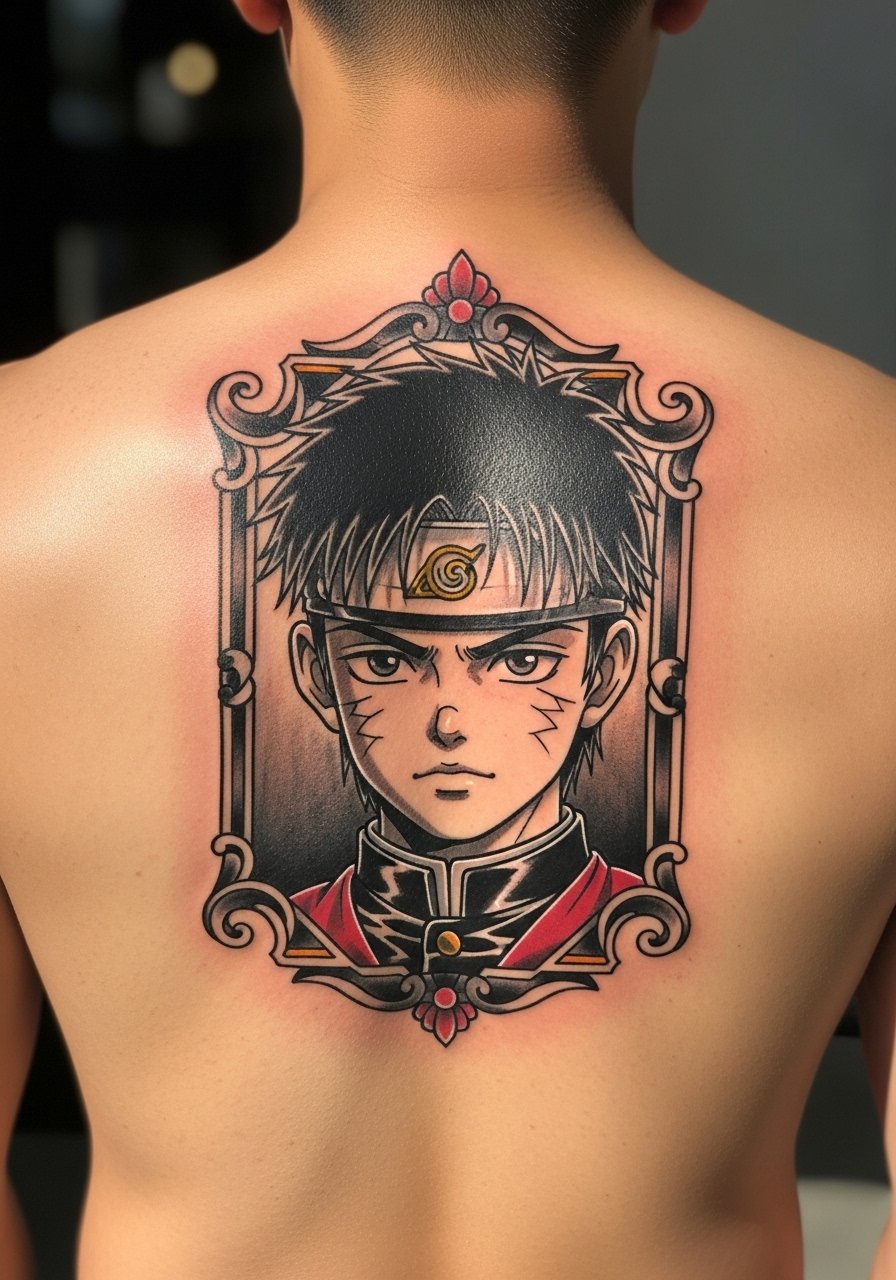
Upper back gives room for larger, neo-traditional manga busts. Strong outlines and flat color blocks keep the piece readable from a distance. I’ve observed that colors heal brighter when artists separate color fields with clean black lines. Pain is moderate and spread across sessions. Don’t over-refine tiny facial lines; use color planes for expression.
19. Fine Line Floral Motif With Kanji On Ribcage
Style/Technique: Fine Line / Botanical + Text
Pain Level: Very High (8/10)
Session Time: 1–3 hours
Best For: Sentimental pieces, elegant placement
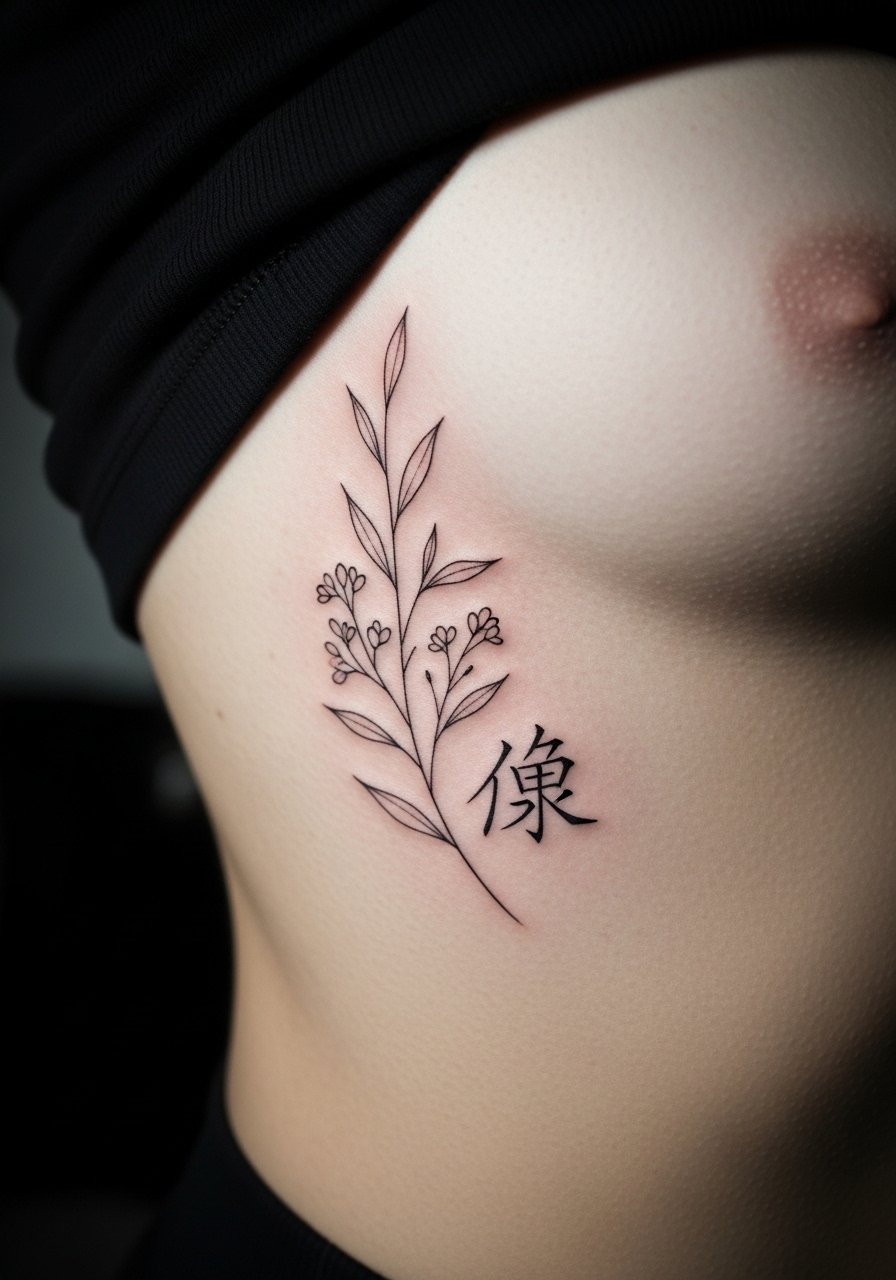
Delicate floral linework combined with kanji reads poetic but ribs bite. Fine lines here need bold anchors to survive. From experience, artists who thicken the first pass of important stems keep the piece intact after healing. Avoid extremely thin script; it blurs. Consider slightly larger kanji strokes for clarity.
20. Blackwork Silhouette On Upper Thigh
Style/Technique: Blackwork / Solid Silhouette
Pain Level: Low-Medium (3/10)
Session Time: 1–2 hours
Best For: Bold contrast, easy care, modest visibility
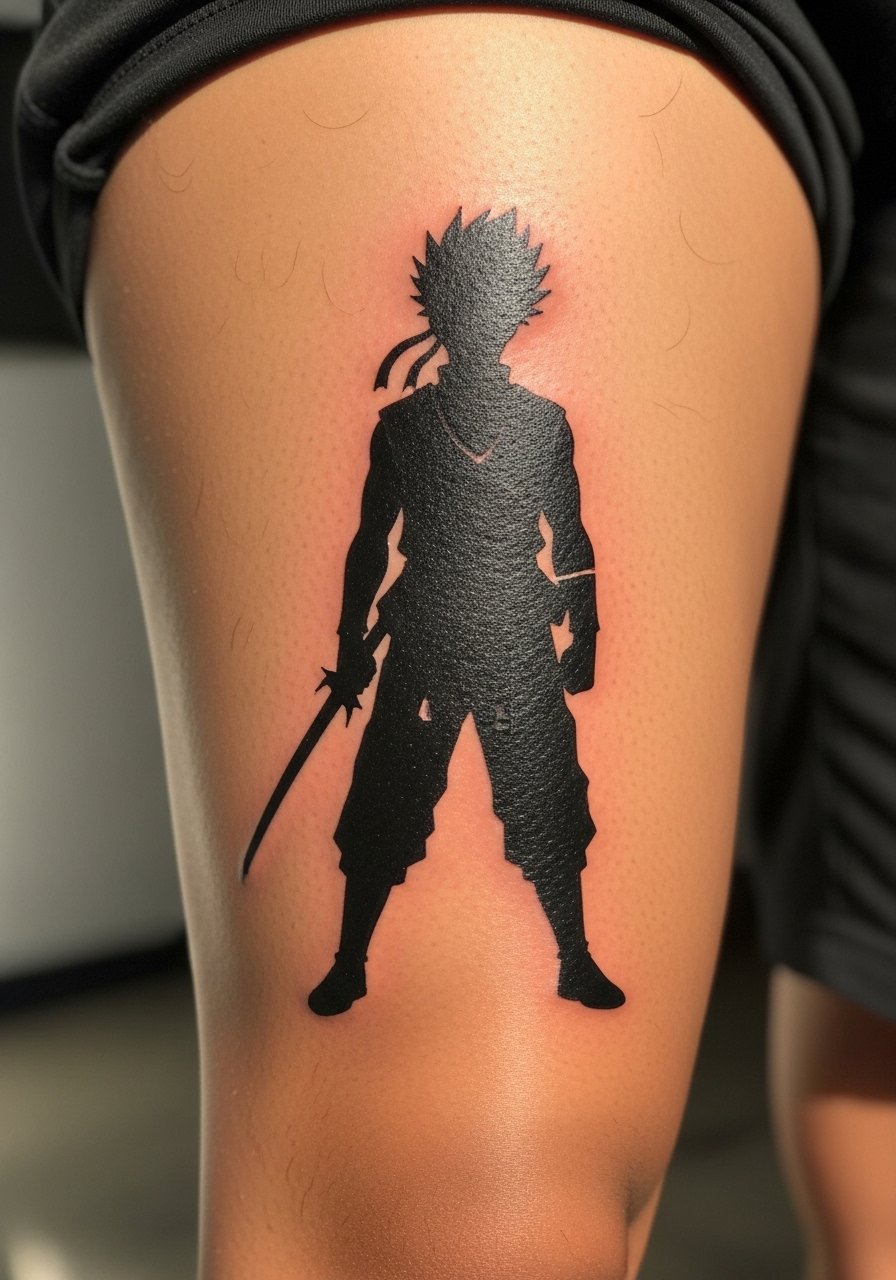
Silhouettes are forgiving. Solid black areas age predictably and demand less touch-up than fine detail. The thigh is comfortable for both sessions and healing. From what I’ve seen, avoid tiny inner details inside silhouettes; they’ll disappear over time. This is a good option if you want a manga shape that stays strong.
21. Manga Speech Bubble Quote On Inner Wrist
Style/Technique: Minimalist / Script + Linework
Pain Level: Medium (4-5/10)
Session Time: 30–60 minutes
Best For: Short quotes, daily reminders
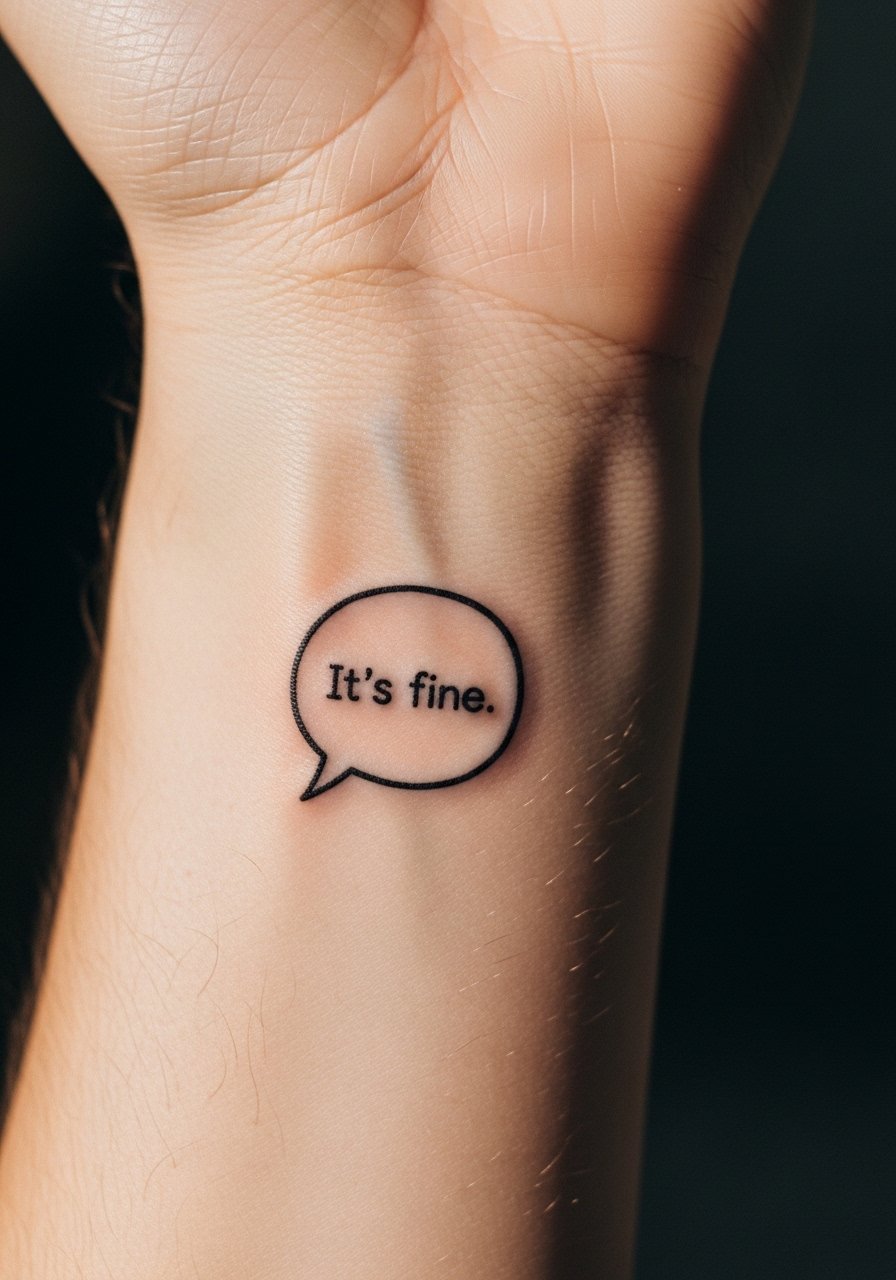
Speech bubbles feel playful and direct. Inner wrist placement is visible and meaningful but exposed to sun. From my experience, keep text short and bold so it stays readable as ink settles. Protect this area from constant friction during healing. Avoid tiny script fonts; choose block or simple handwritten styles.
22. Linework Speed Effect Around Knee Cap
Style/Technique: Linework / Motion Accents
Pain Level: High (7/10)
Session Time: 1–2 hours
Best For: Active motion pieces, dynamic accents
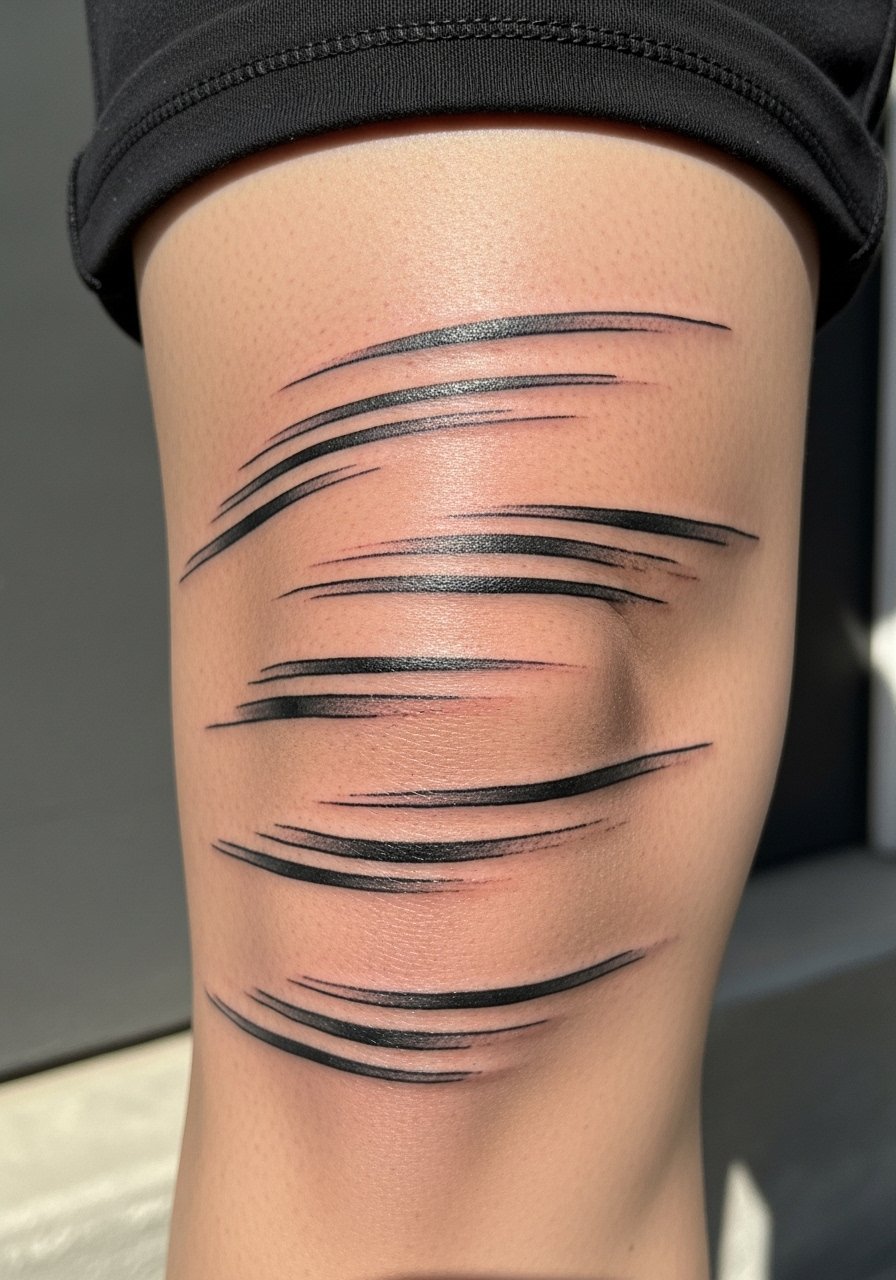
Knee-area tattoos are conspicuous and move with the joint. Pain is high during tattooing. Speed effects here accentuate motion and pair well with other limb pieces. I’ve noticed that bold line anchors and generous spacing prevent ink smudging as the skin flexes. Plan placement carefully to avoid lines splitting across joints.
23. Scar-Camouflage Manga Motif On Abdomen
Style/Technique: Illustrative / Scar Cover-Up Integration
Pain Level: Medium (4-6/10)
Session Time: 1–3 sessions depending on scar size
Best For: Scar blending, personal reclamation
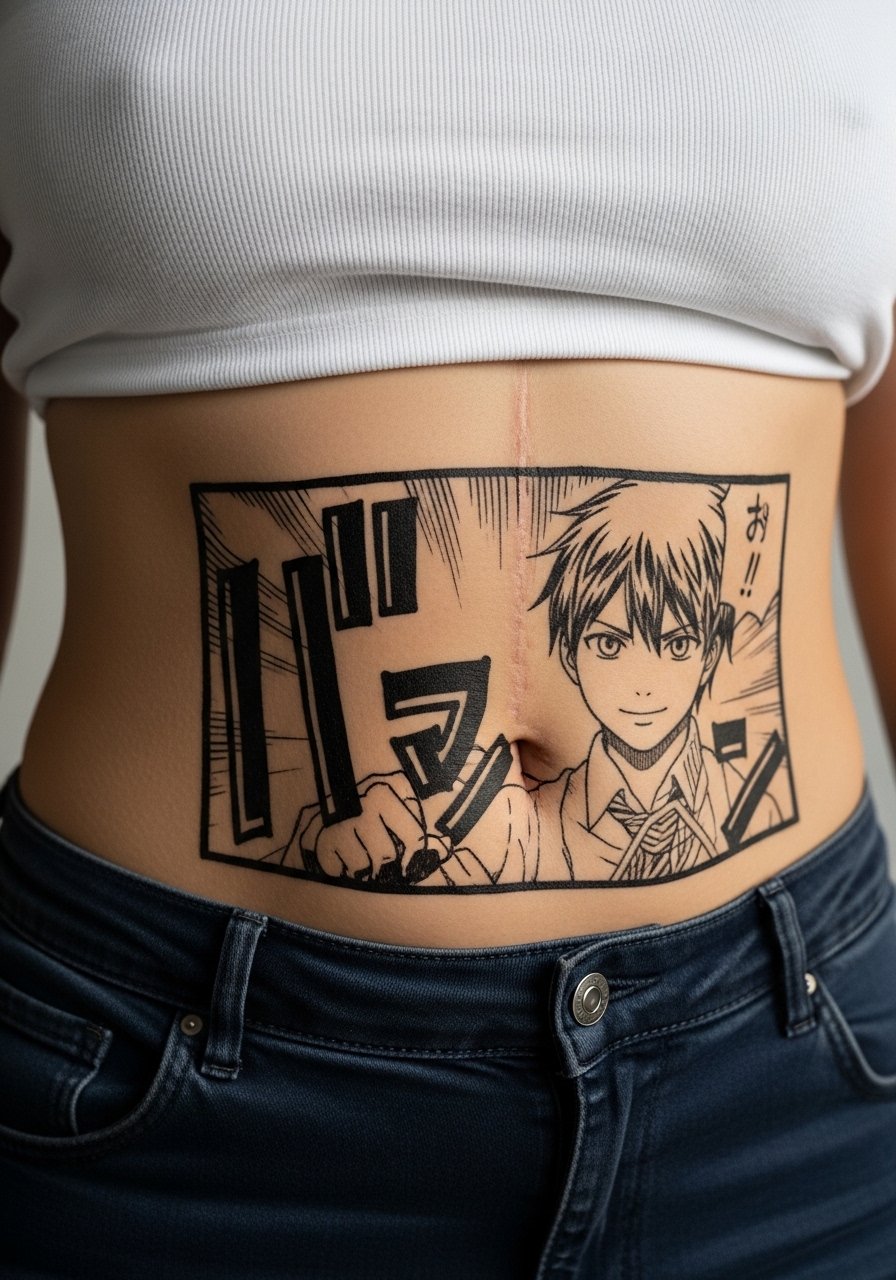
Working over scars requires artist experience. Manga motifs—fans, waves, clouds—can be designed to incorporate scar texture into the composition. I’ve talked with artists who recommend waiting until scars are fully matured before tattooing. Pain varies by scar sensitivity. The trick is to use bold lines and texture to draw attention away from uneven skin. Avoid single thin strokes lying directly on obvious scar ridges.
Tattoo Prep and Aftercare Essentials
Aftercare Essentials:
- Aquaphor Healing Ointment, 14oz tube — Industry standby for first 3–5 days
- Saniderm Transparent Adhesive Bandage, 6-inch roll — Second-skin method many artists use
- CeraVe Fragrance-Free Moisturizing Lotion, 12oz — Daily moisturizer during days 4–14
- Dr. Bronner's Unscented Castile Soap, 32oz — Gentle cleaning option
Before Your Appointment:
- Tattoo Numbing Cream 5% Lidocaine — Ask your artist before use
- Tattoo Stencil Transfer Paper, Multi-Pack — Handy if you're sketching layouts at home
Long-Term Maintenance:
- SPF 50+ Sunscreen Stick for Tattoos — Daily sun protection preserves sharp detail
- Mad Rabbit Tattoo Balm, 2oz — Keeps healed ink vibrant
- Hustle Butter Deluxe, 4oz — Vegan long-term care option
Optional Comfort & Repair:
- Hydrocolloid Bandages, Large — For small scabs or spot protection
- Tattoo Aftercare Kit, Complete — Useful if you want an all-in-one option
I recommend stocking a gentle soap and an SPF stick before your appointment. From what I've seen, consistent daily sunscreen and a fragrance-free lotion are the two biggest long-term helpers for keeping manga tattoos crisp.
Frequently Asked Questions
Q: How bad does a tattoo actually hurt?
A: Pain depends on placement and your tolerance. Outer arm and thigh tend to be 2–4/10. Ribcage, spine, and knee are closer to 7–9/10. It's more a burning, vibrating scratch than a single sharp shock for most spots. For sensitive areas ask your artist about tattoo numbing cream 5% lidocaine—it helps some people but doesn't erase everything.
Q: How will my manga tattoo look as it heals and ages?
A: Fresh ink always looks sharper. Expect the first two weeks of flaking and dullness. Lines settle over months. From my experience, fine line detail softens more than bold blackwork. Protect your piece with SPF 50+ sunscreen stick and keep skin moisturized to slow fading.
Q: I'm worried about regret—should I start with a small piece?
A: Only get a small tattoo if you actually want small art. A tiny test piece can help you understand pain and healing, but it's also a permanent choice. If visibility worries you, choose a placement that's easy to cover (upper thigh, upper back). Sit with the design for a few months and tweak it before booking.
Q: What's a common mistake people make with manga tattoos?
A: Packing too many tiny details into small placements. Manga thrives on contrast and clear shapes. I've seen many designs lose their identity after healing because lines were too fine or panels were too dense. Ask your artist to simplify or scale up critical elements.
Q: Can I work out after getting inked?
A: Wait at least 48–72 hours before light activity. For placements that flex (elbow, knee, ribs), wait longer—about one to two weeks. Sweating can irritate fresh ink and increase infection risk. Keep a gentle soap and Aquaphor Healing Ointment on hand for those first days.
Q: How do tattoos look on different skin tones?
A: Black and gray linework reads well across tones. Bright colors can appear muted on deeper skin and white ink is often subtle. From what I've noticed, artists experienced with your skin tone will show healed examples—ask to see them. Strong contrast and bold anchors are your friends.
Q: What should I buy for my first 2 weeks of aftercare?
A: I pack a small kit: gentle soap (like Dr. Bronner's Unscented Castile Soap), Aquaphor Healing Ointment for the first few days if recommended, and a fragrance-free lotion like CeraVe for later. Saniderm is a solid option if your artist uses it.
Q: Can scar tissue be tattooed with manga-style designs?
A: Yes, but cautiously. Wait until the scar is mature and healed. Choose designs that incorporate texture and avoid super-fine detail on raised scars. I’ve seen really good results when artists design motifs that blend with the scar rather than trying to hide it completely.
