
I spent months testing henna-style tattoos on myself and chatting with artists before I settled on designs that feel fresh but low-commitment. What I wanted was style that reads like henna—intricate, jewelry-like, travel-ready—without the permanence. These 25 henna-style tattoo ideas are the ones I see hold up healed and still feel playful a year later.
This list focuses on henna-style tattoos that translate well from temporary paste to ink—floral, geometric, mandala, and jewelry bands. I picked placements that are easy to hide or show, and styles I keep noticing in 2026 tattoo threads—minimalist wrist bands, toe motifs, and small freckle clusters.
1. Geometric Henna Band on Outer Forearm
Style/Technique: Geometric / Fine Line
Pain Level: Low-Medium (2-4/10)
Session Time: 1–2 hours
Best For: Simple henna ideas, office-friendly statement
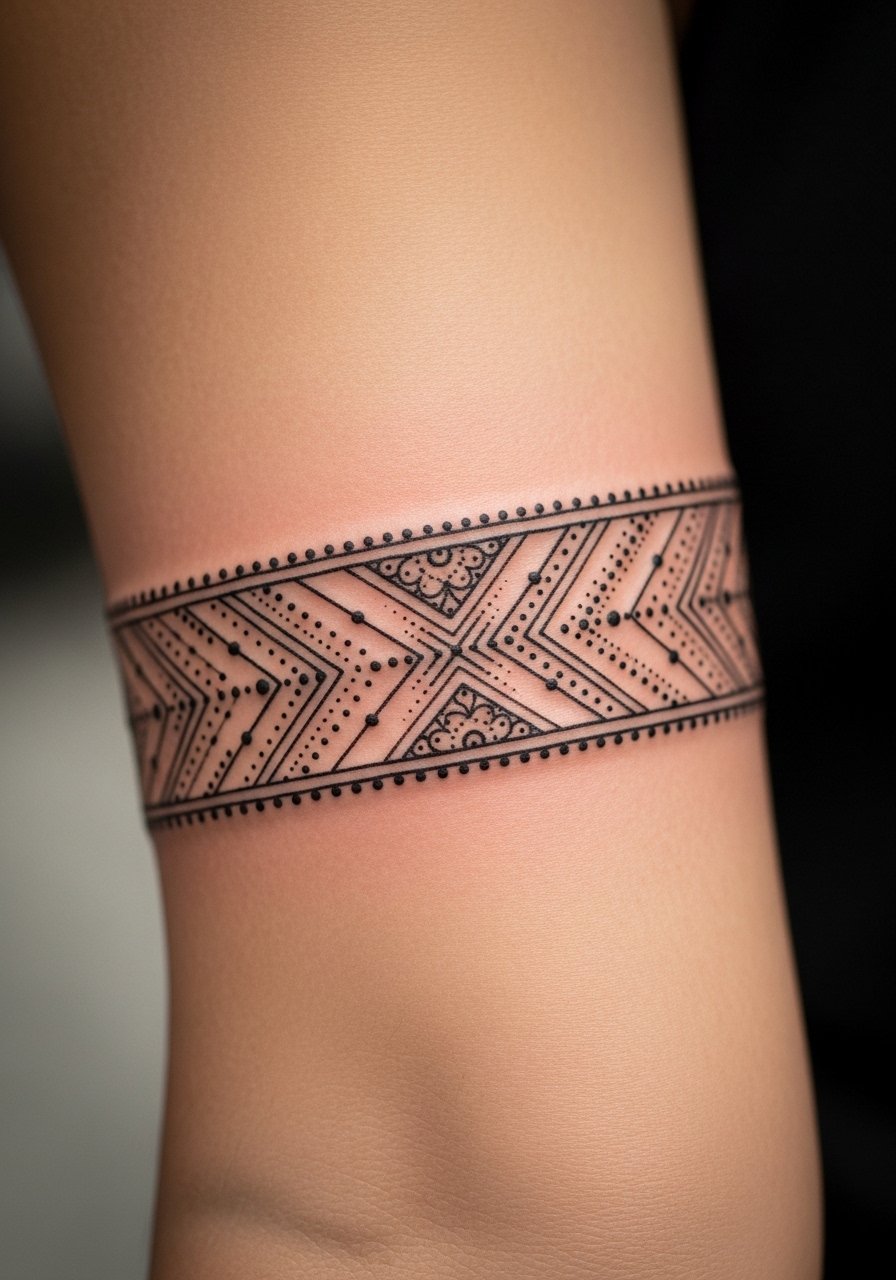
I love geometric henna bands because they give that modern-meets-traditional vibe. Artists use steady single-needle lines to mimic henna precision—ask for thin, consistent spacing. Forearm placement keeps the design readable and low-mess during application. Expect light soreness and 1–2 weeks of surface healing; avoid heavy friction while it peels. These designs age well if the linework is slightly bold; super-fine lines may blur faster. Common mistake: asking for lines so thin they won’t hold after healing—ask the artist for slightly reinforced lines if you want longevity. If you liked henna stencil ideas, this is a perfect permanent test run.
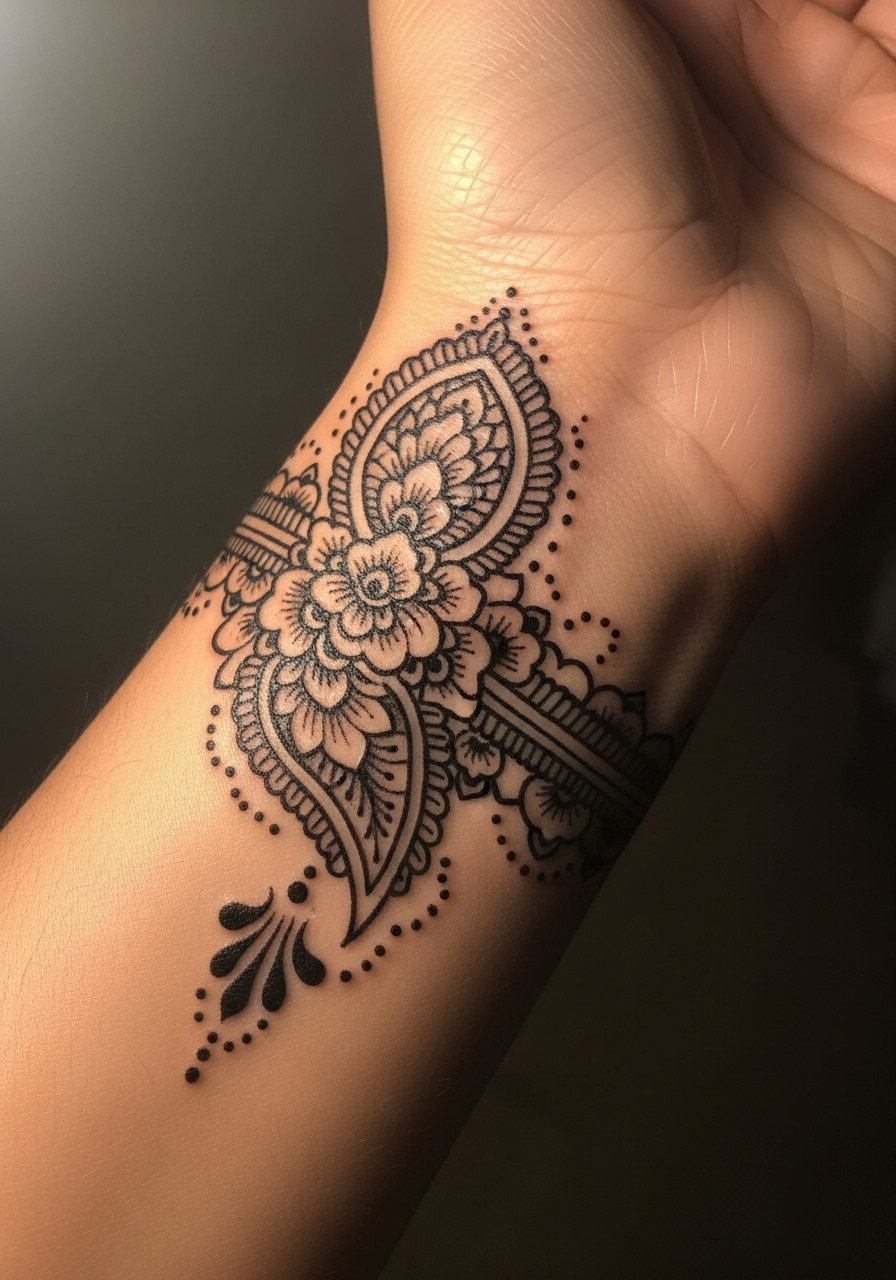
2. Floral Henna Wrist Wrap
Style/Technique: Floral / Illustrative
Pain Level: Low (2-3/10)
Session Time: 1–2 hours
Best For: Simple henna ideas, wrists that double as jewelry
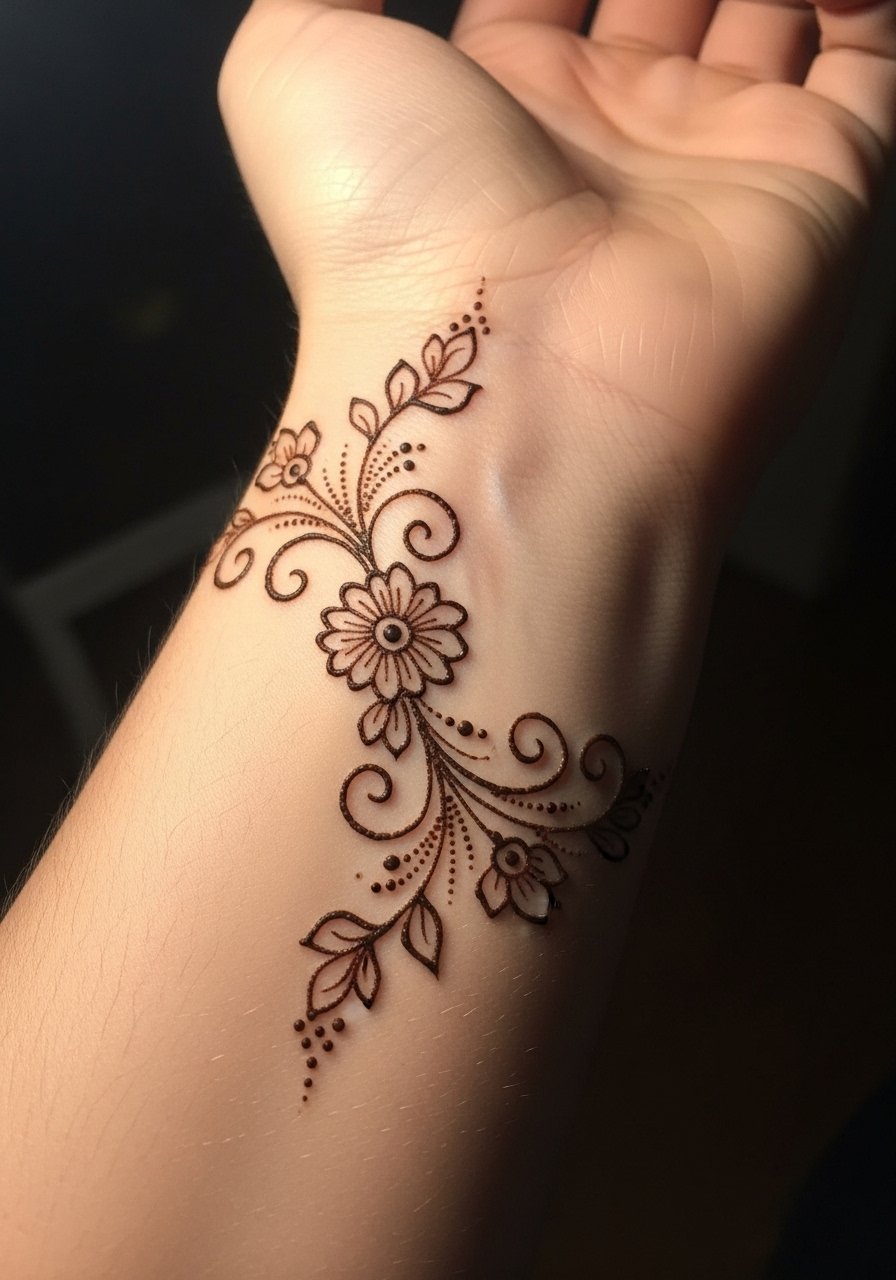
Floral wrist wraps are my go-to when I want a jewelry look without rings or bracelets. The motifs echo traditional floral henna designs and sit comfortably on the flat wrist skin, which helps during application and healing. Pain is mild; the biggest issue is movement—keep wrist activity light for the first few days. Healed results show delicate dotwork and small leaves; they suit people seeking floral henna meanings like joy or femininity. Avoid overcrowding the pattern—negative space keeps the design readable. If you like stencil-driven henna, bring a reference and ask the artist for a repeatable band motif.
3. Back of Hand Mandala
Style/Technique: Mandala / Dotwork
Pain Level: Medium (4-5/10)
Session Time: 1.5–3 hours
Best For: Henna for hands, symmetric statement
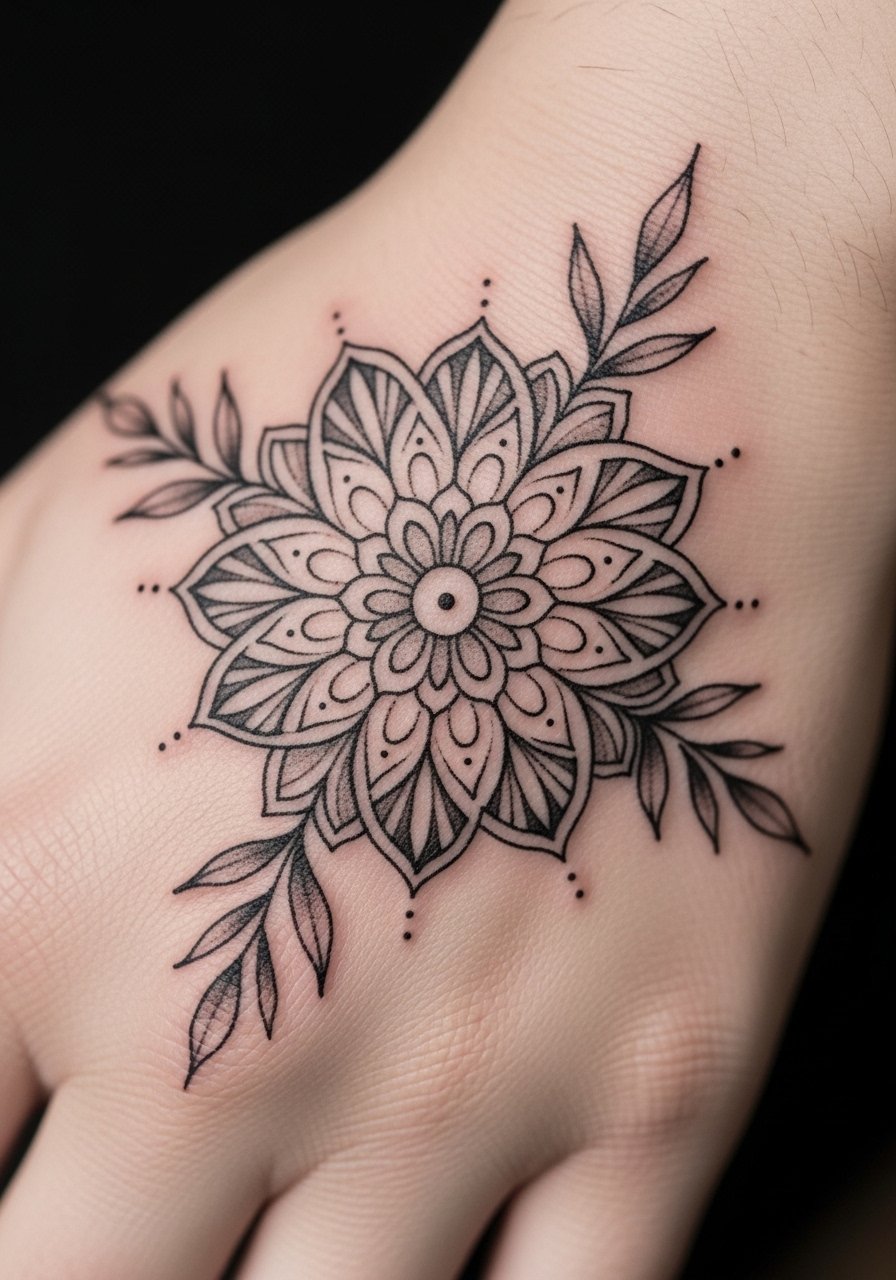
Back-of-hand mandalas give that classic henna focal point without covering the whole palm. The symmetry reads well and small leaf sprays soften the edge. Hands are higher-movement areas, so expect a bit more sting and slightly longer surface healing. From what I’ve seen, dotwork and mandala lines can hold up nicely if the artist balances detail with slightly bolder anchor lines. Common mistake: packing too much tiny detail that blurs—opt for readable modules. This is a great place to test a mandala that might become a centerpiece in a future sleeve.
4. Paisley Thumb Wrap
Style/Technique: Paisley / Minimalist
Pain Level: Medium (4/6/10 depending on positioning)
Session Time: 45–90 minutes
Best For: Jewelry-inspired finger accents
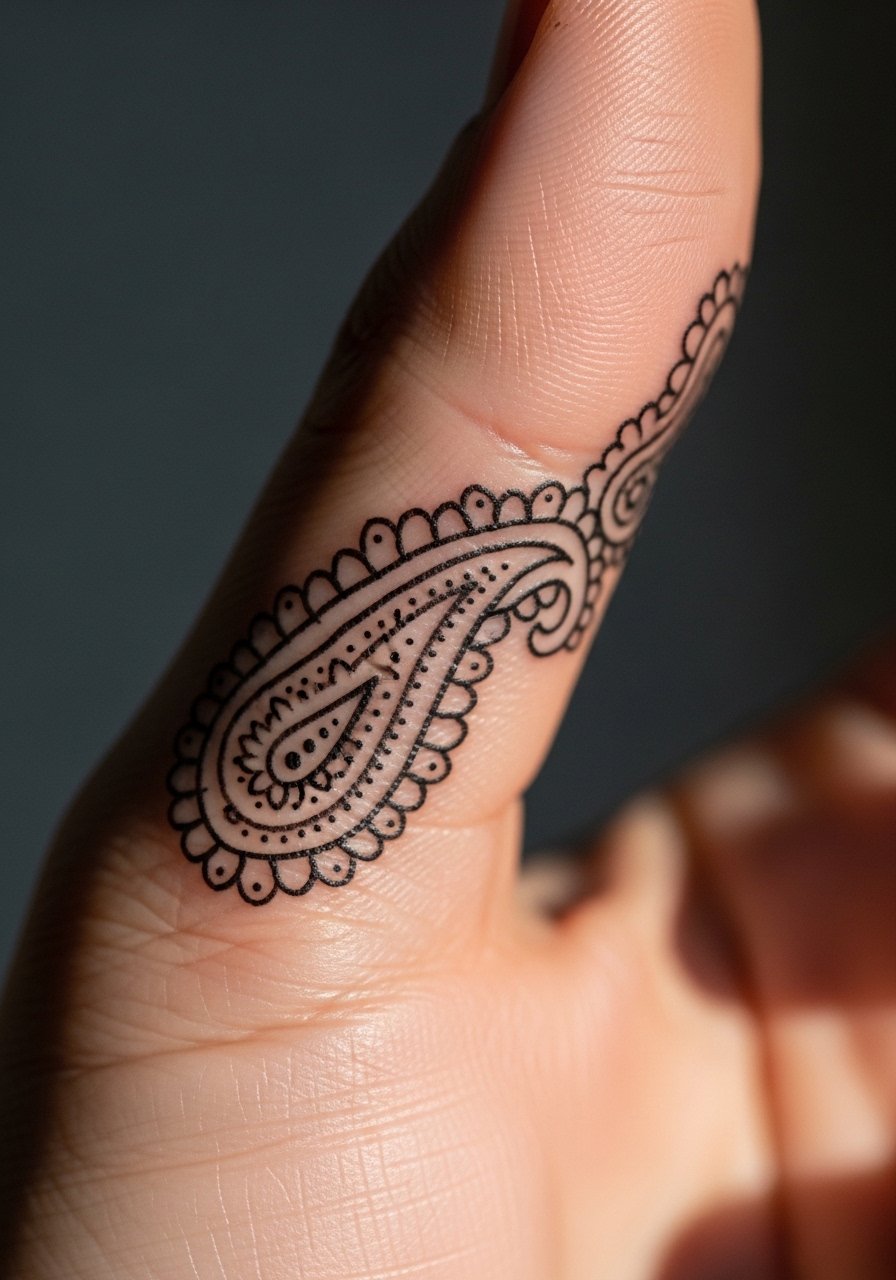
Thumb wraps channel South Asian paisley motifs in a compact, tactile space. Fingers and thumbs move a lot, so expect more touch-ups historically, but a clean paisley with clear outlines will age better than microfiligree. This placement is ideal if you want discreet henna-style tattoos that peek out while texting or holding a cup. Pain is higher than the outer forearm but manageable for short sessions. Tip: ask the artist to slightly thicken outer lines to help the piece stay crisp over time.
5. Sun and Moon Wrist Cluster
Style/Technique: Illustrative / Minimalist
Pain Level: Low (2-3/10)
Session Time: 45–90 minutes
Best For: Cosmic motifs, small forearm accents
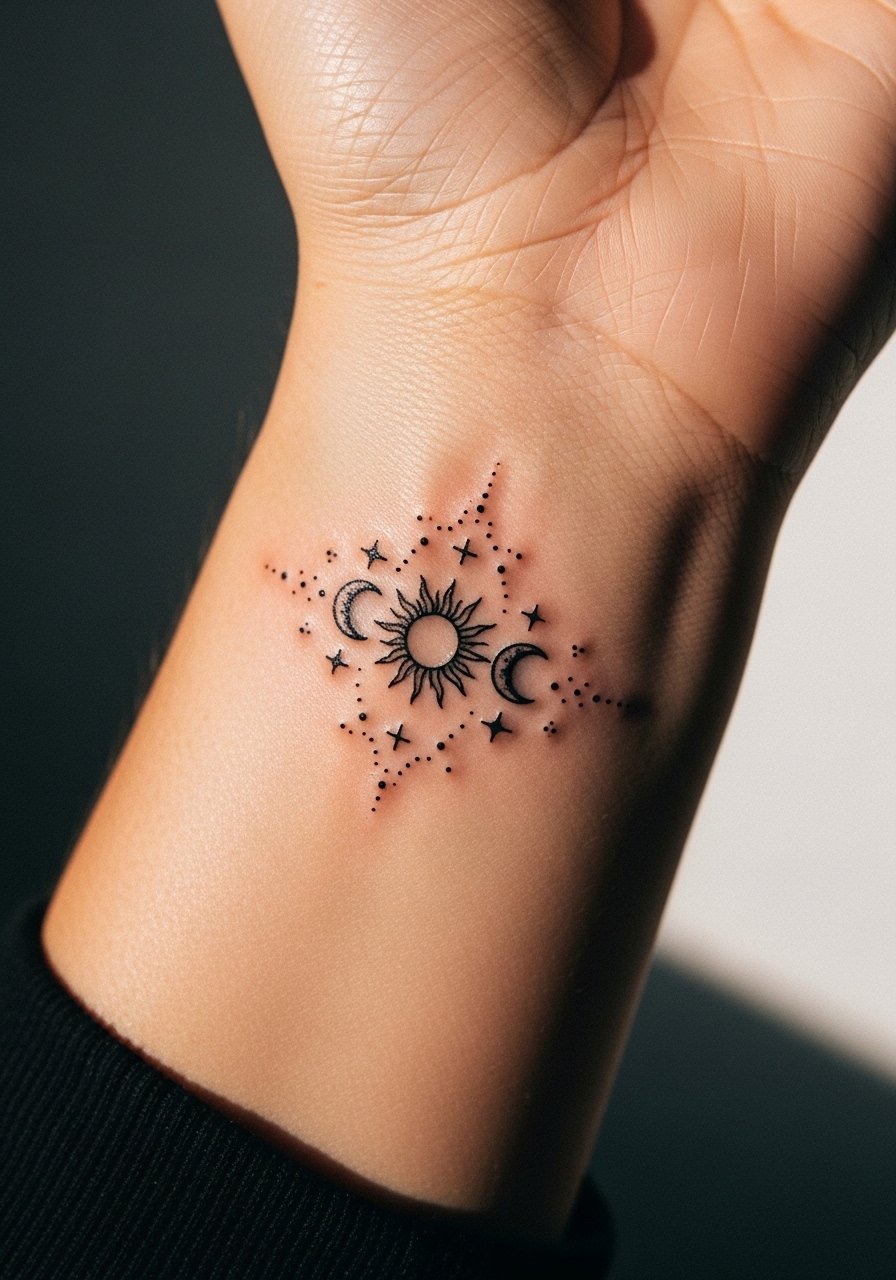
Cosmic henna-style motifs—sun, moon, and little stars—translate beautifully into small tattoos. I’ve noticed them often paired with dotted trails that mimic henna dotwork. Wrist placement is easy to hide with sleeves but shows off in summer. Pain is low, healing quick; keep the area moisturized as dots can scab more than lines. These designs feel youthful and symbolic—great for first henna tattoo experiments without full sleeves. One mistake people make is cramming too many tiny elements; negative space keeps celestial clusters readable.
6. Ring Finger Henna Band
Style/Technique: Minimalist / Jewelry-Inspired
Pain Level: Medium (3-5/10)
Session Time: 30–60 minutes
Best For: Tiny visible henna-style tattoos, finger jewelry substitute
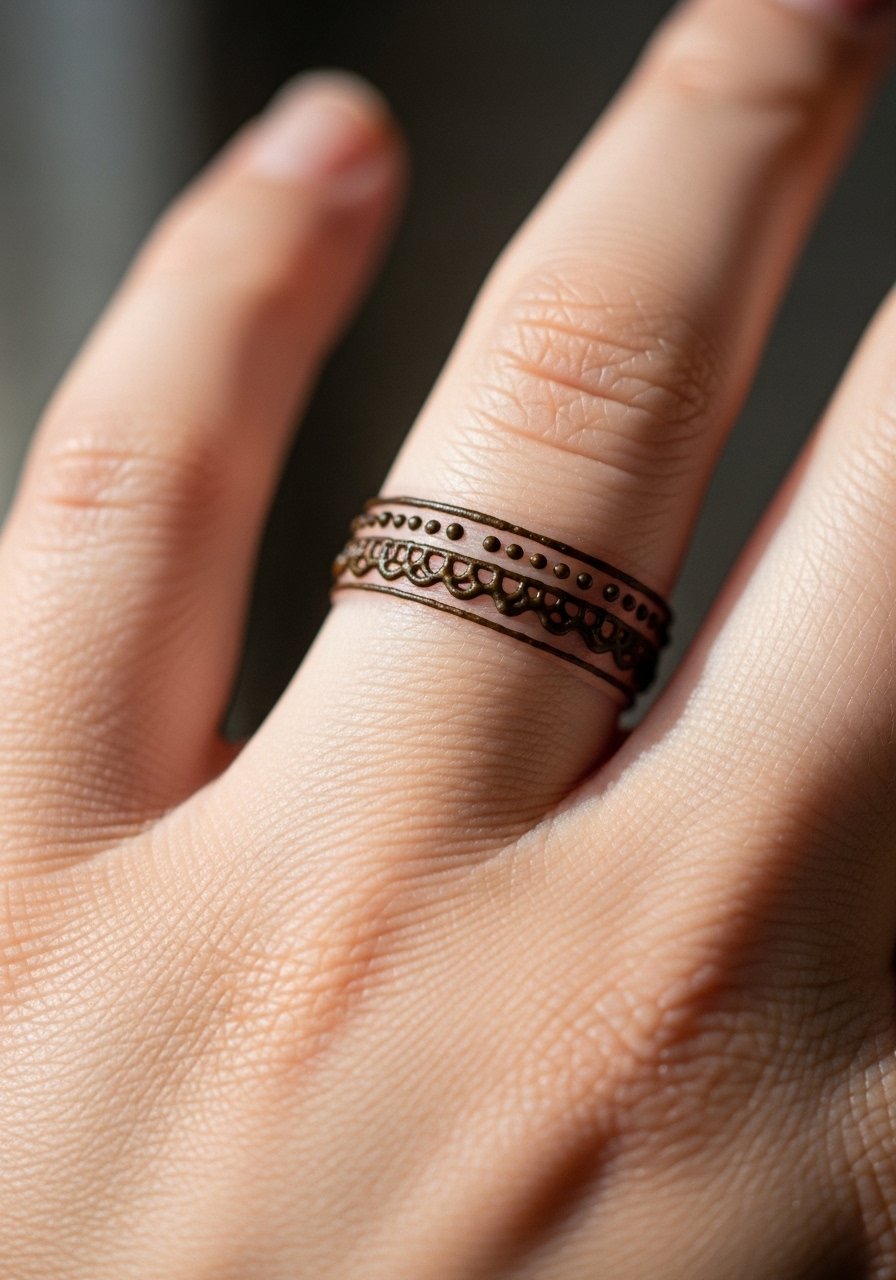
Finger bands are classic henna-style tattoos that mimic mehndi rings. They’re small and perfectly suited for people unsure about permanent pieces. Fingers see constant washing, so expect faster fading and potential blurring; thicker bands or tiny gaps help maintain clarity. Pain can spike depending on proximity to bone. For longevity, plan on occasional touch-ups. I recommend a simple scallop or dot pattern over ultra-intricate fills—too much detail on fingers rarely holds.
7. Henna Freckle Cluster on Cheekbone
Style/Technique: Minimalist / Dotted
Pain Level: Low (1-2/10)
Session Time: 15–30 minutes
Best For: Subtle temporary look, festival-ready accents
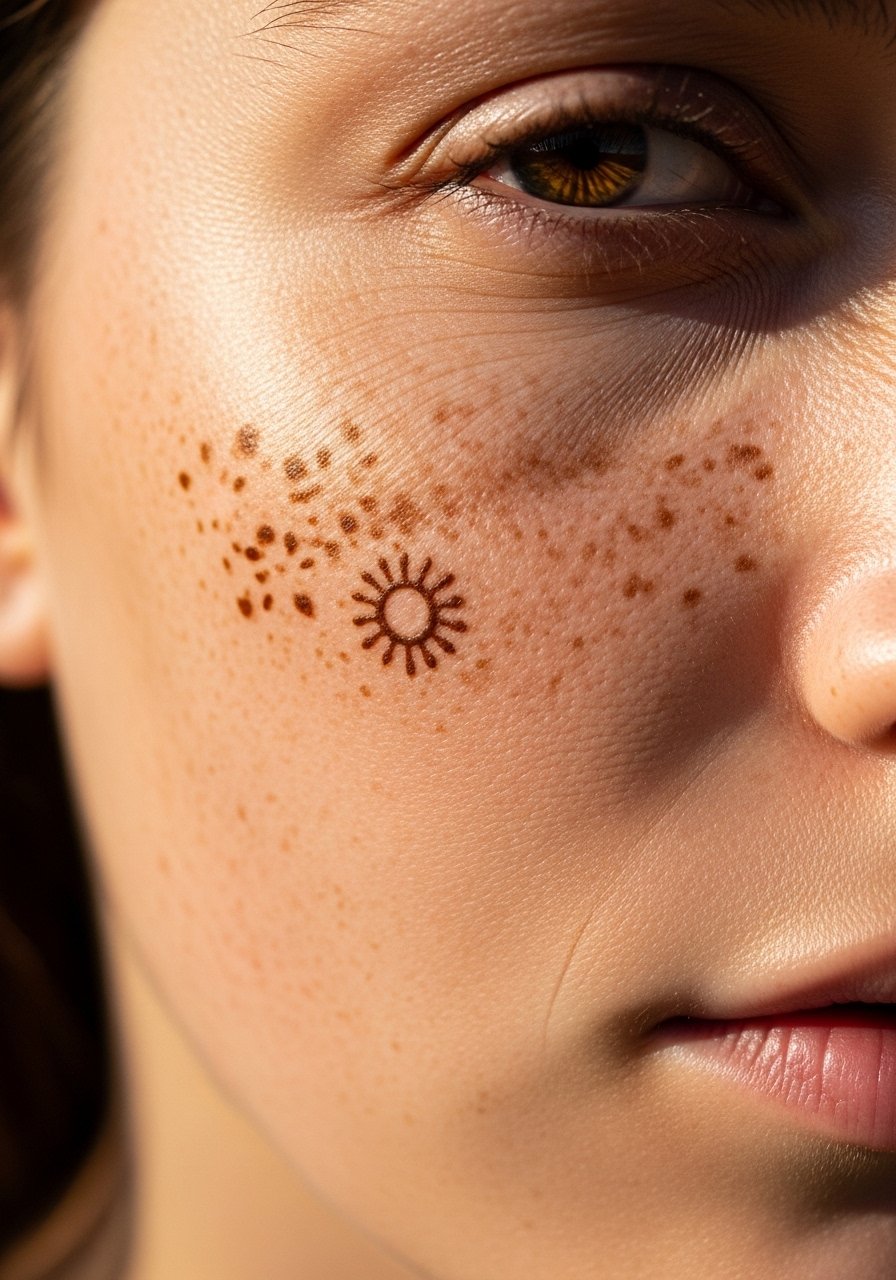
Henna freckles and tiny sun motifs on the cheekbone are an underused idea I’ve tried myself. They read playful and very low-commitment. Facial skin is more sensitive but small dots are quick and relatively low-pain. Healing is visible sooner but keep makeup minimal while it settles. Avoid overcrowding and choose placement that complements your bone structure. These are great for festival looks and to test how visible you want facial ink to be long-term.
8. Berber Geometric Ankle Lines
Style/Technique: North African Geometric / Linear
Pain Level: Low-Medium (3/5/10)
Session Time: 1–1.5 hours
Best For: Ankles, stories and stripes, toe-flossing footwear
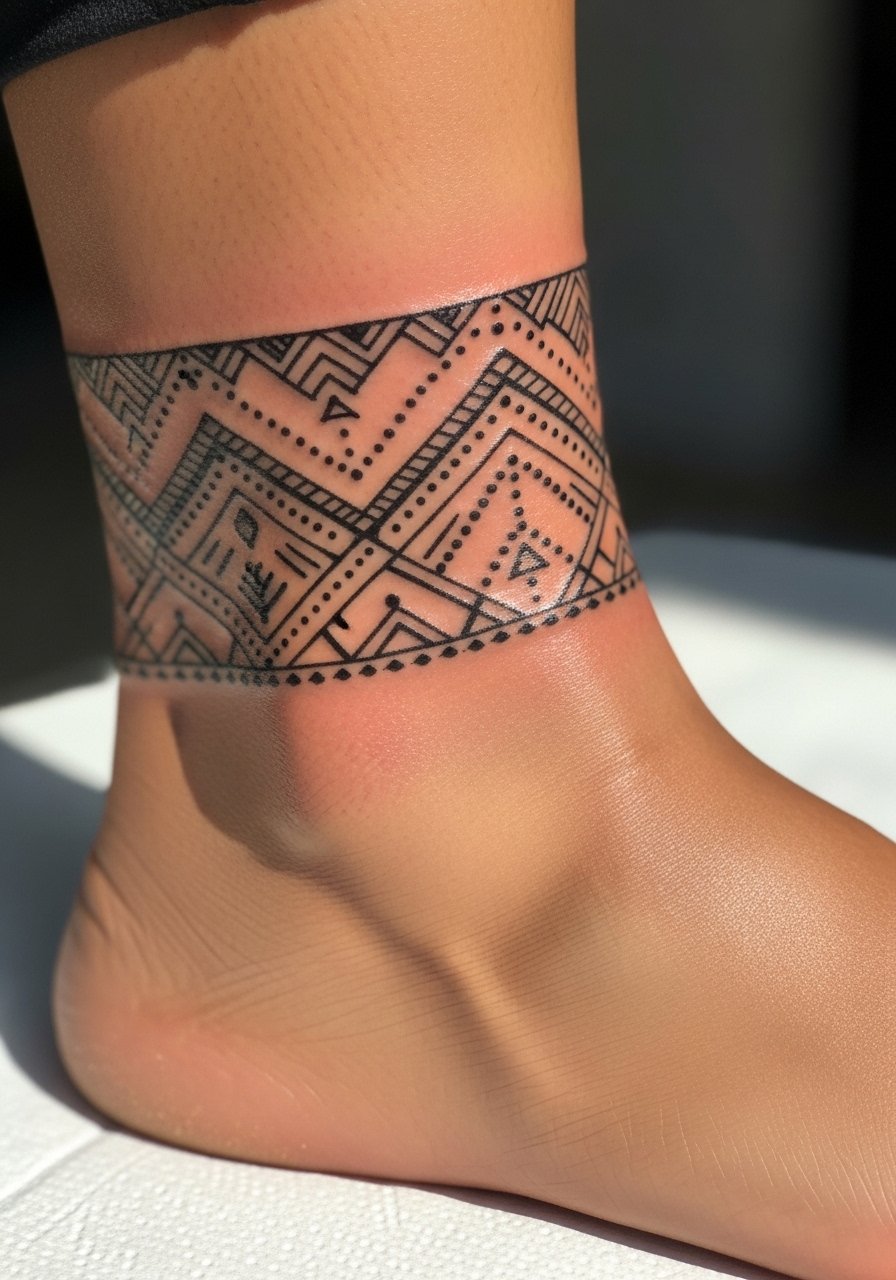
Berber geometric lines feel like storytelling bands—bold, rhythmic, and great around the ankle. This placement looks striking with sandals and holds a henna-style aesthetic without full-fill complexity. Ankles tend to bruise less than fingers but can be sensitive near bone. Keep the first week light on long walks that rub the area. I’ve seen these hold up well if the artist uses distinct negative space and consistent line weight.
9. Henna Toe Motif Under Shoe Line
Style/Technique: Dotted / Fragmented
Pain Level: Low (2-3/10)
Session Time: 20–40 minutes
Best For: Hidden-elegance, summer shoes
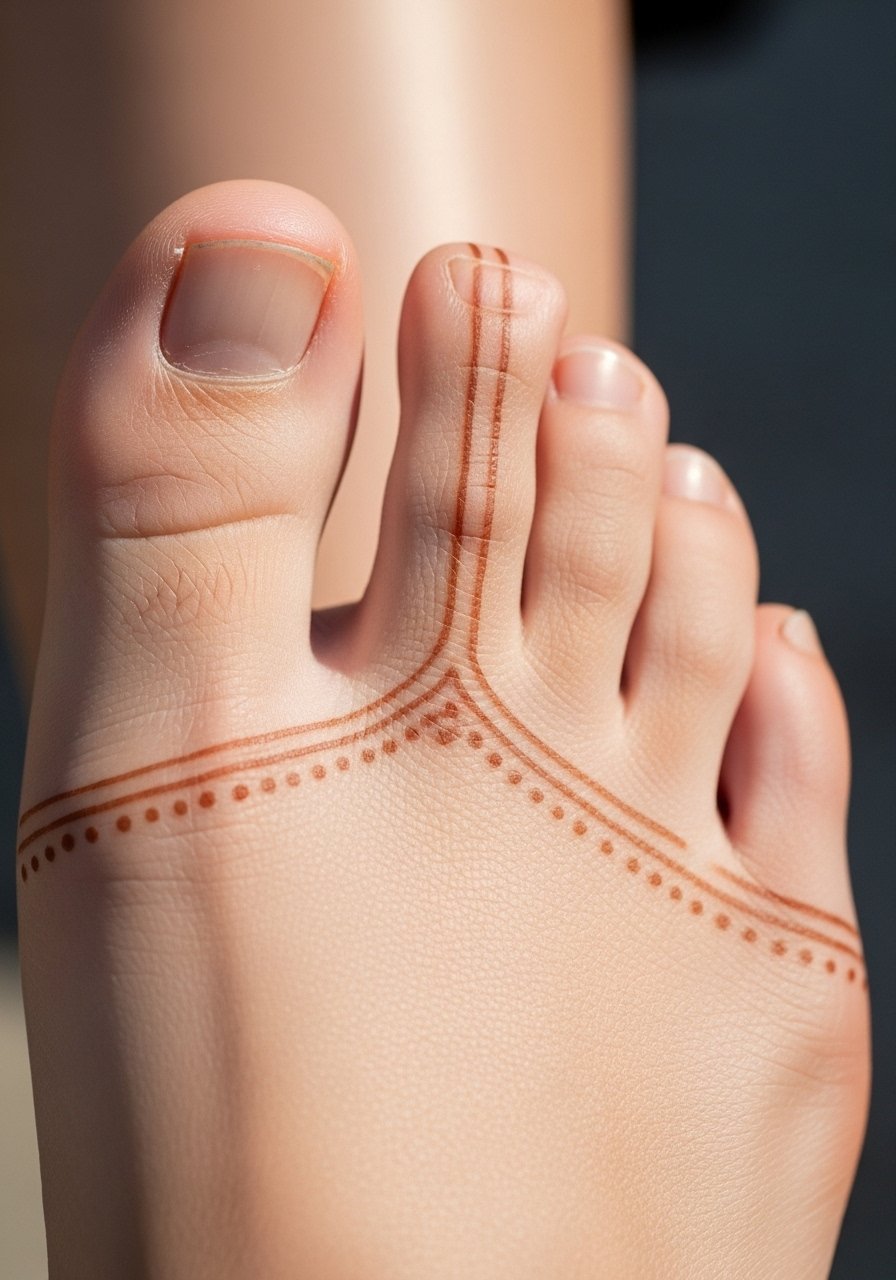
Toe patterns and tiny designs under the shoe line are a clever henna-inspired choice—visible in sandals, hidden in closed shoes. Foot skin heals differently; expect more peeling and caution with shoes during the first week. Pain is mild but locations near joints can be twitchier. Artists who favor small dot-and-line motifs excel here. These are great toe tattoos under shoes that combine event-ready aesthetics with everyday concealability.
10. Modern Fusion Bracelet on Wrist
Style/Technique: Neo-Traditional / Jewelry Band
Pain Level: Low (2-3/10)
Session Time: 1–2 hours
Best For: Wrist jewelry alternative, repeatable motif
Modern fusion bracelets mix paisley, petals, and geometric nodes into a band that reads like delicate jewelry. I’ve seen these across Pinterest and tattoo reels—artists often use stencil templates for symmetry. Ideal for those who want a consistent accessory without actual jewelry. Healing is straightforward; keep hand washing gentle. This is an office-friendly henna-style tattoo that balances detail and readability.
11. Mini Mandala Behind Ear
Style/Technique: Mandala / Micro
Pain Level: Low (1-3/10)
Session Time: 30–60 minutes
Best For: Hidden henna motifs, subtle symmetry
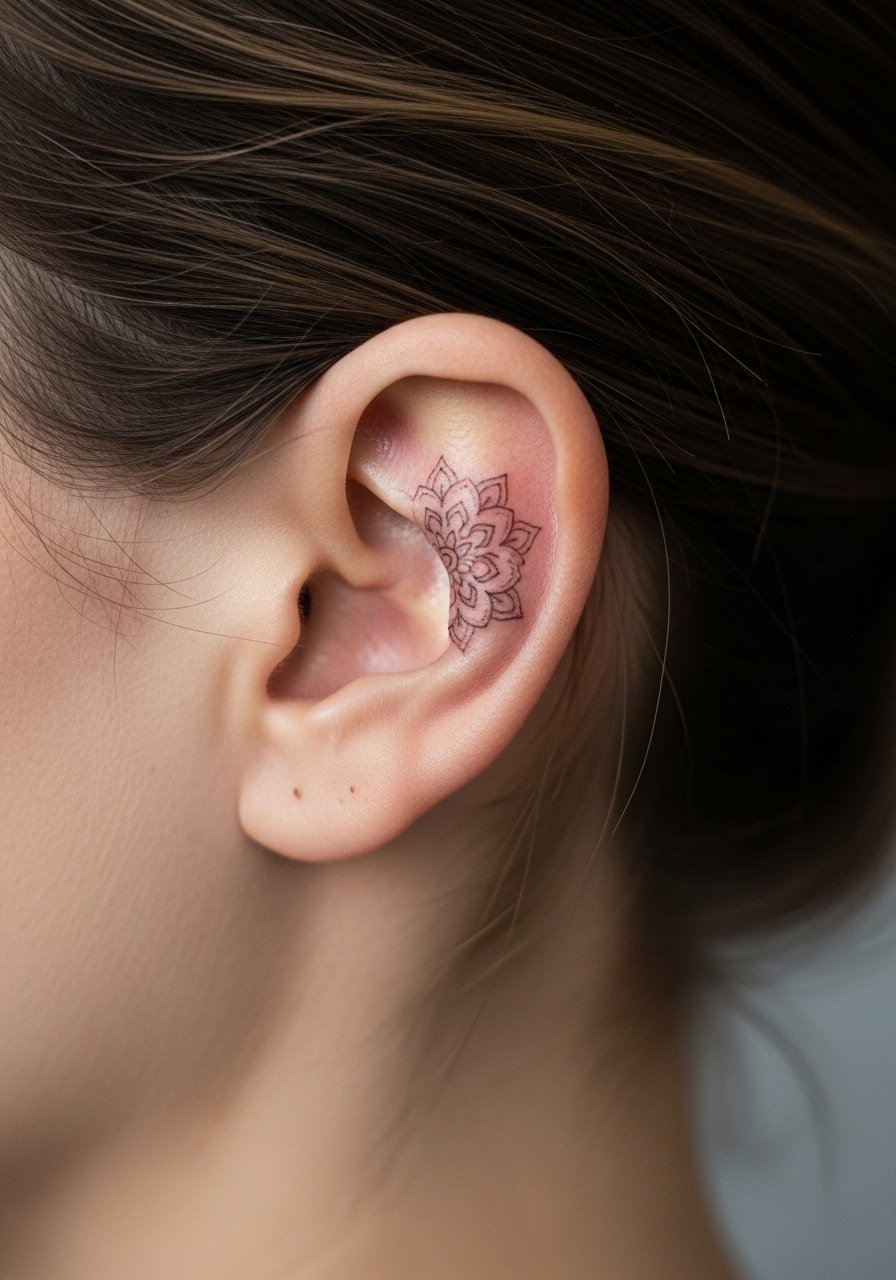
A behind-ear mandala is a neat spot if you want a henna-style accent that’s easy to conceal with hair. The area is low-pain but smaller size means detail must be simple. Healed results read as delicate geometric flowers. Avoid overcomplicating the design; a micro-mandala with dotwork accents is timeless. This placement is great to test a more central mandala concept for future larger pieces.
12. Sun Ray Shoulder Cap
Style/Technique: Illustrative / Radiant Linework
Pain Level: Low (2-3/10)
Session Time: 1–2 hours
Best For: Shoulder exposure, summer-ready statement
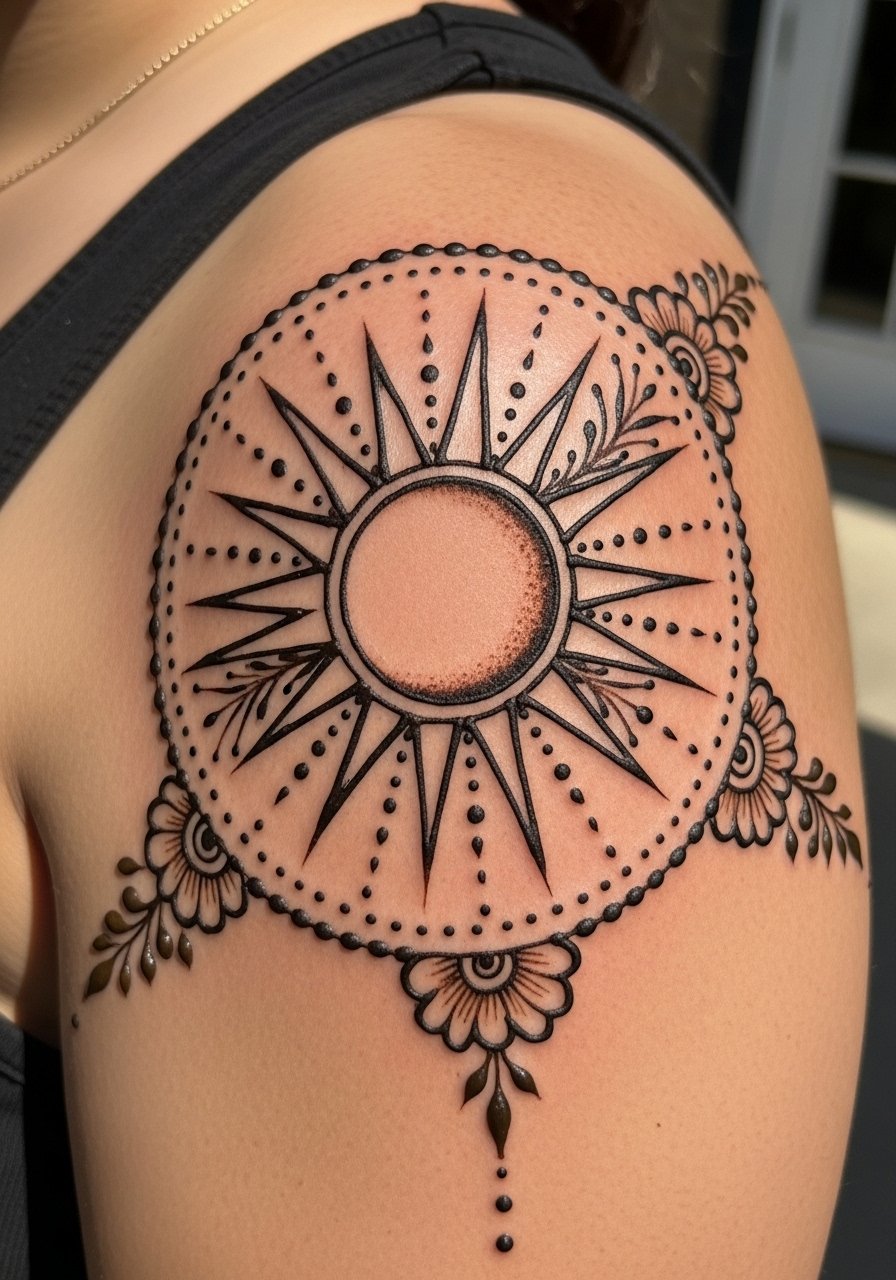
A sun ray shoulder cap mimics henna’s radiant motifs and works beautifully with tank tops. Shoulders are forgiving—low pain and quick healing. This placement lets you test medallion-like designs that could extend later into back pieces. Keep lineweight balanced; too-thin rays can fade into a blur. From what I’ve noticed, simple crescents and rays age better than micro-shading in this spot.
13. Gulf-Style Evil Eye Fill on Instep
Style/Technique: Middle Eastern Fill / Protective Motif
Pain Level: Low-Medium (3-4/10)
Session Time: 1–1.5 hours
Best For: Instep/foot protection motifs
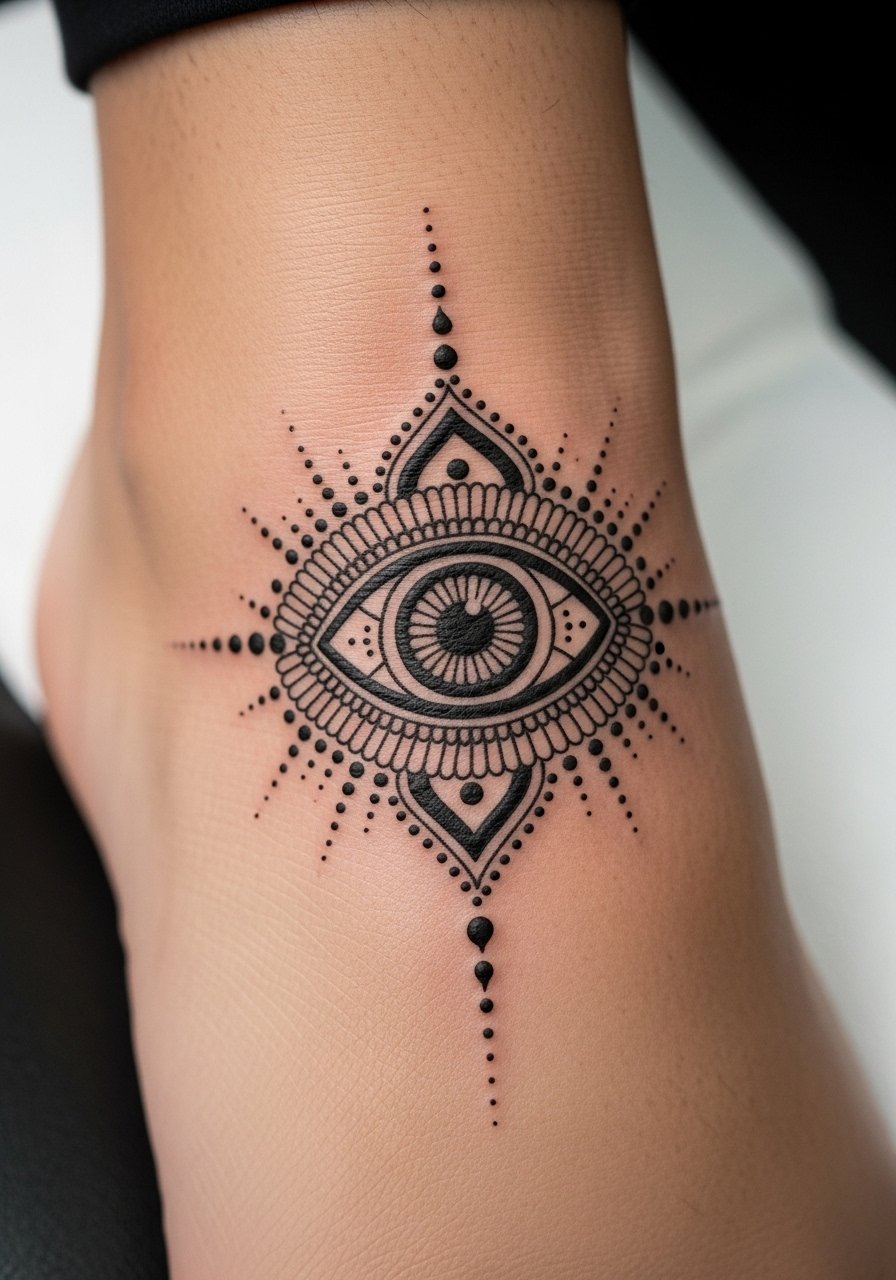
Gulf-style fills and protective symbols like the evil eye are under-covered but powerful henna-style options. Instep placement reads traditional and can peek out of shoes. Feet require care during healing—limit tight footwear and long walks. The look pairs bold central motifs with dot-and-dash fills; ask your artist to avoid tiny hatch fills that blur quickly. Symbolically, it’s a strong option if you want cultural resonance without full bridal patterns.
14. Hidden Initials in Paisley on Ribcage
Style/Technique: Paisley / Personalized
Pain Level: High-Medium (6-7/10)
Session Time: 2–3 hours
Best For: Private personalization, I-spy elements
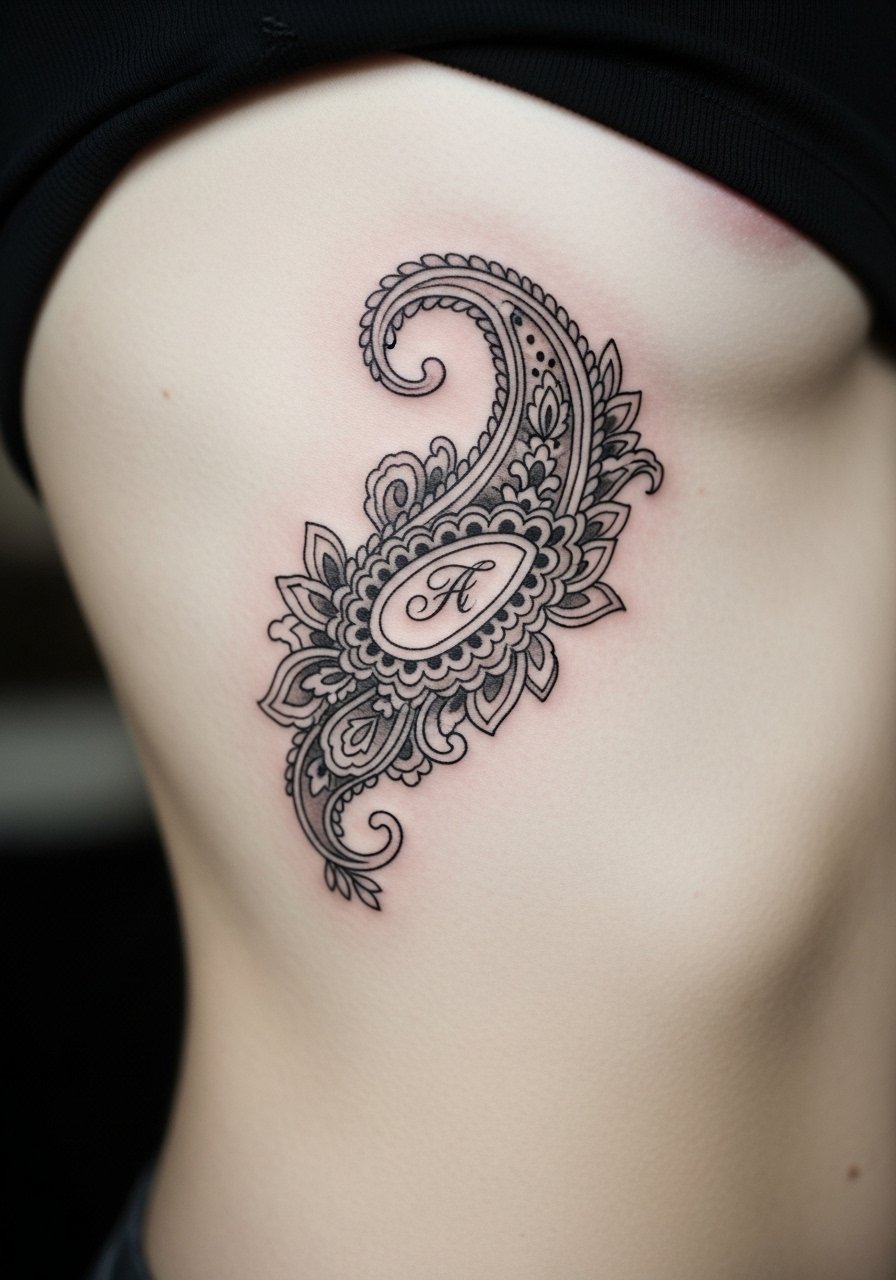
I love the idea of hiding initials or tiny symbols inside a paisley—it's playful and private. Ribcage placement is more painful and needs longer surface healing due to movement and clothing contact. For delicate personalization, you’ll want an experienced artist who can balance legibility and ornament. Healed paisley that integrates initials looks like an easter-egg; just expect increased soreness during the session and avoid tight bras or waistbands while it heals.
15. Celestial Dot Trail on Collarbone
Style/Technique: Minimalist / Dotted Line
Pain Level: Low (2-3/10)
Session Time: 30–60 minutes
Best For: Collarbone accents, layered jewelry effect
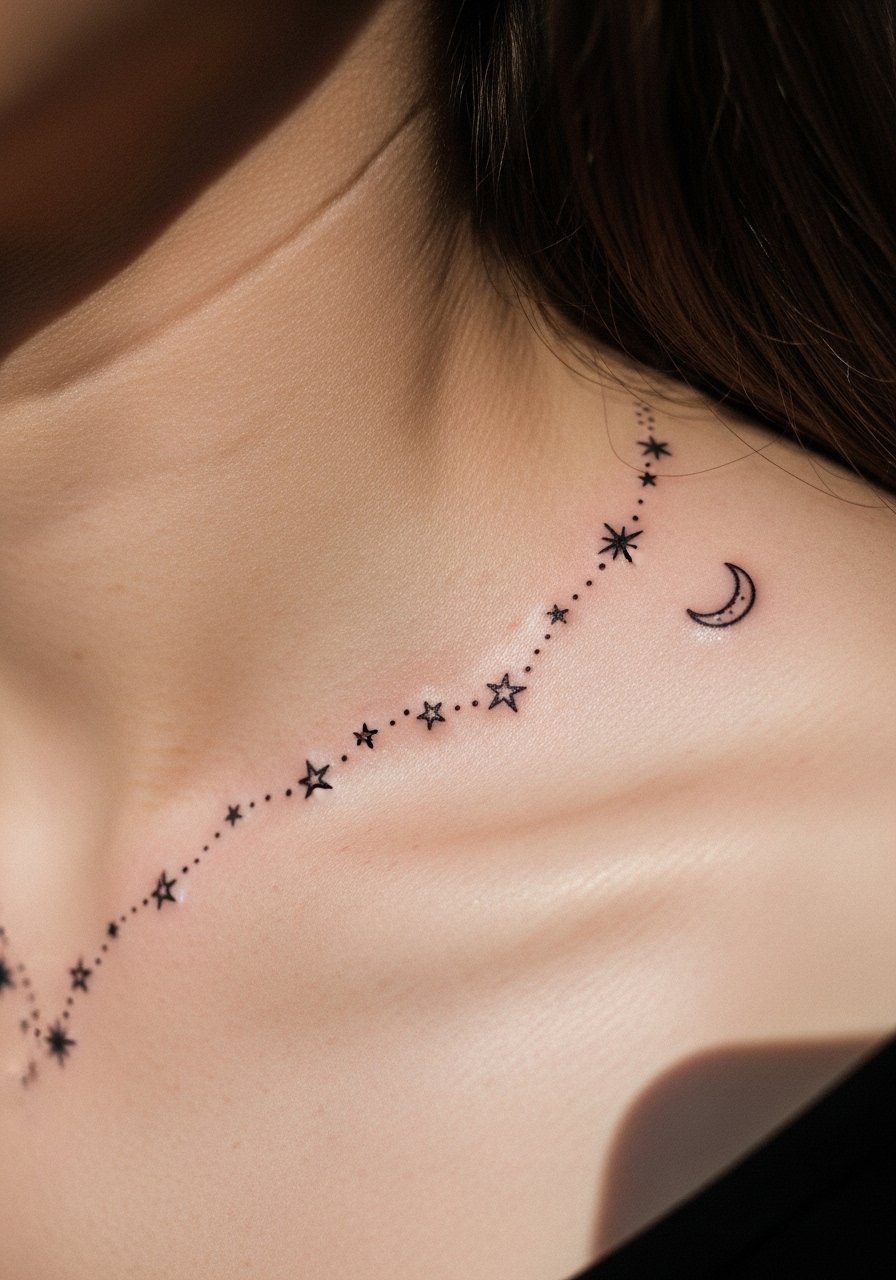
Collarbone dot trails are feminine without being fussy. The dotted henna-style trail mimics paste dotwork and layers well with necklaces. Pain is low but be mindful of clothing rubbing. Healed dots can look like a chain; ask for spacing that reads clearly at arm’s length. This placement suits people who want subtle henna-inspired meaning—cosmic charm without a full sleeve.
16. Thumb-to-Wrist Connecting Vine
Style/Technique: Illustrative / Vine Motif
Pain Level: Medium (3-5/10)
Session Time: 1–2 hours
Best For: Low-commitment sleeve-ish look
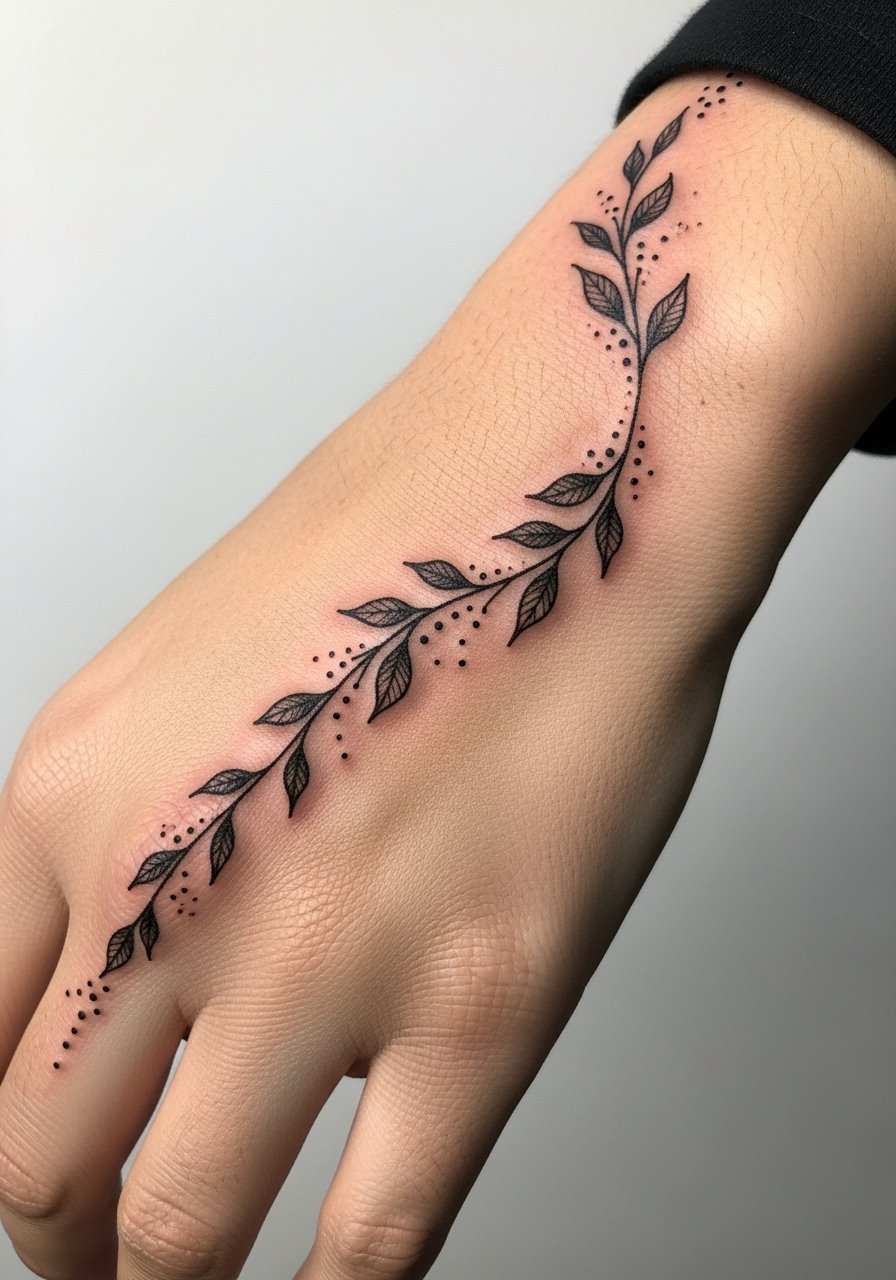
A connecting vine from thumb to wrist mimics bridal henna flow but stops short of full coverage. It feels like wearing a delicate hand chain. Expect mixed pain across areas—thumb base is more sensitive than flat wrist skin. Healing requires gentle movement and moisturizer. This is a good compromise if you like full-hand patterns but want to keep things minimal and wearably casual.
17. Delicate Spine Mandala Drop
Style/Technique: Mandala / Vertical Symmetry
Pain Level: Medium-High (5-7/10)
Session Time: 1.5–3 hours
Best For: Centerline statement, layered pieces
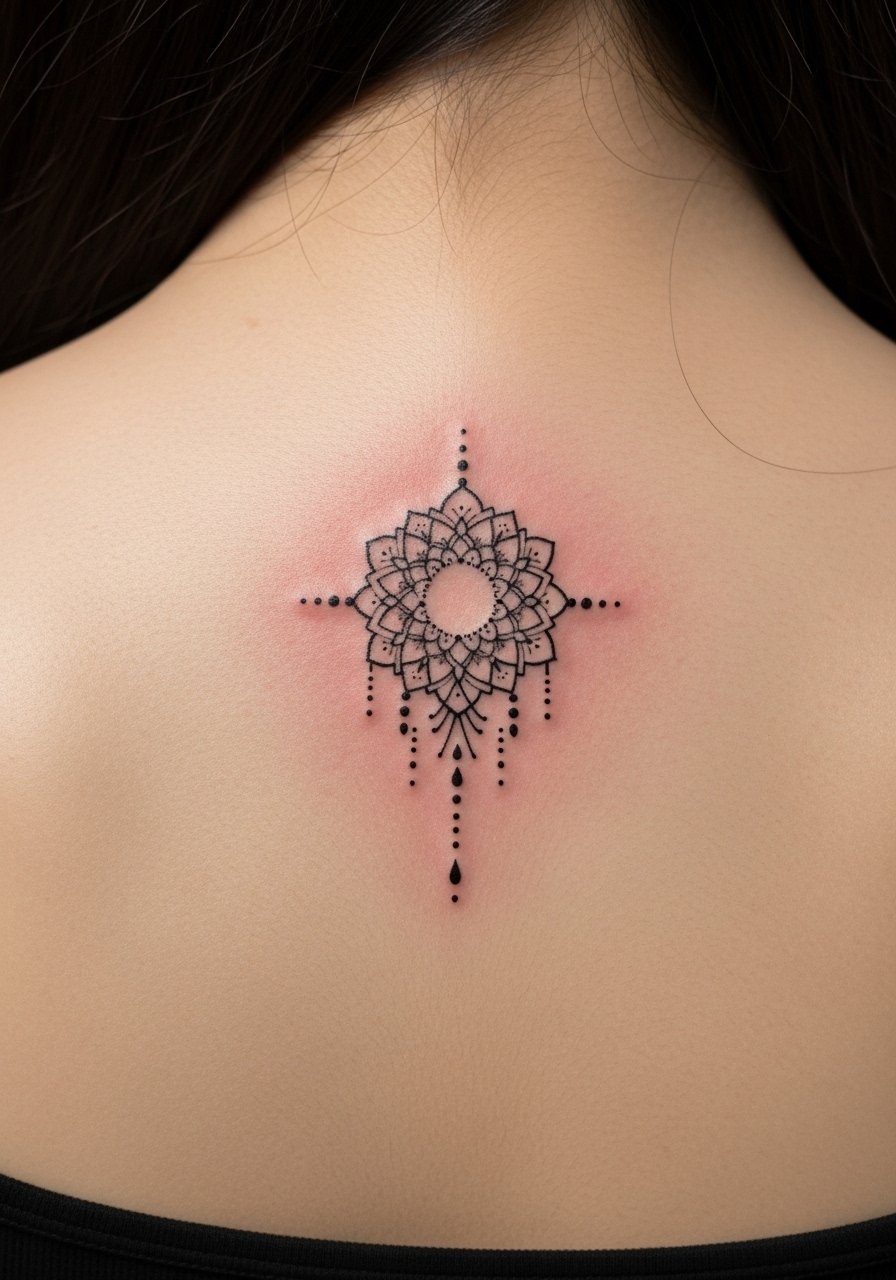
A mandala drop on the spine reads like a henna medallion elongated down the center. Spine work can be painful depending on the vertebrae proximity. Healing can be straightforward if you avoid sleeping directly on it in the first week. These vertical motifs age well because lines are protected by clothing most days. Avoid ultra-fine filigree; the spine rewards bolder anchors with delicate fillers.
18. Tiny Pop-Culture Henna on Inner Arm
Style/Technique: Illustrative / Fusion
Pain Level: Low (2-3/10)
Session Time: 45–90 minutes
Best For: Personalization, trending motifs (Baby Yoda, small icons)
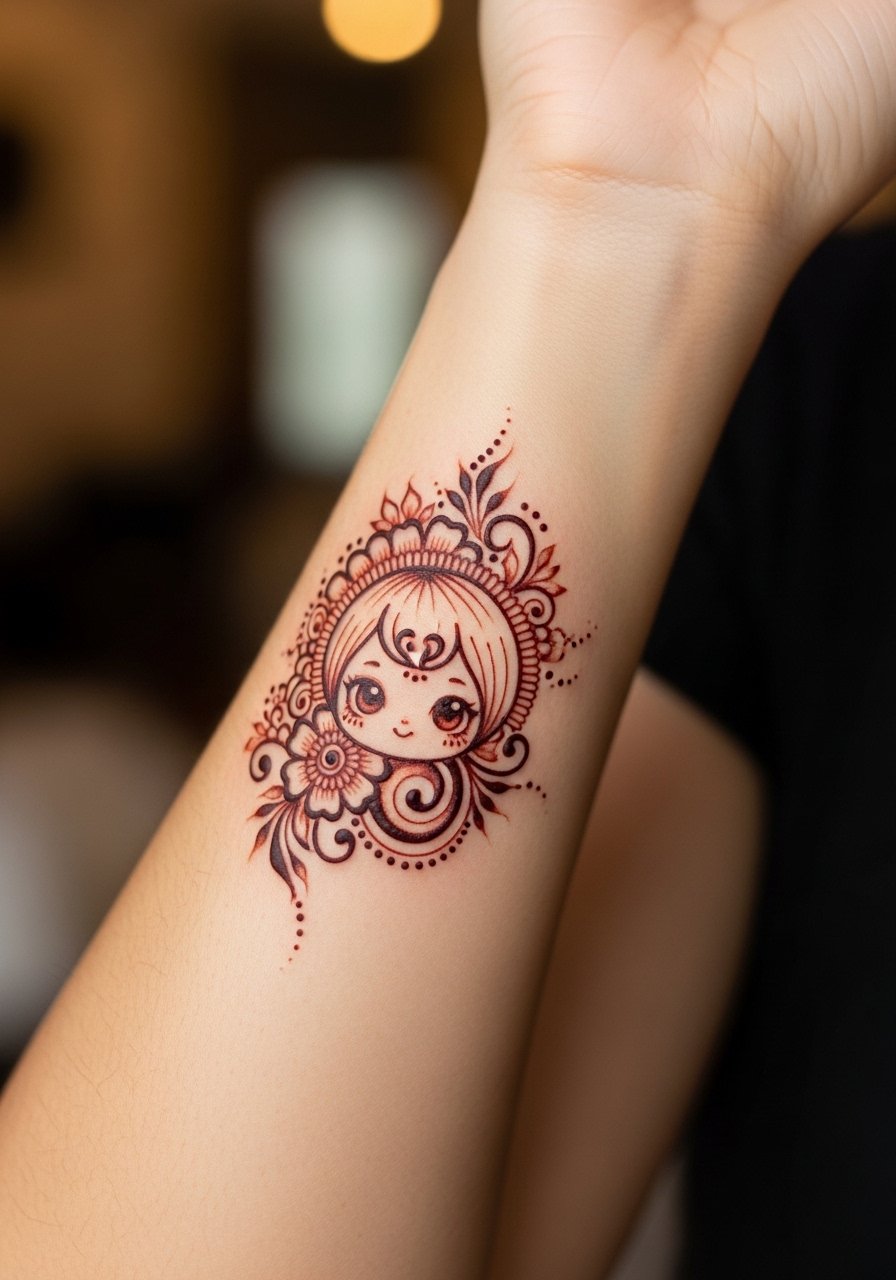
I’ve seen pop-culture henna designs—think tiny character outlines with henna-styled filigree—work great as fun experiments. Inner forearm is a forgiving canvas: visible but easily covered. Artists can fuse illustrative shading with henna dot borders for a fresh mix. Keep it small and simple to avoid early blurring. This is a playful path if you want a trendy motif that nods to henna without being culturally prescriptive.
19. Wrist Paisley Band for Office Days
Style/Technique: Paisley / Minimalist Band
Pain Level: Low (2-3/10)
Session Time: 45–90 minutes
Best For: Office-appropriate, repeatable design
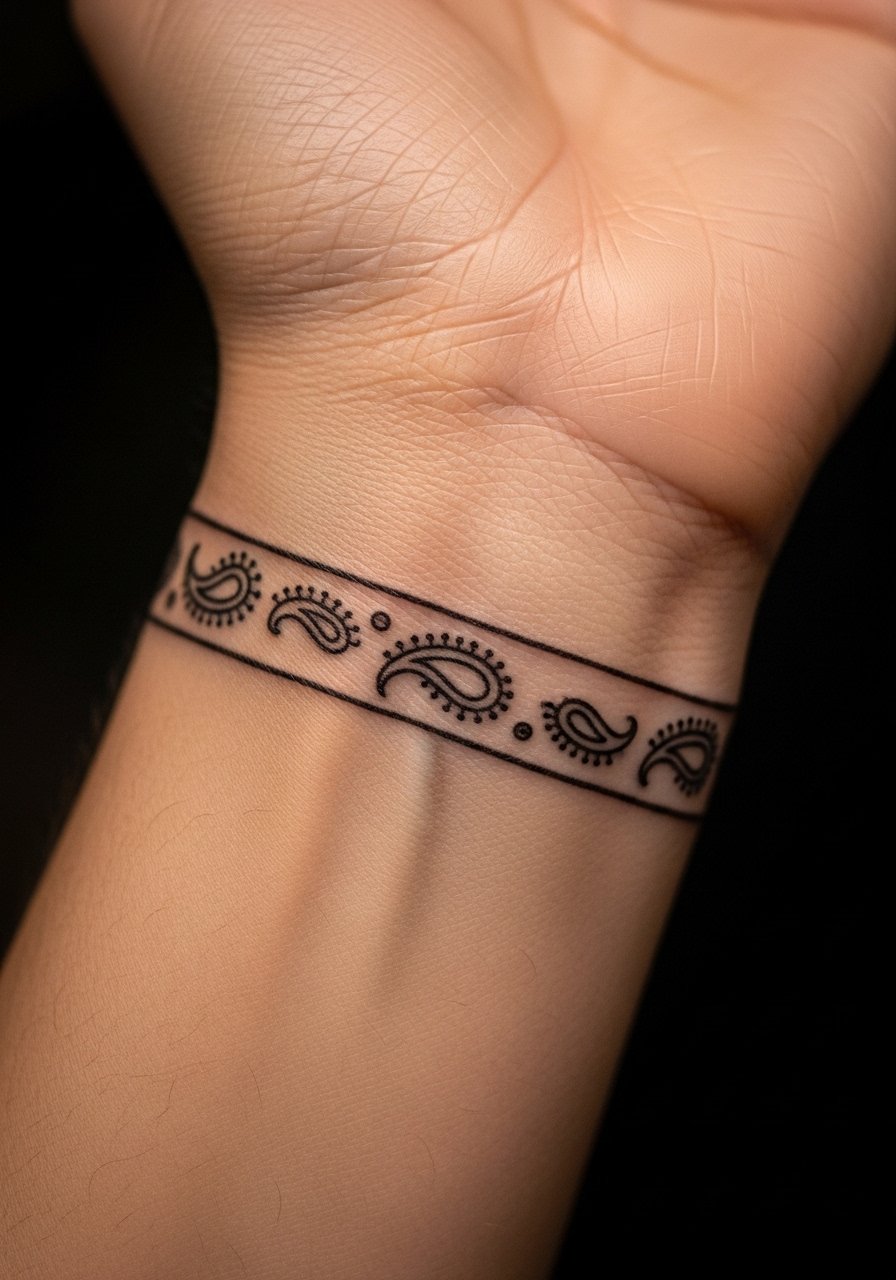
A thin paisley wrist band reads like henna jewelry and suits professional environments. I often recommend this to friends who want simple henna designs that won’t scream attention in work settings. Healing is quick; negative space is key for readability. Ask for a band that’s not too tight—comfort matters since wrists bend constantly.
20. Small Thigh Mandala Burst
Style/Technique: Mandala / Micro-Illustrative
Pain Level: Low (2-4/10)
Session Time: 1–2 hours
Best For: Hidden statement, covers scars gracefully
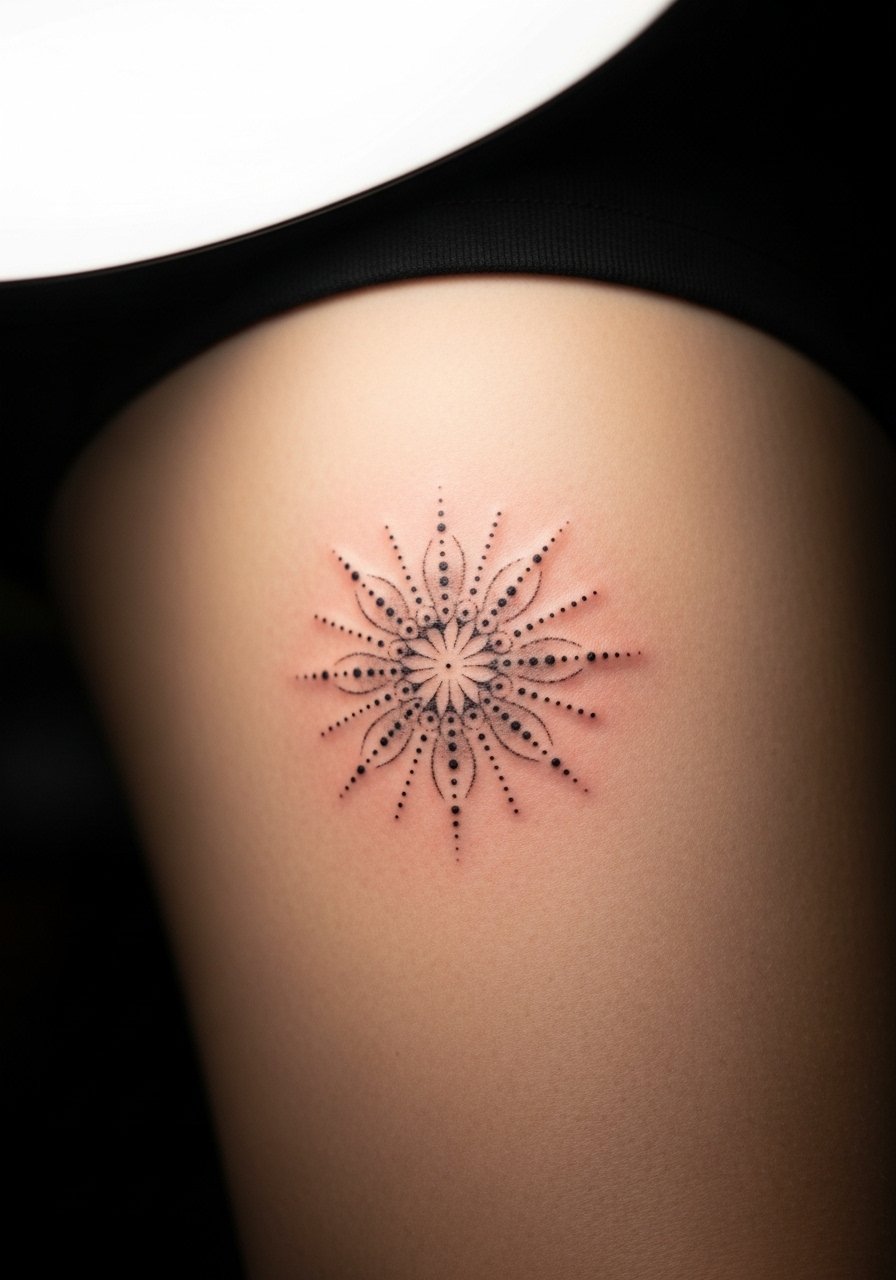
Upper thigh mandalas are intimate and easy to hide. Thigh skin accepts ink well and often produces clean healed lines. It’s a good spot if you want a larger henna-style motif without constant visibility. Pain is generally mild; healing benefits from loose clothing. This area is perfect for testing larger mandala forms before committing to back or sleeve work.
21. Micro-Lotus Behind Knee
Style/Technique: Minimalist / Symbolic
Pain Level: Medium (4-5/10)
Session Time: 30–60 minutes
Best For: Hidden symbolism, yoga-friendly placement
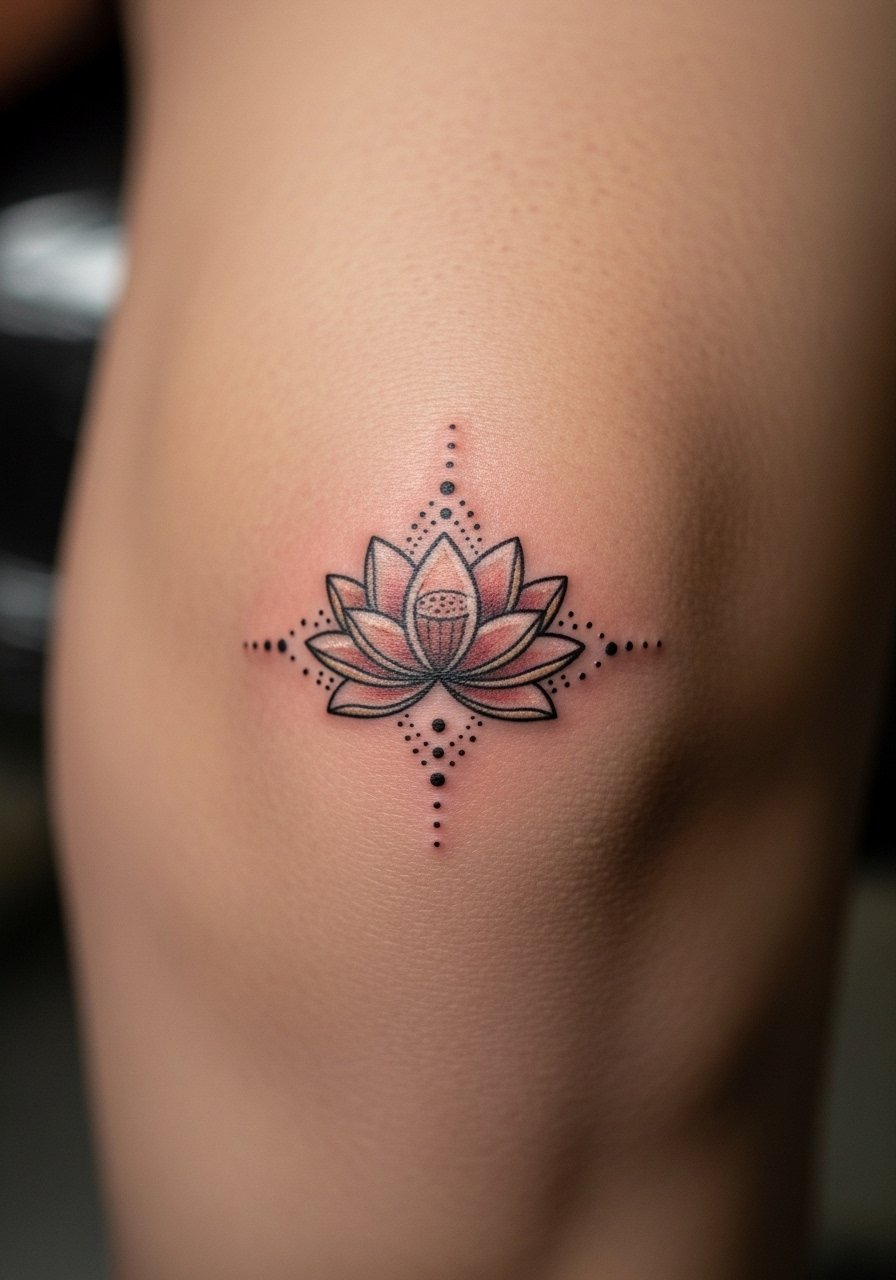
A tiny lotus behind the knee is an unusual henna-style spot that feels private and meaningful. Behind-knee skin creases; expect movement during healing and be cautious with workouts. The lotus reads well in small form and pairs nicely with leg hair patterns. It’s a subtle nod to floral henna meaning without occupying visible skin real estate.
22. Anklet Dotted Chain with Tiny Charms
Style/Technique: Minimalist / Dotted Jewelry
Pain Level: Low (2-3/10)
Session Time: 30–60 minutes
Best For: Summer-ready anklet effect
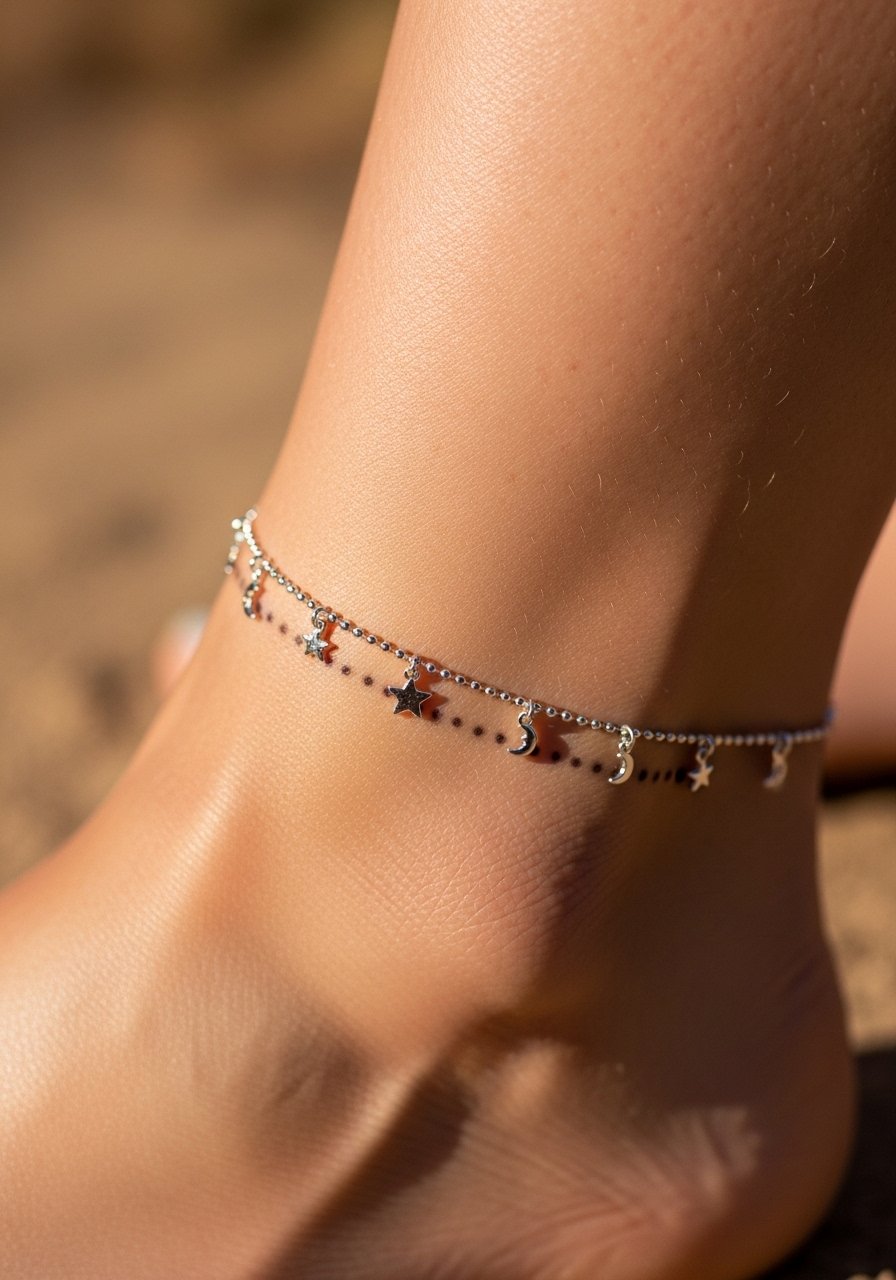
Anklet dotted chains are a favorite for mimicking henna ankle wraps with minimal permanence. The charm dots and tiny motifs read like jewelry and are ideal for sandals. Keep designs airy; too many tiny charms can merge over time. I’ve seen these hold up well if dots are spaced deliberately. Avoid tight socks for the first week to prevent smudging while it heals.
23. Inner Wrist Tiny Evil Eye
Style/Technique: Symbolic / Micro
Pain Level: Low (1-2/10)
Session Time: 15–30 minutes
Best For: Subtle protection symbol, everyday view
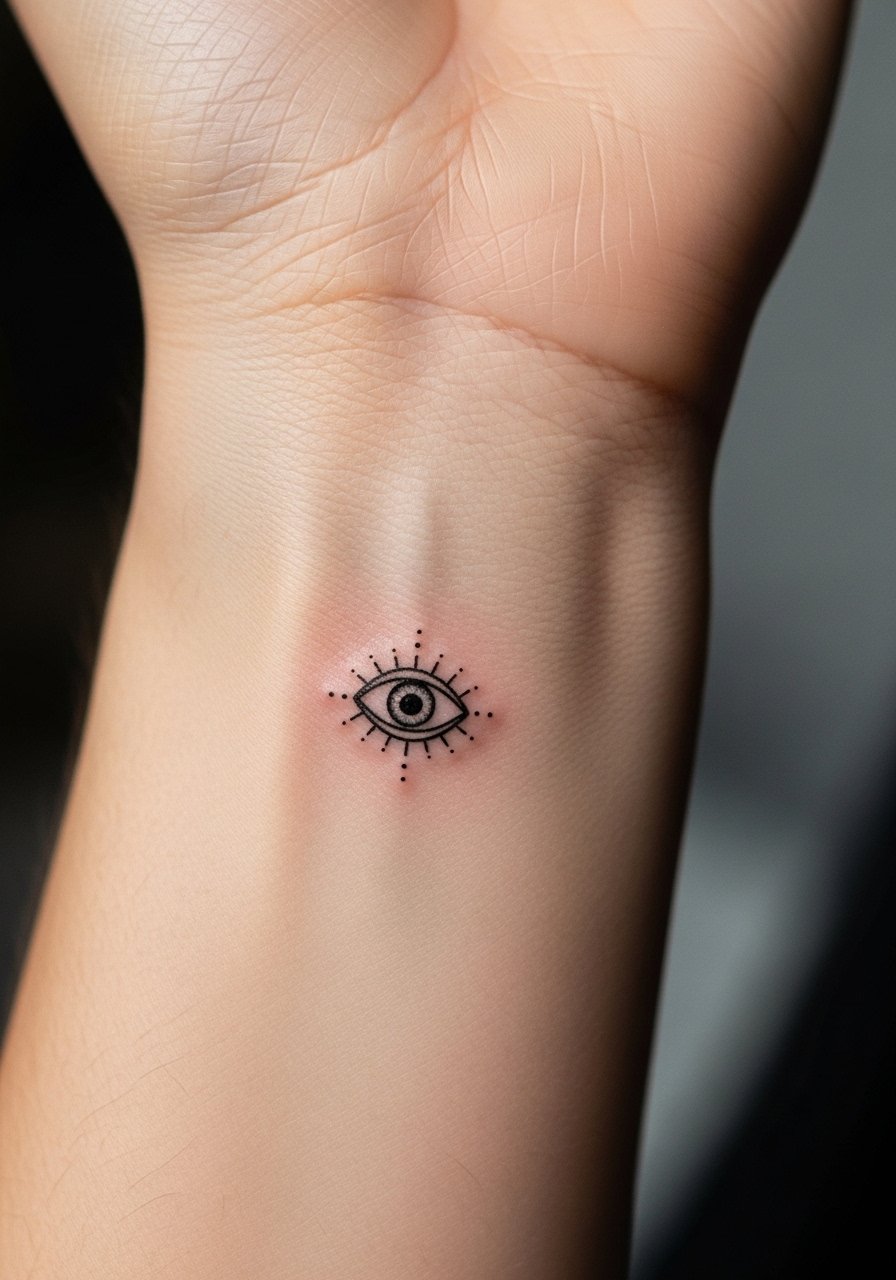
Tiny protective symbols like an evil eye on the inner wrist are discreet and meaningful. The area shows easily to the wearer and is simple to cover. Because it’s small, shading should be minimal; solid small black or navy centers with dot halos work best. From what I’ve noticed, micro-symbols here become a calming daily sight without being showy.
24. Finger Dot Trail Along Side of Index
Style/Technique: Minimalist / Dotted Line
Pain Level: Medium (3-5/10)
Session Time: 20–40 minutes
Best For: Finger accent, minimalist henna look

A vertical dot trail is a minimalist henna-style option for fingers that’s more subtle than full rings. Side-of-finger placement reduces rubbing compared to the pad area, but hands still see lots of use. Expect touch-ups down the line, and ask the artist for a slightly bolder spacing to avoid merging. This is perfect if you want a finger accent that mimics henna dotwork without a full wrap.
25. Toe-Follower Dot Row Along Little Toe
Style/Technique: Dotted / Tiny Line
Pain Level: Low (1-3/10)
Session Time: 15–30 minutes
Best For: Micro casual accents under shoe line
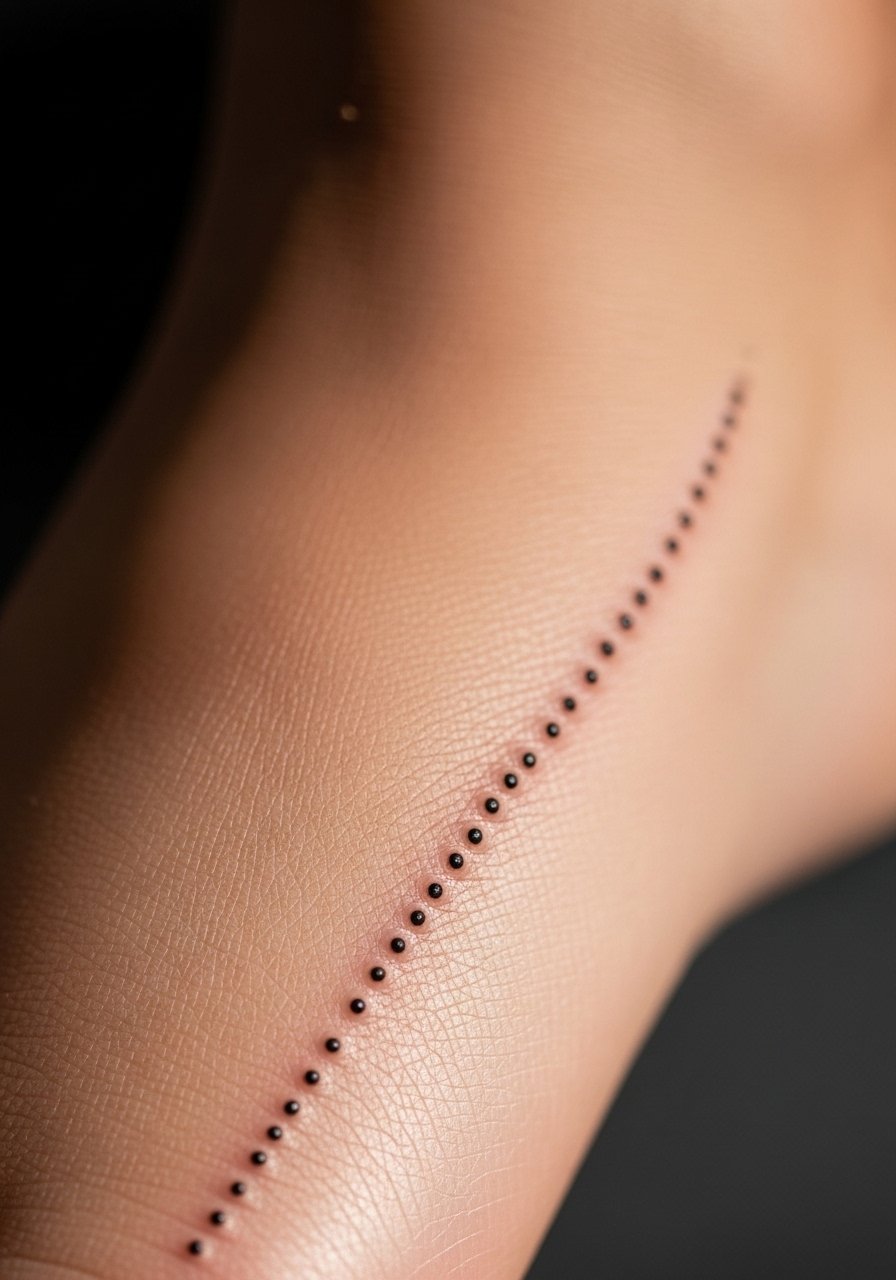
Tiny dot rows along the little toe are a rare but charming henna-style choice. They peek out from sandals and stay mostly hidden in closed shoes—great for those who want a secret accent. Toe skin can be finicky, so expect some initial flaking; keep footwear loose while healing. These small motifs are an under-covered idea I wish more people tried.
Tattoo Prep and Aftercare Essentials
Aftercare Essentials:
- Aquaphor Healing Ointment, 14oz tube — Recommended for the first 3–5 days to keep scabs soft
- Saniderm Transparent Adhesive Bandage, 6-inch roll — Second-skin option many artists use for initial protection
- CeraVe Fragrance-Free Moisturizing Lotion — Daily moisturizer after the first week
- Dr. Bronner's Unscented Castile Soap — Gentle cleaning in the first week
Before Your Appointment:
- Numbing Cream with 5% Lidocaine — Apply 30–45 minutes before only if your artist approves
- Tattoo Stencil Transfer Paper — Useful if you’re designing or testing henna stencil ideas at home
Long-Term Maintenance:
- SPF 50 Sunscreen Stick for Tattoos — Sunscreen is the #1 way to prevent fading long-term
- Mad Rabbit Tattoo Balm — Keeps healed tattoos vibrant and skin supple
- Hustle Butter Deluxe — Vegan aftercare alternative many artists recommend
Optional Comfort Items:
- Tattoo Numbing Spray — For sensitive areas or touch-ups
- Hydrocolloid Bandages for Small Tattoos — Extra protection for scabs or small spots
I keep a small kit with Saniderm, Aquaphor, and a fragrance-free lotion—those three cover most heal cycles. For DIY stencil practice, Mihenna Stencils or Henna King Cones are good names I’ve seen artists reference when talking about stencil-driven designs. Lemon-sugar seal techniques in henna help with even color, and the principle carries over: keep the paste (or in tattoo care, the scab) protected and moisturized.
Frequently Asked Questions
Q: How bad does a henna-style tattoo hurt?
A: Pain depends on placement. Outer forearm/wrist = low (2–3/10). Fingers, ribs, and spine = higher (5–7/10). It’s usually more annoying than unbearable. For sensitive spots, ask your artist about a numbing cream with 5% lidocaine; it helps but won’t remove all sensation.
Q: How long until a small henna-style tattoo heals?
A: Surface healing: about 1–2 weeks for most small pieces. Full settling: 6–12 weeks for lines to soften and color to settle. Keep the area clean with a gentle soap like Dr. Bronner's Unscented Castile Soap and moisturize lightly with CeraVe Fragrance-Free Lotion.
Q: Will henna-style dotwork fade faster than lines?
A: From what I’ve seen, tiny dots can blur or disappear sooner than steady lines, especially on hands and feet. Spacing dots a bit and asking for slightly bolder anchors helps. For longevity, protect the area from sun with an SPF 50 sunscreen stick.
Q: Are there safety concerns with henna-style tattoos?
A: Yes—avoid anything that smells chemical or unusually dark during paste sessions (for temporary henna). For permanent tattoos, choose artists who use safe inks and sterile practices. If you want a temporary trial, use natural henna paste or henna stencil kits from trusted names like Mihenna Stencils and avoid black-inking alternatives marketed as henna.
Q: Can I exercise after getting a henna-style tattoo?
A: Wait at least 48–72 hours before heavy sweating; longer if the tattoo is in a flex area (elbow, knee). Sweat can irritate and interfere with early healing. If you need to limit gym time, focus on low-sweat activities and keep the area clean.
Q: I’m nervous about commitment—should I start with a small piece?
A: Yes, if you’re unsure, choose a small, easily hidden spot like the inner wrist, upper thigh, or behind ear. Don’t pick something you don’t actually want long-term just to test pain. If you plan to test design longevity, a small forearm or wrist henna-style tattoo gives a realistic sense of how lines age.
Q: Do tattoos look different on different skin tones?
A: Absolutely. Black and gray work shows up well across tones. Bright colors may read differently on deeper skin tones; discuss saturation and healed examples with artists who tattoo your skin type. I’ve learned to ask for healed photos on similar skin tones to set expectations.
Q: What’s the single best tip to keep a henna-style tattoo looking fresh?
A: Sunscreen every day and gentle moisturizing. I use a daily SPF 50 stick on areas that see sun—it's the most consistent thing I’ve seen affect long-term vibrancy.
