
I spent months bookmarking gamer tattoos before I got mine. The real struggle wasn't choosing a favorite game—it's picking a style that actually heals well and still looks good years later. These 27 gaming tattoos cut across fine line, micro-realism, blackwork, and bold traditional looks so you can pick something that fits your fandom and your skin.
This list focuses on gaming tattoos that work as first pieces or as additions to a growing sleeve. Placements range from inner forearm and wrist to ribs and thigh. From what I've seen in 2026 trends, minimalist controller icons and micro-realism character portraits are both popular—and they age very differently, so I note longevity and common mistakes below.
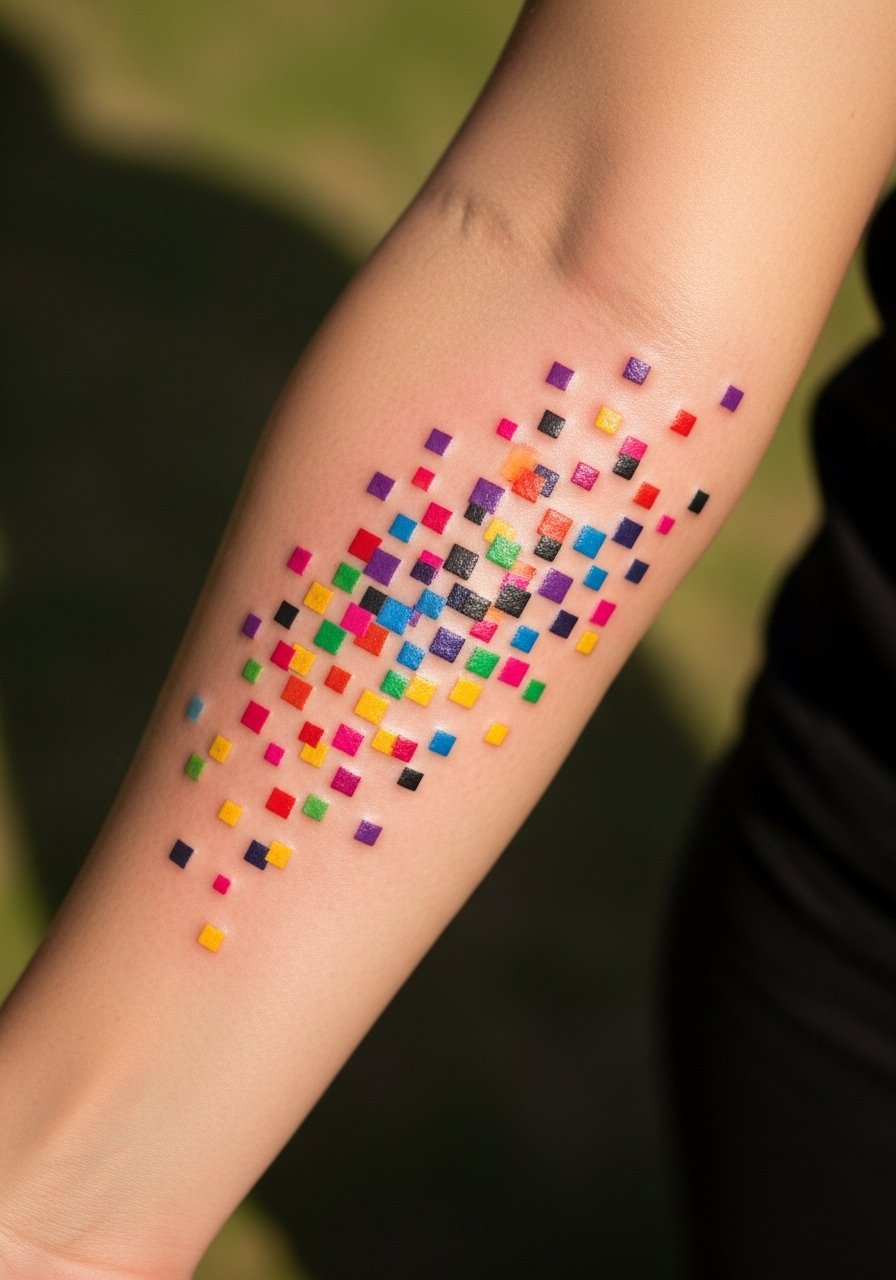
1. Fine Line Pixel Heart on Inner Forearm
Style/Technique: Fine Line / Pixel Art
Pain Level: Low-Medium (2-4/10)
Session Time: 1 hour
Best For: First tattoo, discreet geeky nod
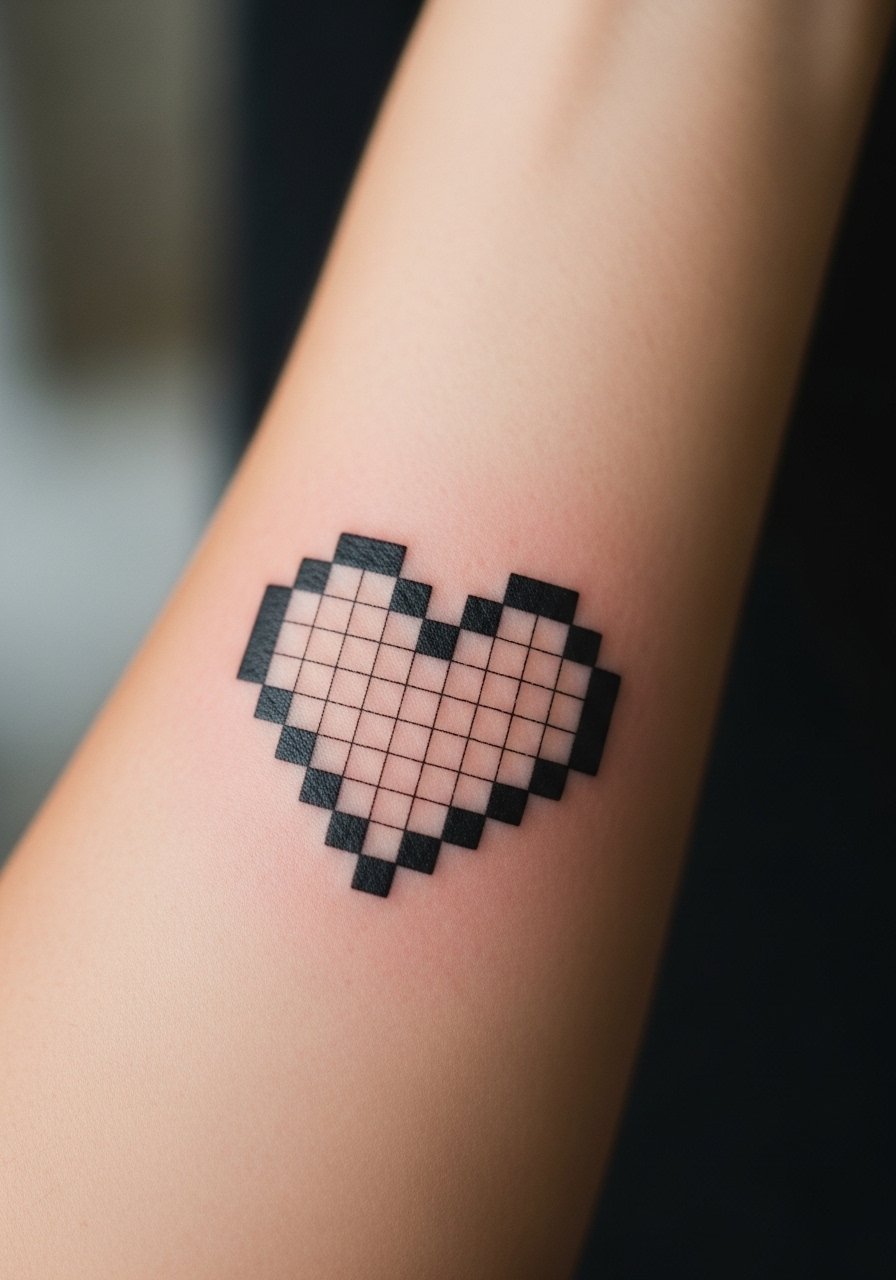
I love the pixel heart because it reads instantly as gaming without being loud. Fine single-needle work keeps the squares delicate and neat. Inner forearm is forgiving—visible but easy to cover with long sleeves. Expect mild soreness and about 2–3 weeks for surface healing; full settling at 3 months. Tiny pixels can blur if lines are too close, so ask the artist for slightly exaggerated block size rather than microscopic pixels. From my experience, black or deep red holds best; pale colors fade faster. This is a low-commitment, meaningful piece that wears well if done by a fine-line specialist.
2. Micro-Realism Character Portrait on Thigh
Style/Technique: Micro-Realism / Portrait
Pain Level: Low-Medium (3-4/10)
Session Time: 3-6 hours
Best For: Statement piece, detailed fandom tribute
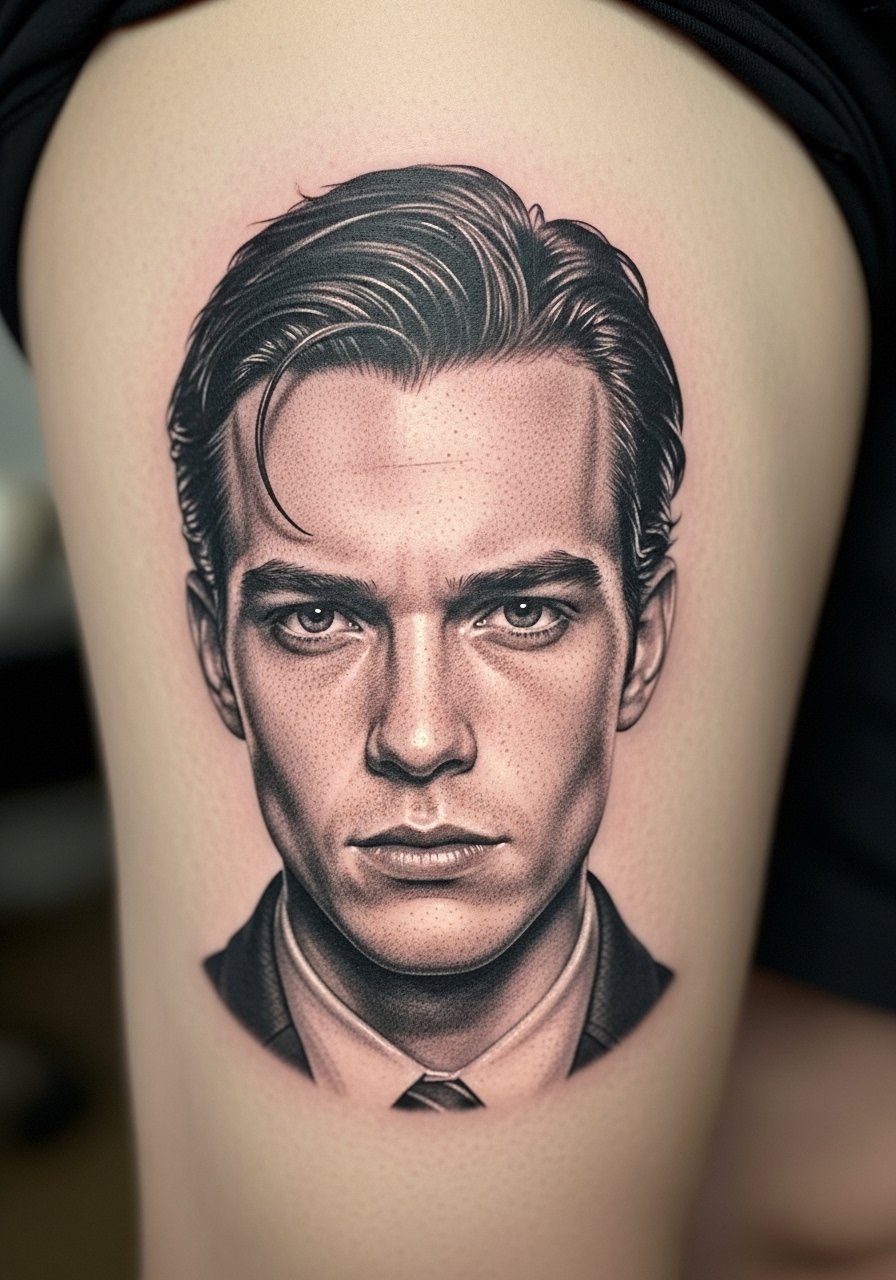
A micro-realism portrait of a favorite NPC or hero can look like fan art on your skin. Thigh flesh takes ink well and lets the artist work slowly for tight detail. Expect some tenderness during a long session but not the sharp bone pain you get on ribs. Healing is straightforward—keep it moisturized and avoid friction from tight pants. These hold up if shaded densely; lighter gray washes thin out over time, so ask for stronger contrast and healed photos from the artist. A common mistake is copying a low-res screenshot—bring high-quality references or commission a custom sketch.
3. Neo-Traditional Console Controller on Upper Arm
Style/Technique: Neo-Traditional / Bold Color
Pain Level: Low (2-3/10)
Session Time: 2-4 hours
Best For: First-timers, vibrant visible piece
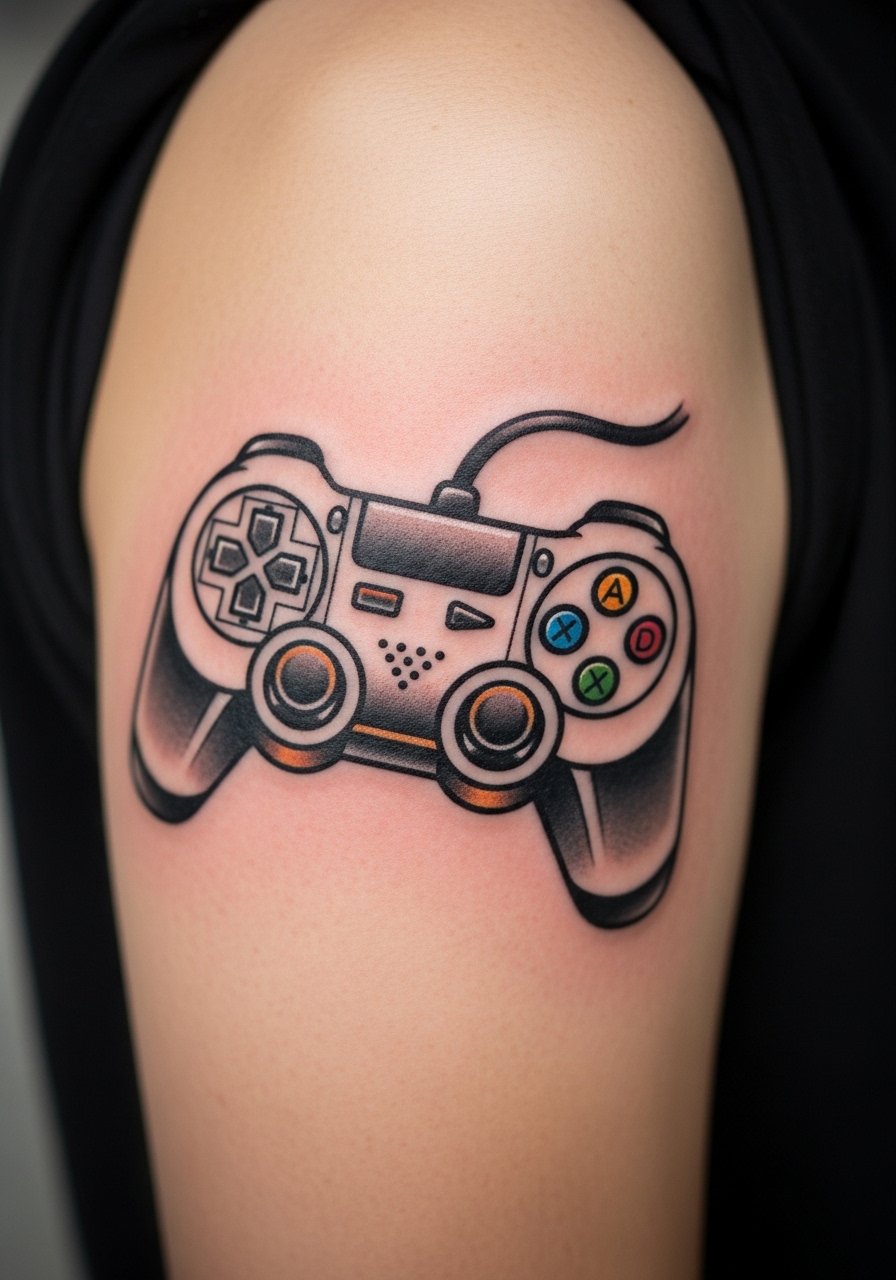
Neo-traditional gives a timeless vibe to a controller design—thick lines, saturated colors, stylized shading. Upper arm placement is forgiving on pain and hides easily under shirts. These age well because bold outlines resist blowout and colors can be maintained with sunscreen. Expect surface healing in 2–3 weeks. Artists I follow use solid black anchors and deeper color layers to ensure longevity. Avoid overly thin linework on buttons; they can blur into the color fill over time. Ask your artist for healed examples of similar color density.
4. Minimalist Button Icons Behind Ear
Style/Technique: Minimalist / Single-Needle
Pain Level: High (6-7/10)
Session Time: 20–40 minutes
Best For: Tiny, hidden nods to gaming
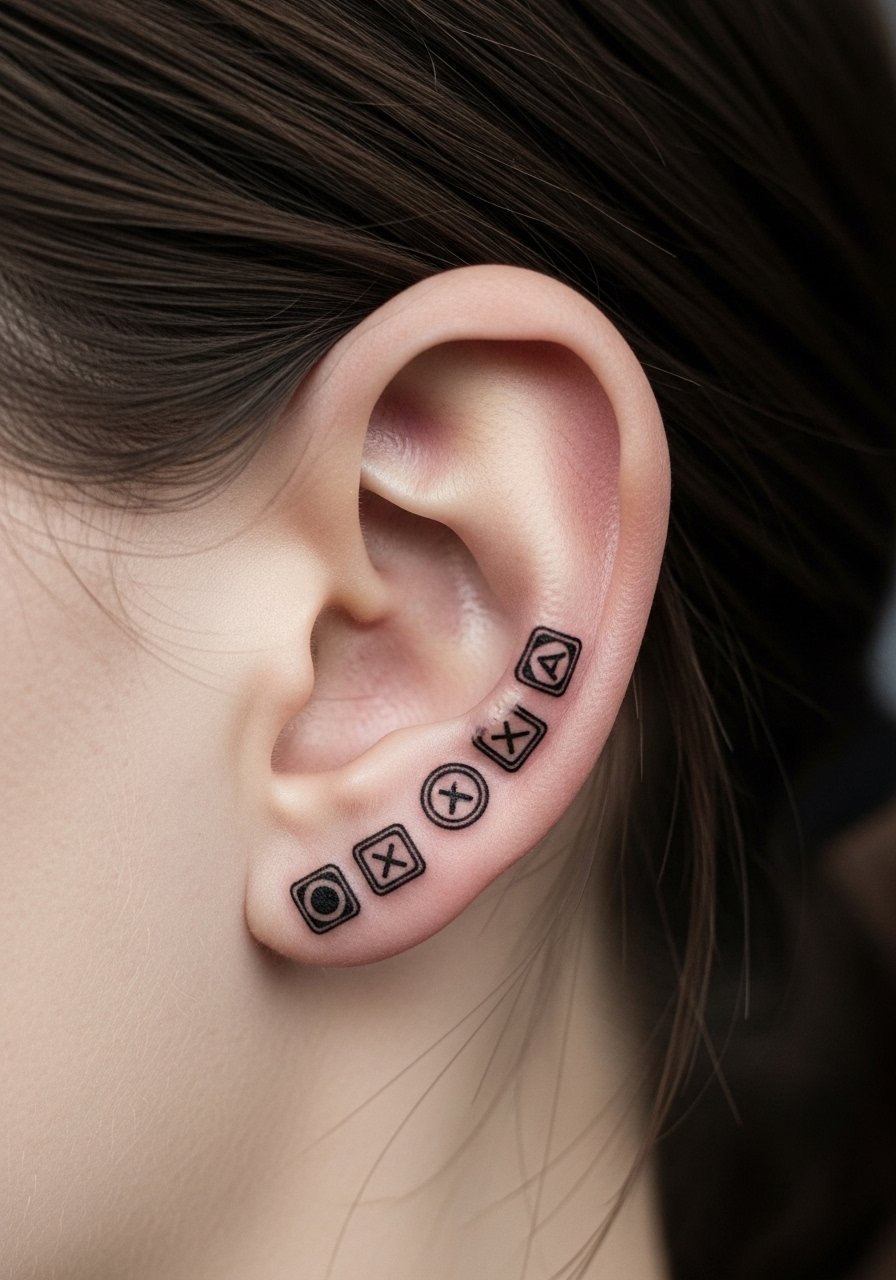
Behind-the-ear tattoos read as unexpected and private. Minimalist D-pad or A/B button icons are simple but painful because the area is thin and close to bone. Healing is quick but requires care—no sleeping on that side for a few nights. Fine single-needle icons can blur if too small, so scale up slightly. I recommend keeping the design simple and solid black. Artists experienced in small placements can show healed close-ups—ask for those during consultation.
5. Blackwork Circuit Board Sleeve on Full Arm
Style/Technique: Blackwork / Geometric
Pain Level: Medium-High (5-7/10)
Session Time: Multiple sessions
Best For: Statement sleeve, tech aesthetic
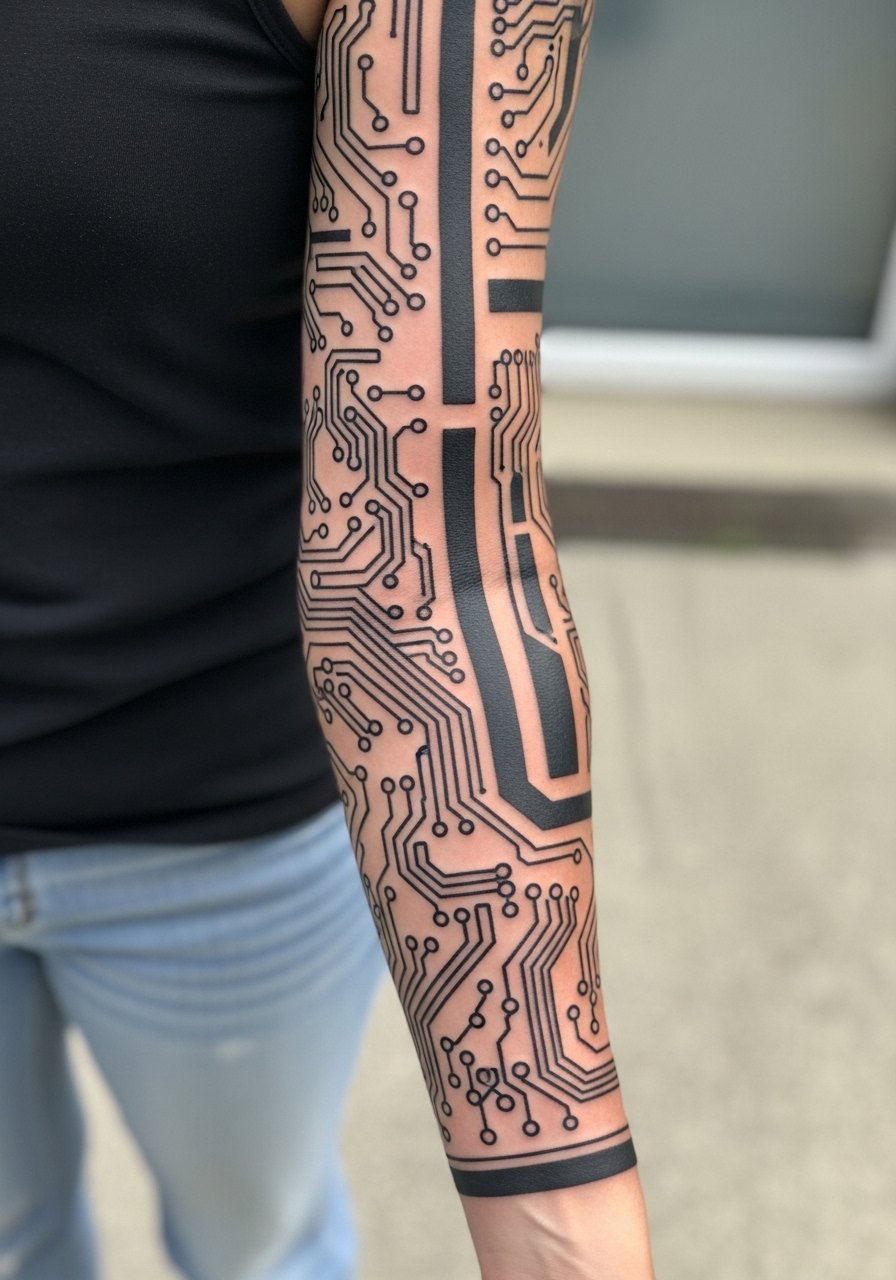
A circuit-board sleeve reads like the inside of a machine—perfect for tech-savvy gamers. Blackwork holds up well long-term; strong blacks age slowly compared with delicate color. Expect multiple sessions and variable pain depending on inner arm or elbow areas. Healing needs patience—large black sections can scab thicker. Artists I follow recommend alternating big sessions with lighter shading days to reduce trauma. Avoid overly intricate micro-lines that will blur; prioritize bold contrasts and negative space.
6. Watercolor Game Logo on Chest
Style/Technique: Watercolor / Painterly
Pain Level: Medium (4-6/10)
Session Time: 2–4 hours
Best For: Fan tribute, colorful chest piece
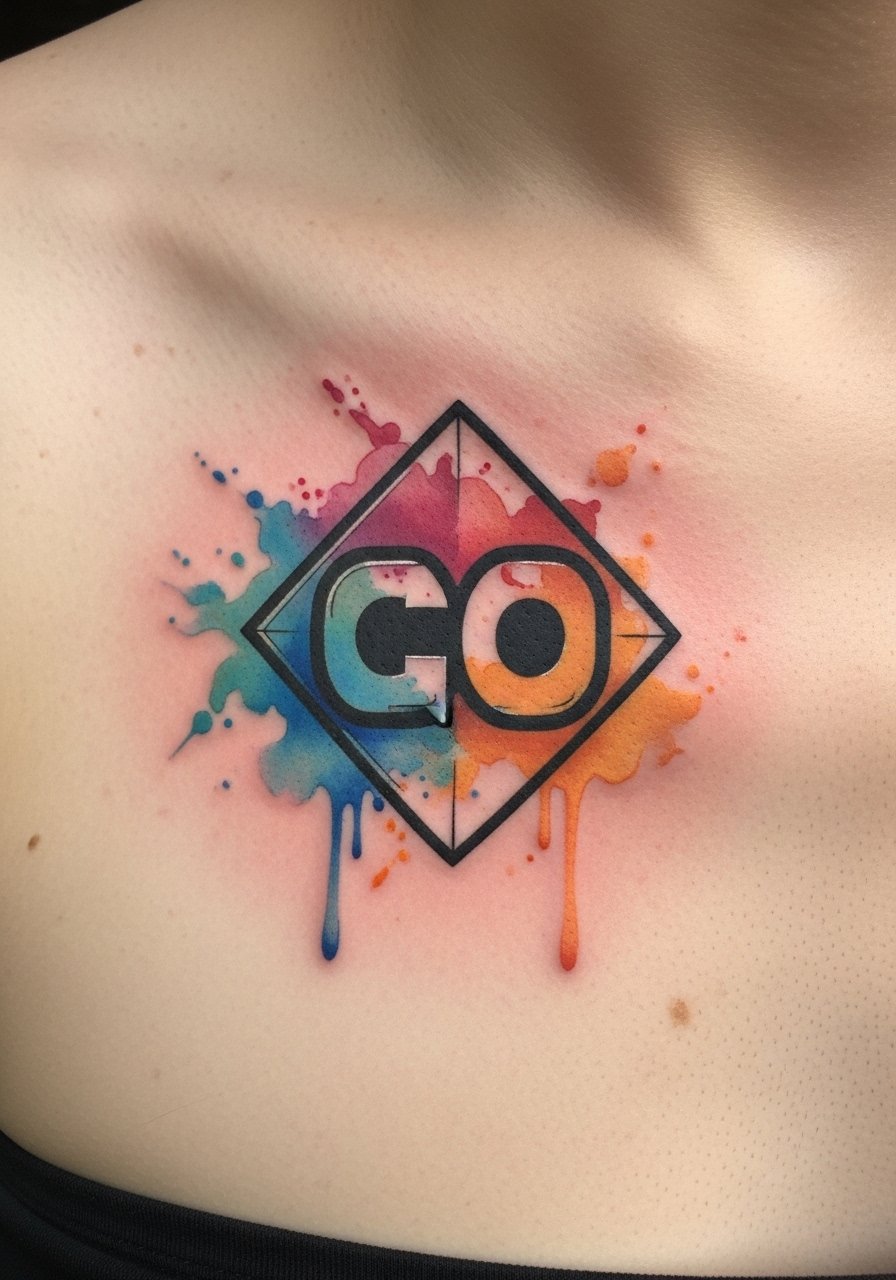
Watercolor effects give logos an artistic twist but need solid black anchors to avoid bleeding into color. Chest placement is dramatic and can be hidden under shirts. The sternum area is more painful than the pectoral meat. In my experience, colorful washes fade faster than black outlines, so plan touch-ups or accept a softer look over time. Ask your artist how they layer color to retain vibrancy when healed. Common mistake: too many pastel tones that disappear on darker skin tones—talk color saturation with your artist.
7. Traditional Game Cartridge on Calf
Style/Technique: Traditional / Retro
Pain Level: Low-Medium (3-4/10)
Session Time: 1-2 hours
Best For: Retro fans, visible on shorts

A cartridge tattoo taps into retro nostalgia. The calf provides a flat canvas and low pain compared to ribs. Traditional thick outlines keep the piece readable even as it tones down with age. I’ve seen cartridges retain shape decades later because of the strong linework. Avoid tiny text on the label; it blurs. If you want a “played-in” look, request selective shading but stay away from very light colors on small areas.
8. Micro-Realism Game Landscape on Back Shoulder
Style/Technique: Micro-Realism / Landscape
Pain Level: Medium (4-5/10)
Session Time: 2-5 hours
Best For: Scenic, wrap-around shoulder piece

Capturing a game’s environment—forests, castles, skyboxes—in micro-realism makes for a contemplative piece. The back shoulder is ideal: enough space and modest pain. Fine shading looks incredible healed if the artist uses layered contrast. Expect gradual brightening after initial dull phase; full depth appears around 2–3 months. A mistake I’ve seen is compressing too much detail into a small shoulder patch—pick the key focal element and let negative space breathe.
9. Single-Needle Speedrun Timer on Wrist
Style/Technique: Single-Needle / Minimalist
Pain Level: Medium (4-6/10)
Session Time: 30–60 minutes
Best For: Subtle reference, time-based achievements
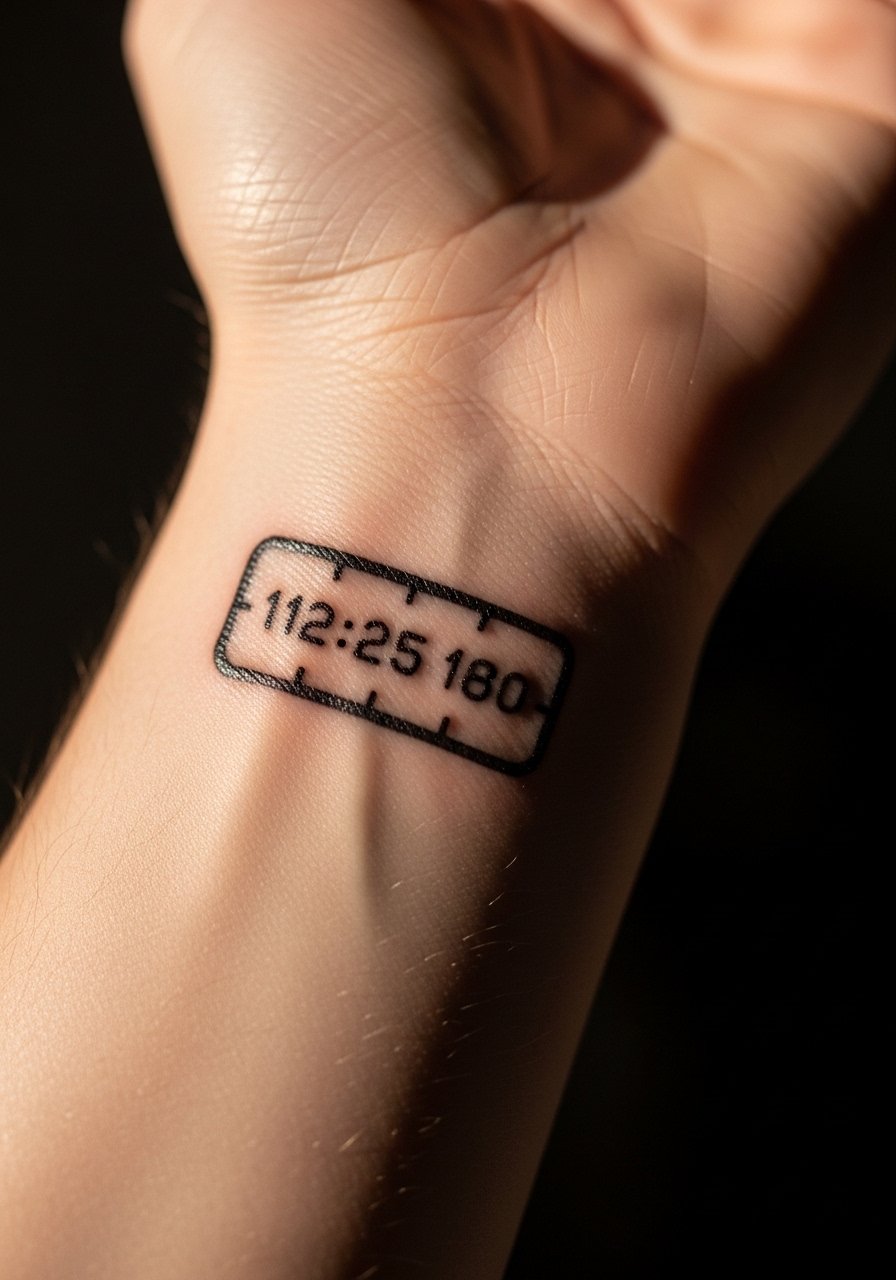
A timer or world-record time on the wrist is a cool, discreet nod. The wrist is sensitive but manageable for a short session. Single-needle numbers can fade faster, so insist on slightly bolder numerals. Keep the digits meaningful and consider an accompanying tiny icon (controller, stopwatch). Watch for rubbing from watches or bands during healing—avoid that for 2 weeks. From what I've seen, black digits with good kerning hold best.
10. Geometric Boss Silhouette on Ribcage
Style/Technique: Geometric / Blackwork
Pain Level: High (7-9/10)
Session Time: 2–3 hours
Best For: Bold, semi-hidden statement
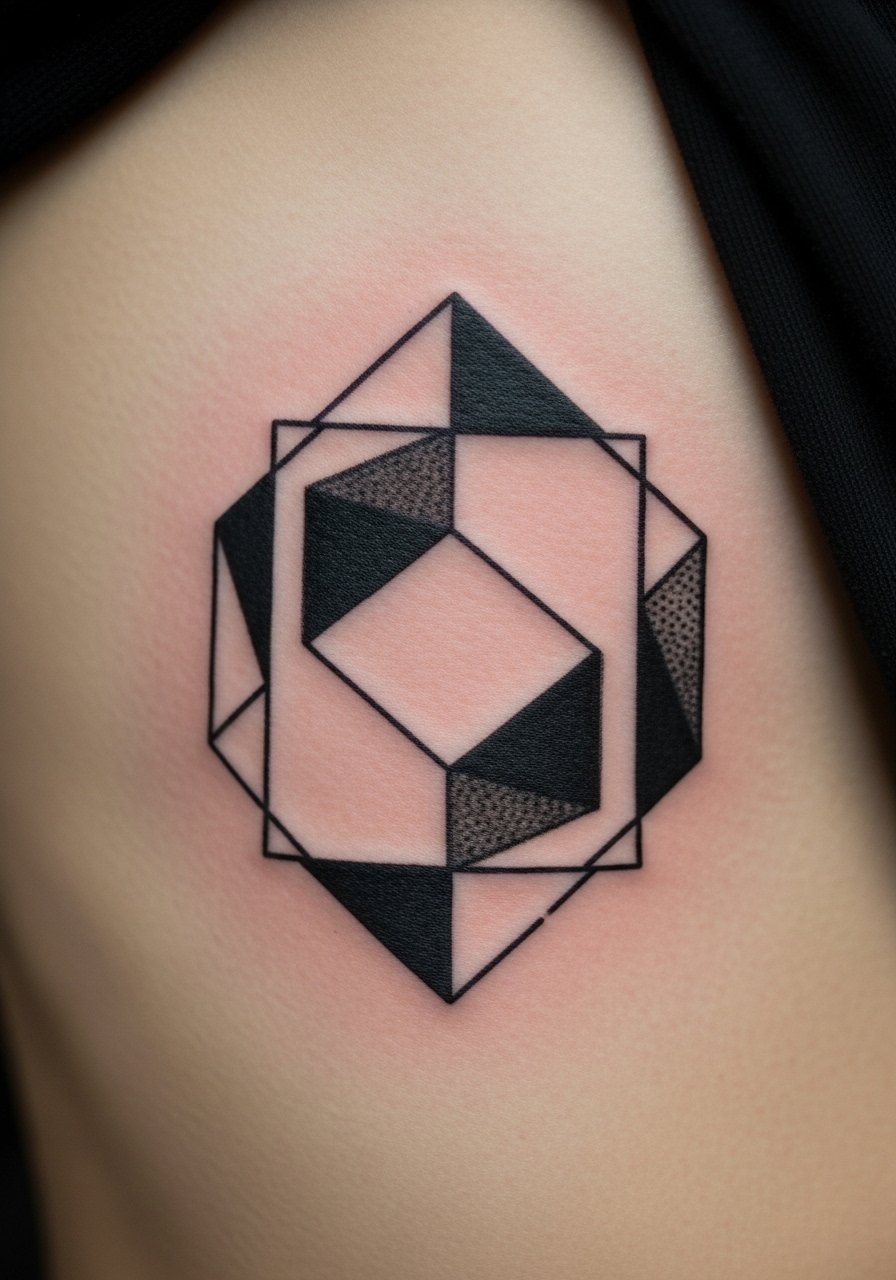
Ribcage tattoos are dramatic but painful. A silhouetted boss or enemy done in geometric blackwork translates well to that placement. Healing can be fussy due to clothing friction; expect extended tenderness and tightness when breathing. The payoff is a striking, timeless piece—black stays strong here. Don't cram tiny details; they’ll blur against the natural movement of the torso. I recommend spacing elements so the design ages gracefully.
11. Minimalist Map Coordinates on Collarbone
Style/Technique: Minimalist / Script
Pain Level: Medium (4-6/10)
Session Time: 30–60 minutes
Best For: Personal, easily hidden with wardrobe

Coordinates of a meaningful in-game location or server spawn point feel personal. Collarbone placement looks sleek but can sting—thin skin and movement increase pain. Script or small numbers need proper spacing to avoid blurring; slightly thicker line weight helps. Expect surface healing in 2–3 weeks and watch for clothing irritation. This is a timeless, subtle choice that reads as a secret for those who know.
12. Glitch Effect Pixel Fade on Forearm
Style/Technique: Neo-Geo / Glitch Art
Pain Level: Low-Medium (3-5/10)
Session Time: 1-2 hours
Best For: Eye-catching, modern aesthetic
Glitch tattoos mimic corrupted game graphics—pixels and color streaks breaking up a solid form. Forearm is perfect for showing motion. Colors can shift during healing, so artists often suggest denser pigmentation. From what I've seen, bright blues and magentas fade faster; pair them with strong black anchors to preserve contrast. Avoid overly intricate gradients at tiny scales—stick to bold blocks that remain legible.
13. Matching Co-Op Half Controllers on Inner Biceps
Style/Technique: Minimalist / Matching Set
Pain Level: Medium (4-6/10)
Session Time: 45–90 minutes each arm
Best For: Couple/friend tattoos, symmetrical sleeve additions
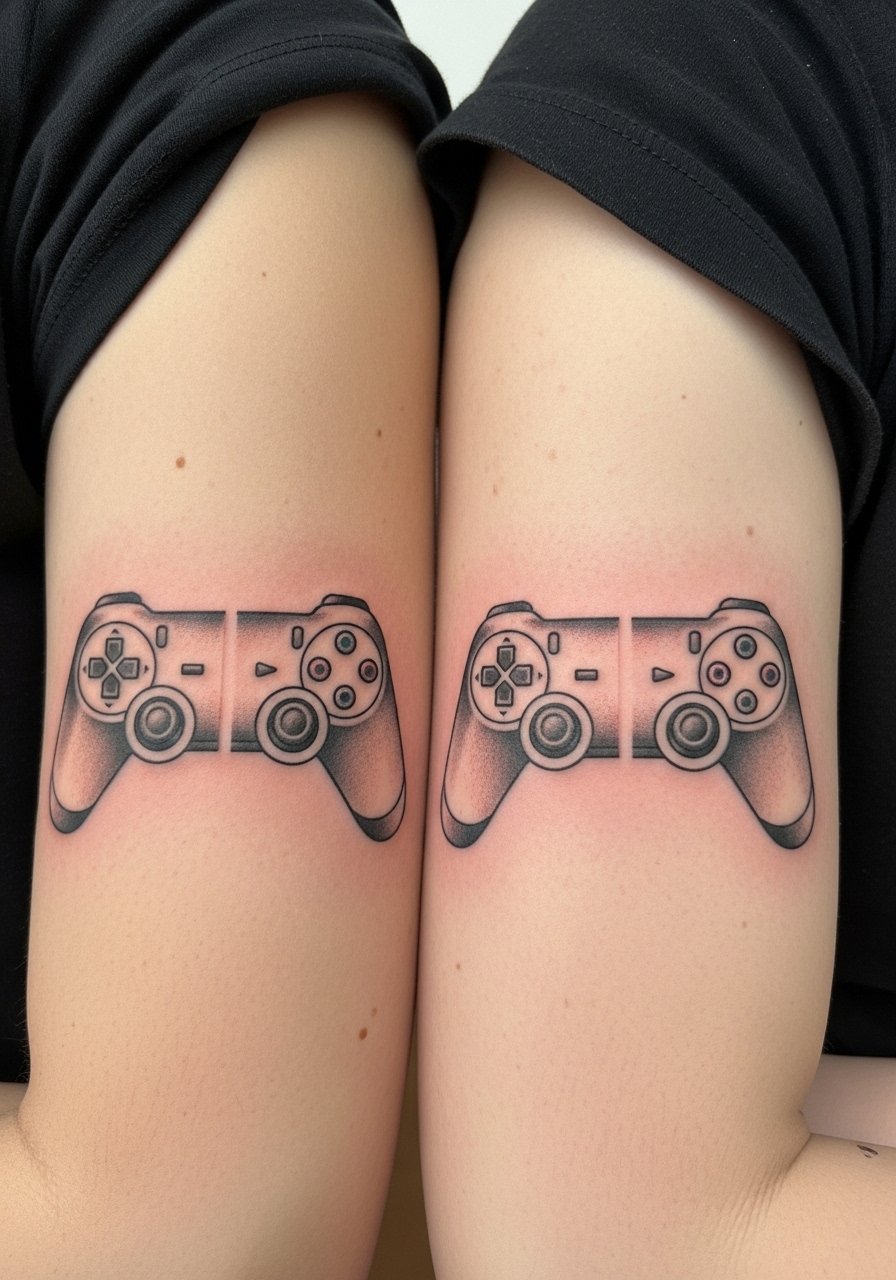
Split designs that form a whole when together are great for co-op partners or best friends. Inner biceps hide well and offer a canvas for matching halves. Pain varies but is manageable; expect tenderness when arms are raised. Alignment is crucial—ask the artist to test poses so halves match when flexed. A frequent error is mismatched scale or orientation; clear stencils and photo proof help avoid that.
14. Retro Arcade Cabinet on Upper Arm
Style/Technique: Neo-Traditional / Retro
Pain Level: Low-Medium (3-4/10)
Session Time: 2–3 hours
Best For: Arcade nostalgia, visible arm piece
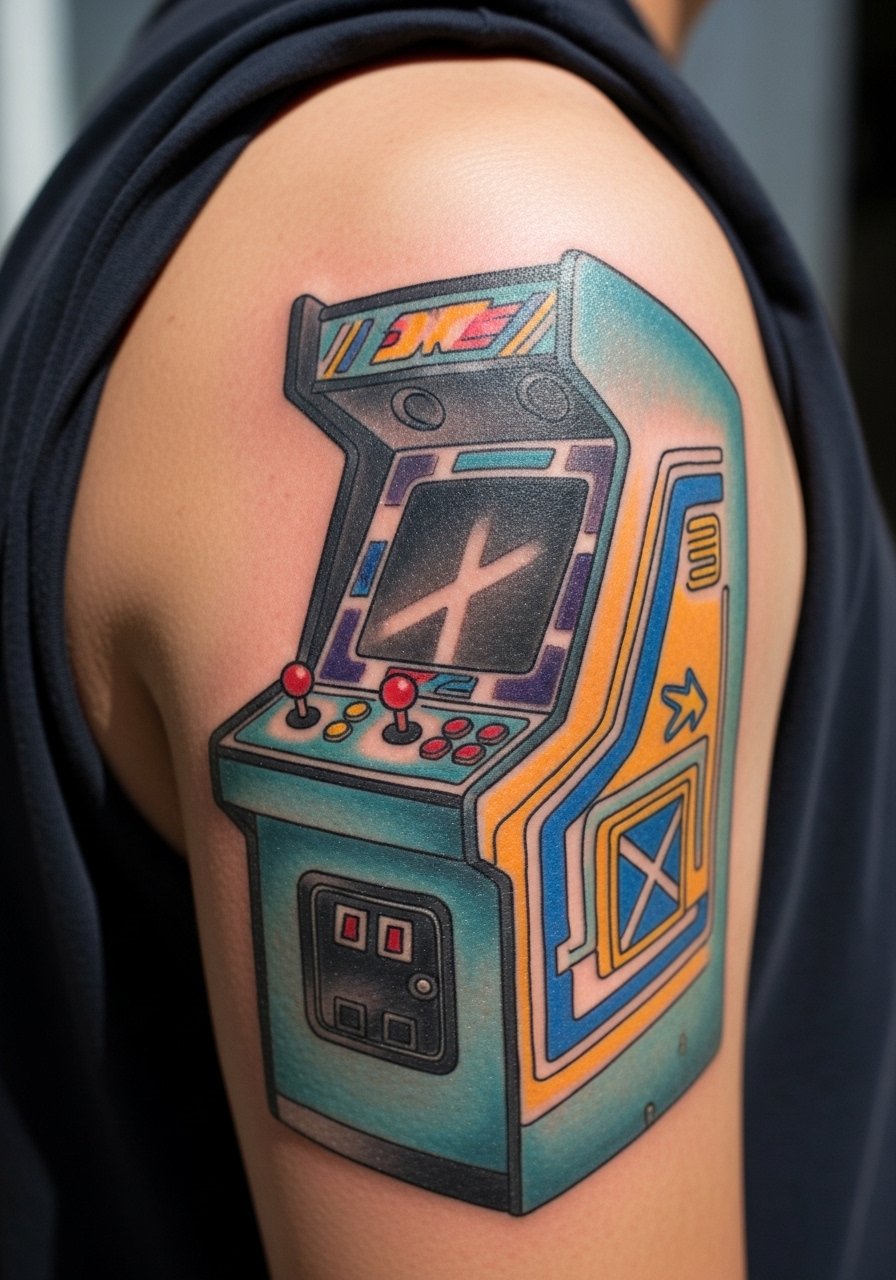
Arcade cabinet tattoos are playful and bold. Upper arm gives room for controls, marquee text, and color. Traditional-style outlines ensure longevity; color can mellow but remains readable. Avoid tiny text on marquee signs—scale up the letters. If you want a vintage look, ask for muted tones and distressed shading so it looks intentionally aged even after healing.
15. Linework Skill Tree on Spine
Style/Technique: Fine Line / Symmetrical
Pain Level: High (7-8/10)
Session Time: Multiple short sessions
Best For: Long vertical design, RPG fans
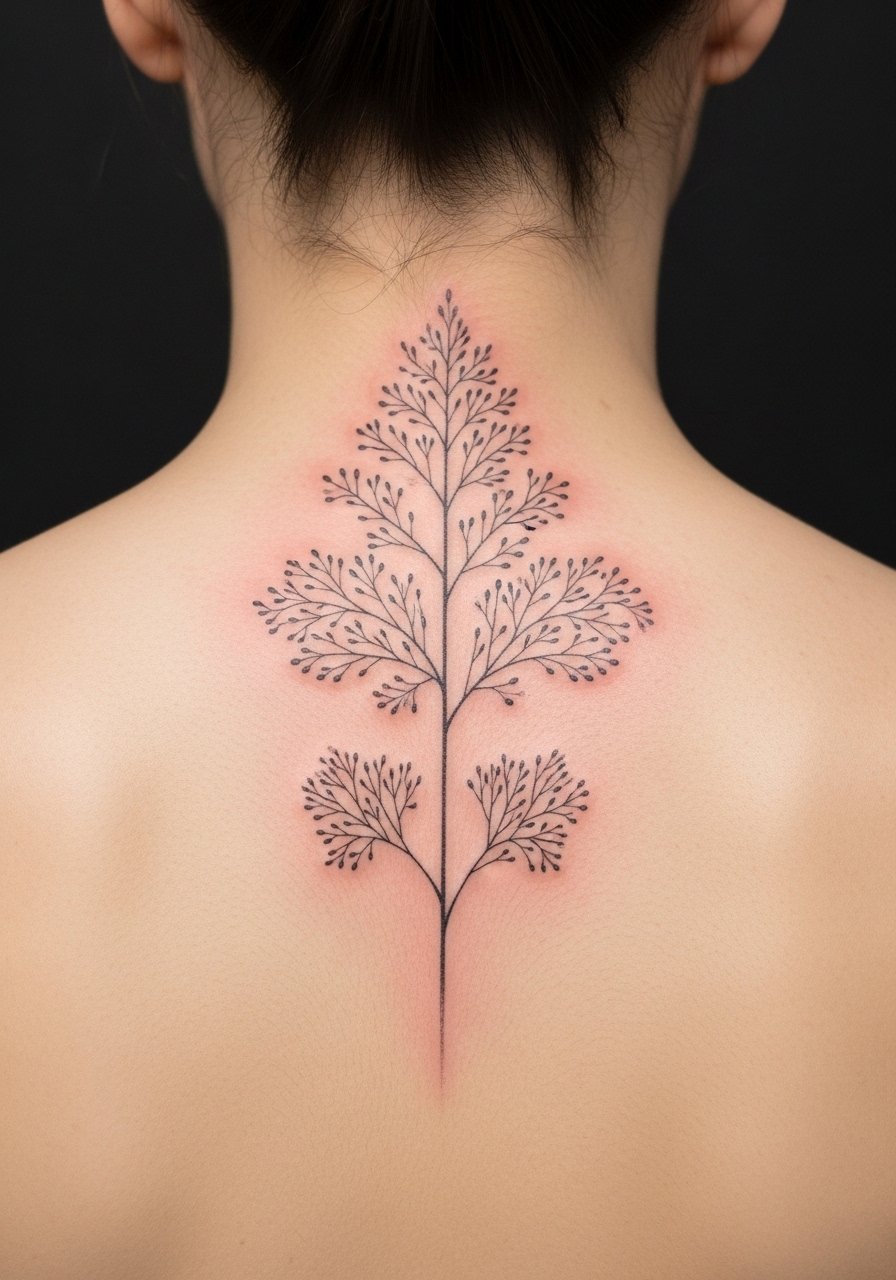
A vertical skill tree down the spine reads like a progression map. Spine work can be intense, especially near the vertebrae. Fine-line connections look great healed if spaced correctly; nodes should be slightly bolder to avoid disappearing over time. Multiple short sessions reduce discomfort and let you check healing between stages. Expect tightness while healing and avoid heavy backpacks.
16. Sticker-Style Achievement Badge on Thigh
Style/Technique: Sticker-Style / Pop Color
Pain Level: Low (3-4/10)
Session Time: 1-2 hours
Best For: Fun, collectible look, easily covered
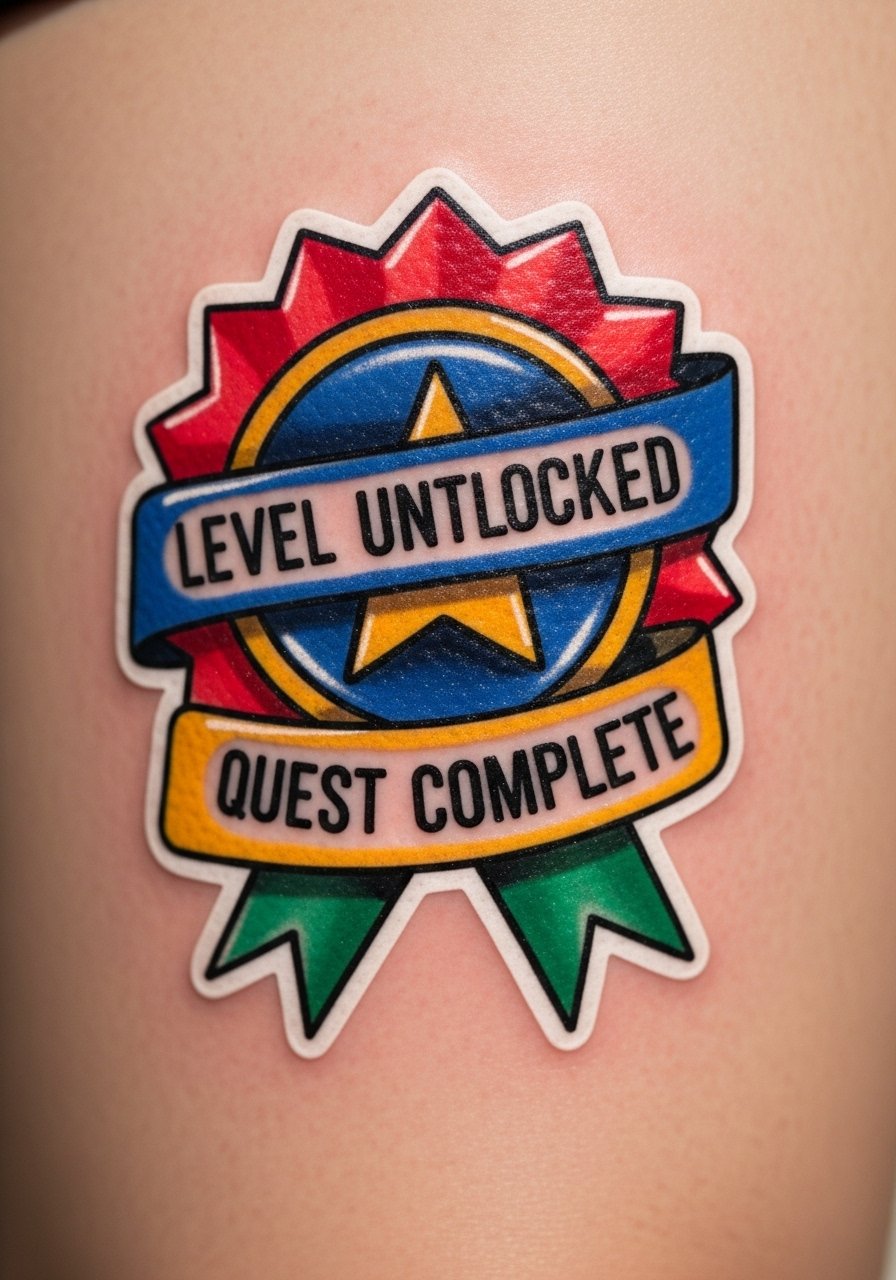
Achievement badges in a sticker style look playful and wearable. Thigh placement is low-pain and easy to hide. White highlights can yellow or fade, so discuss how your artist layers white and lets it age. This design works well as part of a larger “achievement collection” across the body. Keep outlines solid to maintain the sticker motif as it ages.
17. Negative Space HUD Elements on Ankle
Style/Technique: Negative Space / Minimal
Pain Level: High (6-7/10)
Session Time: 45–90 minutes
Best For: Subtle, futuristic accents
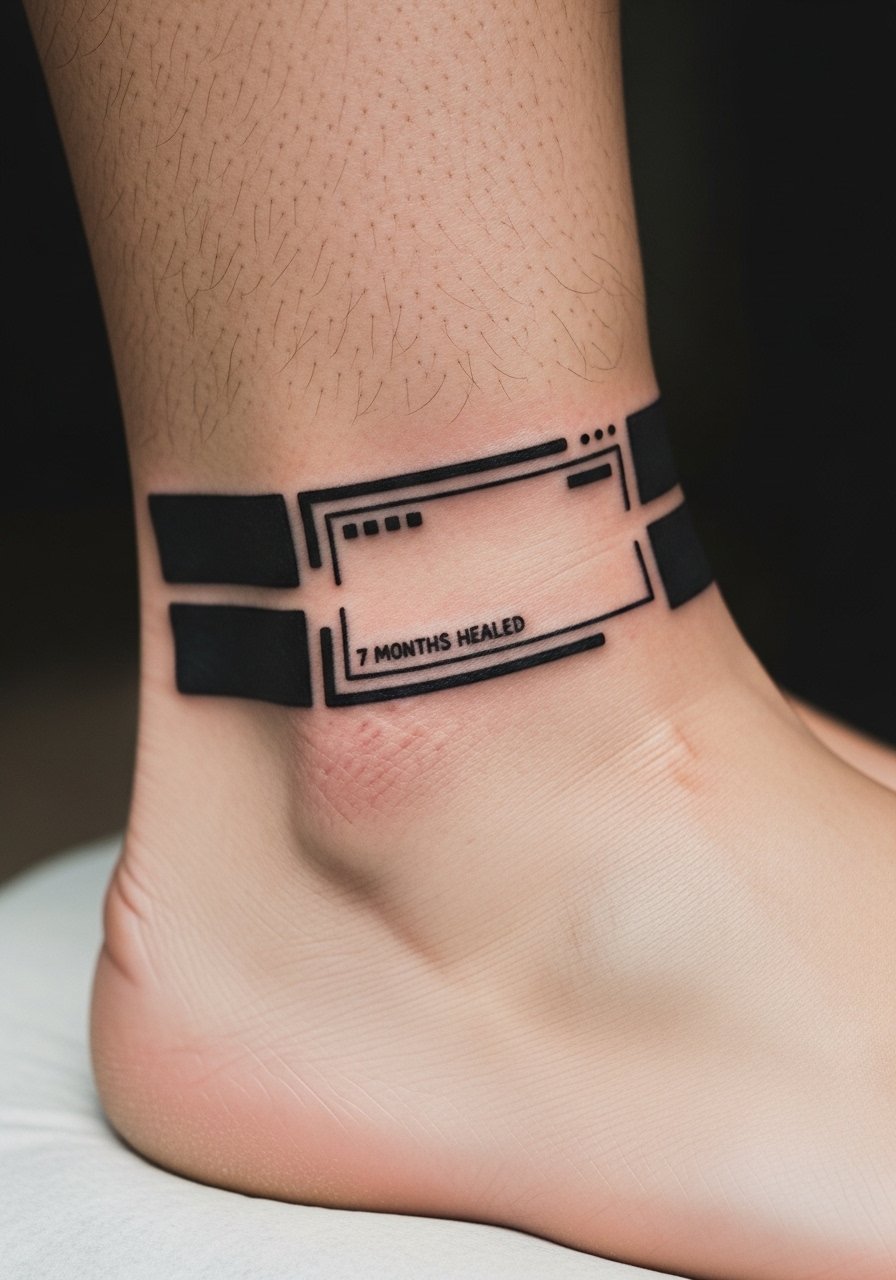
Negative-space HUD lines and reticles on the ankle look technical and clean. Ankles are bony and painful, and small lines can blur with time due to movement and shoes rubbing. Keep shapes bold and allow some breathing room. I’ve noticed negative space reads well on lighter tones—discuss contrast if you have deeper skin, and ask for examples of healed negative-space work.
18. Scripted In-Game Quote on Ribcage
Style/Technique: Script / Fine Line
Pain Level: High (7-8/10)
Session Time: 1–2 hours
Best For: Meaningful lines, private placement
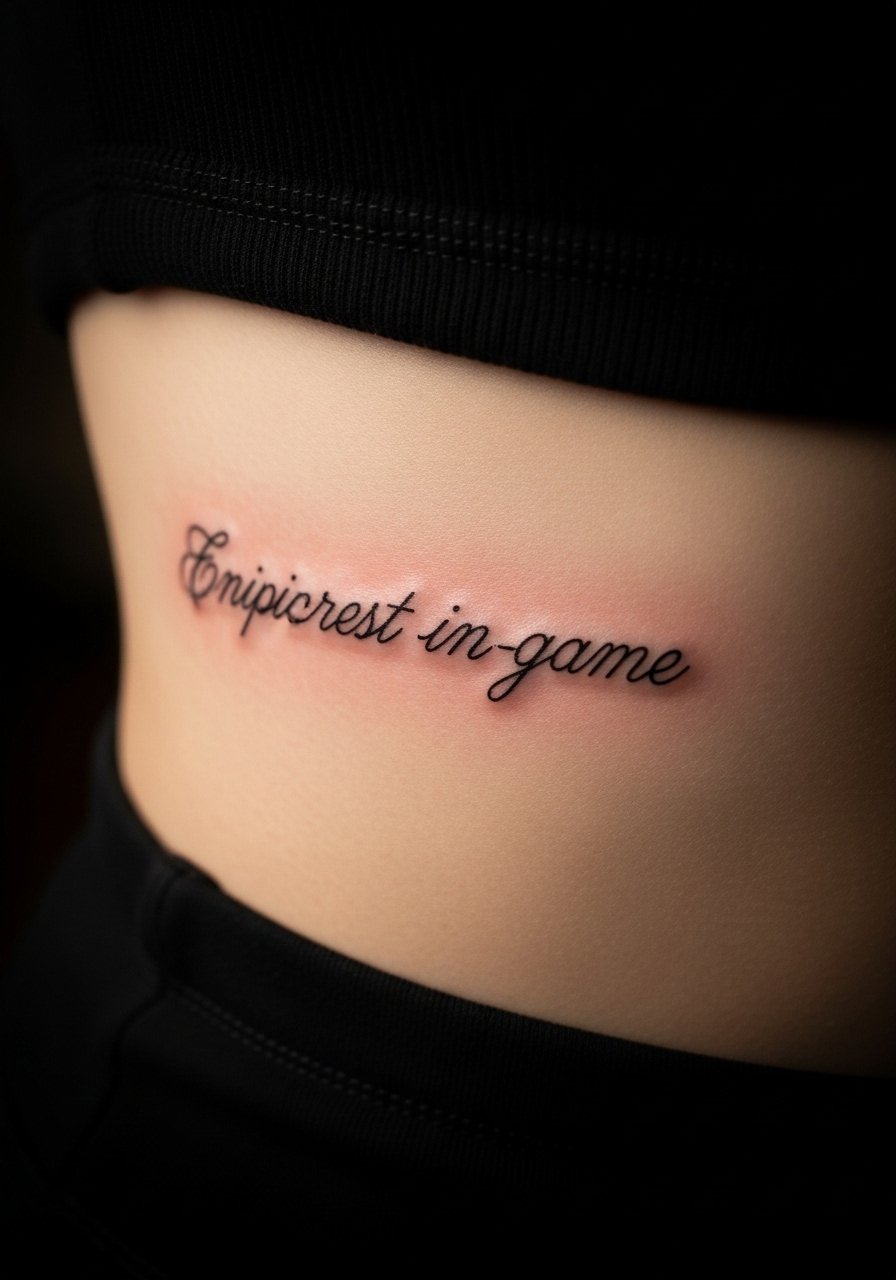
A beloved in-game quote on the ribcage is intimate and powerful. Ribs sting, so plan for numbing or split sessions. Script needs spacing and thickness checks—too thin and letters smudge. I always suggest sitting with the phrase for months and testing fonts on paper and skin stencil. Wear loose clothing during healing to prevent scabbing from seams.
19. Micro-Realism Pet/Companion NPC on Forearm
Style/Technique: Micro-Realism / Portrait
Pain Level: Low-Medium (3-4/10)
Session Time: 2–4 hours
Best For: Emotional tribute, visible arm piece
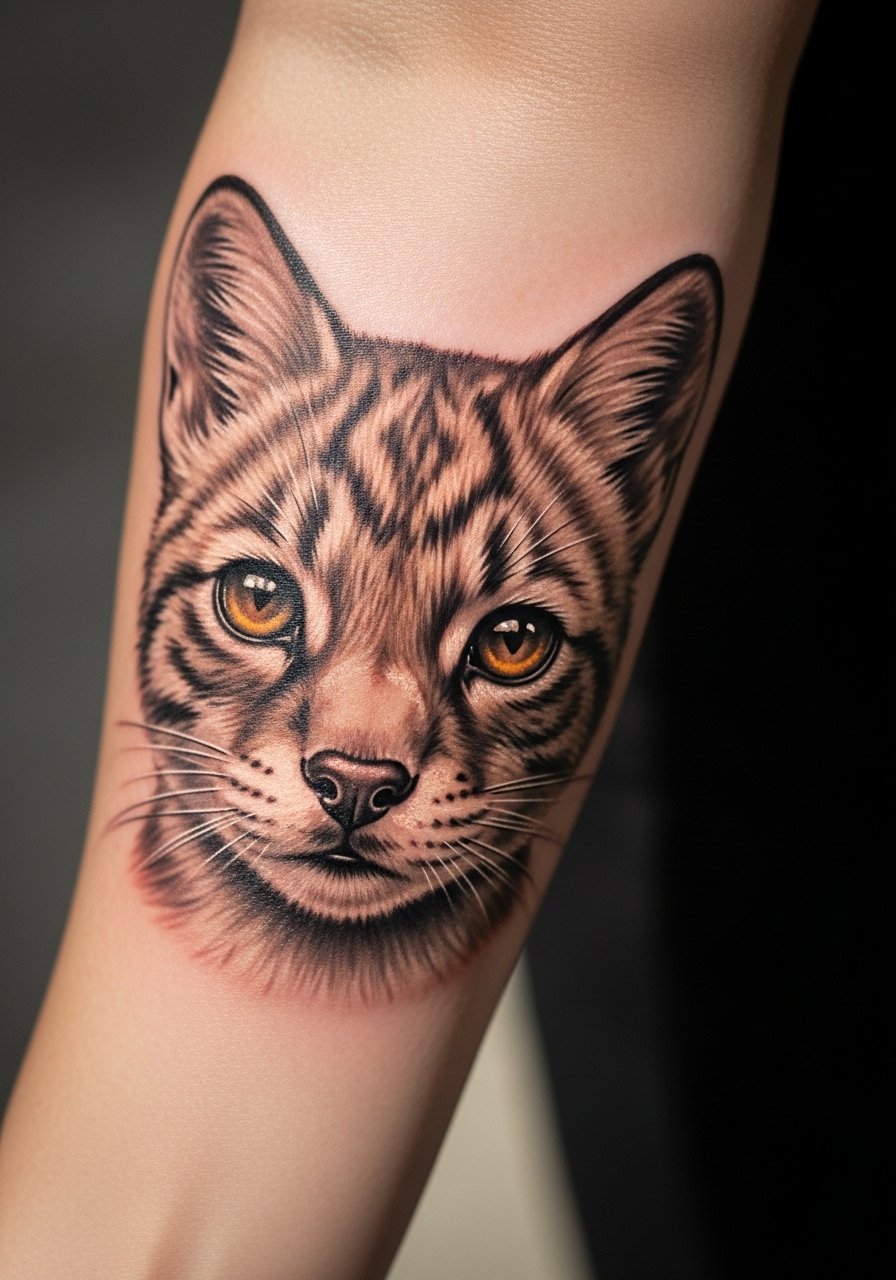
If a sidekick or companion NPC shaped your playthrough, a micro-realism portrait on the forearm keeps that memory visible. The forearm is ideal for showing expression and tiny features. Artists need clear references—screenshots or high-res art—to capture personality. Keep shading strong; delicate mid-tones thin over time. This is one of my favorite types because it reads as both fan art and portraiture.
20. Blackwork Emblem/Guild Crest on Chest
Style/Technique: Blackwork / Heraldic
Pain Level: Medium (4-6/10)
Session Time: 2–4 hours
Best For: Guild pride, bold chest piece
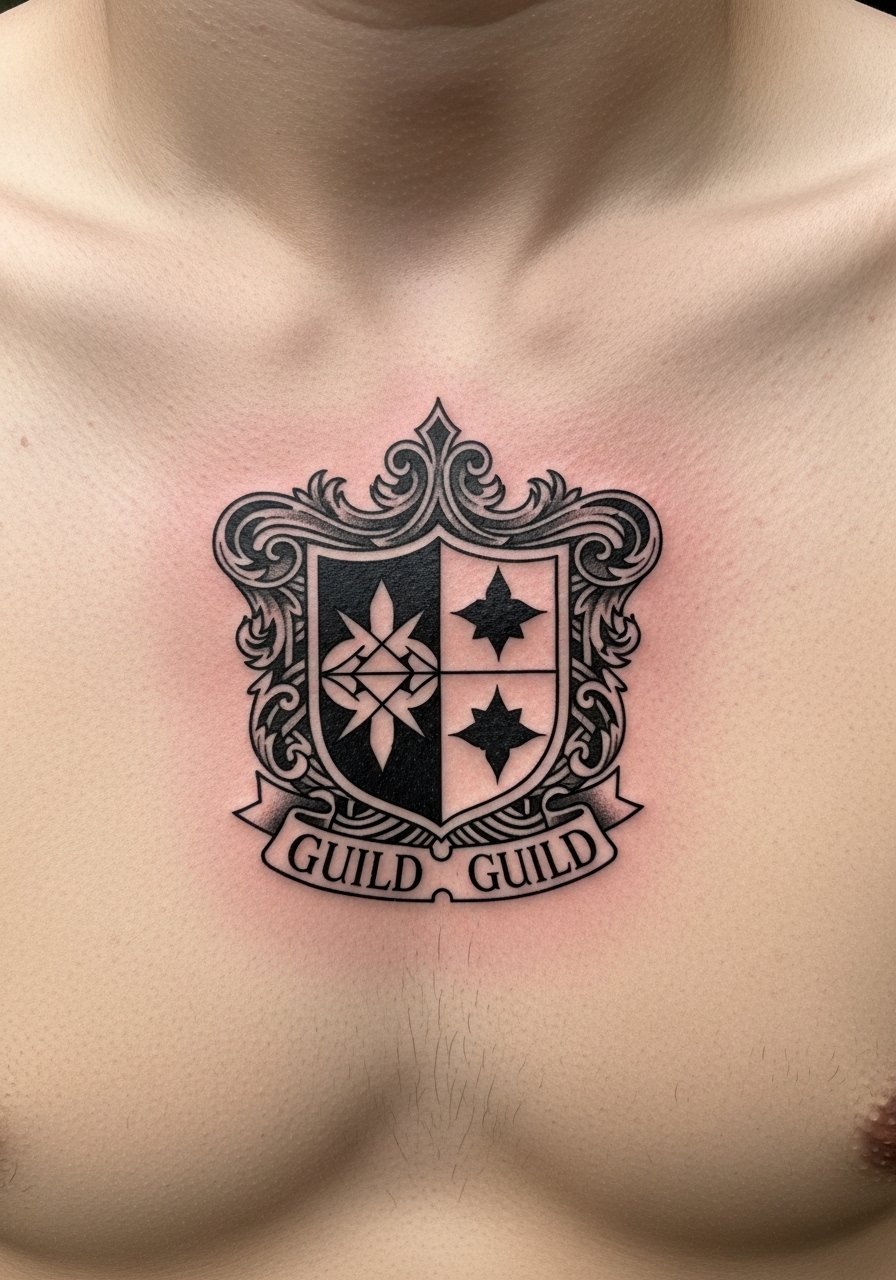
Emblems or crests translate well into blackwork that stands out on the chest. This placement shows commitment but can be covered for work. Solid fill areas age well; detailed filigree needs space and stronger outlines. Expect some soreness near the sternum and collarbones. I’ve seen crests remain striking years later when designed with bold anchors and clean negative space.
21. Minimalist VR Headset Outline Behind Ear
Style/Technique: Minimalist / Outline
Pain Level: High (6-7/10)
Session Time: 20–30 minutes
Best For: Subtle future-tech nod
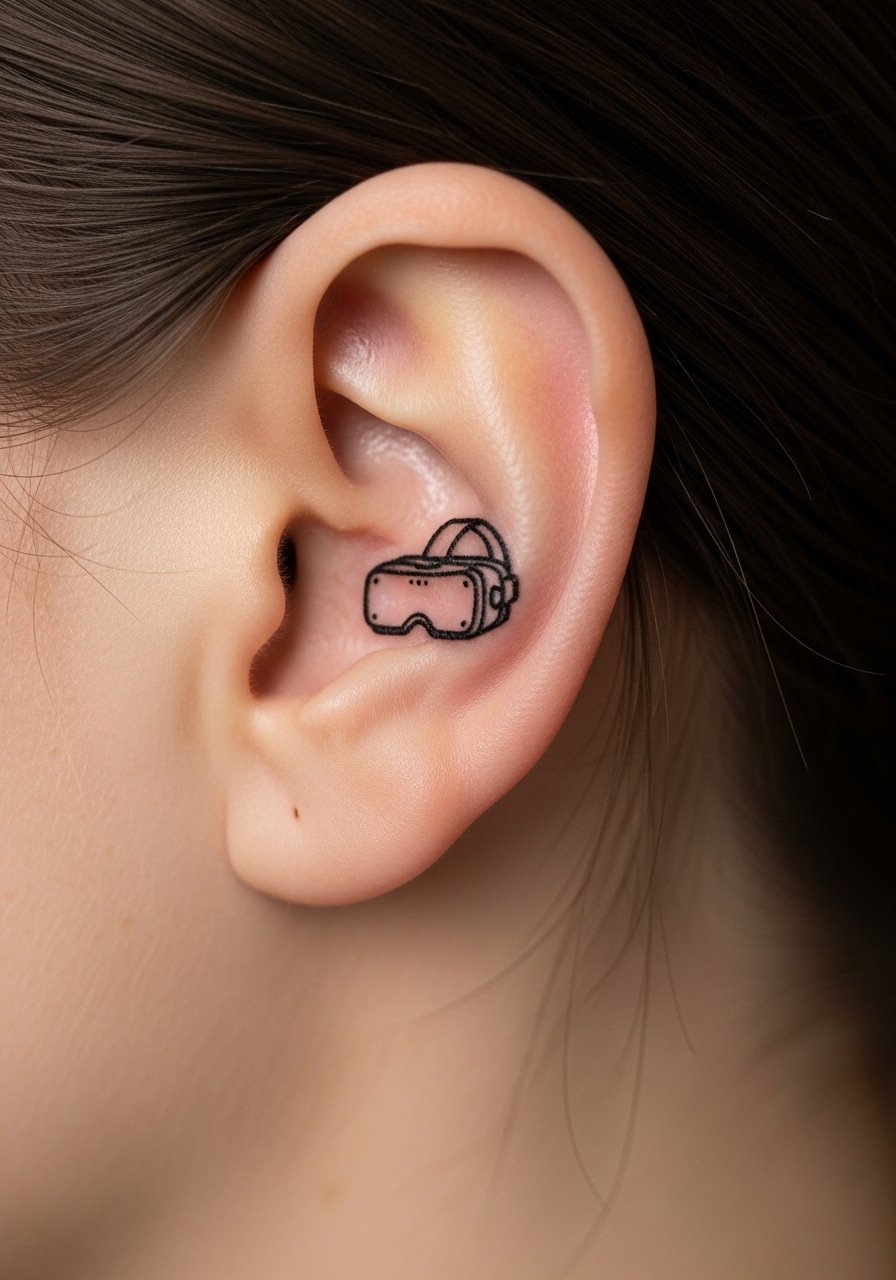
A small VR headset outline behind the ear is almost a secret. It’s painful for the location but quick. Single-line designs should have slight thickness to survive healing. I recommend discussing exact placement while seated to account for ear shape and future headphones. Keep it small but bold enough to avoid disappearing.
22. Color Burst Mana/Health Bars on Wrist
Style/Technique: Minimal Color Block / Neo-Minimalist
Pain Level: Medium (4-5/10)
Session Time: 30–60 minutes
Best For: Wrist art, daily visual cue
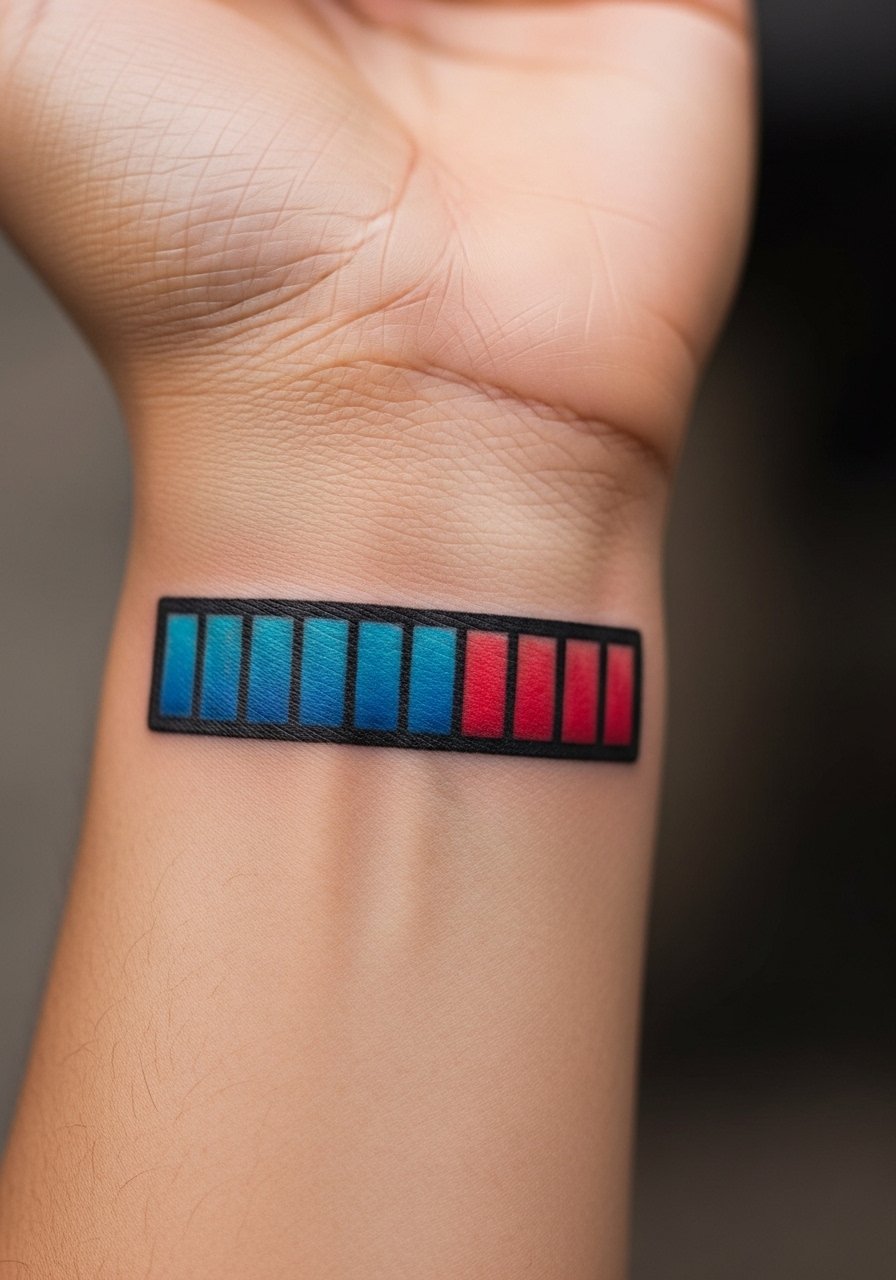
Short stacked bars for health/mana are simple but meaningful—great for wrists. Colors brighten and then mellow; black separators help maintain visual structure. The wrist gets sun exposure and friction, so expect faster fading than inner arm. From experience, keep bars slightly thicker than you think to counter future softening. Artists who specialize in color block work can show you how different pigments heal on your skin tone.
23. Fine Line Map Pins Around Shoulder
Style/Technique: Fine Line / Micro-Icon
Pain Level: Low-Medium (3-4/10)
Session Time: 1–2 hours
Best For: Collection tattoos, travel-through-games theme
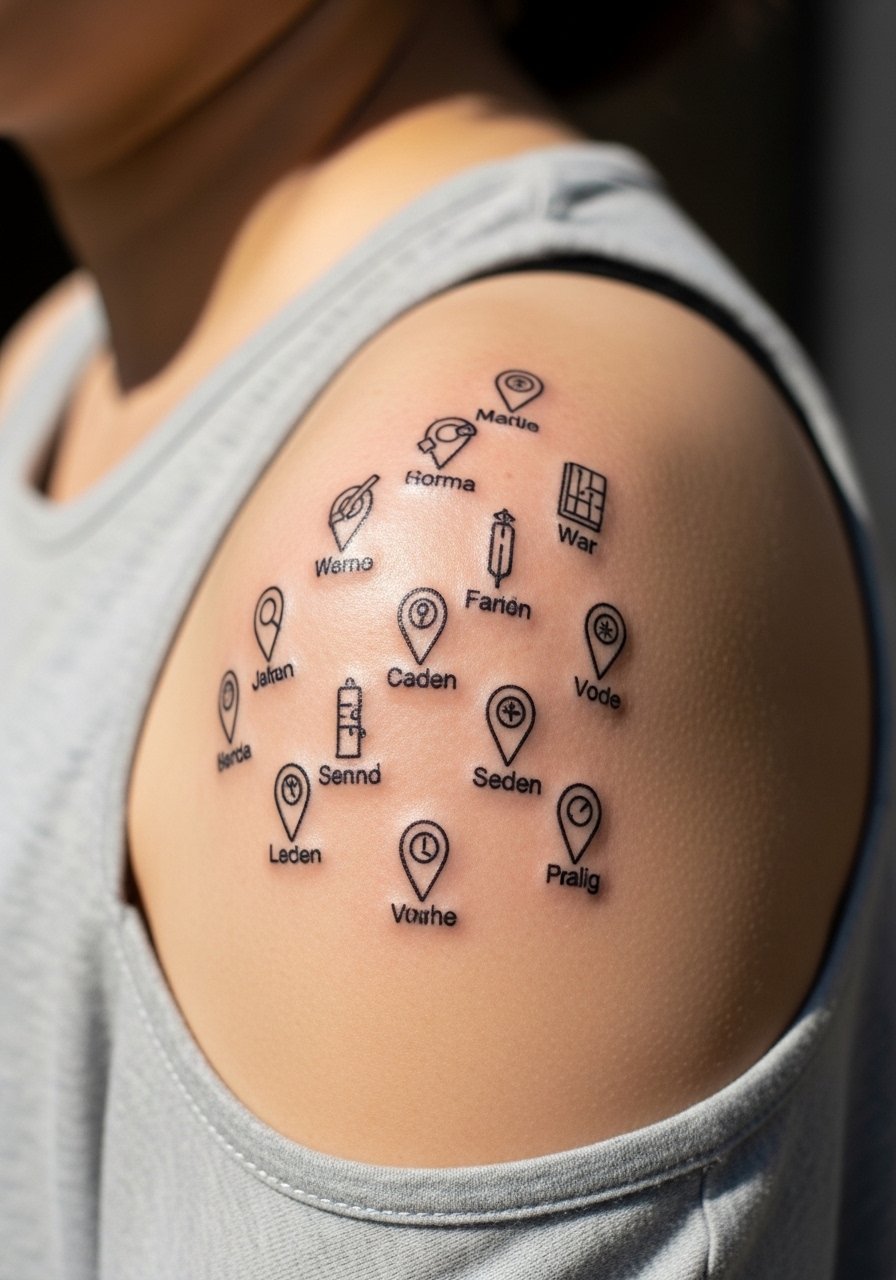
Tiny map pins marking in-game places make a great collection series around your shoulder. Spacing prevents merging as lines soften. Shoulder area is forgiving for pain. I recommend labeling only the most meaningful pins to avoid clutter. Over time, add color or connecting lines to create a larger map composition.
24. Pixel Portrait In Dotwork on Calf
Style/Technique: Dotwork / Pixel Portrait
Pain Level: Low-Medium (3-4/10)
Session Time: 1.5–3 hours
Best For: Retro pixel portraits, stylized look

Dotwork pixel portraits blend retro pixels with stippling to get texture. Calf placement gives space for detail and keeps pain low. Dots can spread slightly, so artists often use denser clusters for key features. This style reads great healed because the stipple creates depth without relying on thin lines.
25. QR Code Easter Egg Tattoo on Inner Forearm
Style/Technique: Micro-Realism / Functional Tattoo
Pain Level: Low-Medium (3-5/10)
Session Time: 1–2 hours
Best For: Interactive, ARG-style fans
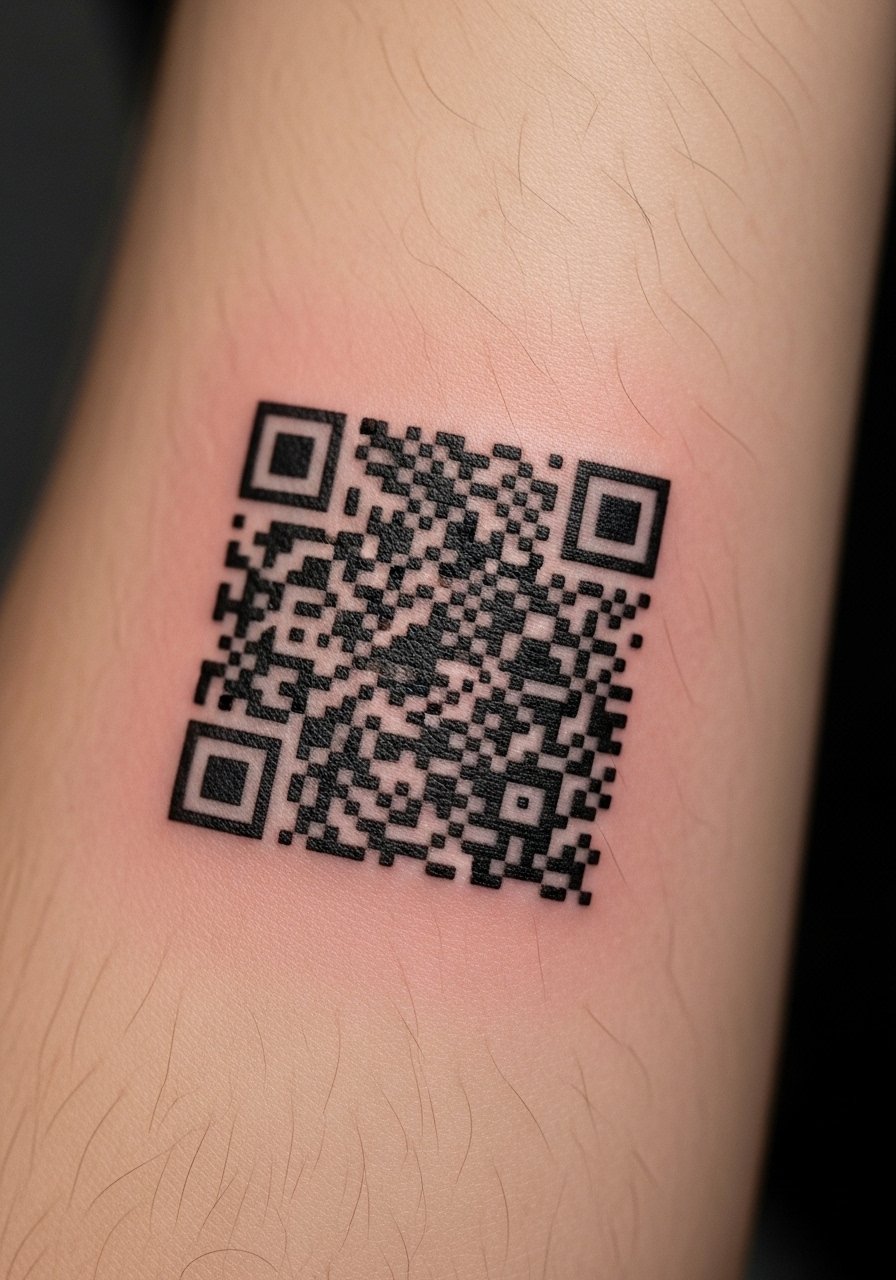
A QR code that links to an easter egg or fan page is a modern twist. Inner forearm is ideal for scanning, but accuracy is crucial—lines must be crisp and sized for scanners. I’ve seen QR tattoos require touch-ups to remain scannable, especially if the code is tiny. Test prints and test scans from the stencil are non-negotiable before inking. This is one of those under-covered ideas that surprises people when it works.
26. Controller Button Labels on Fingers
Style/Technique: Minimalist / Micro-Lettering
Pain Level: High (7-8/10)
Session Time: 15–30 minutes per finger
Best For: Tiny visible nods, hand art
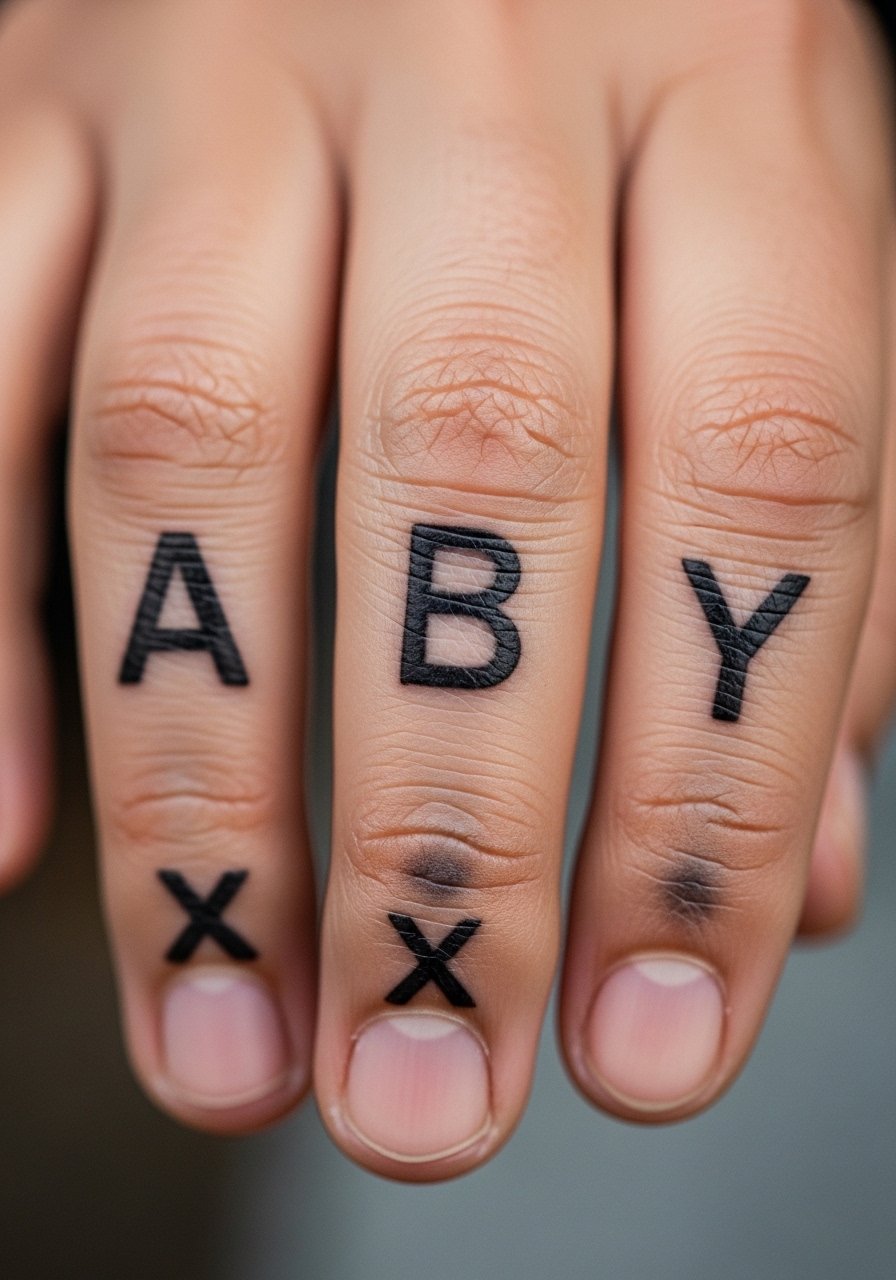
Finger tattoos are visible and prone to faster fading because of skin renewal. Button labels are classic but expect touch-ups; I’ve had friends need refreshers within a year. Pain is sharp due to thin skin. Keep letters slightly bold and avoid too much negative detail. Ask your artist about placement relative to knuckles and how your job/hobbies might affect wear.
27. Augmented Reality (AR) Ink Pattern on Forearm
Style/Technique: Geometric / AR-Friendly
Pain Level: Medium (4-6/10)
Session Time: 1–3 hours
Best For: Tech-forward fans, interactive designs
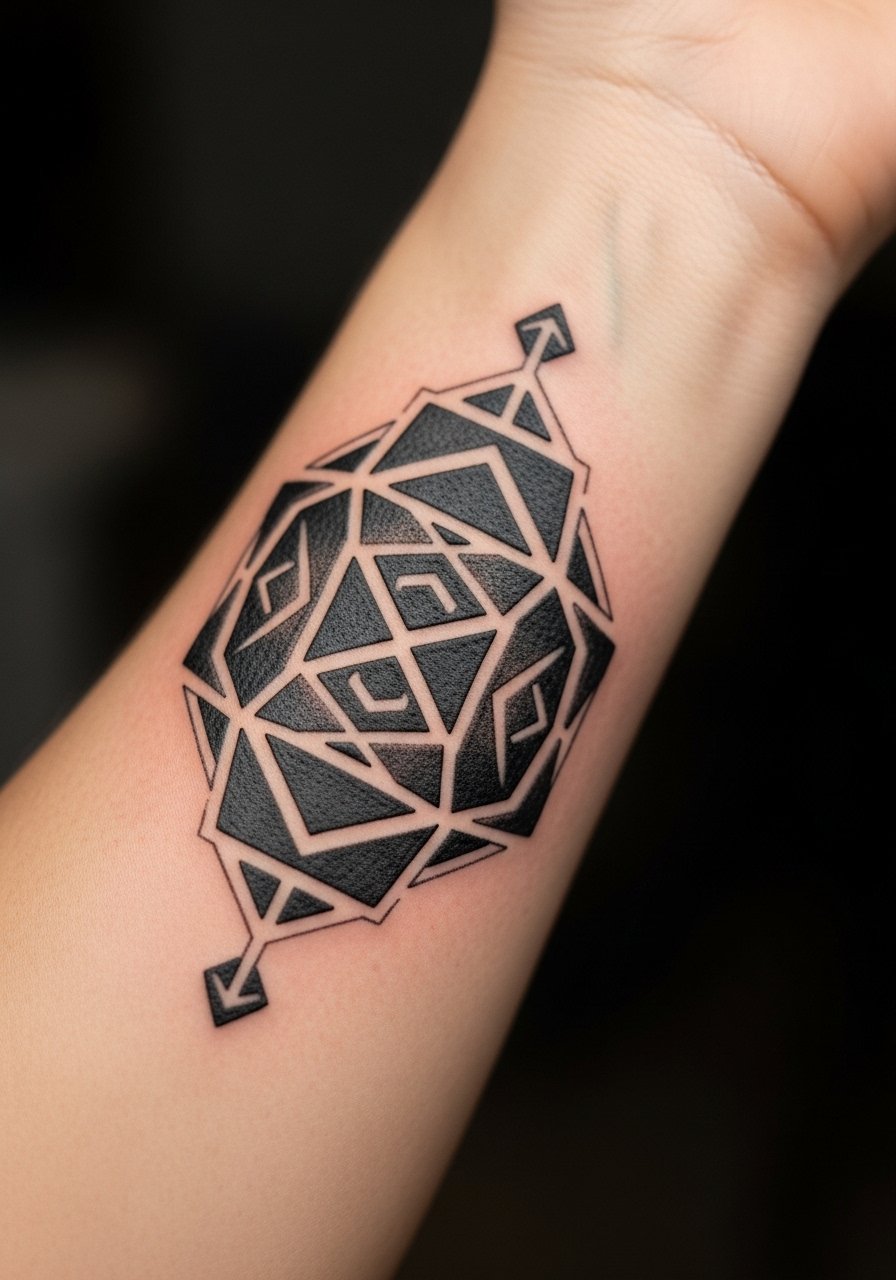
AR-ready tattoos combine bold black anchors with patterns that overlay digital filters. Forearm works well for scanning with a phone. Make sure the artist designs with contrast and spacing that survives healing and scanning. In my experience, pairing strong black lines with negative space gives the best baseline for future AR layers. This is another fresh angle many tattoo lists miss—combining ink with digital experiences.
Tattoo Prep and Aftercare Essentials
Aftercare Essentials:
- Aquaphor Healing Ointment, 14oz tube — Great for the first 3–5 days when skin needs heavy protection
- Saniderm Transparent Adhesive Bandage, 6-inch roll — Second-skin option many artists recommend for clean healing
- CeraVe Fragrance-Free Moisturizing Lotion — Daily moisturizer for days 4–14
Before Your Appointment:
- Tattoo Numbing Cream with 5% Lidocaine — Use only if your artist approves; helps for ribs or sternum
- Tattoo Stencil Transfer Paper — Handy if you’re testing layout at home
Long-Term Maintenance:
- SPF 50 Sunscreen Stick for Tattoos — Daily sun protection preserves color and lines
- Mad Rabbit Tattoo Balm — Popular for keeping healed tattoos vibrant
- Hustle Butter Deluxe — Vegan-friendly aftercare for ongoing moisture
Optional Comfort Items:
- Tattoo Numbing Spray — Useful for sensitive touch-ups or small areas
- Hydrocolloid Bandages Large — For spot protection on peeled areas
- Dr. Bronner's Unscented Castile Soap — Gentle cleanser for washing during early healing
Frequently Asked Questions
Q: How bad does a gaming tattoo actually hurt?
A: Pain varies by placement. Forearm or thigh = 2–4/10. Ribs, spine, fingers = 7–9/10. I tell friends it’s more an intense scratching/burning than a single sharp pain. For sensitive spots, consider a numbing cream with lidocaine but always check with your artist first.
Q: What if I regret a fandom tattoo later?
A: Sit with designs for months and choose placements you can hide (thigh, upper arm). Some people start with small symbols to test commitment. Removal exists but is a process—think about placement and longevity before inking.
Q: How do I keep colors from fading on gaming tattoos?
A: Sunscreen is essential. From what I’ve seen, UV exposure is the main fading culprit. Use an SPF 50 sunscreen stick on exposed tattoos and moisturize regularly with a fragrance-free lotion like CeraVe.
Q: How long before I can get sweaty after a tattoo session?
A: Wait at least 48–72 hours for light activity; longer if the tattoo is in a flex area. Sweating can introduce bacteria and cause scabbing or ink loss. I usually skip heavy workouts for a week and keep the area clean with a mild soap.
Q: Should I test my pain tolerance with a small tattoo first?
A: Only if you actually want a small tattoo. Pain depends more on placement than size. A tiny wrist piece might hurt more than a larger outer arm tattoo. If you’re nervous, pick an outer arm or thigh spot for your first one.
Q: How long does a tattoo take to fully heal?
A: Surface healing is typically 2–3 weeks; deeper layers settle over 2–3 months. The first week is the most critical—clean, moisturize, and avoid picking. Using Saniderm or Aquaphor in the opening days helps many people.
Q: Do tattoos look different on various skin tones?
A: Yes. Black and gray tend to be the most reliable across tones. Bright yellows and pastels may appear muted on deeper skin tones. I always suggest looking at healed photos of the artist’s work on skin tones similar to yours and asking about color saturation choices.
Q: What’s the most common mistake people make with gaming tattoos?
A: Going too small with intricate details—tiny pixel art, scripts, or QR codes that aren’t sized for long-term clarity. I’ve seen many pieces that needed touch-ups because the concept was great but the scale was too optimistic.
