
The neon-on-black images you see on inspiration boards are only half the story. A cyberpunk piece that still reads in five years uses bold negative space, deliberate panel breaks, and room for touch-up, not just blistering tiny detail. Pick the sub-style first, plan sessions around pain and clothing access, and prioritize one or two signature motifs so the work reads as a cohesive system on the body.
1. Cybernetic Forearm Circuit Sleeve

A full circuit sleeve reads best when the panels breathe. Recommend medium-thick linework for the main traces and finer dot work for texture so the pattern keeps contrast as it settles. For the session wear a black fitted t shirt so the artist can roll sleeves without tugging. Expect 2 to 5 sessions depending on coverage. Common mistake is jamming too many tiny connectors into a narrow forearm. Bring a blown-up reference of the main panel so the artist shows how it looks at three inches versus five. This placement tolerates touch-ups well, but thin single-needle traces will likely blur first.
2. Biomechanical Inner Upper Arm Paneling

This placement converts body contour into mechanical depth, so request clear panel edges and heavier black fills where the skin curves. Pain here is moderate to high, so plan for 2 to 4 sessions and wear a mens muscle tank to the appointment. Avoid over-detailing the smallest panels because the inner arm eats fine work. In consultation, ask the artist to map the largest elements along the medial line so the piece reads whether your arm is hanging or flexed. Healed photos show blackwork holds well here, while ultra-fine mesh textures can soften within two years. Expect a touch-up at year two if you want crisp panel separation.
3. Neon-Accent Cyberpunk Shoulder Cap
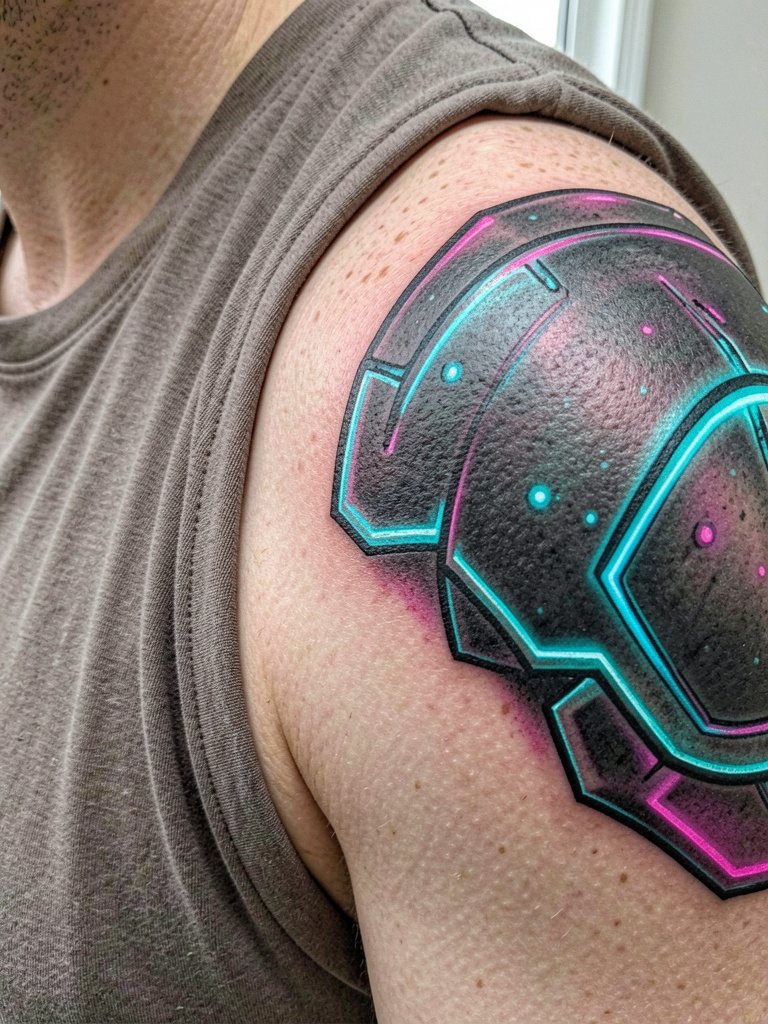
Artists and collectors split on neon use. One camp says neon color makes cyberpunk instantly readable and gives that rainy-night glow. Another camp says black and grey with careful geometry ages longer and still reads as cyberpunk. If you want neon, ask for it as controlled accents only and request swatches over healed-like saturation samples so you know how it will look after settling. For show-off outfits try a sleeveless tank or an open-button overshirt to frame the shoulder. Neon requires careful touch-ups and UV caution because bright pigments shift faster than black ink.
4. Glitch-Style Outer Forearm Symbol

A glitch symbol is a compact way to signal cyberpunk without heavy commitment. Size matters here. The most common error is scaling the symbol too small so the breaks fuse into a single black block. Aim for minimum three-inch width and ask the artist to thicken interrupted segments slightly for longevity. Session time is usually one hour. For appointments wear a short sleeve henley so the artist can work the wrist area without elastic seams. Expect a light touch-up at 12 to 18 months if you want the crisp staggered edges preserved.
5. Post-Apocalyptic Cityscape Calf Piece

Calf pieces let artists play with horizontal depth and atmosphere. Plan panels and negative space so distant towers don’t clutter the foreground. Discuss scale with the artist and bring mid-distance reference shots to show how light and shadow should behave. For showing it off try cropped jogger pants or athletic shorts. Calf sessions can run 2 to 5 hours per sitting depending on detail. The biggest mistake is packing tiny architectural details into thin strips; make the skyline graphic and leave the micro-ornament for later additions.
6. Cyber-Eye Micro-Realism on the Wrist

A micro-realism eye reads as an augmentation symbol in a compact area. The inner wrist is high-visibility and high-motion, so choose high contrast and avoid ultra-fine lashes or hair details. Bring a magnified reference to the consult and request a slightly heavier pupil edge to hold over time. For session wear keep the wrist free of jewelry and try a minimal wrist watch on the opposite wrist so nothing rubs the fresh ink. This piece usually fits into one to two short sessions but demands careful placement to avoid early blur.
Session Day Picks
The forearm, wrist, and calf pieces above call for clothing that gives clear access and avoids seams rubbing fresh ink.
- Stencil transfer paper kit. Lets you preview linework placement directly on the skin, which is handy for the circuit sleeve and glitch symbols discussed above.
- Topical numbing cream. Applied 30 to 45 minutes before softer sessions eases wrist and ribcage discomfort without compromising line depth.
- Thin protective film roll. Useful for small hand and wrist marks during the first week of frequent washing and work.
- Fragrance-free gentle body wash. Cleans healing areas without stripping pigment or irritating sensitive skin.
- Aquaphor healing ointment. Thin application in the first 48 hours helps protect fine-line work on the wrist without clogging needle channels.
7. Ribcage Reactor or Core Implant

Ribcage work is dramatic but painful. Artists split on whether fine line holds here. One camp says ribs stretch and blur fine lines within two years because of breathing and weight changes. The other camp says with precise needle depth and slightly wider spacing fine work can settle well, and they will point to healed photos as proof. If you want a core implant effect, plan multiple shorter sessions and request clear black panels to anchor the composition. For appointment wear a loose button up shirt that opens easily. Pain is high on most charts, so numbing and breaks matter.
8. Nape Tech Glyph or Barcode Strip
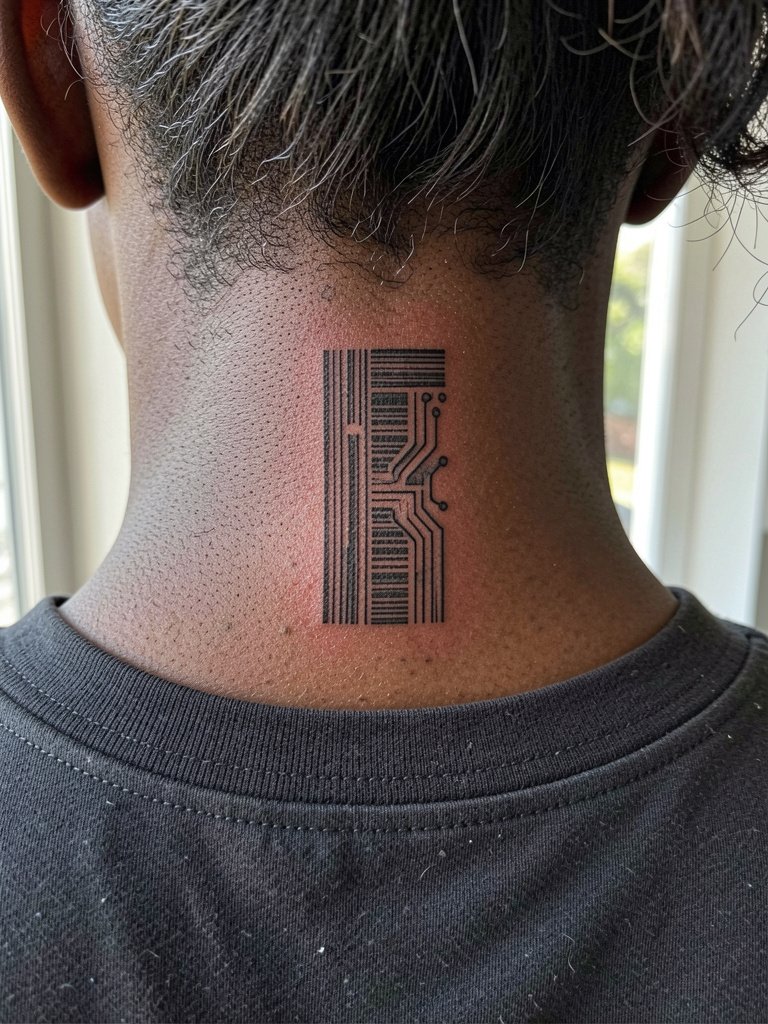
Nape marks are discreet and easy to hide. The main longevity risk is ink migration in tiny bars. Ask for slightly wider bars and negative spacing so the strip reads at arm's length. Session time is short and healing is quick but avoid tight collars for a week. A bomber jacket frames the back-of-neck area well when you want to show it. If you have a longer hairline, get a consult photo with hair up so placement sits below the hairline reliably.
9. Lateral Hip Augmented-Skin Panel

Hip panels are private reveals and they handle medium-sized modules very well. For the session wear soft-waist shorts or low-rise jeans that can sit below the area without pinching. In consultation, show your preferred waistband height so the artist places edges safely away from friction. The biggest mistake is placing critical seams where belt or waistband pressure will sit. This design looks sharp with modest neon slivers, but keep the color sparing if you want lower long-term maintenance.
10. Sleeve Fragment Patchwork with Wires and Ports

Patchwork lets you build a sleeve without committing to every panel at once. Ask the artist to design modular anchor pieces with clear negative space between them so future fills look intentional. For session access wear a rolled cuff overshirt that can be removed easily. Expect multiple bookings over months. The usual error is adding filler that conflicts with earlier panels; insist on a shared composition file or printed mockup so new elements align with existing seams.
11. High-Contrast Hand Circuit Mark

Hands are high-visibility but high-maintenance. The skin there regenerates faster and faces daily abrasion. Plan bold black nodes and keep the connecting traces slightly thicker than reference to preserve shape. For the session remove rings and avoid applying lotions that day. If you want to stage fashion around it, minimal rings and monochrome sleeves help the mark stand out. Small hand marks often need touch-ups within a year depending on activity and washing frequency.
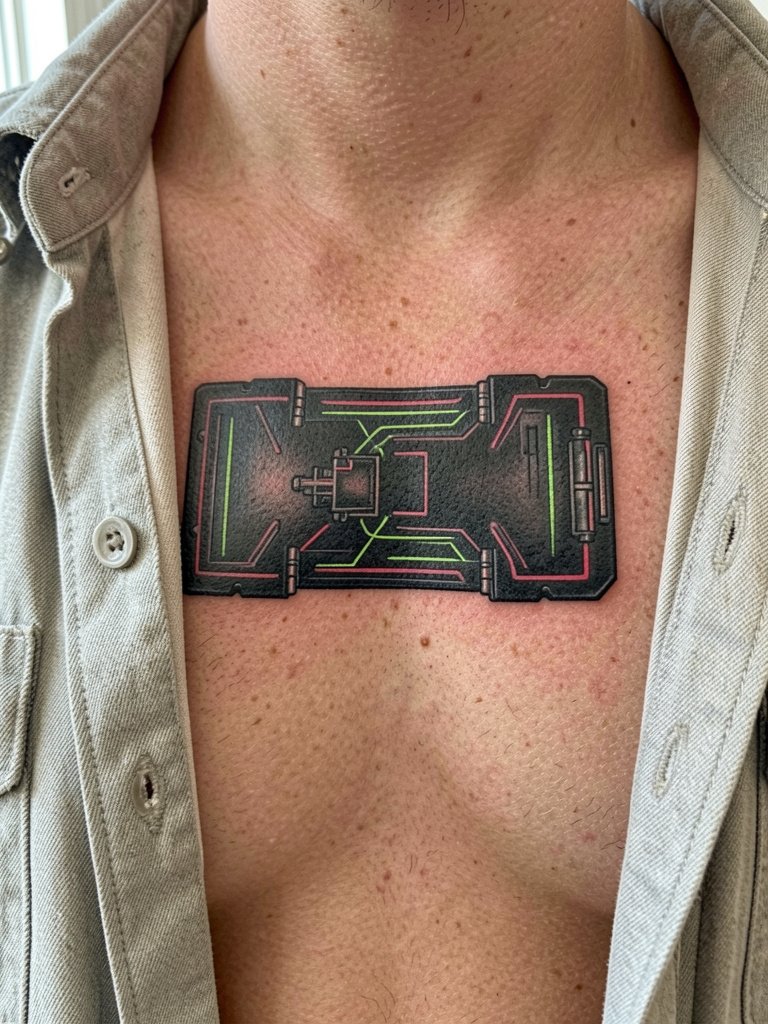
12. Dark-Neon Upper Chest Implant Graphic

An upper chest implant reads strongly with open collars. The key is a bold black core that anchors any neon accents so the design does not float as it fades. Ask the artist to show a collar-raising mockup so the piece aligns with shirt lines. For showing it off choose an open collar shirt or scoop-neck tee. Chest skin moves less than forearms, but heavy sun exposure accelerates pigment shift, so plan for sun protection after healing.
13. Cyberpunk Knee or Lower Thigh Armor Plate

Thigh armor fits the body curve and can be scaled for impact. Discuss how the plate will flex with muscle movement and request heavier outer lines so panels do not lose shape when you sit. For the session wear loose shorts with a wide leg opening so the artist can access the area without waistband pressure. Thigh skin ages well for bold work, but delicate filigree inside plates is prone to soften and may need a touch-up at year two or three.
14. Back-of-Neck Barcode or Machine Tag

Back-of-neck tags are strong visual stamps. Keep bar widths generous and avoid microtype unless you want it decorative only. For healing avoid tight collars and try a crew neck tee for the first week. A common misstep is asking for extremely small serial type which later smudges into unreadable marks. If you want future expansion, ask the artist to leave negative space above or below the strip.
15. Palm-Device or HUD Panel Motif

Palm-up UI panels make for introspective pieces that read when you gesture. Inner forearm skin is more stable than the palm but still moves, so fine shapes should have slightly increased spacing. During the consult, bring two scales of the same element so the artist can show axis legibility. For the appointment wear a short sleeve shirt with no wrist elastic. This style ages reasonably well if you avoid the thinnest single-needle filigree.
16. Forearm Band with Circuit Glyphs
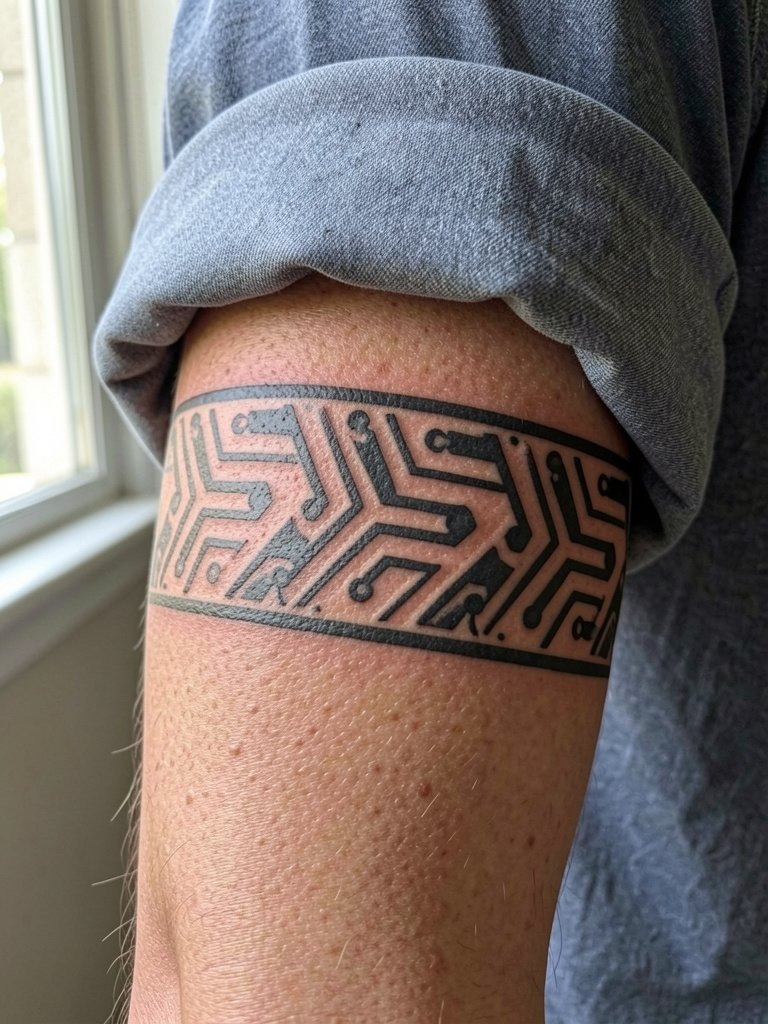
Bands work as modular statements and fit many wardrobes. For a clean wrap ask the artist to measure the forearm circumference and map the glyph repeat so negative spaces align when the arm rests. Session wear a short sleeve henley for easy access. The common error is forcing a tight micro-repeat that blurs; instead choose a larger repeat with clearer spacing to age better.
17. Minimalist Barcode Wrist Strip

Wrist barcodes read best with bold bars and generous spacing. Tiny pinstripe bars vanish within a year on the wrist. If you want legibility, ask the artist to thicken every second bar and mark the reference with measurements. Wear no bracelets on the tattooed wrist for the first two weeks. This is a low-session-time design but plan for a touch-up at year one depending on wear.
18. Cyberpunk Ankle Data Node

Ankle nodes are discreet and photograph well. The main risk is sock friction, so plan placement above likely sock lines. For the session wear jeans with cuffs rolled to expose the area, or crew socks and shorts so the ankle is free. The tattoo typically finishes in one short session but can need a touch-up due to daily friction. Keep the design simple and avoid ultra-fine rays that will disappear.
19. Modular Chest Panel for Expansion
Design modular panels with future joins in mind. Ask the artist to leave clean negative margins where later additions will connect. For appointments choose an open-button shirt for easy chest access. Larger chest panels age well when anchored by heavy black shapes. The mistake people make is filling edge areas that later prevent seamless extension.
20. Scapular Cybernetic Plate

Back plates allow scale without constant visibility. Mapping matters because shoulder blades move with the arm. During consultation, ask the artist to test the plate curvature by having you move your arm so they can adjust the seam flow. For session wear a wide-neck top that can be removed without tugging. Expect several-hour sessions and plan for gradual shading rather than trying to complete all blending in one sitting.
21. Micro-LED Dot Constellation on Fingers

Finger work is visible but notoriously fickle. The skin there exfoliates often so micro-dots and tiny LEDs can fade quickly. If you want the look, ask the artist to plan for a yearly touch-up and to place dots slightly deeper and a touch larger than the reference. Keep the hand dry for the first week and avoid friction. Minimalist rings and sleeves pushed up pair well when showing this work.
22. Spine Column Interface

Spine interfaces demand symmetrical spacing and strong vertical anchors. Discuss how the modules align with vertebrae so the piece reads when you bend or stand. For the session wear a zip hoodie you can open or a wide-neck top to allow the artist to work without tugging. Pain varies along the spine, so plan segmented sessions focused on anchor modules first. The result photographs well and gives a clean tech column effect without needing color.
23. Geometric HUD Mandala on the Sternum
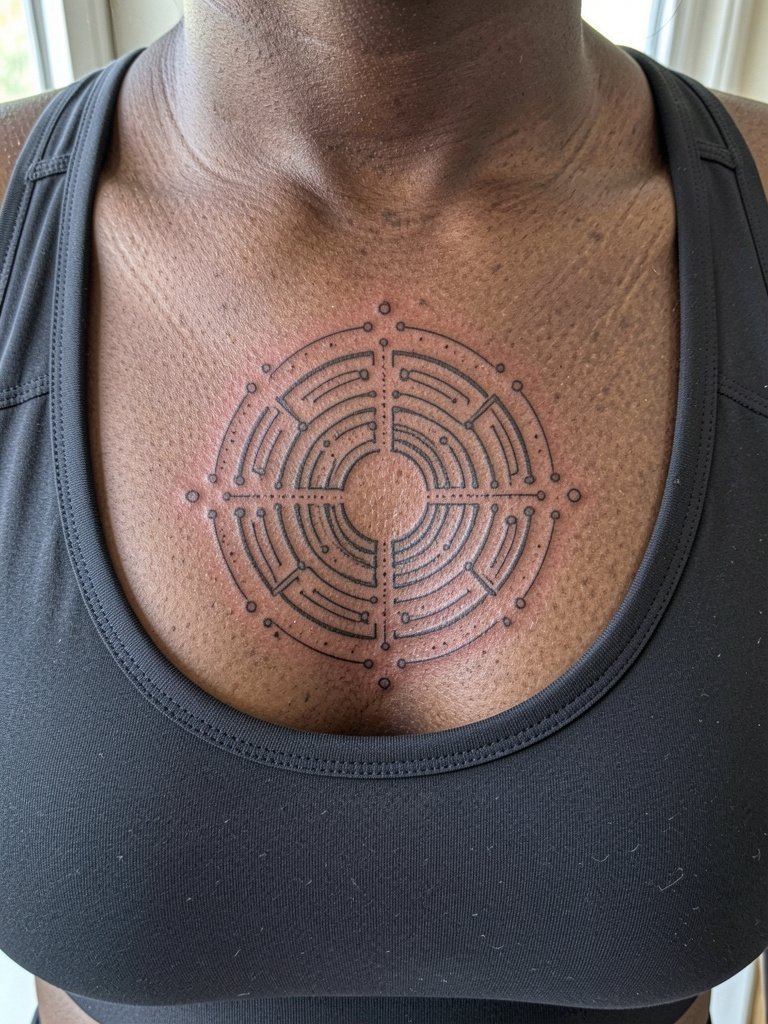
Sternum mandalas read best when balanced and not overcrowded. The sternum is a sensitive spot so plan shorter sessions and request clear center spacing to prevent crowding. For the session wear a fitted sports bra or a loose button-up that opens easily. Be explicit about how dense the dot work should be because too many tiny stipples here will lose definition as the skin heals. If you want a cleaner look, favor bolder rings and fewer inner details.
Frequently Asked Questions
Q: How should I choose between neon accents and black-and-grey for cyberpunk pieces?
A: Two camps exist. One camp prefers neon accents because the bright color immediately signals a neon-noir aesthetic and offers high contrast for photos. The other camp prefers black-and-grey because those foundations age more predictably and keep the composition readable as pigments settle. Decide by the placement and your lifestyle: visible, sun-exposed areas favor black-and-grey with small color pops, while covered pieces can handle larger neon swaths and more frequent touch-ups.
Q: Where can I find artists and healed examples without relying on specific names?
A: Search style hashtags like #cyberpunktattoo, #biomechtattoo, and #blackworktattoo on Instagram and TikTok and filter by your city. Tattoodo keyword searches for "biomechanical sleeve" or "glitch tattoo" surface portfolios organized by style. Reddit threads also show healed photos that illustrate how a design ages on different skin tones. Focus on portfolios that include healed shots and full projects rather than single fresh photos.
Q: What should I wear to my ribcage or upper chest session?
A: For ribcage sessions wear a loose button-up shirt that opens easily so the artist can access the whole side without the waistband pressing the area. For upper chest pieces pick an open-collar shirt so the collarbone is exposed without fabric rubbing the fresh ink. These clothing choices minimize fabric friction during the appointment and help you avoid shifting the stencil while the artist works.
Q: How do cyberpunk tattoos age on darker skin tones and what adjustments help readability?
A: On darker skin, higher contrast and wider line weight help the design stay crisp. Neon pigments show differently and often benefit from being used as tiny accents rather than large fields. Ask the artist for healed-tone mockups in similar skin tones and for bolder anchor lines to preserve silhouette. Personal observation shows that slightly larger geometry keeps the cyber motifs readable over time.
Q: Are fine-line UI symbols a bad choice for high-movement areas like forearms and ribs?
A: Fine-line UI symbols split opinion. Some artists say fine line works if spacing is increased and the needle depth is precise. Others point out that high-movement areas tend to blur thin lines sooner. A practical route is to scale up the main glyphs a little, use heavier anchor lines, and reserve single-needle strokes for inner details away from high-friction zones.
