I spent months bookmarking collarbone tattoos before I realized the real problem: many designs look great fresh but don't respect the bone's curve or long-term wear. These 23 collarbone tattoo ideas focus on flow, style, and real-world healing so you can pick something that actually frames your body — not just your Instagram feed.
Fine Line Floral Along Collarbone
Style/Technique: Fine Line / Minimalist
Pain Level: Medium (Bone proximity)
Session Time: 1 session
Best For: Delicate, timeless collarbone accent
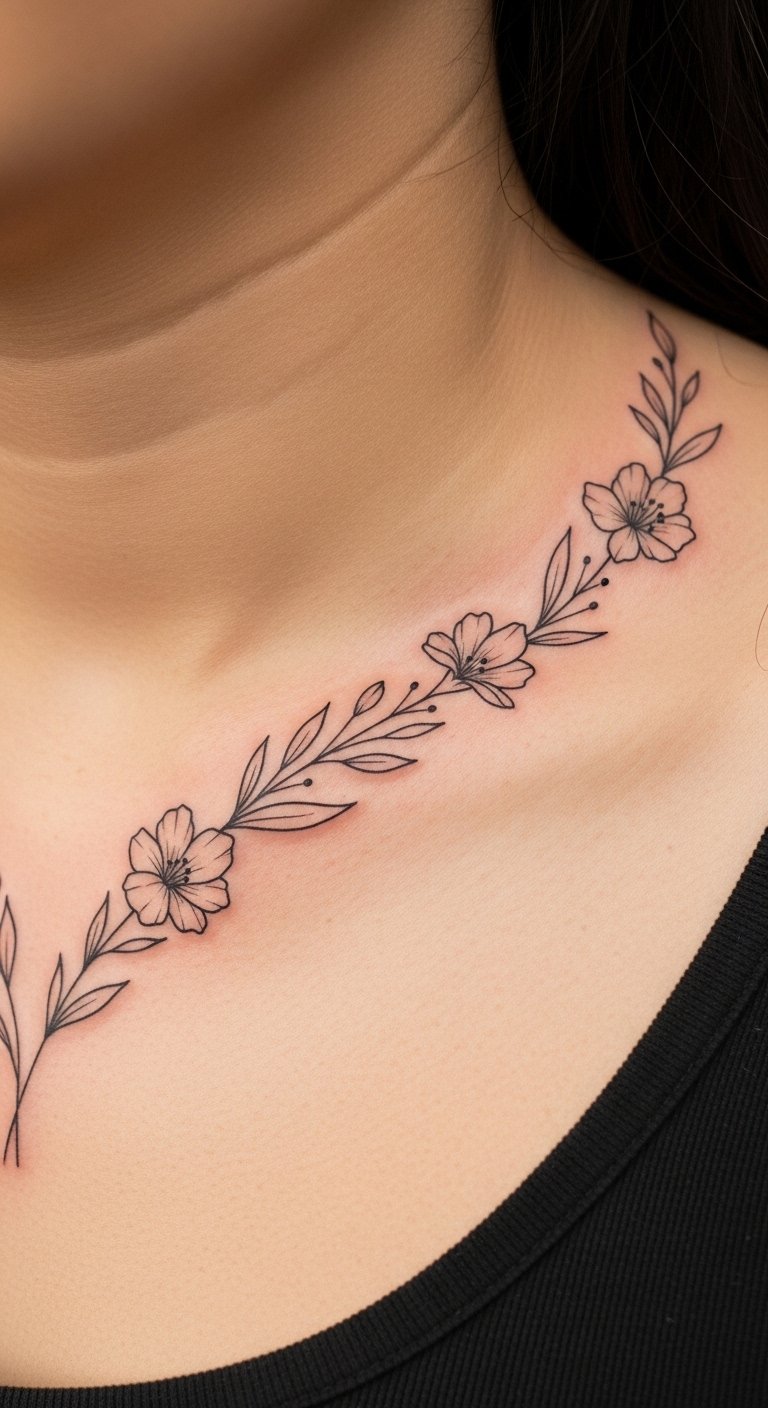
I picked this after seeing it recommended for flow and longevity. Fine line floral hugs the collarbone and reads elegant from every angle. Expect moderate pain because the needle hits close to bone; short sessions are kinder. Healing takes 2–4 weeks before peeling settles. This style ages well if lines are spaced — cramped petals blur over time. Ask your artist for contrast and spacing, and avoid tiny dots that can blow out on bony skin. Useful search terms: fine line collarbone tattoo, flow, small collarbone tattoos.
Minimalist Quote Along Collarbone
Style/Technique: Script / Minimalist
Pain Level: Low-Medium
Session Time: 1 session
Best For: Personal mantra, first tattoo
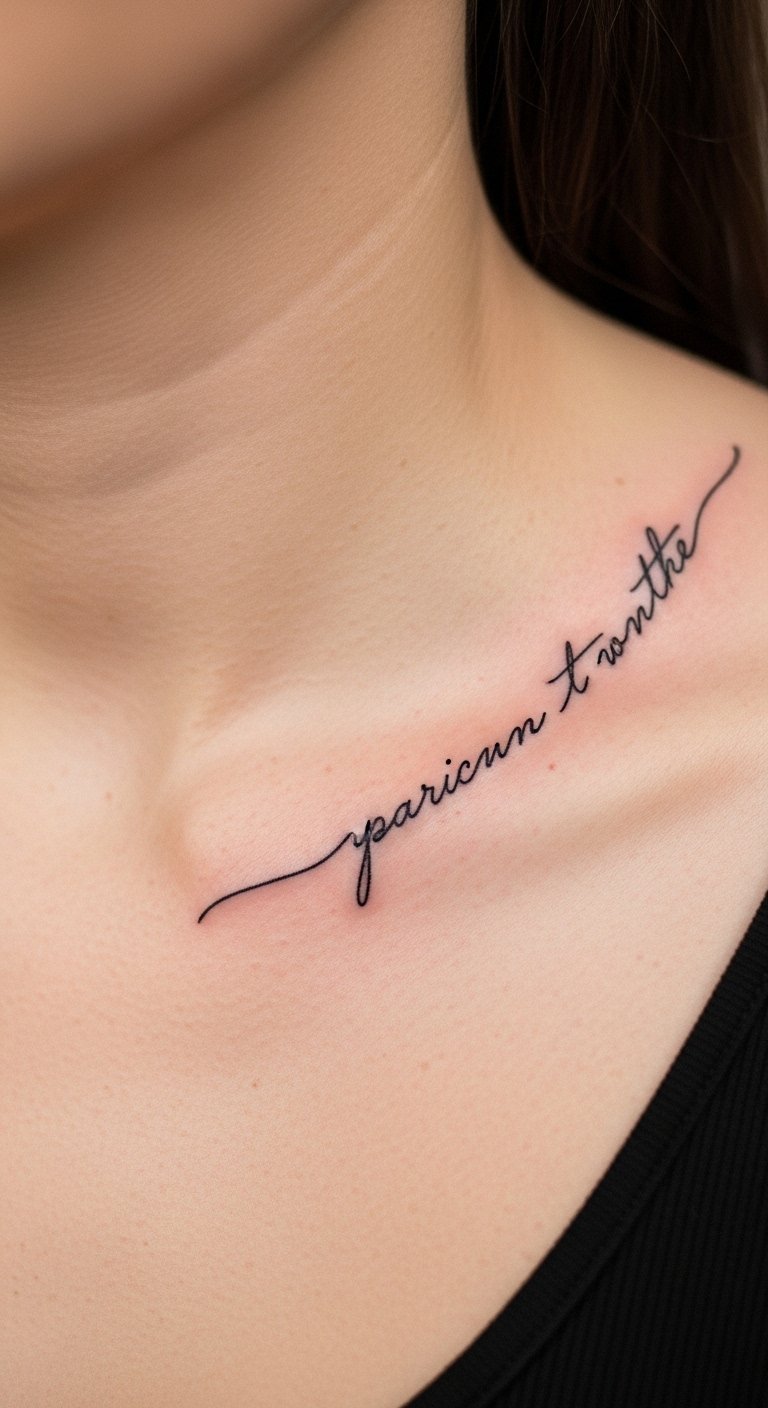
I love how a short mantra curves with the bone. Script here should be scaled to the 2–4 inch canvas and avoid ultra-tiny fonts — small letters can blur. Pain is manageable but expect more sensitivity right over the bone. Healing is 2–3 weeks; moisturing daily prevents scab cracking. Artists skilled in fine line lettering or script will give the cleanest healed look. Try “minimalist quote” and “collarbone tattoo designs for women” when browsing portfolios.
Moon Phases Linear Over Collarbone
Style/Technique: Fine Line / Celestial
Pain Level: Medium
Session Time: 1 session
Best For: Timeless, mystical accent
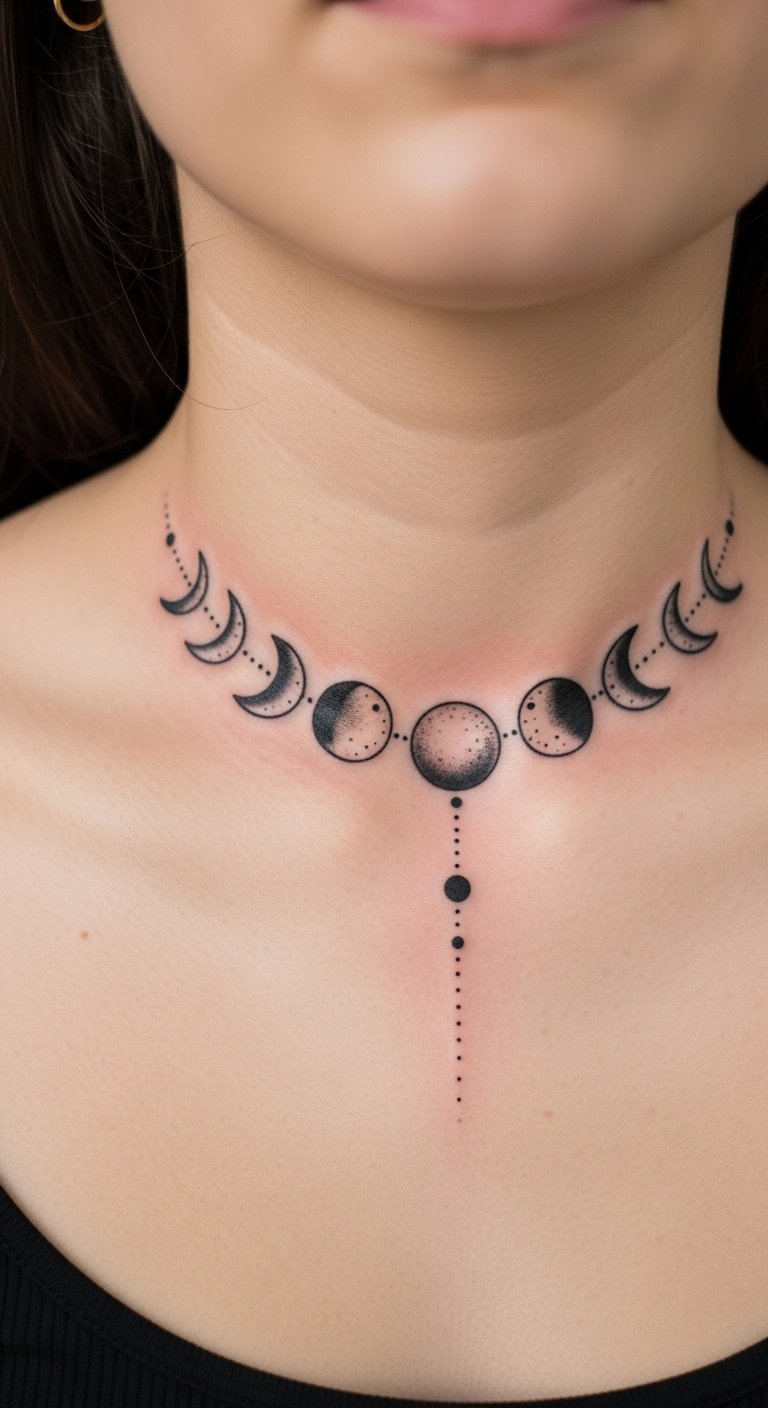
Moon phases elongate the collarbone beautifully and read timeless. Because this is linear, flow with the bone is essential — ask for a mockup curved to your collarbone. Pain is moderate across the bone; sessions are short. Healed moons keep their shape if the artist uses slightly bolder fine lines. Common mistake: exact symmetry without accounting for shoulder height differences. Search: fine line collarbone tattoo, celestial, timeless.
Bird Motif Flying Over Collarbone
Style/Technique: Illustrative / Fine Line
Pain Level: Medium
Session Time: 1–2 sessions
Best For: Symbolic freedom, peekaboo reveal

Birds work with the collarbone’s slope — they create motion as you move. I saw lots of these as micro-scale animals that peek out from clothing. Expect moderate sensitivity near the bone; a single short session usually does it. Healed detail depends on line weight — too thin and feathers blur. Ask for slight contrast and leave space around the wing tips. Use tags like “birds + freedom” and “small collarbone tattoos.”
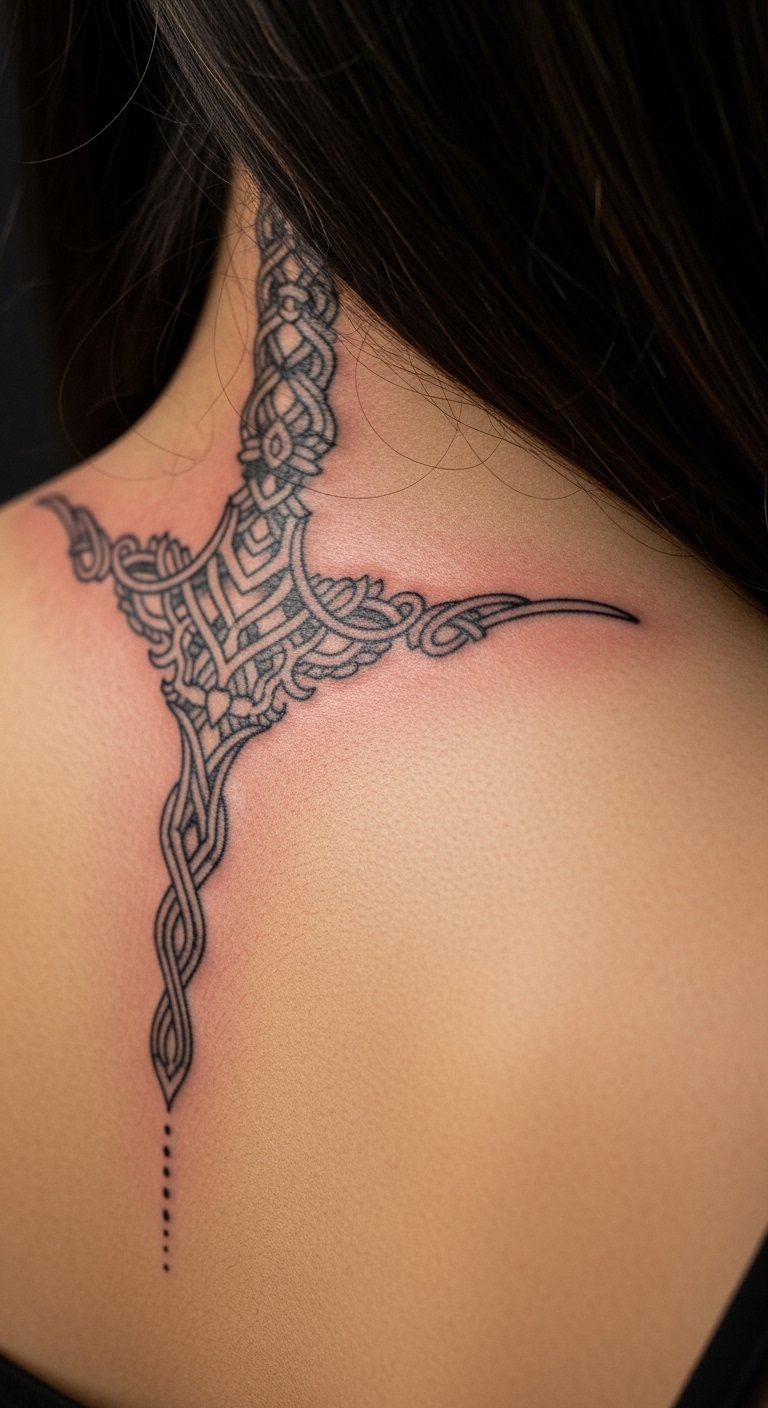
Serpent Vine Wrap Along Collarbone
Style/Technique: Illustrative / Organic
Pain Level: Medium-High
Session Time: 1–2 sessions
Best For: Flowing, contour-hugging design

A serpent or vine uses organic curves to match the bone. It’s forgiving for placement because the imagery is meant to flow. Pain spikes where the needle crosses thin tissue near bone. Healing requires careful movement control — stretching can tug scabs. This ages well if linework is consistent and shading isn’t too soft. Avoid overly tight scales or tiny dots that can fill in. Look for artists experienced in illustrative, organic flow.
Mandala Sternum-Collarbone Hybrid
Style/Technique: Dotwork / Mandala
Pain Level: High (sternum + bone areas)
Session Time: Multiple short sessions
Best For: Symmetrical chest-collarbone statement
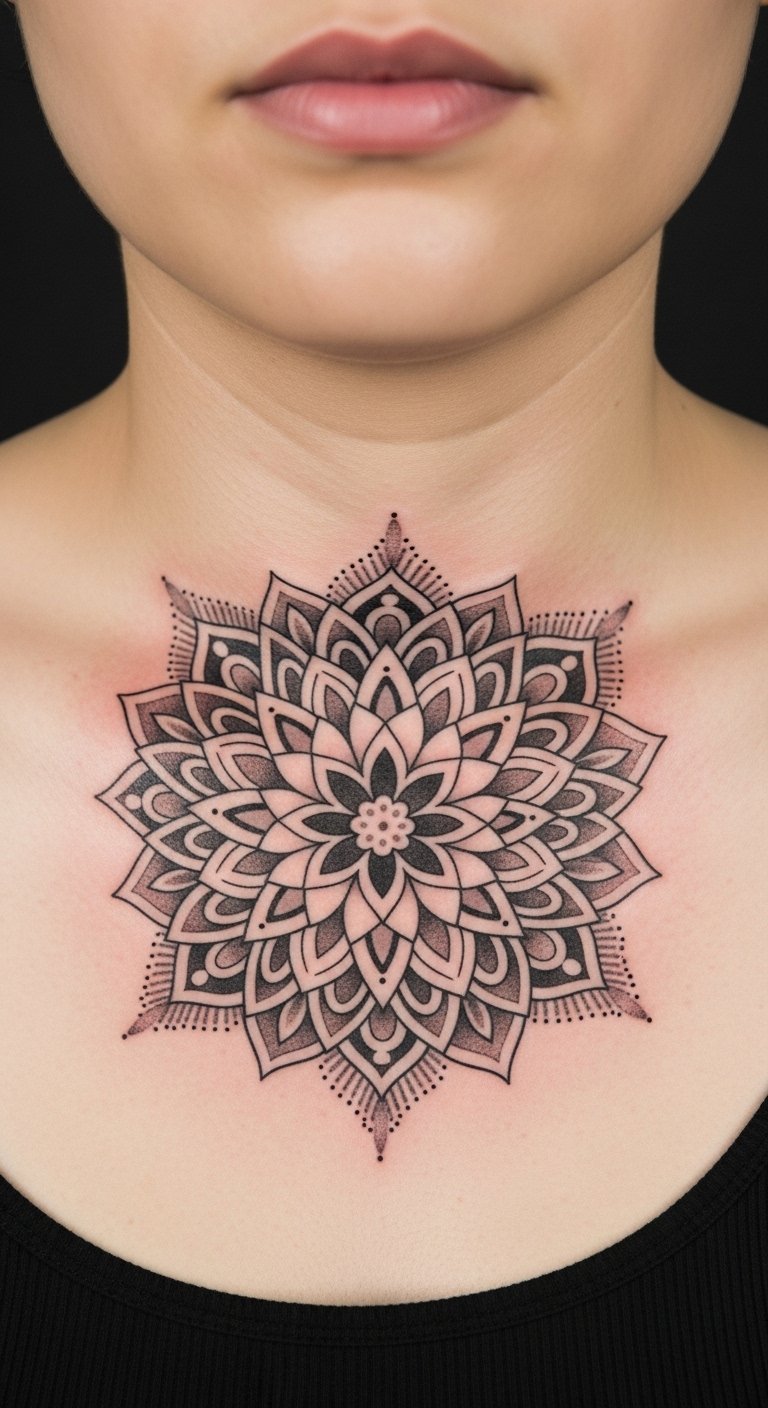
When I saw mandala hybrids I liked how the symmetry frames the sternum and collarbones. This spot can be painful — sternum and collarbone hits are more intense. Dotwork requires patience and often multiple sessions. Healed mandalas look striking if the dot density is balanced; too dense and areas can grey-out. Common mistake: making a mandala too large for the chest—scale it to your anatomy. Ask for examples of healed dotwork.
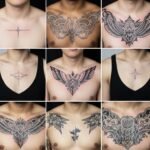
Neo-Traditional Butterfly Centered On Collarbone
Style/Technique: Neo-Traditional / Color Accent
Pain Level: Medium
Session Time: 1 session
Best For: Vibrant, symbolic centerpiece
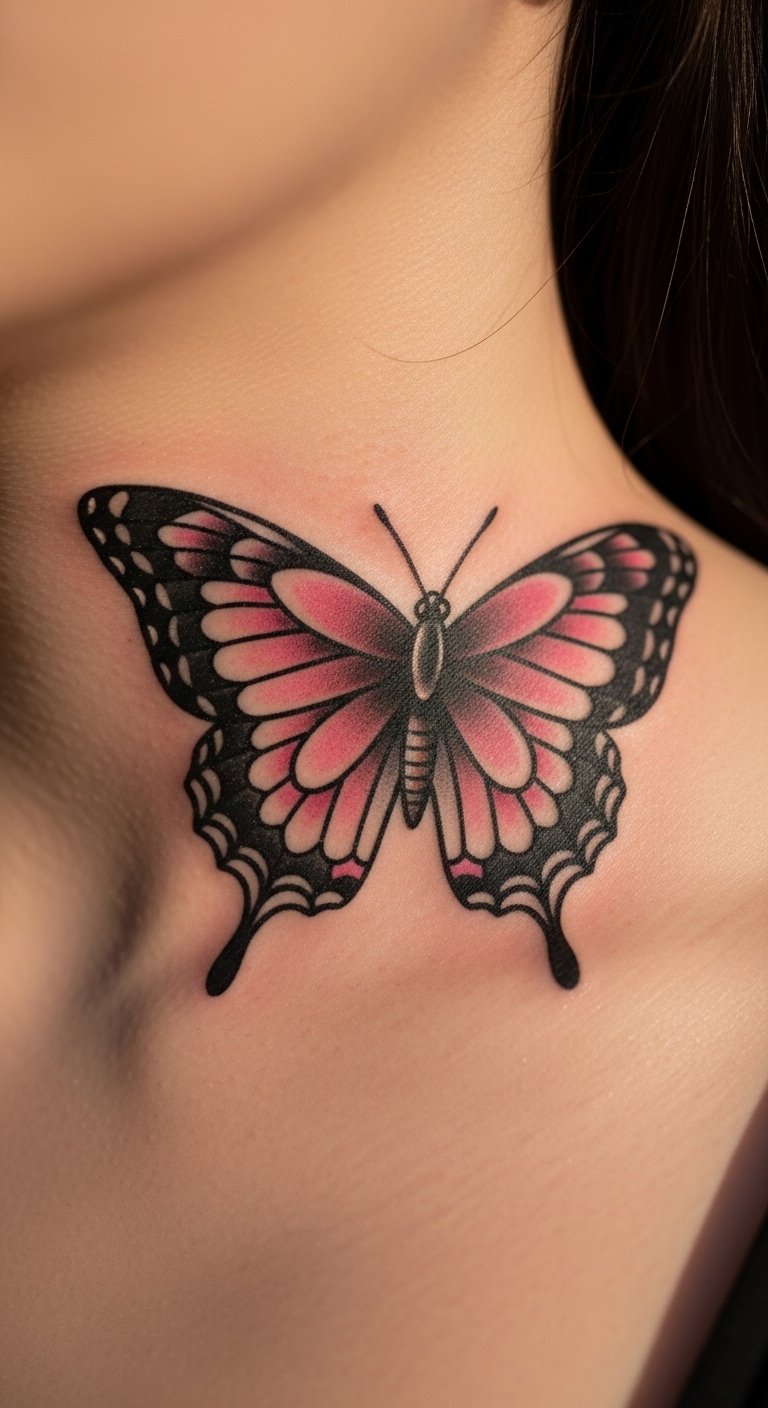
Butterflies with pink accents bring life to the collarbone. I noticed color accents are trending again, but this area gets sun and friction—so choose saturated pigments and solid outlines. Pain is moderate. Healed color can look softer than fresh; ask the artist about color saturation for your skin tone. Avoid tiny watercolor splashes without anchors — they fade unevenly. Search “butterfly in pink and black” and “color accents.”
Lotus Outline At Shoulder-Collar Joint
Style/Technique: Minimalist / Botanical
Pain Level: Low-Medium
Session Time: 1 session
Best For: Subtle shoulder-collarbone transition
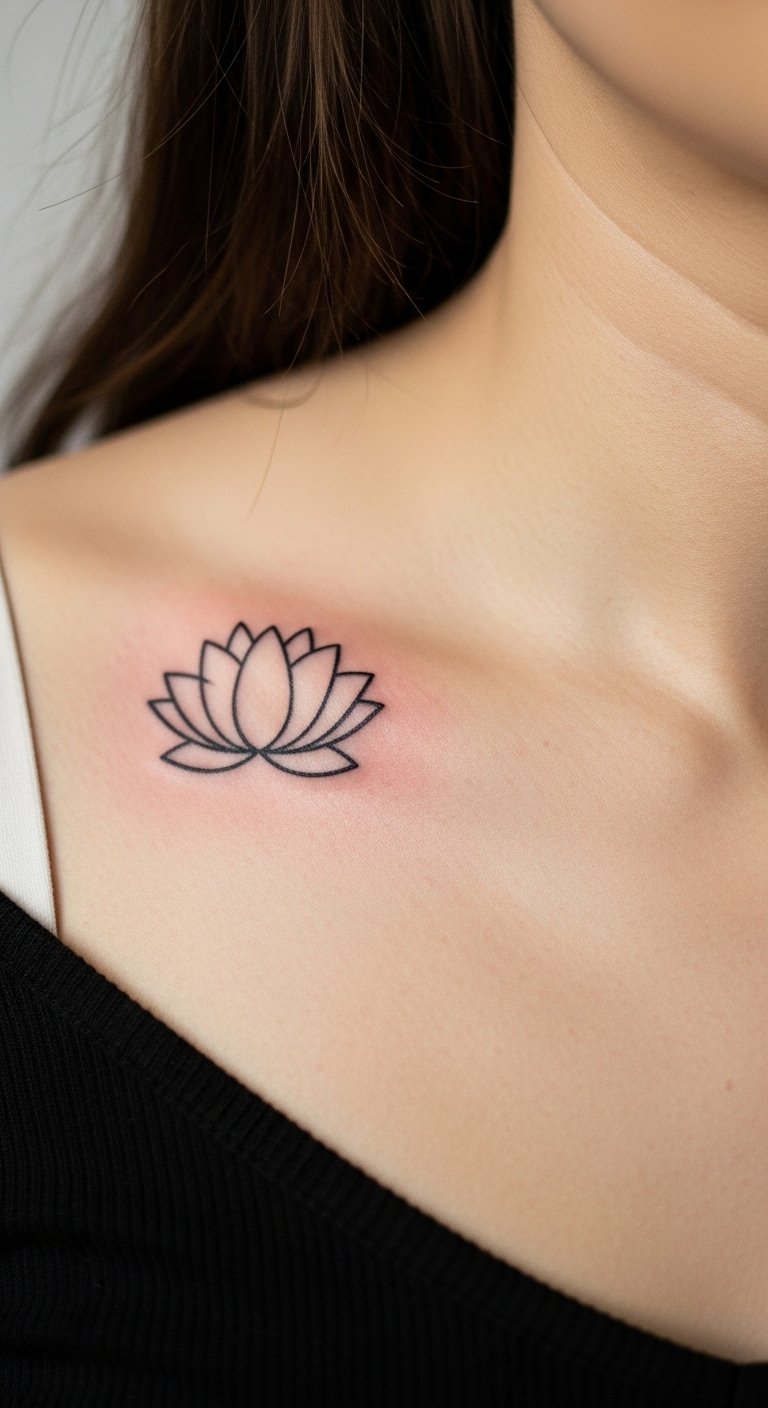
A lotus outline sits naturally where shoulder meets collarbone. It’s a low-commitment, low-pain option that still reads meaningful. Healing is straightforward; avoid tight straps that can rub the area during week one. This ages well if lines aren’t too thin. Artists who do minimalist botanical work will show healed examples — check them. Related terms: small collarbone tattoos, fine line botanical.
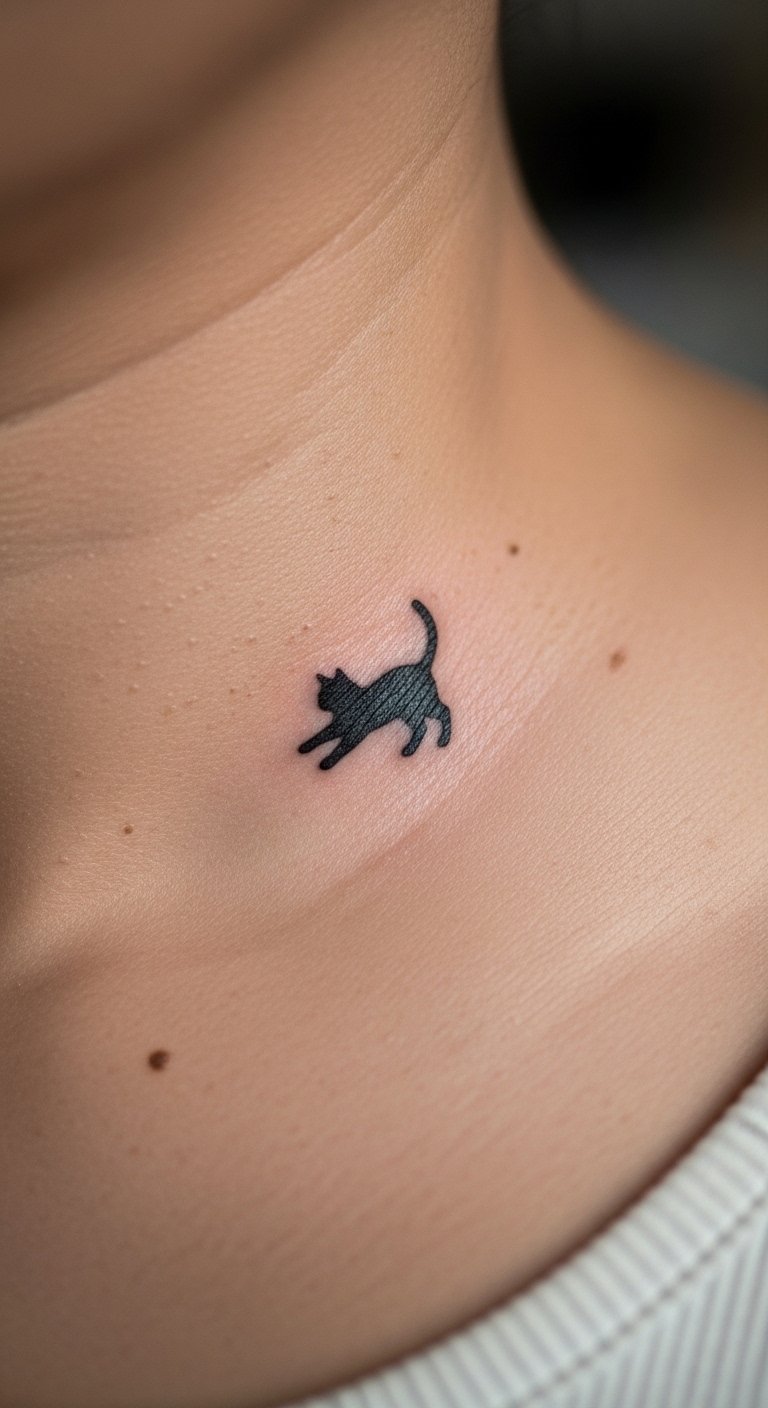
Micro Dragon Silhouette Along Collarbone
Style/Technique: Traditional / Minimal
Pain Level: Medium
Session Time: 1 session
Best For: Compact strength symbol
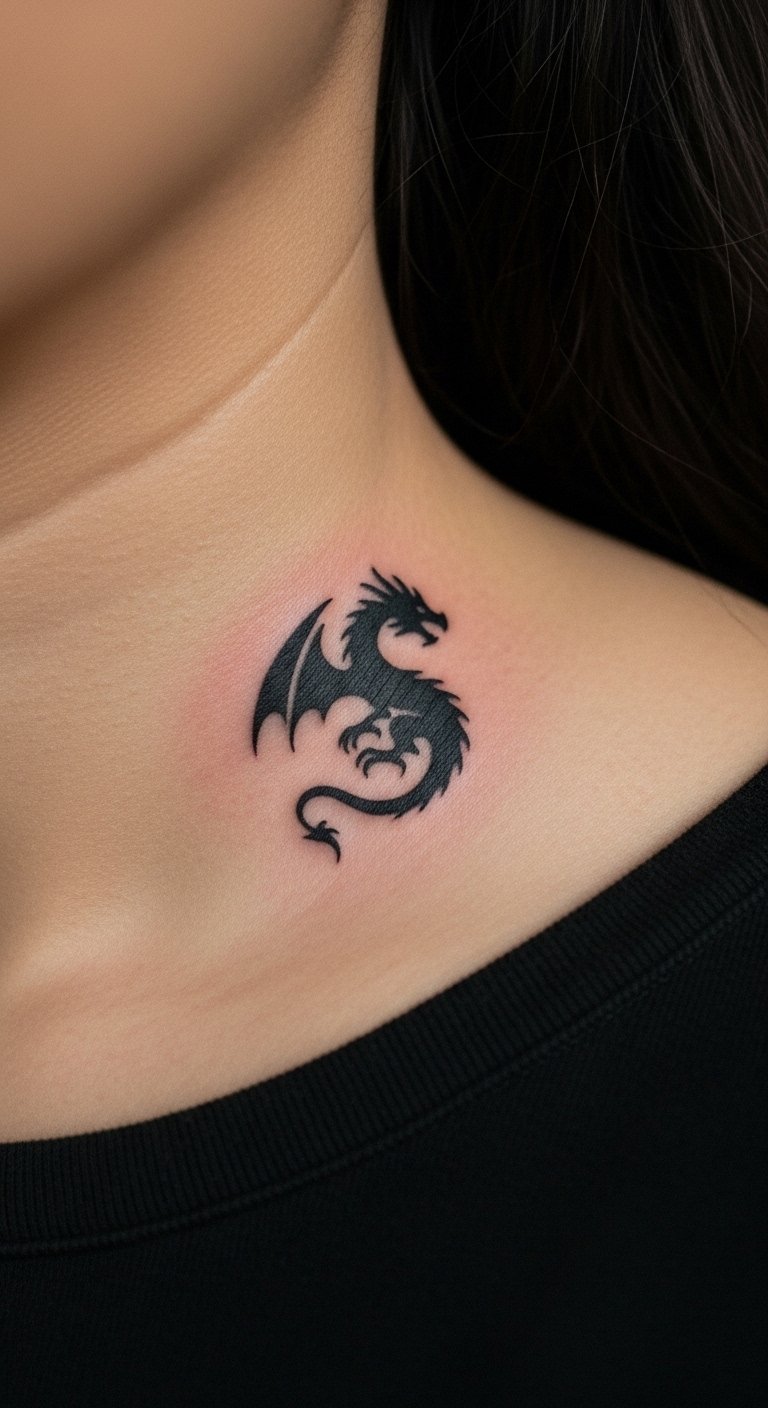
A tiny dragon gives attitude without bulk. It’s a micro-scale animal that reads strikingly when placed just above the bone. Pain is moderate near the bone; short sessions are best. Small silhouettes hold up well because of clean, bold lines. Mistake to avoid: over-detailing such a small motif — details blur over time. Look for artists who show small-scale traditional pieces.
Cherry Blossom Falling From Shoulder To Collarbone
Style/Technique: Watercolor-Light Color / Botanical
Pain Level: Medium
Session Time: 1–2 sessions
Best For: Seasonal, soft shoulder-collar flow
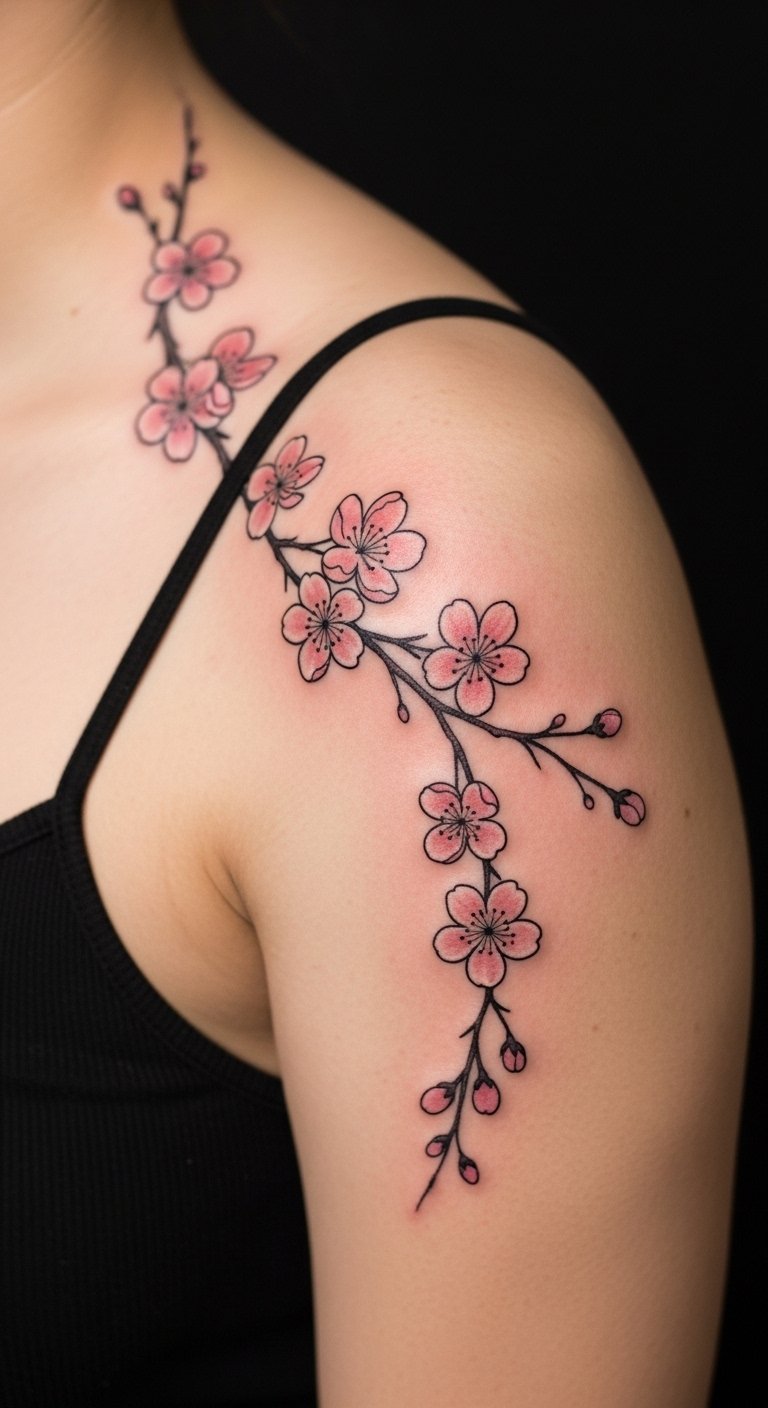
Cherry blossoms create a soft cascade that flatters the collarbone curve. Watercolor-style color must be anchored with crisp stems or outlines to avoid patchy healing. Pain varies along the shoulder and bone. Colors fade faster in sun-exposed spots, so long-term maintenance matters. Common mistake: too faint color lines without solid borders. Search “cherry blossom falling,” “color accents,” and “shoulder collarbone tattoo.”
Anatomical Heart Under Collarbone
Style/Technique: Realism / Fine Line
Pain Level: Medium
Session Time: 1 session
Best For: Intimate, meaningful placement
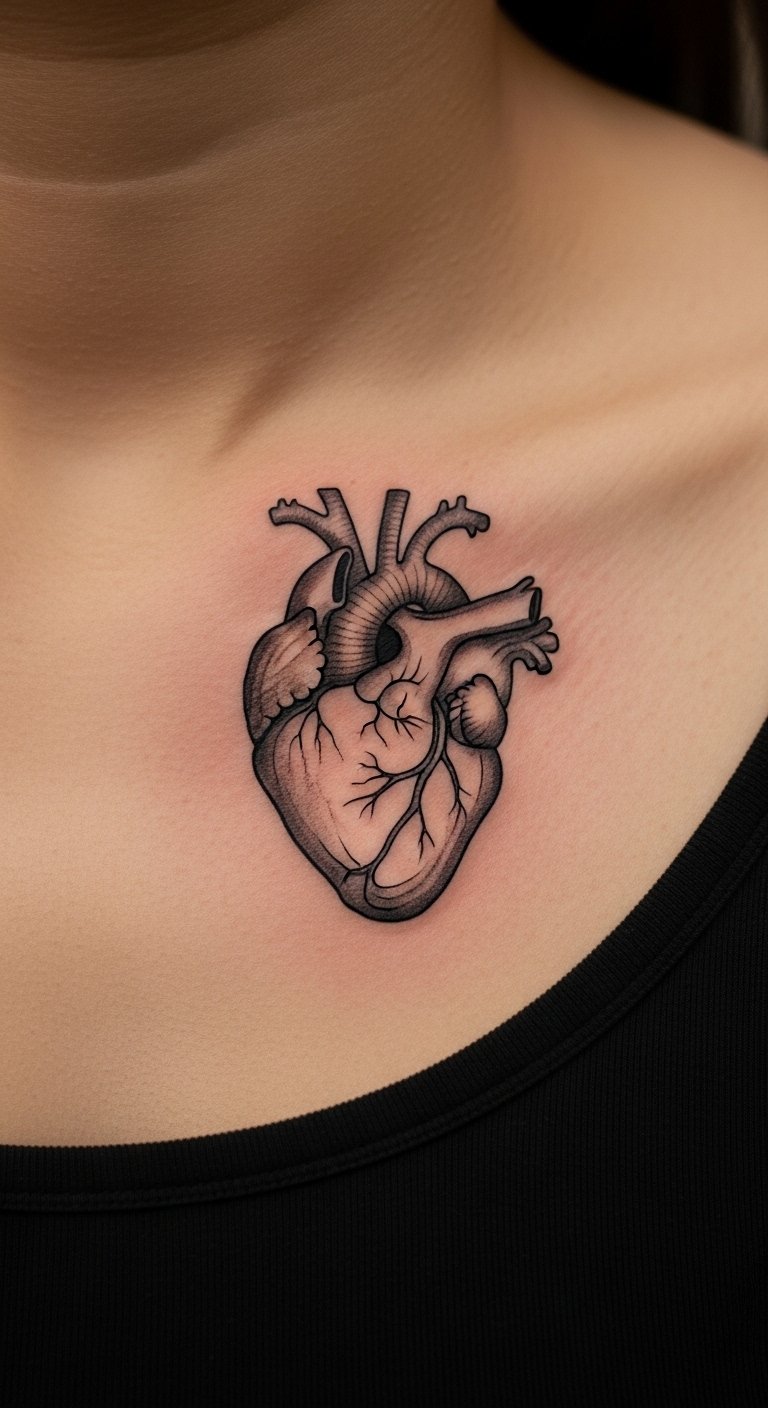
An anatomical heart feels personal and sits well tucked under the collarbone. Realism requires precise fine-line work — pick an artist with small-scale realism healed photos. Pain is moderate; healing is typical 2–4 weeks. Healed realism shines with contrast, so avoid light hairline shading that can vanish. Ask for healed portfolio examples on similar placements.
Moth With Geometric Accents On Shoulder Edge
Style/Technique: Blackwork / Abstract
Pain Level: Medium-High
Session Time: 2 sessions
Best For: Bold shoulder-collar statement
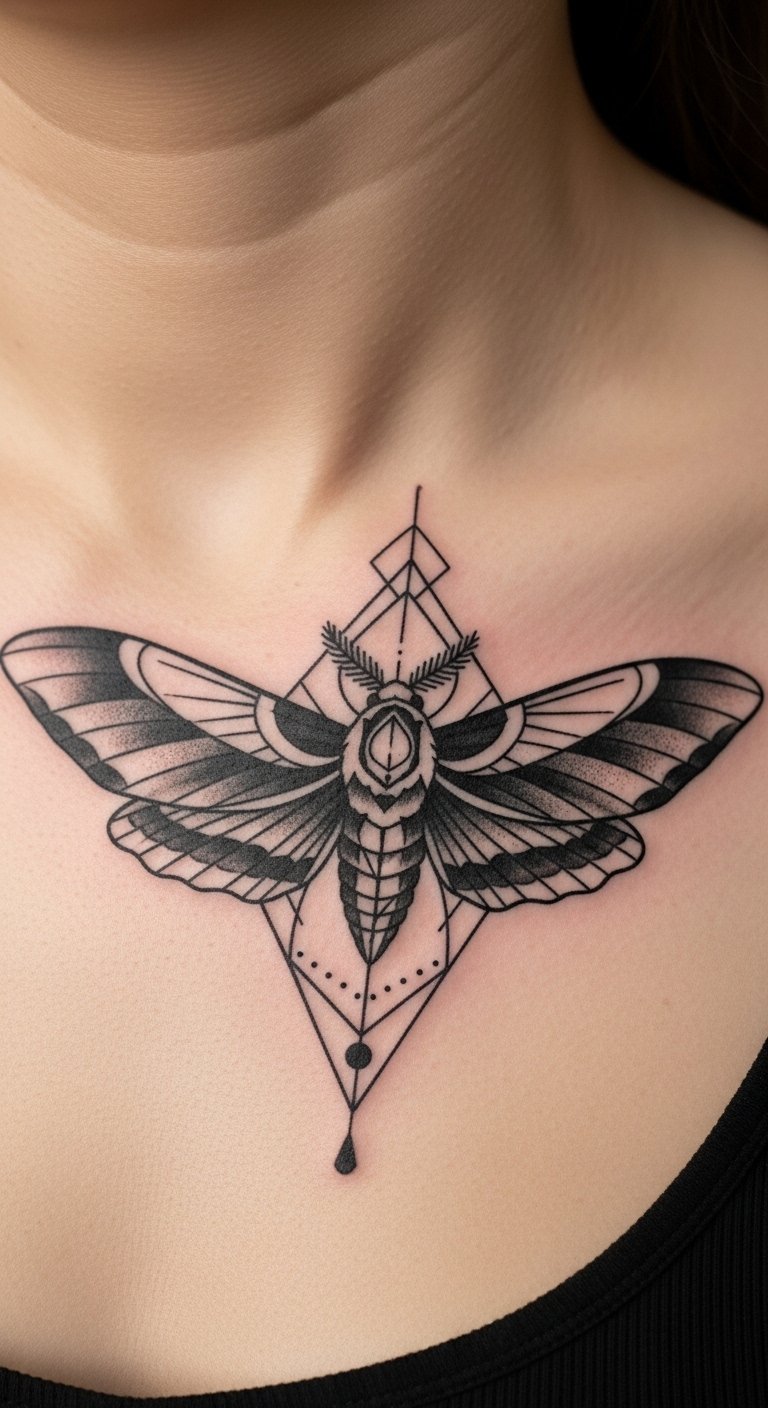
Moths with geometric elements read modern and textured. They translate well across the shoulder into the collarbone area. Because of heavier blackwork, pain and session time increase. This ages well if solid blacks are balanced with negative space. Don’t request overly tight dot shading next to heavy fills — it can grey in. Look for blackwork portfolios and healed contrast examples.
Fern Botanical Wrap Along Collarbone
Style/Technique: Fine Line / Botanical
Pain Level: Medium
Session Time: 1 session
Best For: Natural, camouflaging movement
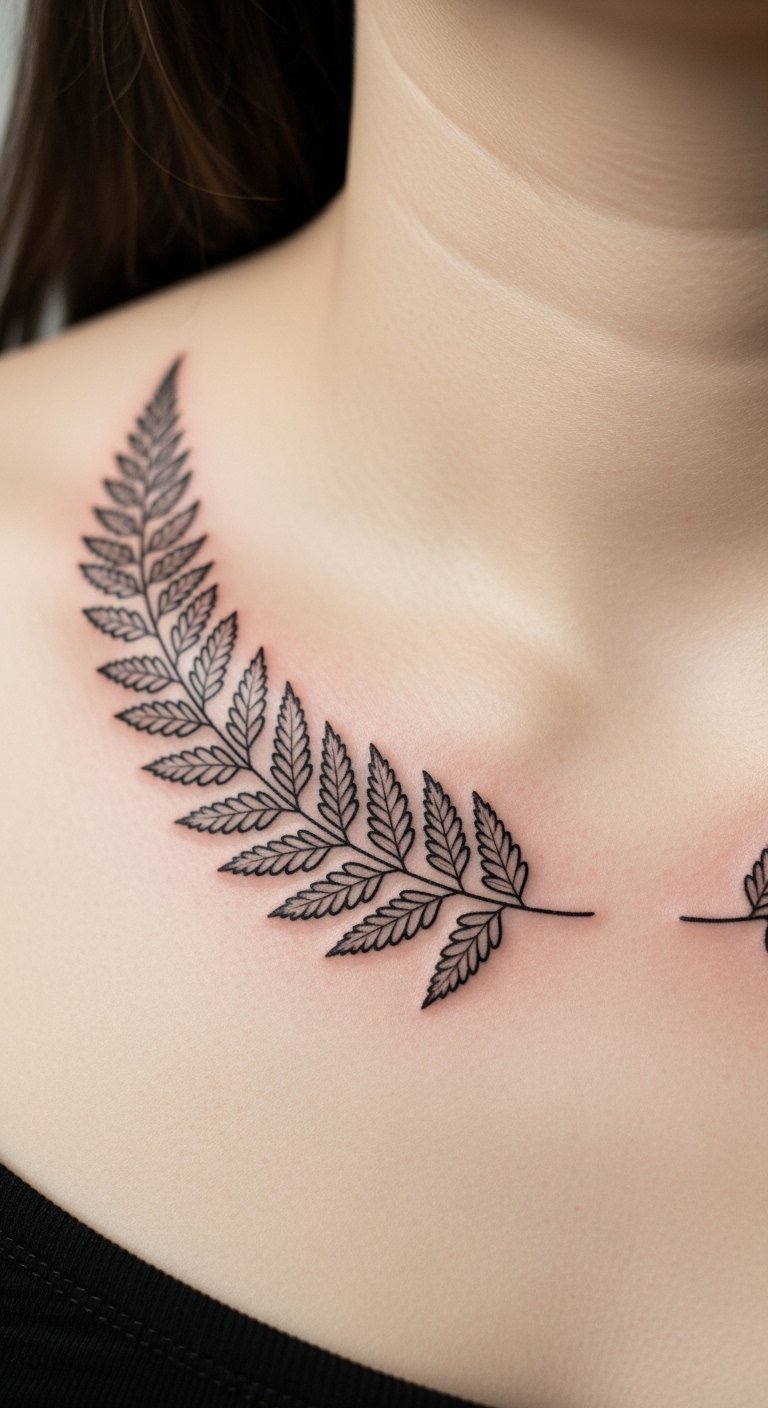
Ferns sit flush with the collarbone and work for a “grown into skin” look. I saw a lot of fern-based custom pieces that feel personal. Pain is moderate; movement during healing can tug at the edges. This ages gracefully if leaves are spaced to avoid blurring. Common mistake: cramming too many tiny leaves; opt for clean silhouette and ask for healed examples on similar skin tones.
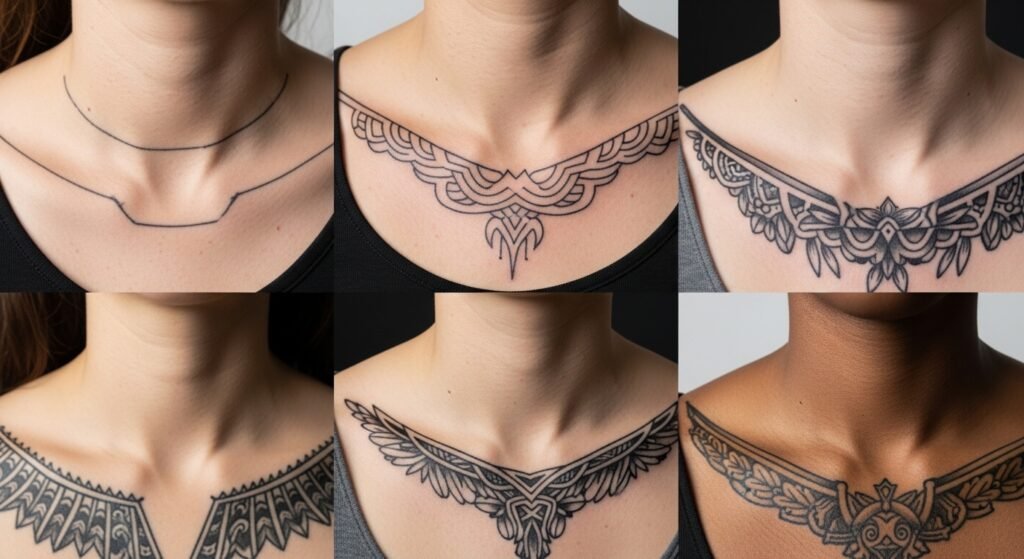
Geometric Shoulder-Collarbone Wrap
Style/Technique: Blackwork / Geometric
Pain Level: Medium-High
Session Time: 2 sessions
Best For: Modern, edgy contours
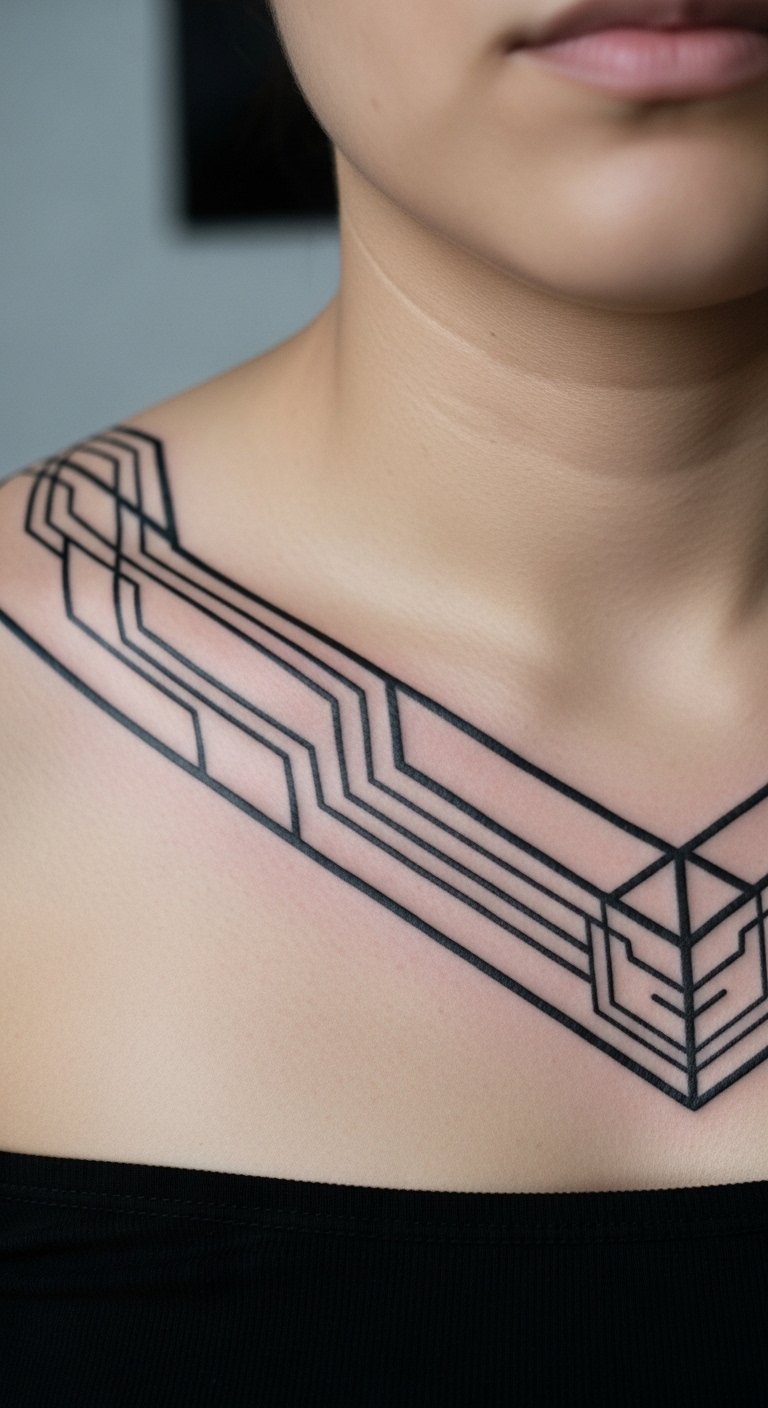
Geometric wraps can be striking but need the right artist to map shapes to your anatomy. They demand precision; improper flow looks stiff across the bone. Pain rises where fills are dense. Healed geometry retains impact if linework is crisp and not overly thin. Avoid rigid grids that ignore the collarbone’s curve — ask for a placement mockup.
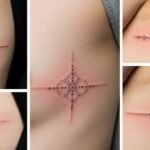
Tiny Constellation Cluster Near Collarbone
Style/Technique: Minimalist / Celestial
Pain Level: Low-Medium
Session Time: 1 session
Best For: Subtle, personal star map
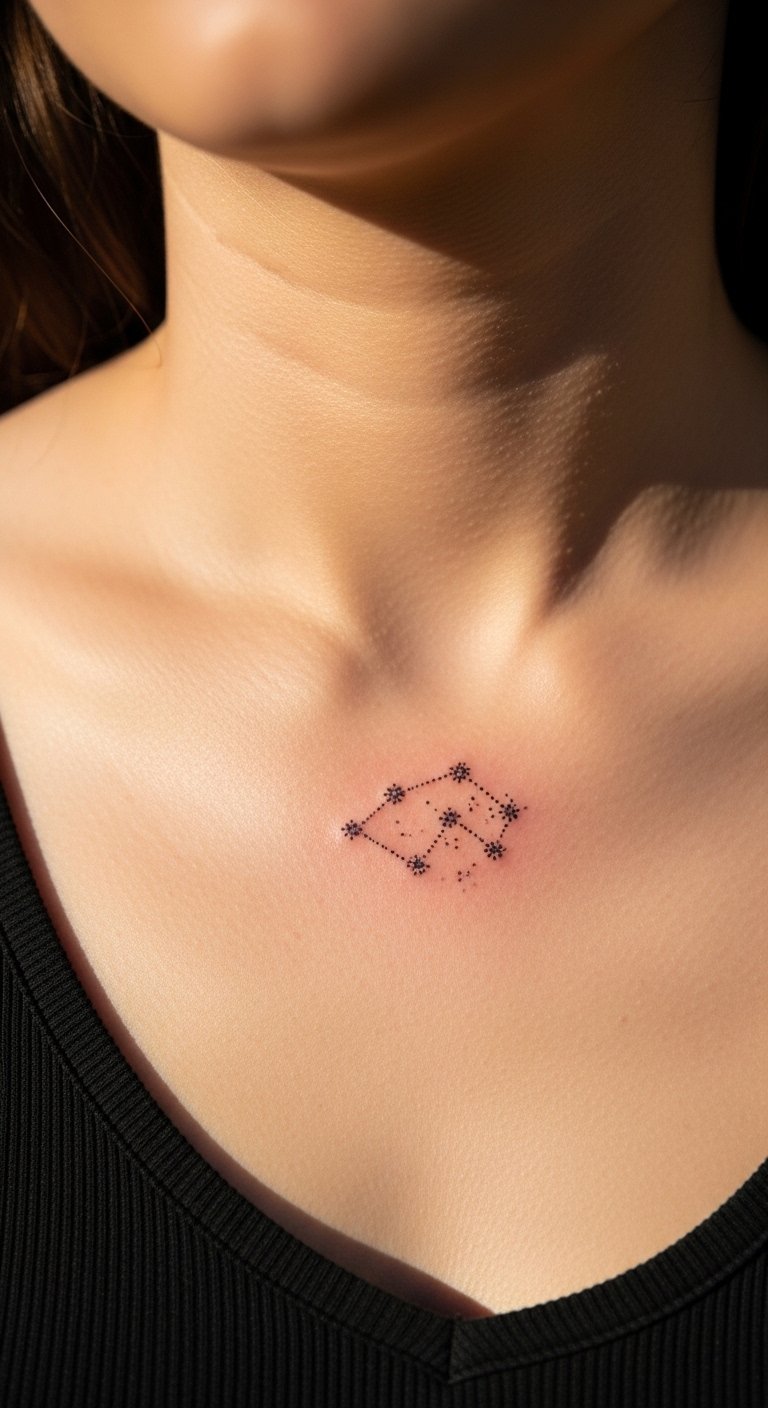
Constellations are minimalist and easy to hide with clothing. They’re low pain because of sparse atomized points, but each dot must be placed thoughtfully. Healing is straightforward. The common mistake is too-small dots that fade; ask for slightly bolder points for longevity. Use terms like “small collarbone tattoos” and “celestial motifs.”
Symmetrical Dotwork Collarbone Band
Style/Technique: Dotwork / Ornamental
Pain Level: Medium
Session Time: 1–2 sessions
Best For: Subtle framing, symmetry lovers

A dotwork band frames the collarbone cleanly and reads ornamental rather than literal. Dot shading must be consistent — uneven dots age poorly. Pain is moderate; go slow to keep dots crisp. Healed bands look best with breathability in the pattern; avoid dense fills that grey over time. Ask for healed photos of similar dotwork bands.
Micro-Realism Pet Silhouette On Collarbone
Style/Technique: Micro-Realism / Fine Line
Pain Level: Medium
Session Time: 1 session
Best For: Sentimental, hidden-yet-visible tribute
Pet silhouettes are intimate and work well as tiny collarbone pieces. Detail must be balanced for the small canvas or it will blur. Pain is moderate; healing is typical. Artists who specialize in micro-realism can show healed examples. Mistake to avoid: asking for tiny facial detail that won’t hold—focus on silhouette and recognizable shape.
Bold Script Curve Over Collarbone
Style/Technique: Bold Script / Statement
Pain Level: Medium
Session Time: 1 session
Best For: Readable phrases, high-visibility mantras
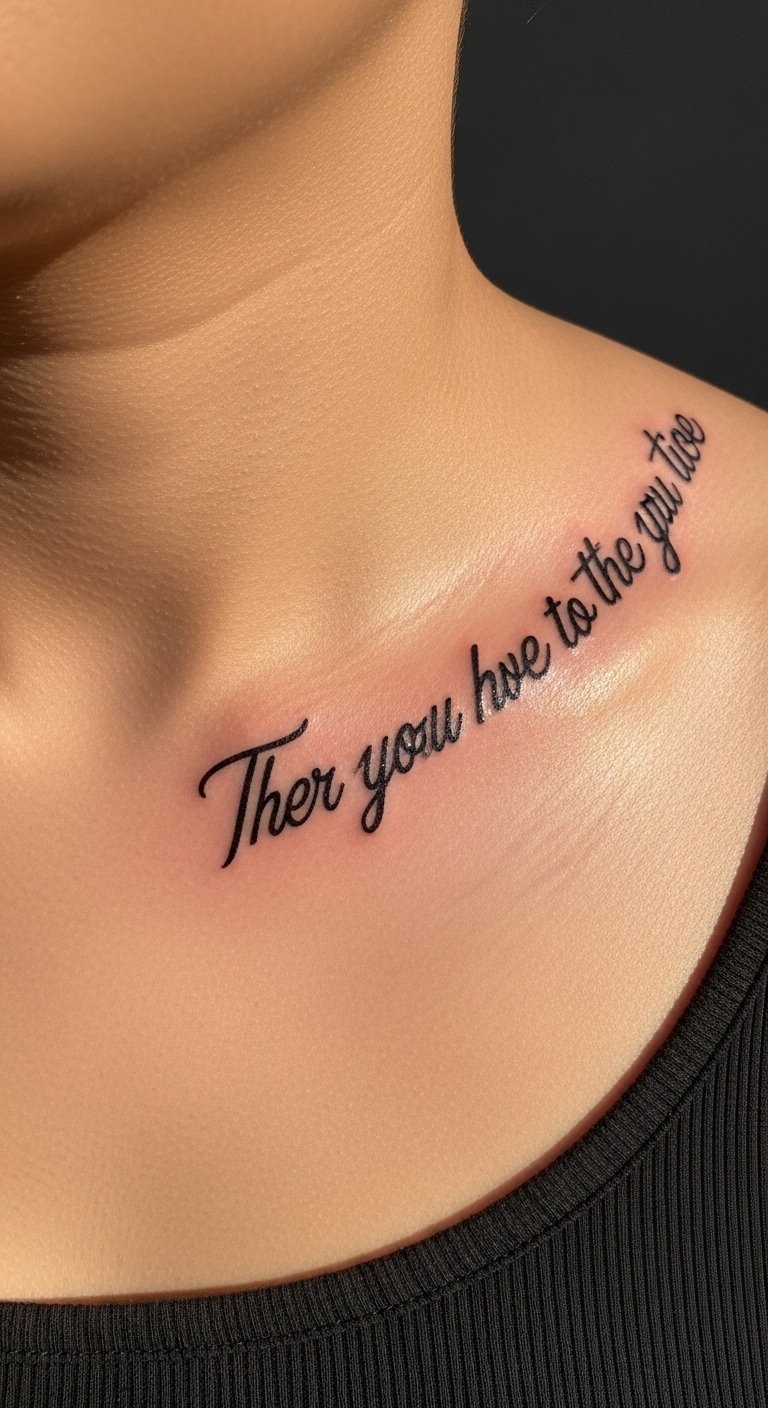
Bold script offers strong visibility and resists early blurring because letter strokes are thicker. It works for statements you want seen. Pain is moderate. Keep text short to match the collarbone curve. Healed script holds up if spacing is generous. Avoid tiny serifs and hairline details that fill in. Search “bold script” and “collarbone tattoo designs for women.”
Chameleon Adaptive Illusion Near Collarbone
Style/Technique: Color-Shift / Optical
Pain Level: Medium
Session Time: 1–2 sessions
Best For: Unique, conversation-starting pieces
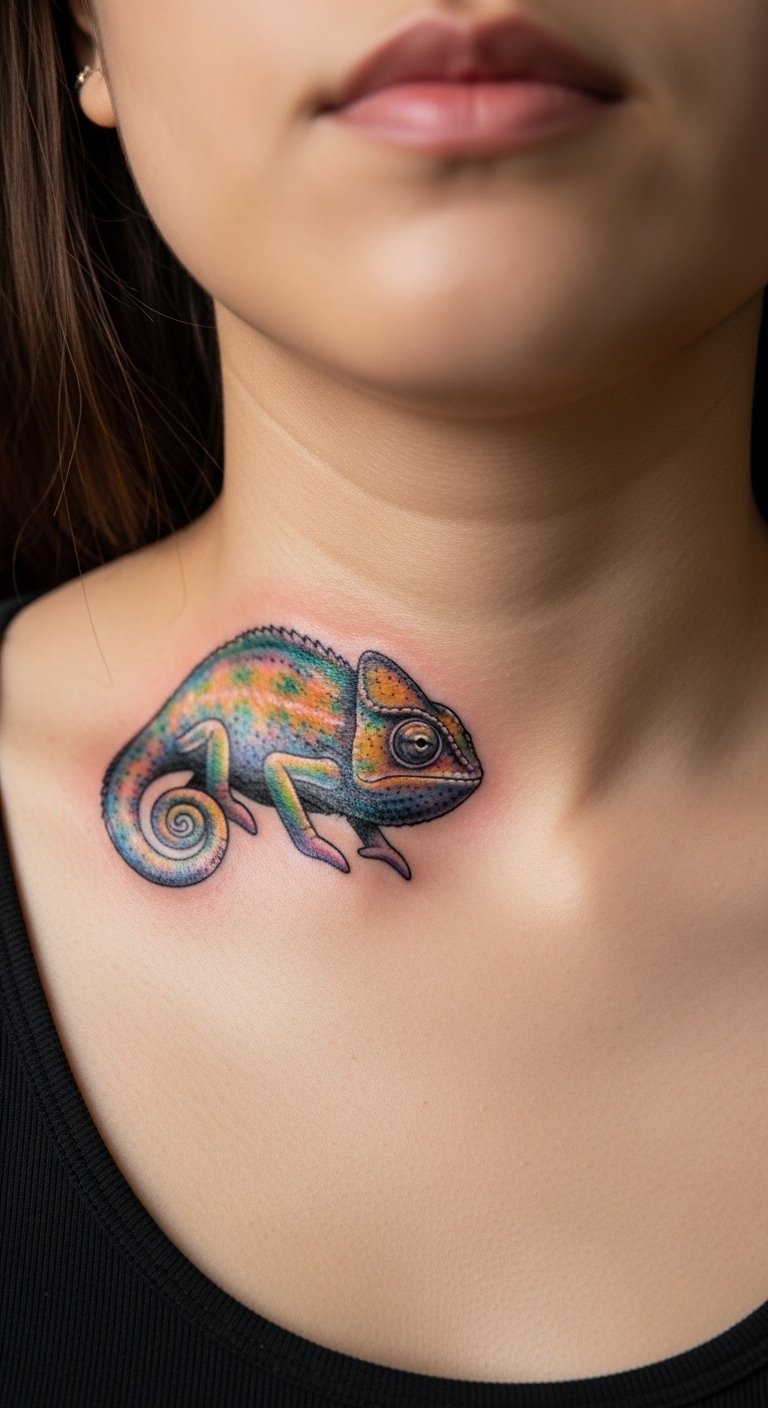
I noted one-off color-shifting illusions in niche galleries — they’re eye-catching but demand careful placement on the collarbone to keep the illusion intact. Pain is moderate. Color longevity varies by pigment and sun exposure; maintenance matters. Common mistake: overcomplicated gradients without solid outline anchors. Look for artists experienced in color transitions on bony areas.
Aggrogoth Collarband Wrapping Collarbone
Style/Technique: Gothic / Textured Blackwork
Pain Level: High (dense fills)
Session Time: Multiple sessions
Best For: Bold full-bone statement
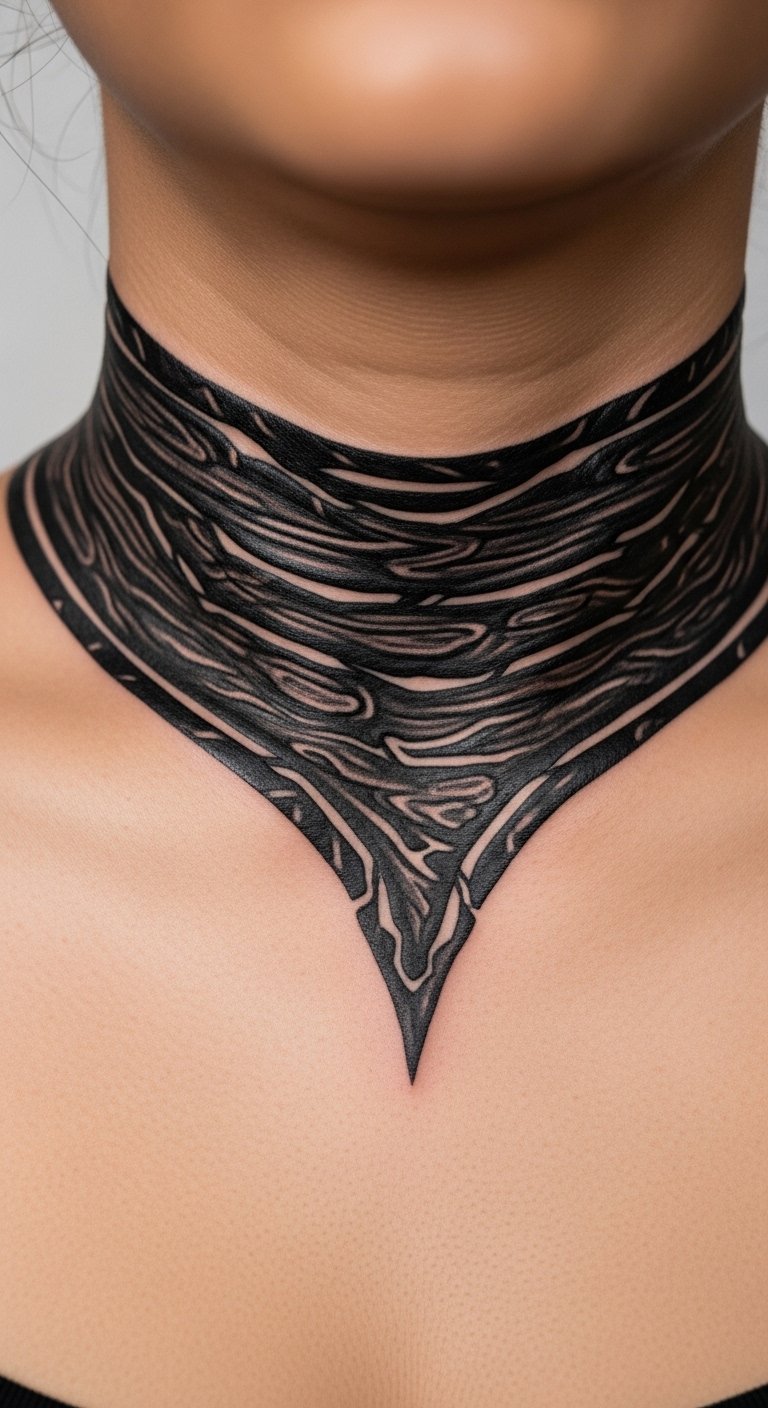
This is a rarer bold look — a textured collarband that fully wraps the bone. Expect higher pain where large black fills meet thin tissue. Healing requires careful aftercare to avoid scab-heavy loss. Healed texture depends on consistent fill and spacing; ask to see multi-year healed examples. Avoid making the band too wide for your bone width.
Cybersigil Tech-Organic Collarbone Design
Style/Technique: Tech-Organic / Futuristic Fine Line
Pain Level: Medium
Session Time: 1–2 sessions
Best For: Cyberpunk aesthetic, unique flow
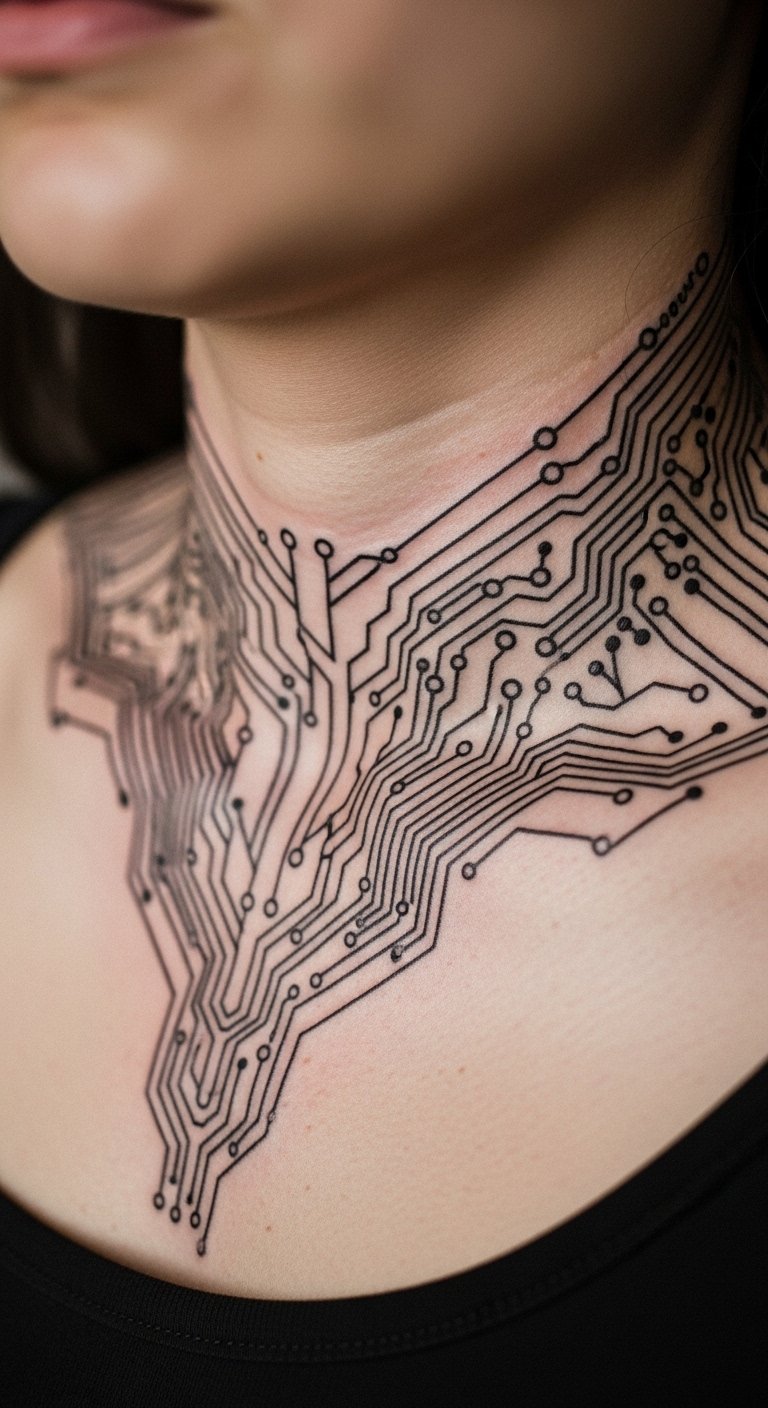
I came across this in niche galleries — circuitry lines that flow with the collarbone for a futuristic look. Precision matters; uneven lines age poorly on bony skin. Pain is moderate. Healing benefits from slight bolding of key lines so the pattern remains crisp. Ask for healed examples and placement mockups that bend with your bone.
Placement Connector: Spine To Collarbone Flow
Style/Technique: Connector / Symmetrical Flow
Pain Level: High (spine + bone)
Session Time: Multiple sessions
Best For: Cohesive full-body themes
Connecting a spine piece to the collarbone creates a cohesive vertical theme. It’s a larger commitment and includes painful zones (spine, sternum). Healing is staggered across sessions. The key is matching flow lines; otherwise the connector looks disjointed. Mistake: forcing symmetry without accounting for shoulder asymmetry. Ask for multi-angle mockups.
Small Sunburst At Collar Tip
Style/Technique: Minimalist / Iconic
Pain Level: Low-Medium
Session Time: 1 session
Best For: Tiny, peekaboo focal point
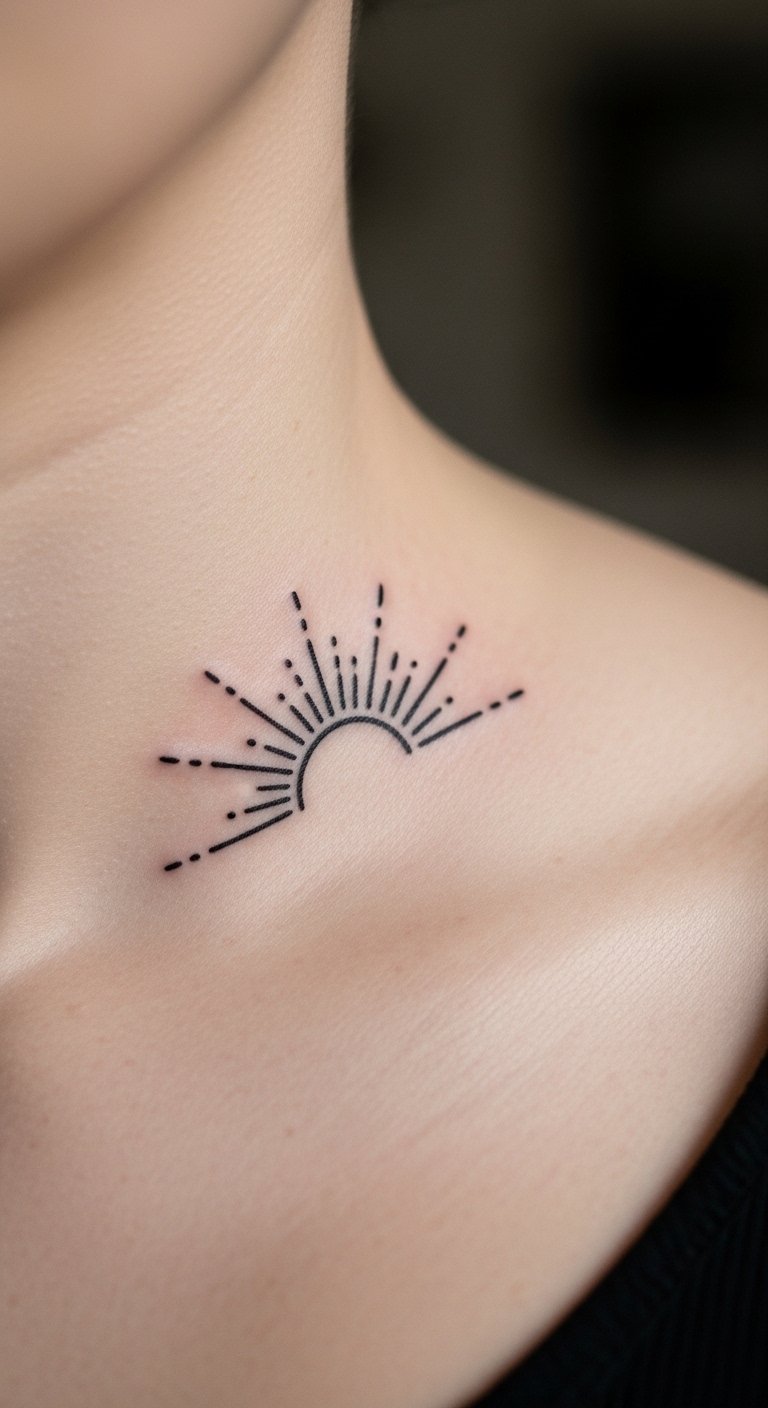
A tiny sunburst at the collar tip is a low-commitment, readable symbol. Pain is lower than sternum but still noticeable over bone. Heals quickly and makes a great starter collarbone piece. Avoid micro-lines that are too faint. Look for artists who show healed tiny symbols.
Abstract Watercolor Splash On Collarbone
Style/Technique: Watercolor / Freeform
Pain Level: Medium
Session Time: 1 session
Best For: Painterly color emphasis
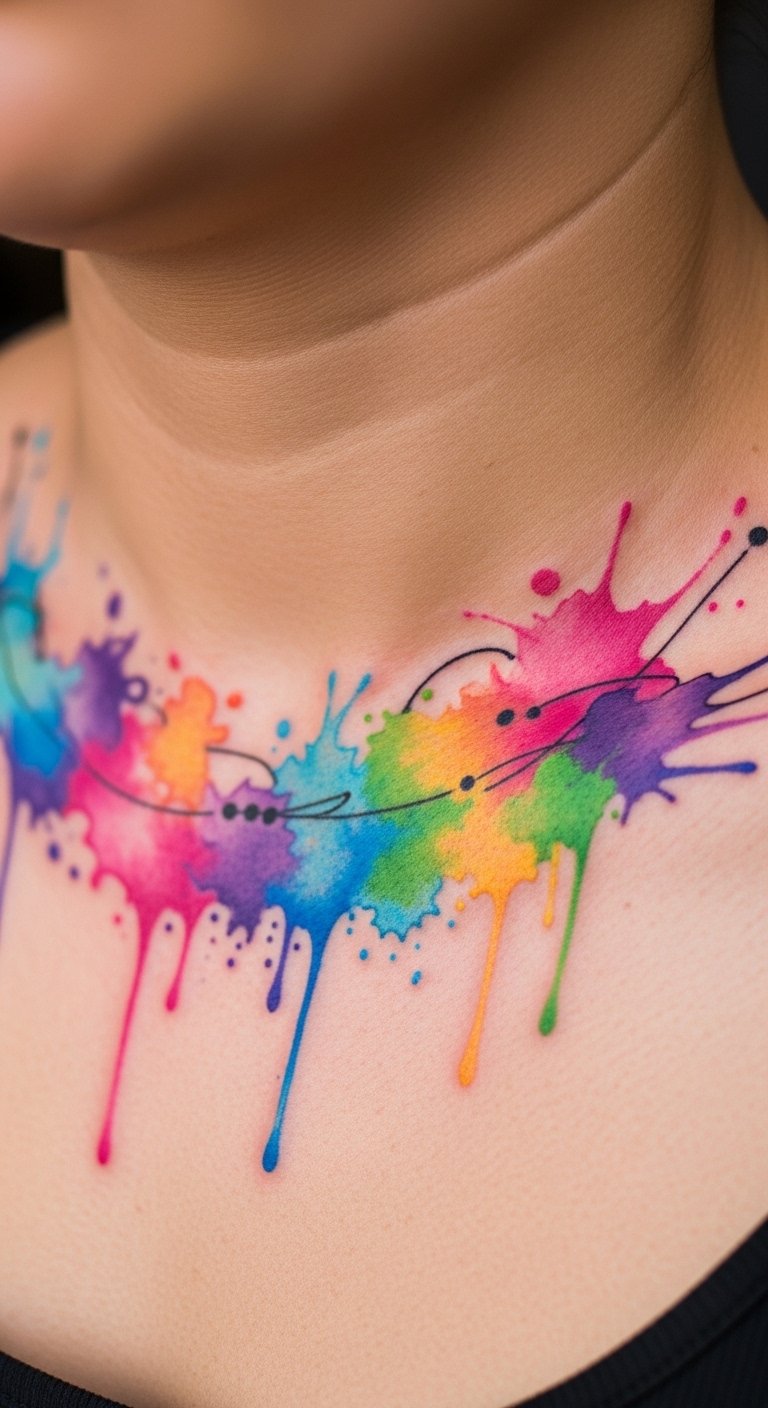
Watercolor splashes look fluid across the collarbone if anchored with line work. Colors can fade faster here, so plan for touch-ups. Pain is moderate. Healed watercolor often looks softer than fresh—don’t expect the same vibrancy. Common mistake: no anchor lines; pigments can blur. Seek artists who show healed watercolor on bony spots.
Single Dot Accent On Collarbone
Style/Technique: Minimalist / Micro
Pain Level: Low
Session Time: Under 30 minutes
Best For: First-timers, test placement

I sometimes recommend a single dot as a placement test. It’s low pain and straightforward to heal. Use it only if you truly want the mark; don’t get it as a placeholder you’ll regret. Healed dots are simple but can migrate over years—ask about placement precision. Good tags: small collarbone tattoos, minimal.
Tattoo Prep and Aftercare Essentials
Healing Essentials:
- Aquaphor Healing Ointment, 14oz tube — Recommended first 3–5 days for bony areas
- Saniderm Transparent Adhesive Bandage, 6-inch roll — Second-skin option for movement-heavy spots
- CeraVe Fragrance-Free Moisturizing Lotion — Daily moisturizer after initial healing
Before Your Appointment:
- Numbing Cream With 5% Lidocaine — Ask your artist before use
- Tattoo Stencil Transfer Paper, Roll — For at-home mockups
Long-Term Maintenance:
- SPF 50 Sunscreen Stick For Tattoos — Prevents sun fading on collarbones
- Mad Rabbit Tattoo Balm, 2oz — For healed skin maintenance
- Hustle Butter Deluxe, 4oz — Vegan aftercare alternative
Comfort & Extras:
- Tattoo Numbing Spray — For touch-ups or sensitive sessions
- Hydrocolloid Bandages, Large — Small-area protection alternative to Saniderm
Note: Artists often recommend Aquaphor and Saniderm for collarbone areas because movement is high and skin is thin. I always ask to see healed-product use examples in portfolios.
Frequently Asked Questions
Q: How bad does a collarbone tattoo actually hurt?
A: Pain is usually moderate—more than an outer arm but less than ribs. The bone proximity makes it sharp in short bursts. For sensitive folks, try a numbing cream (ask the artist): Numbing Cream With 5% Lidocaine.
Q: How long does healing take on the collarbone?
A: Surface healing is 2–4 weeks; full settling can take 2–3 months. Keep it moisturized with CeraVe Fragrance-Free Moisturizing Lotion after the initial ointment phase.
Q: Will a fine line collarbone tattoo blur quickly?
A: Fine lines can blur if they’re too close together or too faint. Ask for slightly bolder fine lines and healed portfolio shots. Consider touch-ups later.
Q: How do I stop fading?
A: Sunscreen daily is the biggest factor: SPF 50 Sunscreen Stick For Tattoos. UV exposure causes most fading, especially on collarbones.
Q: Can I exercise after getting collarbone ink?
A: Wait 48–72 hours before light activity, longer if movement stretches the area. Sweat can irritate a fresh tattoo.
Q: Do tattoos look different on darker skin tones?
A: Yes. High-contrast blackwork and bolder lines often show better. Discuss color saturation and healed examples with artists who regularly tattoo your skin tone.
Conclusion
I recommend starting with research and a placement mockup. The collarbone is a visible, high-movement area—so prioritize flow, healed examples, and aftercare like Aquaphor and sunscreen. What collarbone style are you leaning toward?