
Bold black Celtic knot bands often outlast the wispy bracelet versions everyone pins. I still see single-needle knot bands that look crisp for a month and then blur into soft loops by year two. The real choices that change longevity are line weight, negative space, and how the pattern wraps around a curved limb. Read the ideas below for band styles and the exact consultation points that help each design age cleaner.
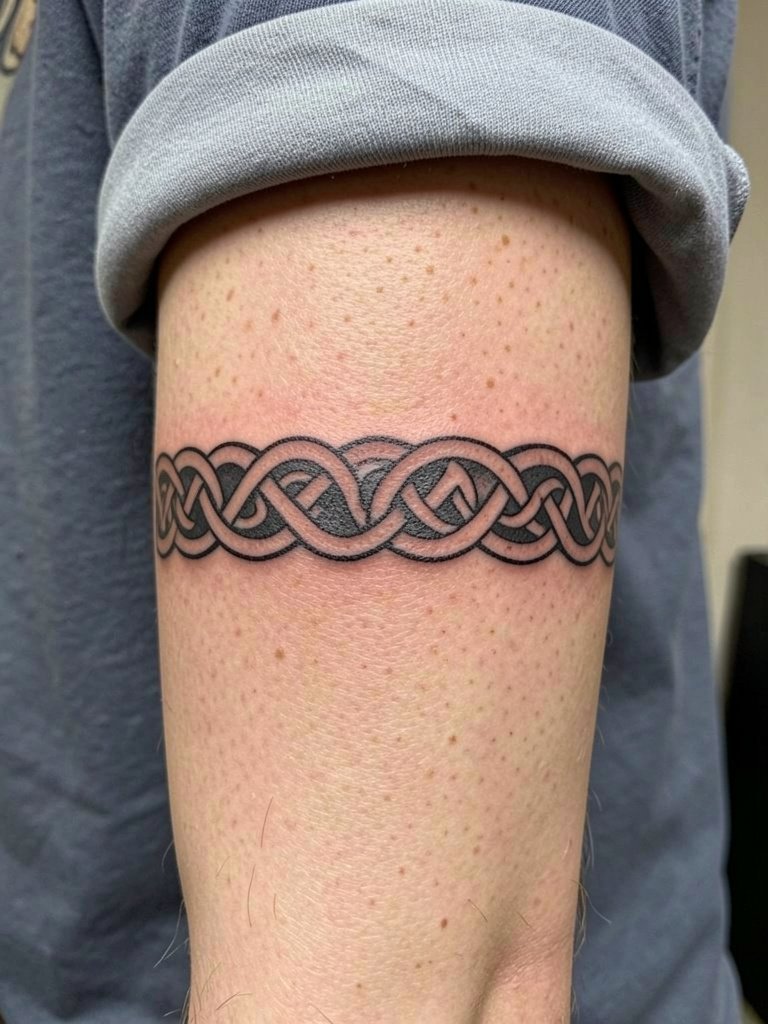
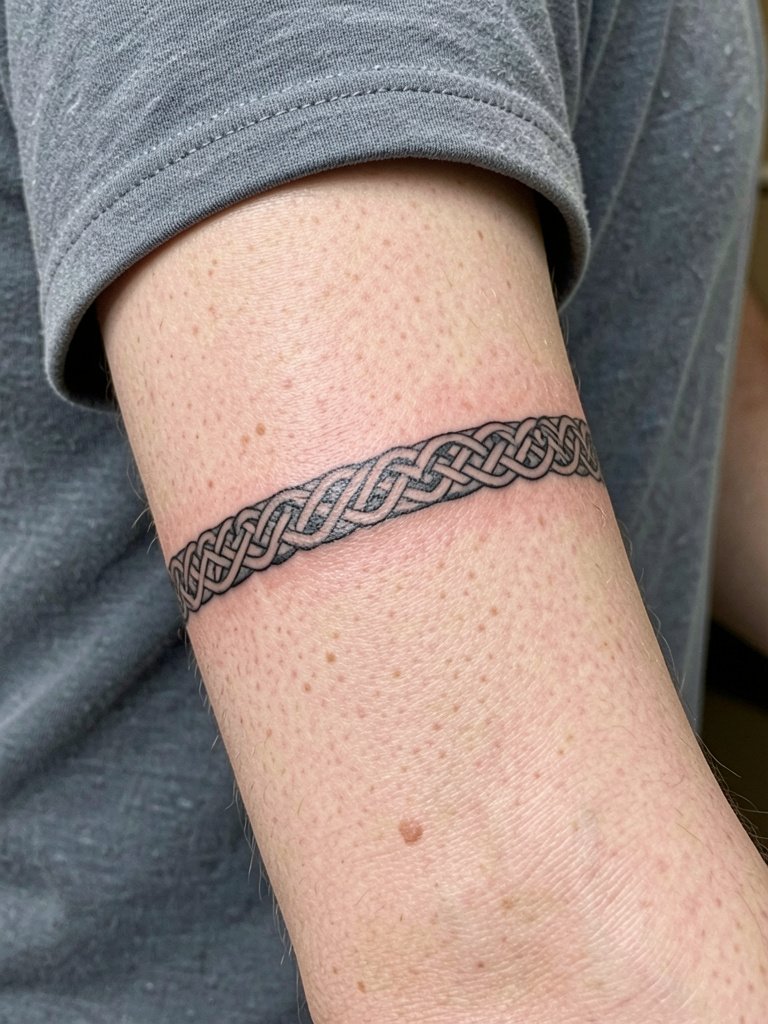
1. Classic Blackwork Forearm Band

This is the go-to if you want the interlace readable from a few feet away. I recommend asking for slightly heavier linework than the Pinterest reference so each loop keeps its shape as the skin moves. A common mistake is shrinking a forearm band down to wrist width without adjusting spacing. At six months the pattern will look tight and tidy. By two to five years, thin loops can merge into a darker bar unless the negative space was preserved up front. For showing it off, roll a linen sleeve to mid-forearm and pair with a rolled sleeve shirt for clean contrast.
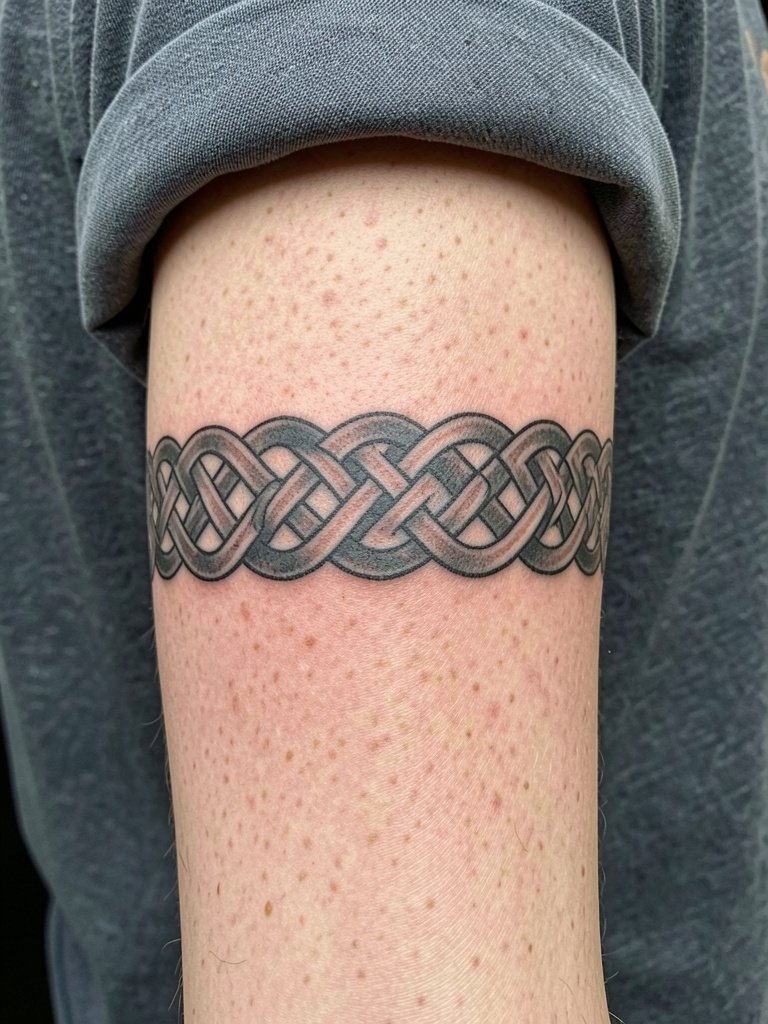
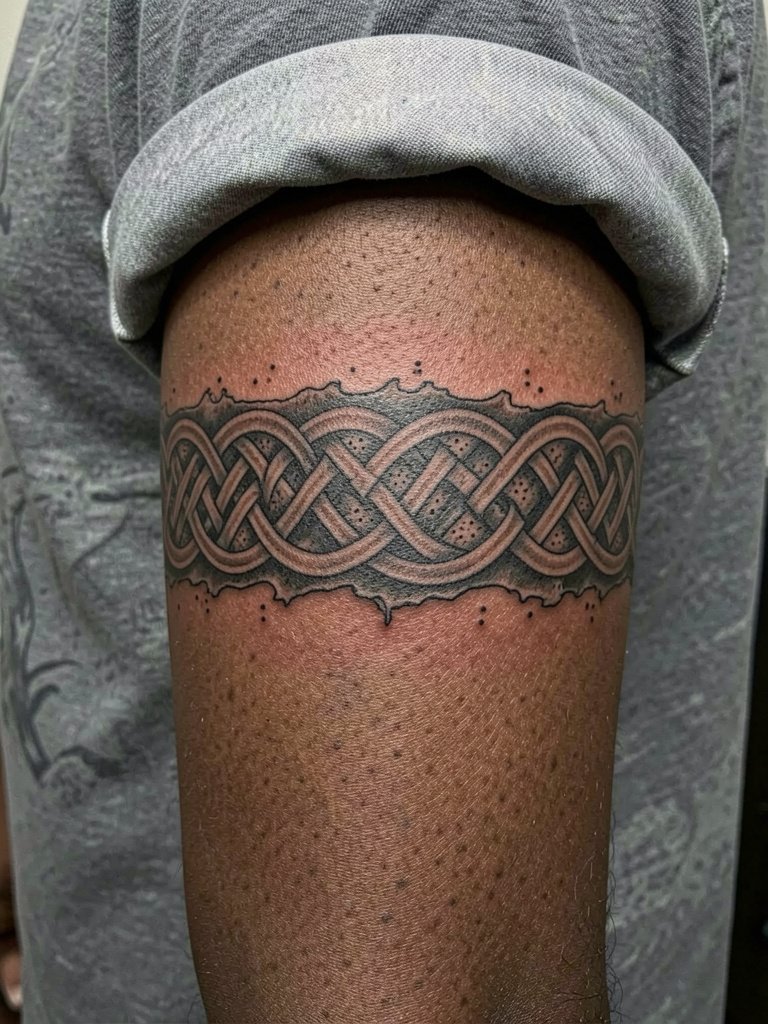
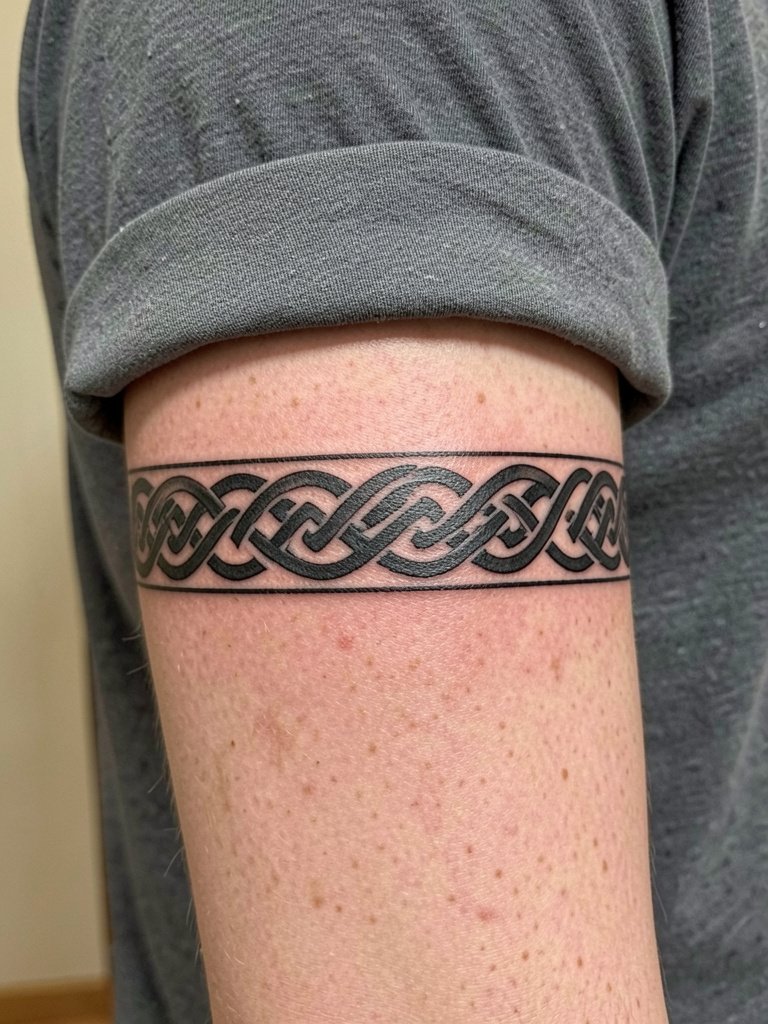
2. Repeating Braid Upper-Arm Band

If you want a strong, balanced cuff that reads from across the room, this repeating braid is dependable. Tell the artist you want the braid modules sized to the upper-arm circumference so the pattern wraps without awkward cutoffs at the seam. Artists disagree on fine-line versus bolder approaches. One camp prefers fine line for an elegant look and accepts a shorter lifetime for the crisp detail. The other camp favors bolder blackwork because it preserves the braid structure on rounded muscle and through friction. Both positions are valid. Choose based on how visible you want the band daily and how often you plan to refresh it.
3. Scalloped Link Band with Negative Space
Scalloped edges give your band breathing room, which helps on rounded limbs. Bring a flat pattern and ask for a wraparound mockup so you can see where the scallops fall at the seam. A common error is packing the scallops too tight to the knotwork. At six months the pattern looks unified. At two years the negative space is what keeps the band readable. For outfits, this sits well with cropped utility jackets that push sleeves to mid-forearm and let the scalloped rhythm show.
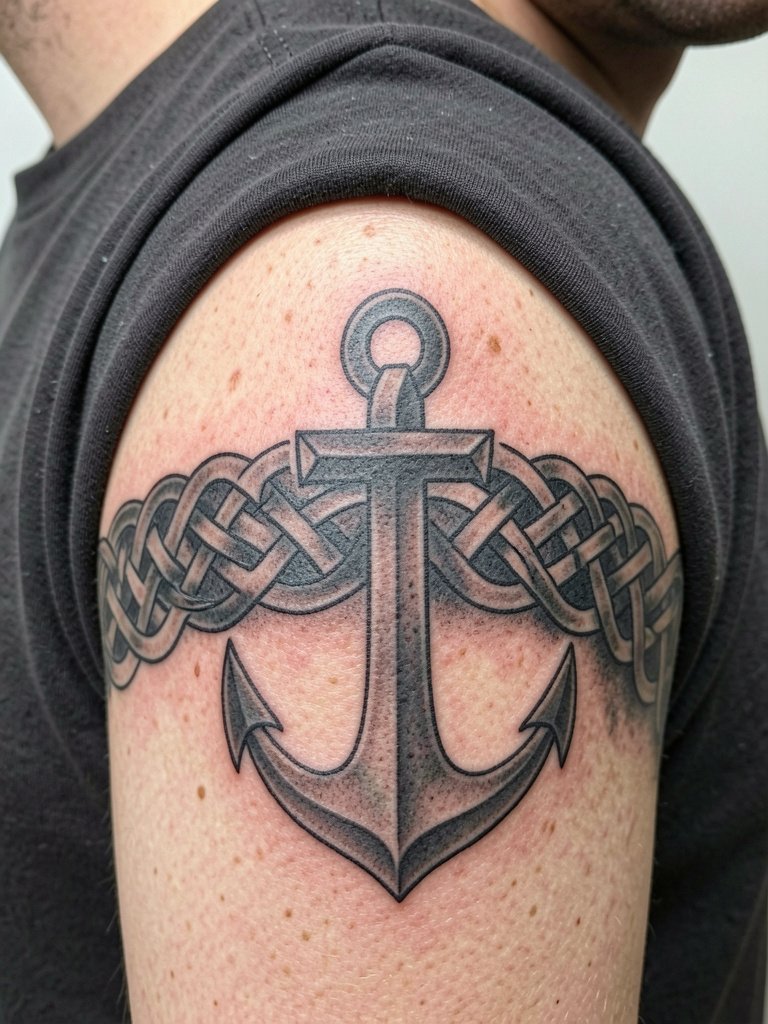
4. Cross-Integrated Knot Band for Heritage Emphasis
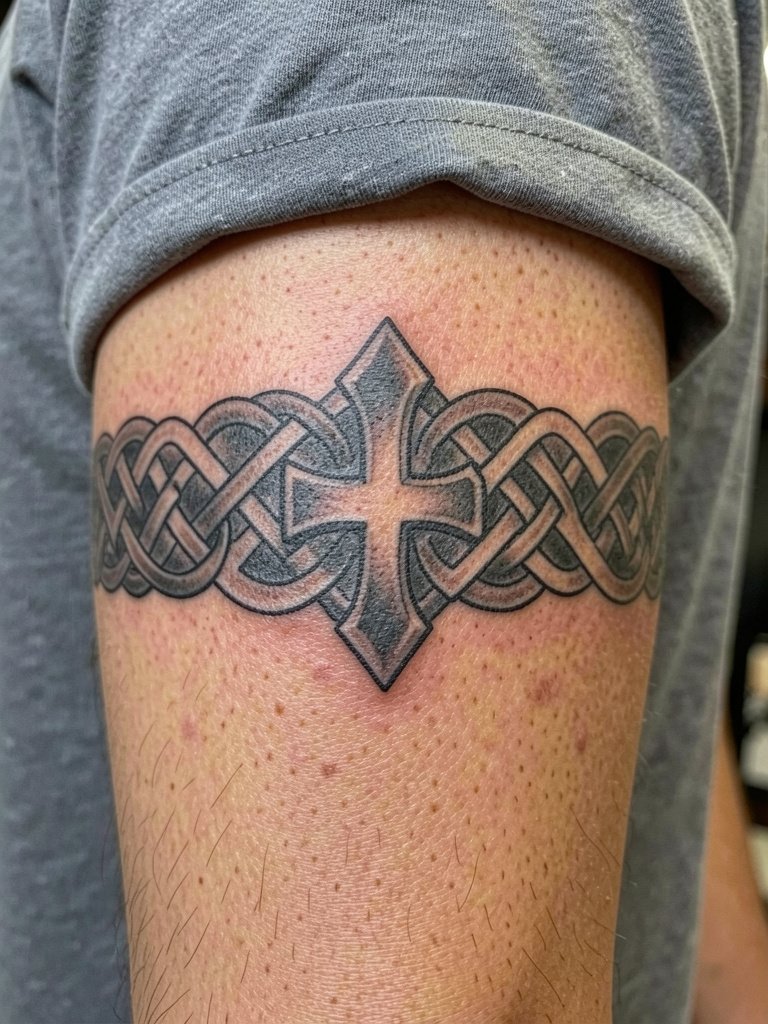
This design marries heritage knotwork with a clear focal point. If you want the cross readable, insist on a larger central panel and simple surrounding knots rather than jamming extra detail into the cross. There is disagreement about wrist bands versus forearm bands for readability. One camp says wrist bands are subtle and jewelry-like. The other camp says forearm scale preserves knot detail and is less likely to blur. Both camps make valid points. Pick the placement that balances visibility with how much pattern you want preserved.
5. Thin Bracelet-Style Wrist Band

Bracelet bands read as permanent jewelry when they sit at wrist scale. Tiny single-needle knots can look beautifully delicate at first. The mistake is not planning for future blur. Ask the artist to thicken the anchor lines slightly while keeping the detail inside the loops lighter. Expect your session to be short and stinging at the wrist. For showing it off, layer with a minimalist watch or wear a minimalist watch on the opposite wrist for balance.
6. Spiral-Accented Celtic Band

Spirals add movement and soften strict braid geometry. Tell the artist you want the spirals to breathe, not to crowd the knot modules. A common aging issue is placing too many spirals in a narrow band which becomes visually noisy as lines soften. This session typically takes under two hours and feels like repeated stinging across the forearm. For the outfit, pair with rolled sleeve shirts or fitted knits pushed to mid-forearm to show the spirals without distraction.
Session Day Picks
The first six band styles cover wrists and forearms where friction and movement matter. A few small tools make booking and the first week smoother.
-
Stencil transfer paper kit. Lets you preview the linework on skin before committing, which helps avoid awkward seam placements on wraparound designs.
-
Topical numbing cream. Applied as directed before the session reduces bite on sensitive wrists and ribs without disrupting linework.
-
Medical-grade protective film roll. Use on knuckle or wrist bands for the first 24 hours to reduce friction and keep the area clean during showers.
-
Fragrance-free gentle body wash. Cleanses the healing area without irritating fresh ink or damaging linework.
-
Aquaphor Healing Ointment. A mainstream option for short-term moisture that many people use during the first few days to avoid dry cracking.
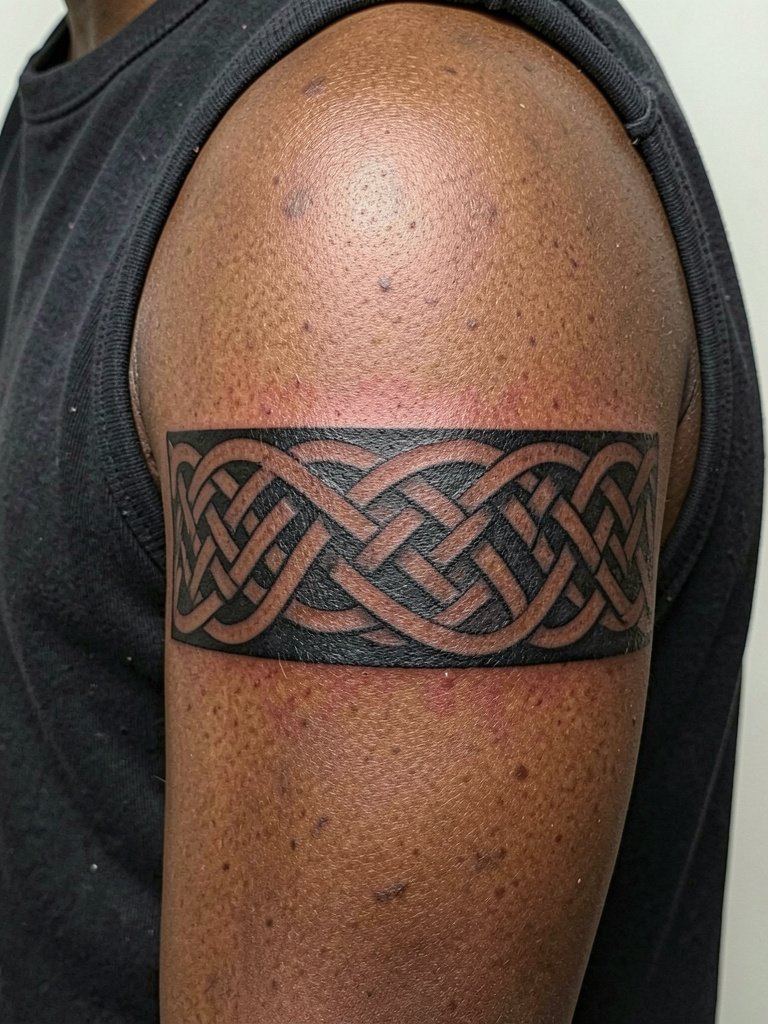
7. Heavy Black Cuff for Upper Arm
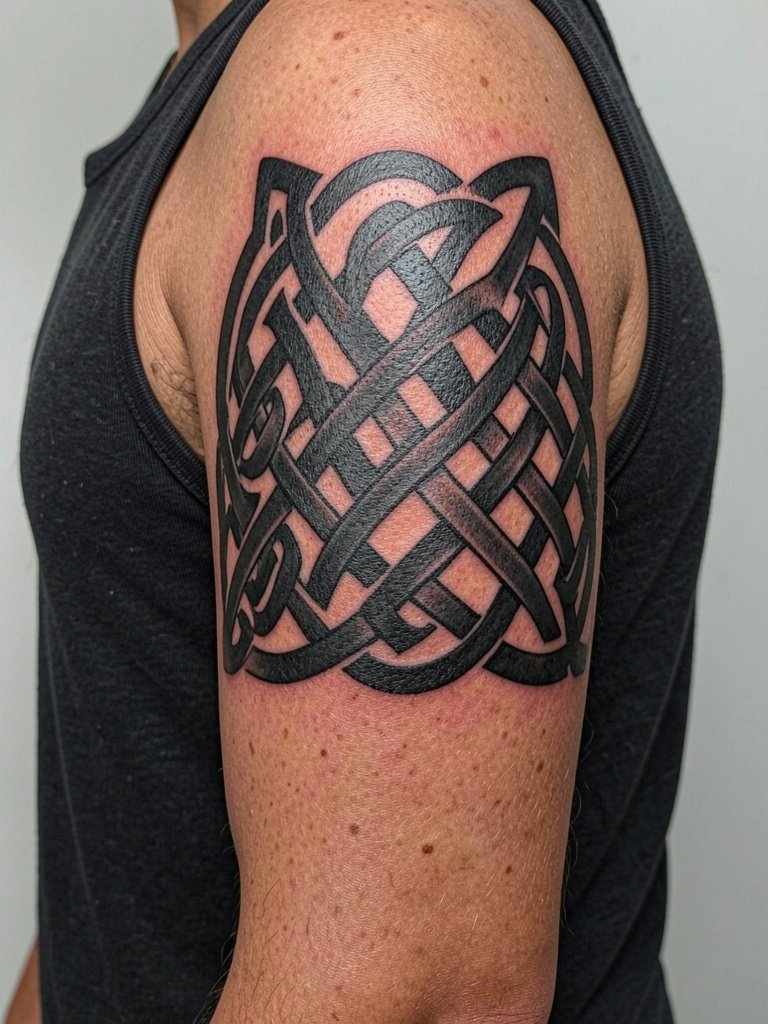
Heavy cuffs age predictably because bold fills hold up through friction and time. If longevity is the priority, choose strong black fills and minimal tiny detail. The session feels like steady pressure with occasional deeper passes to saturate the black. A mistake is trying to compress very fine knotwork into a cuff that already has heavy fill. For show-off outfits, sleeveless or racerback tops keep the cuff visible. Try a racerback tank for summer wear.
8. Scottish Heritage Calf Band

If ancestry matters, small shape language cues can make the design feel Scottish rather than generically Celtic. Bring pattern references that highlight the regional look and ask for custom tweaks rather than copying an exact library image. Calf placements give the artist room to make modules larger and more readable. The session can take longer than a wrist band, and you will feel steady work on the muscle. For summertime looks, low sneakers or cropped jeans pair well with a calf band. Consider cropped straight jeans.
9. Cross-Hatched Texture Band
Texture can give knot fills depth without adding colors that compete with skin tone. Ask the artist to mock up the cross-hatching at two scales so you can see how it holds at small and medium band widths. A common error is too-dense hatch lines in narrow bands. At six months textured fills look subtle and tactile. For outfits, neutral sleeves or a fitted knit pushed to mid-forearm keep the texture readable. Try a fitted knit sleeve to frame the band.
10. Small Knot Ring for Wrist or Ankle

Tiny ring bands are excellent first tattoos if you want low commitment. The pitfall is going too thin. I advise slightly thicker anchor lines while keeping interior knot details minimal. One debate concerns black-only versus adding gray shading. One camp says black-only keeps the knot high contrast. The other camp argues that gray shading adds dimensional separation between strands. Both choices affect how the ring reads over time. For footwear pairings, cropped straight jeans or low sneakers keep ankle rings visible. Link a clean sock or sandal look with ankle-baring sandals.
11. Micro Detail Wrist Band
Micro details look delicate but need careful sizing. Bring two reference scales so you can compare how a three-inch ring looks against a five-inch ring. The most common mistake is trusting an image without checking how the modules scale. Expect a short session but surface sensitivity at the wrist. For session clothing, wear short sleeves and remove bracelets. If you want to accessorize after healing, do it on the opposite wrist and consider a minimalist bracelet stack to keep the view balanced.
12. Manuscript-Inspired Decorative Band
If you like the Old Book look, request weathered edges and small stipple shading that reads like ink on parchment. The session involves focused dot work which can feel like a steady scratch. A mistake is overcomplicating the manuscript effect on narrow bands. Manuscript cues work best at medium scales on forearms. Pair it with a loose button-down shirt rolled at the sleeve for a literary aesthetic.
13. Reference Mockup Translated into Tattoo

People often bring a detailed graphic mockup and expect an exact tattoo translation. The artist will simplify to preserve read at skin scale. Bring the reference and ask for a simplified version and a scaled mockup showing the band at actual wrap circumference. Expect a longer consult before the needle hits skin. For session wear on the calf, choose shorts or joggers that can be pulled up easily. A drawstring jogger makes access simple and comfortable.
14. Band-to-Sleeve Transition Piece

Use a band as a bridge into larger sleeves so the pattern can widen naturally into adjacent motifs. Discuss scale progression with the artist so the band does not abruptly end. A common error is treating the band as an afterthought and then discovering the sleeve needs rework. This piece often requires two sessions. For reveal, wear cap-sleeve tops or off-shoulder knits that show the transition. Consider a loose tank top for easy access and display.
15. Minimalist Micro-Fine Line Band

Micro-fine bands are subtle and elegant when planned for how they will heal. I suggest requesting slightly larger knot modules than your initial mood board shows. The biggest mistake is trusting single-needle reference images without a healed comparison. If you want the least visible band, this is it. For session wear keep sleeves loose and avoid bracelets that could press on the fresh ink. A simple short sleeve tee works well.
16. Ornamental Band with Spiral Terminals

Terminals soften the edges of a repeating knot and work well where a band meets other pieces. Ask the artist to show how the terminals will nest with existing tattoos if you have them. A mistake is not aligning terminals to the limb's natural lines, which can cause the band to appear skewed. For the session, wear a short sleeve that can be moved without friction on the area. A short sleeve tee is ideal.
17. Bold Cuff with Negative-Space Straps
Wide cuffs with carved negative straps age well because the thick black holds while the straps create rhythm. Tell your artist you want the negative spaces evenly spaced and not too narrow. The session feels like blocks of fill work with rest breaks. This type of cuff shows well with sleeveless looks. Consider a sleeveless tank for visibility.
18. Calf Wraparound Band with Elongated Modules

Calf wraps need elongated modules so the pattern reads when the leg curves. Ask for a body-wrapped mockup so you can judge where modules align with muscle contours. A common error is using a flat band pattern without adapting it to the calf, which leads to awkward seams. For session clothing, wear shorts or easy-pull joggers. A loose gym short is practical.
19. Narrow Ankle Band with Open Interlace
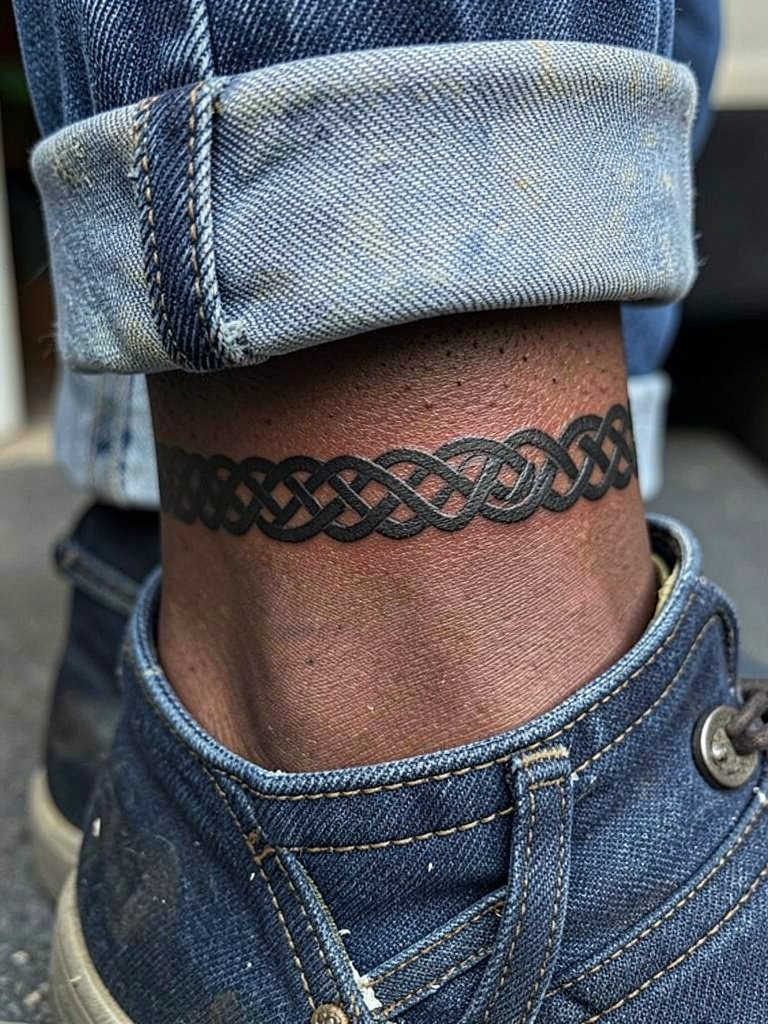
Ankle bands are charming and low-commitment, but the area takes a lot of wear from socks and shoes. Ask for slightly bolder anchor lines and expect possible touch-ups after a year. Avoid ultra-fine internal detail in narrow ankle bands. For showing it off, pair with cropped jeans or ankle-baring sandals. A cropped straight jean keeps the ankle visible.
20. Shoulder Band with Sleeve Anchor
Shoulder bands that become sleeve anchors work as long as the anchor is planned first. Request a continuity sketch that shows how the band feeds into the sleeve motifs. A mistake is leaving the band isolated and then realizing the sleeve needs rebalancing. For reveal, wear tank tops or off-shoulder knits. An off shoulder top is a good choice.
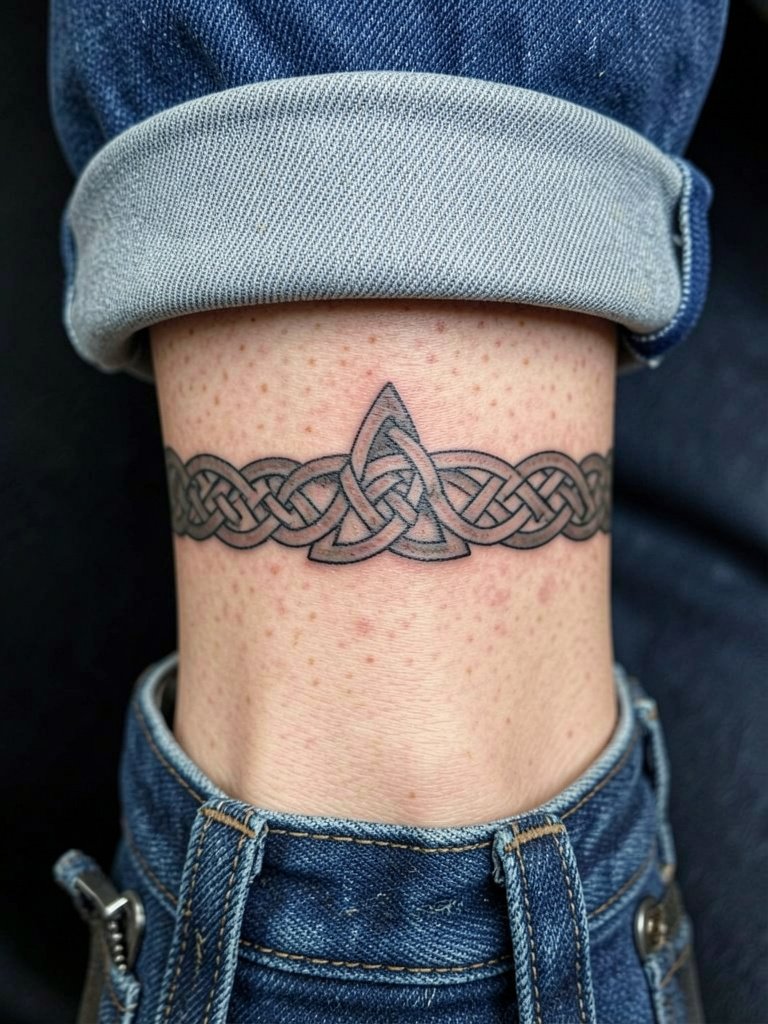
21. Knot Band with Central Medallion

A medallion gives the band a focal point and makes the piece more symbolic without turning it into a full pictorial sleeve. Ask the artist to keep medallion detail bold enough to survive touch-ups. Expect a slightly longer single session. For outfits that highlight the forearm medallion, roll a fitted knit sleeve to mid-forearm. A fitted knit sleeve keeps attention on the feature.
22. Photo-Reference-to-Simplified Blackwork
When translating a photo reference to tattoo, expect the artist to reduce contrast and delete tiny photographic texture. Ask for a comparison mockup that shows the simplified blackwork next to the original reference. A typical mistake is insisting on photographic detail at a scale that cannot stay crisp. Session time depends on how much simplification the artist needs to achieve. For session comfort, wear a loose tee that exposes the forearm.
23. Wide Link Cuff for Bicep Edge

Placing a cuff where the sleeve edge sits creates a deliberate reveal when shirts are rolled. Ask the artist to map how the cuff aligns to sleeve length so it never looks accidentally covered. Overly complicated internal knots are the main mistake here. For summer, pair the cuff with a muscle tee or sleeveless layers to keep it visible.
24. Linear Knot Band with Small Breaks

Breaks can help a busy pattern read better on curved skin. Tell the artist the maximum size of the break you will accept before the band loses continuity. The common mistake is making breaks so large the band reads like separate motifs. For the session, wear a short sleeve garment that allows clear access to the inner forearm.
25. Threaded Rope Band for Wrist
A rope-style knot band reads like braided metal jewelry and tends to age more forgivingly than ultra-fine filigree. Ask for slightly rounded outer anchors so the braid looks three-dimensional. A mistake is compressing too many tiny strands into a narrow band. For styling, this pairs with minimal watches or a clean cuff on the opposite wrist. Check a minimalist watch for balance.
26. Interlocking Tri-Loop Band for Ankle
Tri-loop repeats create a distinctive rhythm that works well at ankle scale. Request slightly bolder anchors so the motif survives frequent foot movement. Expect modest touch-ups after a couple of years if you wear closed shoes daily. For display, ankle-baring sandals or rolled cuffs help. A cropped straight jean works well.
27. Wide Heraldic Band with Negative Frame

A framed negative field makes complex knotwork legible at larger scales. Ask the artist for a mockup showing the negative frame and how it reads at three sizes. The usual mistake is adding too many interior elements that compete with the frame. Sessions for this size often run longer and may need a second pass for saturation. For weekend wear, rolled sleeves or cropped jackets let the framed band dominate. Consider a cropped utility jacket to show it off.
Frequently Asked Questions
Q: How do I choose line weight for a wraparound Celtic band so it ages well?
A: Line weight should be slightly heavier than the thinnest version you like visually. Ask the artist for two mockups at different weights and look for how the negative space holds at smaller scales. In practice, most people who go slightly bolder avoid early softening and reduce the need for touch-ups.
Q: Should I pick wrist or forearm placement if I want detail to last?
A: Forearm placement gives more circumference to preserve knot detail and it endures movement better than the wrist. The wrist works if you want jewelry-like visibility, but plan for thicker anchors and expect higher touch-up chance. Choose based on how often you want people to see the piece and how much future maintenance you expect.
Q: Where can I find real healed examples and local artists without naming people?
A: Search Instagram and TikTok with tags like #celticknottattoo and #celticbandtattoo plus your city name to narrow local results. Use Pinterest for pattern ideas but verify healed shots on studio portfolios and Booksy-style booking pages. Tattoo-specific galleries and studio portfolios are the best places to compare wraparound bands because they show healed work more honestly than generic inspiration boards.
Q: How soon might a thin bracelet-style band need a touch-up?
A: It depends on skin type and placement, but thin wrist bands commonly show softening within one to three years. If you want to avoid early touch-ups, start with slightly heavier anchor lines and plan for a possible touch-up in year two.
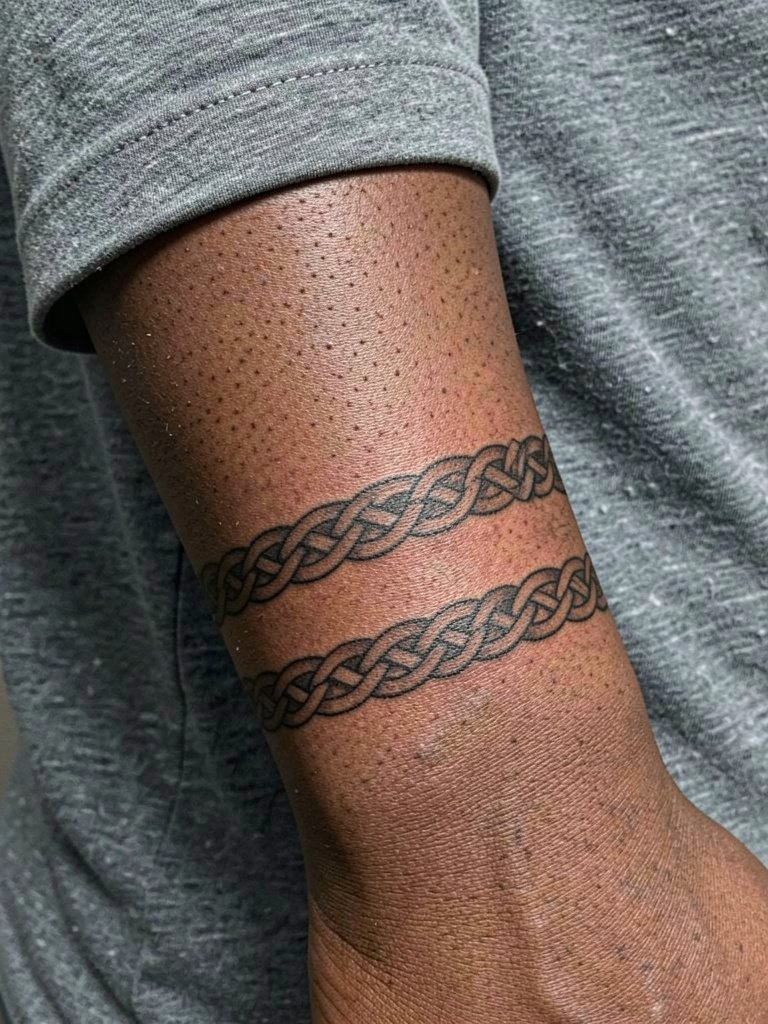
Q: Does my skin tone affect which Celtic band style will read best?
A: Yes. High-contrast blackwork tends to read across a wide range of skin tones. For darker skin, prioritize bolder anchors and slightly larger modules so the interlace stays clear. For lighter skin, mid-weight lines often preserve detail without needing heavy fills.
Q: What should I wear to the session for a forearm or upper-arm band?
A: Wear clothing that exposes the placement without being tight. For forearm work a short sleeve tee is ideal. For upper-arm and shoulder work a sleeveless tank or zip-front layer that can be removed easily is best. Comfortable, loose garments make the artist's access easier and keep the first band alignment accurate.
Q: Does black-only ink always perform better than adding gray shading?
A: There are two viewpoints. One group prefers black-only for the highest contrast and simplest aging. The other group uses gray shading to add depth and help strands visually separate. Both approaches can work. The choice should be guided by how bold you want the finished piece and how complex the knotwork is.
