
I spent months tracing which birth flower designs actually looked good healed, not just fresh. I kept a notebook of pieces that looked crisp at six months and ones that went mushy after a year. These ideas mix classic birth meanings with styles that last on real skin. Use them to pick a shape, placement, and the exact wording to bring to your artist.
This list focuses on birth flower tattoos across fine line, traditional, and micro-realism. Good placements range from inner wrist to thigh. From what I've gathered, artists are leaning into small, highly detailed flowers and updated classic pieces that survive sun and time.
1. Fine Line Carnation On Inner Wrist
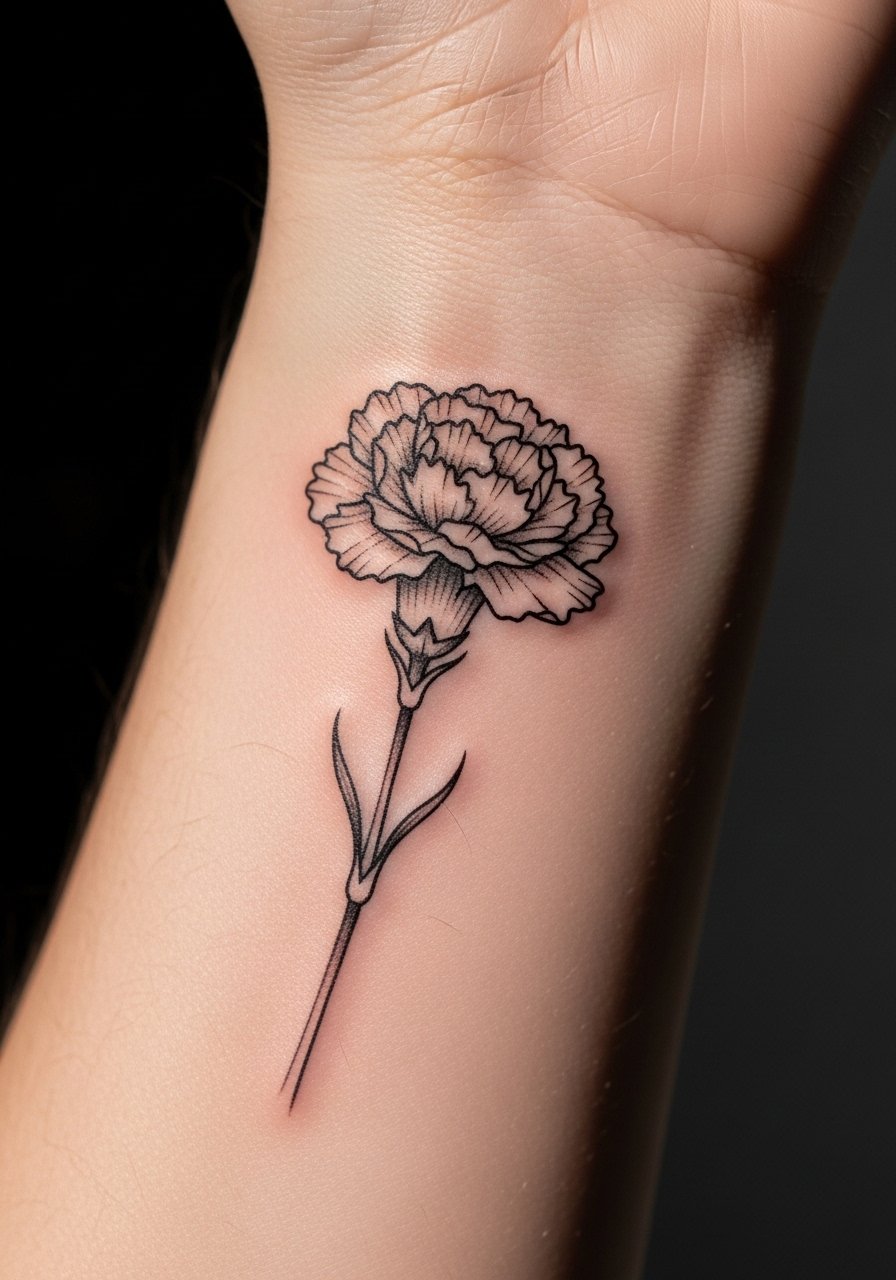
I first noticed this style on a friend who wanted a subtle January marker. Fine line works here because the wrist gives a flat canvas for crisp stems and tiny ruffled petals. Expect light pain, like a frequent scratching. Sessions are quick, usually 30 to 45 minutes. Tell your artist you want a slightly heavier outline at the base so the petals keep shape as it blurs. The common mistake is making each petal insanely thin. Those vanish in two years. Healed at six months the lines settle into a soft gray, not mushy, if you ask for slight contrast. For aftercare use a short first-aid ointment cycle and then a light fragrance-free lotion. If you want adhesive protection, I’ve used Saniderm rolls for wrist pieces and seen good results. Saniderm Transparent Adhesive Bandage, 6-inch roll
2. Watercolor Violet Behind Ear
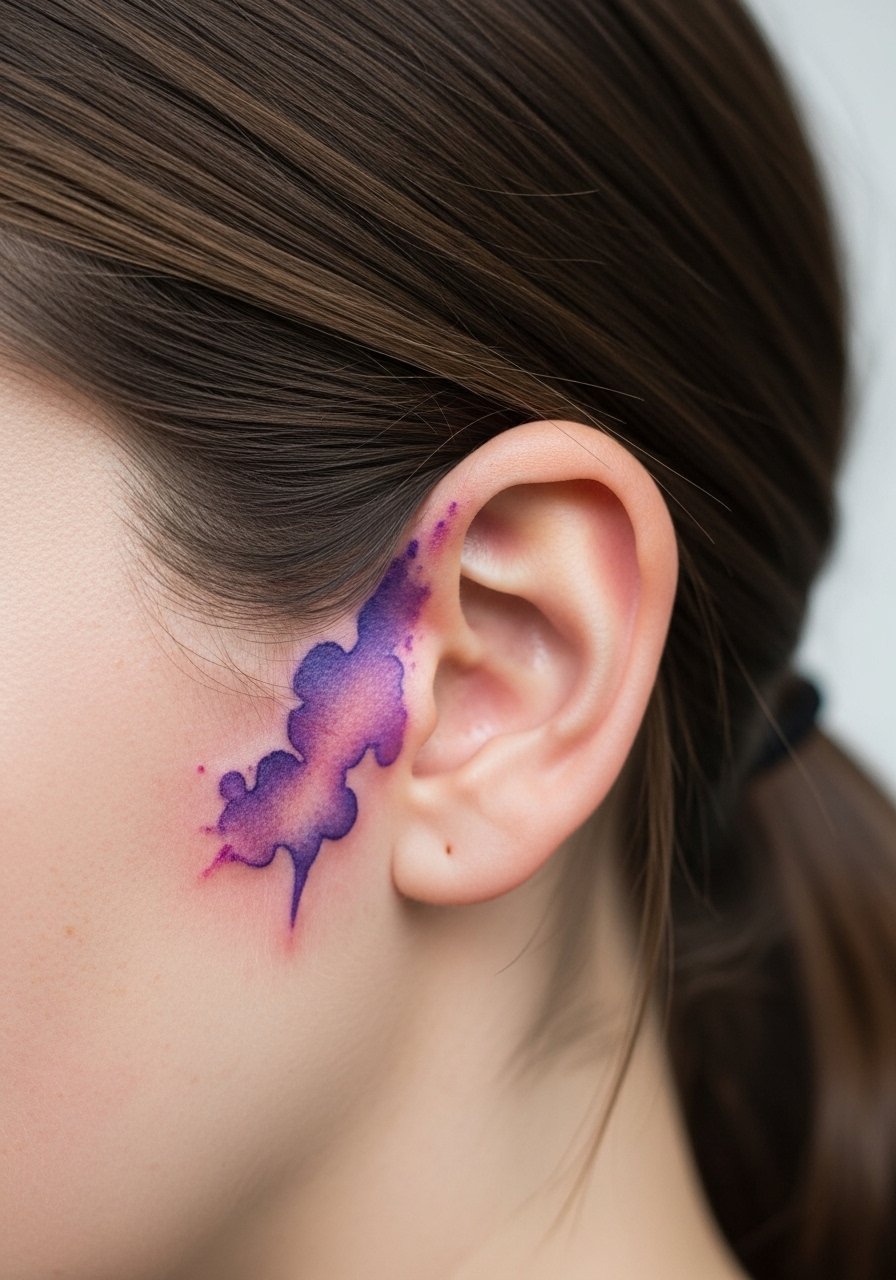
Fair warning, behind the ear is tender. The skull bone is close, so pain spikes during shading. I saw this on someone who wanted February symbolism that read soft and painterly. Watercolor style looks fragile fresh. It also tends to fade unevenly on the ear because of friction from collars and hair. Ask your artist to keep splashes small and anchor the design with thin, stable outlines. Session time is usually 45 to 90 minutes. Healed at one year the pigments are softer but still readable if you pick saturated tones. Avoid asking for huge washes that sit on thin skin. For upkeep I recommend a non-greasy SPF stick for daily sun protection when hair parts. SPF 50 sunscreen stick for tattoos
3. Micro-Realism Daffodil On Upper Arm
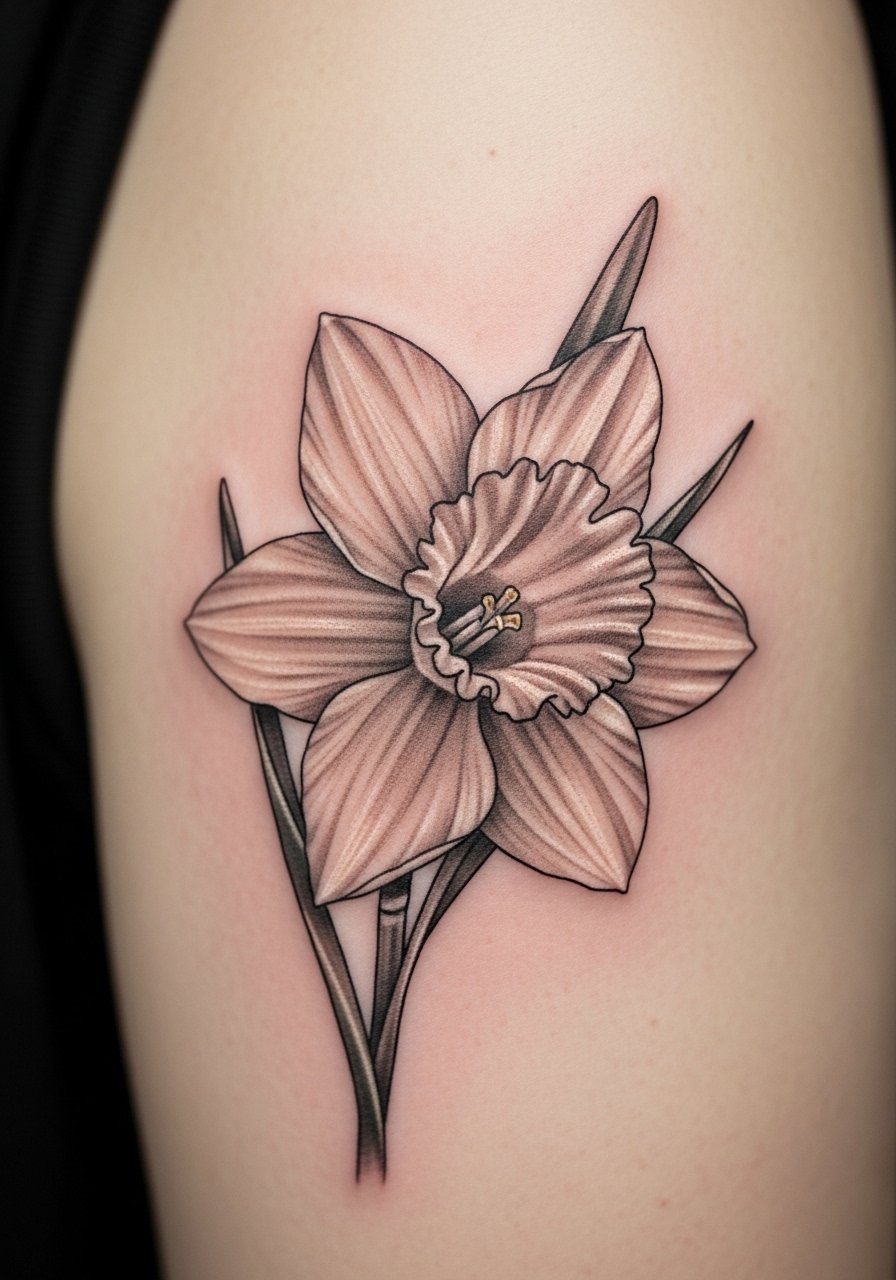
I loved this when an artist combined a birth daffodil with light skin tonal work for March. Micro-realism makes the trumpet and ruffled petals read like a small painting. The upper arm handles long sessions well. Pain is moderate. Expect a 1.5 to 2 hour session for a palm-sized piece. What works in real life is slightly exaggerated shadow. Tiny micro-dots look great for texture, but if you make everything ultra-fine it can blur into gray. During consultation ask to see healed photos from the artist of similar sizes. I also tell clients older skin needs bolder contrast to stay legible at two years. For initial healing use a fragrance-free lotion like CeraVe. CeraVe Fragrance-Free Moisturizing Lotion
4. Traditional Daisy On Ribcage
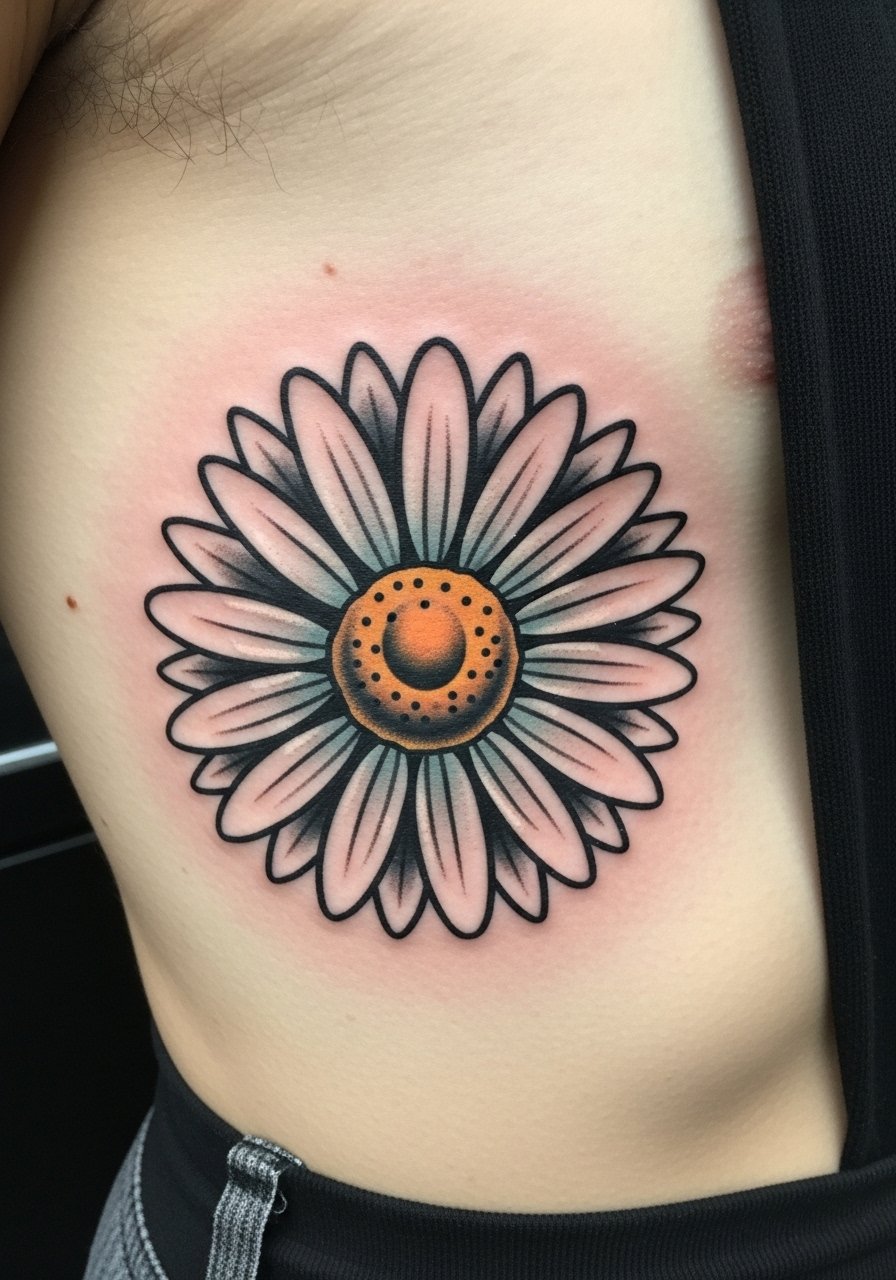
The ribcage hurts. I say that up front because many people plan this for a meaningful April mark without thinking about pain. Pain sits around 7 out of 10 for most. Traditional style with bold outlines works best on ribs, because lines hold longer on that skin. Session time can be 2 to 3 hours if color is involved. I've seen traditional daisies that stay crisp for years when the outline is given room. A common mistake is packing tiny details into petals. They disappear. Tell your artist you want clear black lines and solid color blocks, not micro-shading. Keep movement light while healing, and avoid tight clothing rubbing the area.
5. Minimalist Sweet Pea On Ankle
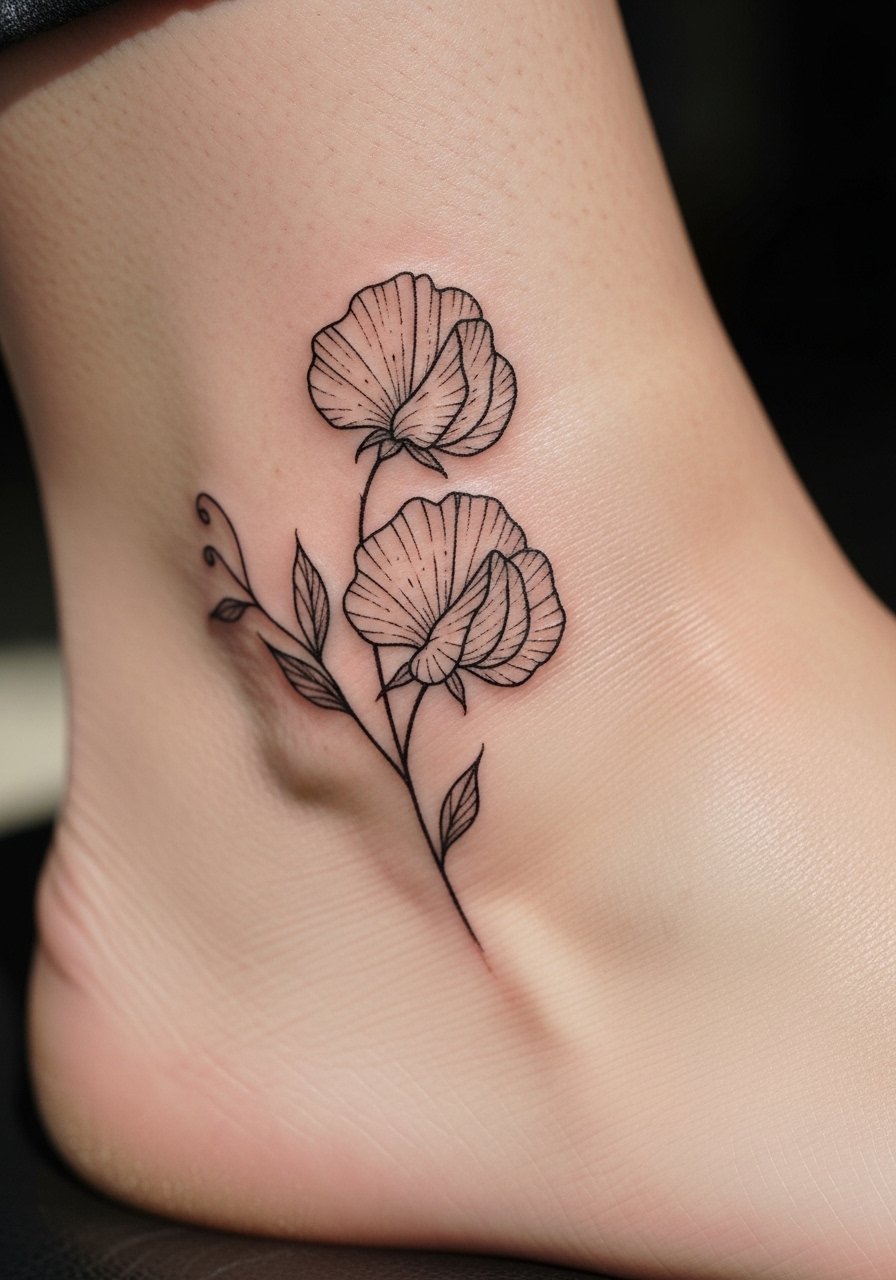
I got one like this as a test run. The ankle is bony and it hurts in short sharp bursts. Minimalist single-stem sweet peas read elegant when placed on the medial ankle. Session time: 20 to 40 minutes. Many people make them too tiny, and finger-to-ankle movement plus shoes cause early fading. I recommend slightly larger line weight and ask the artist to avoid single hairlines where the stem meets the flower. Healed at six months this style needs yearly sunscreen and occasional balm to stay bright. For daily showers I used mild castile soap to keep the area clean without stripping oils. Dr. Bronner's Unscented Castile Soap
6. Blackwork Lily Of The Valley On Ribcage
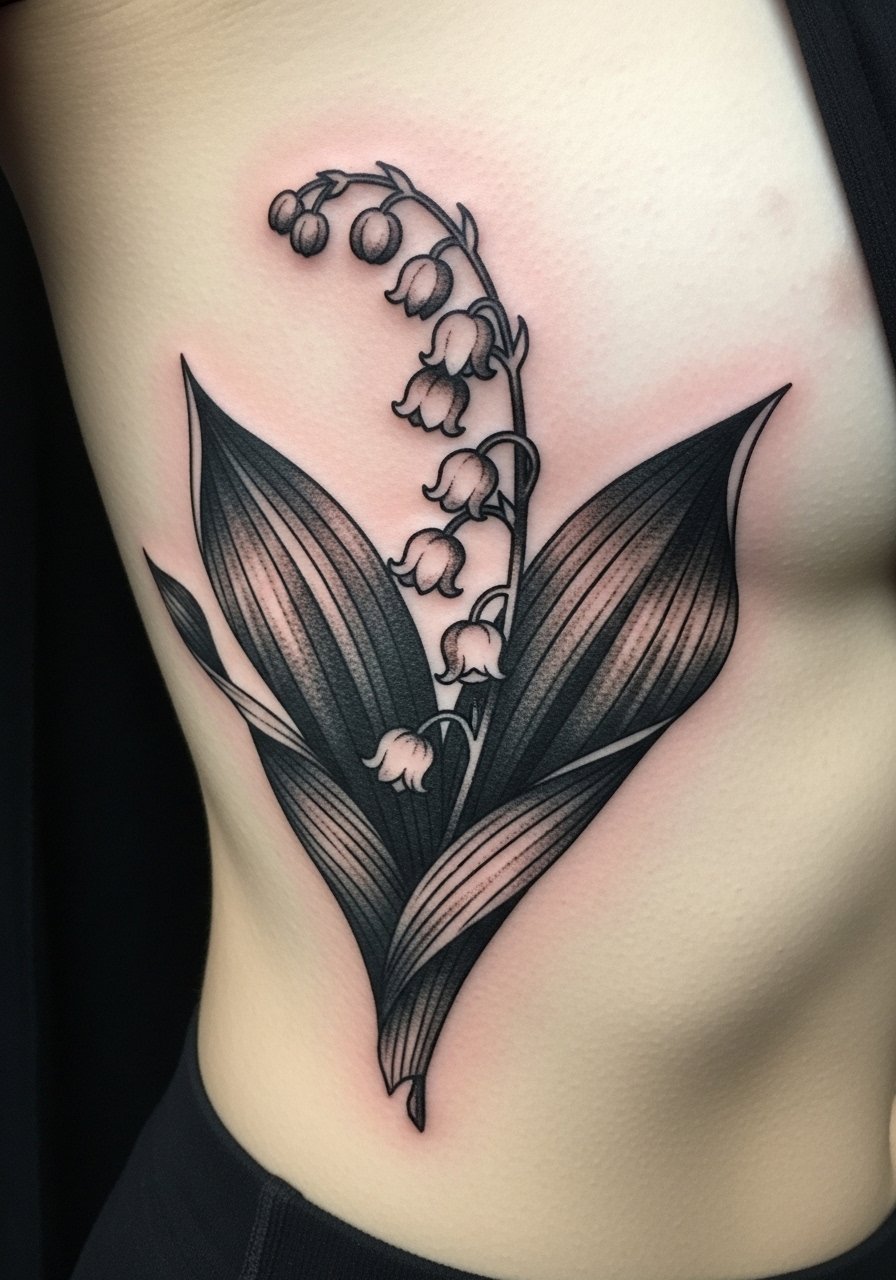
I first saw this on an artist's portfolio and loved the contrast of tiny bells with heavy black leaves. Blackwork hides aging well because solid black ages into darker gray rather than spotty fade. That helps on ribs which experience occasional stretching. Expect higher pain than the upper arm. Session time depends on fill area. Tell the artist you want clean negative space between the bells so the silhouette stays readable. A mistake I see is packing too many tiny dots into the bells. Those go soft at one year. Aftercare is the same as other large pieces, but give it two full weeks of gentle care before heavy lifting.
7. Neo-Traditional Rose On Shoulder Blade
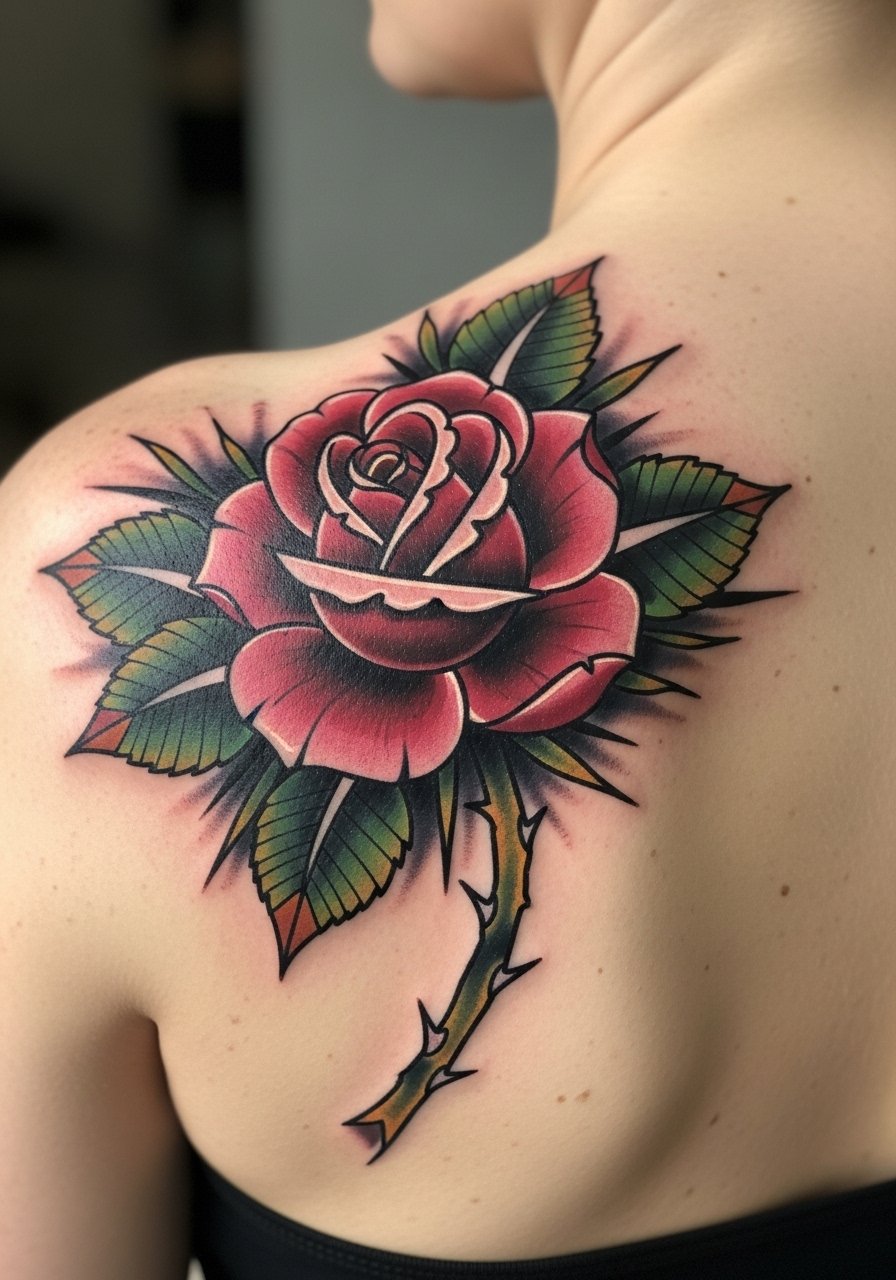
I noticed neo-traditional roses on shoulders during a gallery hop. This placement sits where clothing rarely rubs. Pain is low to moderate. A 1 to 2 hour session will get you a saturated rose with depth. The style ages well because the outlines are purposeful and the shading has room. Ask your artist for reference photos of healed neo-traditional pieces on the shoulder. Avoid asking for lots of tiny stippling near the petals. That detail can merge with healed skin texture. If you want long-term vibrancy, use a targeted tattoo balm in the months after healing.
8. Single Needle Honeysuckle On Collarbone
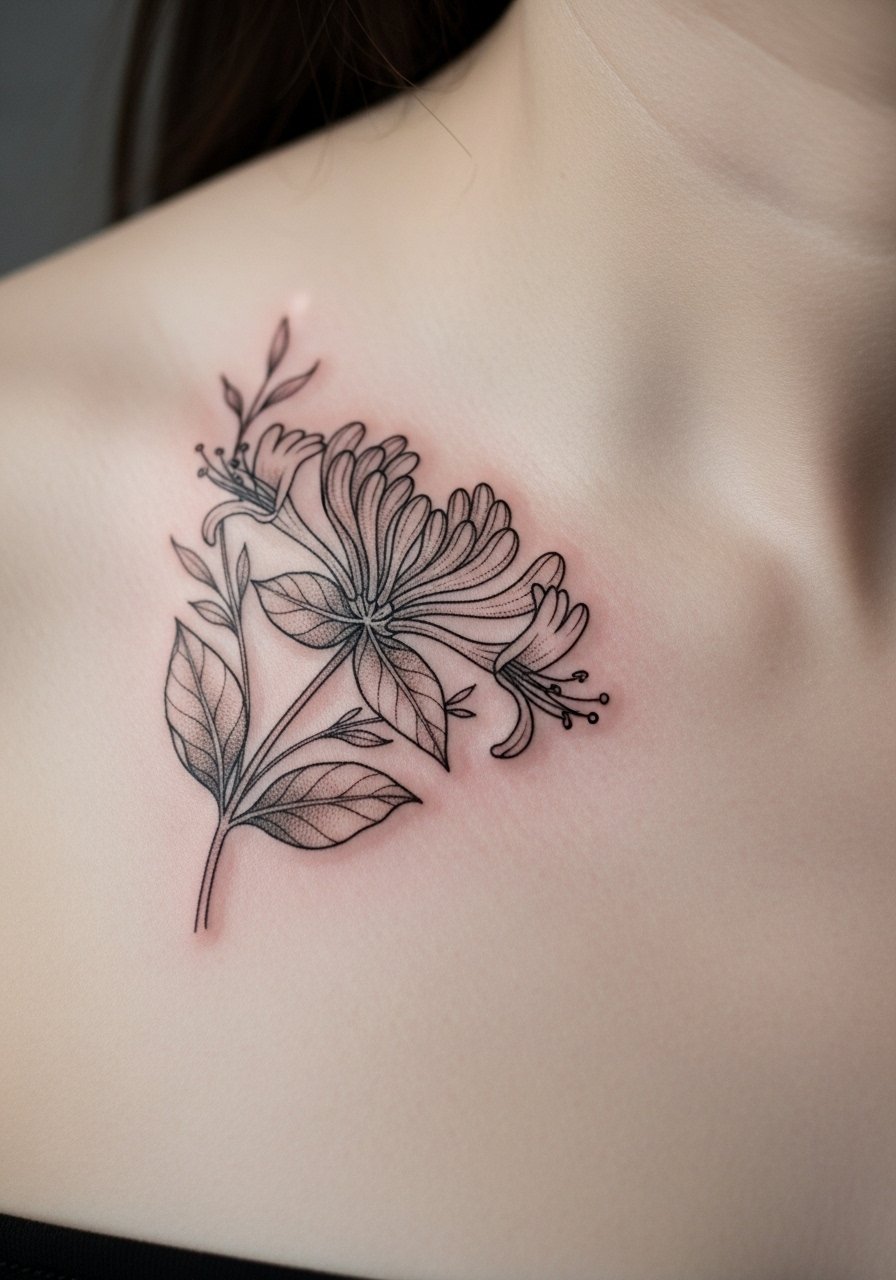
The collarbone is sensitive. Expect sharp, thin-line pain. Single-needle honeysuckle looks delicate perched along the clavicle. Session time is usually under an hour for a small sprig. What I like is how it flatters collarbone curves. From what I have seen, the biggest mistake is asking for hairline stems that braid into the clavicle creases. Ask for slightly denser stems to hold up at two years. When healed, this placement needs SPF whenever it sees direct sun. I recommend a small, travel sunscreen stick for touch-ups. SPF 50 sunscreen stick for tattoos
9. Botanical Sleeve With Birth Flowers On Inner Forearm
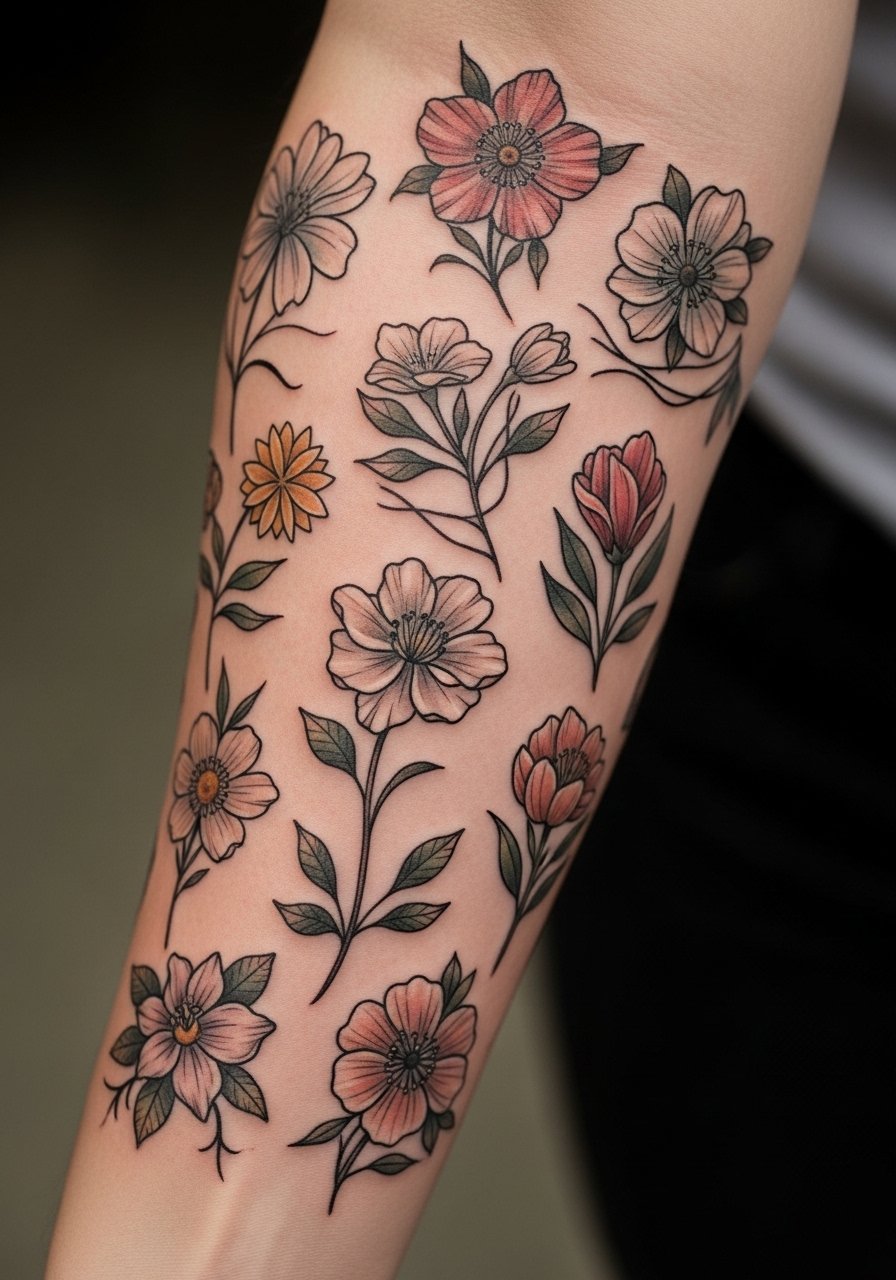
I sat with an artist who sketched a sleeve made of twelve months worth of blooms. The inner forearm is forgiving and shows detail well. Pain range is low to moderate across sessions. Expect this over multiple appointments. Tell your artist you want graduating line weight, not uniform fine lines, so the larger blooms still read at distance. A common error is cramming too many micro-details into the forearm. That makes the sleeve look muddy at two years. During consultations bring photos of healed sleeves to set realistic expectations. For healing I used Saniderm patches after each session for the first 48 hours and then switched to a thin ointment. Saniderm Transparent Adhesive Bandage, 6-inch roll
10. Tiny Larkspur Stack On Finger
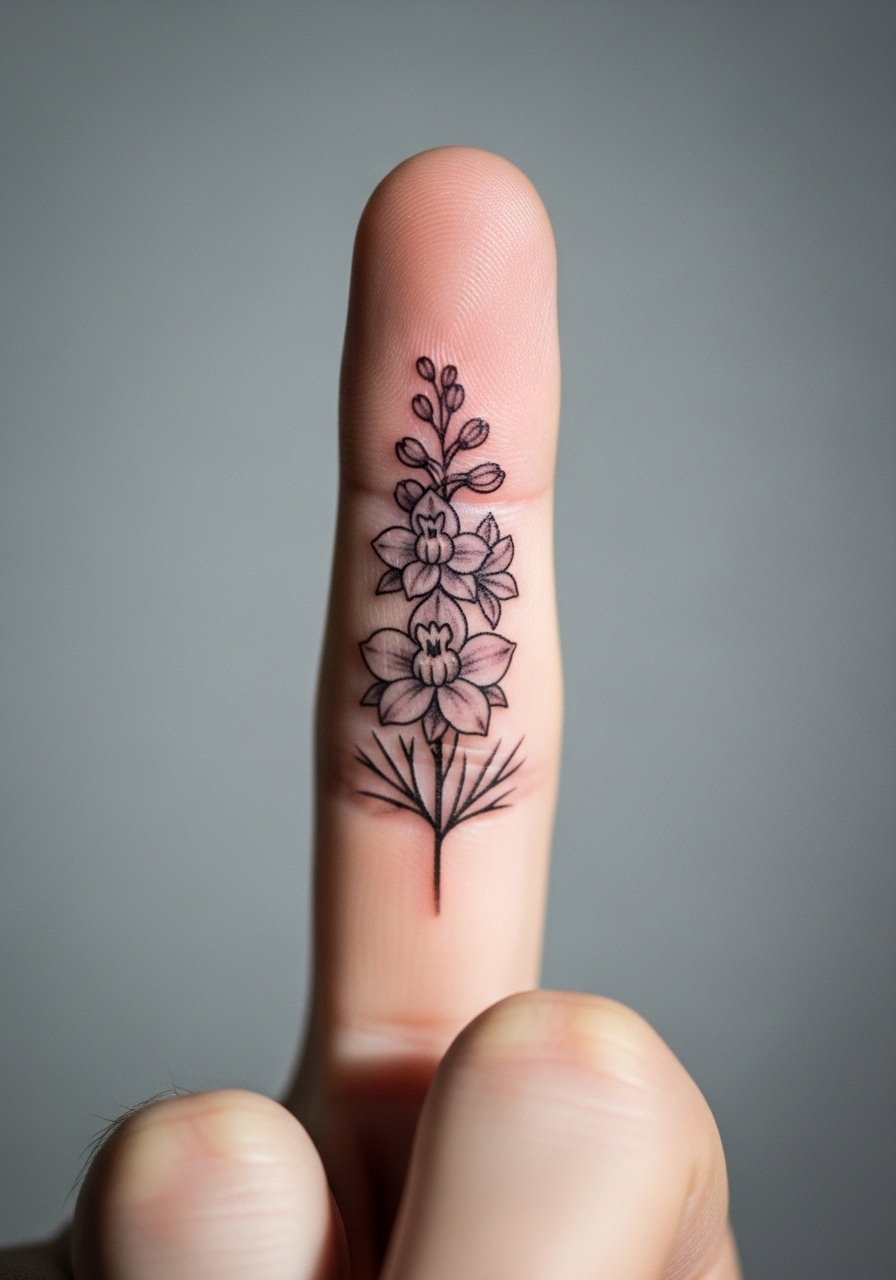
Finger tattoos are tempting, but plan for touch-ups. I have observed finger work fading faster because of constant washing and friction. A tiny stack of larkspur across the finger joints looks delicate. Pain is bright and quick. Sessions are short, 15 to 30 minutes, but you will likely need a touch-up at one year. Ask the artist for slightly thicker stem lines and avoid ultra-fine petal veins. If you want longevity, place the design on the side of the finger rather than the pad. I recommend hydrocolloid bandages for small tattoos while they seal. Hydrocolloid bandages for small tattoos
11. Geometric Gladiolus On Calf
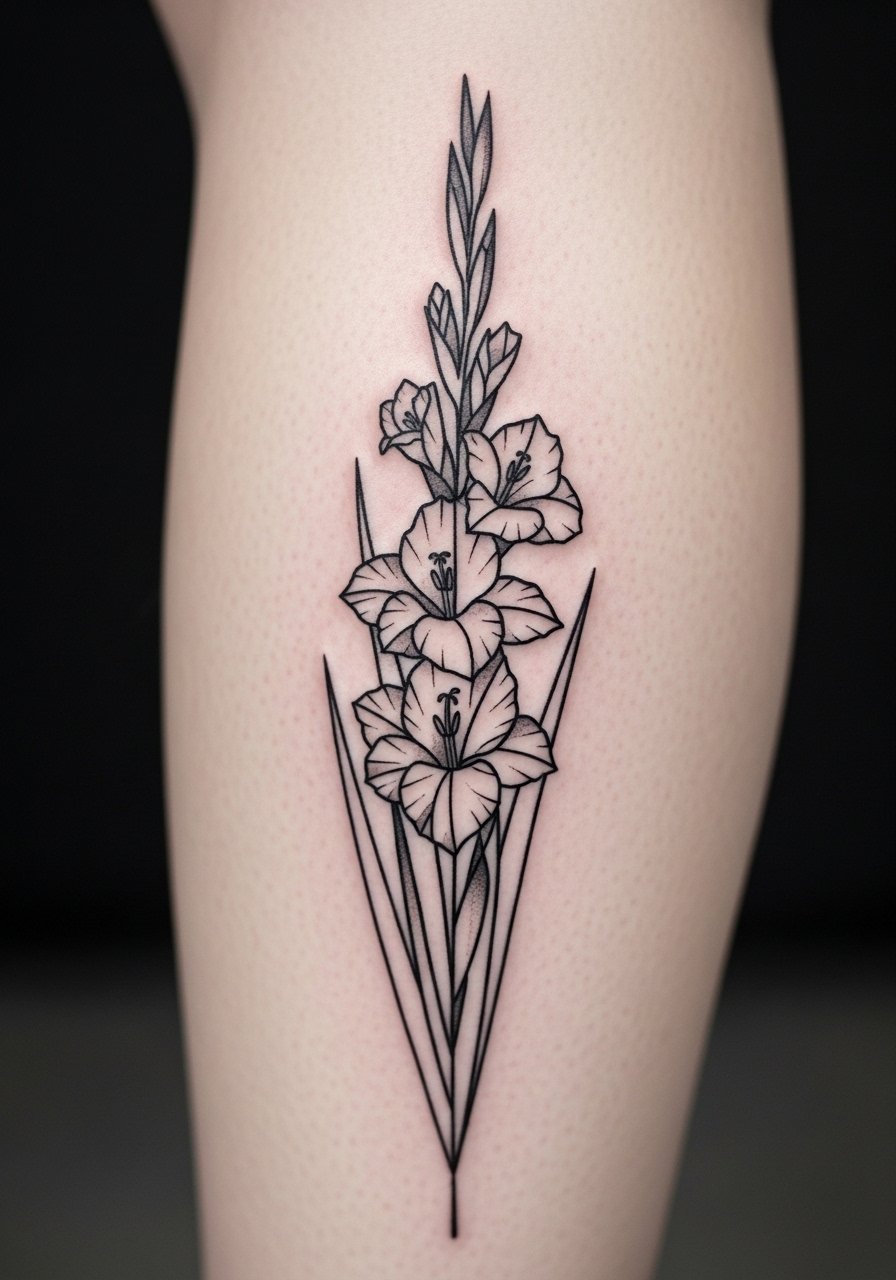
I saw this at a convention. The pairing of rigid geometry with vertical gladiolus makes a dynamic calf piece. Calf pain is moderate. A 1 to 2 hour session can create a bold rhythm. The trick is spacing. I tell clients not to compress the gladiolus petals into tiny compartments inside shapes. That causes blurring. Ask your artist to draft the geometry over the calf muscle in different positions so you can see how it looks during movement. After healing, the black geometry will soften but remain legible if given clean negative spacing.
12. Micro-Realism Water Lily On Thigh
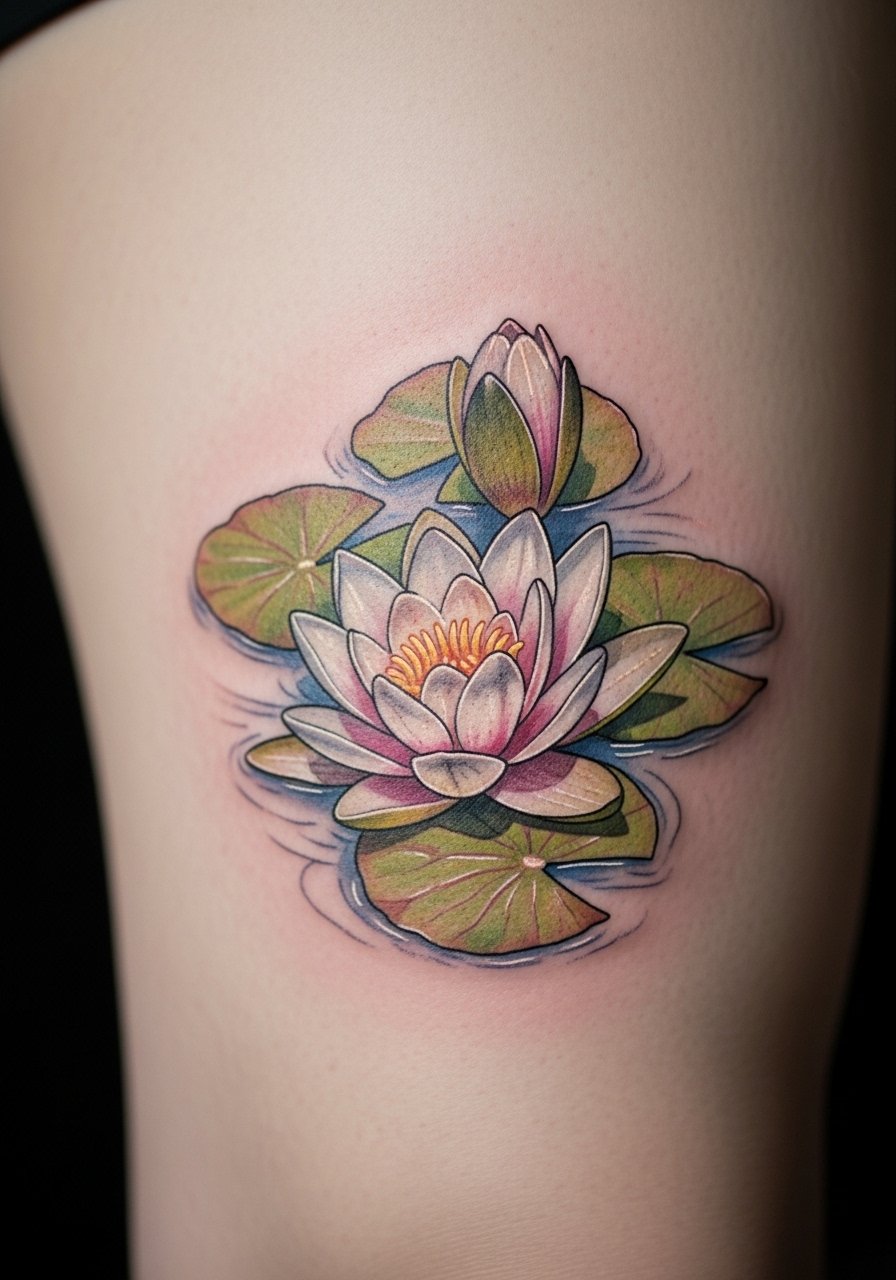
Thigh skin handles larger micro-realistic pieces well. I have a friend with a June water lily done this way. Pain is low to moderate. Sessions run longer, often two hours or more for petal texture. Micro realism ages well here because the thigh gets less UV and abrasion. Still, tiny highlights can flatten at two years. Ask the artist to preserve a few crisp edges in the petals and to use slightly deeper mid-tones. For recovery avoid tight pants for the first week. I often suggest a gentle moisturizing schedule starting day four.
13. Delicate Poppy On Sternum
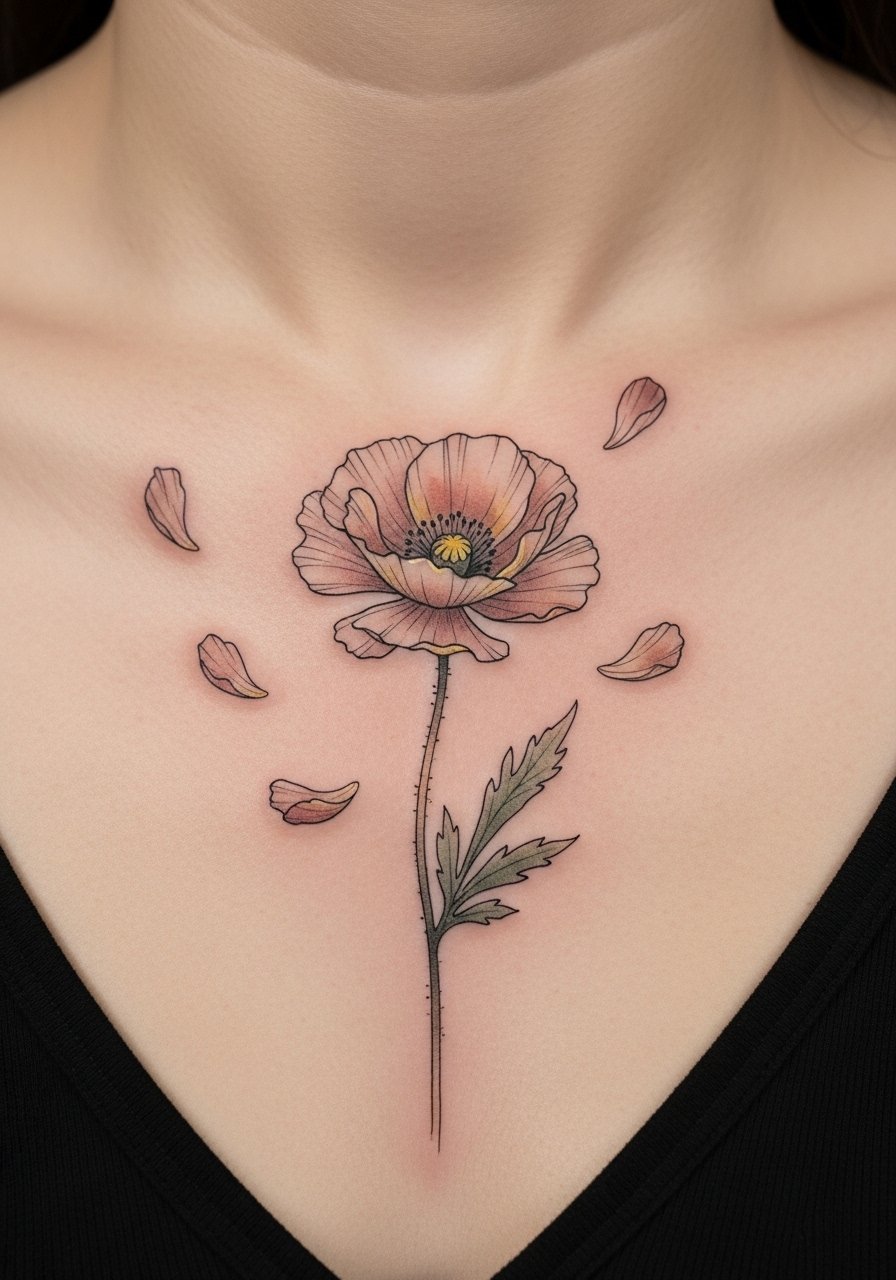
Sternum work can be intense. Pain is high for many people. A delicate poppy here reads intimate and symbolic for an October person. Session time depends on size, but a small central poppy is 45 to 90 minutes. The common mistake is asking for ultra-thin details across ribs. Those blur quickly with chest movement. I prefer slightly bolder edges near the base so the flower keeps its silhouette. Healed at six months the poppy is softer. Keep upper chest clothing loose while healing to avoid scabbing issues.
14. Vintage Tattoo Marigold On Outer Arm
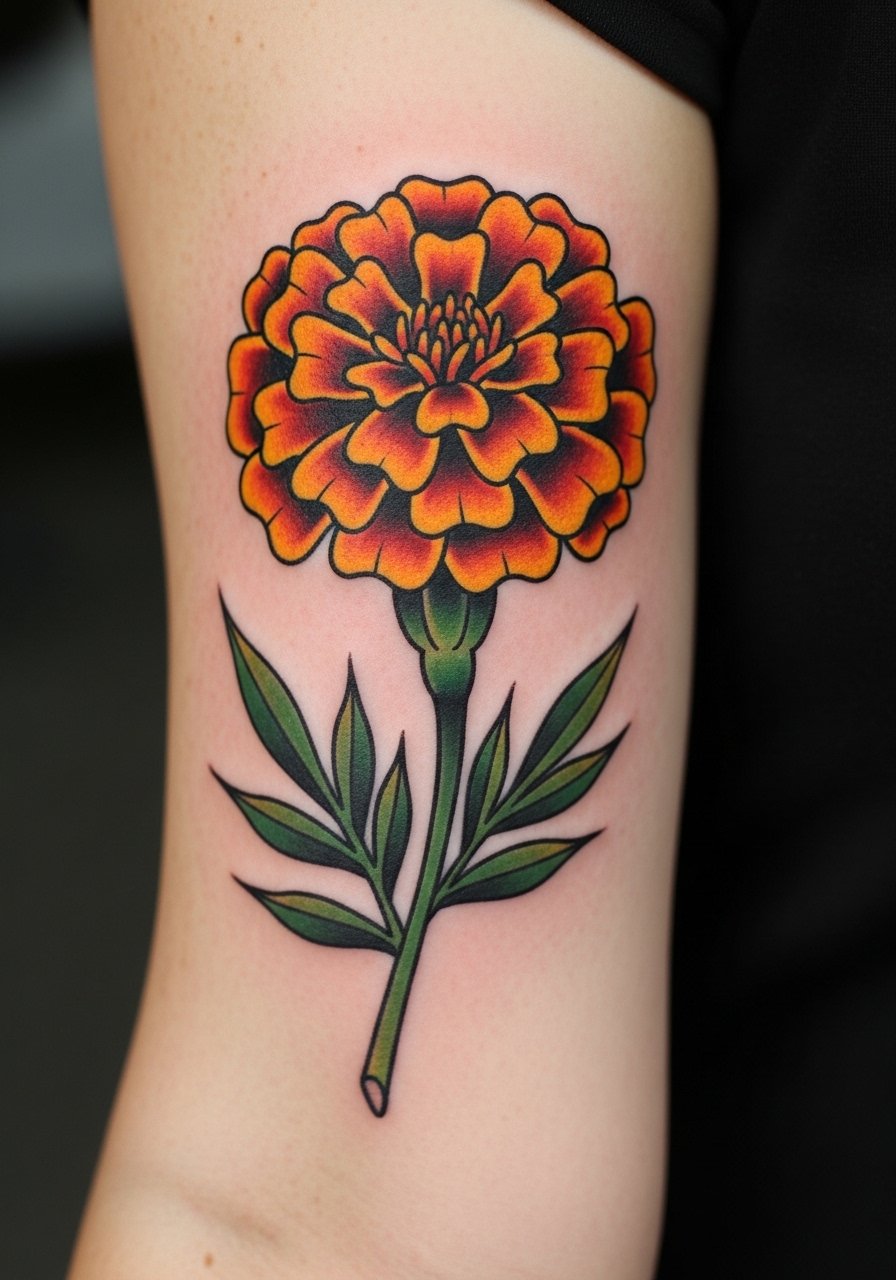
I noted a trend of October marigolds rendered with classic sailor-era shading. The outer arm is great for visibility and lower pain. A one to two hour session lends itself to bold outlines and solid color fill. Artists I know recommend saturated pigment blocks because marigolds can lose yellow vibrancy over time. Avoid asking for hair-thin shading within petals. That gets lost. For everyday wear, a thin layer of tattoo balm during the first three months helps maintain saturation.
15. Fine Line Aster Behind Knee
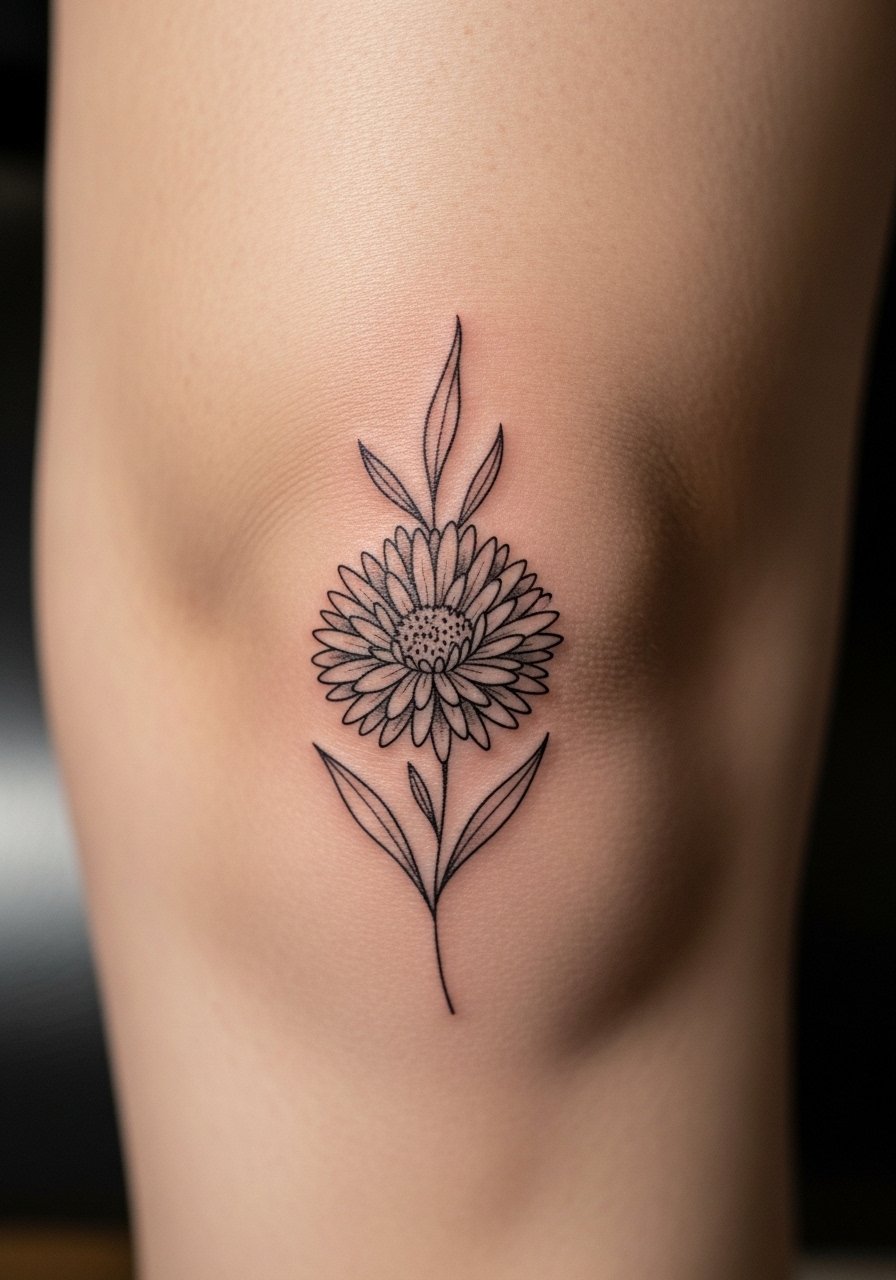
Behind the knee is a tricky area. The skin folds and stretches so linework must account for that. I saw an aster here that looked elegant but needed careful placement. Pain is variable. Sessions are often short but require careful positioning. The mistake I see is using a perfectly symmetrical design. When knees bend, symmetry breaks. Ask your artist to design for movement and to test the stencil with your leg bent. Healed at six months thin lines look softer. Consider slightly bolder stems so the piece reads when you walk.
16. Minimalist Morning Glory On Foot
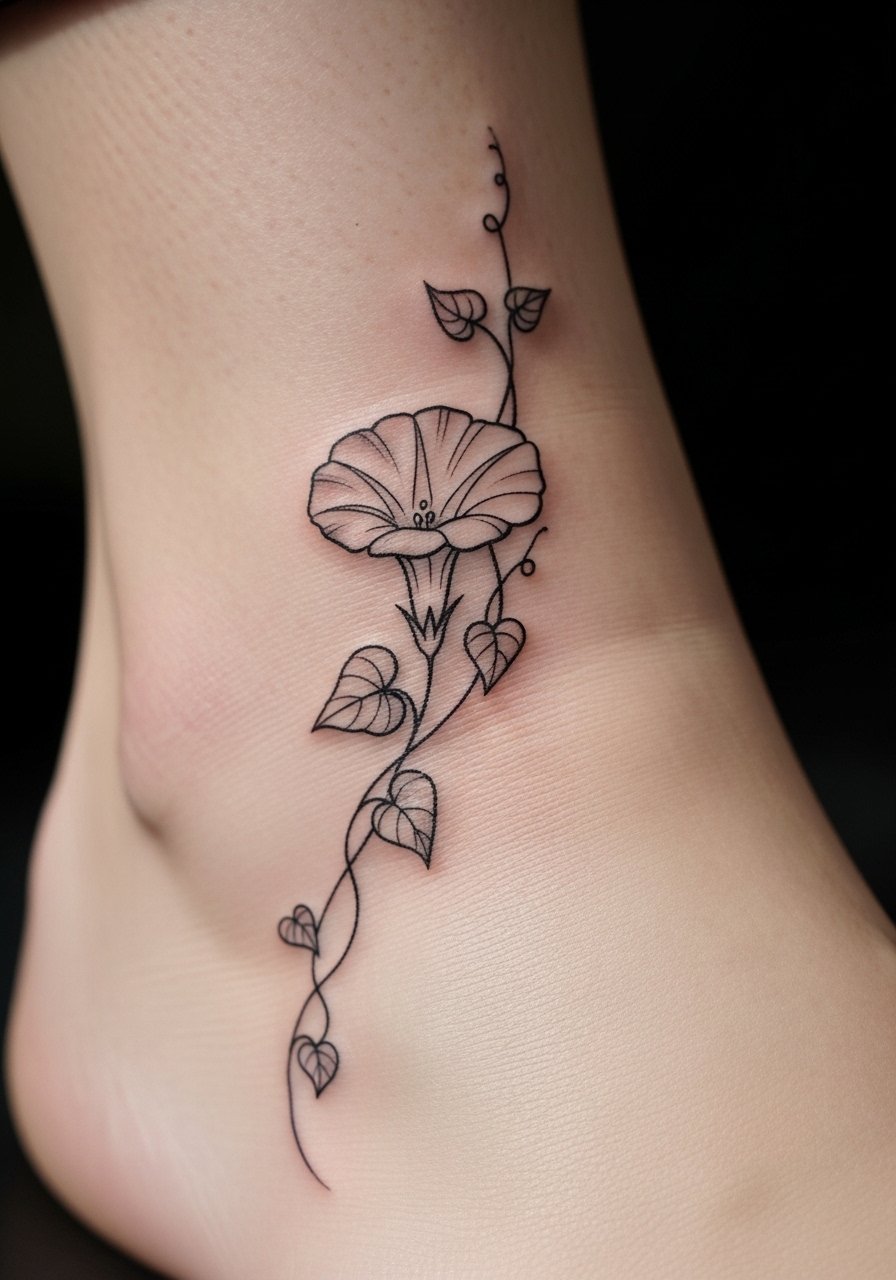
Feet take repeated rubbing from shoes, so plan for fading. I recommend minimalist morning glories placed on the outer foot where friction is lower. Pain is high for the top of the foot. Sessions are brief, often 30 to 45 minutes. The biggest mistake is positioning under straps. You need to think about seasonal shoes. Aftercare includes keeping the foot elevated for hours after your session if feasible. At one year expect softening, but with SPF and occasional balm it can still read nicely.
17. Bold Black Chrysanthemum On Back
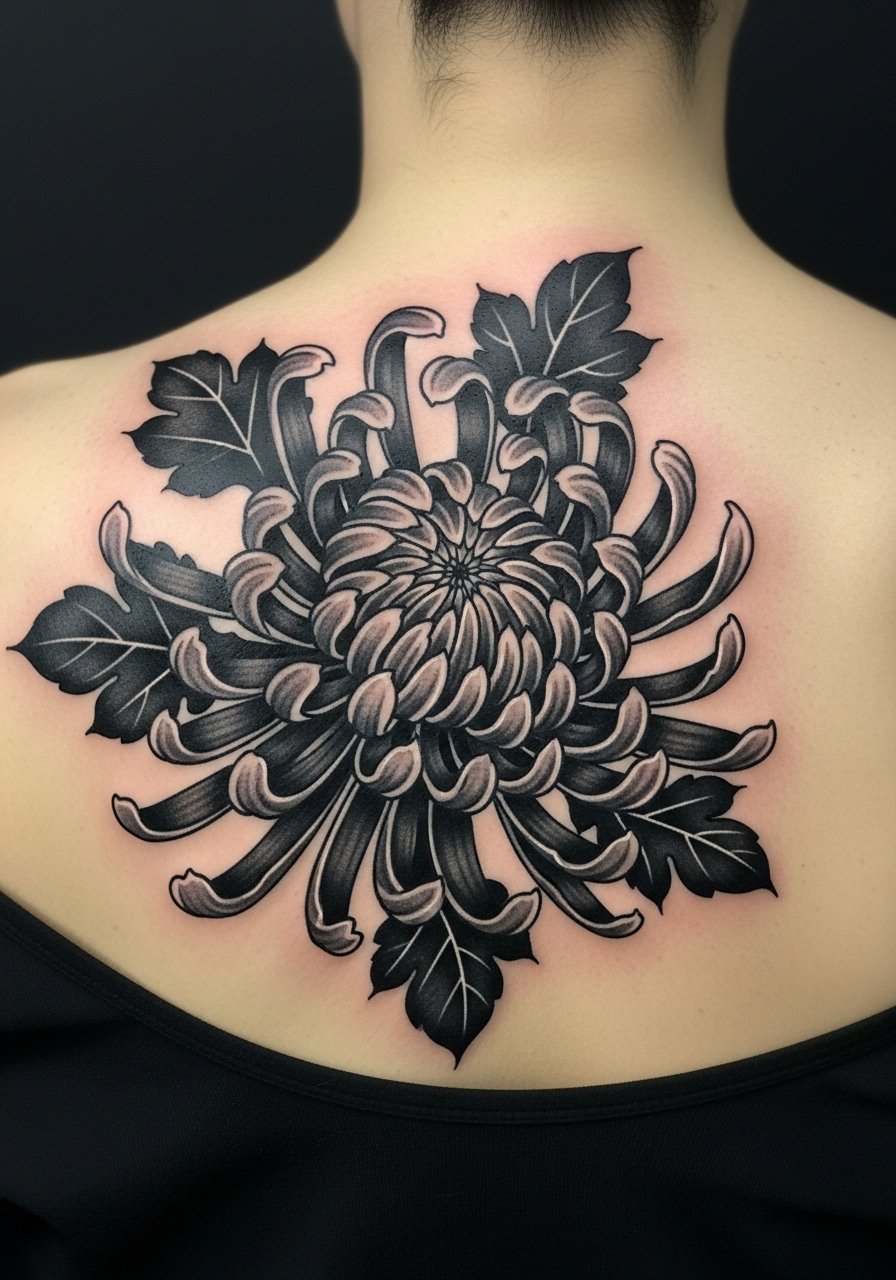
Big back pieces allow dramatic composition. I recommend bold black chrysanthemums for November symbolism. Pain is manageable across the back. Sessions can be long. For longevity pick dense black fills and avoid tiny stipple in key petals. I tell clients to plan this as a multi-session commitment. When healed the petals form strong silhouettes. A common mistake is crowding too many blooms into one spot. Give each flower room to age into its own shadow.
18. Painterly Peony On Hip
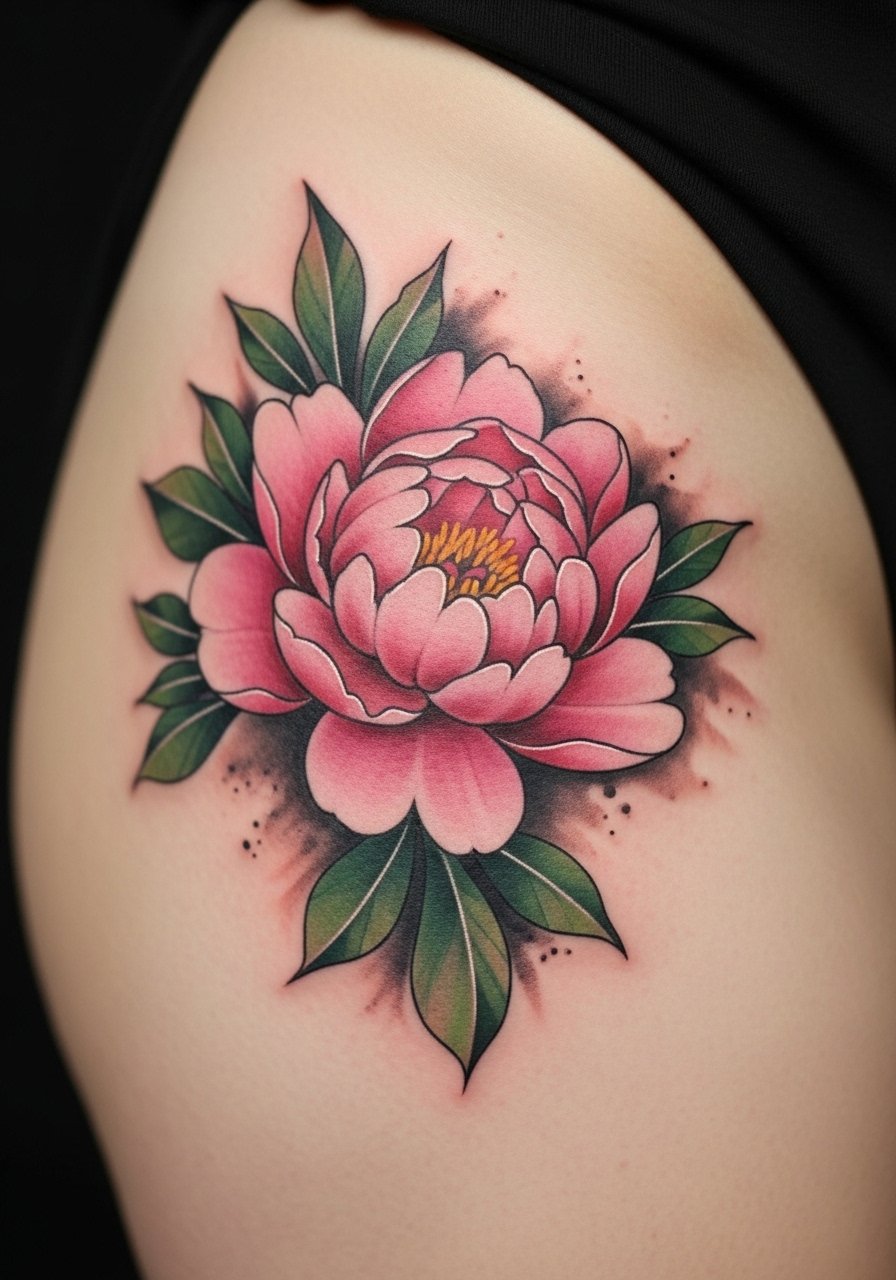
Hip work sits where clothing can rub, but it hides well. I saw a peony like this on someone who wanted a July marker that felt like a painting. Pain is moderate to high depending on proximity to bone. Sessions are often 1.5 to 3 hours. Painterly shading looks gorgeous fresh but can feather slightly over time. Ask for restrained color washes and defined petal edges at the base so the silhouette survives. During healing avoid tight waistbands. If you want a vegan balm option, I've heard good things about Hustle Butter as a maintenance product. Hustle Butter Deluxe
19. Negative Space Narcissus Over Scars
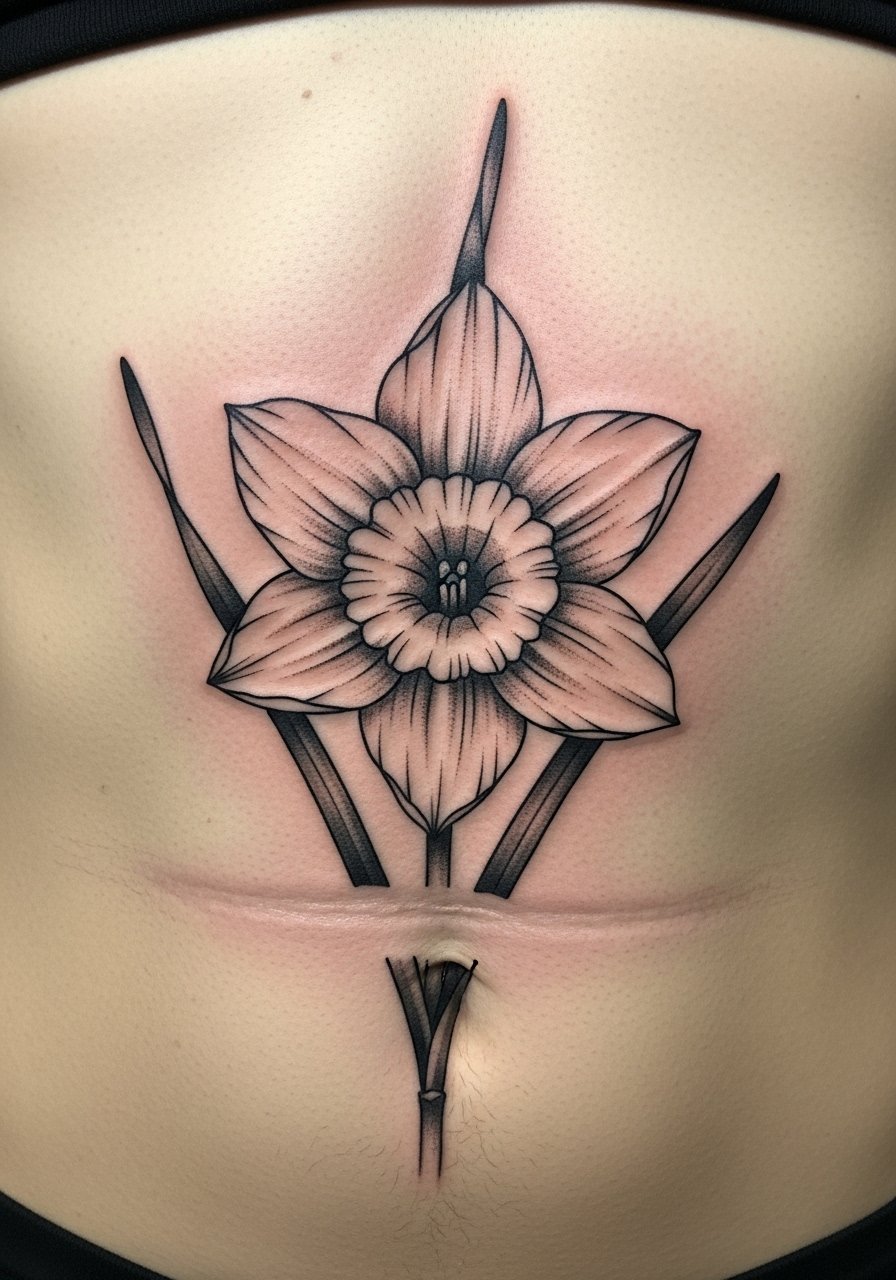
I found this trick in a private portfolio. Negative space can camouflage old scars beautifully if the scar is flat and well-healed. Pain varies with scar thickness. The session focuses on creating bold surrounding shapes that leave the scar visible as part of the design. Tell your artist about your scar history so they can plan coverage. A mistake is trying to hide raised scars with tiny details. Those stick out during healing. Negative space pieces need less touch-up and age gracefully because the design leans on contrast, not micro-lines.
20. Birth Flower Constellation On Upper Back
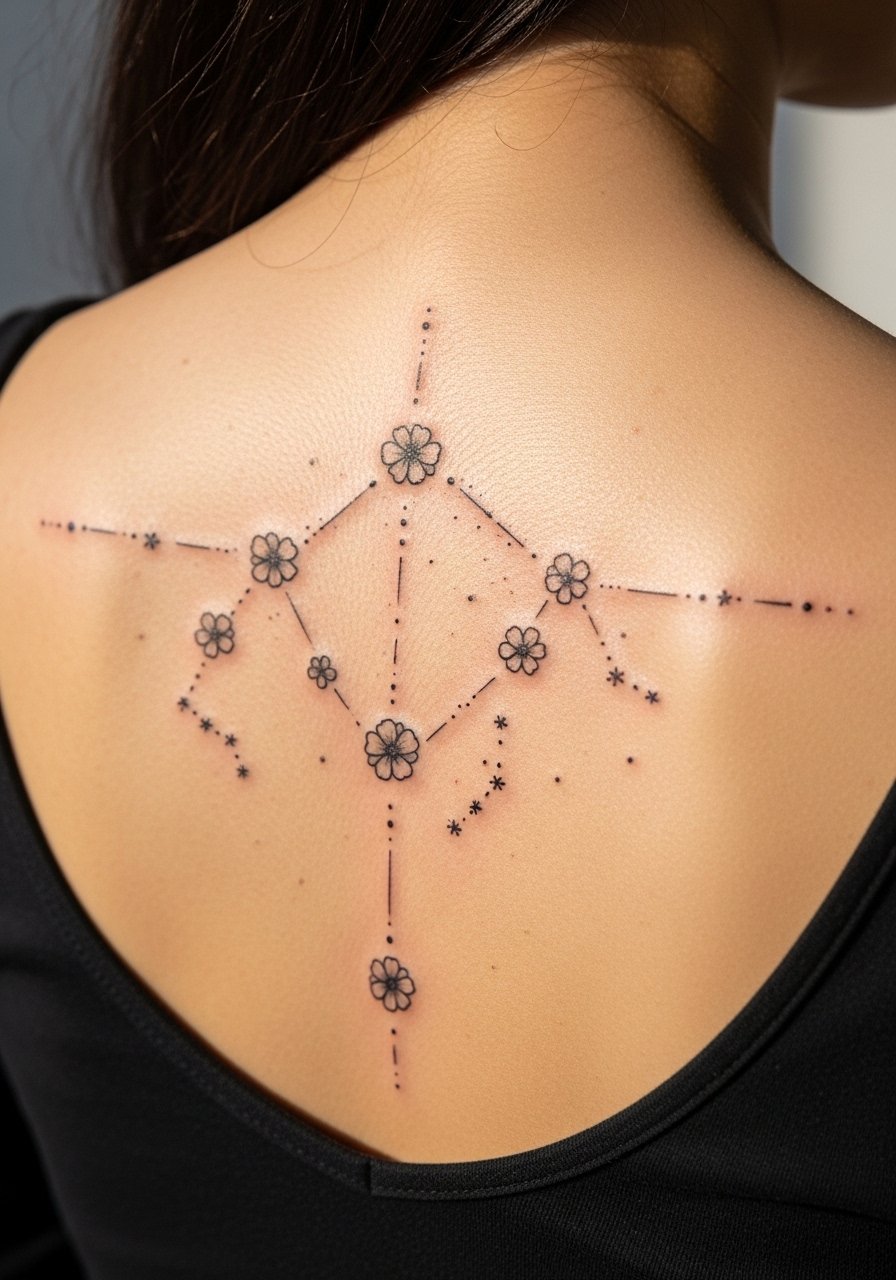
This was an idea I picked up from a collage of artist sketches. It combines a birth flower with star mapping to represent family ties or birth date. The upper back is forgiving for small clusters. Pain is mild. Sessions vary by number of flowers. The key is to space the stars and blooms so they breathe. I see mistakes where artists place too many tiny stars next to thin flower lines. Those elements merge after a year. Ask to test the density on a similar skin patch before committing. For this one, light waterproof protection early on reduces scab loss.
21. Tiny Hawthorn Wrist Band Tattoo
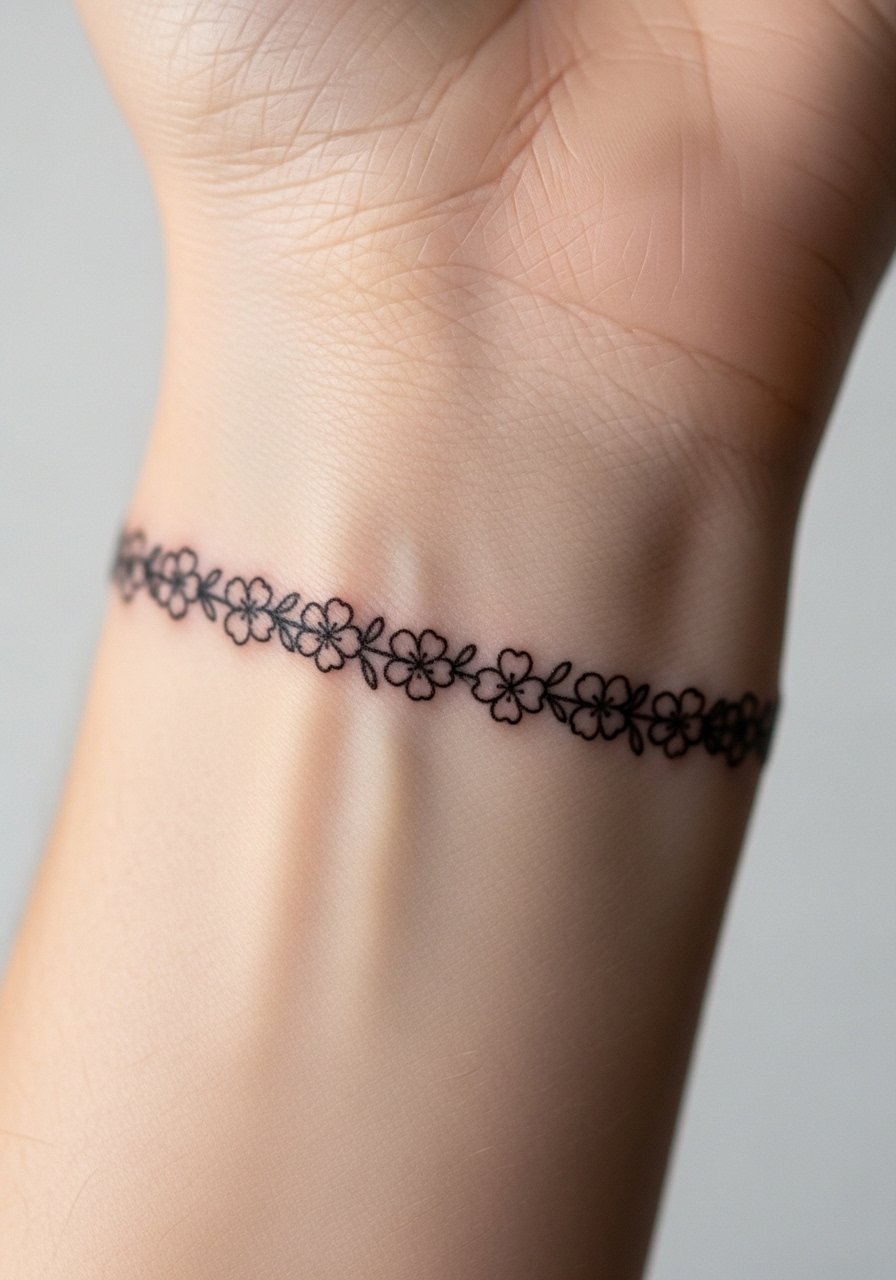
A wrist band of hawthorn feels symbolic and delicate. I have clients who prefer repeating tiny motifs over a solid bracelet. The wrist experiences friction and sunlight so pick bolder stems. Pain level is low to moderate. Sessions are short. The most common mistake is making each bloom tiny. That turns into a gray smudge. Tell your artist you want spacing and a slightly thicker outline at the band’s base. For cleaning the wrist I recommend mild soap and light lotion during the first two weeks.
22. Birth Flower And Birthstone Combo On Ring Finger
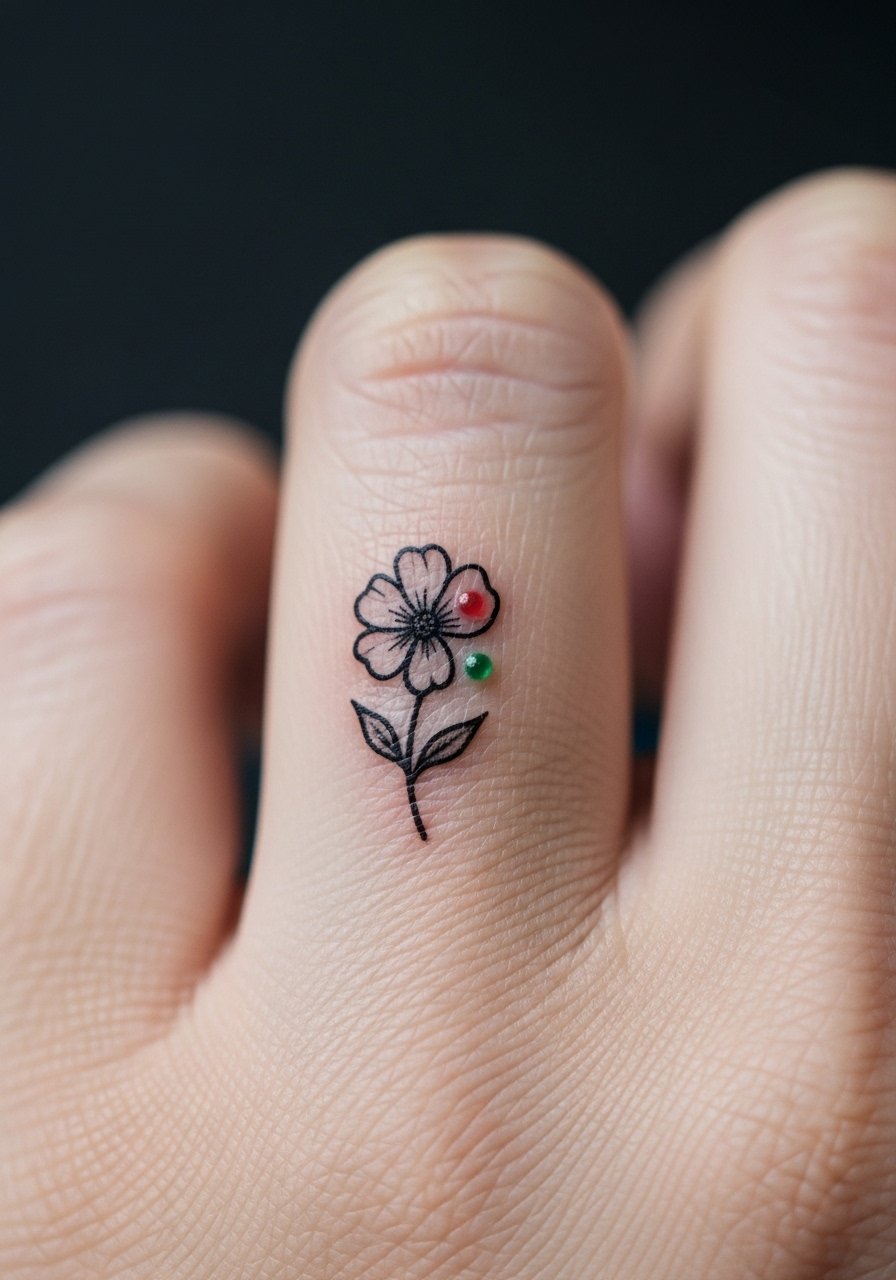
Micro pieces on ring fingers are highly personal. I have seen a tiny bloom paired with a small color dot for a birthstone. Expect quick pain and a likely touch-up due to constant use of hands. Keep the design minimal. Ask for a reliable pigment that holds color on fingers and for slightly bolder black anchors. A mistake is asking for too much color detail. Colored dots can migrate. Consider moving this design a smidge toward the side of the finger to reduce abrasion.
23. Minimalist Calendula On Behind Ear
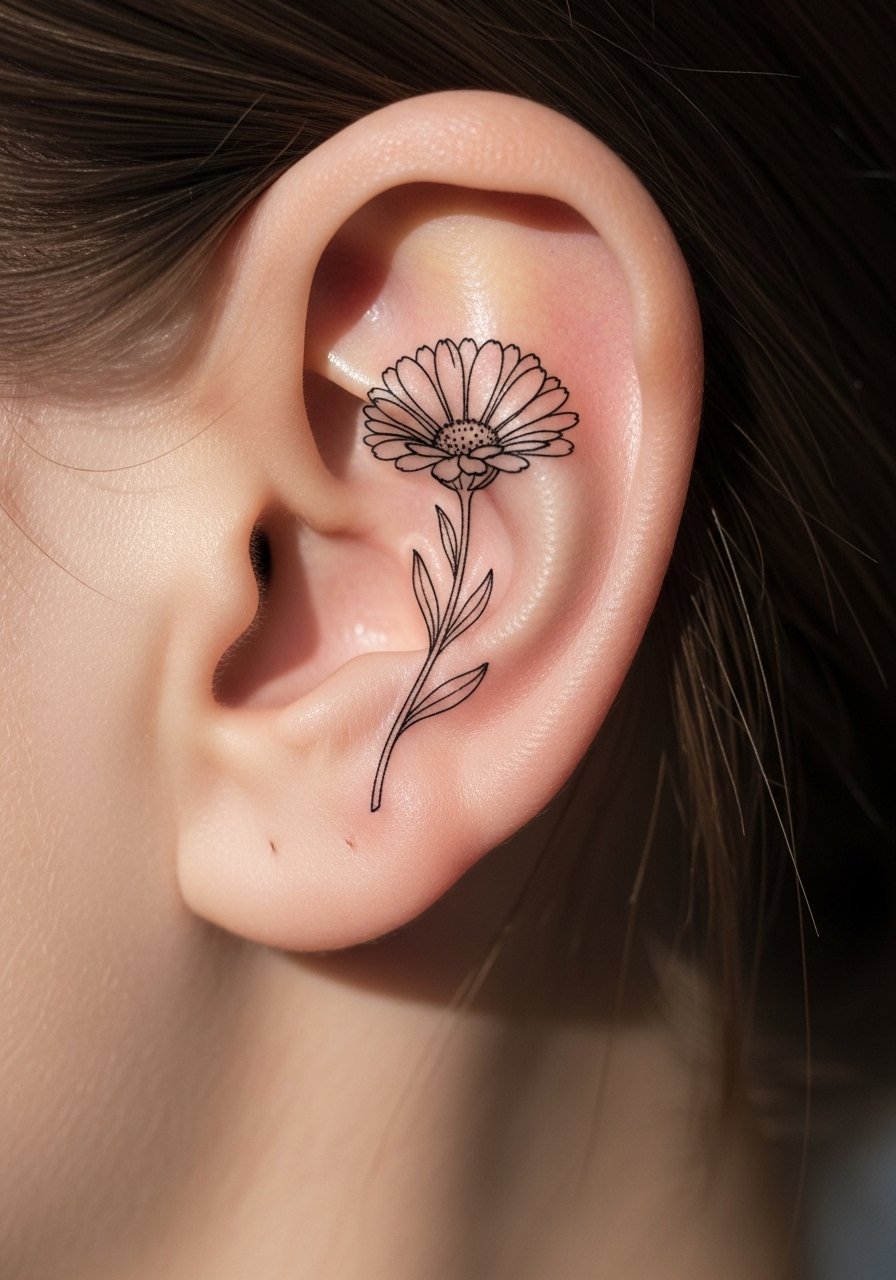
Behind the ear is a low-visibility sweet spot that carries little daily abrasion if hair covers it. I watched someone get a small calendula here for an October tie. Pain is sharp but brief. Keep the lines slightly stronger than you think so it remains legible at two years. Artists I know will show you healed behind-ear shots because the area can lose thin lines. For post-care a tiny dab of healing ointment and careful drying works well.
24. Single Needle Snowdrop On Nape
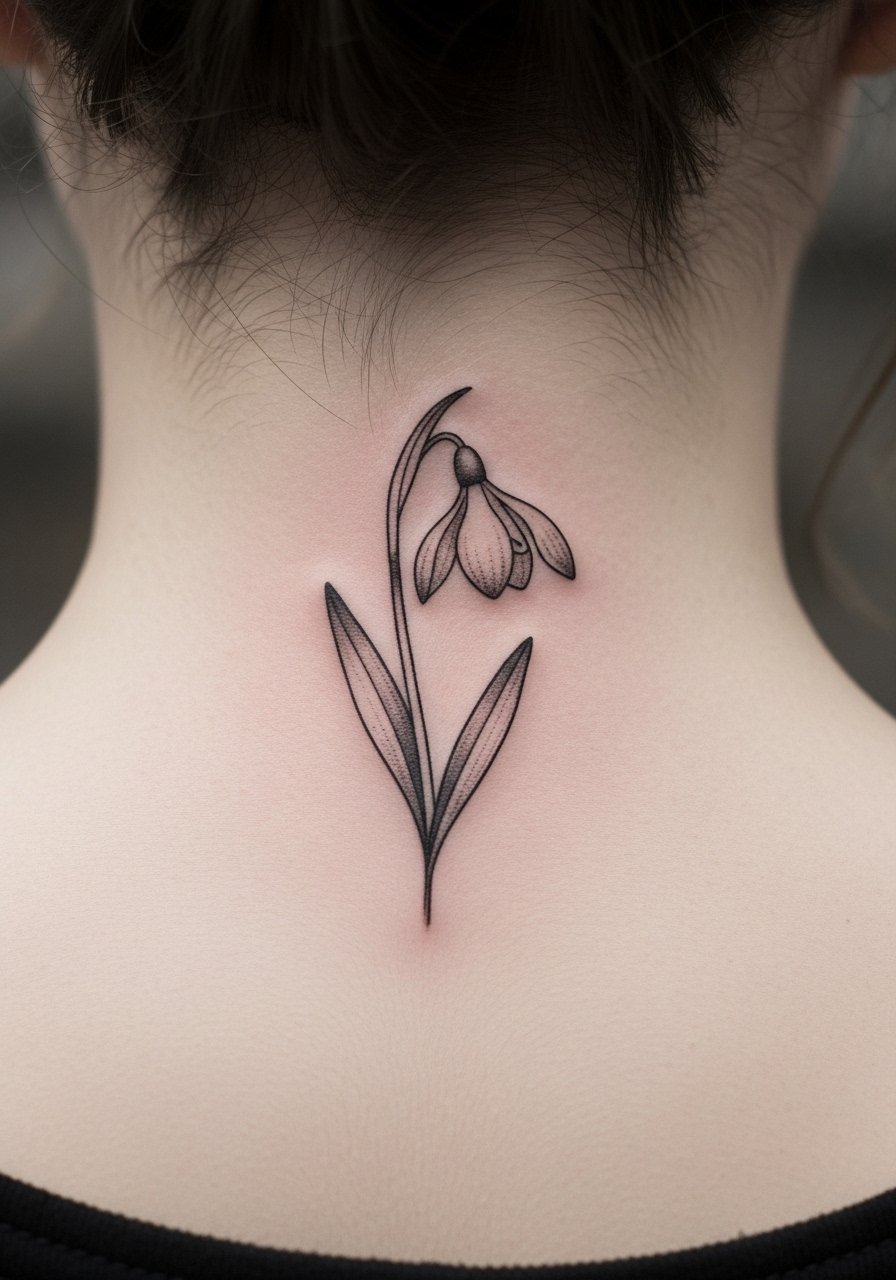
A snowdrop at the nape is a quiet January statement. The skin is thin. Single needle gives an elegant look but needs regular sun avoidance. Expect moderate pain when the needle reaches closer to bone. Session time is short. I advise asking for slightly reinforced line weight near the base so it survives hair brushing. A common mistake is placing it too low where hair pulls the scab. Place it a little higher and ask your artist how you should sleep while it heals.
25. Lace-Like Bouquet On Thigh
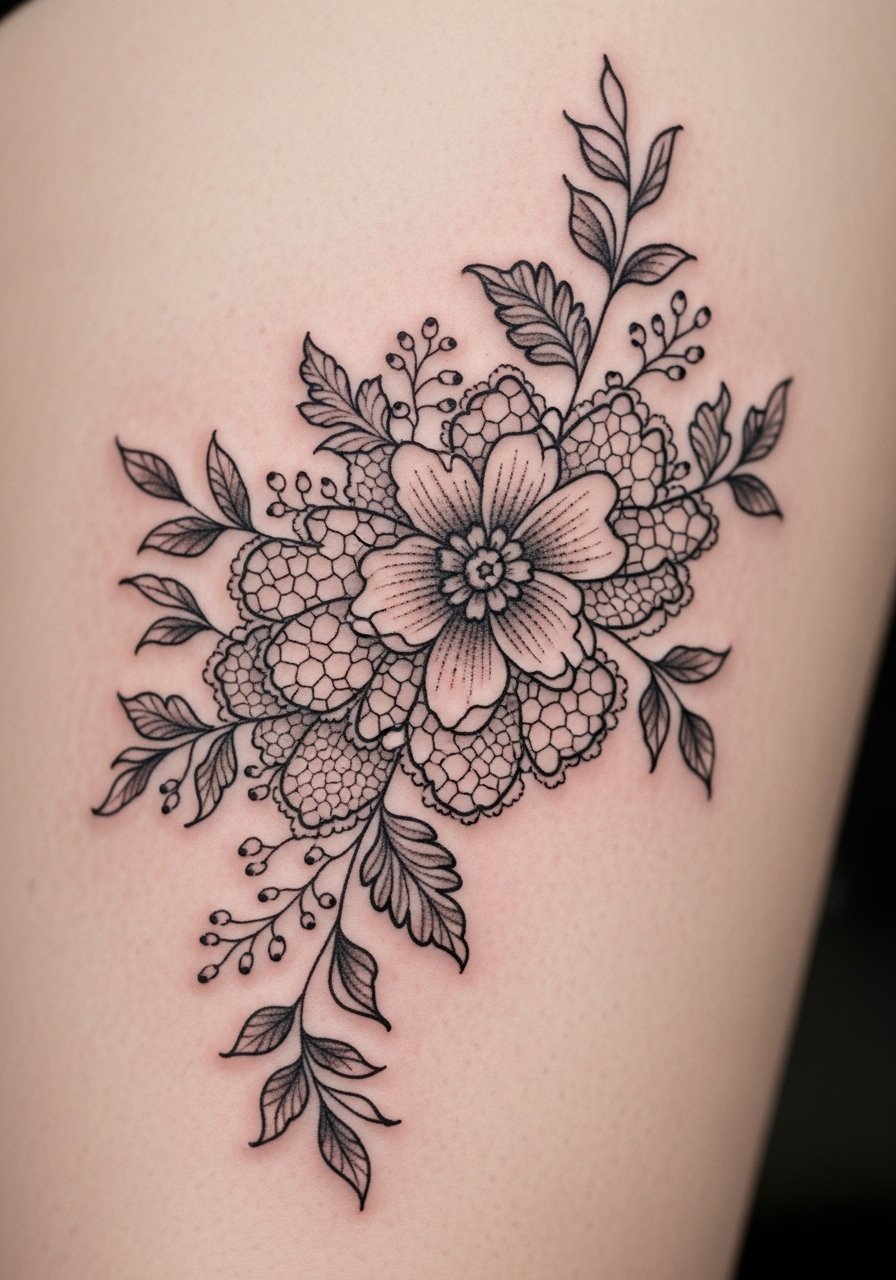
Thighs are forgiving and perfect for larger lace-like compositions that blend multiple birth flowers. Pain is low compared to ribs. Sessions can be long. The difference between a flattering lace bouquet and a messy one is the space between elements. I tell clients to give the artist room to breathe. A common error is asking for too many tiny filigree details which fill in over time. Healed at a year the lace should have gentle softness, not a clumped texture.
26. Miniature Mixed Flowers Behind Ear
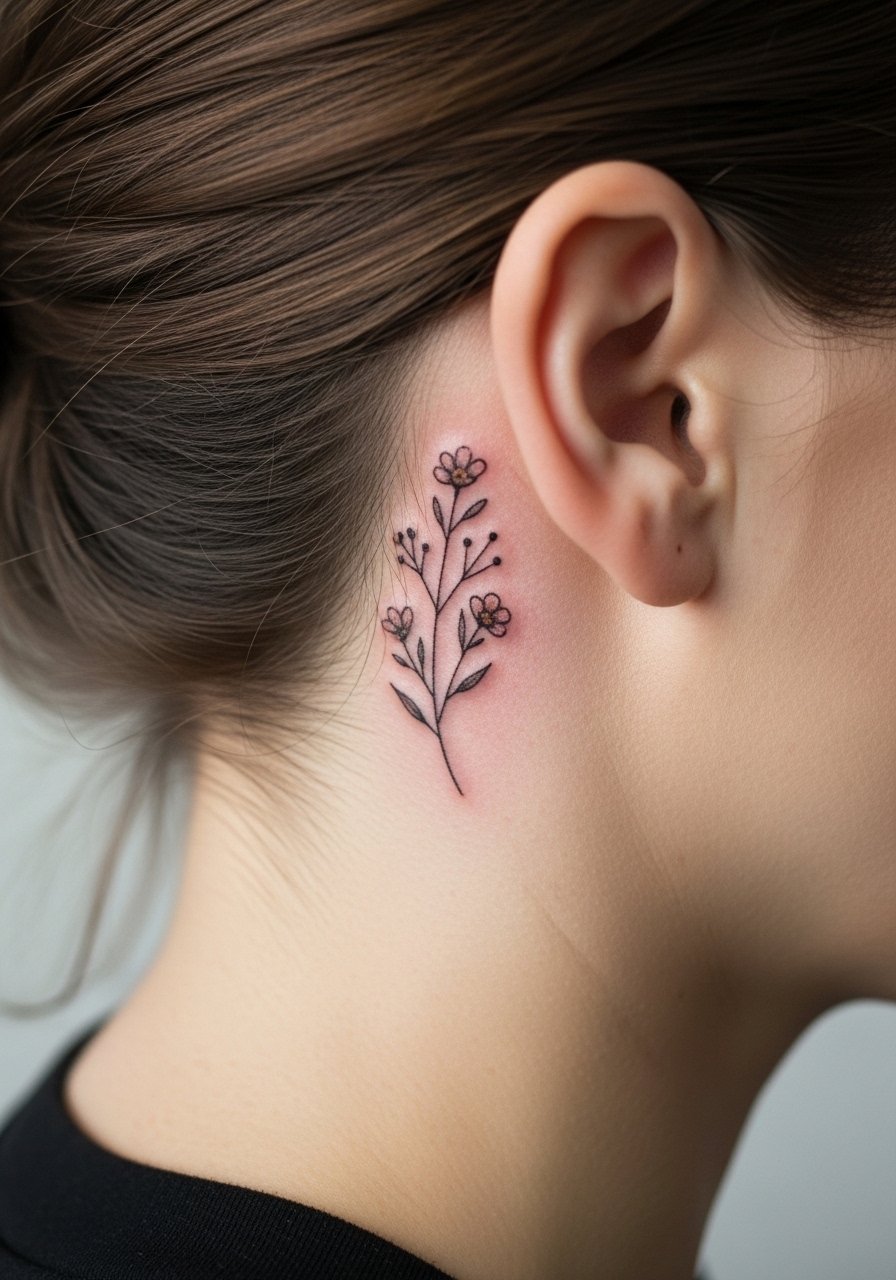
I kept seeing small clusters like this on social feeds. Behind the ear lets you wear a tiny bouquet without committing to a visible spot. Pain is quick and sharp. Short sessions are common. The risk is scabs snagging on hair. Ask for compact petals and slightly thicker connectors between blooms. That prevents individual flowers from flattening into a smudge. For drying and sleep, use a silk pillowcase if you can. It helps reduce hair friction.
27. Morse Code Stem Tattoo Down Spine
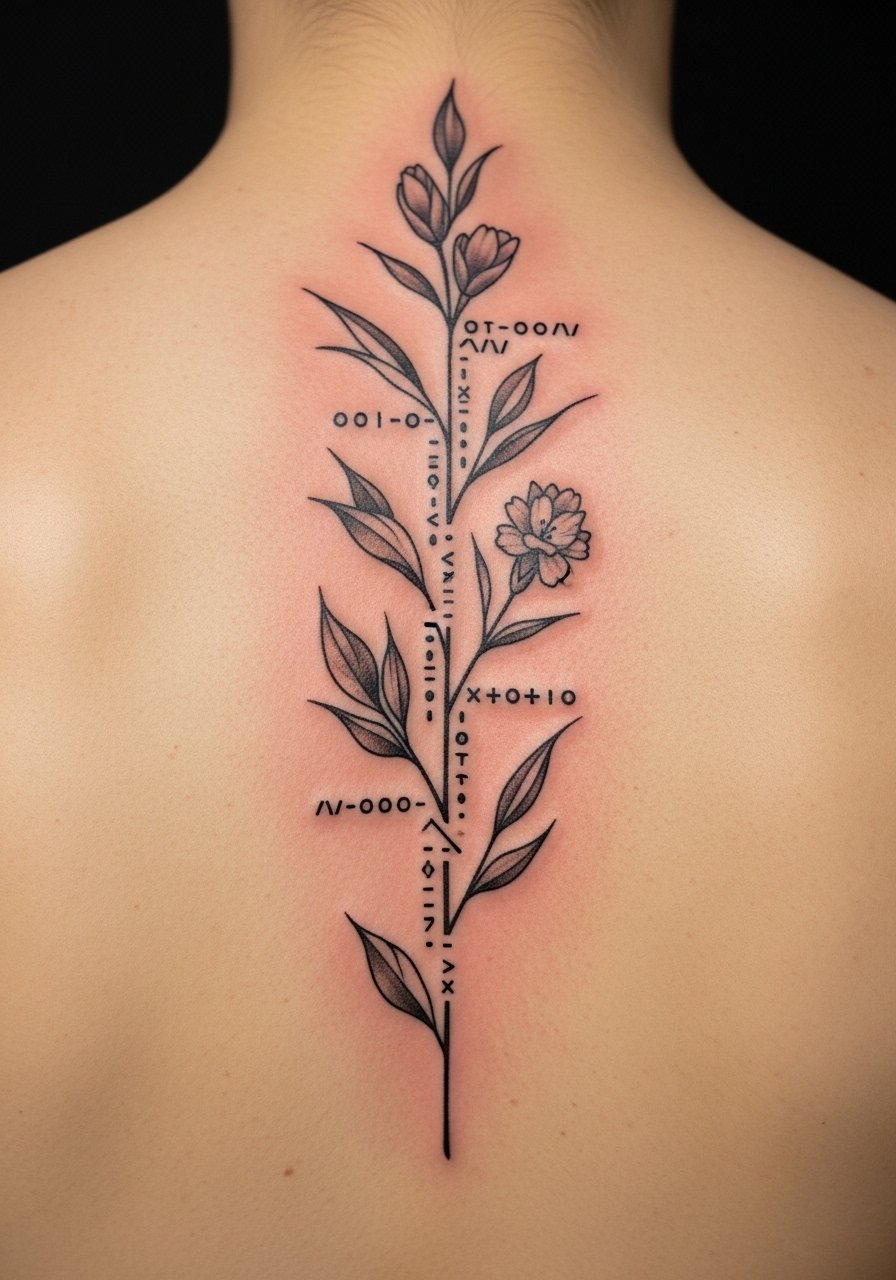
This is one of the unique angles I found. Integrating morse code into the stem of a flower adds a secret layer of meaning. Spinal placement can be tender, but the vertical line reads beautifully. Pain is moderate to high depending on how close to the bone you go. Sessions can be split. The trick is consistent spacing for dots and dashes so the code remains legible long term. A mistake is spacing dots too closely to petal lines. Ask your artist to map the code on your back in different positions before inking. Healed, it looks like a delicate spine ornament.
28. Micro-Realism Seedling On Inner Elbow
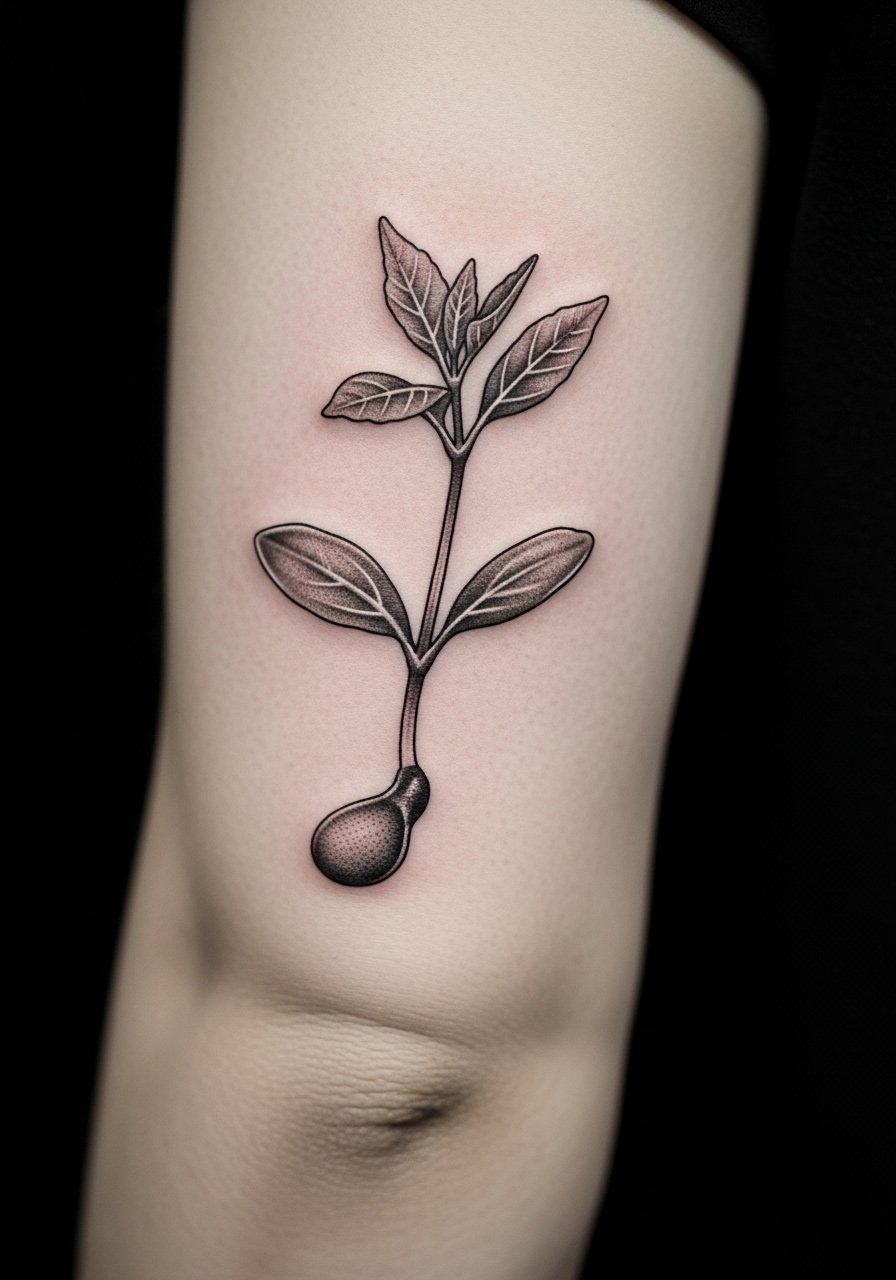
Inner elbow pieces move with the joint. I liked a tiny seedling here representing new life or a birth month. Pain is moderate. Sessions are short but require care because the skin creases. The common mistake is placing heavy shading inside folds. Ask your artist to design with the elbow partly bent so they can see how it will sit. At six months small highlights soften. Keep the area moisturized and avoid heavy bending while the scab forms.
Tattoo Prep and Aftercare Essentials
Aftercare Essentials:
- Aquaphor Healing Ointment, 14oz tube — Use first 3 to 5 days for open wounds
- Saniderm Transparent Adhesive Bandage, 6-inch roll — For second-skin protection after the booth
- CeraVe Fragrance-Free Moisturizing Lotion, 12oz — For days 4 to 14 when skin needs daily moisture
- Dr. Bronner's Unscented Castile Soap, 32oz — Gentle cleanser for washing tattoos
Before Your Appointment:
- Tattoo numbing cream with 5% lidocaine, 30g — Apply 30 to 45 minutes prior only if your artist approves
- Tattoo stencil transfer paper, A4 pack — Useful for home mockups before consultation
Long-Term Maintenance:
- SPF 50 sunscreen stick for tattoos, travel size — Use daily on exposed tattoos to prevent fading
- Mad Rabbit Tattoo Balm, 1oz — Keeps healed tattoos vibrant during maintenance months
- Hustle Butter Deluxe, 3oz tub — Vegan balm artists recommend for ongoing care
Optional Comfort Items:
- Tattoo numbing spray, 50ml — Helpful for touch-ups or sensitive areas
- Hydrocolloid bandages for small tattoos, pack of 20 — Alternative to Saniderm on tiny spots
Every artist I've talked to has a preferred product. From what I heard, Aquaphor and Saniderm are the most commonly recommended for the initial healing phase. Mad Rabbit and Hustle Butter come up often for maintenance, but pick what suits your skin.
Frequently Asked Questions
Q: Will fine line birth flower sleeves blur into each other over time?
A: From what I've seen, fine line sleeves can blur if you pack too many thin elements too close. Tell your artist to create breathing room between blooms and to vary line weight. Request healed photos of similar sleeves from your artist so you can see how those lines settled at six months and two years. For healing use a trusted balm like Aquaphor Healing Ointment, 14oz tube for the first few days before switching to lotion.
Q: Do watercolor-style birth flower tattoos need different aftercare than traditional ones?
A: In my experience the aftercare steps are the same, but watercolor styles rely on pigment saturation and softer edges. That means they are more sensitive to sun and abrasion. Keep them covered while healing and use SPF regularly after they're healed. A travel sunscreen stick is easy to carry. SPF 50 sunscreen stick for tattoos
Q: Will a birth flower on the ribcage hold up if I want a lot of detail?
A: Ribs can hold detail, but the skin moves and stretches. I recommend prioritizing defined outlines and moderate shading over micro-detail. Ask your artist to stage the piece in multiple photos with you at rest and breathing. For larger rib pieces consider Saniderm for initial protection after the session. Saniderm Transparent Adhesive Bandage, 6-inch roll
Q: How soon can I wear tight clothing after a thigh bouquet tattoo?
A: I tell people to avoid tight waistbands and thigh compression for at least seven to ten days. The thigh tolerates pressure a bit better than ribs, but scabs under tight fabric risk premature loss and uneven healing. Opt for loose shorts or dresses during the first week.
Q: Can a tattoo cover or hide a raised scar if I choose negative space design?
A: Yes, but the scar needs to be fully healed and relatively flat. From what I have seen, artists do best when they are honest about scar texture during consultation. Negative space designs that incorporate the scar as part of the art tend to look organic and require less aggressive pigment which helps reduce irritation.
Q: Are finger and ring finger birth flower tattoos worth it if I want them to last?
A: Fingers fade faster. If longevity matters, place the bloom slightly off the pad toward the side. Ask the artist for bolder anchors and expect a touch-up at one year. Hydrocolloid bandages during early healing can help small finger pieces seal better. Hydrocolloid bandages for small tattoos
