
I spent months bookmarking bird tattoos and asking artists what actually holds up healed. The trick wasn’t just finding a pretty bird — it was choosing a style and placement that keeps its freedom vibe for years. These 25 bird tattoo ideas are the ones I kept circling back to in my research and conversations with artists.
This list focuses on fine line, realistic, watercolor, and neo-traditional bird styles that feel light and airy. These ideas work well on forearms, collarbones, ankles, ribs and thighs. From what I've seen in 2026 trends, micro-realism and geometric fusions are taking off—I point out which styles age best and which need extra aftercare.
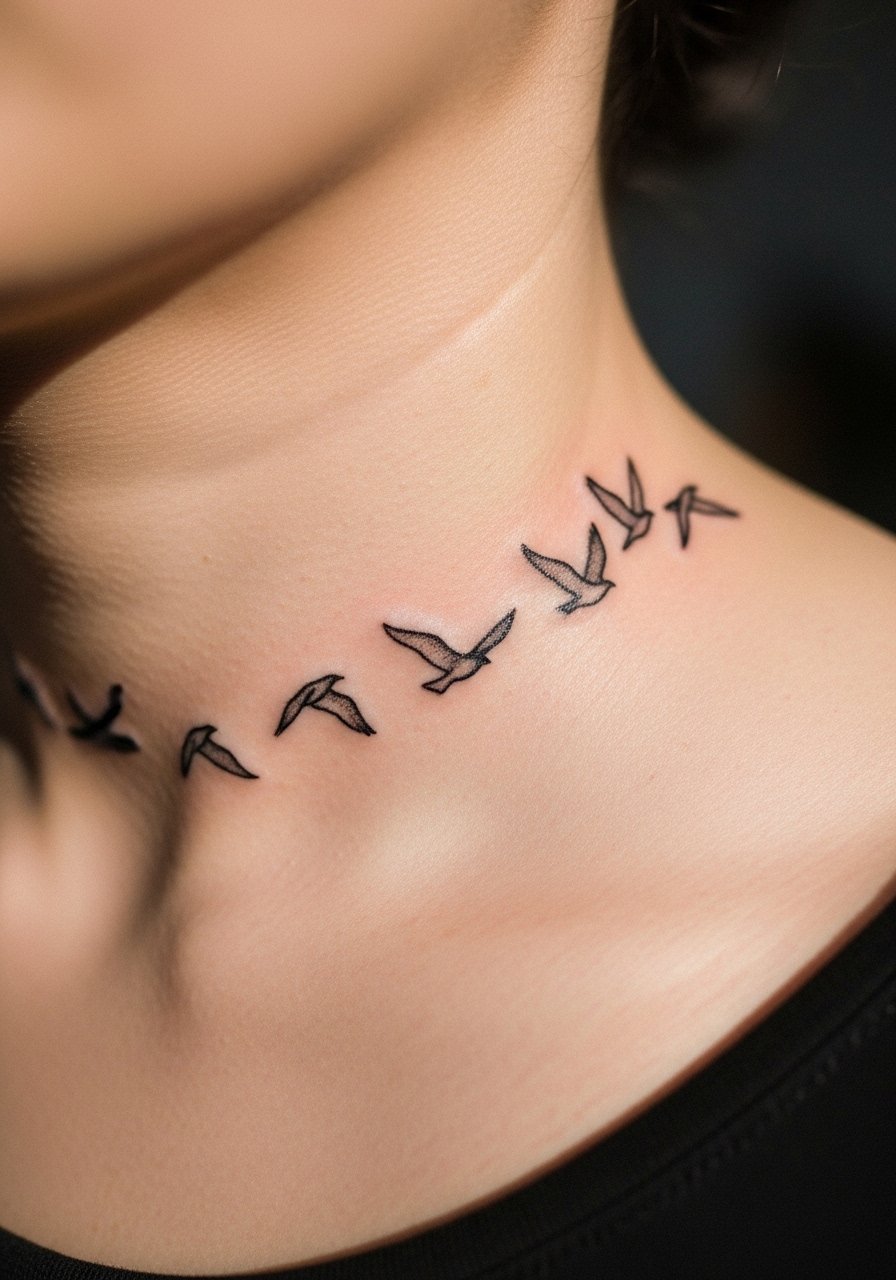
1. Fine Line Sparrow Flock on Ribcage
Style/Technique: Fine Line / Minimalist
Pain Level: Medium-High (6/10)
Session Time: 1-2 hours per small bird
Best For: Meaningful cluster, concealable placement
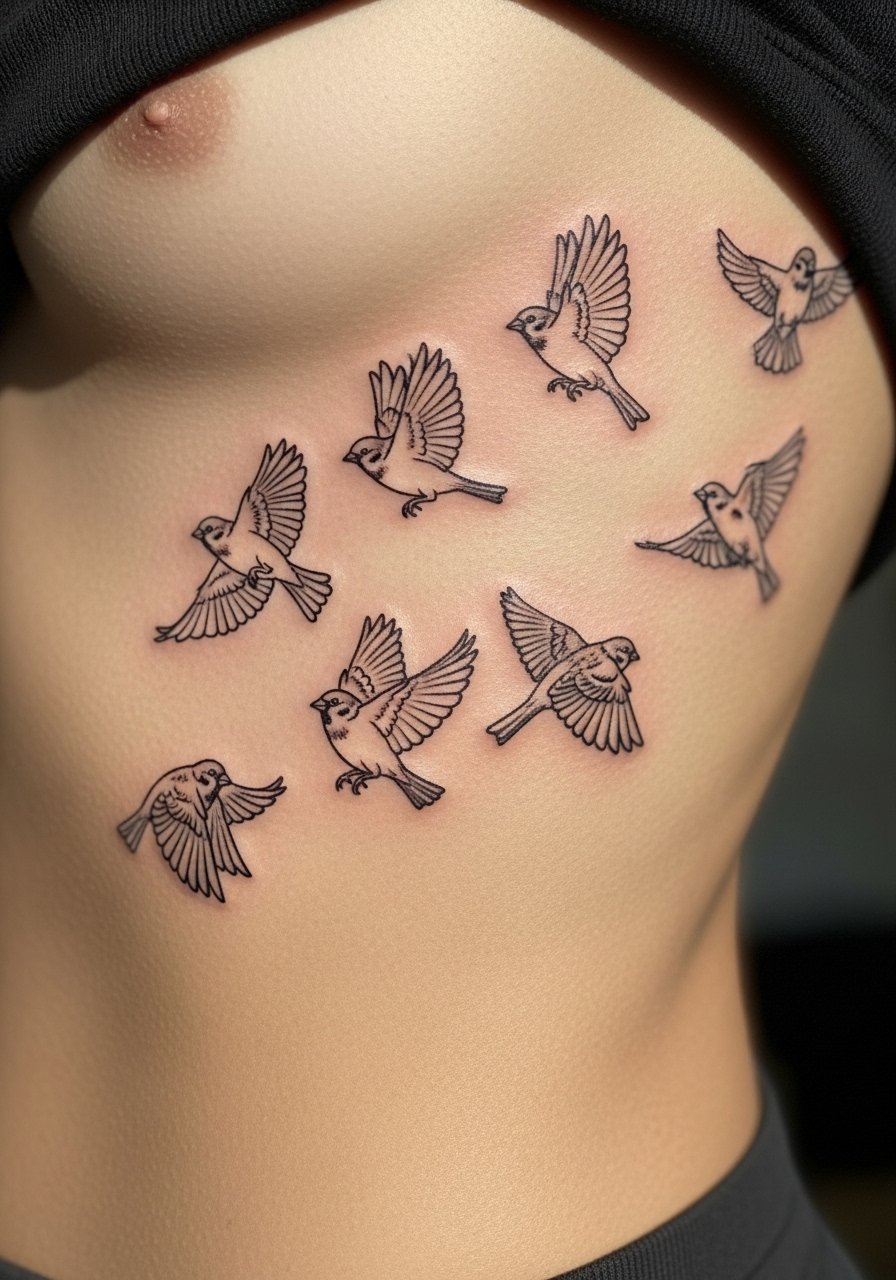
I love small bird flocks for the freedom symbolism. Fine line sparrows create motion across the ribcage and read as delicate without overpowering. Expect higher pain on the ribs, and plan for short sessions if you're nervous. Healing needs steady moisturizing—fine lines can blur if scabs are picked. Ask your artist for slightly bolder line starts at key points so the flock still reads in 1–2 years. Avoid trying to cram too many birds into a small area; spacing keeps the light feeling.
2. Watercolor Swallow in Flight on Wrist
Style/Technique: Watercolor / Illustrative
Pain Level: Low-Medium (3-5/10)
Session Time: 1–3 hours
Best For: Small bird tattoo ideas, visible freedom symbol
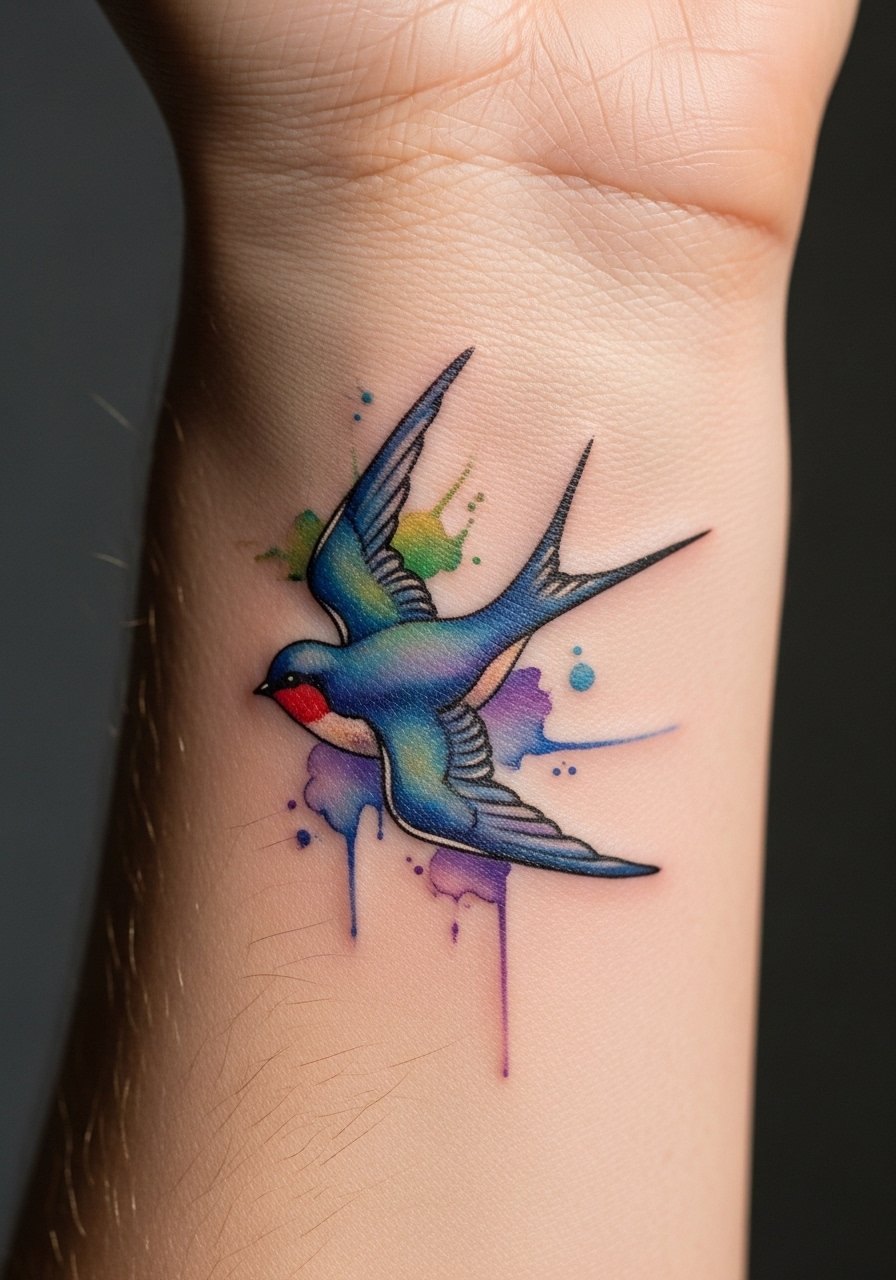
A watercolor swallow feels like motion captured mid-flight. It’s a top pick for freedom vibes and pairs well with bracelets. Be honest about aging: from what I’ve seen, watercolor fades faster, so ask your artist about reinforced outlines or plan touch-ups. Wrist skin moves a lot, so expect a longer-looking healed edge. This placement is great for first bird tattoos—pain is modest and it's easy to test with a temporary. Bring references and ask the artist about pigment saturation for healed color.
3. Realistic Hummingbird Portrait on Collarbone
Style/Technique: Realistic / Full Color
Pain Level: Low-Medium (3-5/10)
Session Time: 2–4 hours, possibly multi-session
Best For: Photorealistic detail, airy collarbone placement
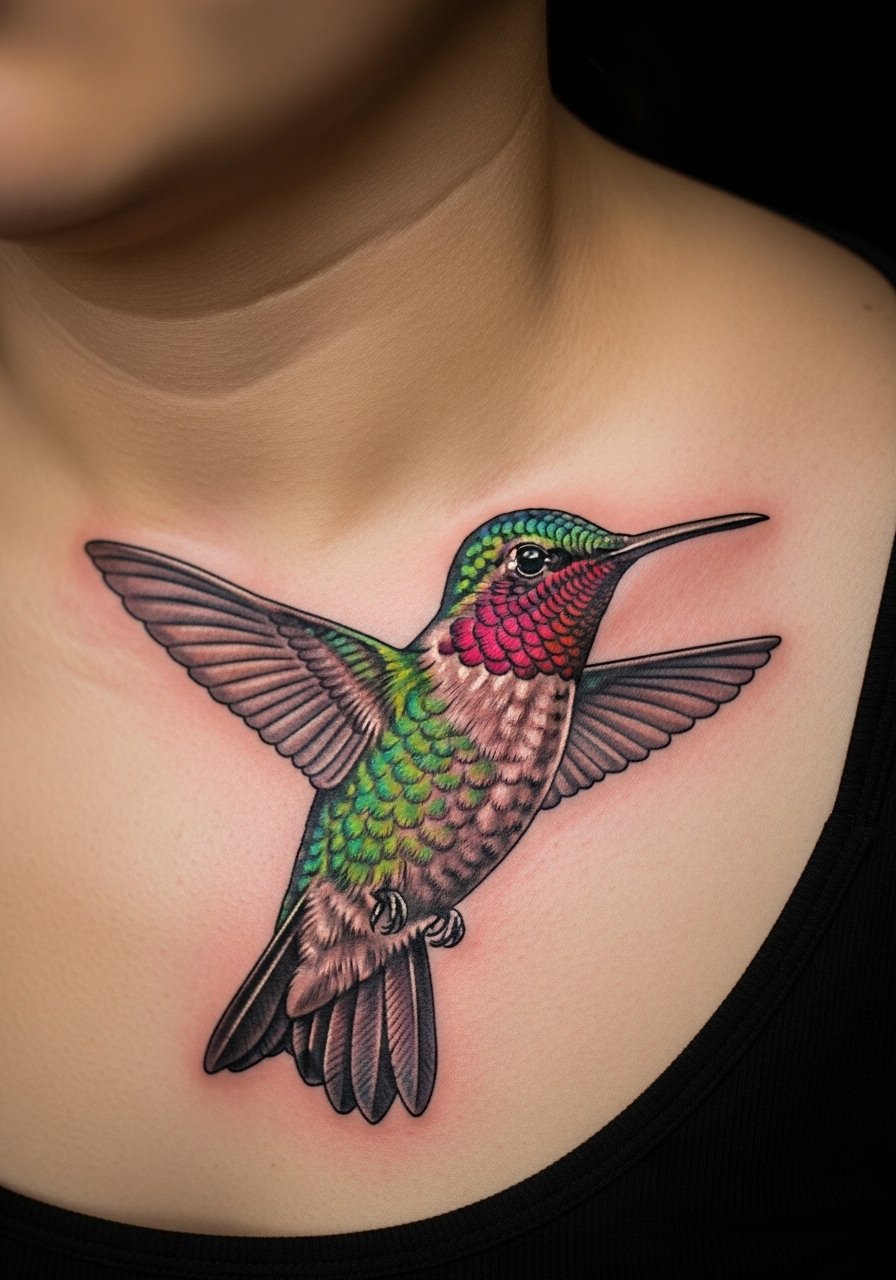
Realistic hummingbirds pop with tiny feather detail and iridescence. The collarbone gives a floating, light effect that suits their speed and agility. Pain is manageable but expect some sensitivity on the bone. Healing requires gentle cleansing so fine shading doesn’t dull. I’ve seen hummingbird portraits look great healed when artists oversaturate slightly and use crisp contrast. Ask to see healed examples of similar color work on comparable skin tones.
4. Geometric Owl Silhouette on Shoulder
Style/Technique: Geometric / Blackwork
Pain Level: Low (2–3/10)
Session Time: 1–2 hours
Best For: Timeless, professional-friendly placement
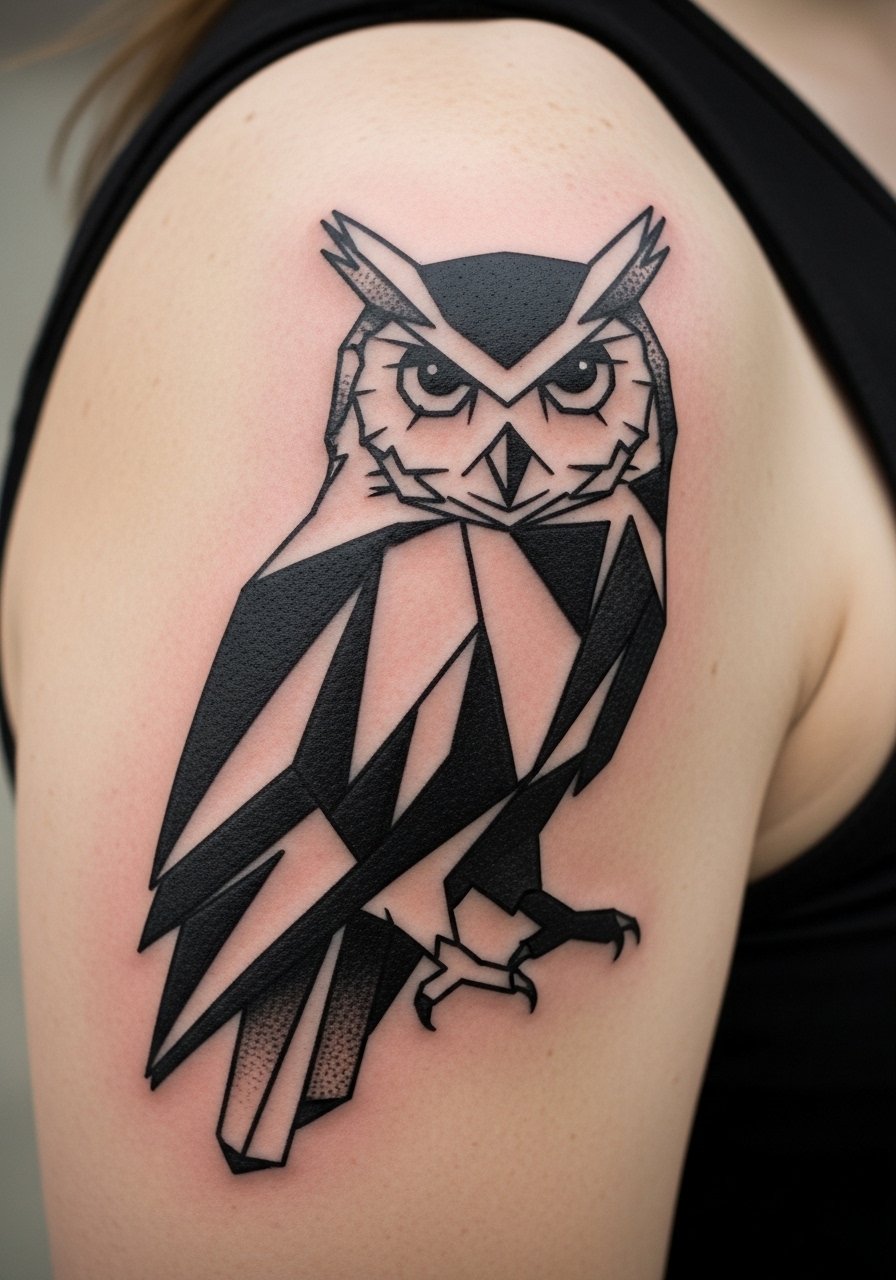
A geometric owl mixes minimalism and meaning. The shoulder is forgiving for size and low pain. Geometric birds age well because solid black holds up; dotwork fills add texture without blurring into mush if done by a steady hand. This is a solid choice if you want a meaningful bird tattoo that remains readable over time. Bring clear geometry references and confirm the artist’s straight-line work—crisp edges matter here.
5. Neo-Traditional Eagle on Bicep
Style/Technique: Neo-Traditional / Bold Outline
Pain Level: Low (2–4/10)
Session Time: Multiple sessions for larger pieces
Best For: Statement piece, bold freedom motif

Neo-traditional eagles give that timeless, bold freedom energy. Thick outlines and saturated fills are forgiving as tattoos age, so this style holds its presence. The bicep is a great low-pain, highly visible canvas. Expect sessions to be longer for shading and color. I recommend trusting your artist's placement instincts so the bird’s wings flow with your muscle lines. Avoid overly fussy small details that will lose clarity in a bold piece.
6. Minimalist Dove Outline on Inner Wrist
Style/Technique: Minimalist / Fine Line
Pain Level: Low (2/10)
Session Time: Under 1 hour
Best For: First bird tattoo ideas, symbolic small tattoo
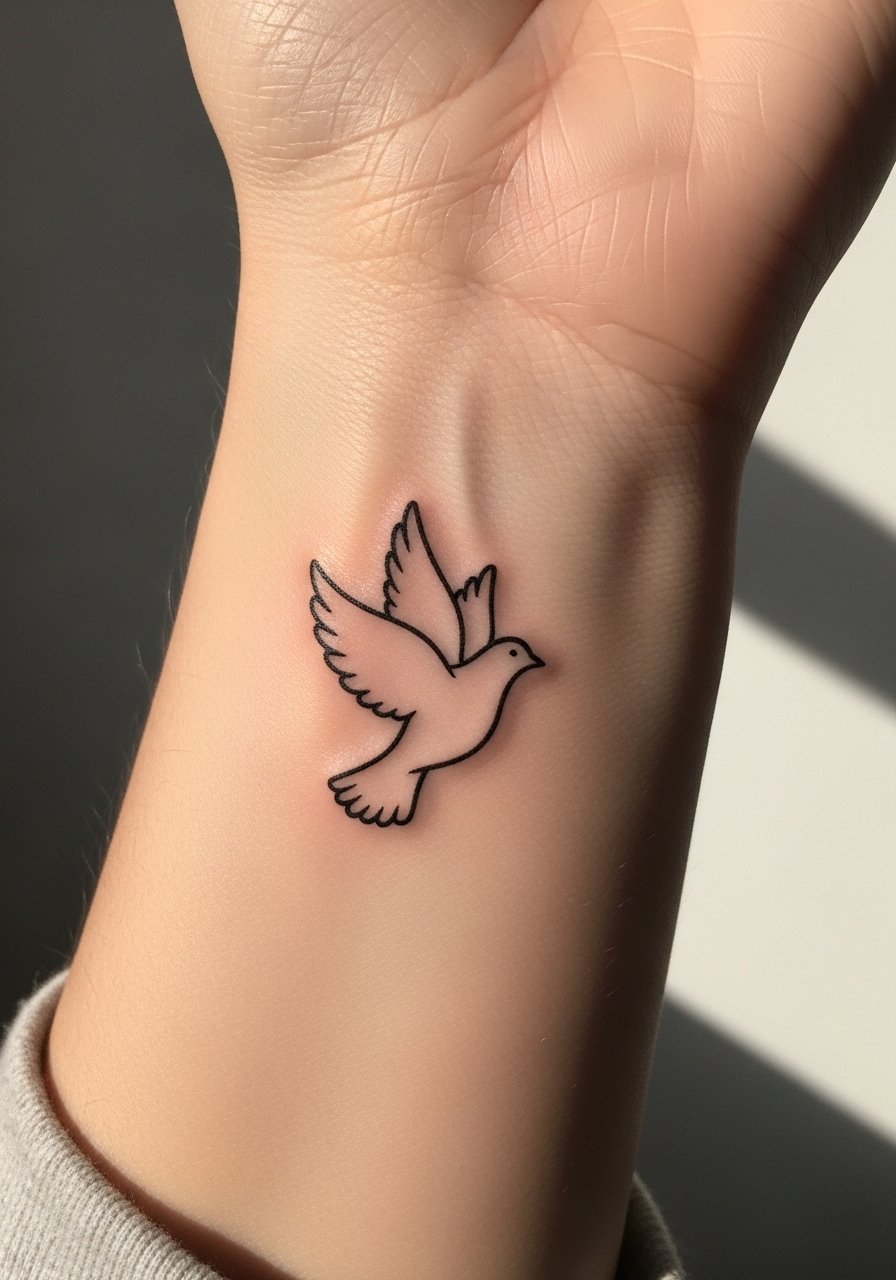
A tiny dove outline says peace and freedom without fanfare. Inner wrist placement is low pain and super visible, perfect for first-timers. Single-needle work looks elegant, but fine lines can blur over years—so I ask artists to slightly thicken anchor points. Keep the area moisturized during healing and avoid heavy wrist flex for the first two weeks. If you want something discreet, this is an excellent, low-commitment option.
7. Fine Line Botanical Hummingbird on Sternum
Style/Technique: Ornamental / Fine Line
Pain Level: Medium-High (6/10)
Session Time: 2–3 sessions
Best For: Intimate placement, decorative framing
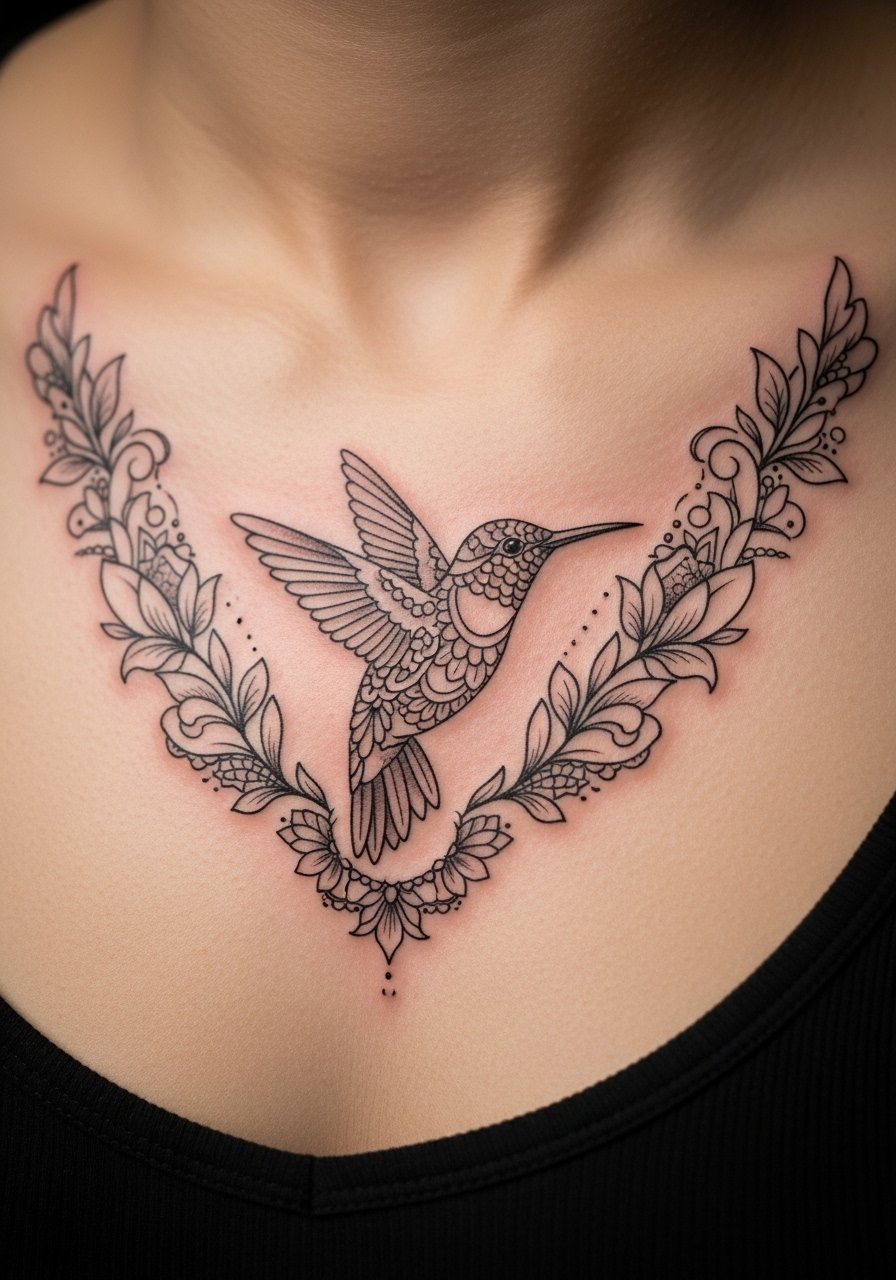
An ornamental hummingbird in a lace frame feels delicate and personal. The sternum placement reads like jewelry and enhances the bird’s delicate motion. Sternum pain is higher, but the visual payoff is big. For fine ornamental fills, consistent moisturization is essential so stippling and linework set cleanly. I usually recommend checking healed portfolio pieces from the artist so you know how their fine lines settle on chest skin.
8. Blackwork Raven Mandala on Upper Back
Style/Technique: Blackwork / Dotwork
Pain Level: Low-Medium (4/10)
Session Time: Multiple sessions depending on size
Best For: Mysterious, large canvas pieces
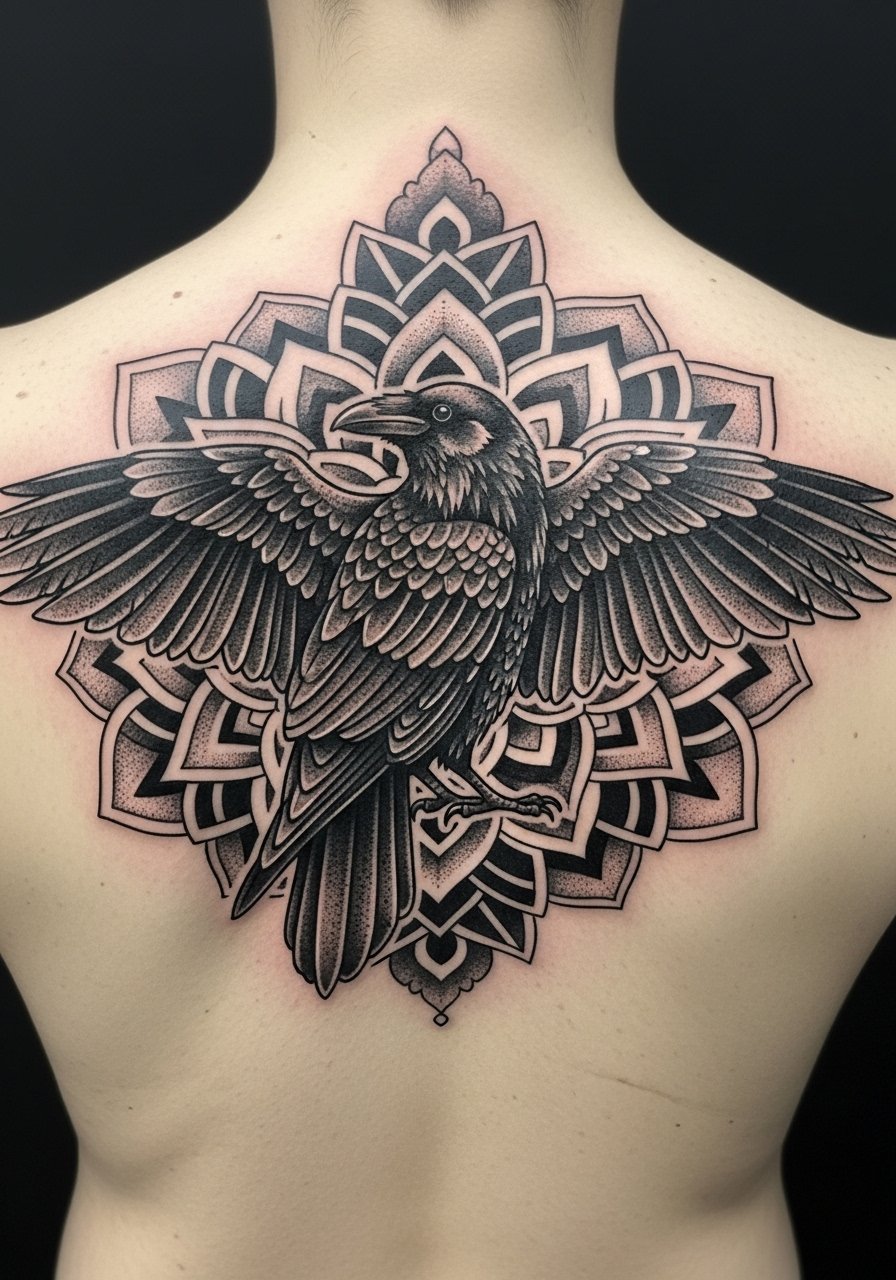
A raven surrounded by mandala geometry is striking and deep. Blackwork ages well and keeps contrast on darker tones. Upper back is a comfortable area for long sessions. Dotwork stippling gives depth but takes time; make sure your artist stages sessions so you can heal in between. Artists I follow stress that bold anchors around dotwork help the piece maintain definition as skin ages.
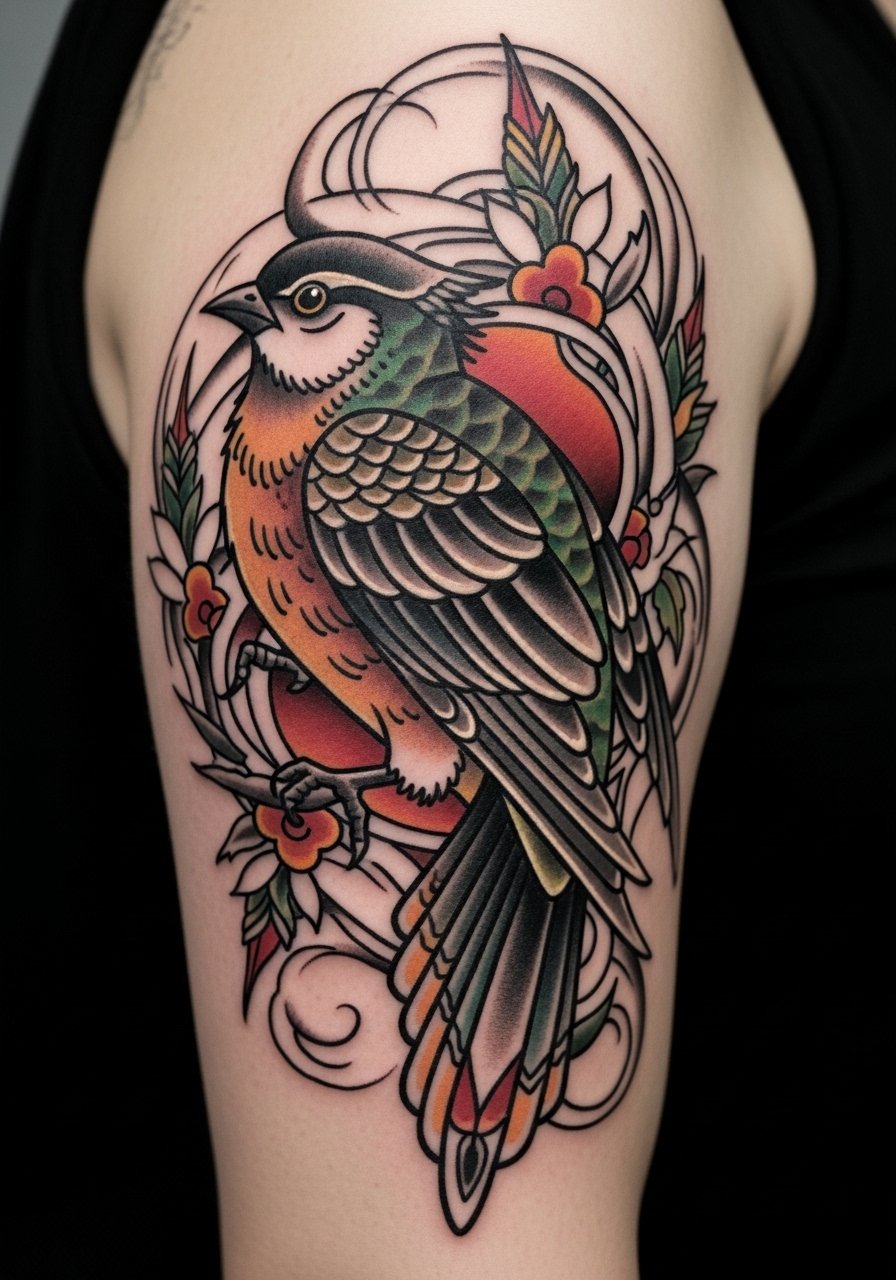
9. Traditional Canary with Flowers on Forearm
Style/Technique: Traditional American / Bold Color
Pain Level: Low (3/10)
Session Time: 1–2 sessions
Best For: Classic look, forearm visibility
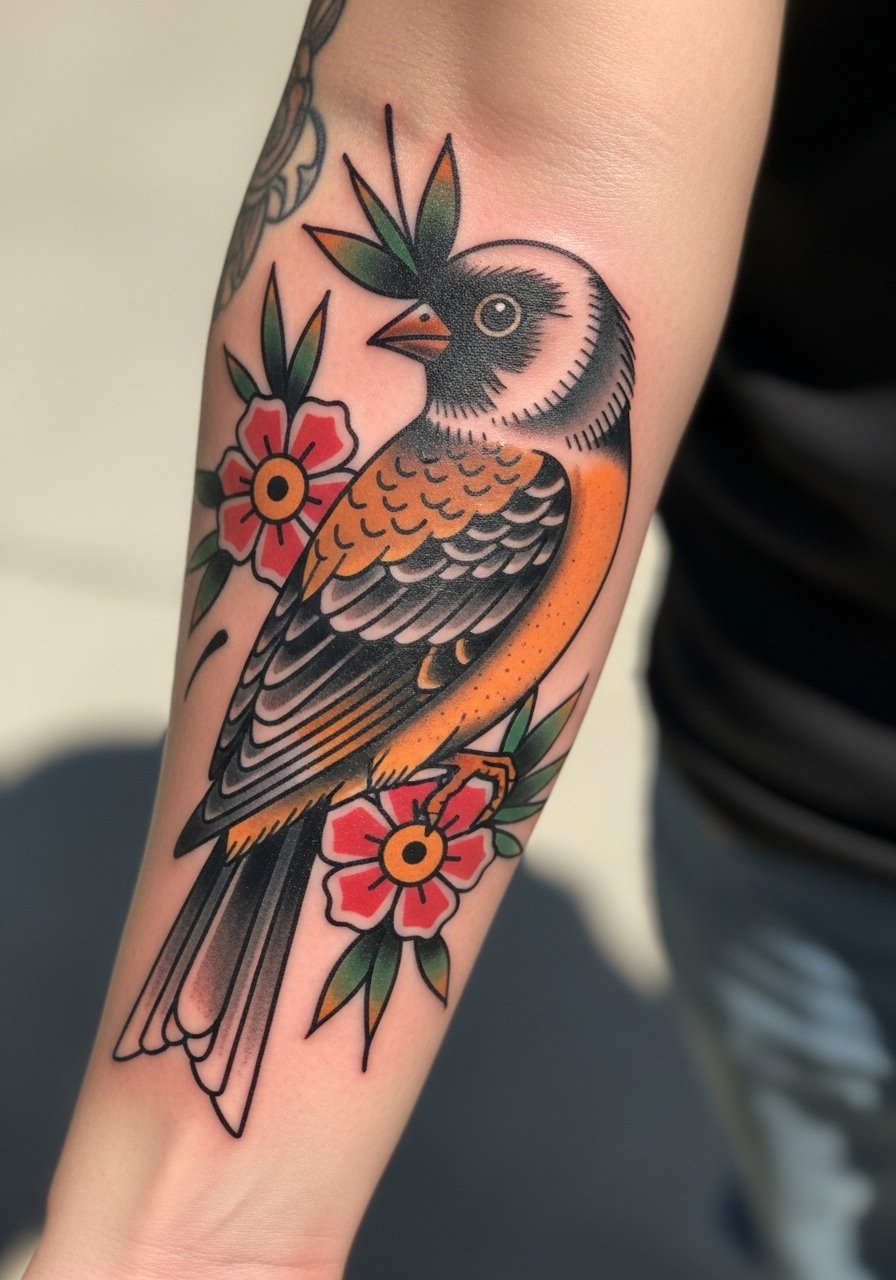
A canary with flowers is nostalgic and joyful. Traditional style’s thick outlines keep shapes readable even after years. The forearm is a forgiving spot with low pain. I’ve noticed classic color palettes soften but remain readable—ask your artist about color contrast so yellows don’t disappear too quickly in your tone. This design is great if you want a bright, timeless bird tattoo.
10. Illustrative Finch Perched on Ankle
Style/Technique: Illustrative / Black & Gray with Color Accents
Pain Level: Medium (5/10)
Session Time: 1–3 hours
Best For: Ankle placement, storybook aesthetic

A perched finch reads like a small portrait. The ankle offers a dainty, low-commitment location, but it can be more painful than expected due to thin skin. Fine shading and subtle color bring a storybook charm. I tell people to protect ankle tattoos from shoes and socks while healing—they rub easily. If you want a narrative piece, add a tiny branch or name to personalize without clutter.
11. Micro-Realism Eagle Eye Behind Ear
Style/Technique: Micro-Realism / Single-Spot Detail
Pain Level: Low-Medium (4/10)
Session Time: 1–2 hours
Best For: Tiny, intense focal point
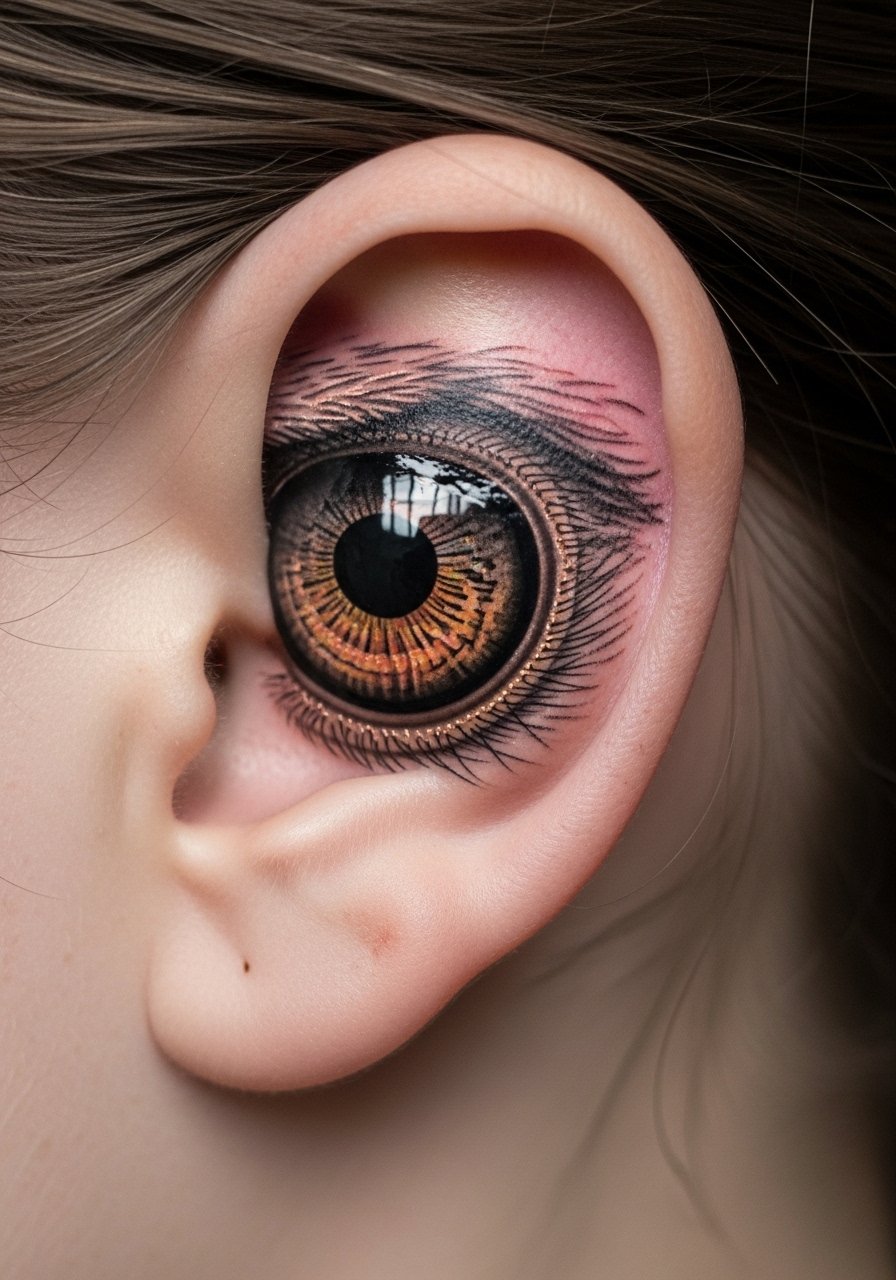
A tiny eagle eye packs intensity in a small spot. Behind the ear hides it well and the pain is moderate. Micro-realism demands an artist who shows healed close-ups of their work—tiny shading can blur if not expertly placed. Expect precise aftercare; keep the area clean and avoid heavy sleeping pressure. This is a great way to carry power in a discreet, lightweight tattoo.
12. Dotwork Phoenix Rising on Shoulder Blade
Style/Technique: Dotwork / Stippling
Pain Level: Medium (5/10)
Session Time: Multiple sessions for large texture
Best For: Rebirth symbolism, textured look
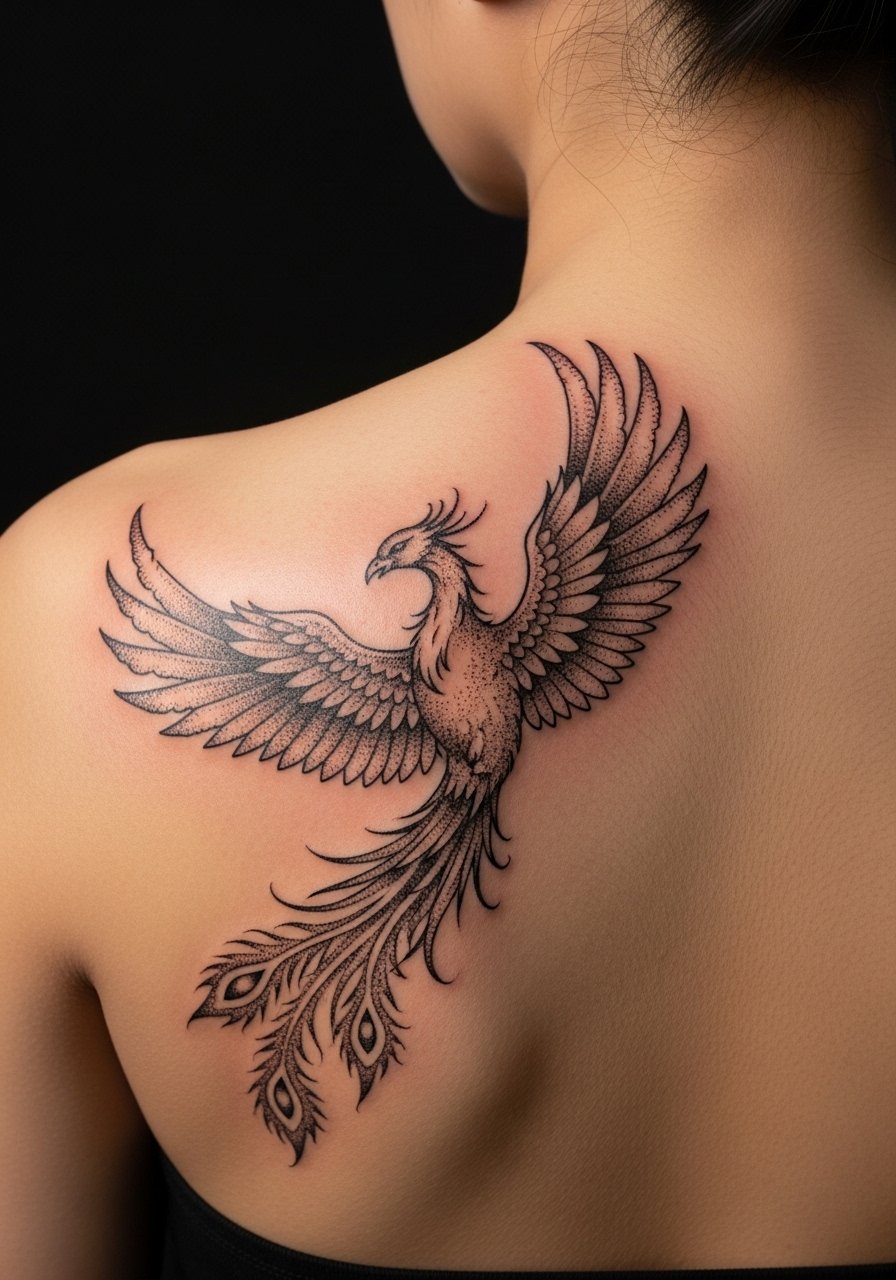
A dotwork phoenix reads as texture and movement. Stippled shading ages gracefully when spaced correctly. Shoulder blade placement moves with the shoulder and looks airy. Artisans I follow emphasize session planning so stippling can be layered and rested. Don't rush; dotwork is time-consuming but rewarding. Keep moisturized and avoid sun exposure during the long healing window.
13. Patchwork Bird Collection on Thigh
Style/Technique: Patchwork / Mixed Styles
Pain Level: Low (2–3/10)
Session Time: Multiple sessions across months
Best For: Collectors building a bird sleeve
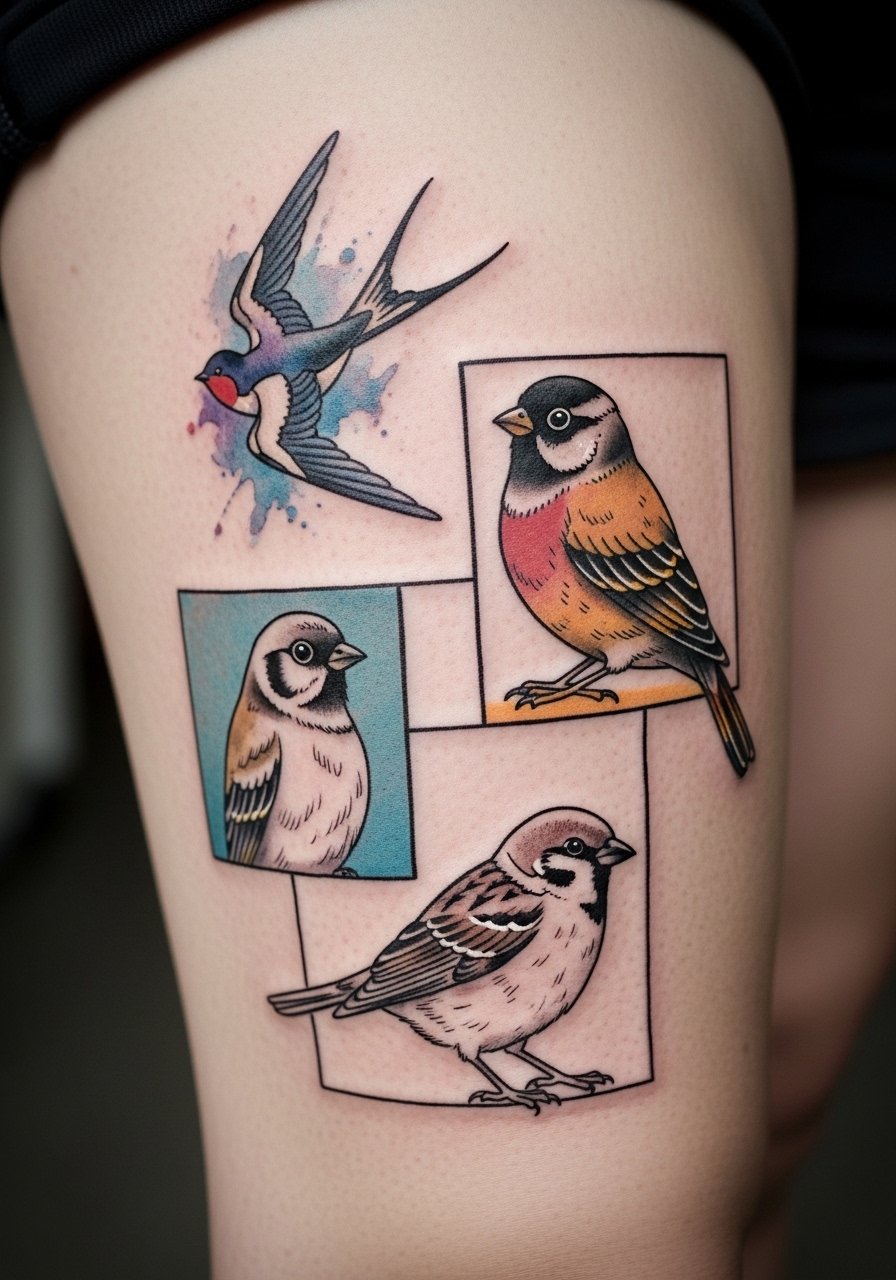
Patchwork lets you collect bird styles over time. The thigh is great for larger, evolving compositions and is low pain. I love this approach because you can mix watercolor, realism, and neo-trad without committing to one language. Plan negative space so new pieces breathe. Artists I know suggest keeping a consistent element—like a shared color or motif—to unify the patchwork as it grows.
14. Ornamental Hummingbird Frame on Hip
Style/Technique: Ornamental / Geometric Fills
Pain Level: Medium (5–6/10)
Session Time: 2–3 sessions
Best For: Intimate ornamental work
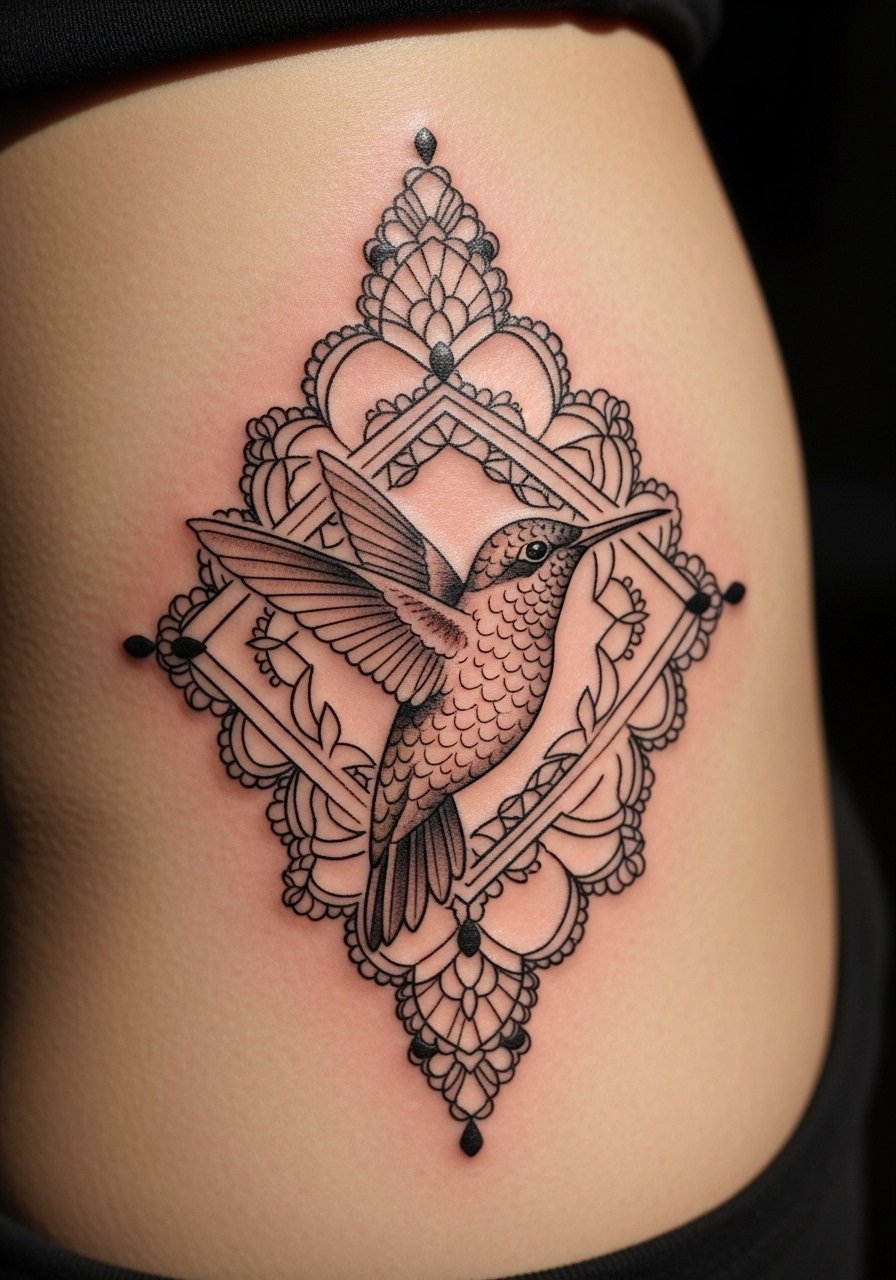
An ornamental hummingbird on the hip looks like a secret jewel. Hip skin can be sensitive, so expect moderate pain. The ornamental frame adds motion and keeps the tattoo feeling airy. I recommend discussing how geometric fills will age on your skin tone—solid black holds best, but delicate fills need regular moisturization to retain crispness.
15. Minimalist Flying Lines on Collarbone
Style/Technique: Minimalist / Single-Needle Linework
Pain Level: Low (3/10)
Session Time: Under 1 hour
Best For: Subtle movement, first bird tattoo ideas
Simple flying lines along the collarbone read as motion and freedom. Collarbone bones add sensitivity but the result is airy and elegant. Single-line tattoos need clean aftercare because thin lines blur if scabs are mishandled. I tell people to sleep carefully and avoid necklaces that can snag during early healing.
16. Handpoke Bird Silhouette on Finger
Style/Technique: Handpoke / Minimalist
Pain Level: High (7/10)
Session Time: Short sessions, may need touch-ups
Best For: Handpoke enthusiasts, small silhouettes
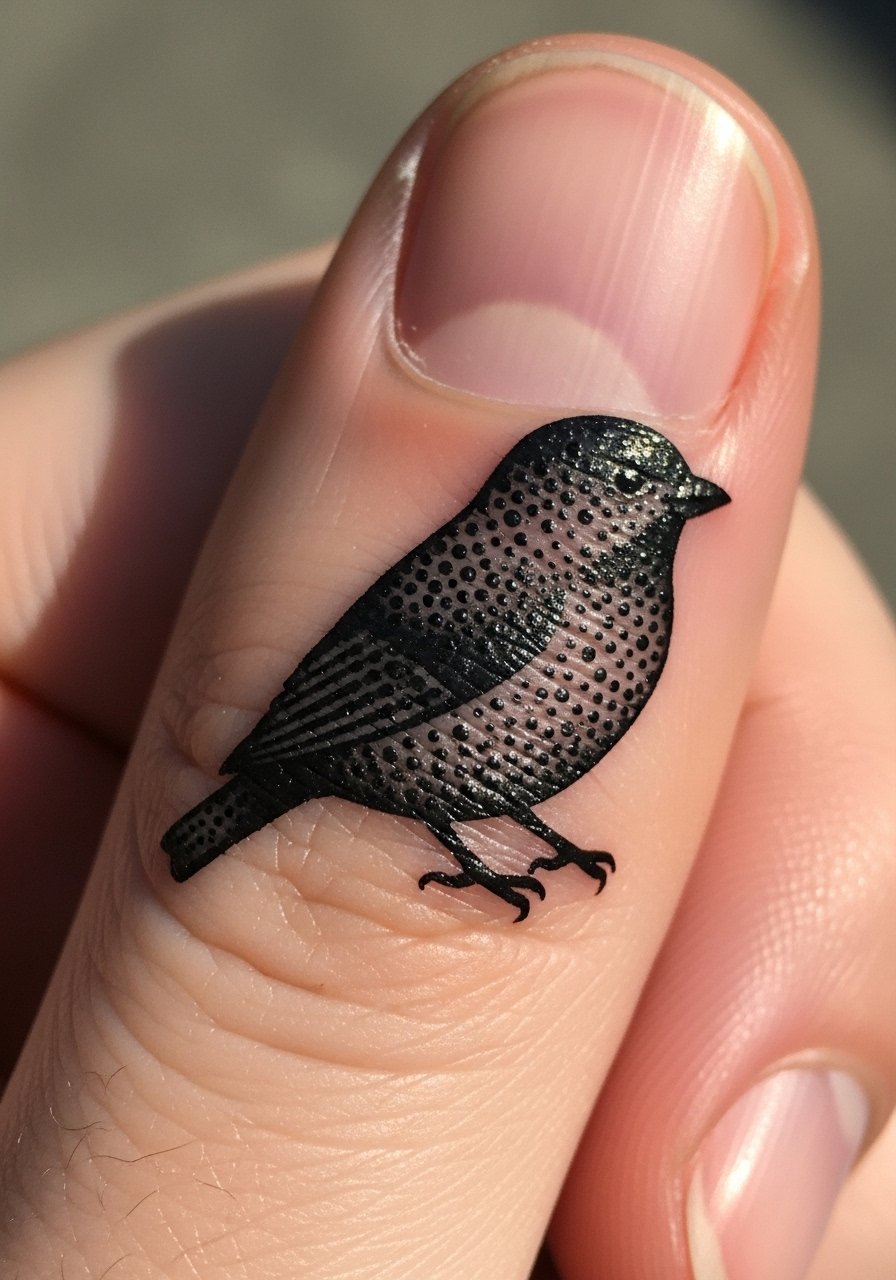
Handpoke silhouettes have an organic, imperfect charm. Fingers are painful and prone to fading; many handpoke clients accept touch-ups as part of the process. If you want an artisanal look and don't mind maintenance, this is a unique route. Keep finger tattoos dry and moisturized differently since hands see frequent washing.
17. Migration Sleeve With Seasonal Birds on Forearm
Style/Technique: Patchwork / Illustrative Sequence
Pain Level: Medium (4–6/10)
Session Time: Multiple over months
Best For: Narrative sleeves, storytelling through seasons
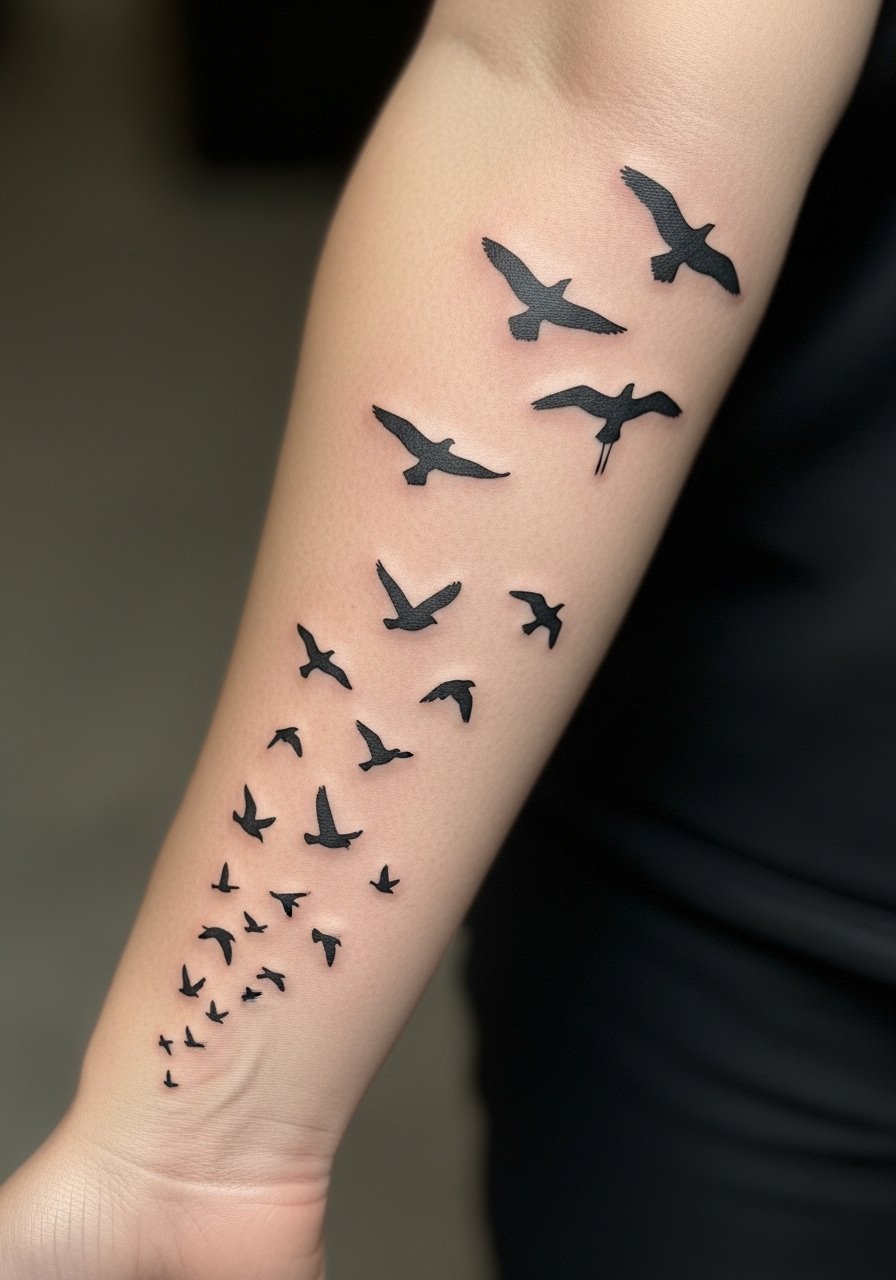
A migration sleeve maps seasons and movement. Start small near the wrist and build toward larger species at the elbow. I’ve seen these age beautifully if you plan pacing and negative space. Discuss transitions with your artist—consistent line weight or color keys unify the narrative. This is a strong option if you want a collection with emotional progression.
18. Birds With Embedded Birthstone Dots on Chest
Style/Technique: Realistic / Tiny Color Accents
Pain Level: Medium (4–5/10)
Session Time: 1–2 hours
Best For: Personal memorials or family symbolism
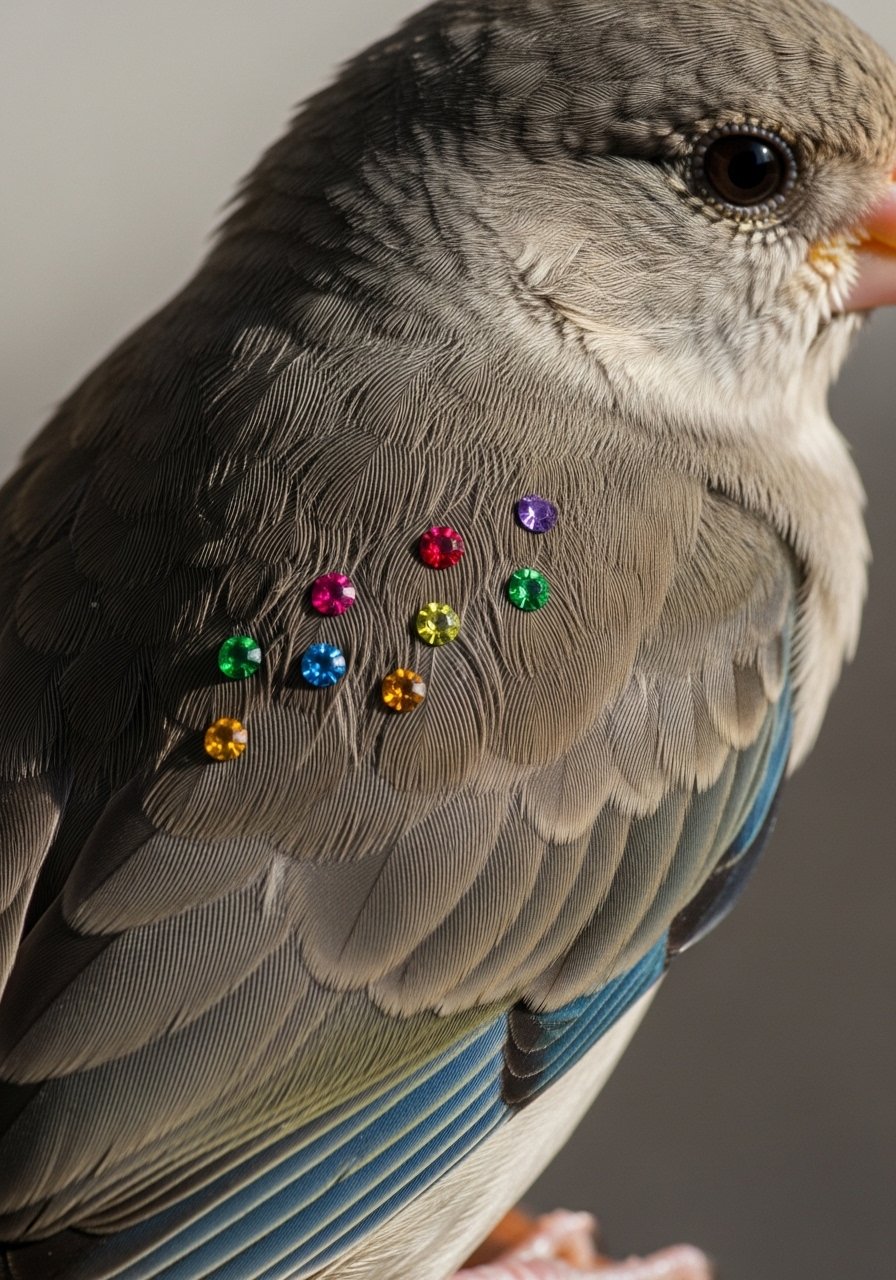
Embedding tiny color dots like birthstones adds a personal touch without elaborate additions. On chest or collarbone it reads intimate and subtle. I advise using conservative color dots—artists often use tiny solid color spots that retain saturation better than extensive watercolor. Ask to see healed examples of bright dotwork on similar skin tones.
19. Geometric Minimalist Swallow on Calf
Style/Technique: Geometric / Minimalist
Pain Level: Low (2–3/10)
Session Time: 1–2 hours
Best For: Timeless look, low pain placement
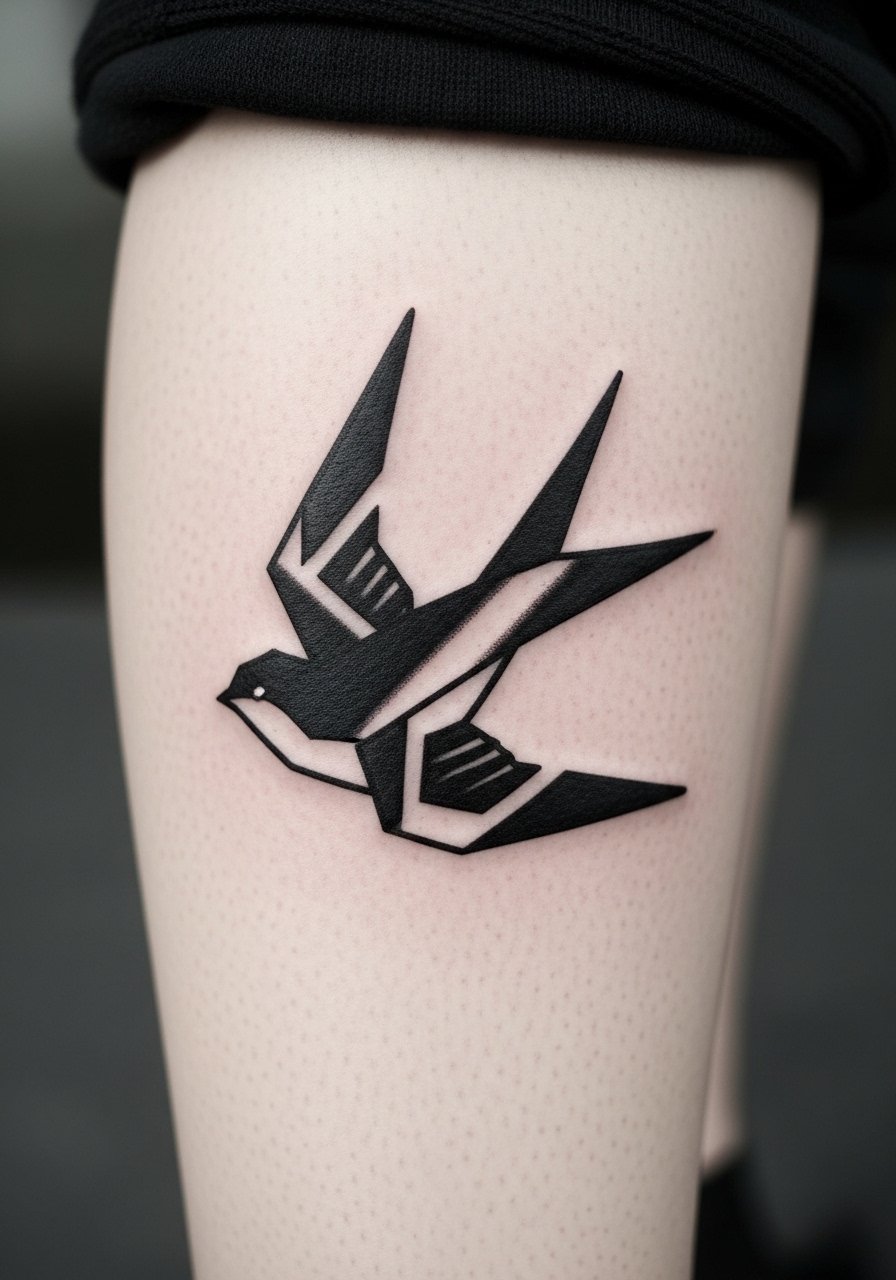
A geometric swallow on the calf is clean and modern. Calves handle bigger shapes well and are low pain. The geometry keeps the bird feeling fresh and professional-friendly. I usually recommend artists map the swallow so it flows with leg shape—avoid forcing too many angles that fight your muscle lines.
20. Illustrative Kingfisher on Thigh with Water Elements
Style/Technique: Illustrative / Color Accents
Pain Level: Low (2–4/10)
Session Time: 1–3 hours
Best For: Larger, colorful bird pieces
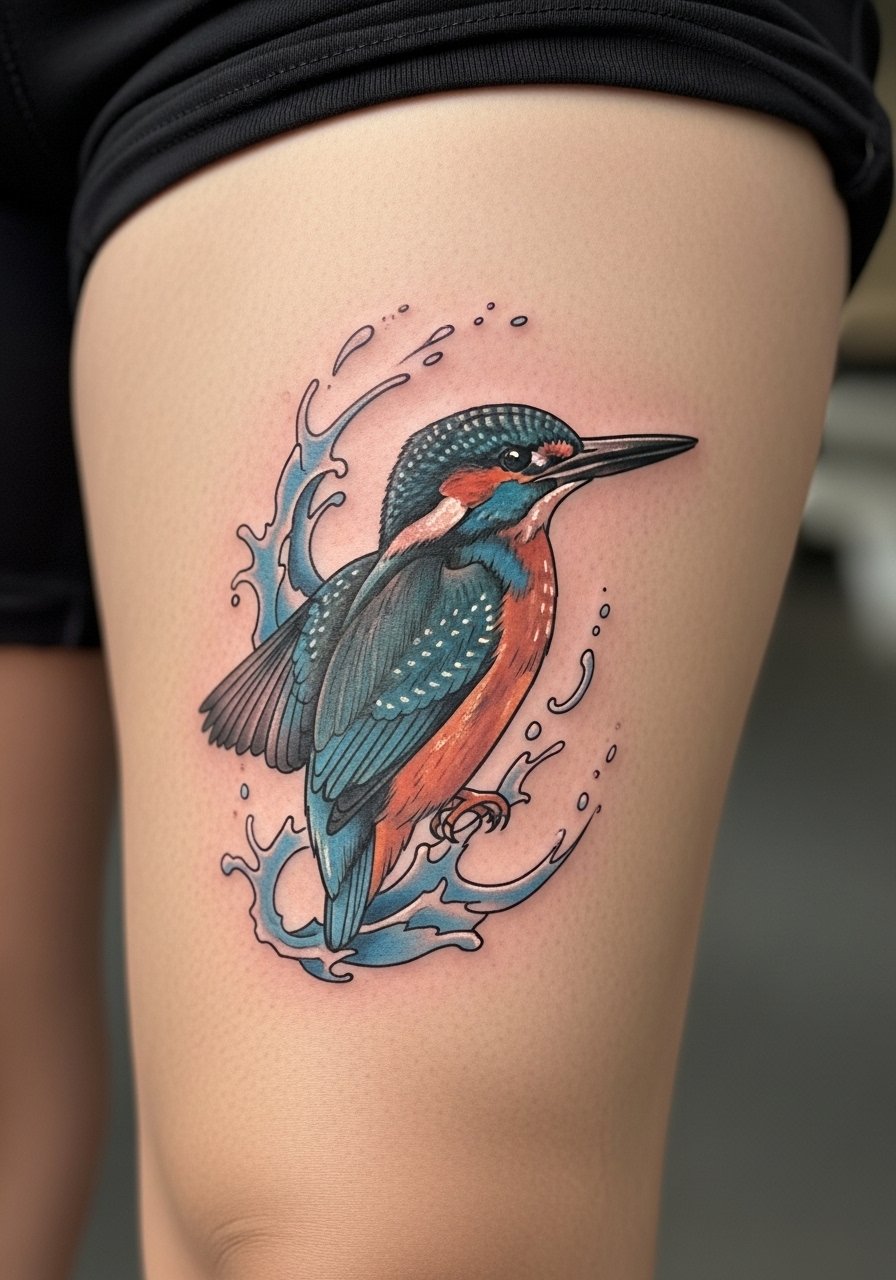
Kingfishers bring vivid color and movement. Thigh placement lets you go larger and keep the piece light with water elements. I’ve seen illustrative color hold well on thighs because the area avoids sun exposure. If you want a painterly bird that still ages reasonably, this placement is forgiving.
21. Tiny Swallow Pair on Ankle Bone
Style/Technique: Minimalist / Fine Line
Pain Level: Medium (5/10)
Session Time: Under 1 hour each
Best For: Matching small bird tattoo ideas, couples/friends

A twin swallow pair near the ankle reads intimate and light. Ankles are sensitive and rub against footwear, so protect them while healing. Swallows are classic freedom symbols and look delicate even as tiny pieces. I recommend slightly more spacing than you think so they remain distinct over time.
22. Blacklight-Reactive Feather Accent on Wrist
Style/Technique: Fine Line with UV Ink Accents
Pain Level: Low (3/10)
Session Time: 1–2 hours
Best For: Subtle by day, glow under UV
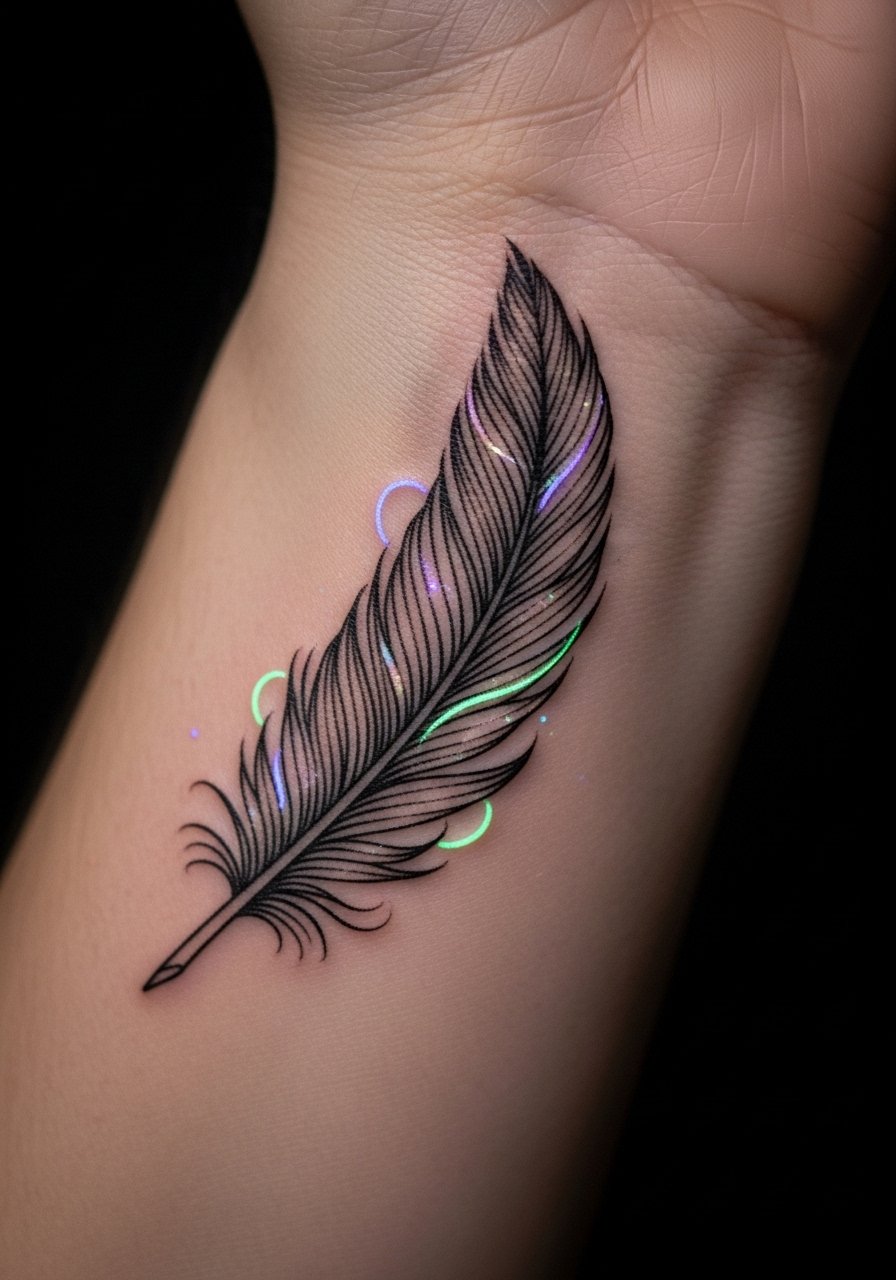
UV-accented feathers stay subtle by day and glow in certain lights. Not all artists offer UV inks, so ask about safety and healed examples. I’ve chatted with artists who use UV sparingly as accent dots or streaks so the piece reads normal outdoors. If you crave a secret effect, this keeps the bird light while adding a playful layer.
23. Cover-Up Neo-Traditional Bird Over Old Ink on Upper Arm
Style/Technique: Neo-Traditional / Cover-Up Friendly
Pain Level: Low-Medium (3–5/10)
Session Time: Multiple sessions likely
Best For: Concealing old tattoos with meaningful new bird
Bird shapes work well for cover-ups because wings and feathers mask old lines. Neo-traditional bold outlines help cover older ink while giving new meaning. Expect layering and potential touch-ups once healed. I always tell people to bring photos of the old tattoo and be open to artist suggestions—the flow and shape often need rethinking to hide what’s underneath.
24. Bird Tattoo on Scarred Skin Using Geometric Lines
Style/Technique: Geometric / Scar Camouflage
Pain Level: Variable (depends on scar)
Session Time: Single or multiple sessions depending on scar sensitivity
Best For: Camouflaging scars while getting meaningful art
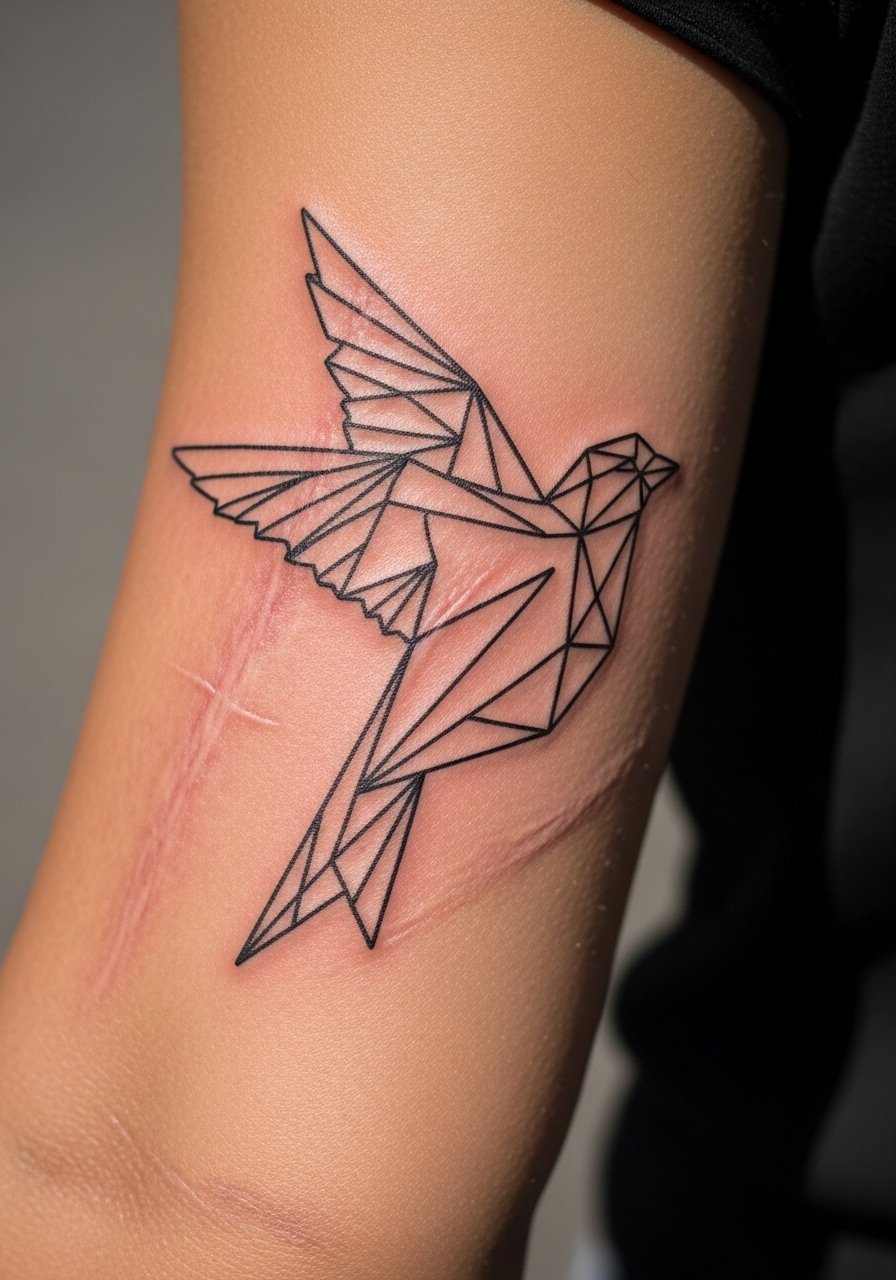
When tattooing scarred skin, geometric bird lines can integrate scars into the composition. I've seen artists use bold outlines and negative space to make scars part of the design rather than fight them. Pain varies—scar tissue can be tender or numb—so plan consultations and patch tests. Ask to see healed scar work from your artist.
25. Seasonally Evolving Migration Band on Upper Arm
Style/Technique: Illustrative Sequence / Sleeve Starter
Pain Level: Low-Medium (3–5/10)
Session Time: Built over many sessions
Best For: Long-term storytelling and sleeve beginnings
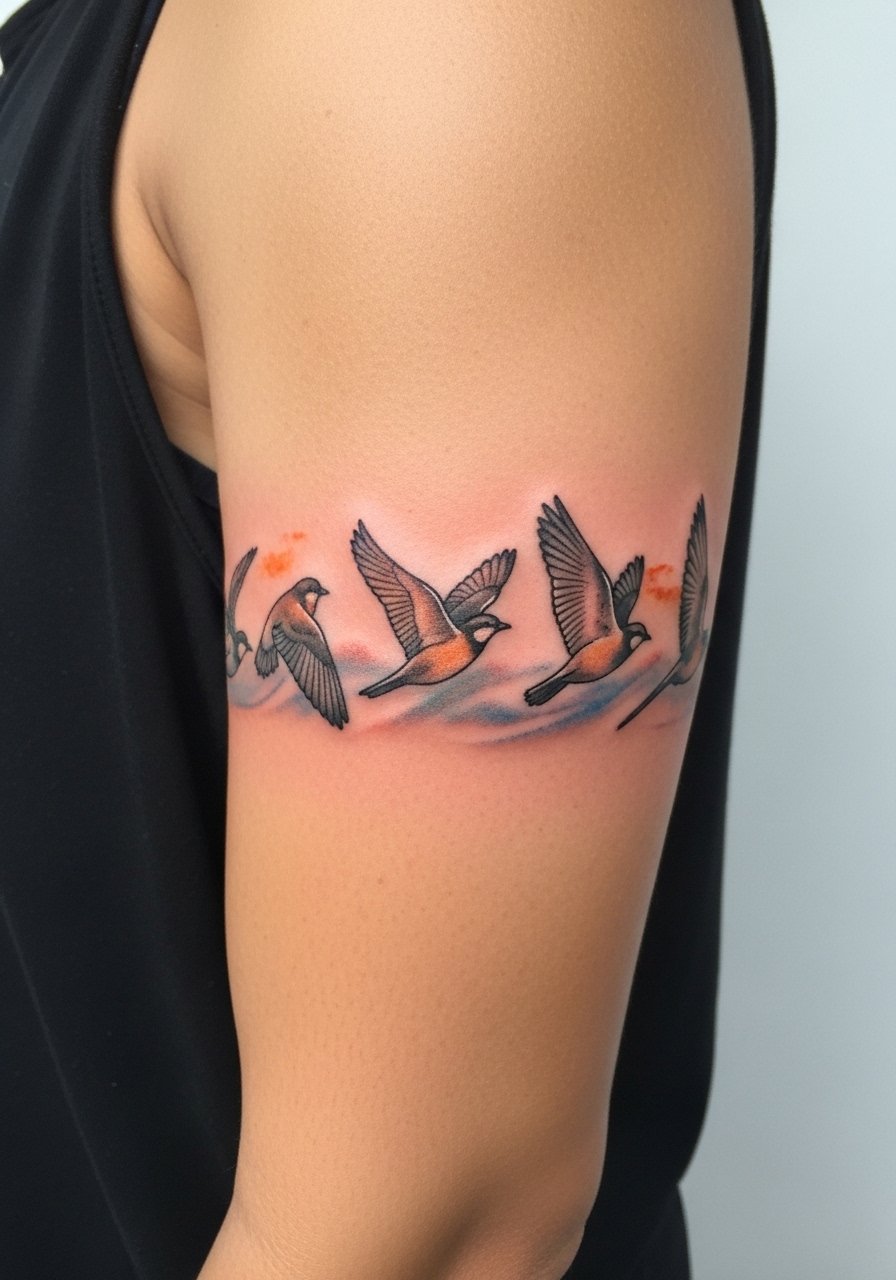
A migration band is a sleeve starter you can add to each season. It stays light because birds are spaced and flying. I love this for people who want a living project—add species that matter to you over time. Artists I trust recommend mapping the arc so each new bird fits the existing flow.
Tattoo Prep and Aftercare Essentials
Aftercare Essentials:
- Aquaphor Healing Ointment, 14oz tube — Industry go-to for first 3–5 days (artists recommend thin layers)
- Saniderm Transparent Adhesive Bandage, 6-inch roll — Second-skin method for colorful pieces
- CeraVe Fragrance-Free Moisturizing Lotion, 12oz — Daily moisturizer after initial healing
- Dr. Bronner's Unscented Castile Soap, 8oz — Gentle cleansing during first two weeks
- Hustle Butter Deluxe, 8oz — Artist-recommended vegan moisturizer for ongoing care
- Mad Rabbit Tattoo Balm, 2oz — Keeps healed colors vibrant (good for touch-up care)
- SPF 50 Sunscreen Stick for Tattoos — Daily protection to prevent fading; use on healed ink
- Tattoo Numbing Cream with 5% Lidocaine, 30g — Use only after consulting your artist, 30–45 minutes prior if approved
- Hydrocolloid Bandages (large) — For spots prone to rubbing or blistering during healing
- Tattoo Stencil Transfer Paper, 8.5x11in pack — Handy if you prototype at home or bring a printed design
- Saniderm Starter Pack, assorted sizes — Good if you want options for different placements
- Alcohol-Free Baby Wipes (sensitive) — Useful for gentle clean-ups in a pinch (avoid on fresh open wounds)
What artists actually recommend vs. hype: Aquaphor and Saniderm are frequently recommended for early healing; Hustle Butter and Mad Rabbit are popular long-term moisturizers. Numbing creams work but only if your artist approves. Avoid heavy creams with fragrances during initial healing.
Frequently Asked Questions
Q: How bad does a tattoo actually hurt?
A: Pain depends on placement and your tolerance. Outer arm and thigh are low (2–3/10). Ribs, sternum, and fingers are higher (6–8/10). It’s often more an annoying burn than a sharp pain. For sensitive spots, ask about a numbing cream with lidocaine but check with your artist first.
Q: What if I regret my bird tattoo?
A: Sit with the idea for months before booking. Start small if you’re unsure. If the tattoo’s visible and you change your mind, cover-ups are possible—birds are good for that because feathers and wings mask old lines. Laser removal exists but is a long process, so patience helps.
Q: How do I keep my bird tattoo from fading?
A: From what I’ve seen, sunscreen is non-negotiable. Use an SPF50 stick on healed tattoos daily and moisturize with a fragrance-free lotion like CeraVe. Bold black holds best; delicate watercolor needs more upkeep.
Q: Can I work out after getting a tattoo?
A: Wait at least 48–72 hours, longer if the placement flexes (shoulder, elbow). Sweating on fresh ink can irritate and risk infection. Keep the area clean with a gentle soap like Dr. Bronner's Unscented and re-bandage if it rubs during activity.
Q: Should I get a small tattoo first to test my pain tolerance?
A: Only if you actually want a small tattoo. A tiny wrist piece can hurt more than a larger outer arm piece. If you’re anxious, choose a low-pain spot and a minimalist design so sessions are quick.
Q: How long does a tattoo take to heal?
A: Surface healing is usually 2–3 weeks; full skin regeneration can take 2–3 months. The first week is critical—clean gently, use thin layers of Aquaphor or Saniderm as your artist recommends, and avoid pools and baths. Expect some peeling around days 3–7; don’t pick.
Q: Do tattoos look different on different skin tones?
A: Yes. Black and gray show well across tones. Bright colors may read differently on deeper skin tones. White ink is often subtle on dark skin. Ask your artist for healed examples on similar tones and talk color saturation during consultation.
Q: Can I tattoo over scar tissue?
A: Often yes, but results vary. Geometric designs or bold blackwork can integrate scars effectively. Scar tissue can be more sensitive or numb, so expect variable pain and a potential need for touch-ups. Always do a patch test if possible.
