
I spent months curating animal tattoo ideas because I wanted pieces that actually say something about who I am — not just what looked good on a feed. These 30 designs reflect identity through style, placement, and symbolism, plus practical notes from my experience about pain, healing, and what to ask your artist.
This list focuses on styles that tend to age well (black & grey realism, traditional, fine line) and a few trend-forward pieces I’ve seen stick around. Most of these work on forearm, chest, back, thigh, and ribs — placements I watch artists recommend when clients want impact without compromising healing.
1. Hyper-Realistic Lion Portrait on Chest
Style/Technique: Black & Grey Realism
Pain Level: Medium-High (6/10)
Session Time: Multiple sessions, 3-6 hours each
Best For: Statement piece, symbolic of leadership and protection
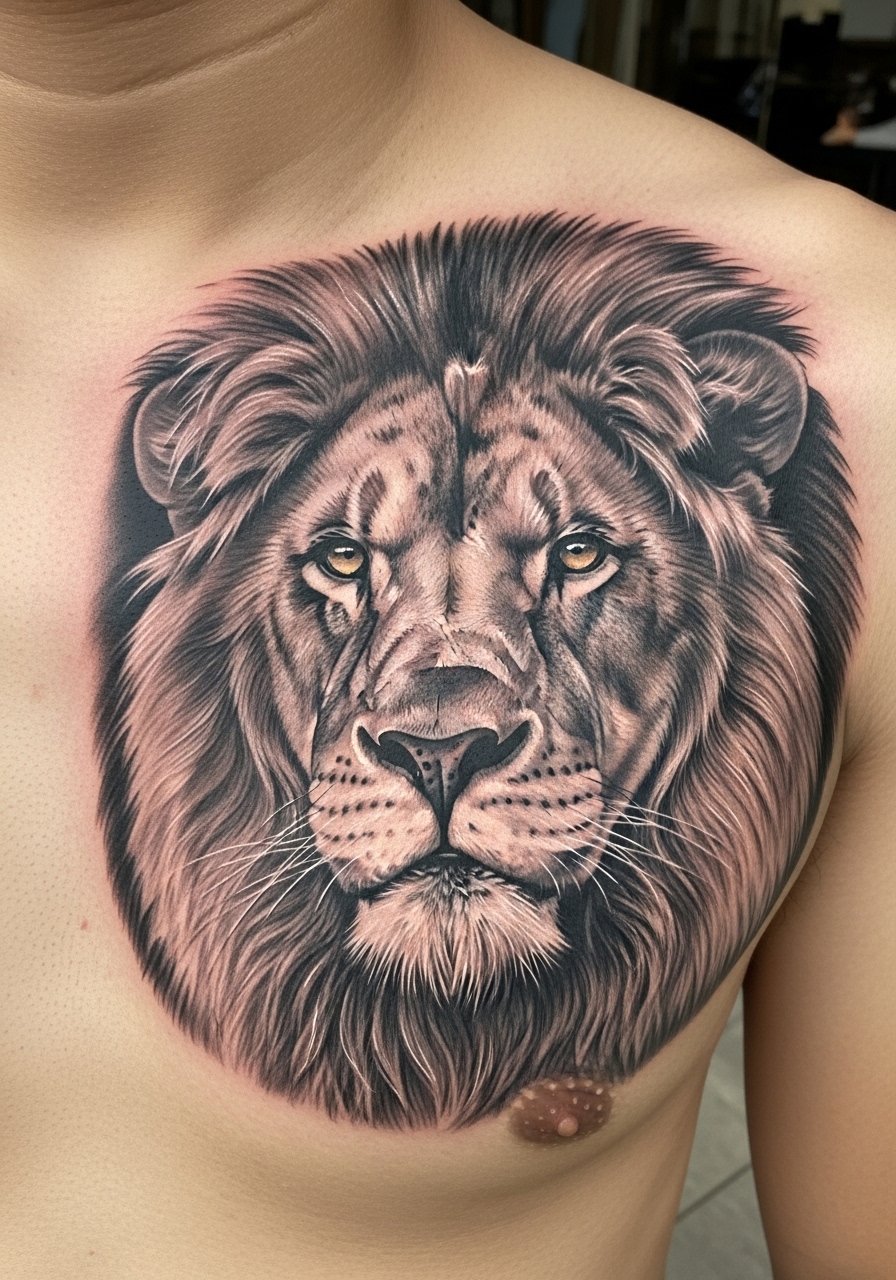
I went with a chest lion because I wanted a piece that reads as strength when I stand tall and as protection when I cover it. Realistic lion manes need an artist who nails fur texture and contrast; otherwise the face can look flat healed. Expect medium-high pain on the chest, especially near the sternum, and multiple sessions for depth. Aftercare in the first two weeks matters more than people think — precise shading loses its pop if the skin scabs heavily. A common mistake is asking for too much tiny detail on a small chest patch; scale matters. Ask your artist for healed photos of other chest portraits and whether they prefer black & grey or subtle color undertones for warmth.
2. Lone Wolf Back Piece in Color Realism
Style/Technique: Color Realism / Illustrative
Pain Level: Medium (5/10)
Session Time: 2–4 sessions, 3–5 hours each
Best For: Story tattoos, loyalty/family symbolism
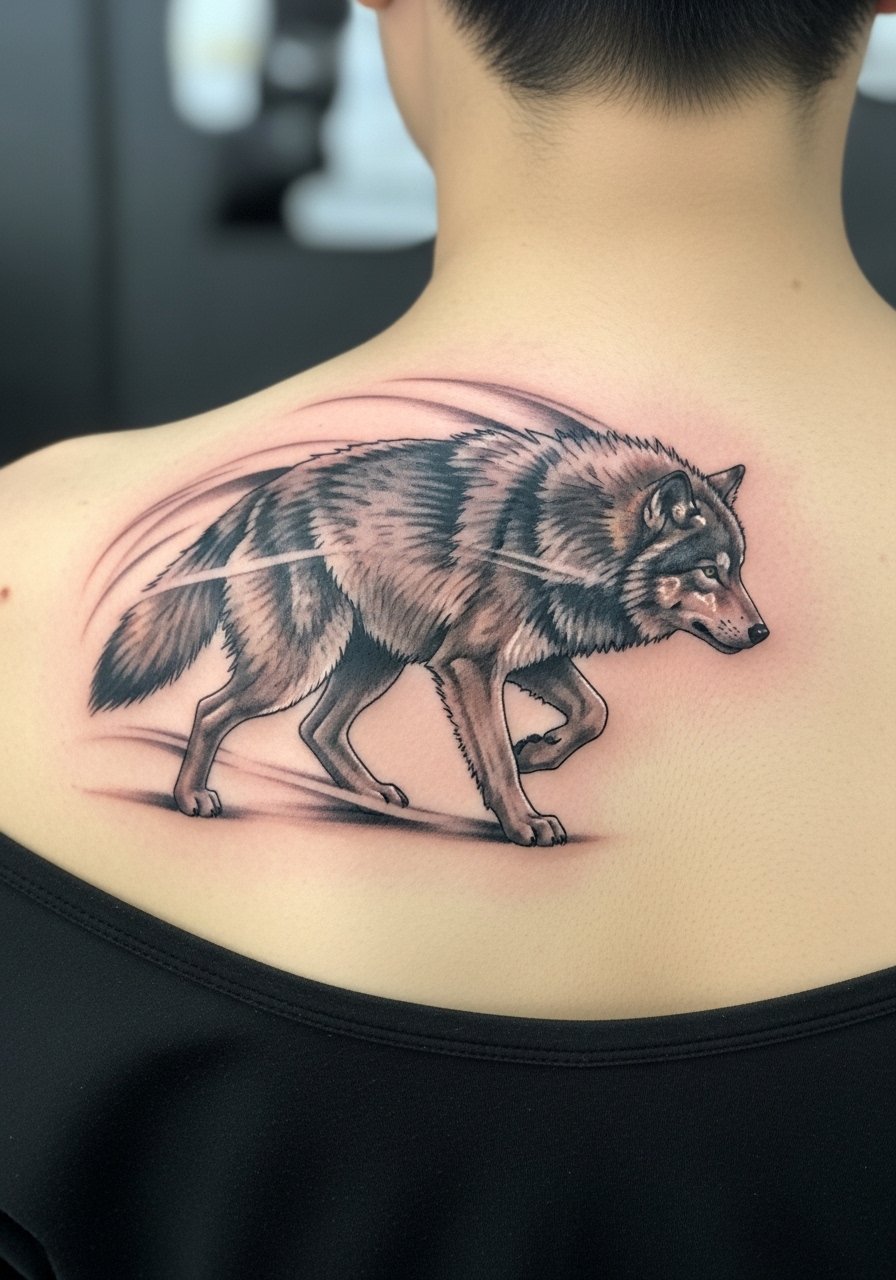
Wolves always read as family, instinct, and independence to me. A sweeping back piece lets the wolf’s motion follow your body contours, which helps the design breathe. Color realism pops on larger canvases; on the back you get room for subtle gradients in fur and eyes. Pain is moderate on the back unless the spine or ribs are involved. Healing tends to be straightforward if you avoid friction from clothing. Watch out for overly bright, saturated fur colors that can flatten when healed — ask for palettes artists have used before. I asked my artist to keep the eyes sharp and the rest slightly softer so it still reads at a distance once healed.
3. Micro-Realism Pet Portrait on Inner Wrist
Style/Technique: Micro-Realism / Black Ink
Pain Level: Low-Medium (3-4/10)
Session Time: 1 session, 1–2 hours
Best For: Memorials, pet homages, first-timers wanting meaning
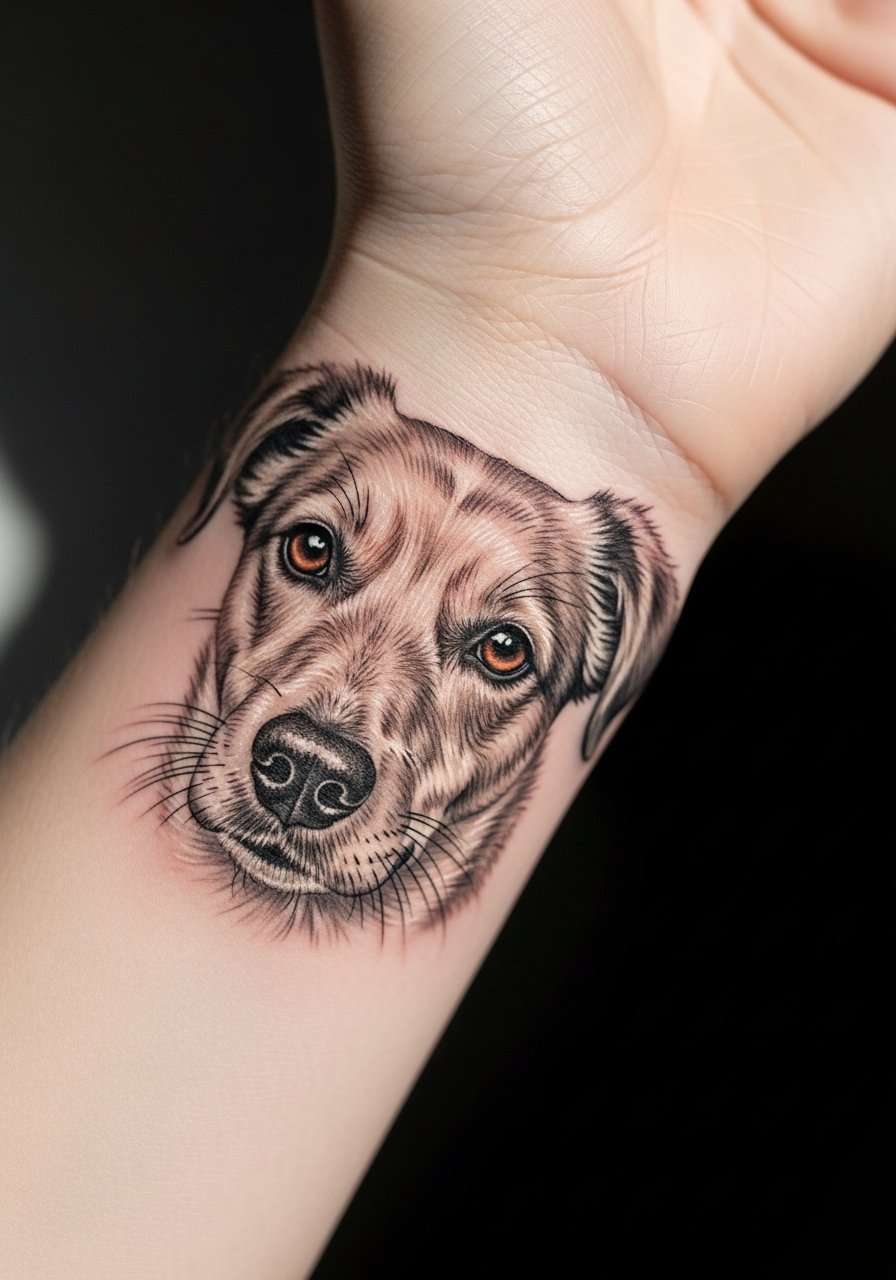
I had a small portrait of my dog done on my wrist, and micro-realism is perfect when you want an intimate homage without a full sleeve. The trick is high-contrast blacks and a patient artist — tiny tattoos can blur faster if lines are too close. Wrist pain is tolerable for most folks, but expect some soreness for a few days. Aftercare should prevent excessive scabbing; tiny details need clean healing. A common mistake is making the portrait too small to read after a year. Ask to see other healed micro-portraits from your artist on similar skin tones.
4. Fine Line Butterfly on Collarbone
Style/Technique: Fine Line / Single-Needle
Pain Level: Low (2-3/10)
Session Time: 1 session, 1–2 hours
Best For: Transformation symbolism, minimalist aesthetic
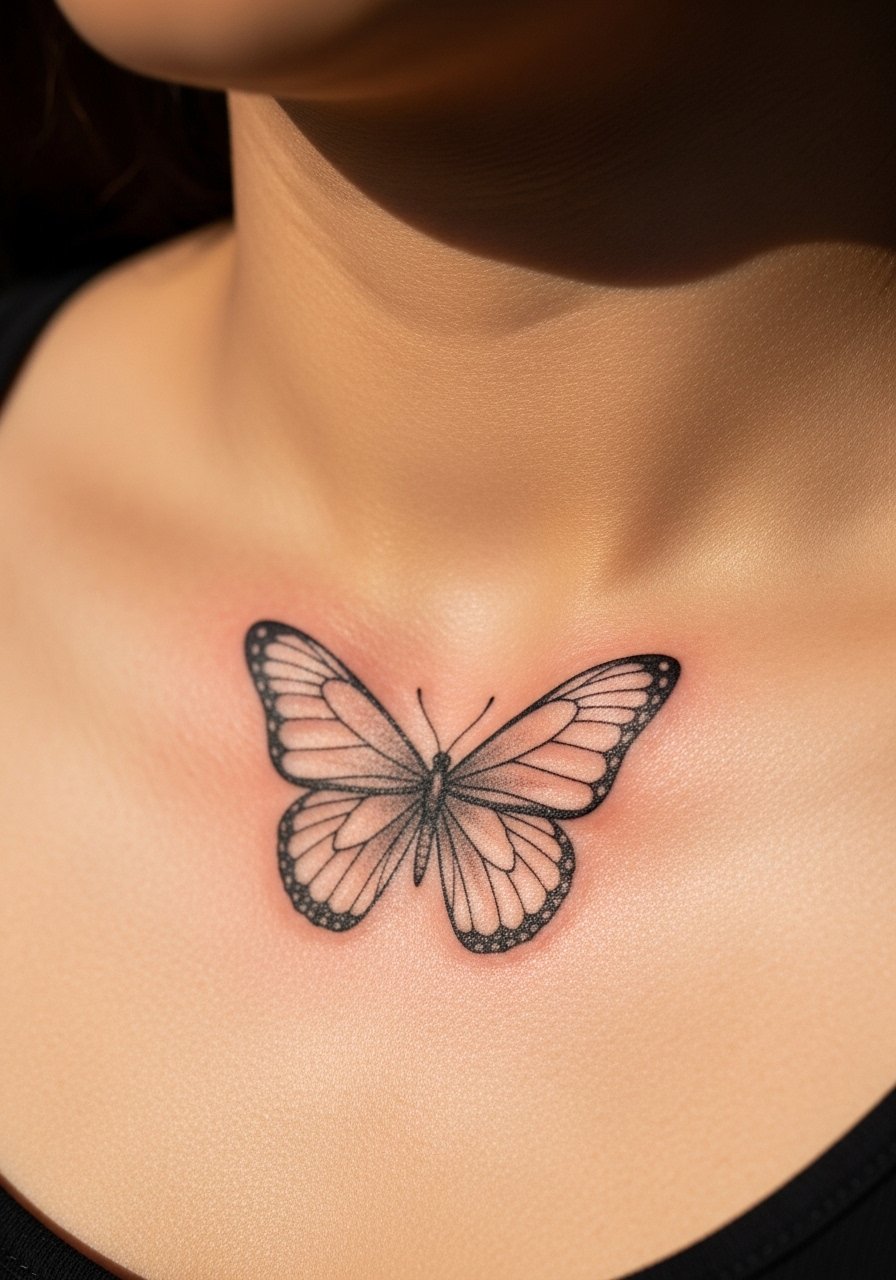
A tiny butterfly on the collarbone is subtle but loaded with meaning — transformation, freedom, rebirth. Fine line work looks elegant there because the bone helps frame the piece. Collarbone tattooing hurts less than ribs but more than the outer arm for most people; expect some sharp scratching near the bone. Fine line ages beautifully if lines are spaced and not too hairline-thin; otherwise they can blur. Don’t ask for extremely faint, single-hairlines if you want longevity. I asked my artist to thicken the main outline slightly so the wings kept definition after healing.
5. Neo-Traditional Fox on Thigh
Style/Technique: Neo-Traditional / Bold Color & Detail
Pain Level: Medium (4/10)
Session Time: 2 sessions, 2–4 hours each
Best For: Color collectors, playful identity symbolism
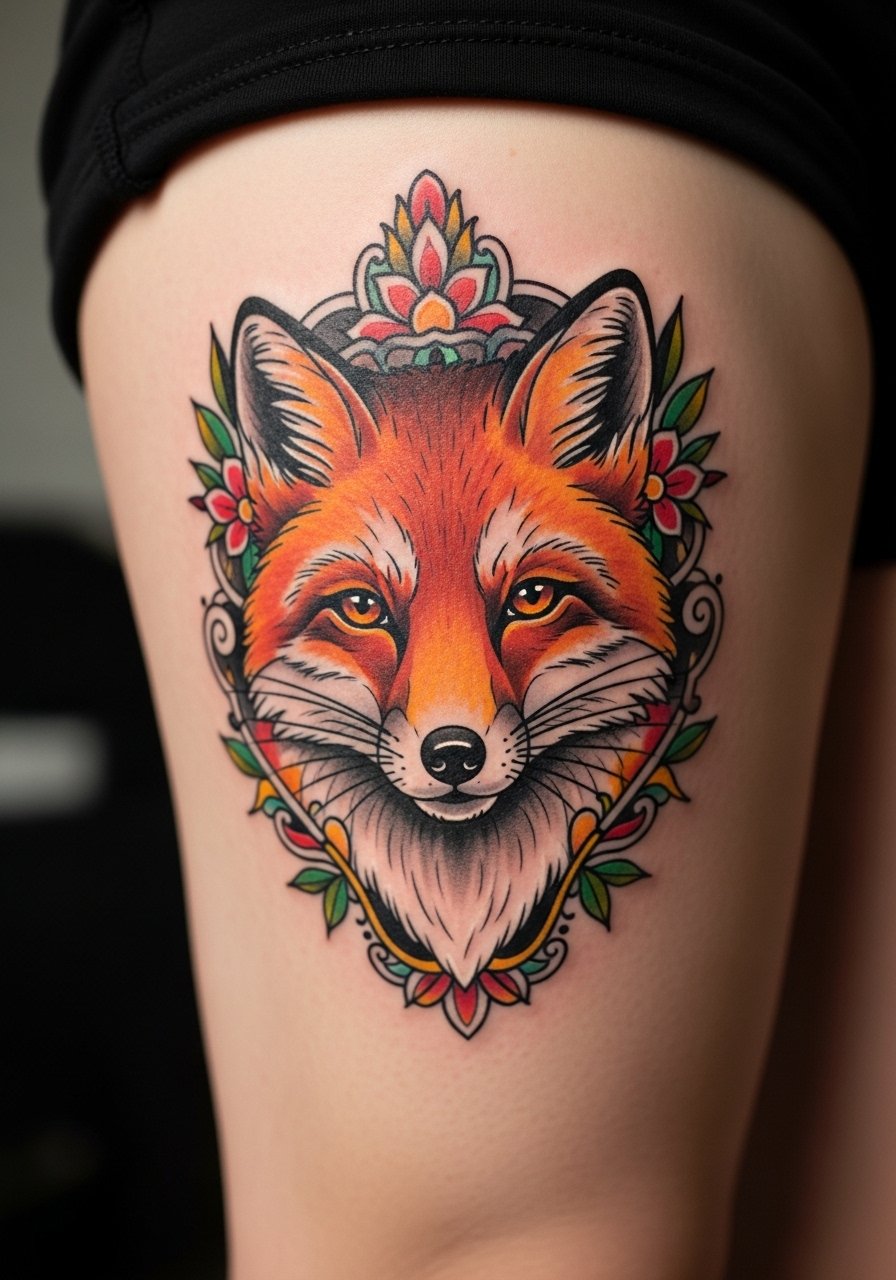
Fox tattoos read as cleverness and adaptability to me. Neo-traditional lets you play with color while keeping strong outlines, and thighs are forgiving for both size and healing (less friction than ribs). Thigh pain is usually moderate and easy to manage. Color retention depends on aftercare and sun protection; healed photos often show slightly softer hues than fresh ink. A common misstep is cramming too many tiny elements; neo-traditional thrives on clear shapes and bold fill. I liked that my artist balanced vibrant orange with muted backgrounds so the fox stays the focal point even as it ages.
6. Geometric Bear Silhouette on Forearm
Style/Technique: Blackwork / Geometric
Pain Level: Low (2-4/10)
Session Time: 1 session, 2–3 hours
Best For: Bold symbolism, masculine or neutral aesthetic
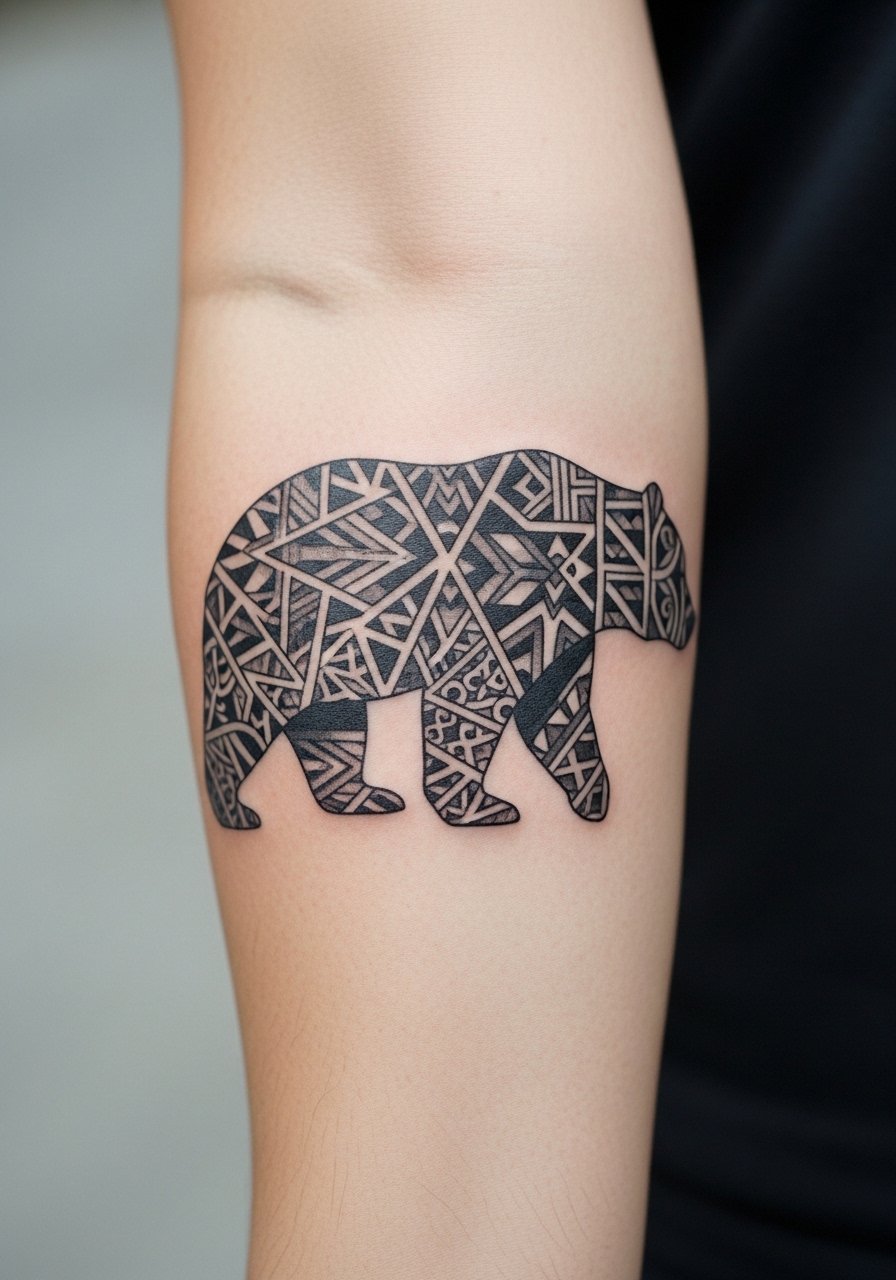
A bear silhouette filled with geometric lines feels modern while carrying primal meanings — strength, protection, grounding. Forearm placement lets it read easily and makes for low-to-moderate pain. Blackwork silhouettes age predictably well because solid black holds up over time. The design’s success depends on crisp edges; ask the artist how they handle solid fills to avoid patchiness. In my experience, geometric fills need careful spacing so tiny triangles don’t bleed together when healed. I recommended a slight negative-space border around key shapes to preserve separation as the skin settles.
7. Coiled Snake with Floral Wrap on Thigh
Style/Technique: Realism + Ornamental
Pain Level: Medium (4-5/10)
Session Time: Multiple sessions, 2–4 hours each
Best For: Rebirth/healing symbolism, flowy body art
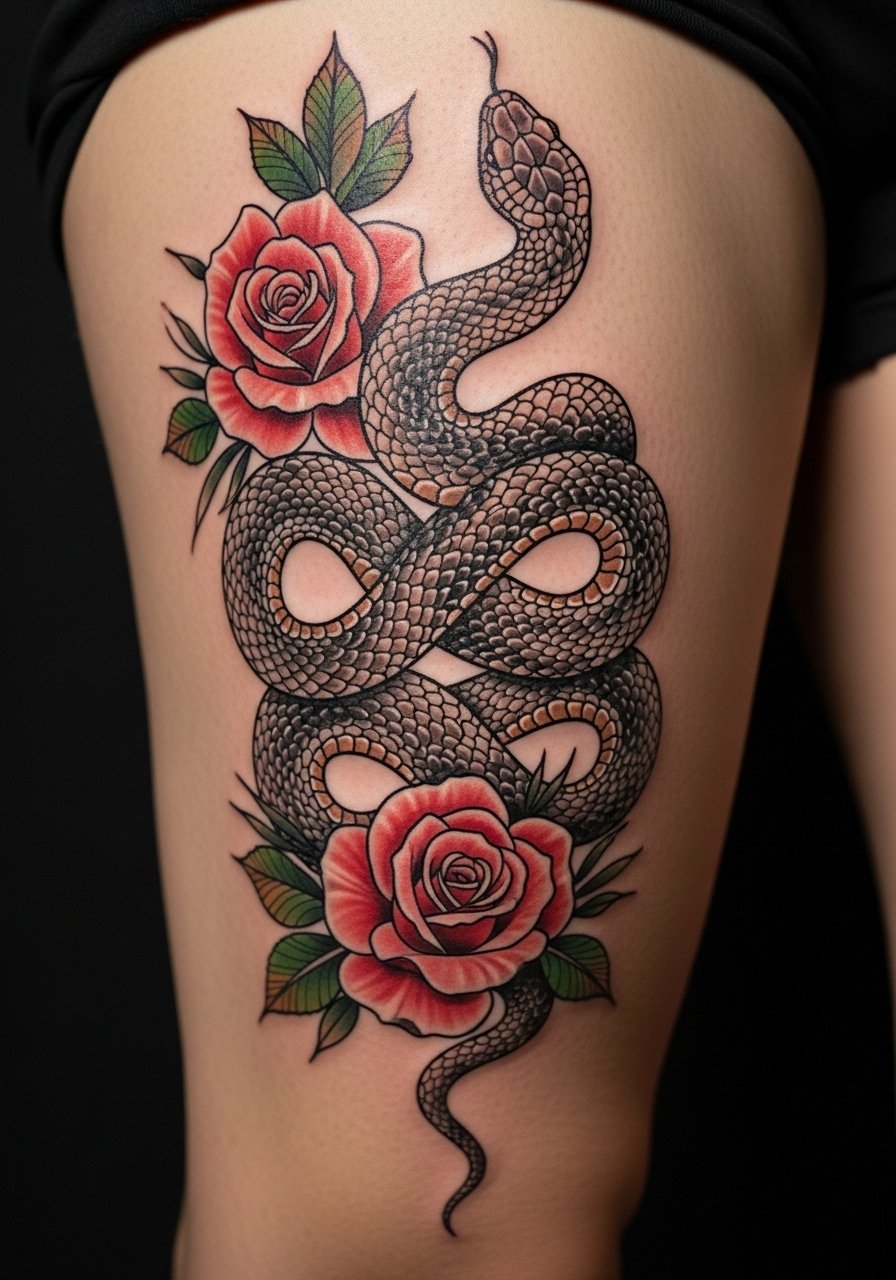
Snakes are about transformation and healing; wrapped with florals they soften the edge. Thigh sleeves or large thigh pieces let the snake coil naturally around muscle contours, which I prefer for motion. Pain on the outer thigh is moderate and tolerable for longer sessions. Scale detail requires an artist who knows how to render texture without crowding the composition; too many tiny scales on small tattoos blur later. I asked my artist to space scales and use varied shading so the snake reads at a glance. Healing on the thigh tends to be forgiving, but avoid tight pants during the first two weeks.
8. Blackwork Raven on Sternum
Style/Technique: Blackwork / Bold Silhouette
Pain Level: High (7/10)
Session Time: 1–3 sessions depending on size
Best For: Deep symbolism (mystery, transformation), statement placements
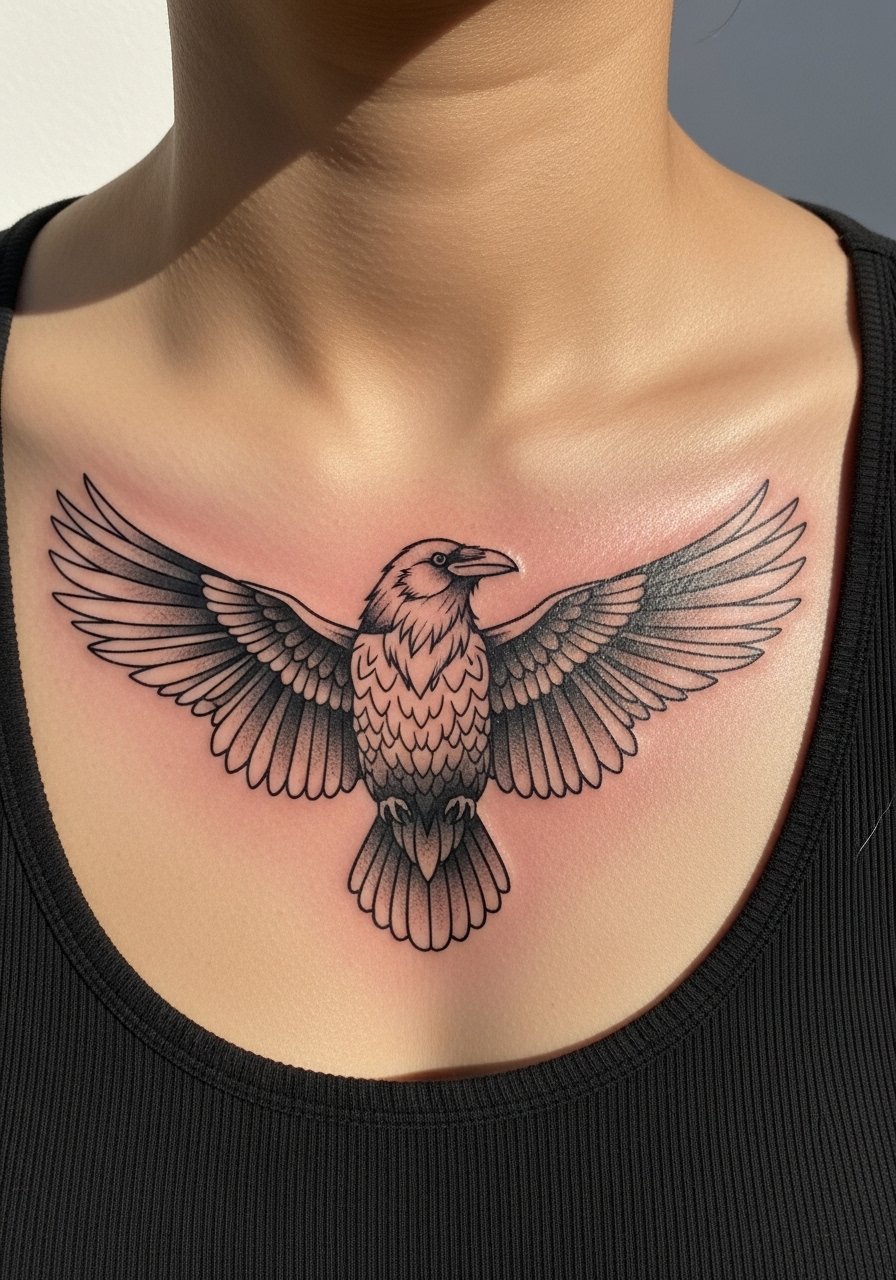
Ravens carry heavy meaning — mystery, messages, change. Sternum placements look dramatic but are among the more painful areas because of thin tissue over bone. Blackwork silhouettes can be forgiving in style but sternum tattoos require steady hands so edges stay crisp. Healing can be tricky due to clothing friction and movement; I avoided chest-straps and tight shirts for a couple of weeks. A common mistake is underestimating sternum pain; plan sessions with breaks and ask if topical numbing is appropriate. I had mine done in two focused sessions to manage both pain and detail.
9. Colorful Koi Swim on Calf
Style/Technique: Color Realism / Illustrative
Pain Level: Medium (4/10)
Session Time: 1–3 sessions, 2–4 hours each
Best For: Perseverance symbolism, flowing designs
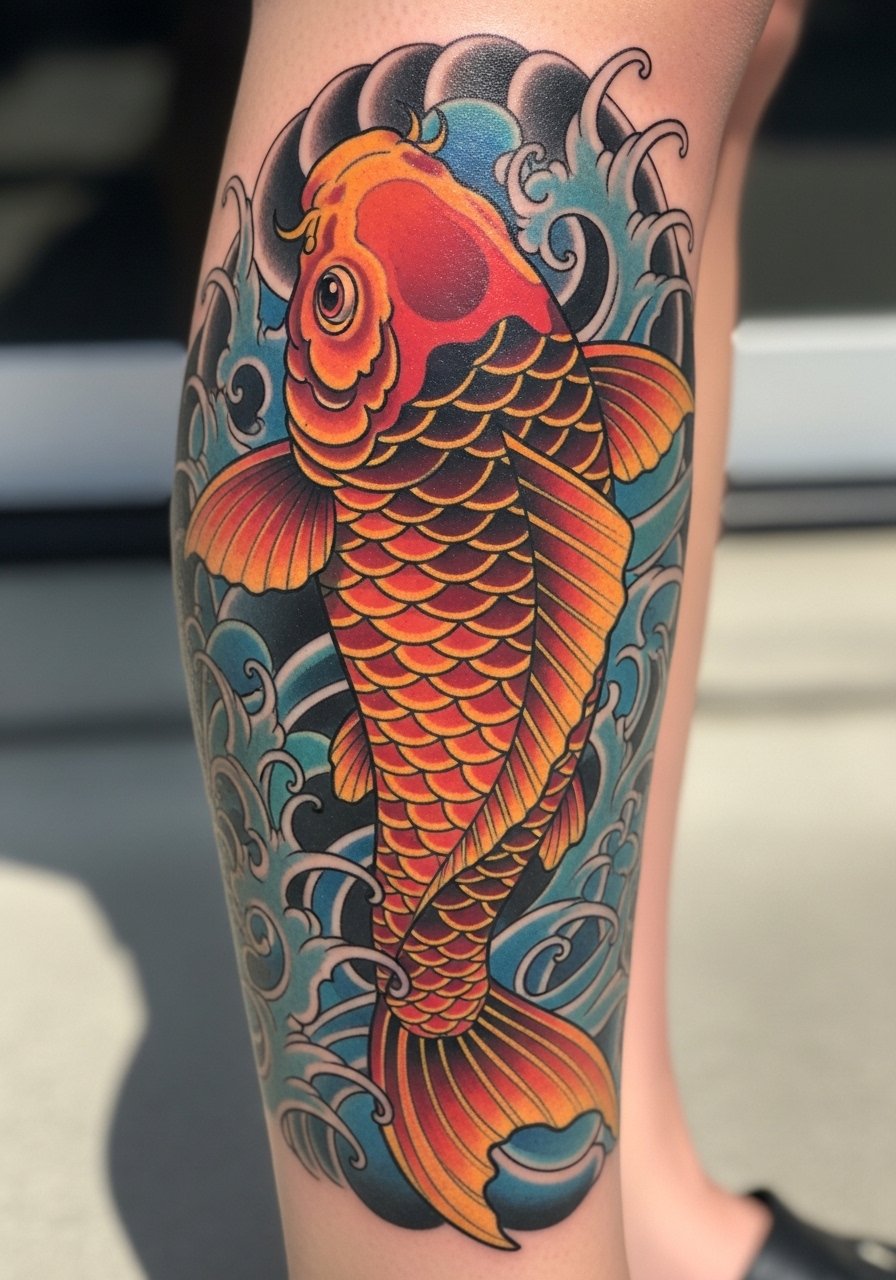
Koi tattoos symbolize perseverance and personal journeys. The calf is ideal because it gives vertical flow for koi movement and sits away from clothing friction. Color realism makes the fish feel alive; healed colors soften a bit, so artists often saturate shades slightly fresh. Calf pain is moderate and tolerable for most folks. Avoid overly intricate water details that read messy once healed — focus on clear contrast and directional flow. I asked for a slightly muted palette so it doesn’t look neon a year down the line, while retaining strong eye and scale details.
10. Minimalist Cat Outline Behind Ear
Style/Technique: Minimal Line / Single-Needle
Pain Level: Low-Medium (3-5/10)
Session Time: 30–60 minutes
Best For: Subtle identity (independence, curiosity), first small tattoo
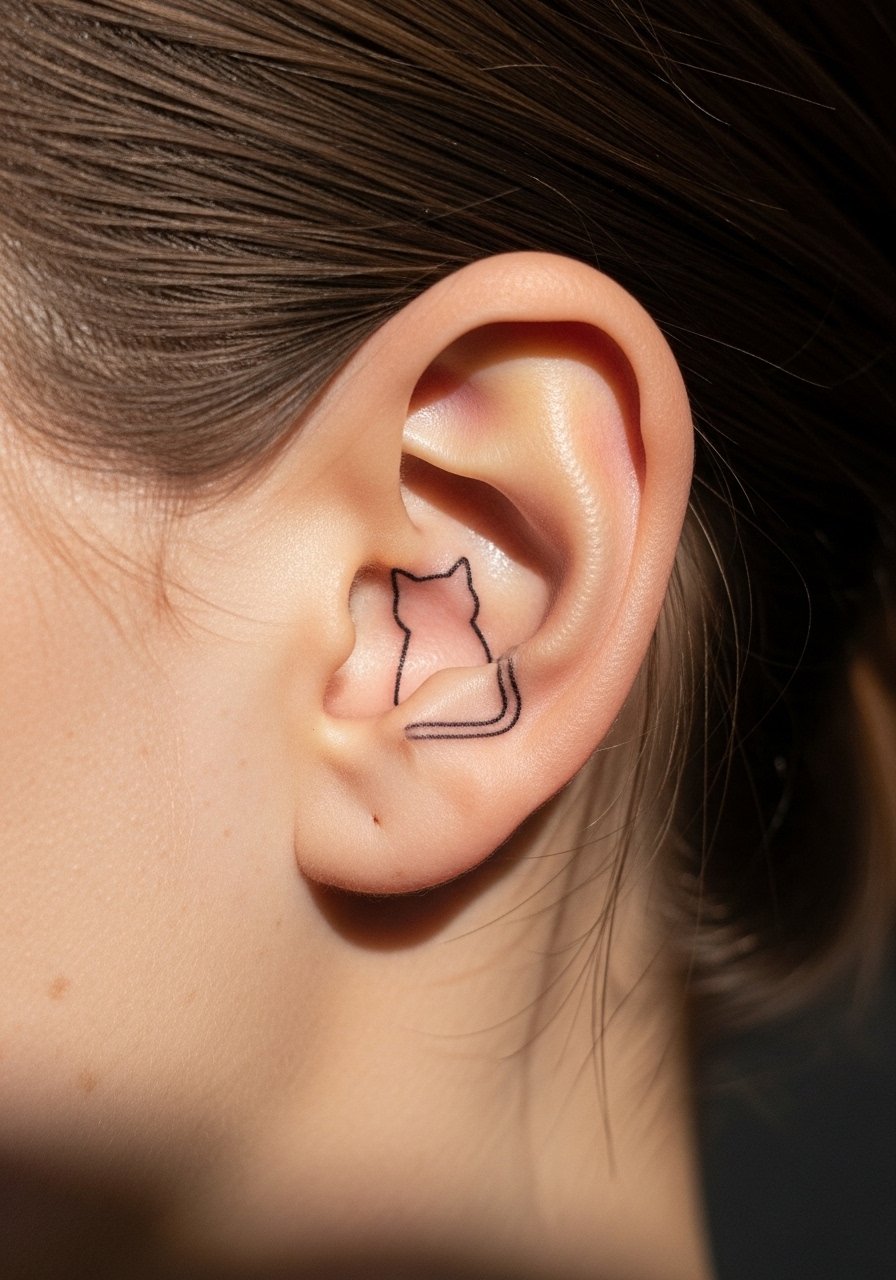
A tiny cat behind the ear is discreet and personal — perfect if you cherish independence or a feline companion. Behind-ear tattoos can be a bit more irritating than the outer arm due to the thin skin, but sessions are short. Minimalist line work needs spacing; hairline lines too thin risk disappearing. From my experience, a small but slightly bolder line survives time better. Aftercare is straightforward but be mindful of sleeping positions for a few nights. Ask your artist how they approach single-needle work on that spot and request healed examples on similar skin.
11. Stag/Deer Geometric Chest Piece
Style/Technique: Blackwork + Geometric Detail
Pain Level: Medium (5/10)
Session Time: 2–3 sessions, 2–4 hours each
Best For: Heritage, renewal, calm strength
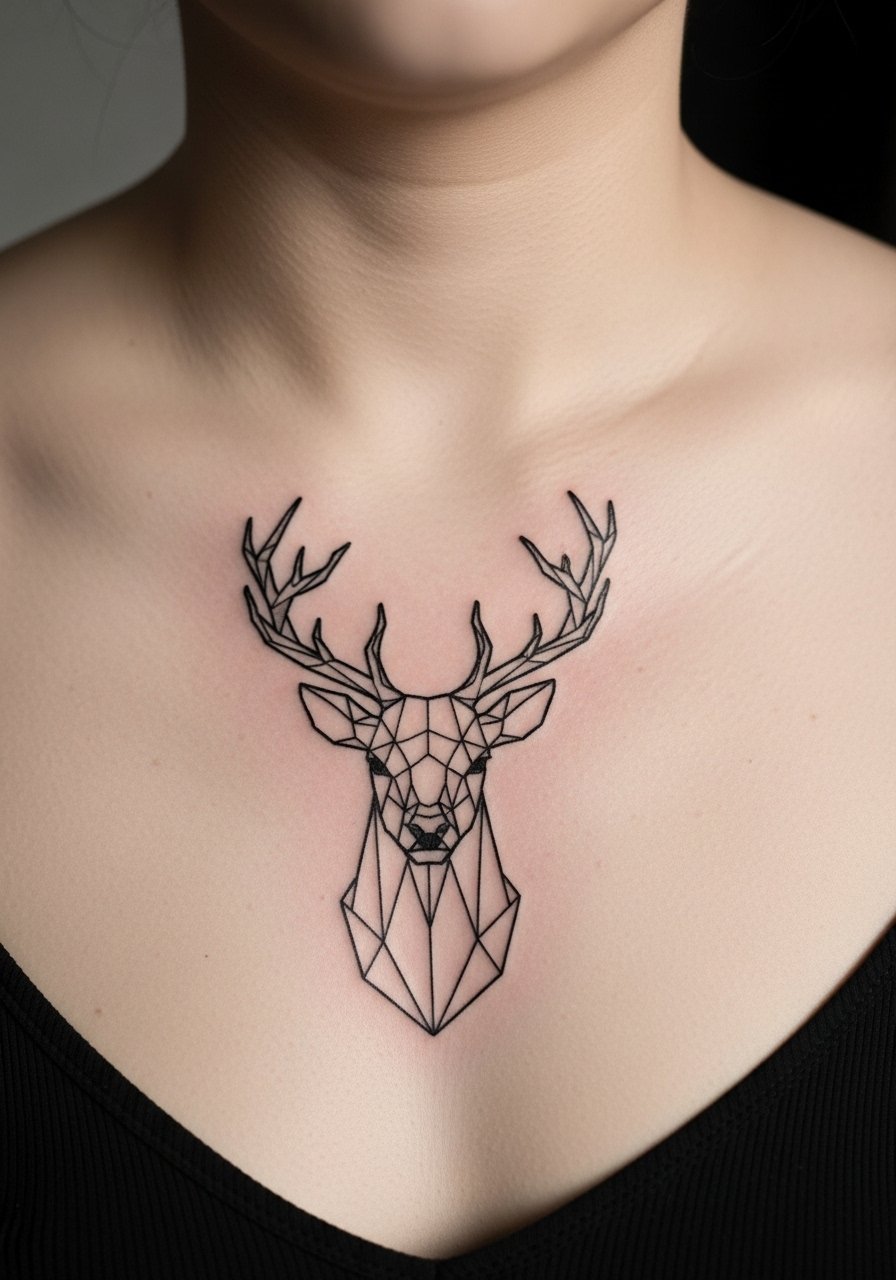
A stag blends nobility and calmness; geometric antlers add a modern edge. Chest placement gives symmetry and presence. Pain is moderate and manageable with breaks. For geometric stags, clarity is everything — crisp lines and balanced negative space preserve the motif as skin shifts over time. I requested slightly thicker primary lines to maintain readability after healing. Don’t overload with tiny dotwork inside antlers unless the artist regularly shows healed dotwork examples — dots can merge over time.
12. Tiny Hummingbird on Ribcage
Style/Technique: Fine Line / Delicate Color Accents
Pain Level: High (7/10)
Session Time: 1 session, 1–2 hours
Best For: Energy, joy, small but meaningful placement
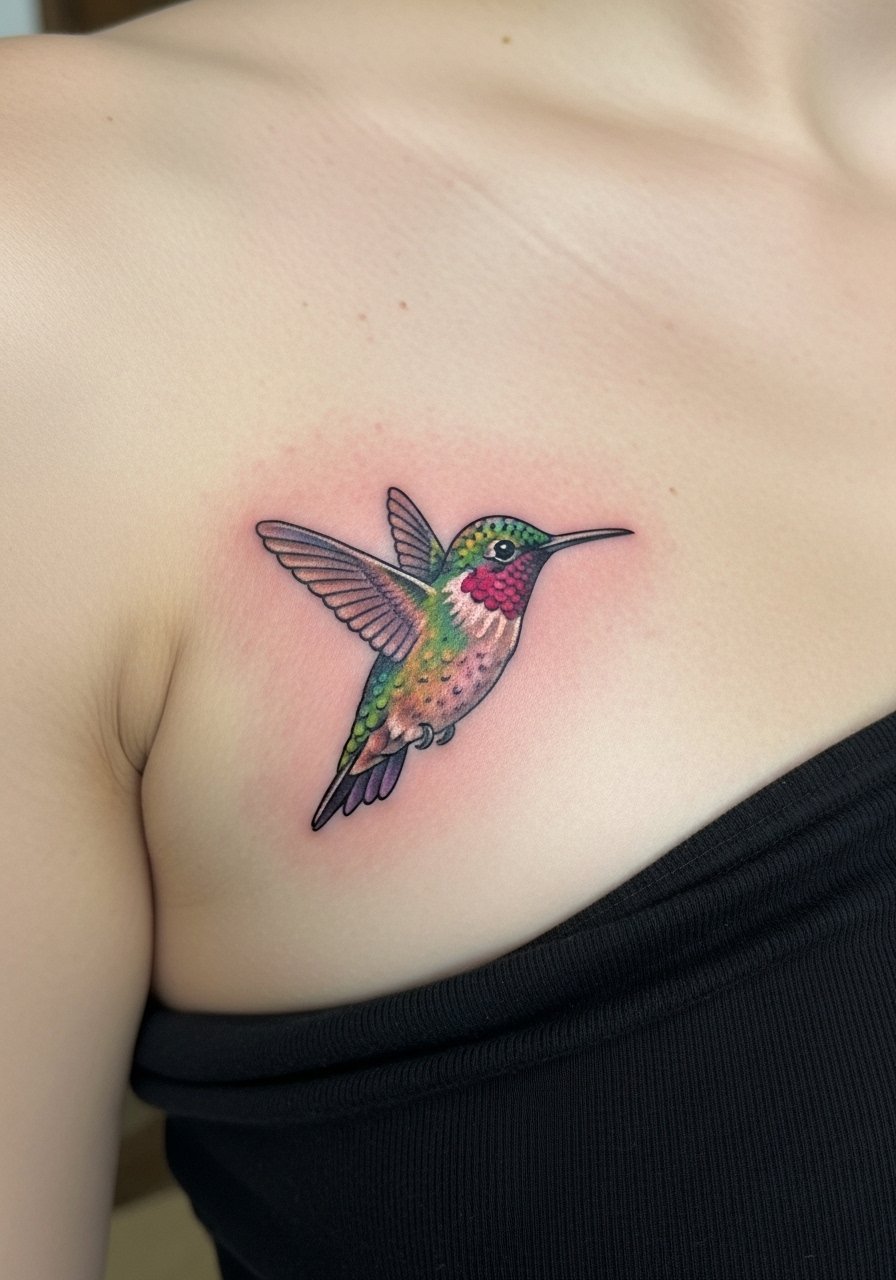
Rib tattoos hurt more than most, but a tiny hummingbird there feels intimate and secretive. Fine line with gentle color highlights can look magical healed, but ribs require patience during both session and healing. Expect tenderness for several days. Artists often advise smaller rib tattoos to avoid long sessions that exacerbate pain. A common mistake is picking the ribs for very detailed tiny pieces; skin movement and breathing can make precise detail harder to execute. I scheduled a short session, healing was slower but worth the placement.
13. Panther Silhouette on Shoulder Blade
Style/Technique: Blackwork / Negative Space
Pain Level: Low-Medium (3/4/10)
Session Time: 1–2 hours
Best For: Stealth strength, sleek aesthetic
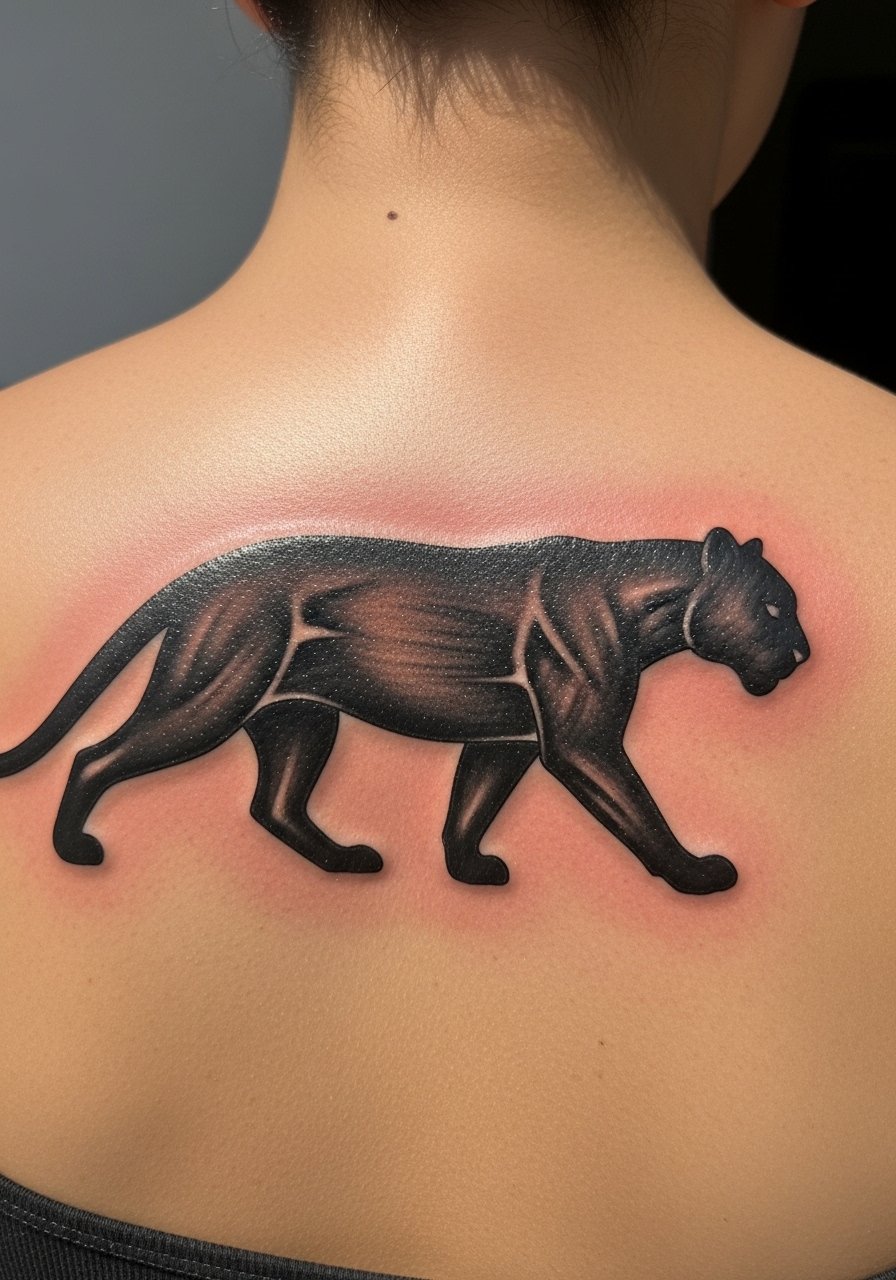
A panther on the shoulder blade reads sleek and controlled. Shoulder blade skin is roomy and relatively low pain, making it a good spot for a strong black silhouette. Blackwork holds up well there since it's not high-movement or high-friction. The main design risk is losing shape with posture changes; good artists plan shapes to follow muscle lines. I liked that my panther still reads from the side when my arm is down. Ask to see healed shoulder blade silhouettes from your artist so you know how solid fills behave on that canvas.
14. Tiny Bee with Floral Accent on Finger
Style/Technique: Micro Line / Tiny Color
Pain Level: Medium-High (5-7/10)
Session Time: 30–60 minutes
Best For: Community, industriousness, delicate statement
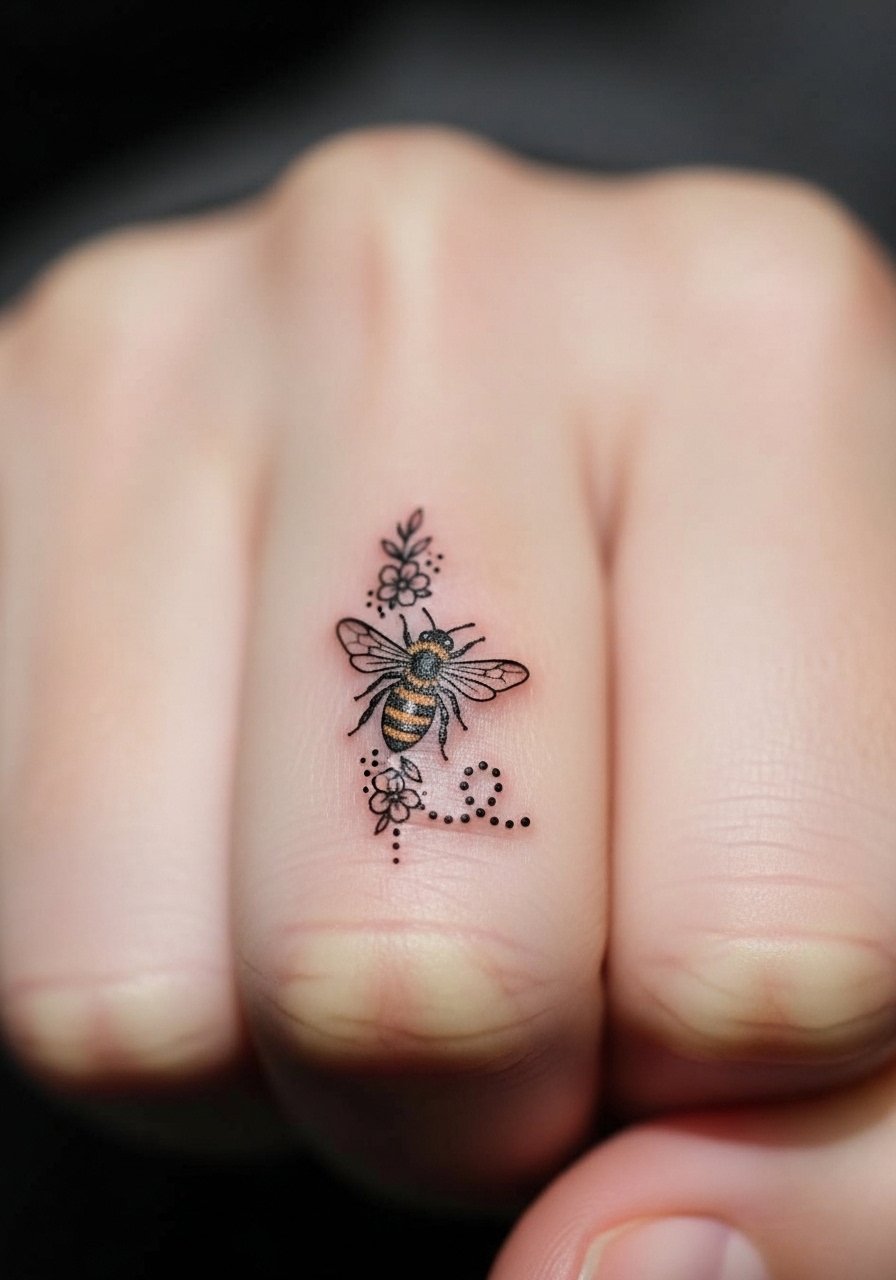
Finger tattoos are charming but finicky. Bees symbolize community and resilience, which I liked for the reminder aspect. Fingers see lots of washing and sun, so tiny tattoos can fade or blur faster. Pain is higher near bone and for repeated sessions. If you choose fingers, expect touch-ups down the line; placement is intentional and visible. Artists I trust recommend slightly bolder lines for finger work to prolong clarity. I kept the design tiny but solid and planned for a possible refresh after a year.
15. Octopus Wrap on Side Rib
Style/Technique: Realism + Illustrative Flow
Pain Level: High (7-8/10)
Session Time: Multiple sessions, 2–4 hours each
Best For: Intelligence, adaptability, large flowing pieces
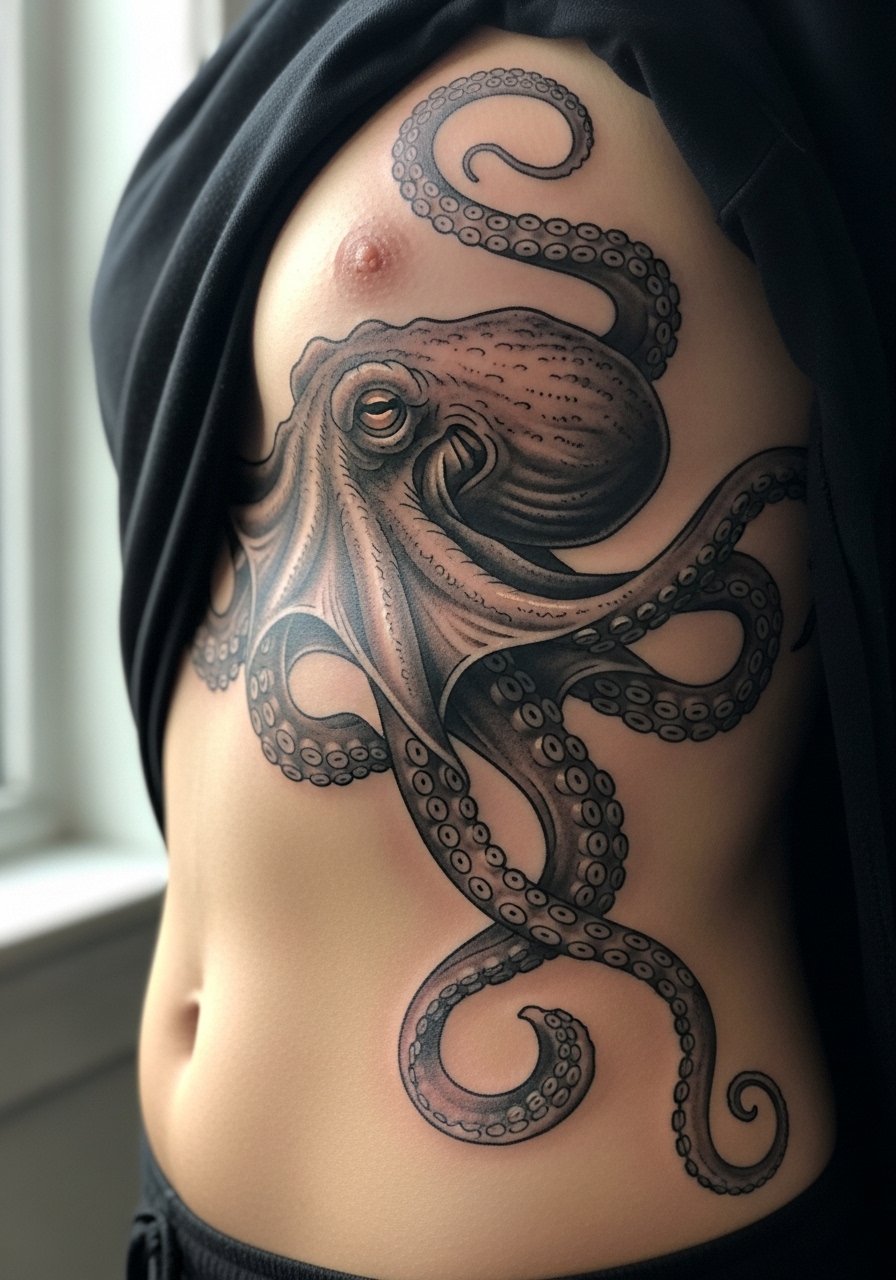
Octopus pieces are stunning because tentacles can follow body curves, creating movement. The ribcage offers dramatic canvas but is one of the more painful spots due to thinness and breathing motion. Expect multiple sessions and careful aftercare to preserve suction-cup textures. Artists who excel at organic flow make tentacles look like they belong on your body. I learned to schedule sessions with breathing breaks and to sleep upright the first few nights to reduce friction. Avoid overly fussy texture if you plan for a faster healing timeline.
16. Sea Turtle Near Ankle in Watercolor-Adjacent Style
Style/Technique: Soft Color Realism with Watercolor Elements
Pain Level: Low-Medium (3-4/10)
Session Time: 1–2 hours
Best For: Calmness, journey symbolism, beach vibes

Sea turtles feel like slow wisdom and safe travel. Ankles are a nice spot for small aquatic pieces, but they can rub from shoes. I prefer defined outlines with watercolor-like fills — purely watercolor techniques can fade unpredictably, but blended color realism with clear structure ages better. Ankle pain is moderate; expect tenderness in the days after. A common mistake is relying on pale colors without contrast; they vanish faster. I requested a slightly stronger shell outline so the turtle stayed readable even as the wash softened over time.
17. Chibi Mythical Creature on Outer Forearm
Style/Technique: Chibi / Illustrative Cute
Pain Level: Low (2/3/10)
Session Time: 1 session, 1–2 hours
Best For: Playful identity, first timers, pop-culture nods
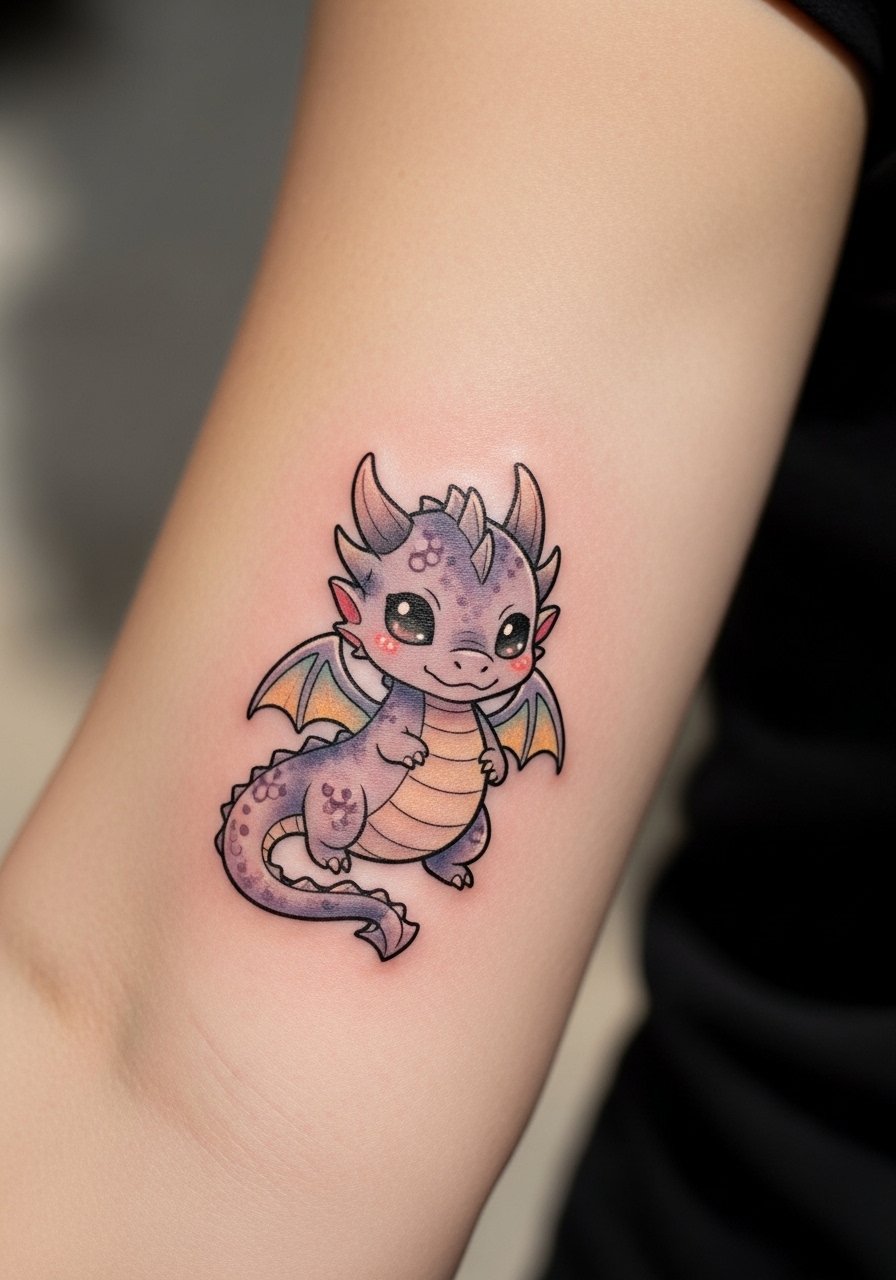
Chibi or cute myth creatures are big among folks who want playful identity markers without heavy symbolism. The outer forearm is visible and low-pain, making it an easy first piece. These translate well into micro-scale and avoid aging issues if lines are bold enough. I’ve seen clients regret overly tiny chibi details because facial features can blur; keep expressions clear and simple. I had mine done with subtle color shading that brightened after healing. Ask for healed chibi examples so you know how eyes and small features hold up.
18. Elephant Linework on Upper Arm
Style/Technique: Fine Line + Dotwork
Pain Level: Low (2–3/10)
Session Time: 1–2 hours
Best For: Memory, wisdom, family anchors
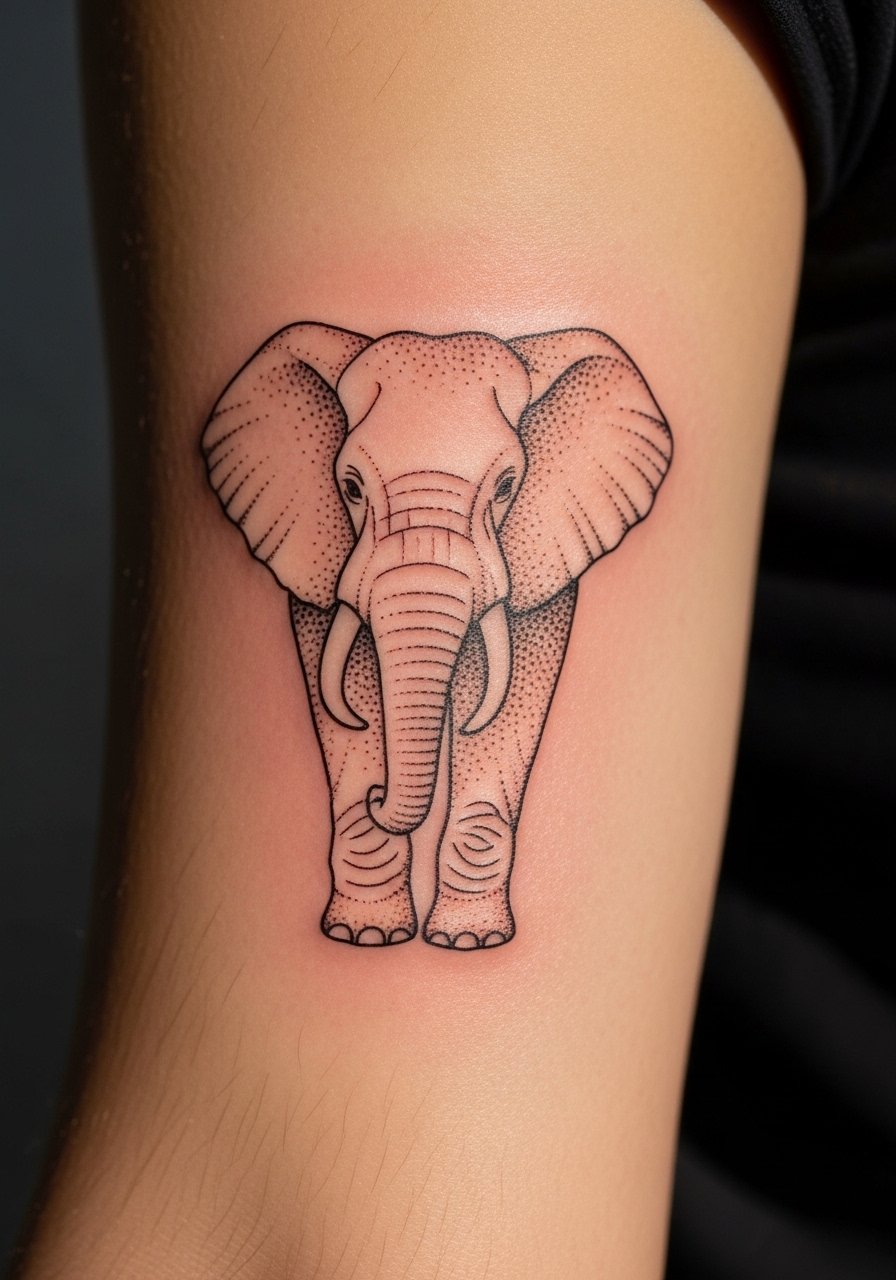
Elephants read as memory and family ties; an upper-arm placement gives a friendly, visible spot without being obtrusive. Fine lines with dotwork can create a soft, textured feel that ages nicely if spacing is respected. Upper-arm pain is generally low, and healing is straightforward. The trap is too-tight dotwork that clumps when healed; I make sure dot spacing is wide enough. My artist suggested a slight contrast in line weight between tusks and ear folds to keep the elephant recognizable from a distance.
19. Dragon (Eastern Style) Along Spine
Style/Technique: Traditional + Illustrative Flow
Pain Level: High (7/10)
Session Time: Multiple long sessions
Best For: Cultural symbolism, protector motifs, dramatic placement
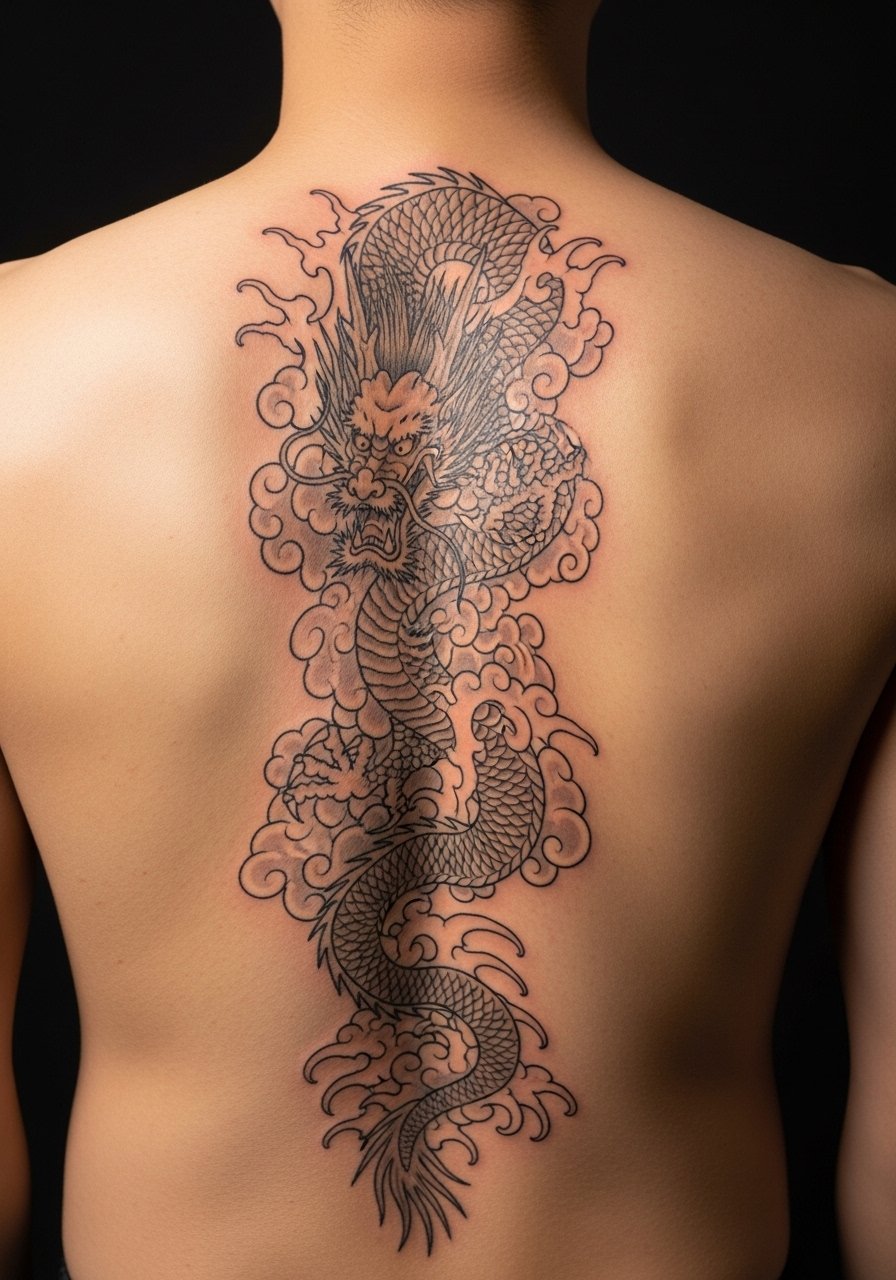
An eastern dragon along the spine reads powerful and protective. Spine tattoos are high pain because of proximity to bone, but they offer unmatched vertical drama. Flow and spacing matter more than tiny detail — a dragon needs readable curves as your posture changes. Expect several sessions and careful aftercare to avoid scabbing that obscures scales. I spaced my sessions to allow healing between major fills and had the artist plan cloud negative-space to keep the dragon popping as the skin settled.
20. Sparrow Flock Collarbone Migration
Style/Technique: Minimal Line + Small Silhouettes
Pain Level: Low (2–3/10)
Session Time: 1–2 hours
Best For: Freedom, travel, subtle movement across anatomy
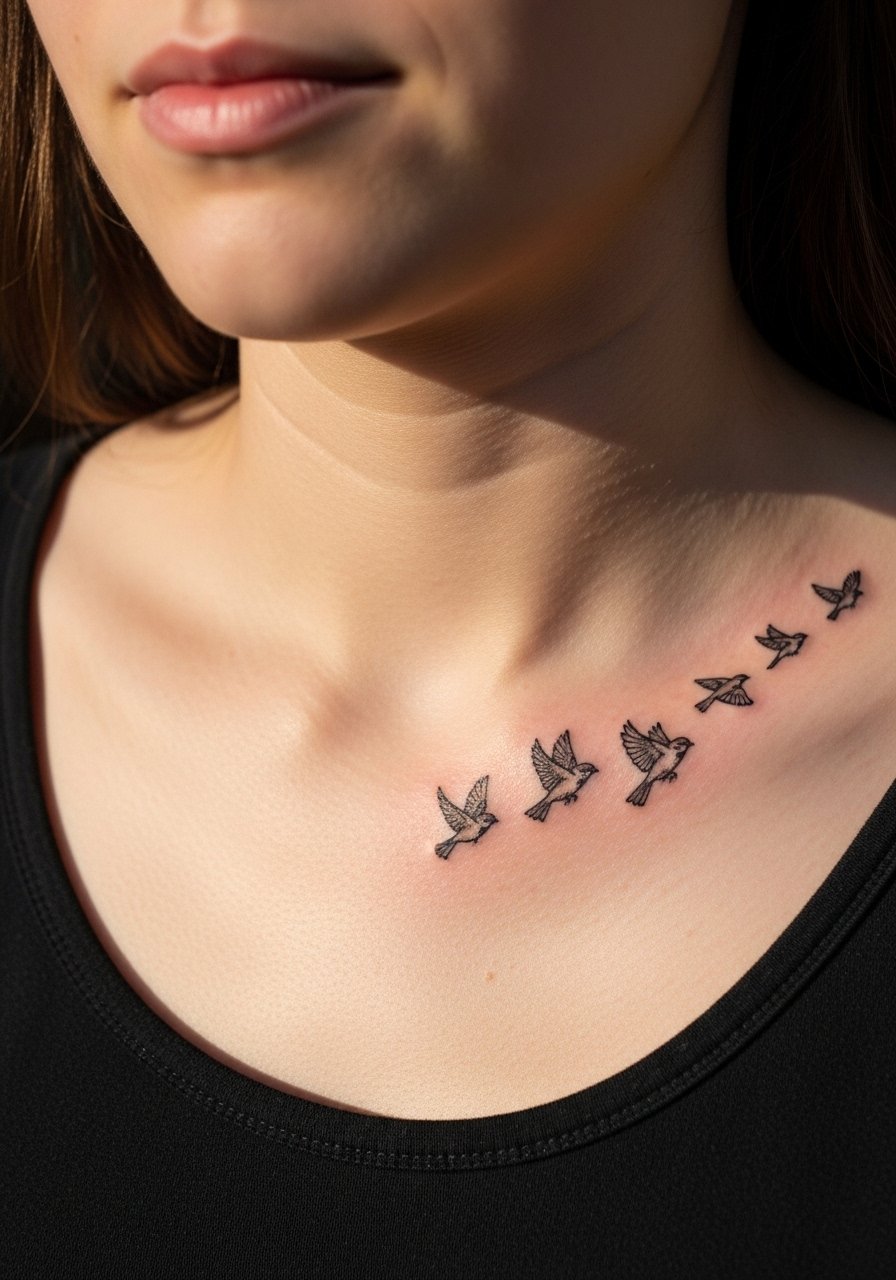
Small flying birds across the collarbone create motion that flat tattoos can't. Sparrows symbolize freedom and hope. Collarbone placement is visible and photographable, with low pain compared to ribs. Keep silhouettes simple — too much feather detail is lost on small birds. I had mine spaced so the flight path followed my collarbone curve; it still reads cleanly months later. Artists often suggest staggered sizes to suggest depth; that trick worked well for me.
21. Wolf & Moon Sternum–Chest Combo
Style/Technique: Black & Grey Realism with Symbolic Elements
Pain Level: High (7/10)
Session Time: Multiple sessions, 2–4 hours each
Best For: Dual symbolism (lone strength + cycles), impactful centerpiece
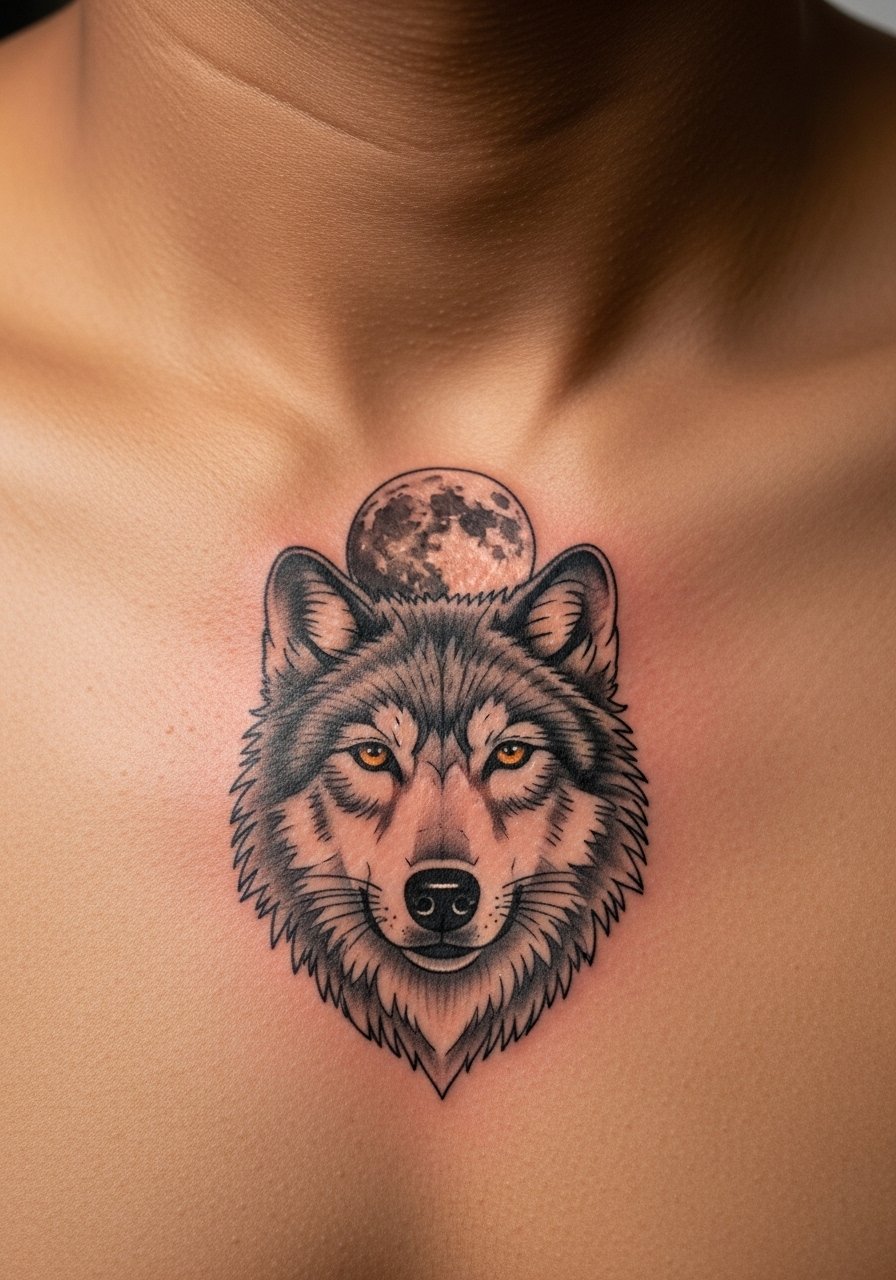
Combining a wolf and moon feels poetic — pack instincts and cycles of self. Sternum-centered pieces are dramatic but painful; plan sessions accordingly. Black & grey realism helps the moon and wolf interplay without needing color. The main aging concern is that delicate facial hair detail can soften; I asked for contrast in the eyes and muzzle to keep facial focus. Sleeping upright and loose clothing during healing helped avoid irritation. Artists I follow suggest breaking a chest combo into two sessions to maintain detail and your comfort.
22. Seahorse Behind Knee
Style/Technique: Fine Line + Soft Color
Pain Level: Medium-High (5-7/10)
Session Time: 1–2 hours
Best For: Unusual placement, patience, delicate aquatic symbolism
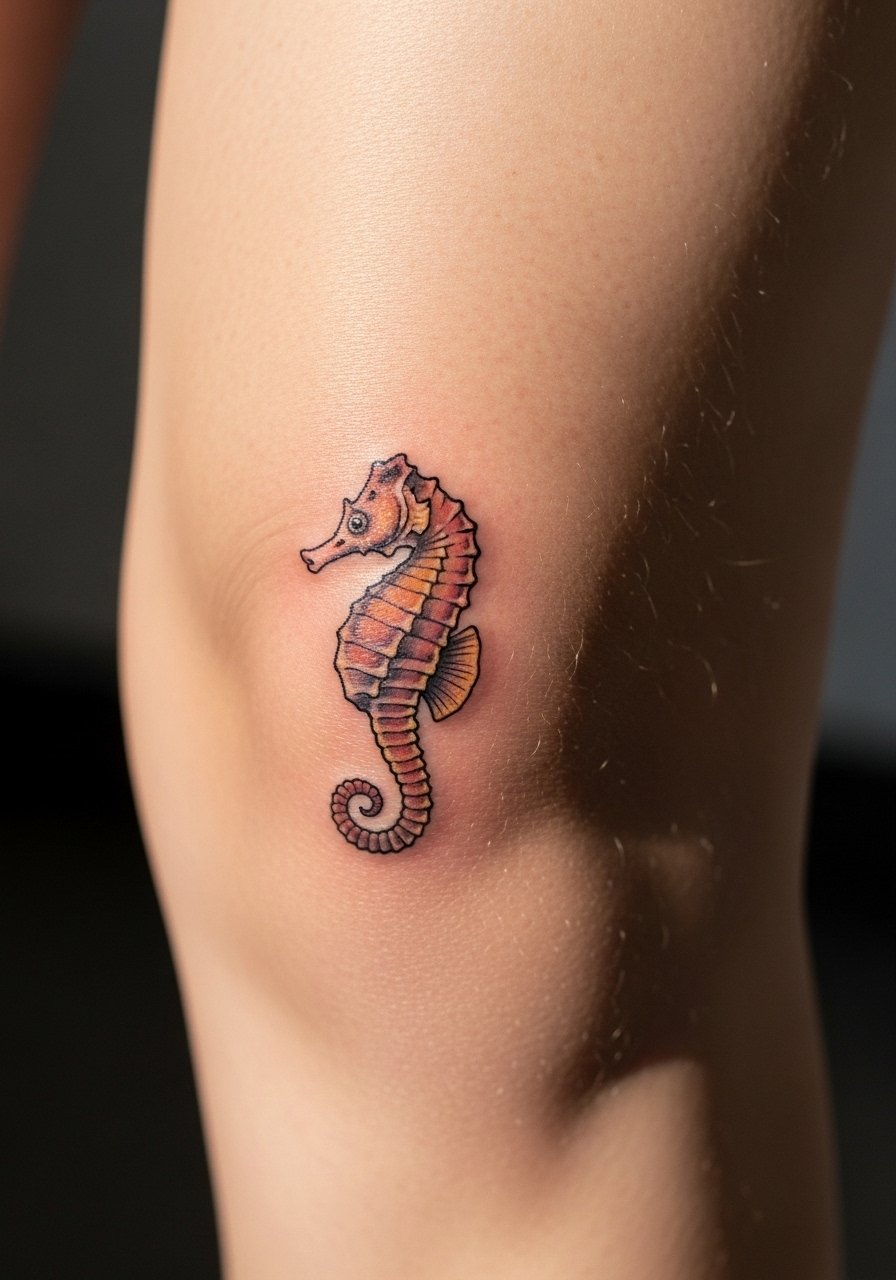
Behind-knee placements are playful but less common, and seahorses represent patience and uniqueness. Pain is variable because the skin there moves and bends; you’ll feel that during the session and in healing. Keep the design simple — small curves and a clear silhouette hold up better than minute scales. I found healing required avoidance of tight leggings for a couple of weeks. Ask your artist how they plan for movement so the seahorse doesn’t distort when you bend your leg.
23. Mantis Minimalist on Rib Side
Style/Technique: Minimal Line / Sparse Detail
Pain Level: High (7/10)
Session Time: 1 hour
Best For: Focus, patience, sharp personal meaning
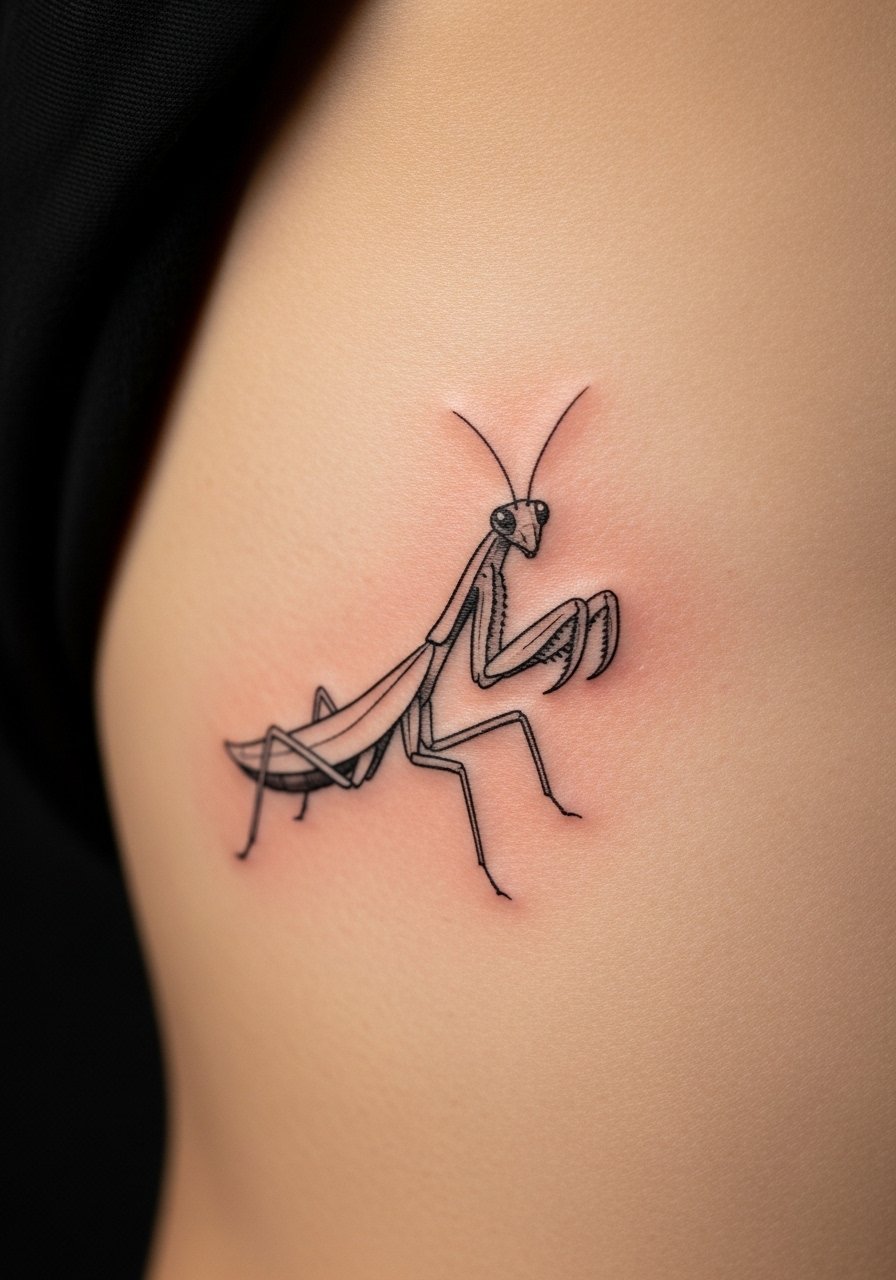
Praying mantis tattoos can symbolize stillness and patience. The rib side is a high-pain area, but a minimalist mantis reads elegantly there. Keep lines simple and slightly bolder than you think so the organism stays visible after healing. I spaced lines to allow negative space to do the shape-work rather than relying on tiny details. Expect tenderness when stretching and avoid abrasive fabrics during recovery.
24. Panther in Color (Midnight Blue) on Thigh
Style/Technique: Color Realism with Limited Palette
Pain Level: Medium (4–5/10)
Session Time: 2–3 sessions
Best For: Stealthy power, statement color collectors
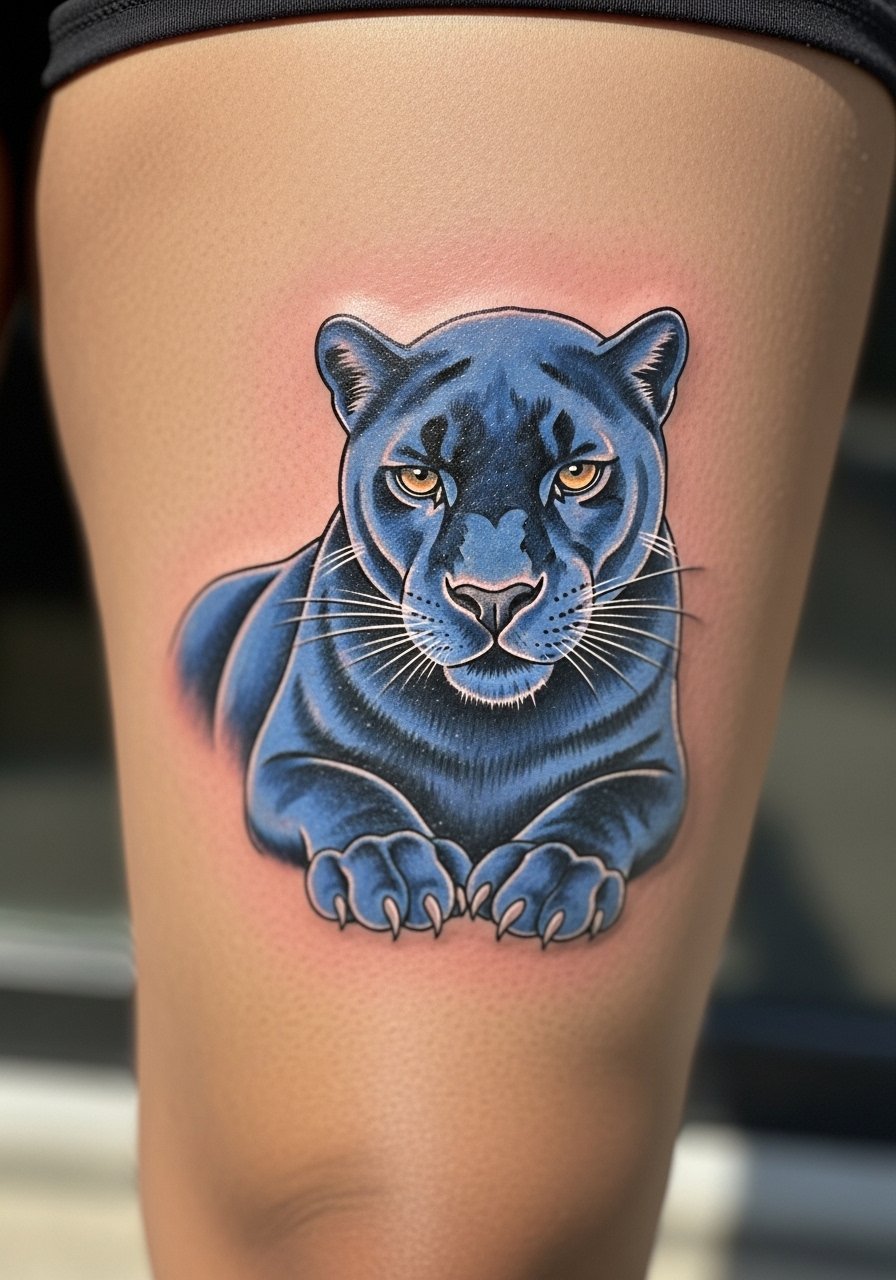
A color panther removes the classic black silhouette and gives a mood — midnight blue reads mysterious and modern. Thigh placement offers room for large muscles and color saturation that lasts. Color aging varies by hue, but dark blues often keep richness longer than bright cyan or lime. I had mine layered in sessions to build depth. Avoid using neon colors for shadow regions; they often lose contrast when healed. Ask your artist about pigment choices for longevity on your skin tone.
25. Owl with Floral Crown on Upper Arm
Style/Technique: Neo-Traditional / Bold Line & Shading
Pain Level: Low-Medium (3–4/10)
Session Time: 2 sessions, 1.5–3 hours each
Best For: Wisdom, transition, feminine/masculine versatility
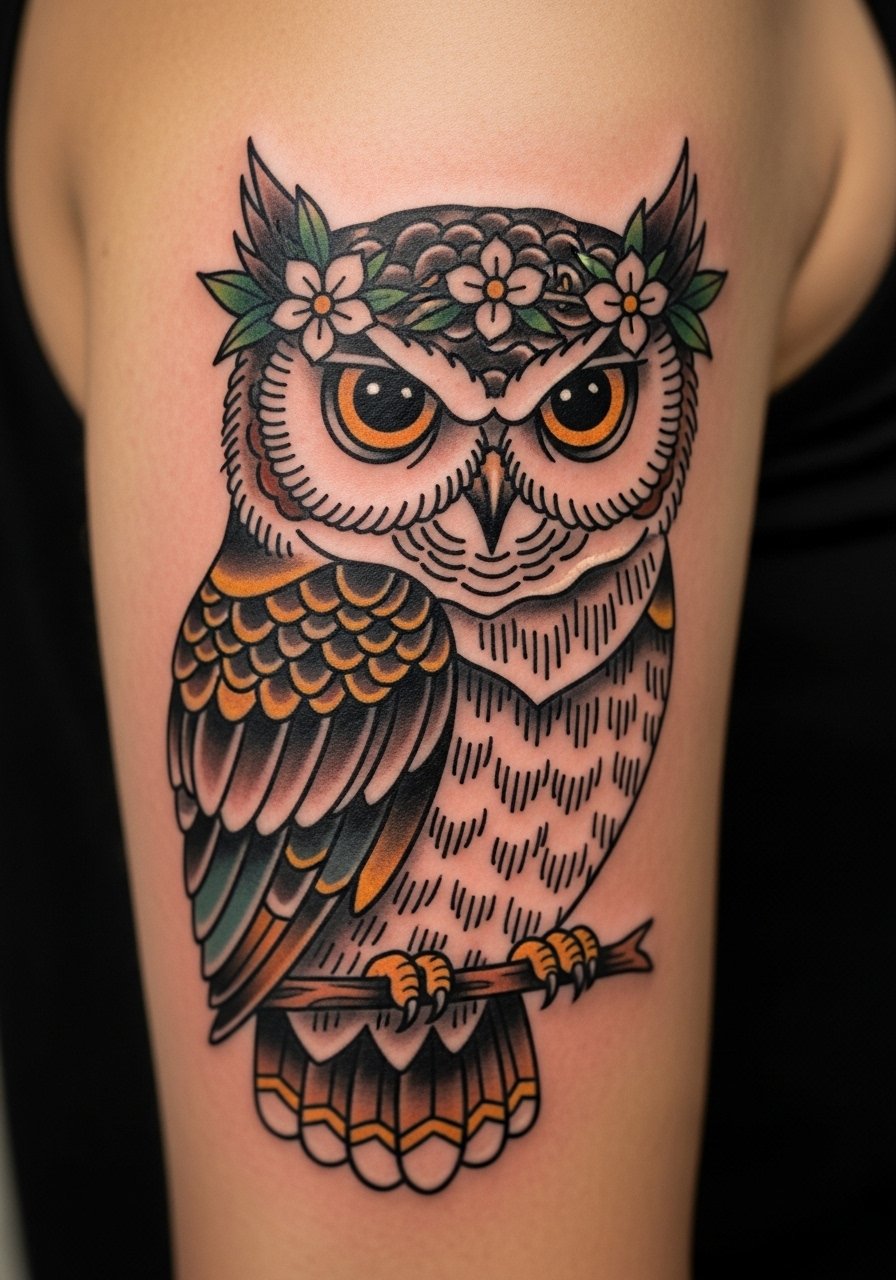
Owls carry wisdom and guardianship. Neo-traditional lets you mix realism with illustrative florals and saturated colors that still respect bold outlines. Upper arm placements are easy to hide if needed and heal well. I liked a palette that used muted jewel tones rather than extreme brightness so the owl kept presence as it aged. Avoid too many tiny petals — flowers look better with clear shapes. In my case, bold eye contrast in the owl kept the expression readable long-term.
26. Lynx Face on Forearm in Black & Grey
Style/Technique: Black & Grey Realism
Pain Level: Low-Medium (3–4/10)
Session Time: 1–2 sessions
Best For: Solitude, intuition, watchful identity
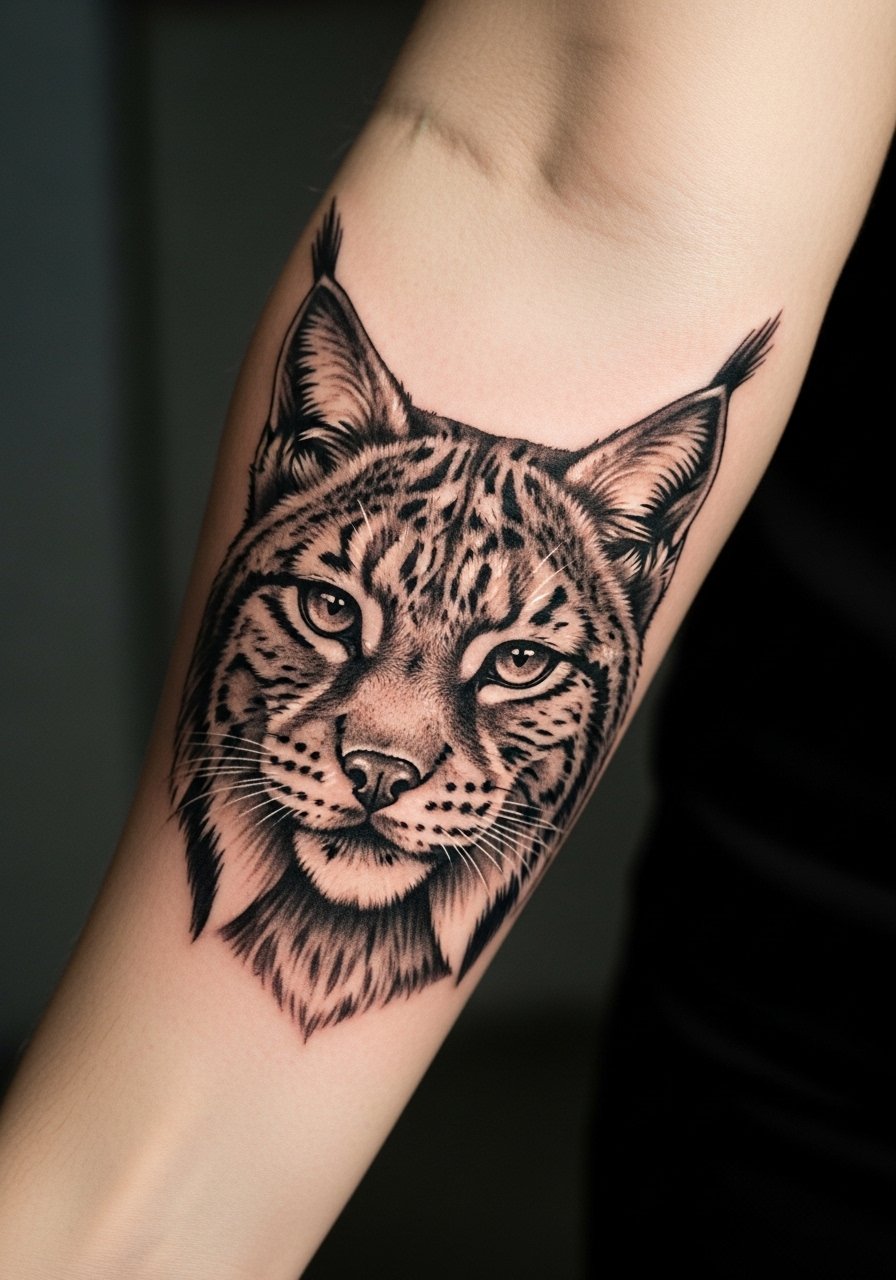
Lynx imagery feels watchful and private. Forearm placement makes it visible and easy to care for during healing. Black & grey realism shines here because the contrast in eyes and ear tufts creates a piercing focal point. Avoid over-detailing fur at tiny scales — let shading define form. I had my artist focus on the eyes and cheek contours while keeping the fur suggestion looser to preserve clarity as the piece matured.
27. Shark Jawline Around Calf
Style/Technique: Illustrative + Minimal Color
Pain Level: Medium (4/10)
Session Time: 1–2 hours
Best For: Tenacity, edge, ocean affinity
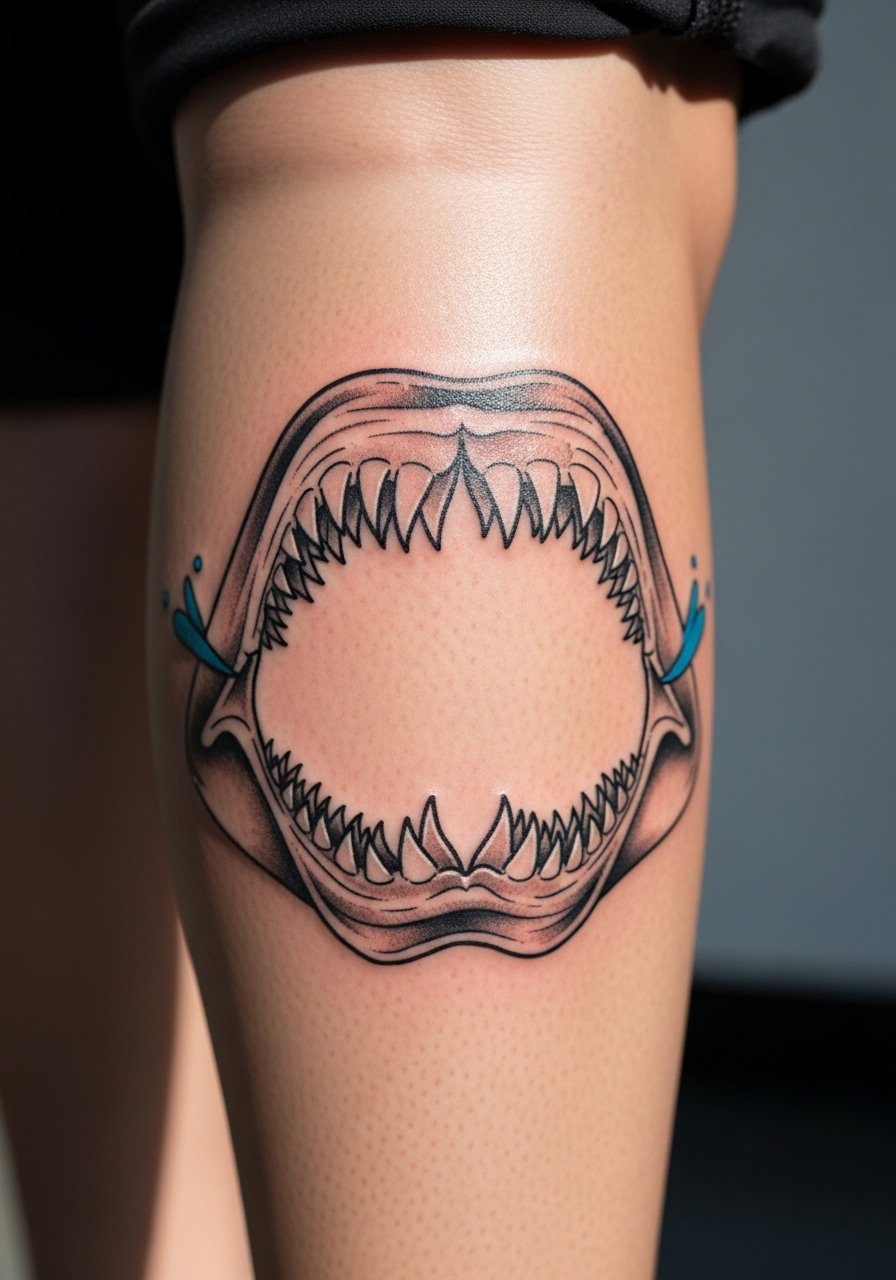
Shark tattoos read as tenacity and courage. A design wrapping the calf can create motion and show a menacing jawline without being gore-heavy. Calf placement heals well and tolerates more aggressive linework. I requested minimal color accents to avoid early fading of lighter hues. Ask your artist how they plan negative space to maintain the jawline’s shape as the calf flexes.
28. Monarch Butterfly Half-Sleeve Accent
Style/Technique: Color Realism + Fine Line Florals
Pain Level: Medium (4–5/10)
Session Time: Multiple sessions, 2–4 hours each
Best For: Transformation, vivid display, seasonal motifs
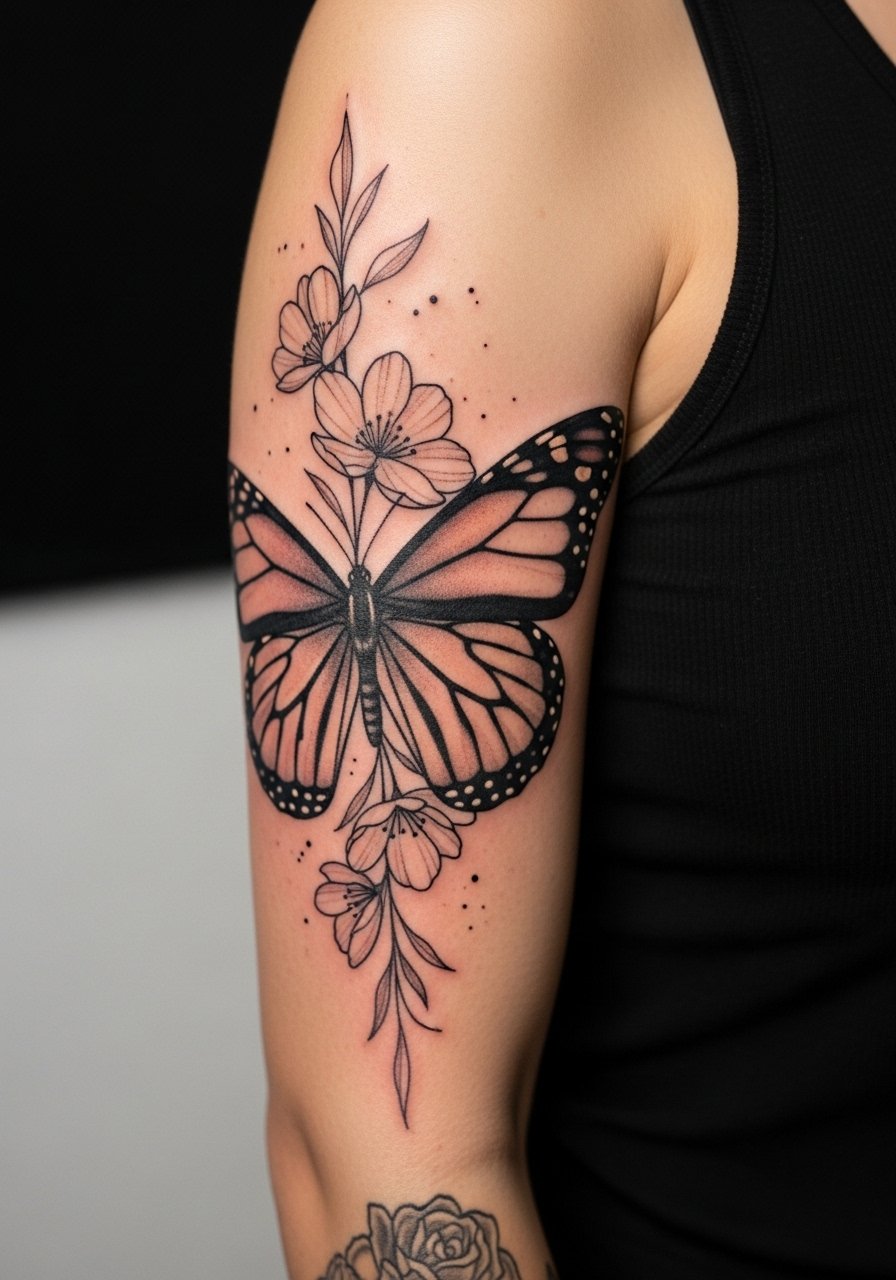
A monarch integrated into a larger half-sleeve gives you both focal symbolism and supporting botanical elements. Color contrast between orange wings and dark veins holds up if the artist balances saturation and shading. Half-sleeves take time but allow design breathing room so elements age consistently. From what I’ve seen, keep yellow accents moderate — they fade faster. I preferred a mix of color realism for the wings and fine-line florals so the sleeve feels layered and dimensional.
29. Chameleon on Thumb-Web (Between Thumb and Index)
Style/Technique: Micro-Realism + Tiny Color Gradients
Pain Level: High (6–8/10)
Session Time: 30–90 minutes
Best For: Adaptability, hidden-but-playful spots
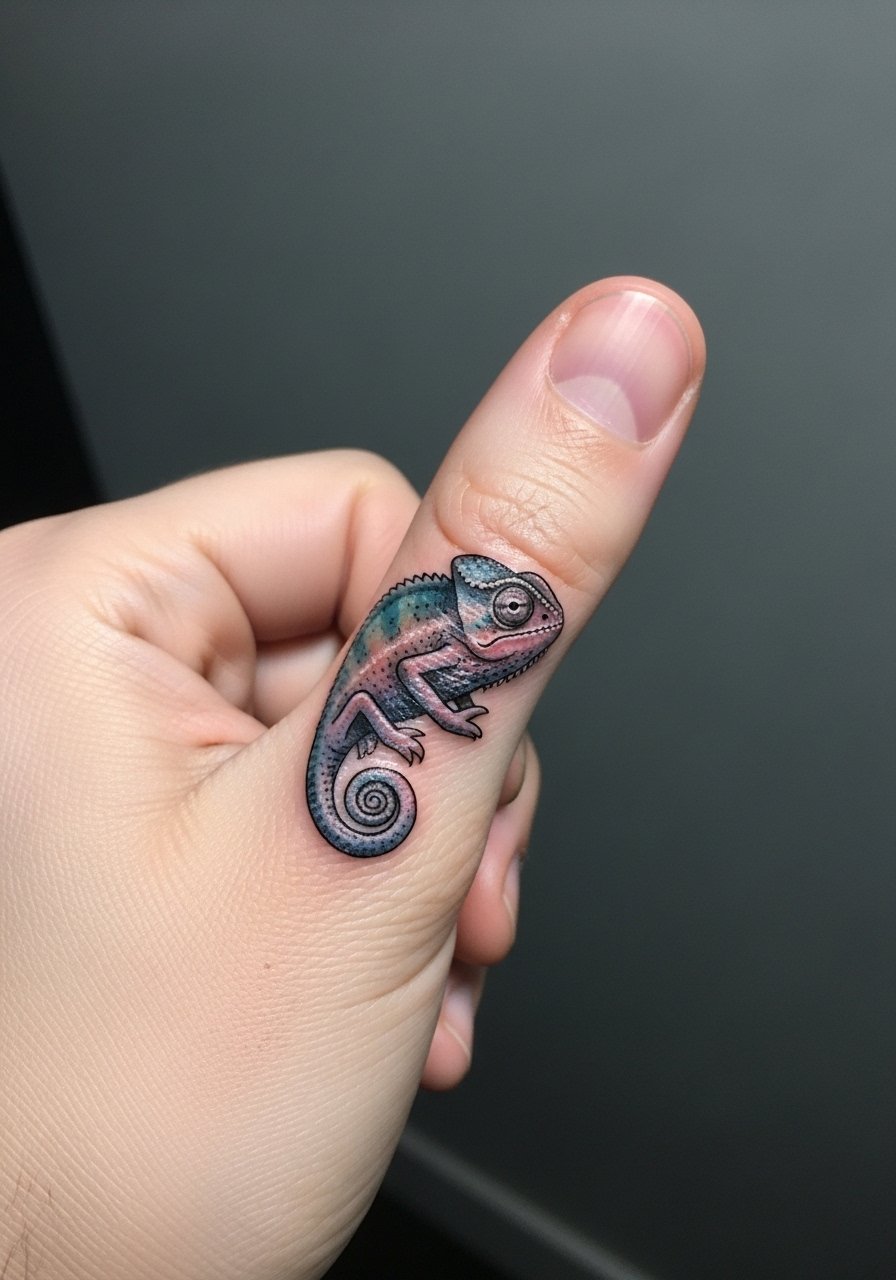
The thumb-web is a small, active area that rubs and washes a lot, but a chameleon there is a cheeky nod to adaptability. Pain can spike due to thin skin and nerve endings. Expect faster fading and possible touch-ups; choose bold lines and solid contrast over tiny texture. I kept mine colorful but simple, and planned for a refresh later. Artists often recommend avoiding white ink in these spots because it disappears quickly.
30. Phoenix Rising Over Sternum–Upper Chest
Style/Technique: Color Realism + Illustrative Flames
Pain Level: High (7/10)
Session Time: Multiple sessions across several months
Best For: Rebirth, overcoming, centerpiece storytelling
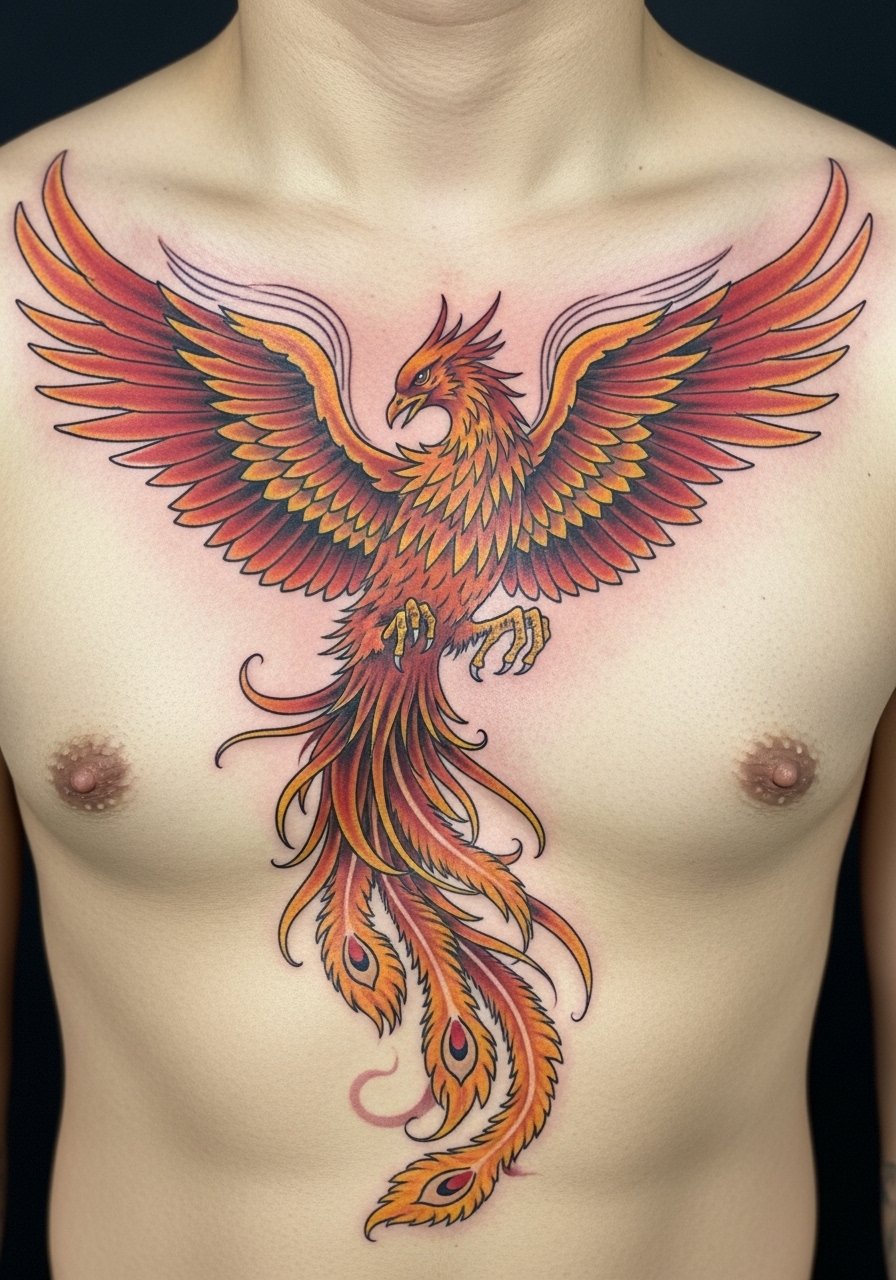
A phoenix is classic for personal rebirth and resilience. Placing it across sternum and upper chest creates a theatrical centerpiece. This is a painful area and requires staged sessions to build color depth without overwhelming your tolerance. Color placement and feather flow should follow chest contours so the wings lift naturally with breathing and posture. I prioritized bold contrast in the core of the phoenix (eyes, beak, chest) so the central motif stayed crisp over time, while wing feathers softened into the skin gracefully.
Tattoo Prep and Aftercare Essentials
Aftercare Essentials:
- Aquaphor Healing Ointment, 14oz tube — Great for the initial ointment stage after washing.
- Saniderm Transparent Adhesive Bandage, 6-inch roll — Second-skin option many artists recommend for the first 24–72 hours.
- CeraVe Fragrance-Free Moisturizing Lotion, 12 oz — Gentle daily moisturizer for the mid-healing phase.
- Dr. Bronner's Unscented Castile Soap, 32 oz — Mild soap for gentle cleaning.
Before Your Appointment:
- Tattoo Numbing Cream with 5% Lidocaine — Use only after checking with your artist; can help with sensitive spots.
- Inkjet Tattoo Stencil Transfer Paper, 8.5×11 — Useful if you or your artist needs a clear stencil.
Long-Term Maintenance:
- SPF 50+ Sunscreen Stick for Tattoos — Daily sun protection preserves color and contrast.
- Mad Rabbit Tattoo Balm, 2 oz — Popular for ongoing moisturization and color maintenance.
- Hustle Butter Deluxe, 2.5 oz — Vegan alternative for long-term skin care.
Optional Comfort Items:
- Hydrocolloid Bandages, Pack — Handy for covering small spots or blisters during healing.
- Cooling Numbing Spray — For touch-ups or very sensitive areas; check artist approval first.
Frequently Asked Questions
Q: How bad does a tattoo actually hurt?
A: Pain depends on placement and your tolerance. Outer forearm/upper arm = lower pain for most people; ribs/sternum/spine = high pain. From my experience, it’s more a constant scratching or burning in high-pain zones than sharp unbearable pain. For sensitive areas, ask about a lidocaine numbing cream but check with your artist first.
Q: How long does a tattoo take to heal?
A: Surface healing is usually 2–3 weeks; full healing can take 2–3 months. The first week matters most — keep it clean, use a thin layer of ointment the artist recommends, and avoid soaking. Expect peeling around days 3–7; don’t pick.
Q: Will my tattoo fade or blur?
A: Yes, all tattoos change with time. Black & grey and bold American-traditional styles generally age more predictably, while very fine single-needle lines and pale watercolor-like fills can blur or fade faster. From what I’ve seen, consistent sunscreen (like an SPF 50 stick) and moisturizing keep ink vibrant longest.
Q: Can I get a small tattoo to test pain tolerance?
A: You can, but choose something you actually want. A tiny wrist or ankle tattoo can hurt more than a larger piece on the outer arm depending on location. If you’re nervous, pick a low-pain spot (outer upper arm, thigh) for your first test.
Q: How should I prepare the day of my appointment?
A: Eat a good meal, stay hydrated, get rest, and wear comfortable clothing that exposes the area easily. Avoid alcohol for 24 hours beforehand. Bring snacks and a playlist for longer sessions.
Q: How can I reduce the need for touch-ups later?
A: From experience, pick an appropriate style for the placement (bold lines for hands, slightly thicker lines for fingers), follow aftercare closely, and use daily sunscreen on exposed pieces. Save very pale color fills for areas that don’t get heavy sun or washing.
Q: Do tattoos look different on different skin tones?
A: Yes. Darker skin tones often render black & grey exceptionally well; bright pale colors can appear muted. I always ask artists for healed examples on similar skin tones — that’s the best guide.
Q: When is it okay to exercise after getting inked?
A: Wait at least 48–72 hours for light movement, longer if the tattoo is in a high-friction or flex area. Heavy sweating can irritate a fresh tattoo and increase infection risk. If in doubt, give it a week before returning to intense workouts.
