
I spent months bookmarking abstract tattoos and asking artists how certain designs actually age on skin. I realized people obsess over the image but forget how placement and line weight change everything. These 30 ideas mix trends I keep seeing in 2026 with a few angles most lists ignore, and I wrote them from real sessions and conversations with artists.
This list focuses on abstract tattoos that lean fine line, blackwork, micro-realism, geometric, and watercolor vibes. I picked placements that actually wear well over time. From what I've seen, minimalist abstract pieces and bold black shapes are trending this year, and I kept an eye on which designs blurred after a few years.
1. Fine Line Abstract Forearm Composition
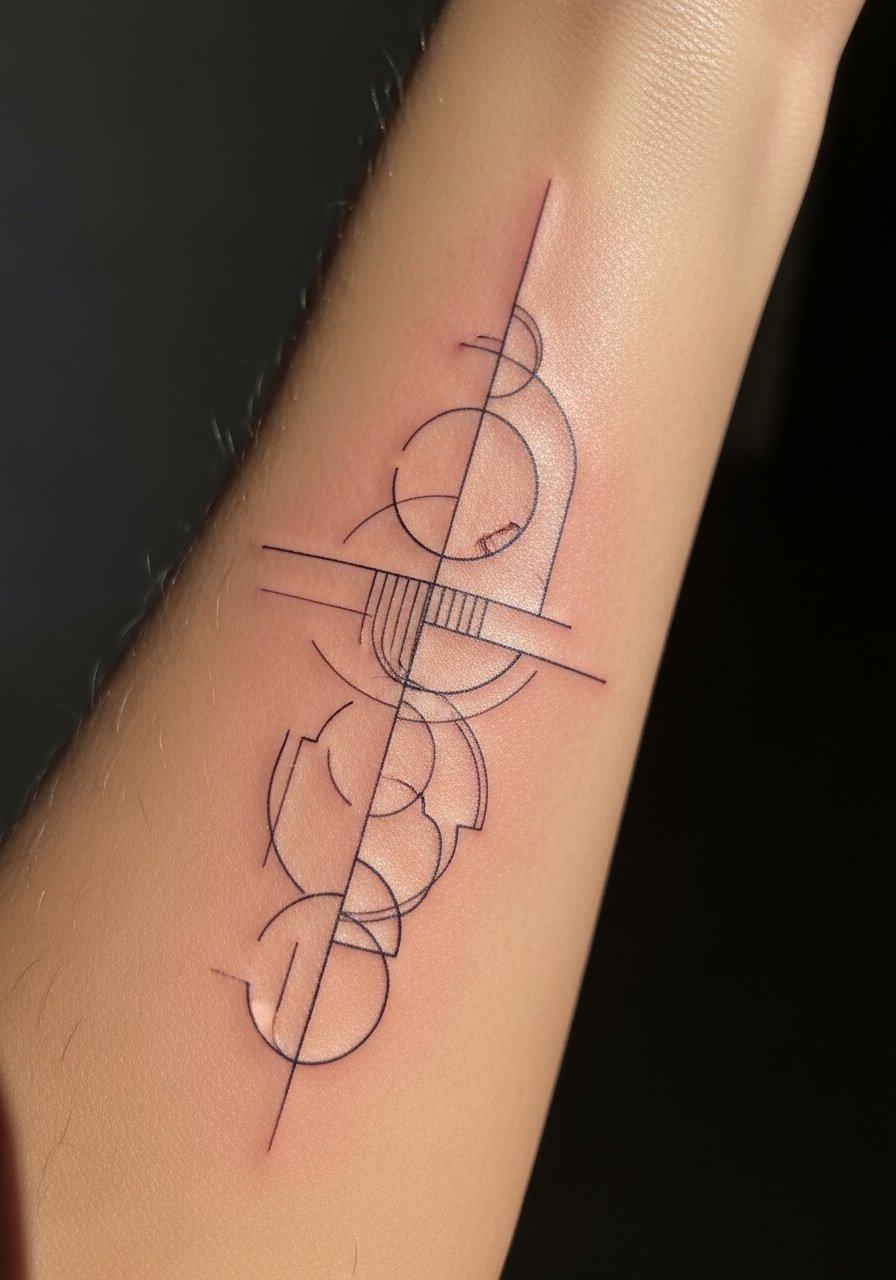
I first saw this on a friend's forearm and loved how the thin lines read like handwriting. For a forearm piece, expect mild to moderate pain. A single 60 to 90 minute session often does it. When you talk to your artist, ask for slightly heavier line weight than you think you want. From what I've seen, ultra-delicate lines merge after two years on active skin. The mistake I see is asking for tiny details that have no breathing room. If you want longevity, pick simple interlocking forms and place them along muscle lines. This style works if you want something readable at arm distance, unlike micro-realism which needs larger canvases.
2. Blackwork Geometric Shoulder Cap
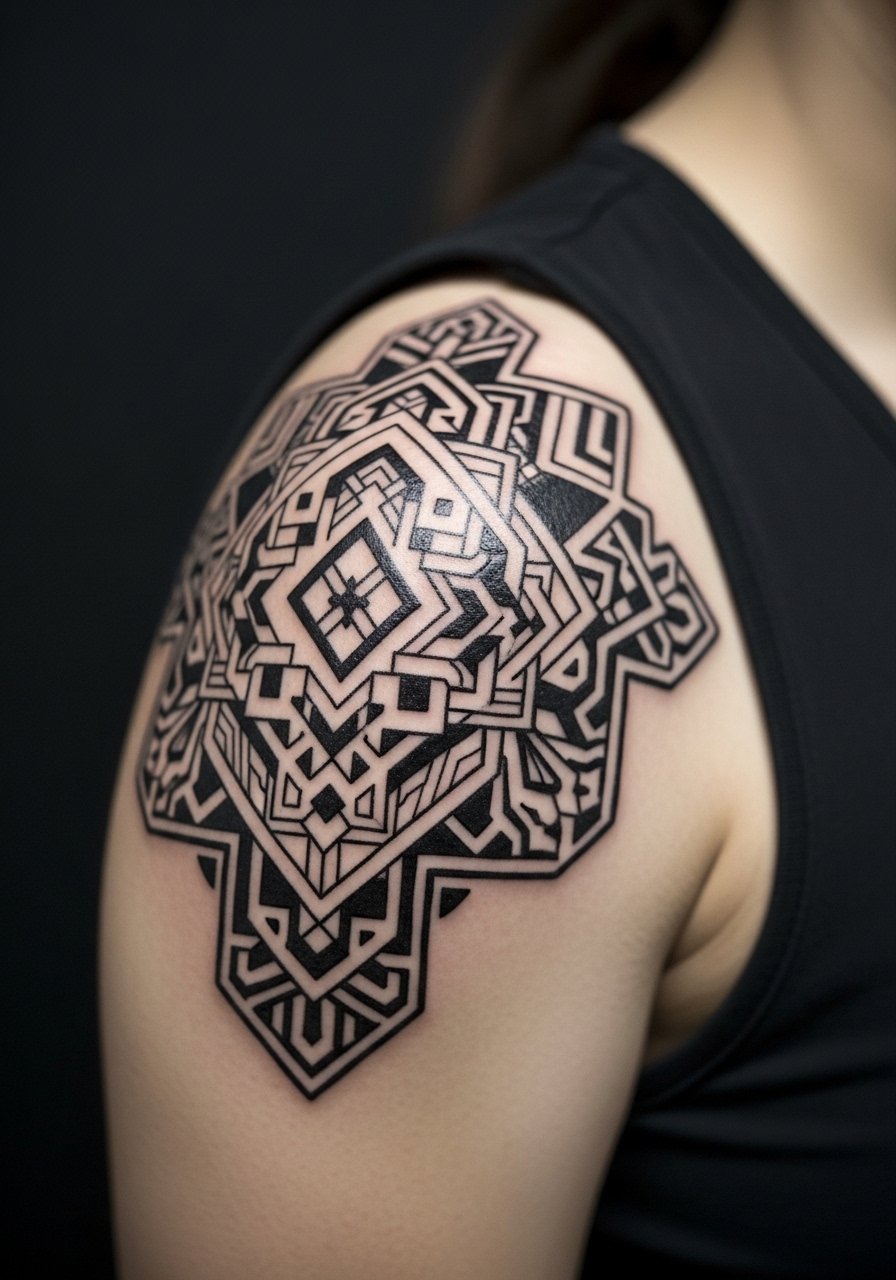
Fair warning, the shoulder can sting but it is forgiving for bold blackwork. I recommend a session of 2 to 3 hours for a compact geometric cap. Tell your artist you want solid fills that contrast with negative space. From my experience, solid black holds remarkably well while thin geometric connections thin out over time. A common mistake is cramming too many tiny polygons into a small space. For a shoulder cap, scale up shapes so they carry when healed. If you want an arm extension later, save a margin for flow.
3. Watercolor Abstract Ribs Splash
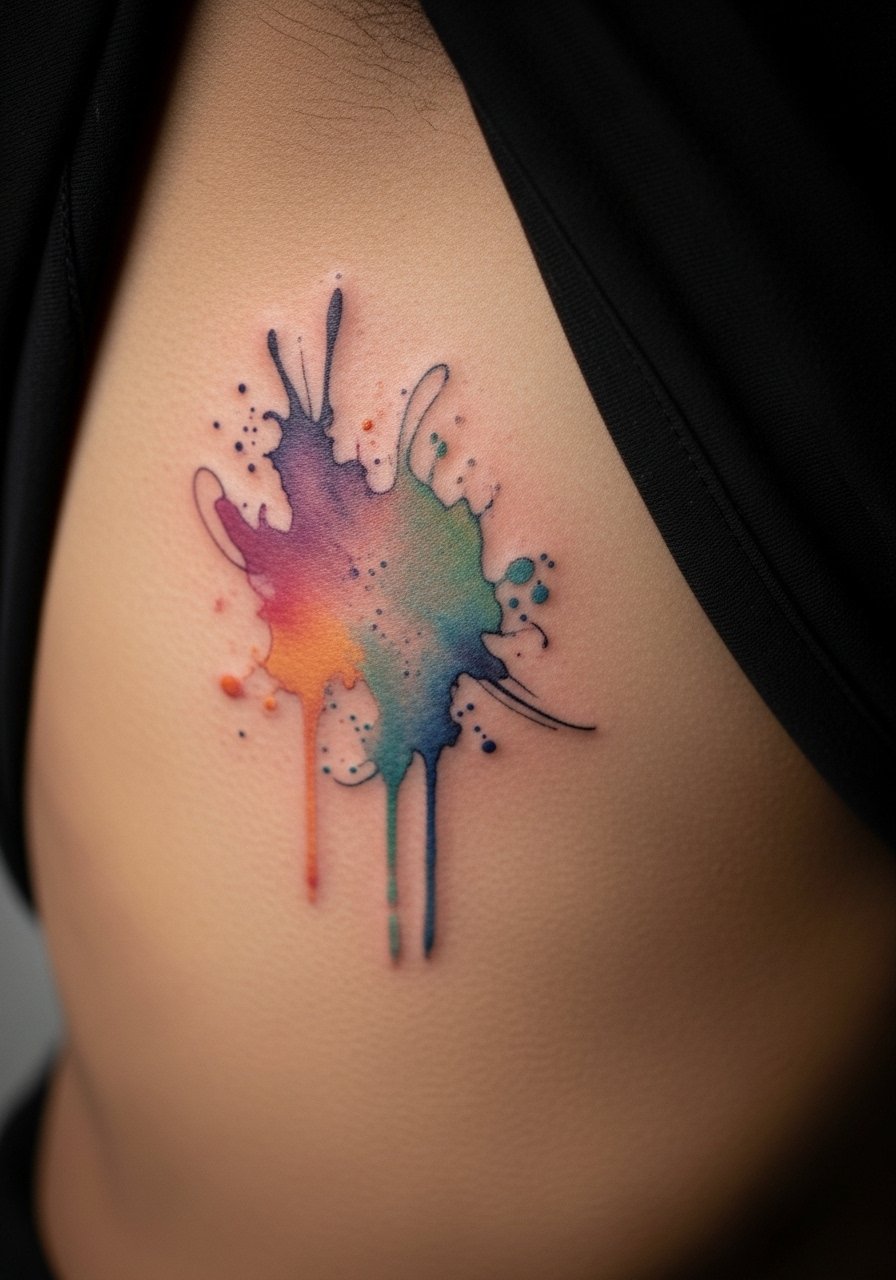
Fair warning: the ribcage is higher pain territory. I got a piece there and it felt like a long session. Watercolor abstractions can look amazing fresh. From what I've seen, they fade into soft clouds at six months unless colors are placed densely. Ask your artist for saturated layering and to keep outlines minimal. The common aging mistake is relying on tiny watercolor dots. Those blur. For better longevity, pair the washes with subtle anchor lines or black dots that keep the composition together as it heals. Expect two sessions for depth.
4. Minimalist Line Art Ankle Band
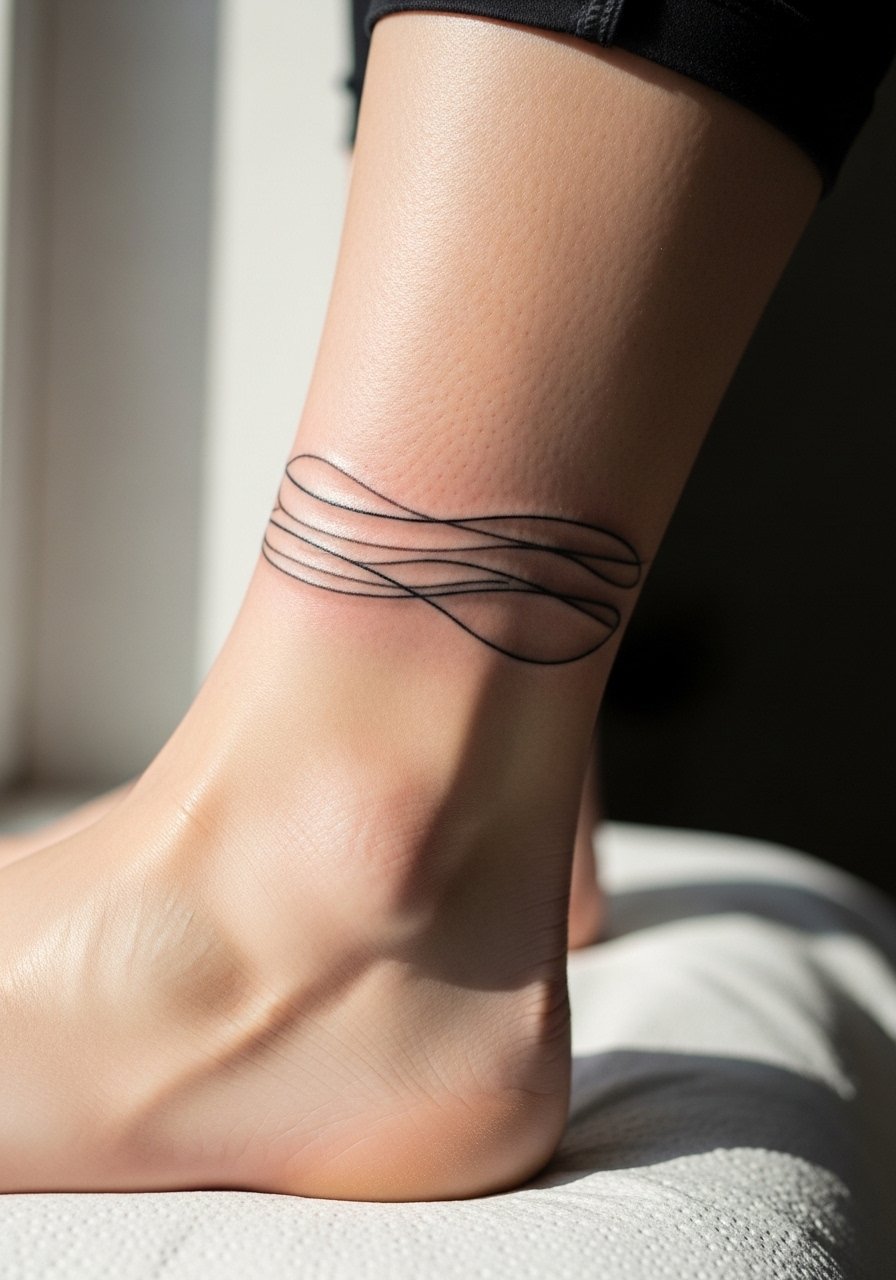
I noticed ankles need design breathing room. The skin wraps and moves a lot. Pain is sharp but brief for an ankle band. If you want this on your ankle, ask for single pass lines with space between loops. Artists I spoke with say tiny repeating details will feather. A typical session is 30 to 60 minutes. One mistake is placing small elements on a bone area that will fade faster. If you want a version for the calf, scale up the loops and add negative space to avoid muddiness.
5. Micro-Realism Abstract Portrait Fragment on Upper Arm
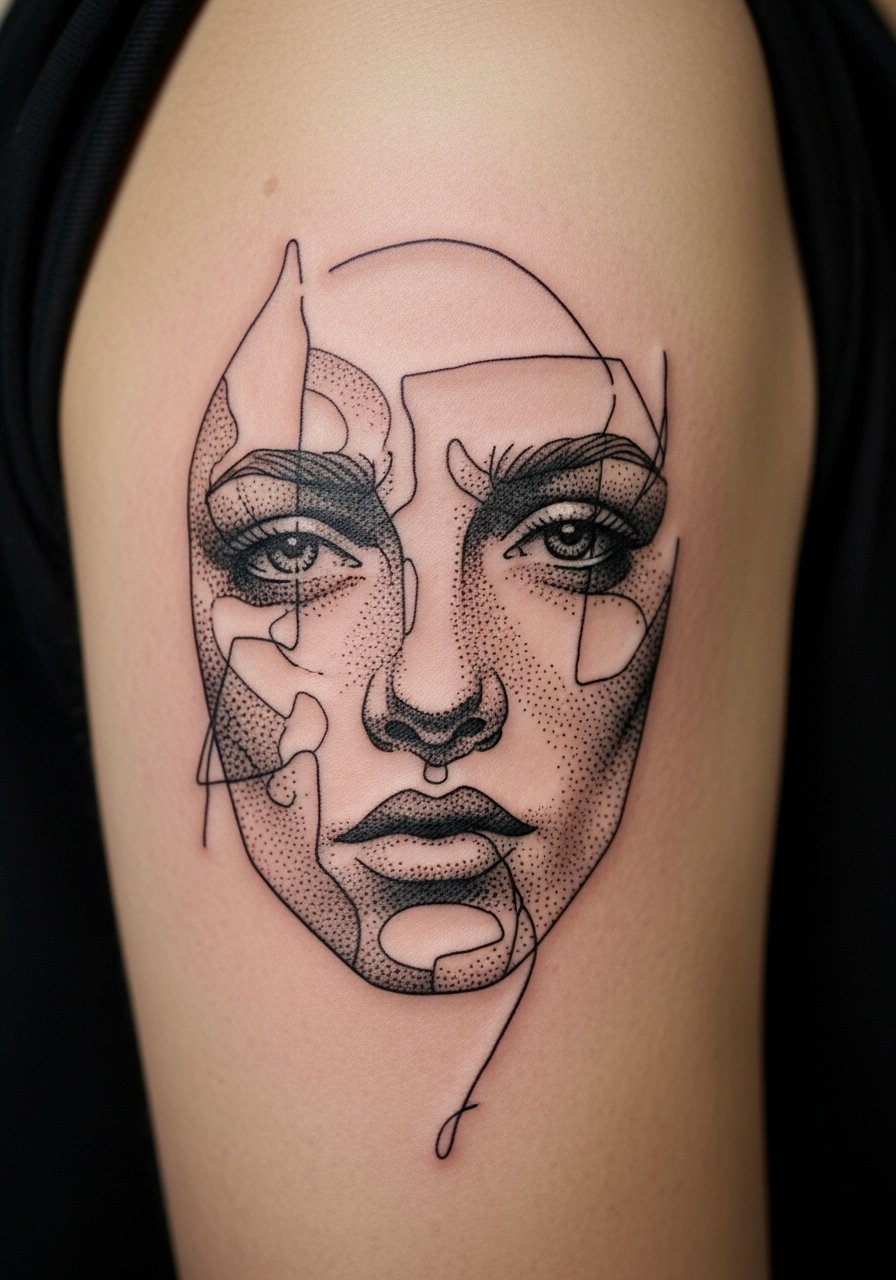
I saw this style in a gallery and it stuck with me because it reads like memory, not a photo. Upper arm placement keeps it low pain and easy to hide. Sessions run 2 to 4 hours depending on detail. Tell your artist to focus on contrast over tiny detail. From what I've gathered, overly fine shading loses clarity after about two years. A frequent mistake is asking for photo-level detail at a small scale. If you want a sleeve later, place the portrait fragment off-center so it can be integrated.
6. Blackwork Negative Space Chest Panel
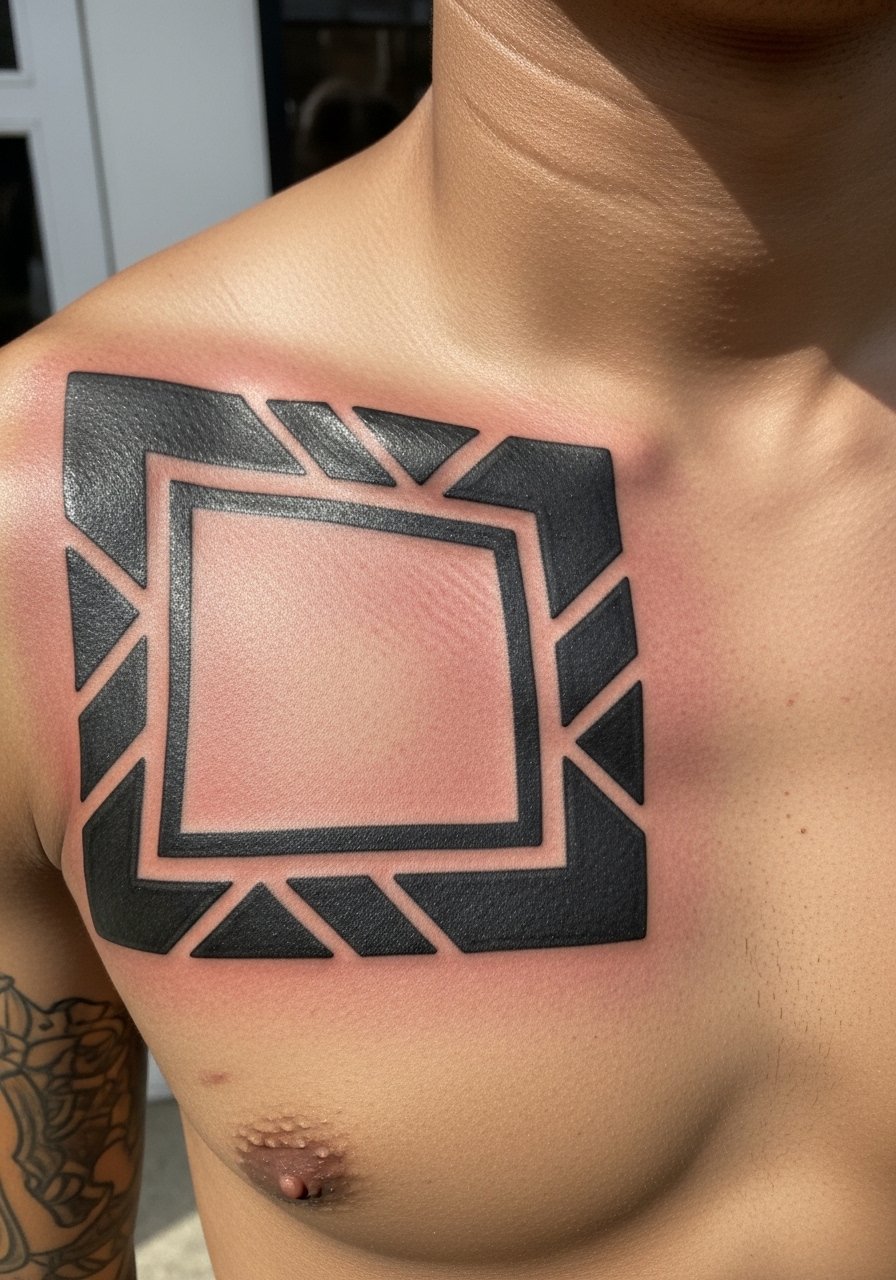
I prefer chest panels for bold negative space work because the flat surface keeps edges sharp. Pain ranges from moderate to high depending on proximity to the sternum. An initial 3 hour block usually gets you most of the black. Artists I talk to recommend leaving deliberate gaps so the skin reads as part of the composition. The mistake I see is filling everything in, which leaves no texture as it ages. After a year, black will soften at edges. Plan touch-ups for the first two years to maintain the crisp contrast.
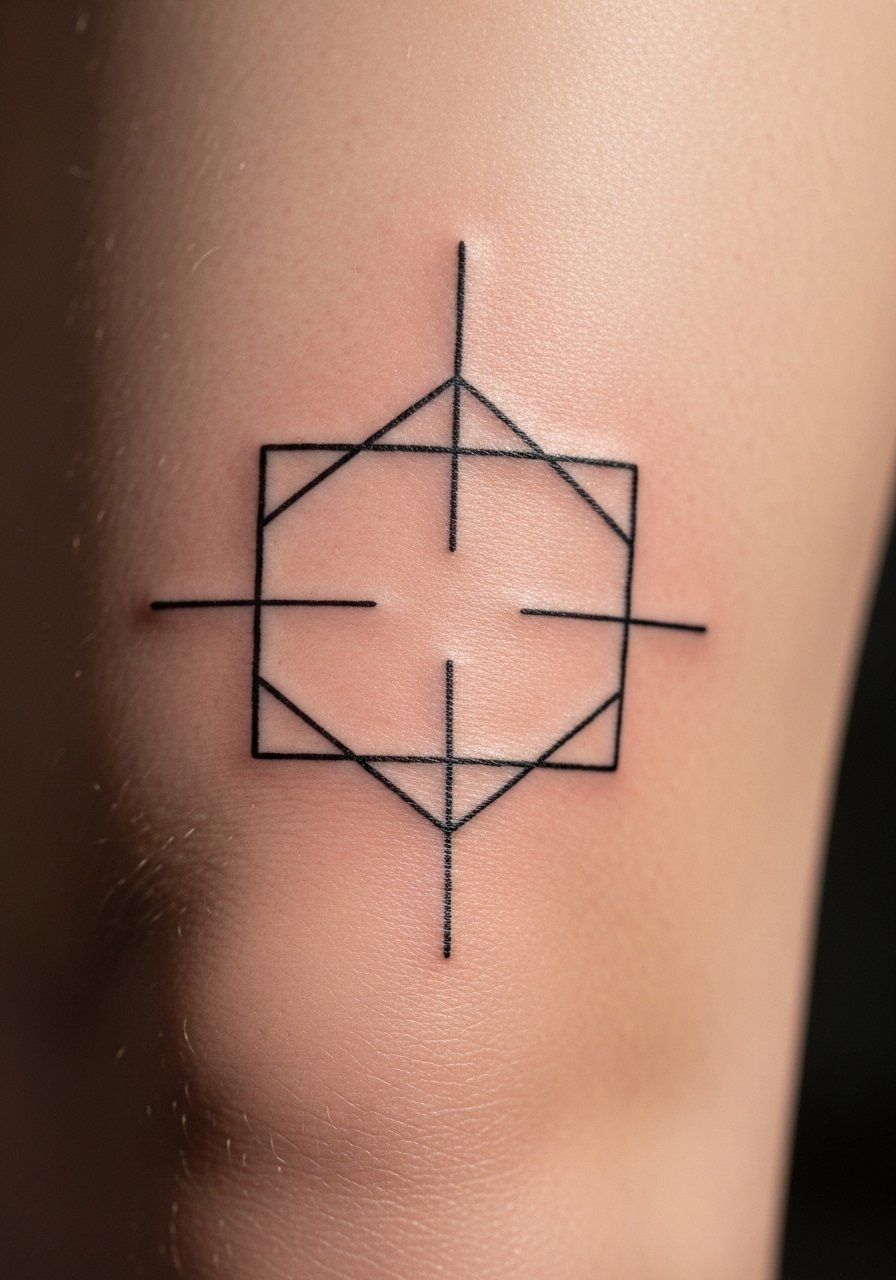
7. Geometric Abstract Thigh Map with Lines
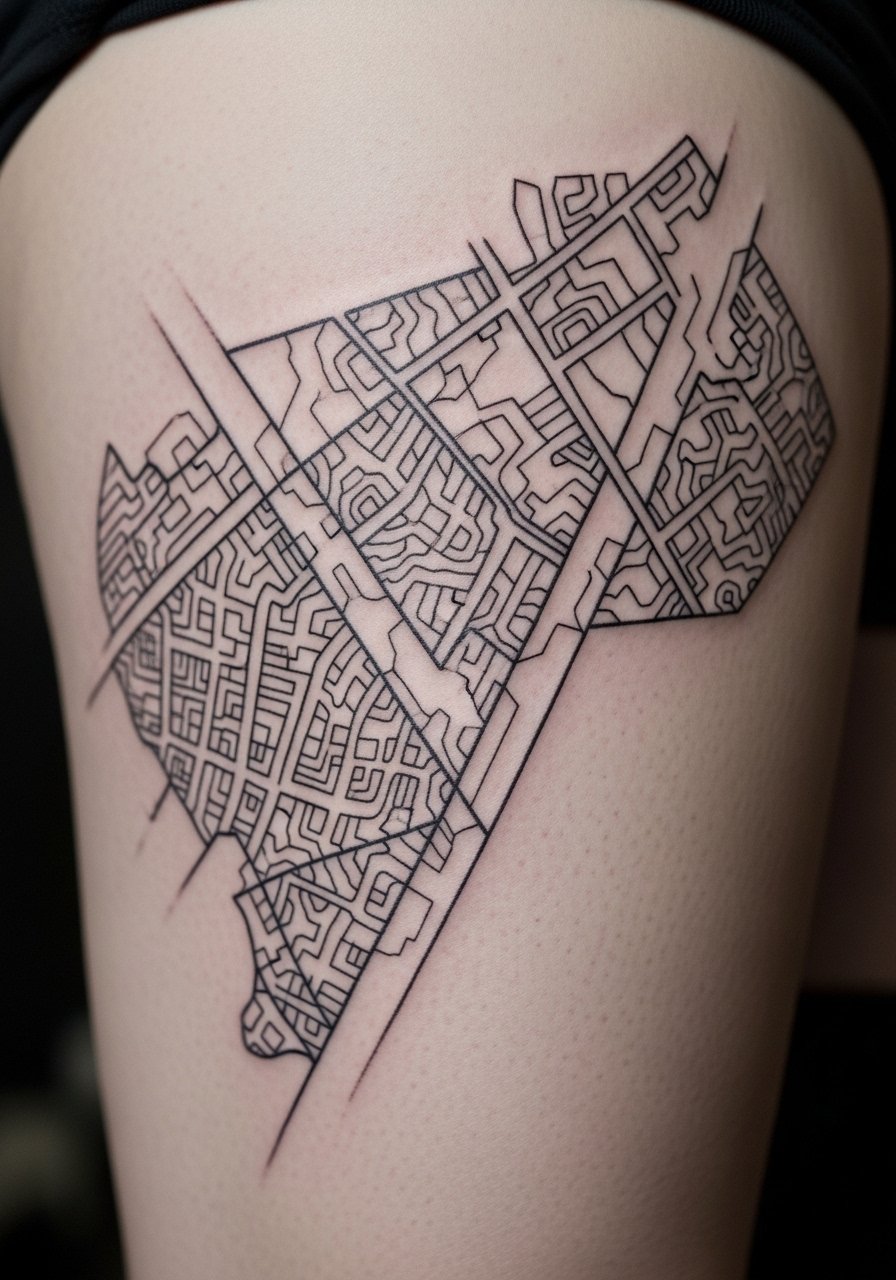
The thigh is forgiving for complex geometry. I tell clients the pain is low and sessions can be long. A 2 to 3 hour session handles intricate intersecting lines. During consultation say you want bold main anchors and finer connective lines. From what I've seen, small parallel lines merge after 18 months if too dense. A common oversight is putting micro detail where the skin flexes. For thigh versions, keep center shapes larger and let the leg muscles dictate flow. Consider a follow-up session for crisping after a year. Saniderm link below can help initial healing.
8. Brushstroke Blackwork Back Piece
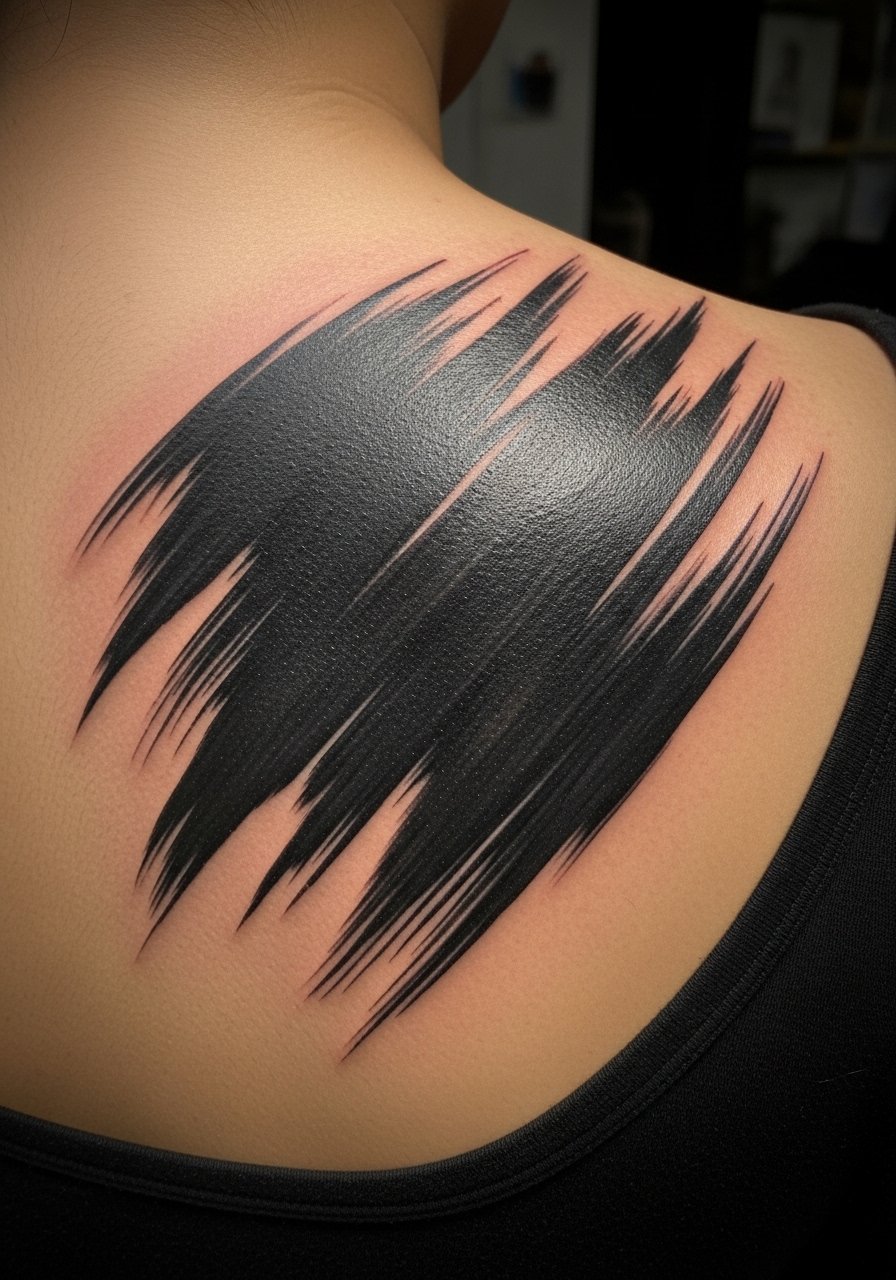
I remember a back piece like this at a convention. The look mimics a painted canvas. Back placement allows large sweeping strokes. Pain varies and you can break it into sessions. Tell your artist you want visible texture in the strokes, not flat filler. From what I've seen, textured fills age more gracefully than tiny dots. A common mistake is over-detailing small areas. If you plan a full back, sequence strokes to leave negative corridors. Healing time for a big blackwork piece is several weeks for scabbing, and touch-ups help keep brush texture alive.
9. Abstract Color Block Calf Panel
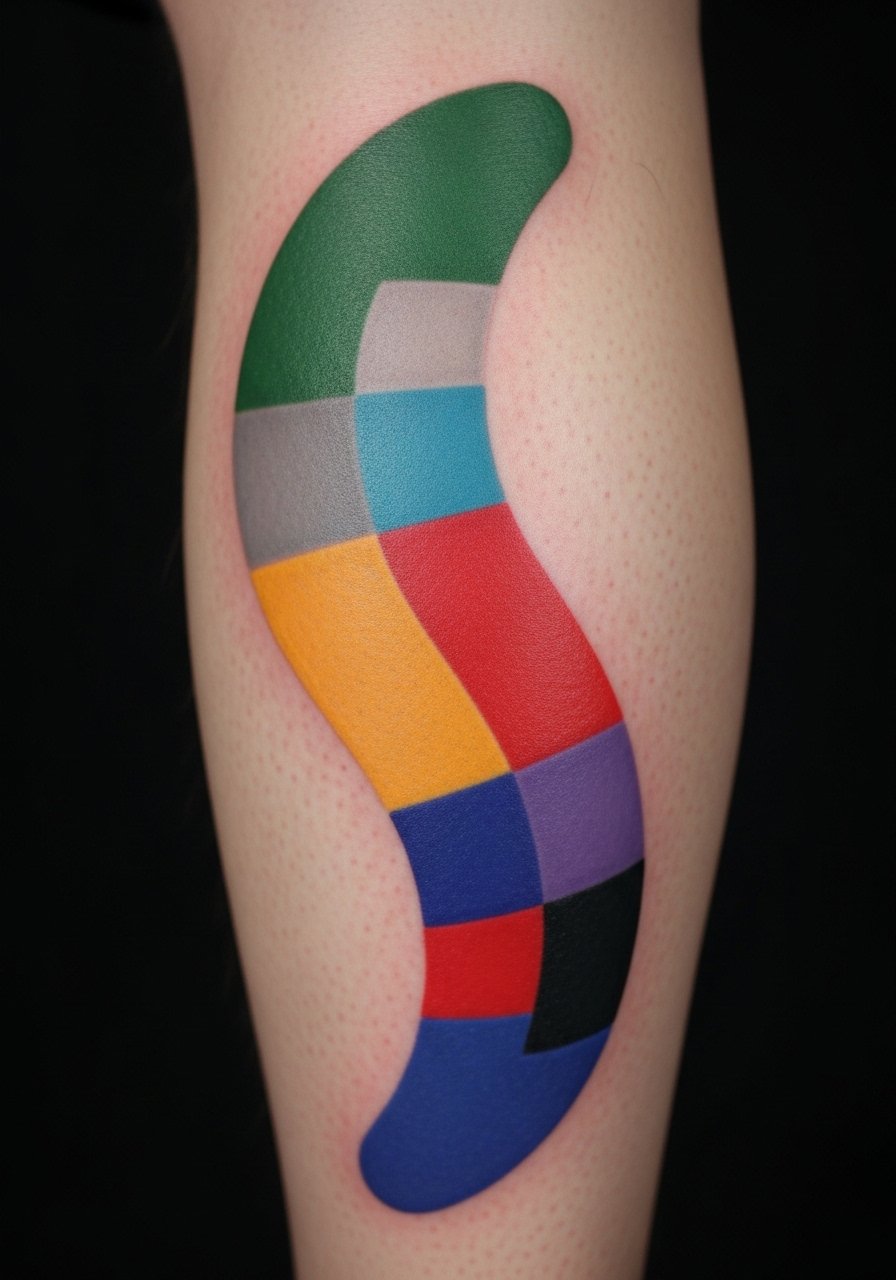
There's something about color blocks that reads graphic at a distance. I recommend calf placement for color because it's less exposed to sun. Pain is mild to moderate. Talk to your artist about solid color packing and edge blending. From what I've seen, patchy color packing is the main culprit in early fading. A good artist will layer pigment and allow for a second session if needed. People often pick too many small color areas in a tiny composition. For calf panels, keep shapes larger so they age evenly.
10. Tiny Surrealist Behind-Ear Symbol
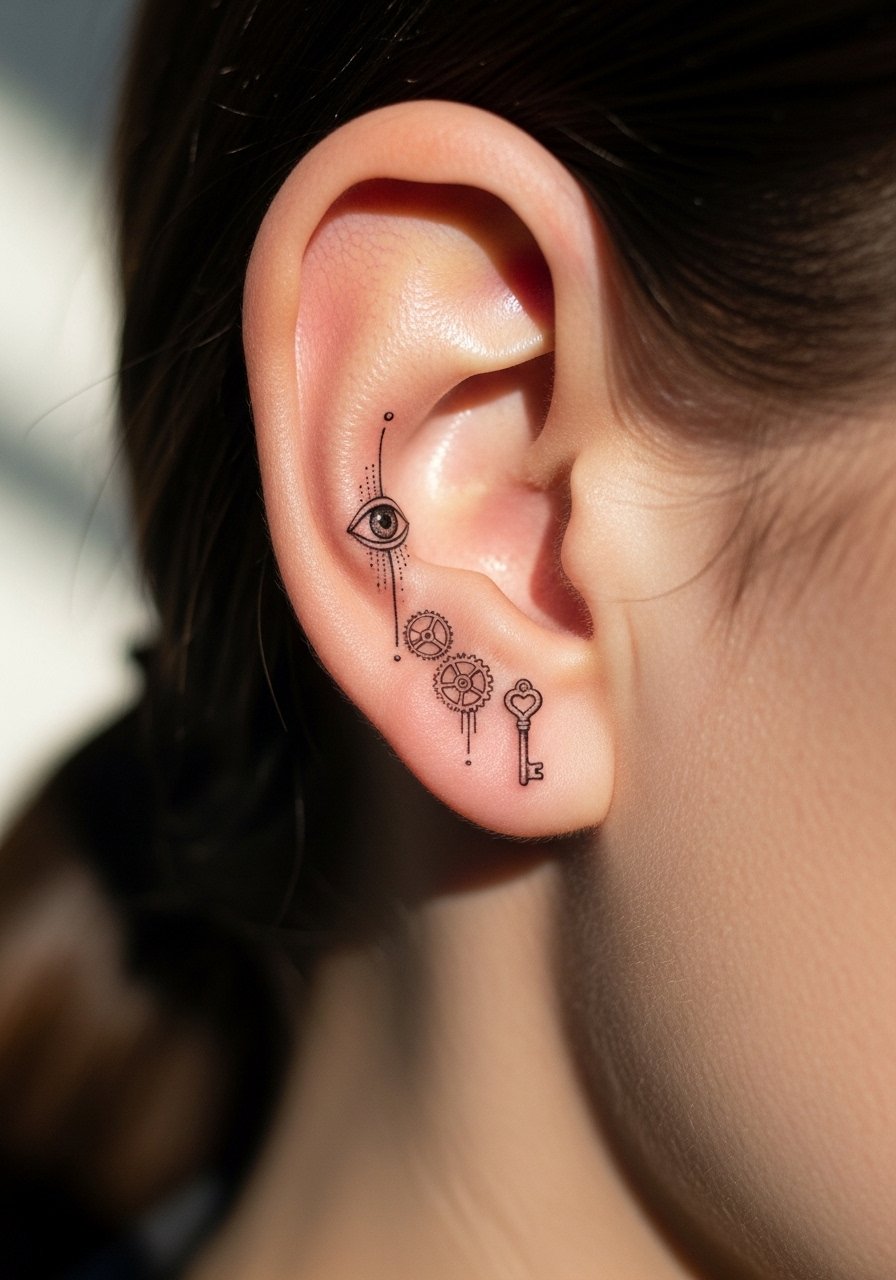
I picked up a behind-ear abstract symbol on a whim. The pain is sharp but very brief. Sessions are quick, often 15 to 30 minutes. Tell your artist you want strong outline anchors because small interior details fade faster. From what I've observed, behind-ear work blurs if artists use hairline strokes. A mistake I see is requesting micro shading there. If you want a small surrealist mark, keep it bold and simple. Touch-ups are common after a year for tiny placements.
11. Split-Face Abstract Neck Panel
Neck tattoos are more exposed, so plan for sun care. When I designed mine, I expected a higher pain level. Sessions run 60 to 120 minutes. Ask your artist to use stronger contrast and avoid tiny cross-hatching. From what I've seen, soft gradients on the neck bleed into a clouded look after two years. The mistake is trying to replicate a full facial portrait at that scale. If you want a version that integrates into hairlines, put bolder lines toward the jaw and softer tones near the collar.
12. Abstract Dotwork Inner Forearm Symbol

I gravitate toward dotwork for inner forearms. It feels tactile and meditative. Pain is low to moderate there. A two hour session usually sets the main pattern. Tell your artist you want clear spacing between dot fields. From what I've noticed, high-density dotwork can look muddy after two years. People also ask for micro dots too close together. A better approach is to vary density and leave negative space to preserve clarity. For visibility, place the densest areas where the skin stretches least.
13. Architectural Linework Ribcage Panel
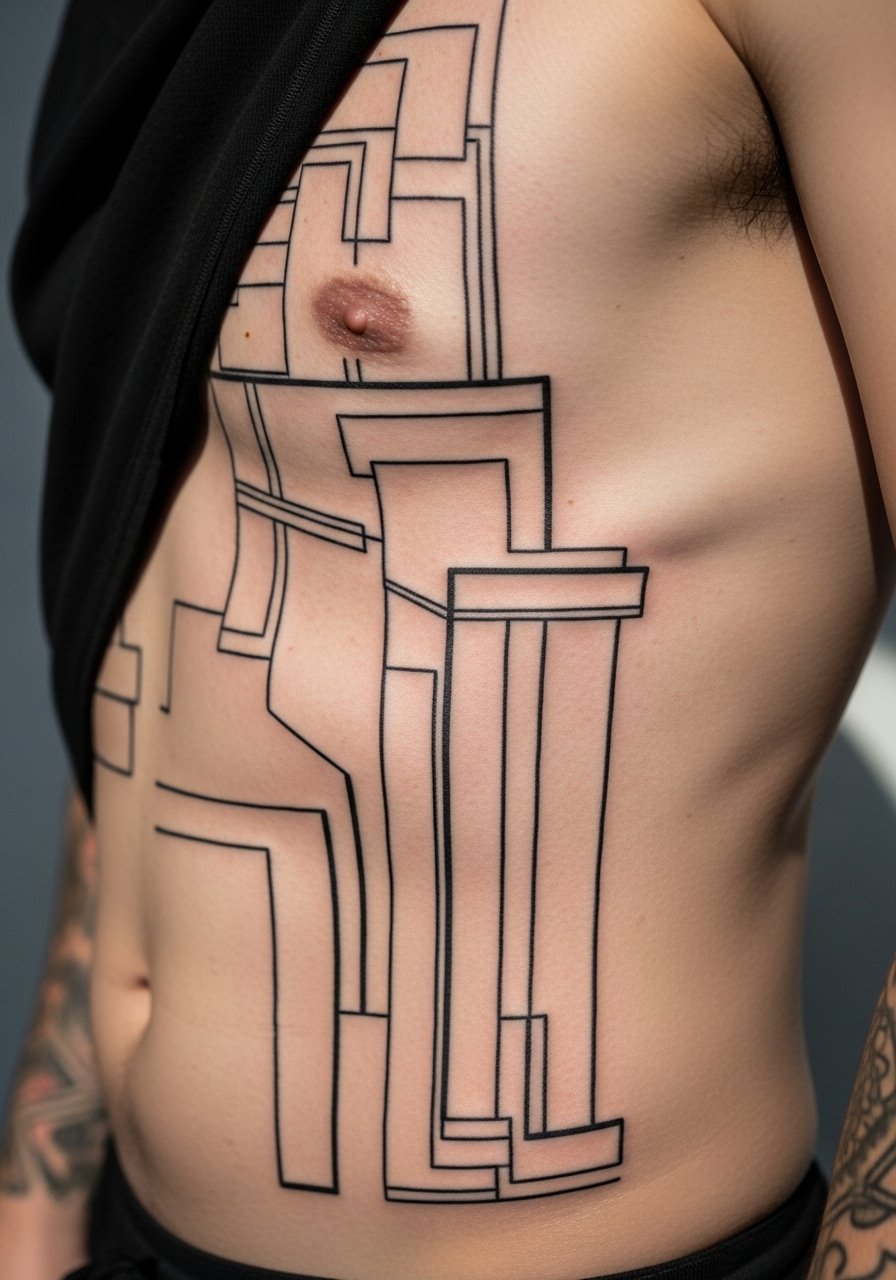
I sketched one of these after visiting modern architecture shows. The lines mimic plans. Expect ribcage pain and several sessions for length. In consultation, bring reference photos of precise line weight. From my experience, straight, thin lines on the ribs can drift over time if they are too fine. A common error is asking for identical line weight throughout. Have the artist emphasize primary structural lines and soften secondary connectors. If you move it to the sternum, anticipate more touch-ups.
14. Glitch Art Abstract Upper Thigh
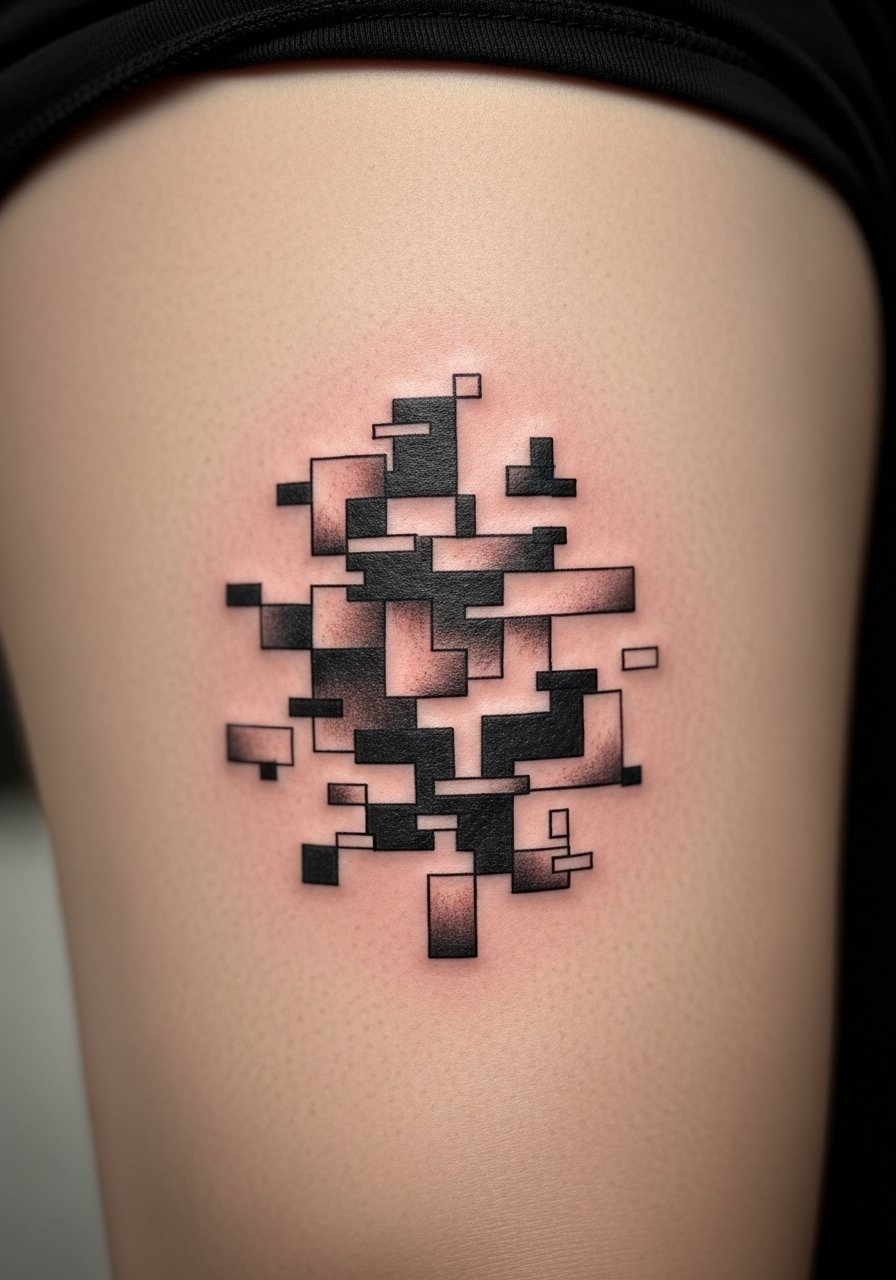
I first saw glitch tattoos online and wanted to try the broken aesthetic. The thigh handles experimental layouts well. Pain is mild. Sessions vary based on color patches. In my experience, blocky glitch elements age fine if edges are not hairline thin. Artists often warn against tiny pixel details. If you want the effect to remain crisp, ask for slightly oversized "pixels" and anchor shapes with small black bars. This keeps the composition readable after a year.
15. Surreal Minimalist Collarbone Thread
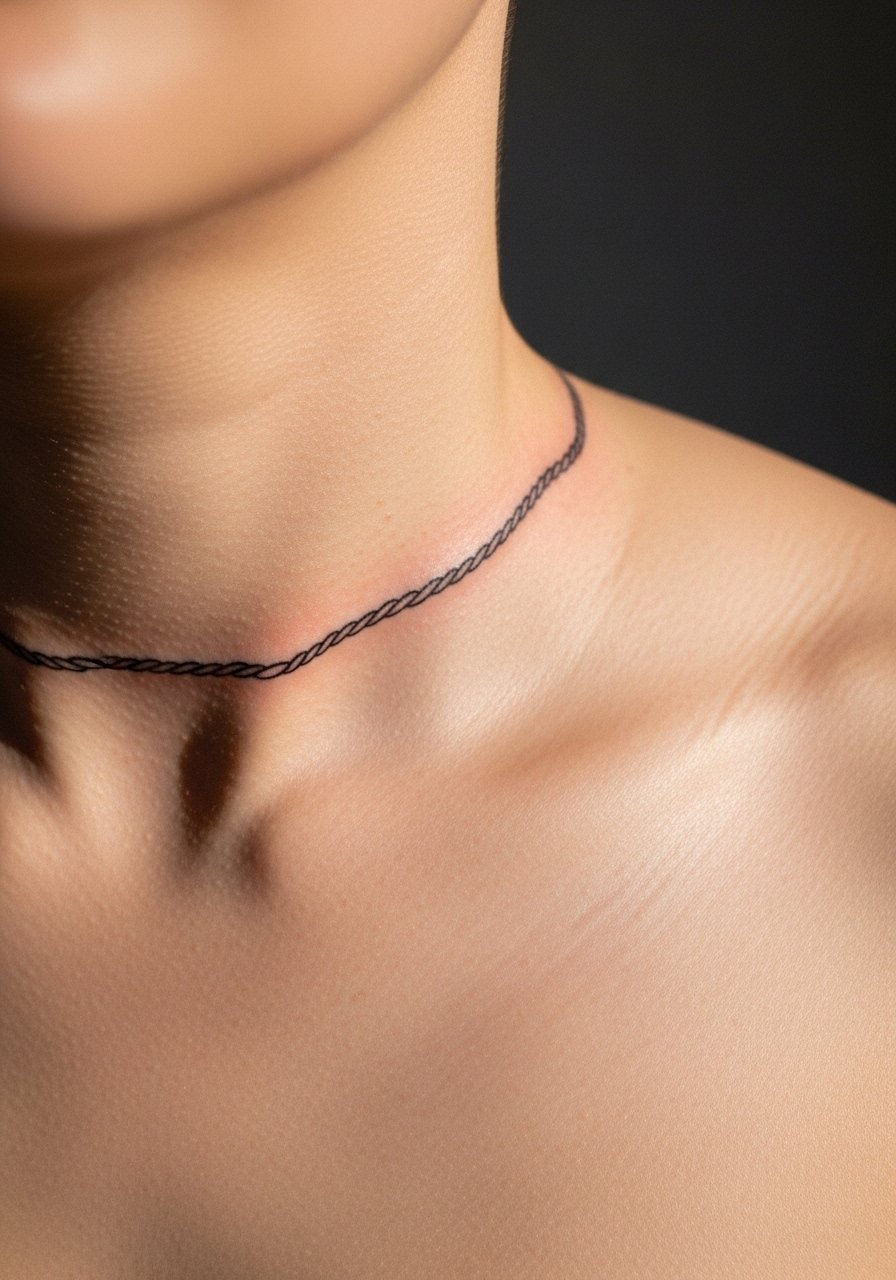
I noticed collarbone threads in gallery shots and tried one. Pain on the collarbone can spike when crossing bone. Keep sessions short. Request a continuous flow line with occasional thicker points. From what I've seen, ultra-thin single threads vanish faster than thicker accents. People make the mistake of adding too many tiny offshoots. For durable results, map the thread to collarbone curvature and reserve space for breathing. If you plan chest work later, integrate thicker nodes to tie pieces together.
16. Abstract Floral Blackwork Wrist Cluster
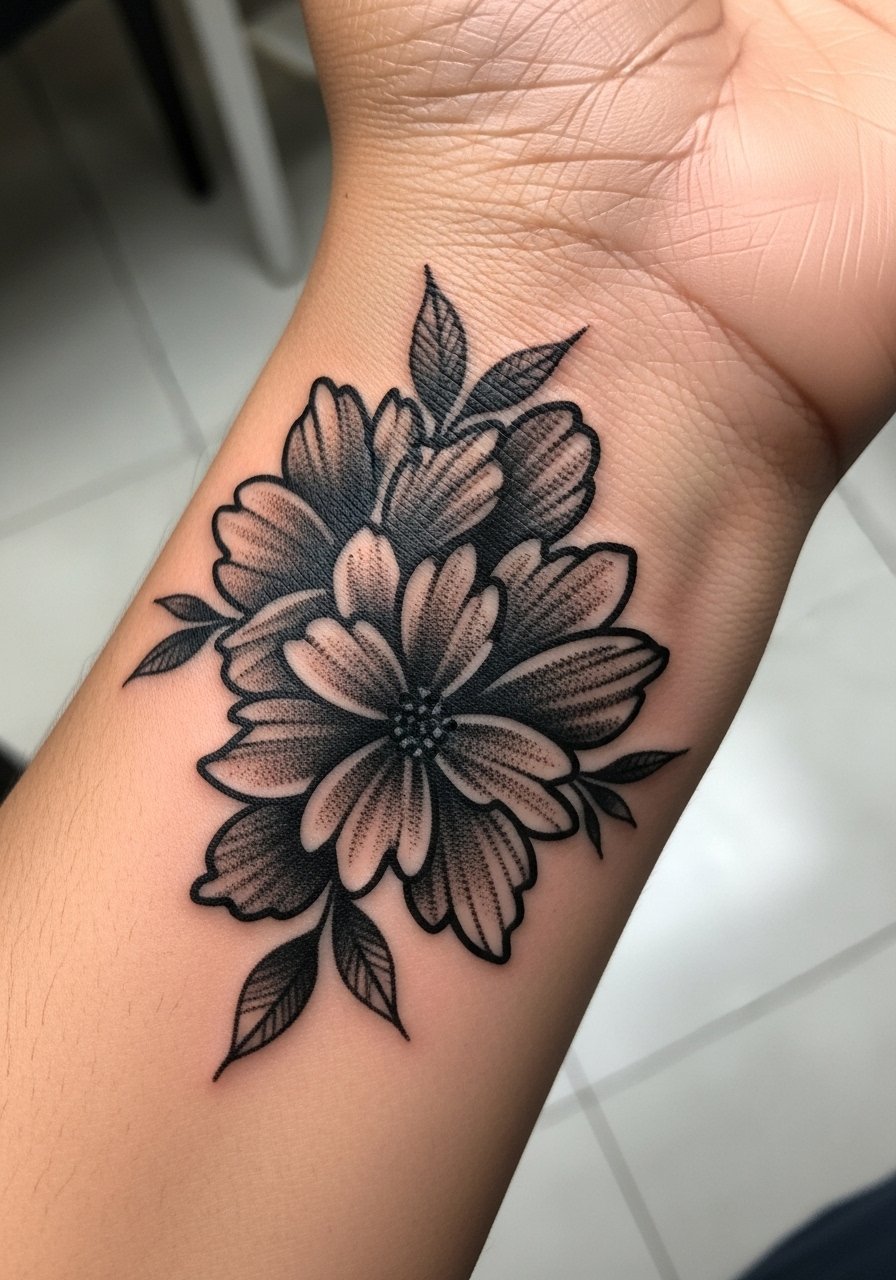
I like abstract florals where petals are hinted through shapes rather than literal depictions. Wrist skin is thin so expect a sharp sting. Sessions are quick, often 45 to 75 minutes. Tell the artist you want bold petal anchors, not tiny veins. From what I've seen, thin veins on the wrist disappear after one to two years. The mistake is overfilling the wrist with detail. If you prefer a forearm version, scale up petals and add negative space to avoid blur.
17. Abstract Map Lines on Side Hip
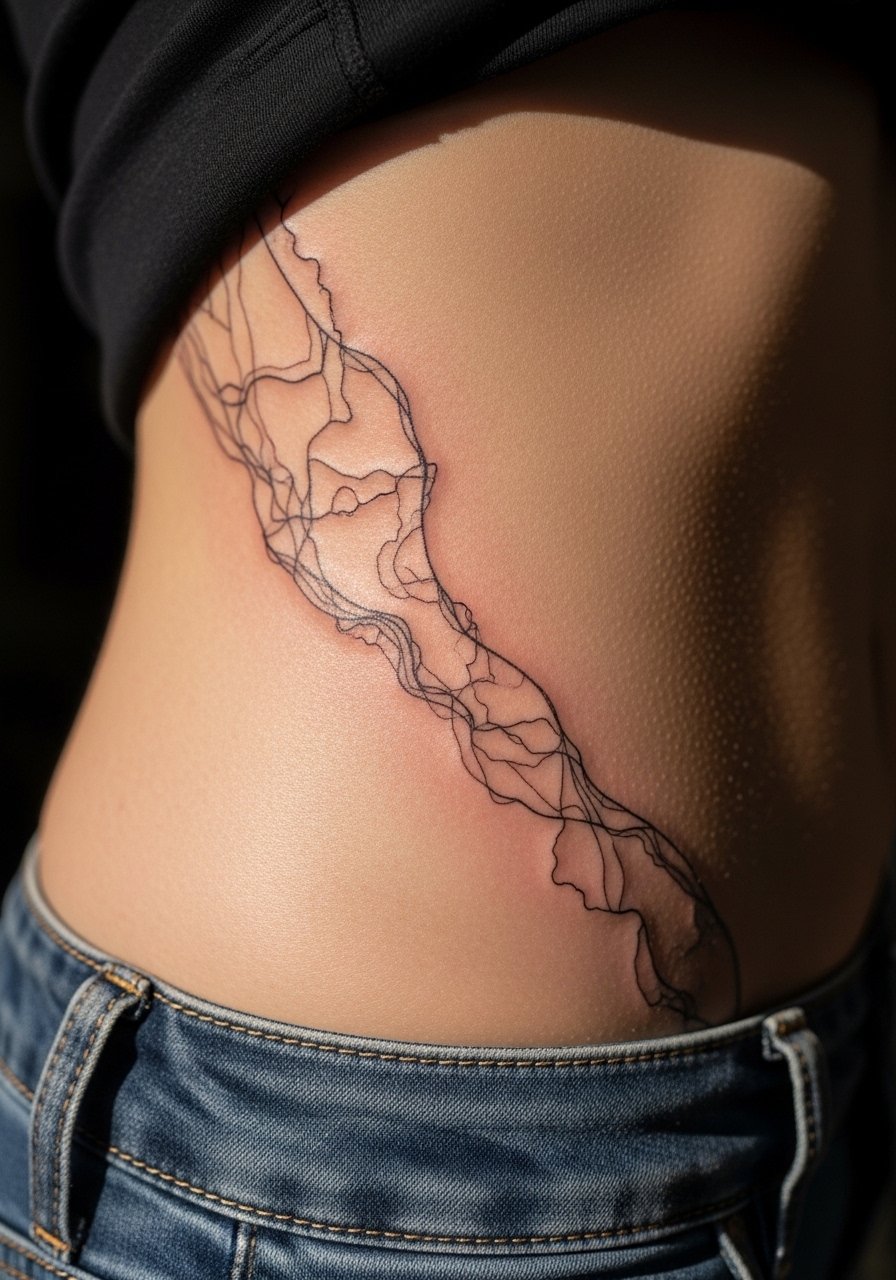
Side hip placement lets abstract contour lines follow body curves. Pain is moderate to high depending on proximity to bone. A single 90 minute session can set a design. When you consult, ask the artist to design lines that follow muscle movement. From what I've gathered, lines that cross high-movement zones thin faster. People often request dense parallel lines there. Instead, stagger them and leave breathing space so the map reads for years. If you want a lower back extension, keep a clean anchor point.
18. Minimalist Geometric Behind Knee
Behind-knee placement is tricky because of constant movement. I tried one and noticed extra scabbing during healing. Pain is moderate. Sessions are usually short. Ask your artist for simplified shapes rather than intricate tessellations. From what I've observed, tight geometry behind the knee blurs quicker. A common error is too much internal detail. If you move the design to the calf, you can add complexity. For behind-knee versions, keep shapes bold and spaced.
19. Abstract Solar Textures on Upper Back
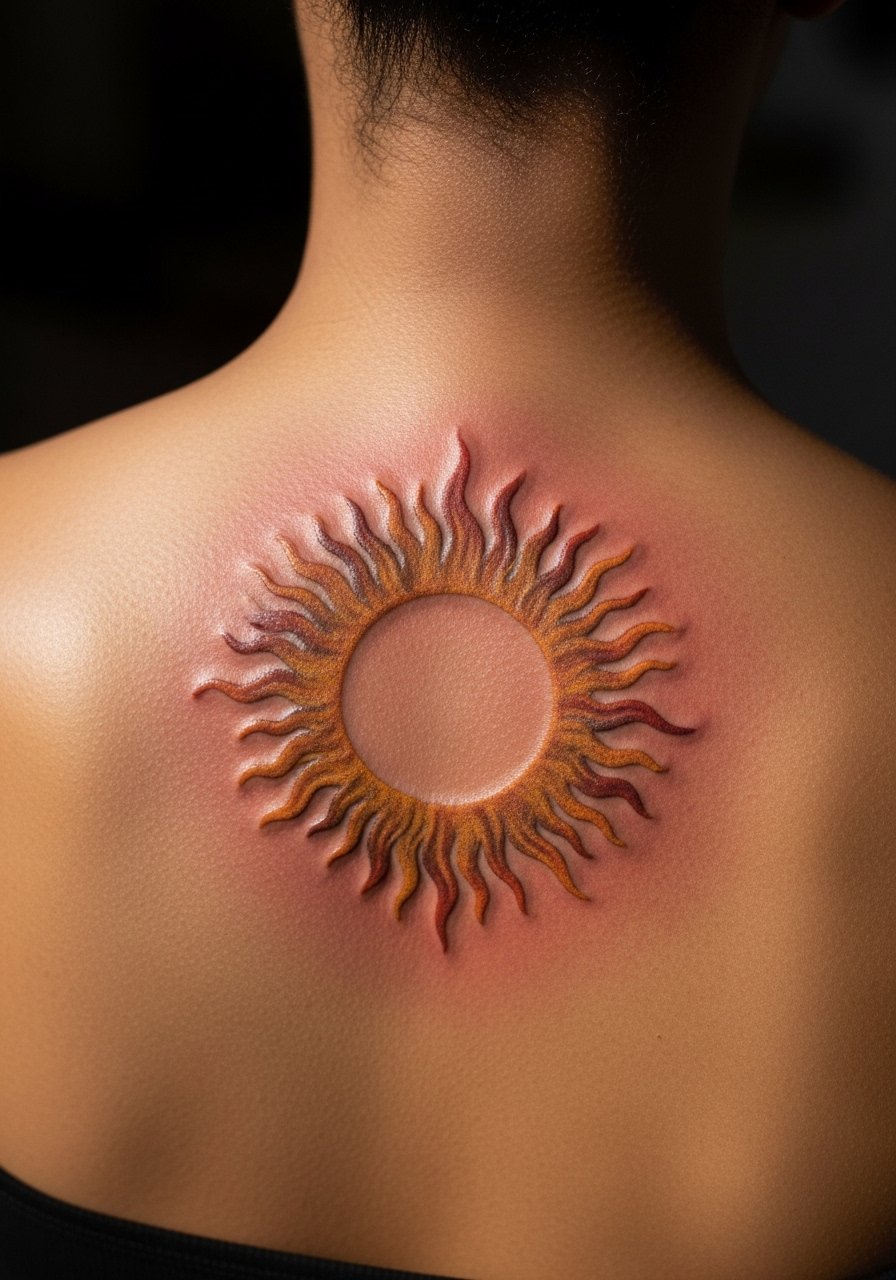
I sketched solar textures after a print show. Upper back gives a broad canvas and moderate pain. A session of 2 to 4 hours fits large textured gradients. During consultation ask for layered tonal ranges with black anchors. In my experience, gradients with very soft edges need careful pigment packing or they fade into a flat tone after two years. People often ask for micro stippling in large areas. Instead, request deliberate tonal bands that can be refreshed in a touch-up.
20. Color Splash Abstract Shoulder Blade
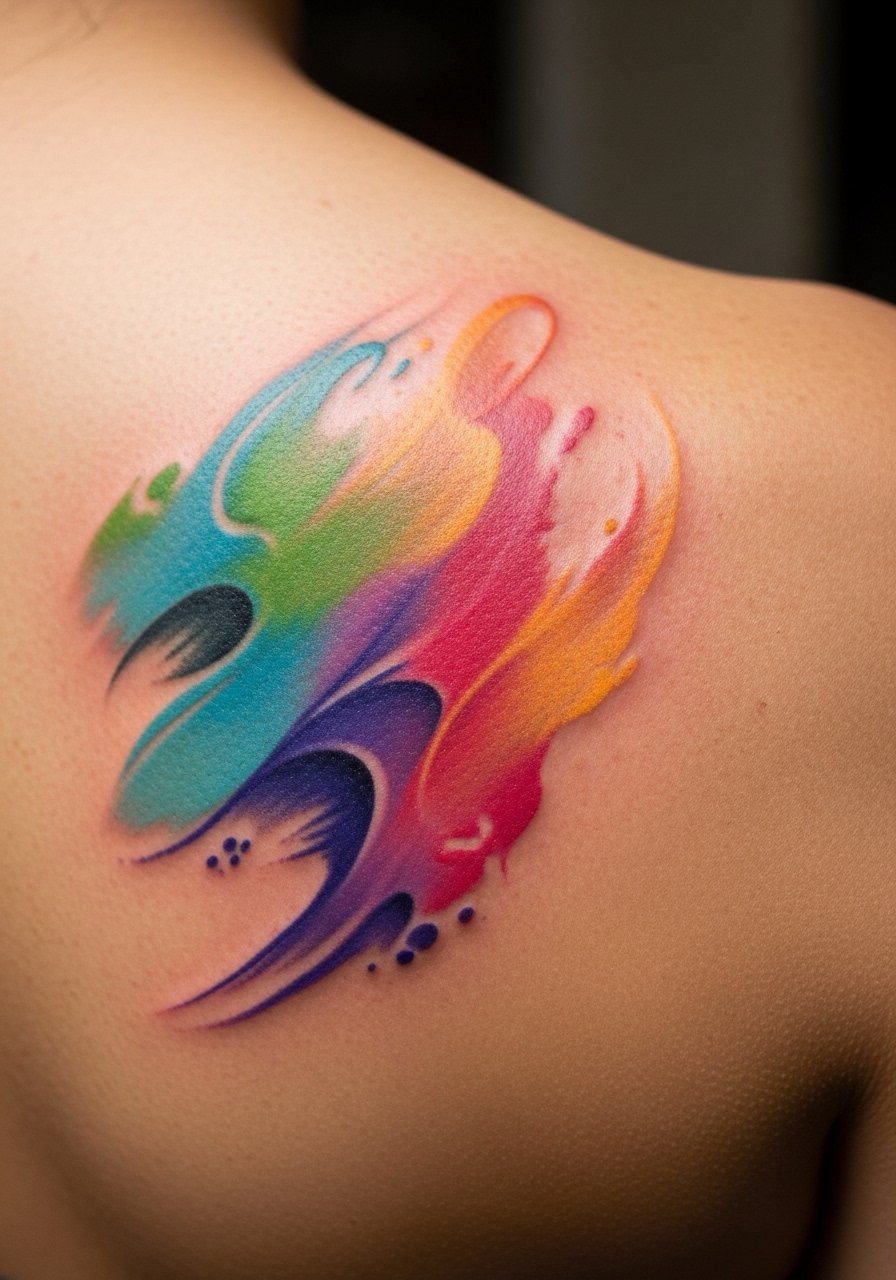
I watched an artist freehand a splash like this live. The shoulder blade is forgiving and shows color well. Pain is moderate. Sessions run 1 to 2 hours for one splash. Ask for saturated base layers and ask about aftercare for color. From what I've seen, color that is not packed densely will shift into a muted haze at six to twelve months. A common mistake is relying solely on feathered edges. For longer vibrancy, anchor the splash with small dark accents. Consider using a sunscreen stick after healing to preserve color, like this SPF 50 sunscreen stick for tattoos.
21. Abstract Constellation Rib Panel
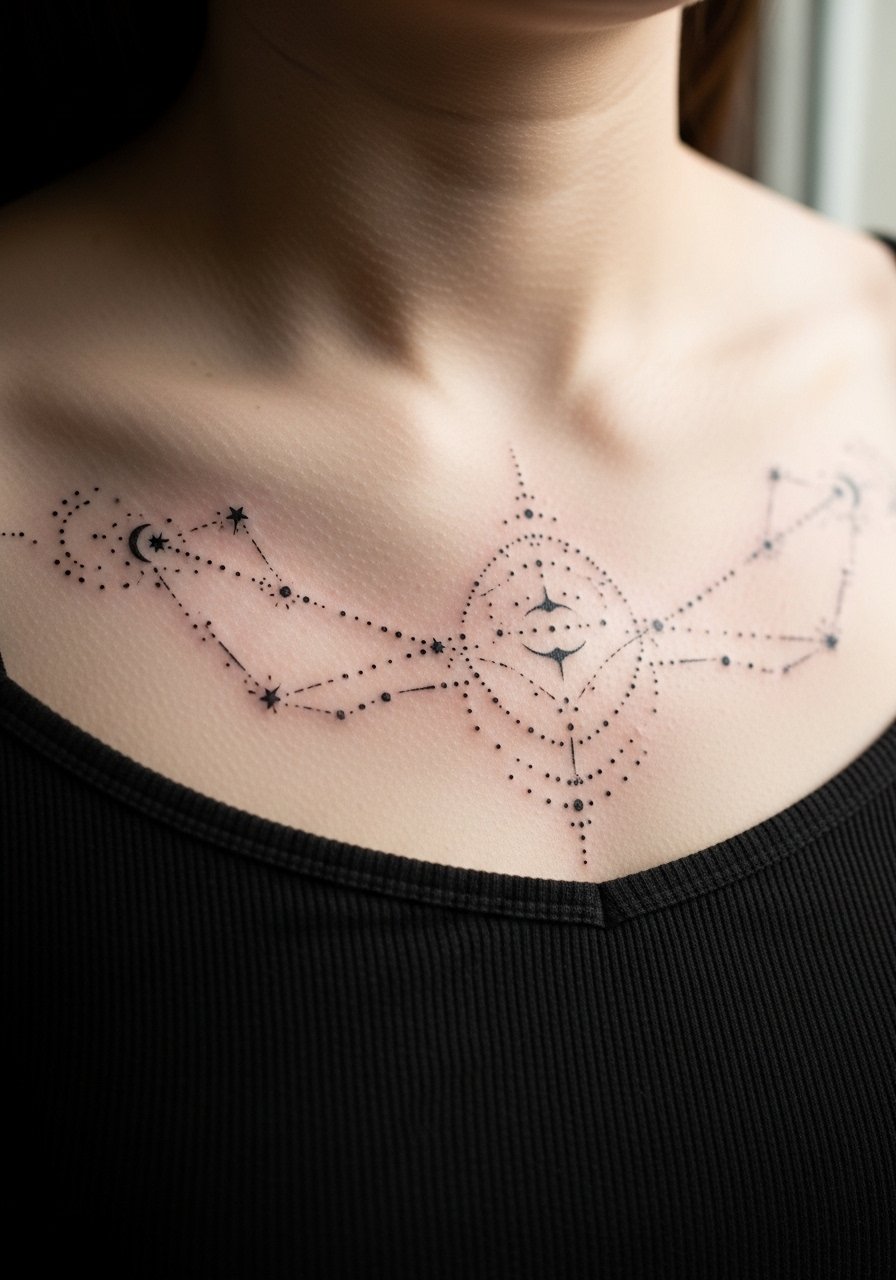
I love connecting dots into constellations. Ribs are high pain but look great. Expect sessions of 1 to 2 hours. Tell your artist you want distinct spacing between stars. From what I've seen, compact constellations lose definition faster than spaced ones. A common misstep is requesting tiny star clusters without negative zones. If you want a chest extension, keep some margin so new lines do not crowd older dots.
22. Abstract Typeface Fragment on Forearm

I saw a type fragment that read like an encoded message and had to try it. Forearm placement is low-moderate pain and highly visible. A 60 minute session often covers it. Tell your artist which parts of letters should remain legible and which should break. From what I've seen, overly fine serifs disappear quickly. A typical mistake is trying to duplicate full fonts at tiny scales. If you prefer a subtler version, use thicker strokes and consider black anchors to keep readability as the ink settles.
23. Abstract Botanical Linework Ribcage Strip
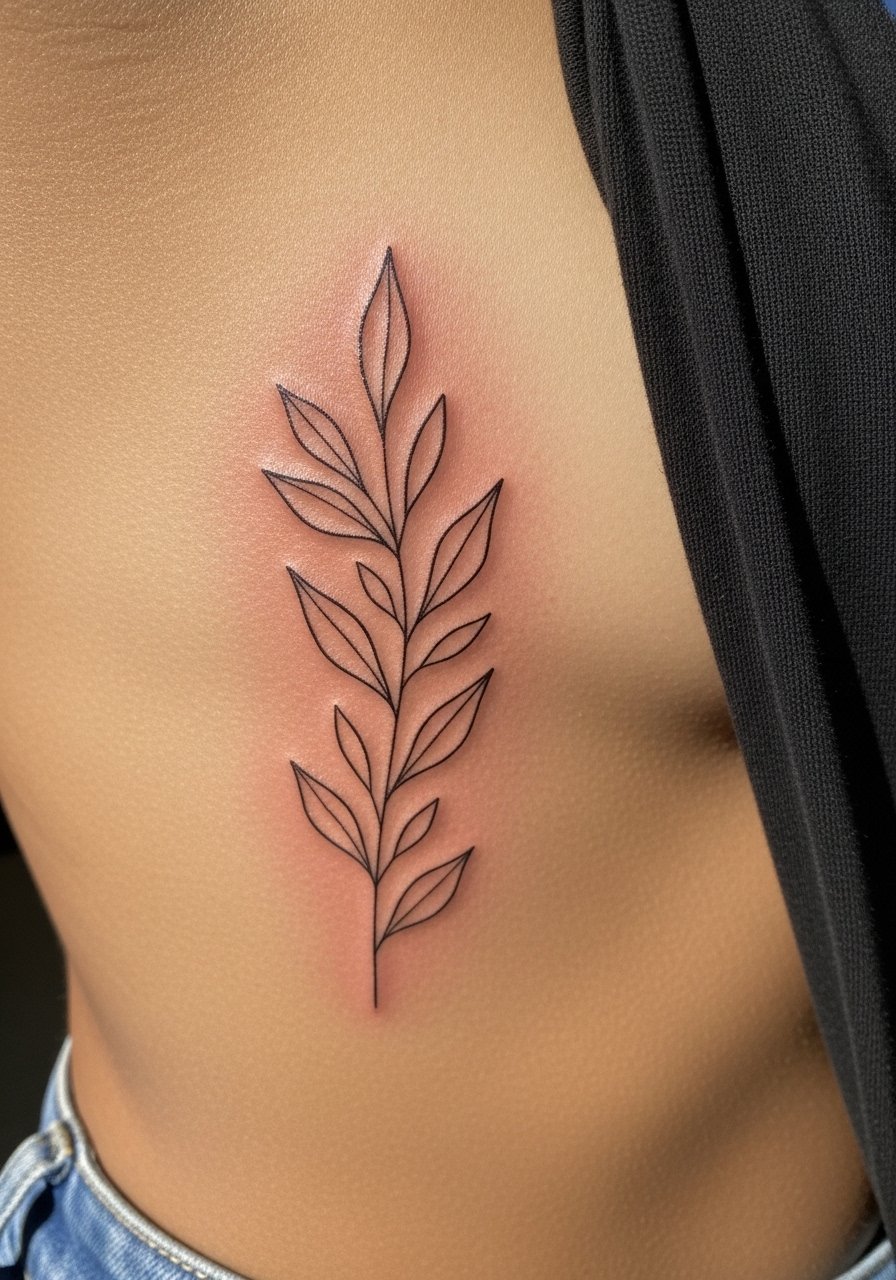
I sketched botanical abstractions for a friend who wanted nature without literal flowers. Ribs again deliver a flowing vertical canvas. Pain is higher and sessions need breaks. Ask your artist for alternating line weights. From what I've noticed, constant hairline strokes on ribs blur into a single tone. People often ask for vein-level detail. Instead, prioritize silhouette lines and let negative space hint at leaves. For a thigh alternative, add more texture.
24. Abstract Optical Illusion Wrist Patch
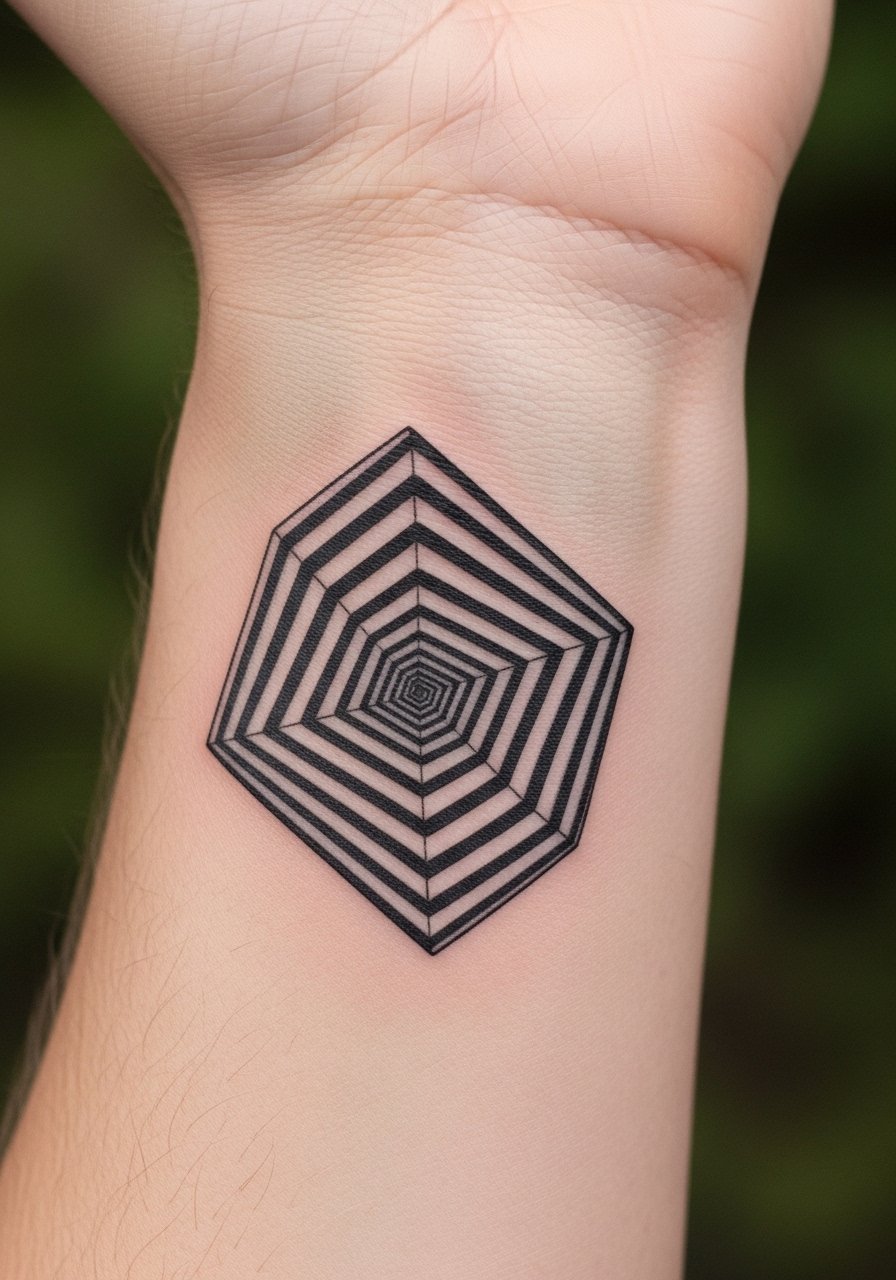
I tested a small optical piece on my wrist and liked the playful pull. The wrist is sensitive. Plan for quick sessions and expect some scabbing. When consulting, request simple curving contrasts not tiny concentric rings. From what I've seen, tight concentric work loses crispness fast. A bad move is packing too many mini gradients onto thin skin. If you want the same illusion on the forearm, scale the rings up for durability.
25. Abstract Landscape Linework Ankle
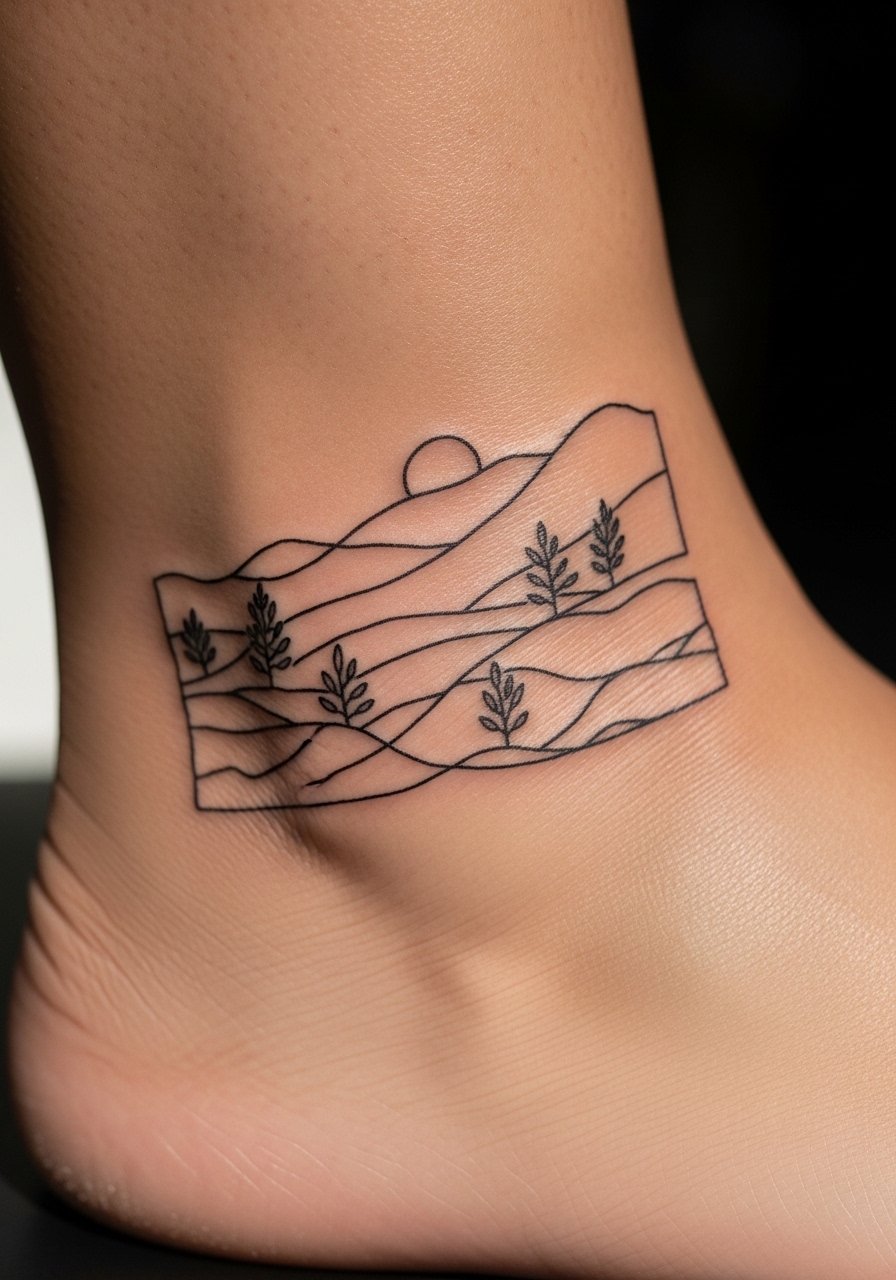
I love small landscapes that read like memories rather than literal places. Ankles wrap so the line flow matters. Pain can peak near bone. Sessions are brief, around 45 minutes. Tell your artist to compose lines that consider the ankle's twist. In my experience, horizontal scenes survive better on the ankle than intricate vertical skylines. People often crowd small landscapes with texture. Keep horizons simple and leave room for touch-ups if details soften.
26. Abstract Kintsugi Gold Ink Accent on Hand
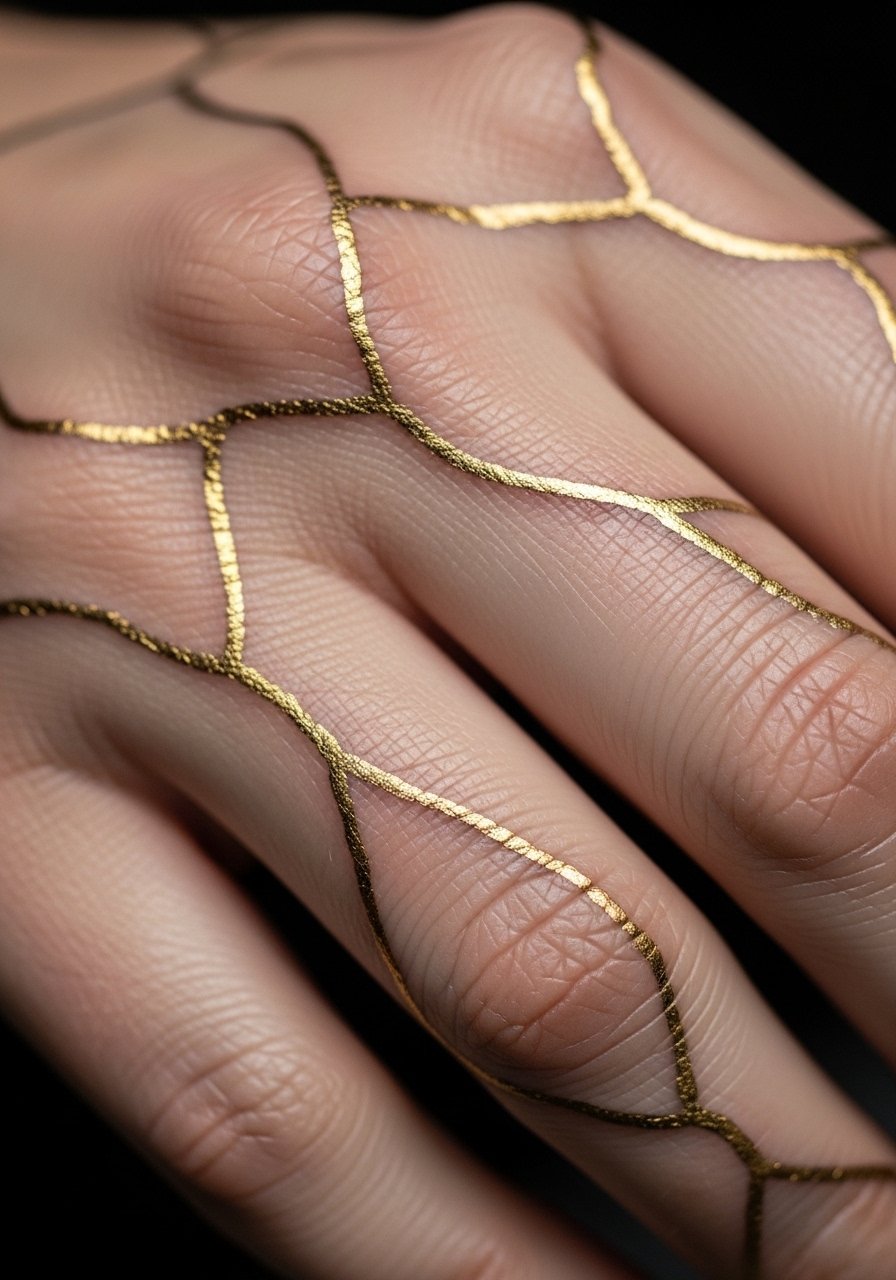
I tried gold-accent tattoos and learned they fade differently. Hands are high wear zones. Pain is moderate. Sessions are short but expect frequent touch-ups. Ask about pigment types and longevity. From what I've seen, metallic and light-toned inks fade faster than black. A common mistake is placing subtle gold where it will be washed and rubbed a lot. If you want this effect, combine gold accents with bold black lines to maintain composition as metallic tones recede.
27. Abstract Maze Micro-Back of Neck
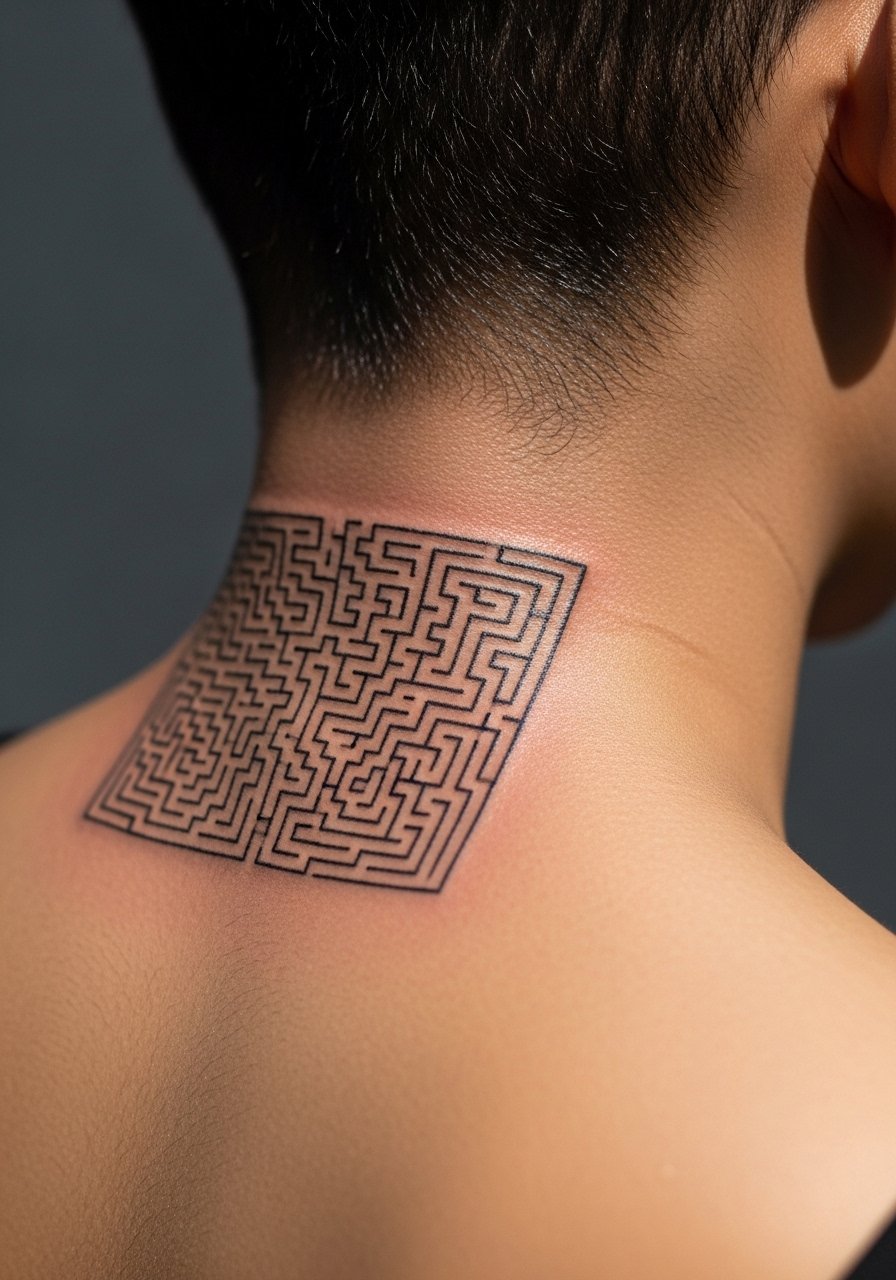
Micro mazes look intriguing on the back of the neck, and they reveal when hair is up. Pain is moderate. Sessions tend to be 30 to 60 minutes. Tell your artist you prefer wider corridors in the maze. From what I've noticed, tight mazes become visually noisy over time. The frequent error is packing too many turns into a tiny patch. For neck placement, prioritize bold pathways and reserve micro detours for larger canvases like the upper back.
28. Abstract Waveform Inner Bicep
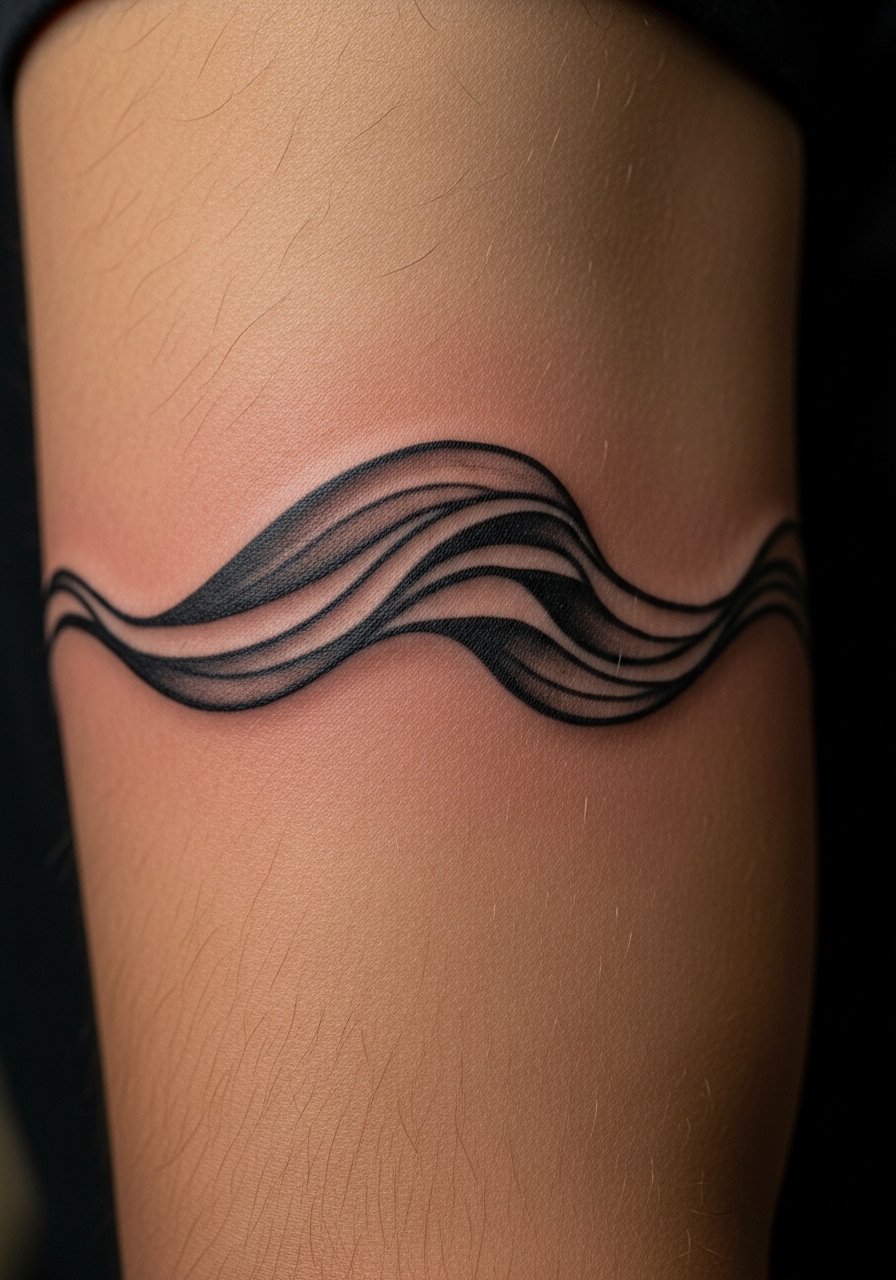
Inner bicep pieces flex with muscle movement. I had one that changed expression when I contracted. Pain is moderate. Expect a one to two hour session. During consultation, ask for slightly heavier main waves and airy secondary lines. In my experience, small secondary lines fade faster on moving flesh. A mistake is wanting equal detail everywhere. For inner bicep work, make primary shapes bold so the piece retains identity as you live with it.
29. Abstract Fragmented Circle Behind Shoulder
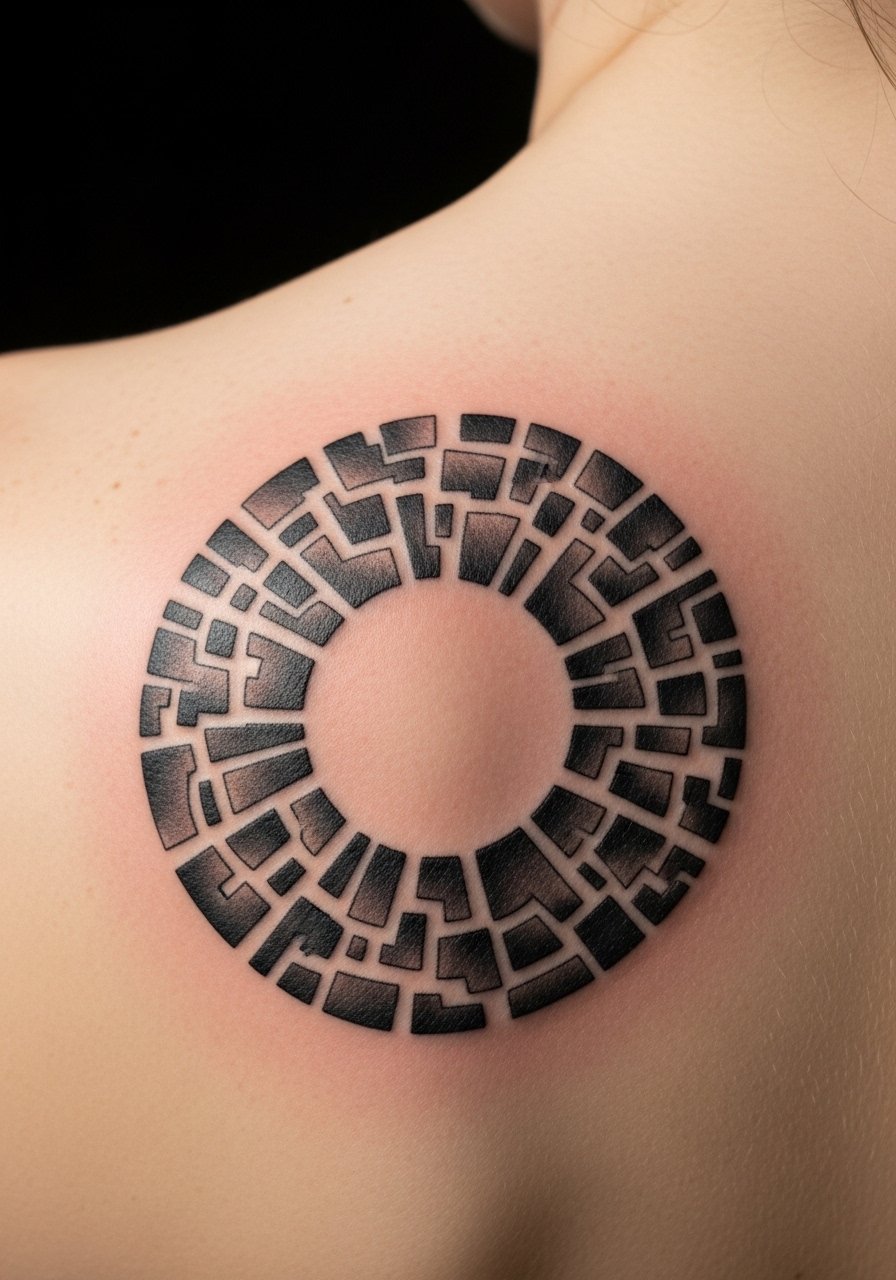
Fragmented circles read modern and ancient at once. Behind the shoulder placement gives a discrete, low-pain canvas. A single session of 60 to 90 minutes is common. Tell the artist you want intentional gaps that age into the skin. From what I've observed, closed micro segments can merge and look messy. People often try to cram tiny inner shapes. Leave larger openings so the circle breathes as it heals. If you later add a sleeve, match fragment density to sleeve texture.
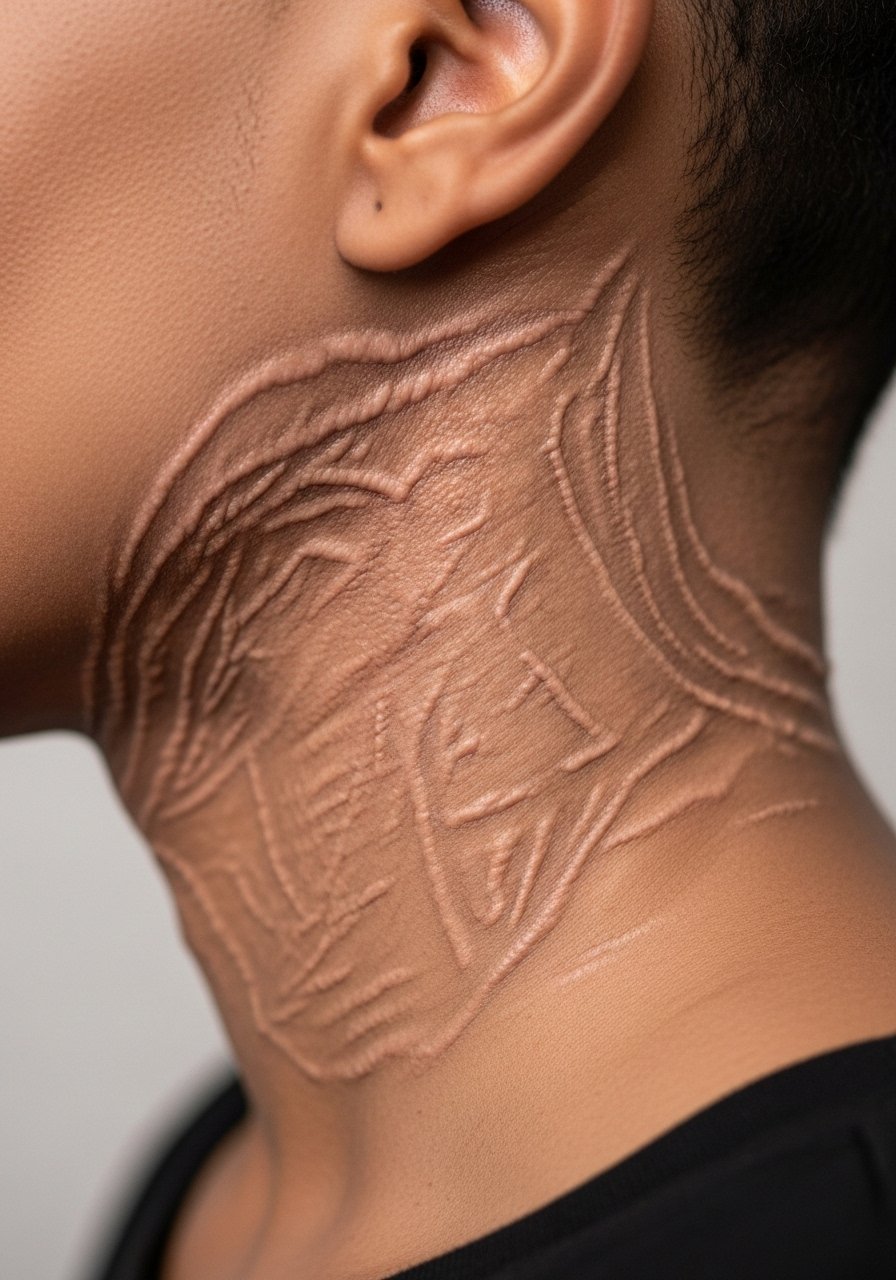
30. Abstract Tactile Scar-Like Forearm Stripe
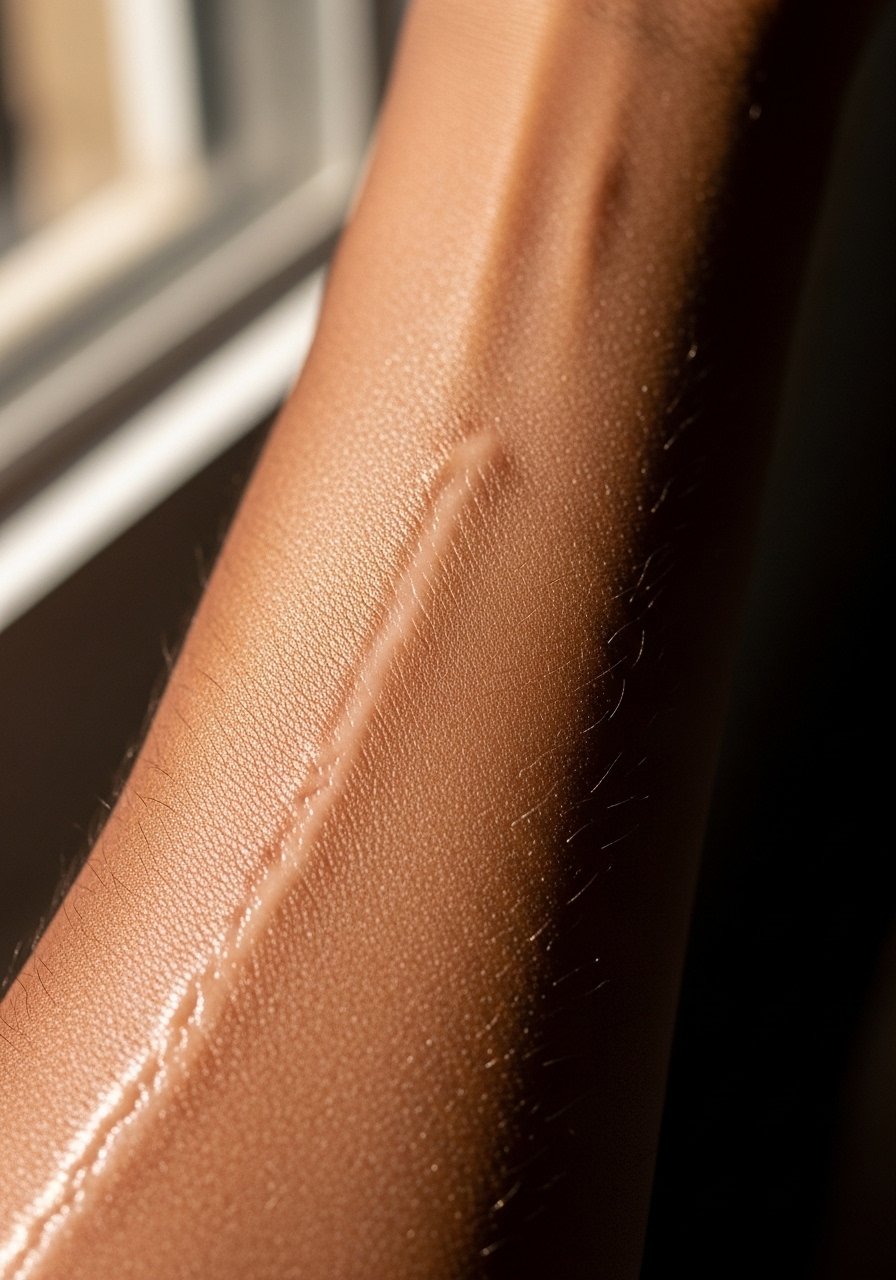
I became fascinated with scar-like tattoos that mimic trauma without harm. On the forearm this reads subtle and personal. Pain is low to moderate. Sessions run 60 to 120 minutes depending on texture. Ask your artist for raised illusion through shading instead of real scarring techniques. From what I've seen, fine scratch marks merge over time if too close together. People often ask for micro scratches. For the stripe, request rhythm and cadence in marks so it reads like a passage rather than noise.
Tattoo Prep and Aftercare Essentials
Aftercare items I actually use, and what artists I've talked to recommend. All links use the tag inkalerts-20.
Aftercare Healing
- Aquaphor Healing Ointment, 14oz tube — Good first 3 to 5 days for open tattoo care.
- Saniderm Transparent Adhesive Bandage, 6-inch roll — Second-skin method, use for first 24 to 72 hours if your artist approves.
- CeraVe Fragrance-Free Moisturizing Lotion, 12oz — Use after ointment phase, days 4 to 14.
- Dr. Bronner's Unscented Castile Soap, 32oz — Gentle cleanser for daily washes during healing.
Before Your Appointment
- Tattoo Numbing Cream, 5% Lidocaine, 30g — Apply 30 to 45 minutes before if your artist says it's okay.
- Thermal Transfer Tattoo Stencil Paper, 8.5×11 — Useful if you test placement at home before your consult.
Long-Term Maintenance
- SPF 50 Sunscreen Stick for Tattoos, 25g — Use daily on exposed pieces to prevent fading.
- Mad Rabbit Tattoo Balm, 2oz — Keeps healed tattoos vibrant during seasonal dryness.
- Hustle Butter Deluxe, 4oz — Vegan conditioning for healed skin.
Optional Comfort Items
- Tattoo Numbing Spray, 100ml — For touch-ups or sensitive spots if your artist allows.
- Hydrocolloid Bandages, Large — For spot protection after initial healing, alternative to Saniderm.
I listed brands and sizes I use. Most artists I talked to still favor Saniderm and Aquaphor during the first few days, then recommend switching to a fragrance-free lotion.
Frequently Asked Questions
Q: Will fine line abstract sleeves blur together over time?
A: From what I've seen, fine line sleeves blur if the lines are drawn too close. Ask your artist to space negative areas and to emphasize a few stronger anchor lines. Using a balm like Mad Rabbit Tattoo Balm, 2oz during healing helps keep the surface supple. Plan touch-ups after one year if you want crispness.
Q: Do watercolor-style abstracts need different aftercare than blackwork?
A: Yes, I've noticed color splashes require strict sun avoidance while fresh. Use Saniderm initially if your artist recommends it and then switch to a neutral lotion like CeraVe Fragrance-Free Moisturizing Lotion, 12oz during the later healing phase. Watercolor pieces rely on dense color packing, so protect them and plan for potential touch-ups to maintain vibrancy.
Q: Are abstract tattoos on the ribs worth the pain for long-term clarity?
A: I have a ribcage piece and I think so. The ribs let lines breathe. Expect higher pain and plan for multiple sessions. The trick is to ask your artist for slightly heavier lines in key places. From experience, ultra-fine detail on ribs can wash out faster than bold directional marks.
Q: What should I tell my artist if I want a scar-like abstract that looks natural?
A: Say you want an illusion of texture created with shading and contrast, not actual scar techniques. Ask the artist to demo how shadow and highlight will sit on your skin. Use a product like Aquaphor Healing Ointment, 14oz tube in the first days to prevent harsh scab formation that can disrupt fine shading.
Q: How often do I need to reapply sunscreen to keep abstract colors bright?
A: From what I've gathered, reapply every two hours during sun exposure. For convenience carry an SPF 50 Sunscreen Stick for Tattoos, 25g. Artists I talked to say consistent sun protection is the single best habit to reduce fading.
Q: Do hand and finger abstract accents last, or should I expect touch-ups?
A: Hands and fingers wear faster because of washing and friction. In my experience you will need more frequent touch-ups, sometimes yearly. If you want longevity, pair dark anchors with the lighter accents so the piece still reads as pigments soften. Hydrocolloid bandages early in healing can help, and I like Hydrocolloid Bandages, Large for spot protection after scabs form.
