
I spent months collecting guitar tattoo references before I got mine. The hard part wasn't finding cool designs — it was picking a style that would still look good after years of gigs, sun, and late-night wear. These 23 guitar tattoo ideas focus on styles that age well and suit different placements and pain tolerances.
This list leans into fine line, traditional, micro-realism, and blackwork treatments tailored for guitar lovers. Placements range from wrist and forearm to ribs and chest. From what I’ve seen in 2026, music motifs that read clearly healed (soundwaves, fret details, bold silhouettes) hold up best.
1. Fine Line Acoustic Guitar on Inner Forearm
Style/Technique: Fine Line / Illustrative
Pain Level: Low-Medium (3/10)
Session Time: 1-2 hours
Best For: First tattoo, visible yet easy to cover with long sleeves
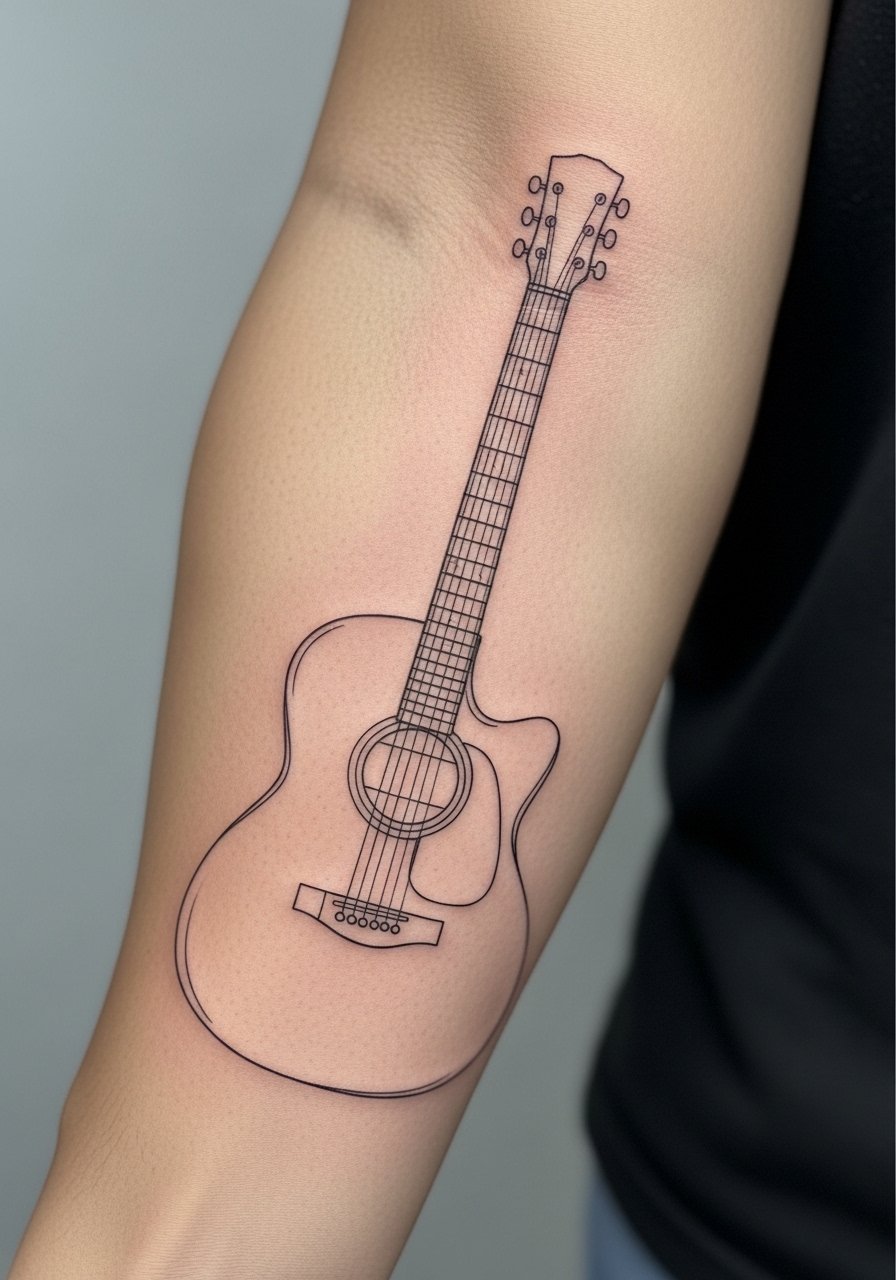
I picked this after seeing several musicians choose subtle forearm ink. Fine line shows the guitar’s silhouette and strings with a delicate, minimalist vibe. Inner forearm pain is manageable. Heals in 2–3 weeks; expect some line softening over a year. Avoid asking for hair-thin lines if you want longevity—ask for slightly stronger line weight and an artist experienced in fine line work.
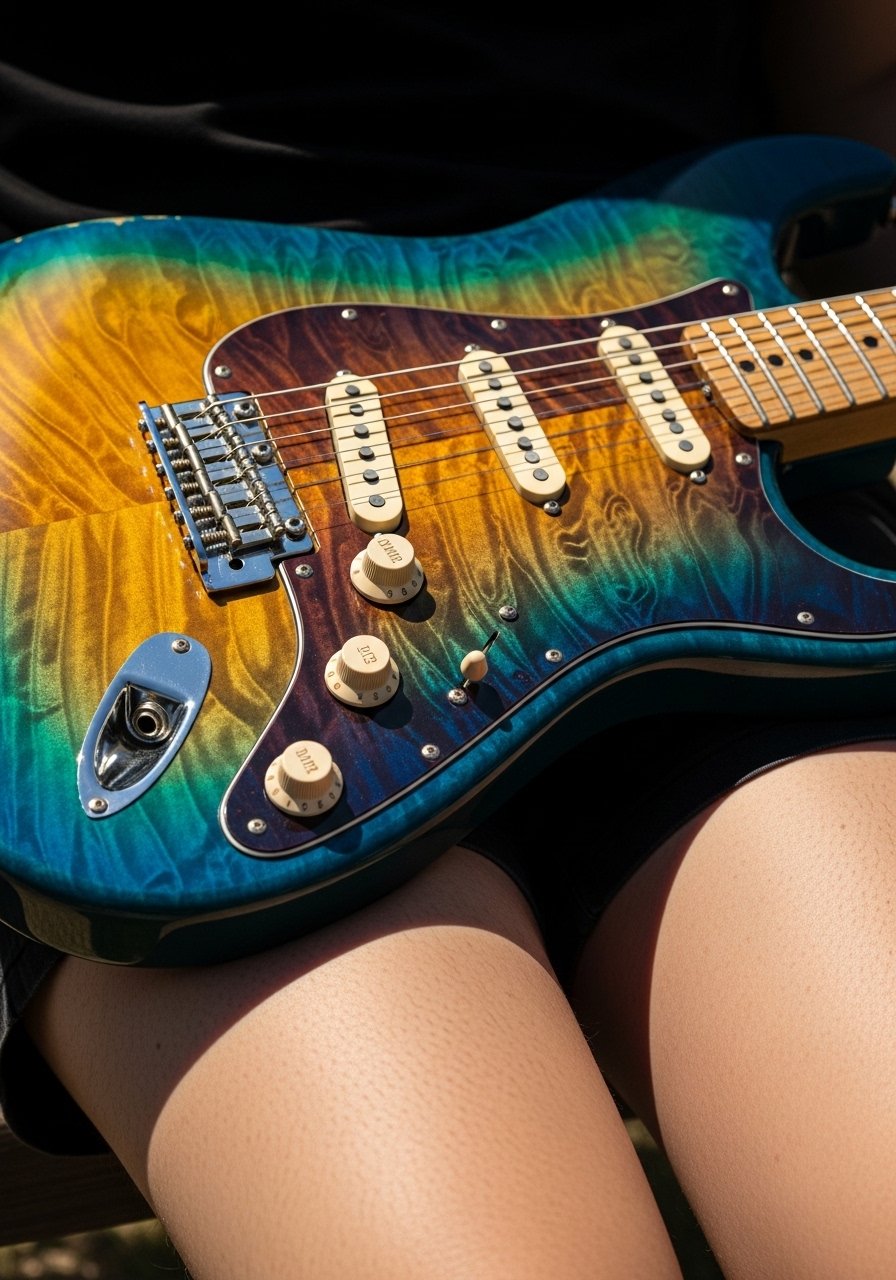
2. Micro-Realism Electric Guitar on Upper Arm
Style/Technique: Micro-Realism / Photorealistic
Pain Level: Low (2-3/10)
Session Time: 2-4 hours
Best For: Statement piece, collectors
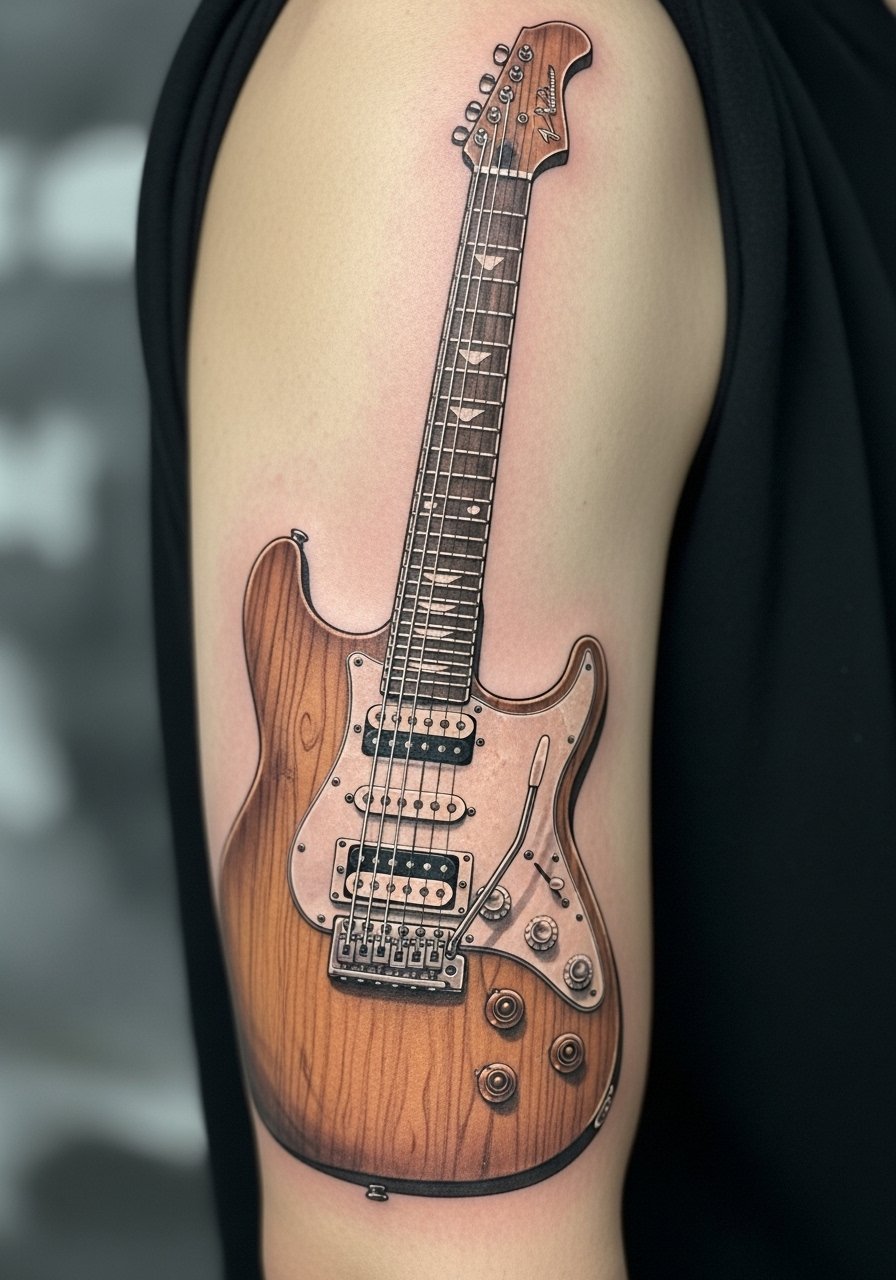
Micro-realism captures pickups, knobs, and hardware with a lifelike look. Upper arm placement is forgiving for longer sessions and ages nicely. Colors can fade, so black-and-gray details hold best. Expect 2–3 weeks of surface healing. Common mistake: overloading tiny hardware with color; ask for contrast and crisp shadows from an artist who specializes in micro-realism.
3. Blackwork Guitar Silhouette on Sternum
Style/Technique: Blackwork / Bold Silhouette
Pain Level: High (7/10)
Session Time: 1-2 hours
Best For: Dramatic, center-chest statement pieces
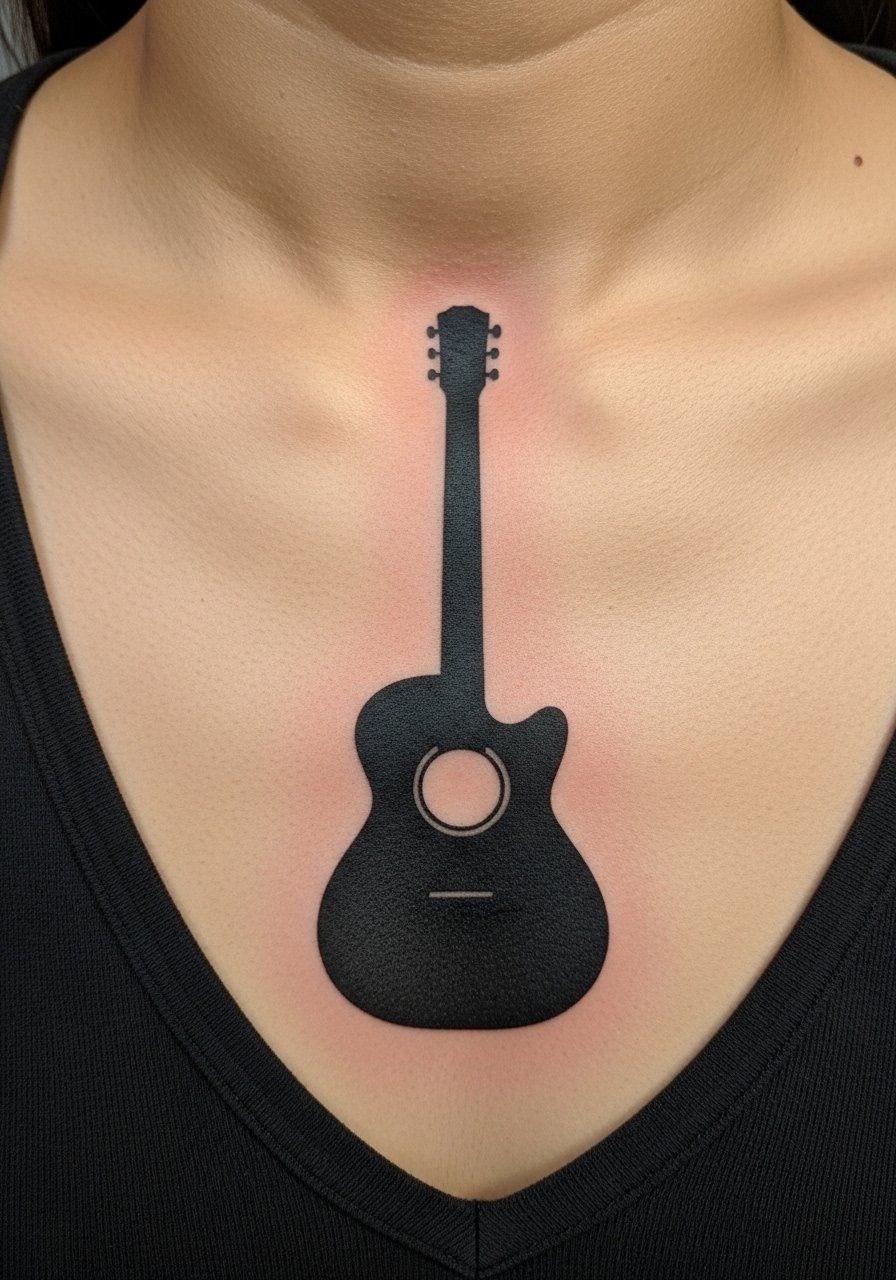
Solid black silhouettes read great across skin tones and hold up extremely well. The sternum is painful but creates a focused, timeless look that resists blurring. Healing takes careful movement restrictions; stretching the chest too early causes scabbing. Avoid tiny interior detail that will blur—bold shapes age best. Ask for consistent black saturation.
4. Neo-Traditional Guitar With Floral Accents on Bicep
Style/Technique: Neo-Traditional / Color
Pain Level: Medium (4/10)
Session Time: 2-5 hours
Best For: Bold color, visible arm art
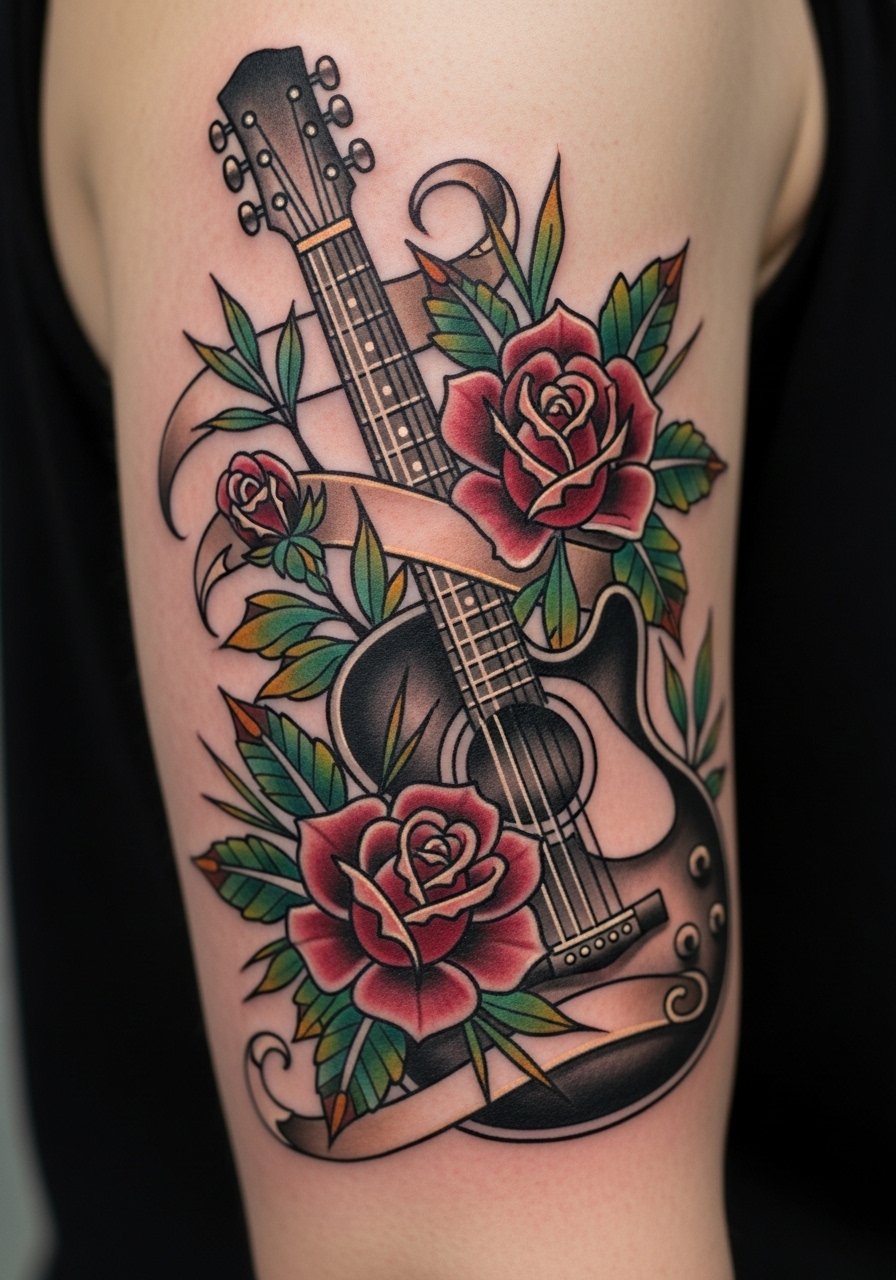
Neo-traditional adds bold outlines and saturated color to guitar motifs—great for a classic-meets-modern vibe. Outer bicep tolerates longer sessions and keeps color vibrant. Colors like red and green settle well; yellows tend to fade faster. Avoid tiny, intricate color fills—choose larger color fields and solid outlines. Find an artist who works with saturated palettes.
5. Minimalist Guitar Pick Behind Ear
Style/Technique: Minimalist / Single-Line
Pain Level: Low-Medium (3-4/10)
Session Time: 30–60 minutes
Best For: Subtle, hidden placement
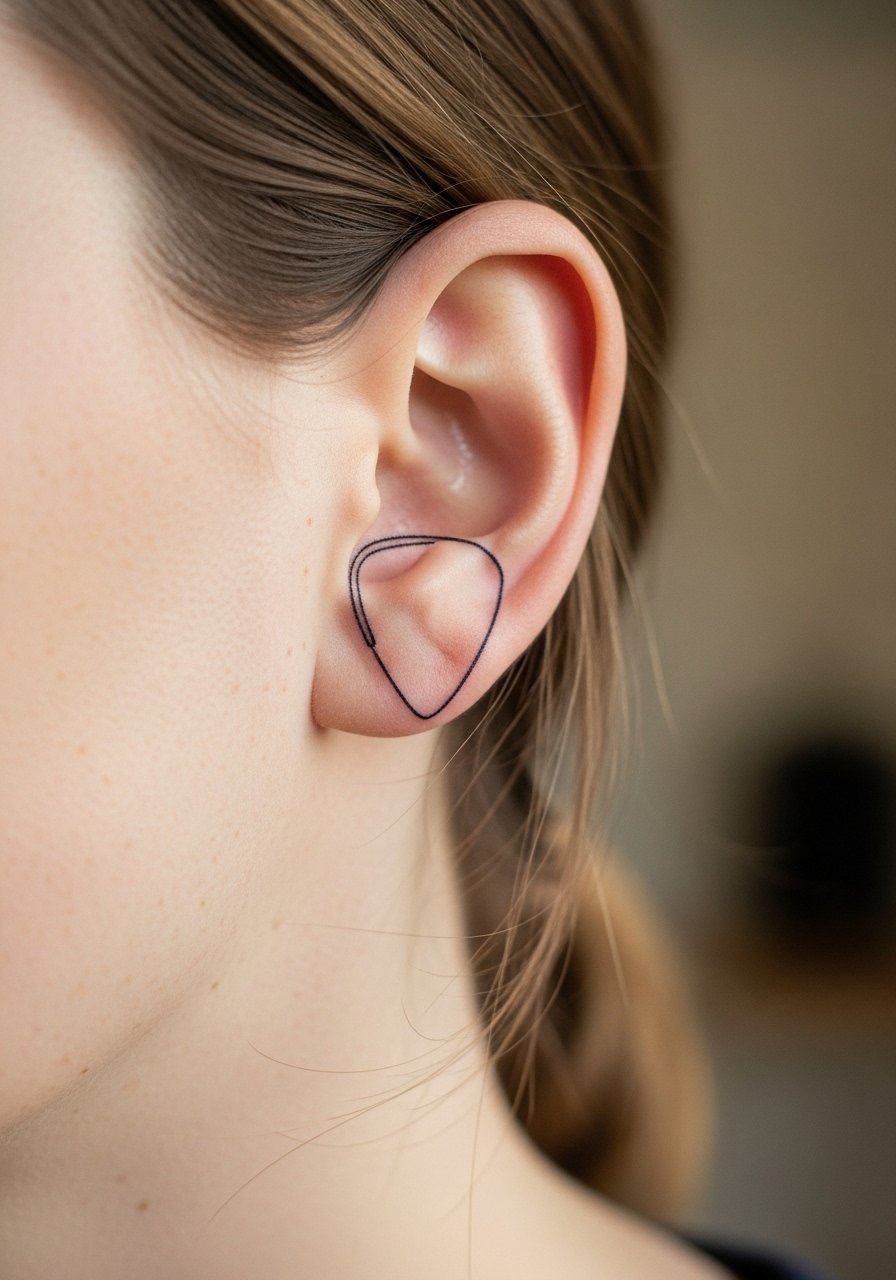
A tiny pick behind the ear is discreet and meaningful. The area is sensitive but quick. Heals fast; expect a few days of tenderness. Minimalist lines can blur if too thin—ask for simple, slightly thicker outlines for longevity. This is ideal if you want a personal nod to music without a loud statement.
6. Watercolor Neckline Guitar on Collarbone
Style/Technique: Watercolor / Painterly
Pain Level: Medium (4/10)
Session Time: 1-3 hours
Best For: Artistic, feminine placements
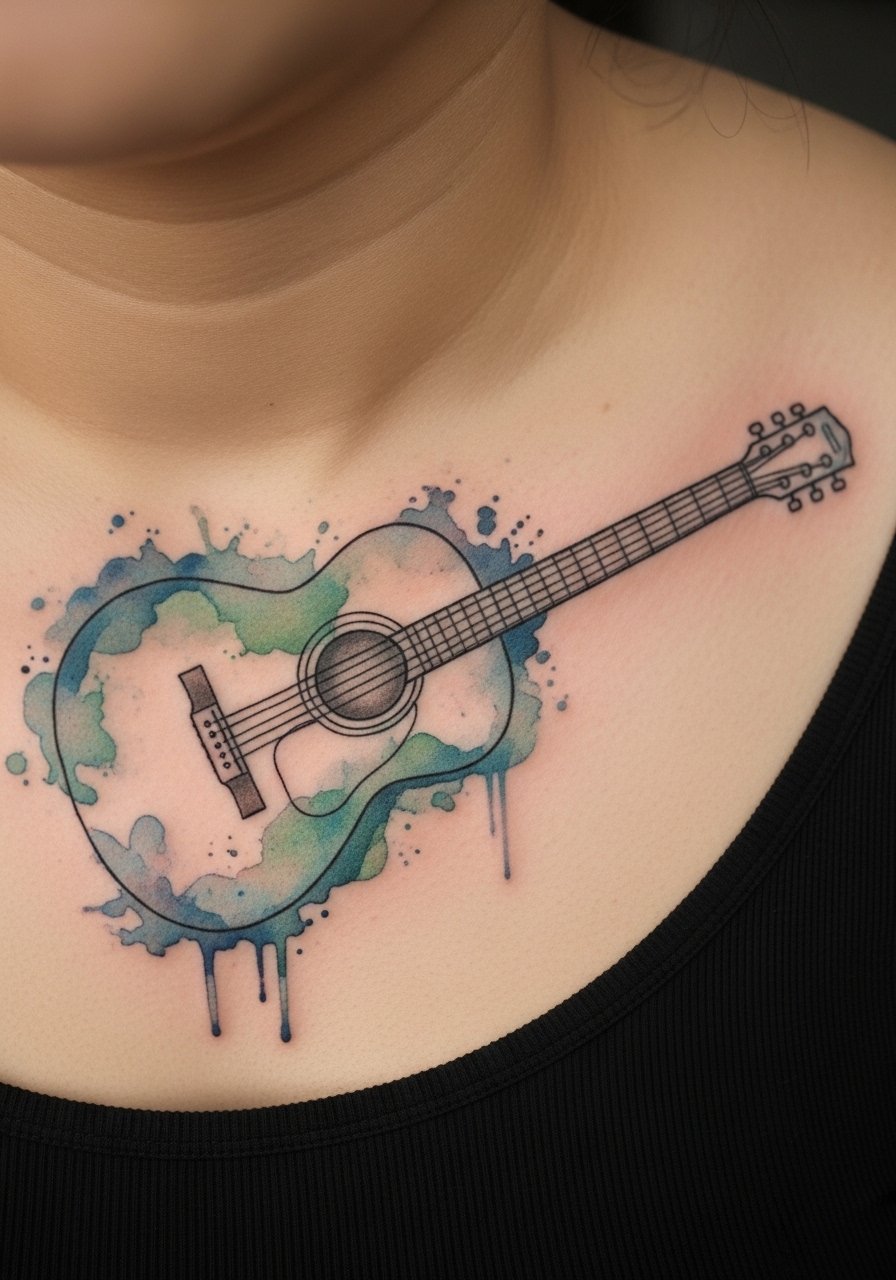
Watercolor offers a loose, expressive feel but needs touch-ups over years since soft color fades faster. Collarbone placement looks elegant but is prone to sun exposure, which accelerates fading—sunscreen is essential. Avoid overly diffuse color that lacks contrast; ask your artist for solid anchors in the composition.
7. Soundwave of a Favorite Riff on Wrist
Style/Technique: Minimalist / Waveform
Pain Level: Medium (4/10)
Session Time: 1 hour
Best For: Personal, meaningful, musical memory
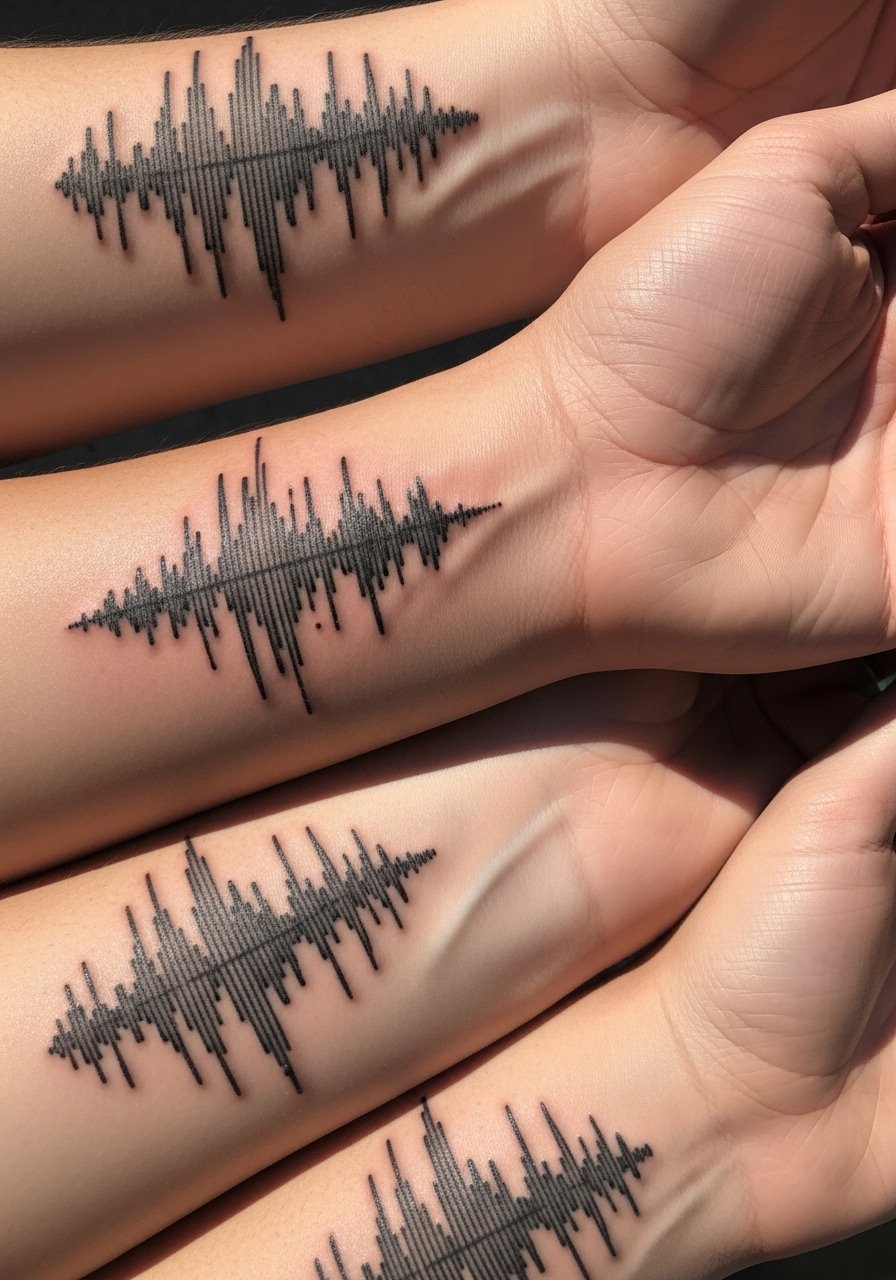
I love soundwave tattoos because they’re personal and decipherable to headphones-only listeners. Wrist placement is visible and heals quickly but sees movement, so expect some fading. Bring a clean waveform file and ask your artist to thicken the peaks slightly to prevent early blurring. This design reads best in black or deep charcoal.
8. Sheet Music With Guitar Neck on Ribcage
Style/Technique: Fine Line / Illustrative
Pain Level: High (7-8/10)
Session Time: 2-4 hours
Best For: Intimate, larger vertical designs
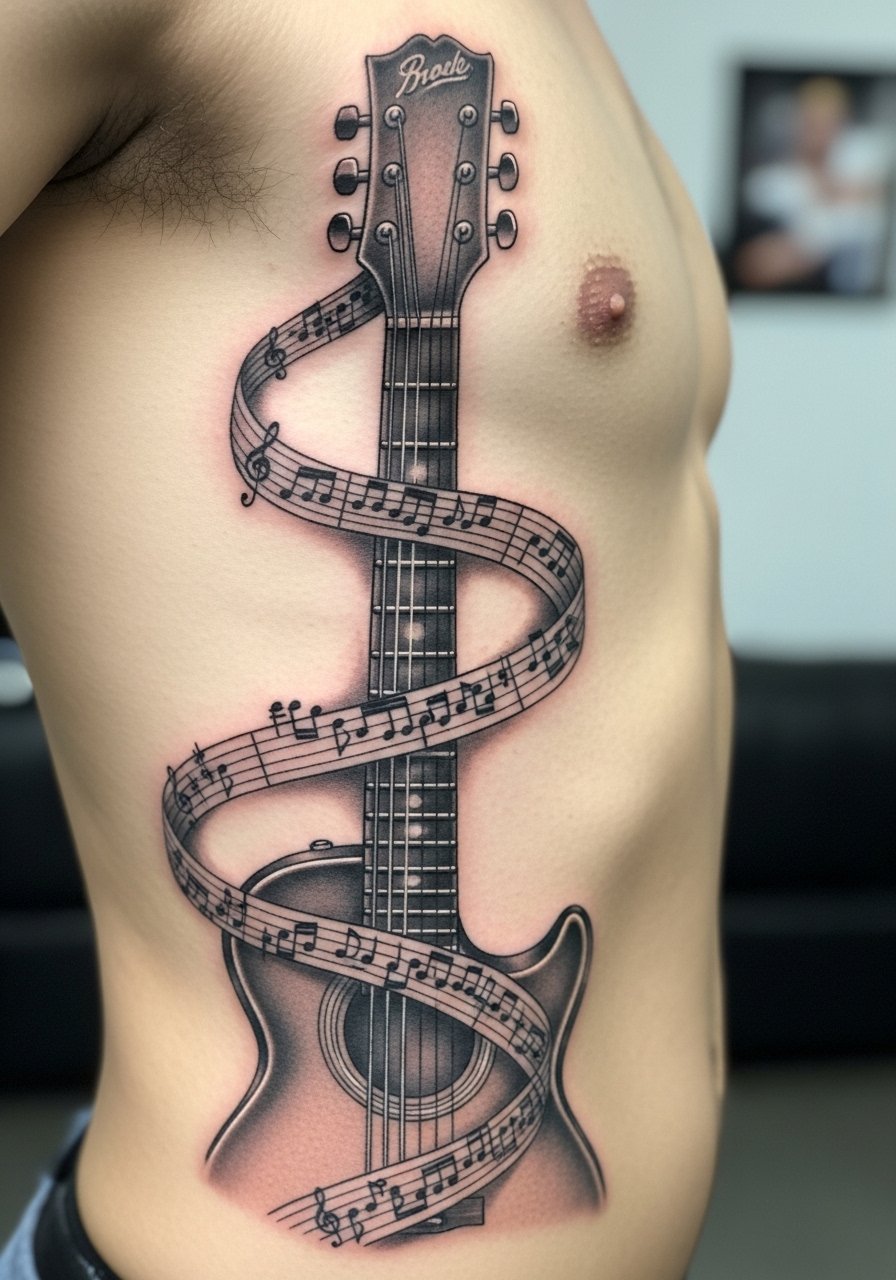
Ribcage tats look beautiful but are painful and need patience. Fine line notation can blur if too tight; ask for readable spacing between notes. Healing requires careful aftercare due to friction from clothing. I’ve seen sheet music lose crispness—insist on slightly bolder staves and ask to see healed examples of notation from your artist.
9. Tiny Line Art Guitar on Ankle
Style/Technique: Minimalist / One-Line
Pain Level: Medium-High (5/10)
Session Time: 30–60 minutes
Best For: Discreet foot or ankle placements
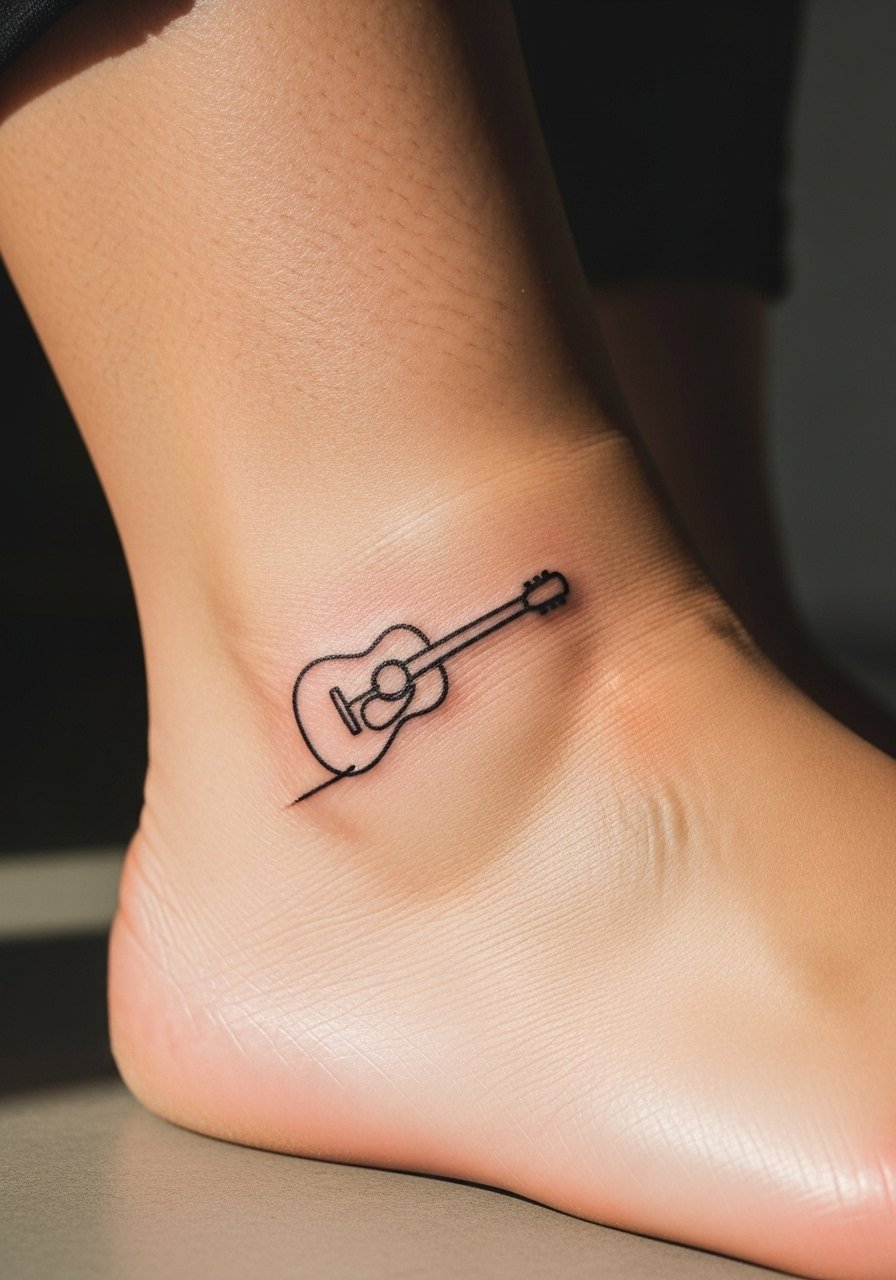
Ankle tattoos are cute but the area moves and can be scratchy during healing. One-line guitars are meaningful and subtle, but thin lines on ankles blur quicker—ask for a slightly heavier line. Expect 2–3 weeks of careful shoe choices. Keep moisturized and avoid tight footwear during healing.
10. Geometric Guitar With Mandala on Back
Style/Technique: Blackwork / Geometric
Pain Level: Medium (4/10)
Session Time: Multiple sessions
Best For: Back pieces, symmetry lovers
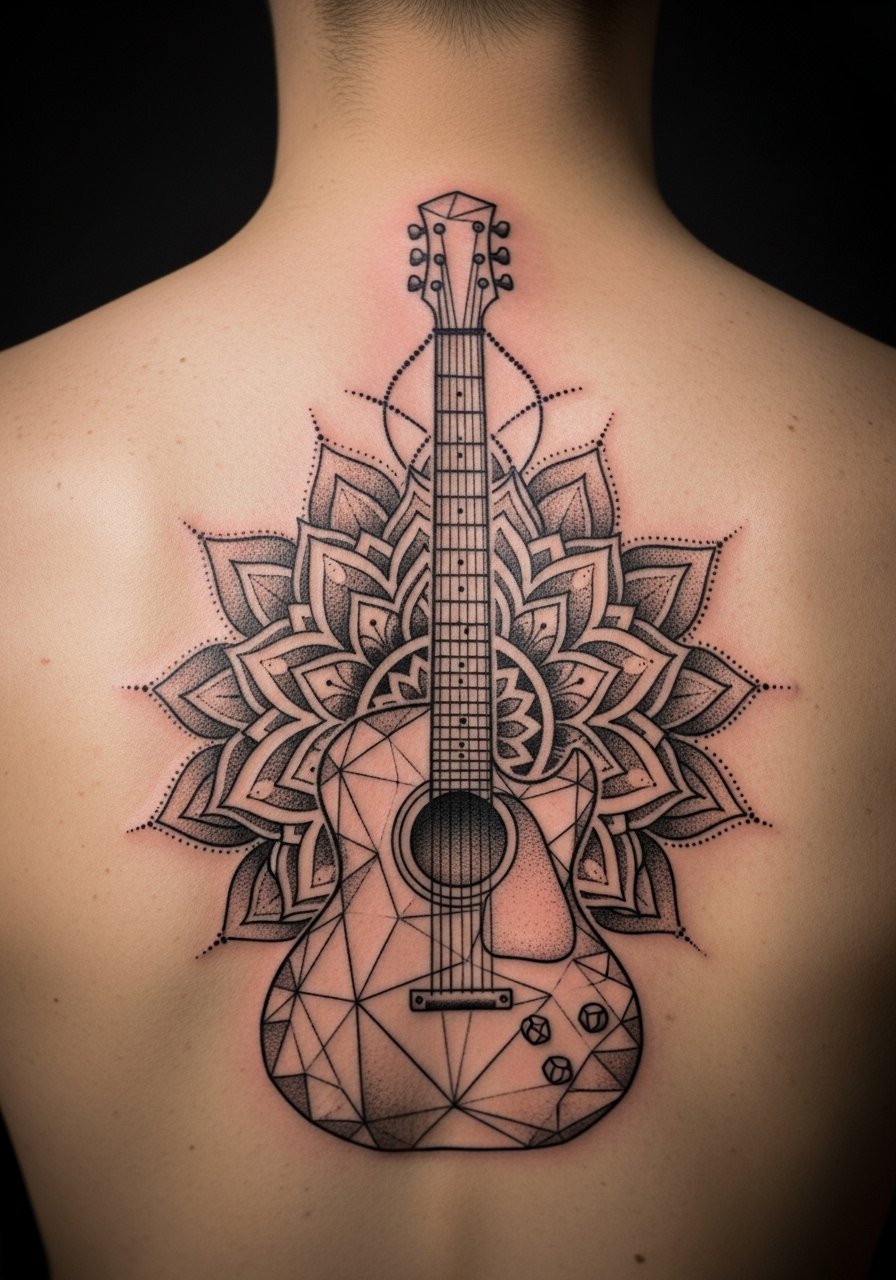
Combining a guitar silhouette with mandala geometry creates a symbolic, meditative design. The back is forgiving for larger, intricate work and ages steadily if line weight is consistent. Dotwork fades if too faint—request stronger dots and clean negative space. This suits someone who wants a balanced, statement piece.
11. Fingerboard Fret Detail on Side of Finger
Style/Technique: Micro-Detail / Fine Line
Pain Level: High (8/10)
Session Time: 30–90 minutes
Best For: Ultra-small, detailed accents
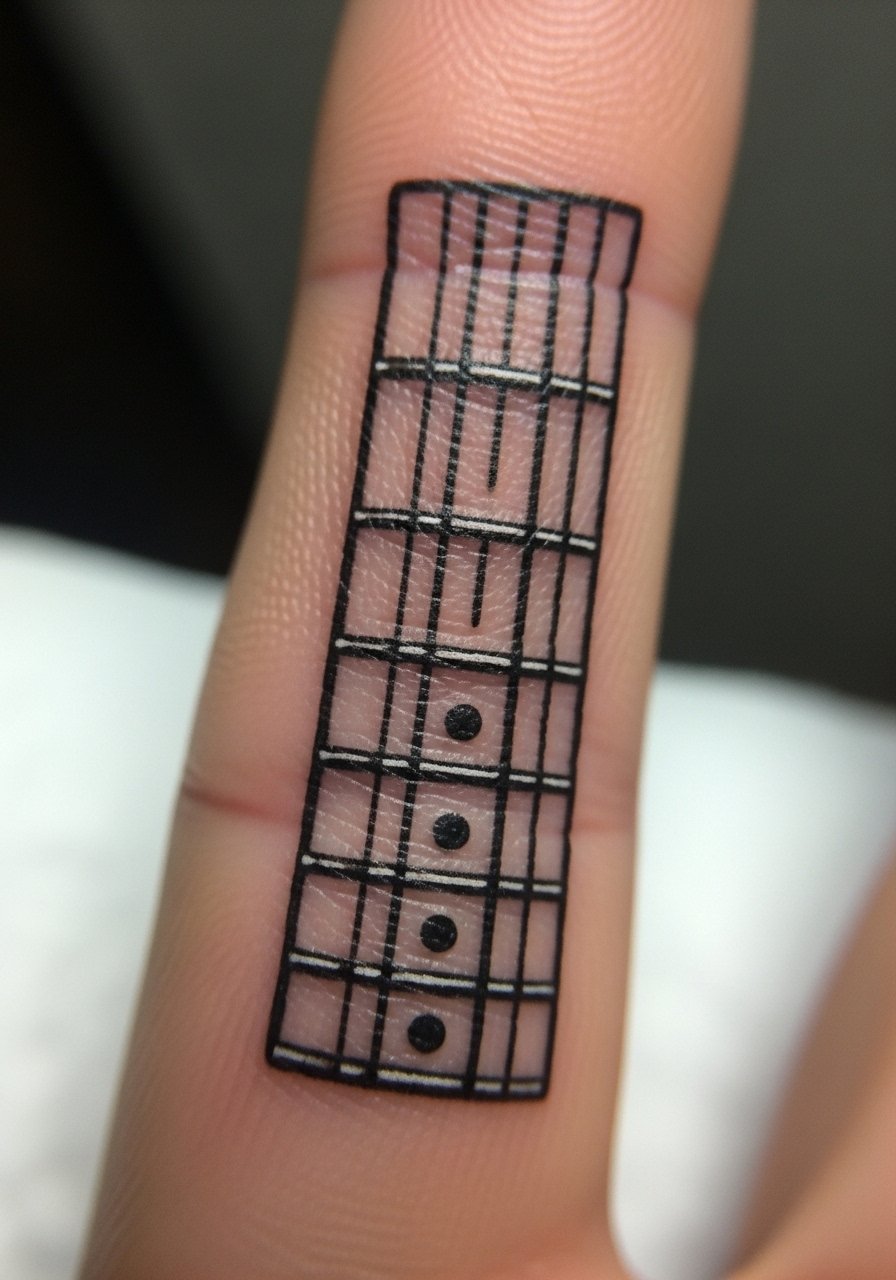
Finger tattoos are trendy but prone to fast fading and blowouts. Fret detail looks cool initially but often blurs; I advise choosing slightly thicker lines or accepting touch-ups. Expect quicker fade than other areas and more frequent maintenance. Ask your artist for healed examples on fingers.
12. Vintage Amp With Guitar Cable on Calf
Style/Technique: Neo-Realism / Line & Shade
Pain Level: Medium (4/10)
Session Time: 1-3 hours
Best For: Calf, showcase of gear love
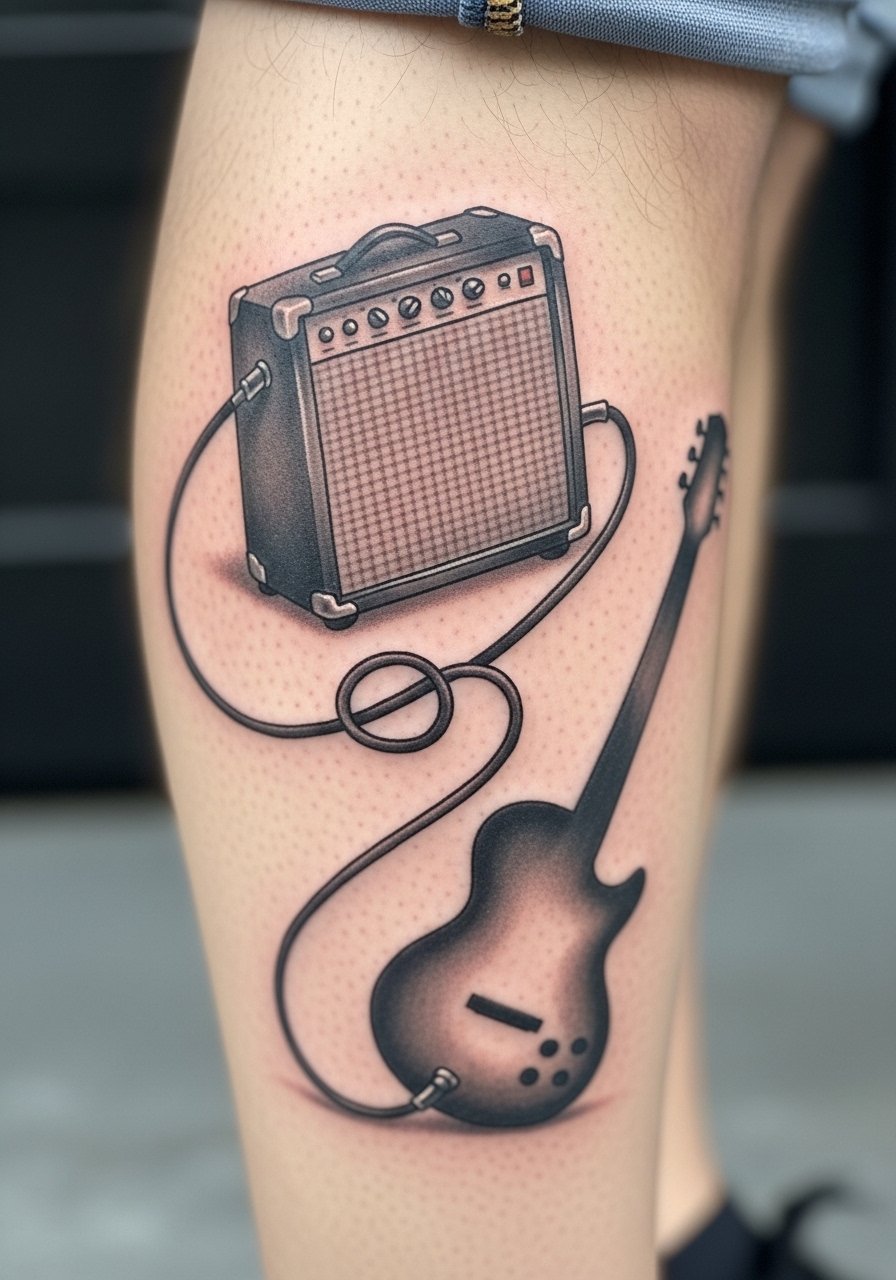
Amplifier imagery tells a gear story without being literal. The calf is great for mid-sized pieces and ages well. Shading holds better than fine color here. Avoid tiny text or logos that age poorly; request strong contrast and bold cord lines to keep the composition readable as it softens.
13. Guitar Pick Mosaic On Thigh
Style/Technique: Blackwork / Pattern
Pain Level: Low-Medium (3/10)
Session Time: 1-3 hours
Best For: Hidden, larger pattern pieces
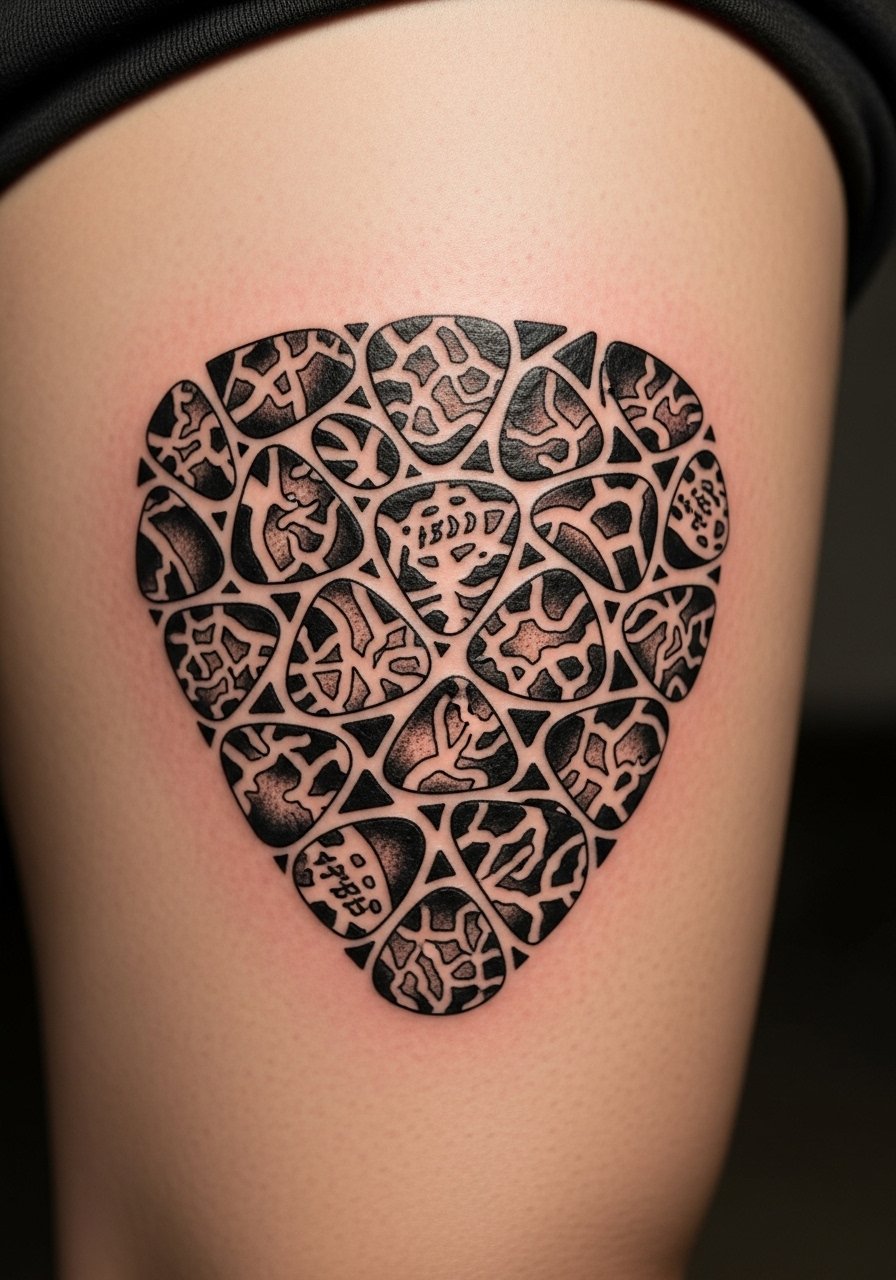
A pick mosaic is playful and versatile for thigh placement. It’s easy to hide and makes a fun statement. Blackwork keeps the design legible over time. Be wary of overly tiny spacing; bigger negative spaces and thicker outlines help longevity. Ask for sample compositions to ensure balance.
14. Pick With Lyrics on Inner Wrist
Style/Technique: Script + Minimalist / Fine Line
Pain Level: Medium (4/10)
Session Time: 1 hour
Best For: Personal, readable small text
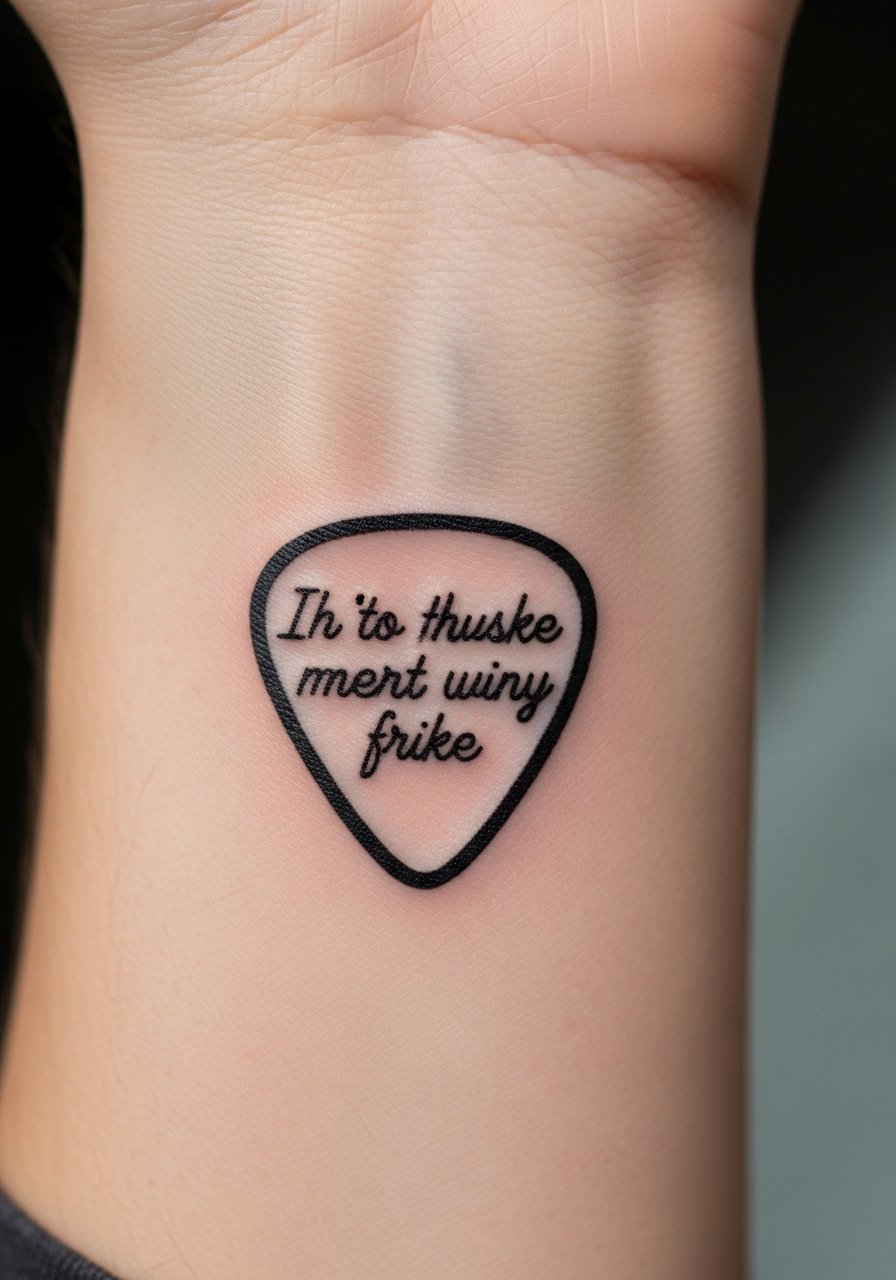
Combining a pick with a tiny lyric is personal and wearable. Wrist skin moves, so choose short, simple text and bold lettering. Script can blur if too thin—opt for a legible typeface. I recommend seeing healed wrist script samples from your artist to set expectations.
15. Sleeve of Guitar Elements on Full Arm
Style/Technique: Mixed Styles / Cohesive Sleeve
Pain Level: Medium-High (5-6/10)
Session Time: Multiple sessions
Best For: Collectors, cohesive storytelling
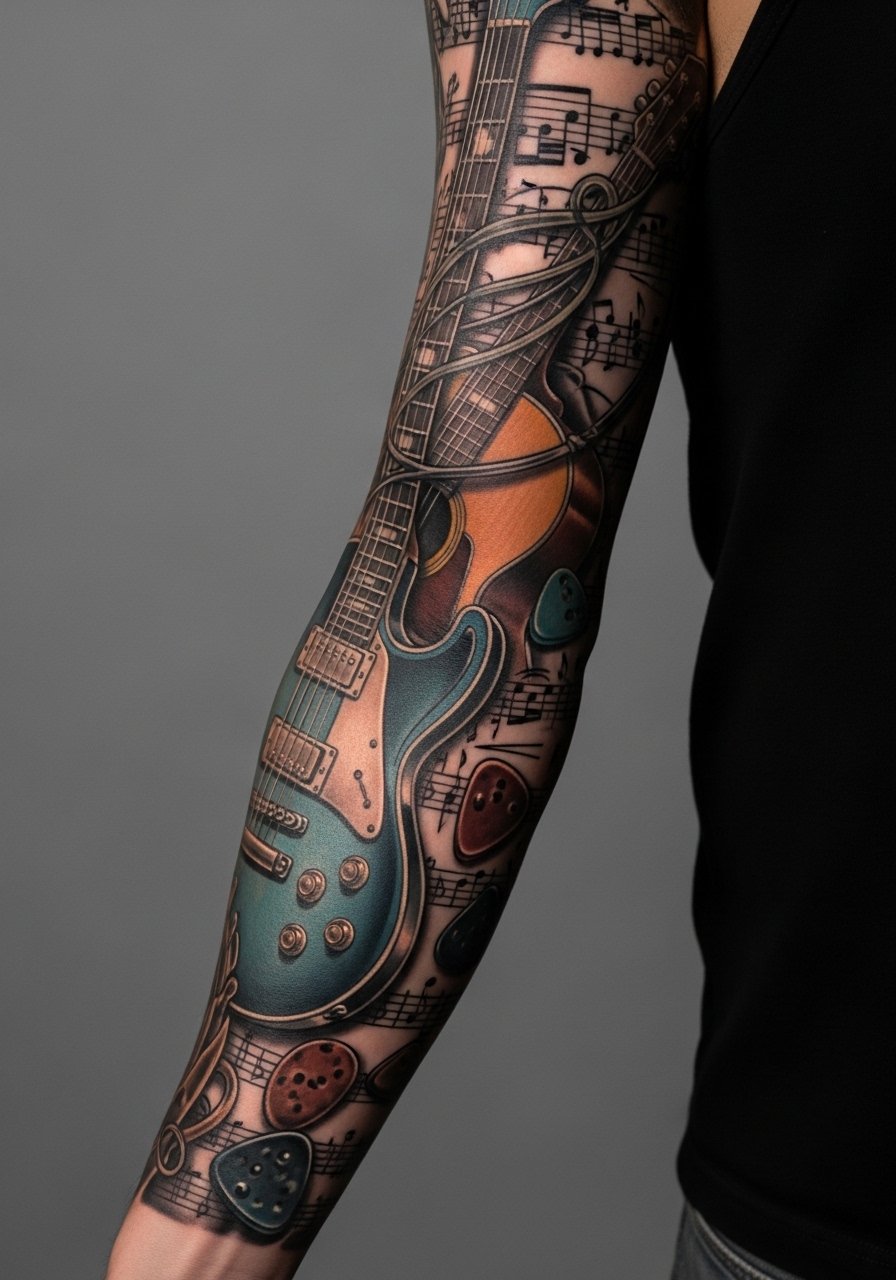
A sleeve lets you combine motifs into a narrative—acoustic bodies, fretboards, amp knobs. It’s a commitment and usually done over sessions. Think about flow and negative space so healed pieces don’t crowd. I always suggest establishing a color palette early and asking your artist for healed sleeve photos.
16. Minimal Chord Diagram on Back of Neck
Style/Technique: Minimalist / Iconic
Pain Level: Medium (4/10)
Session Time: 30–60 minutes
Best For: Small, meaningful placements

Chord diagrams are clever, discreet, and meaningful to players. The neck is visible with certain haircuts and heals relatively fast. Keep the diagram simple and bold—tiny dots will fade. Ask your artist to thicken nodes for clarity.
17. Illustrated Guitar Player Silhouette on Ribcage
Style/Technique: Silhouette / Illustrative
Pain Level: High (7-8/10)
Session Time: 1-3 hours
Best For: Dramatic, story-driven pieces

A guitarist silhouette captures motion and mood. Rib placement is painful but creates an intimate design. Solid black silhouettes fare well over time. Avoid tiny interior detail that will blur; keep the figure bold and iconic.
18. Vintage Headstock Tattoo on Forearm
Style/Technique: Micro-Realism / Line & Shade
Pain Level: Low-Medium (3/10)
Session Time: 1-2 hours
Best For: Gear lovers, visible forearm pieces
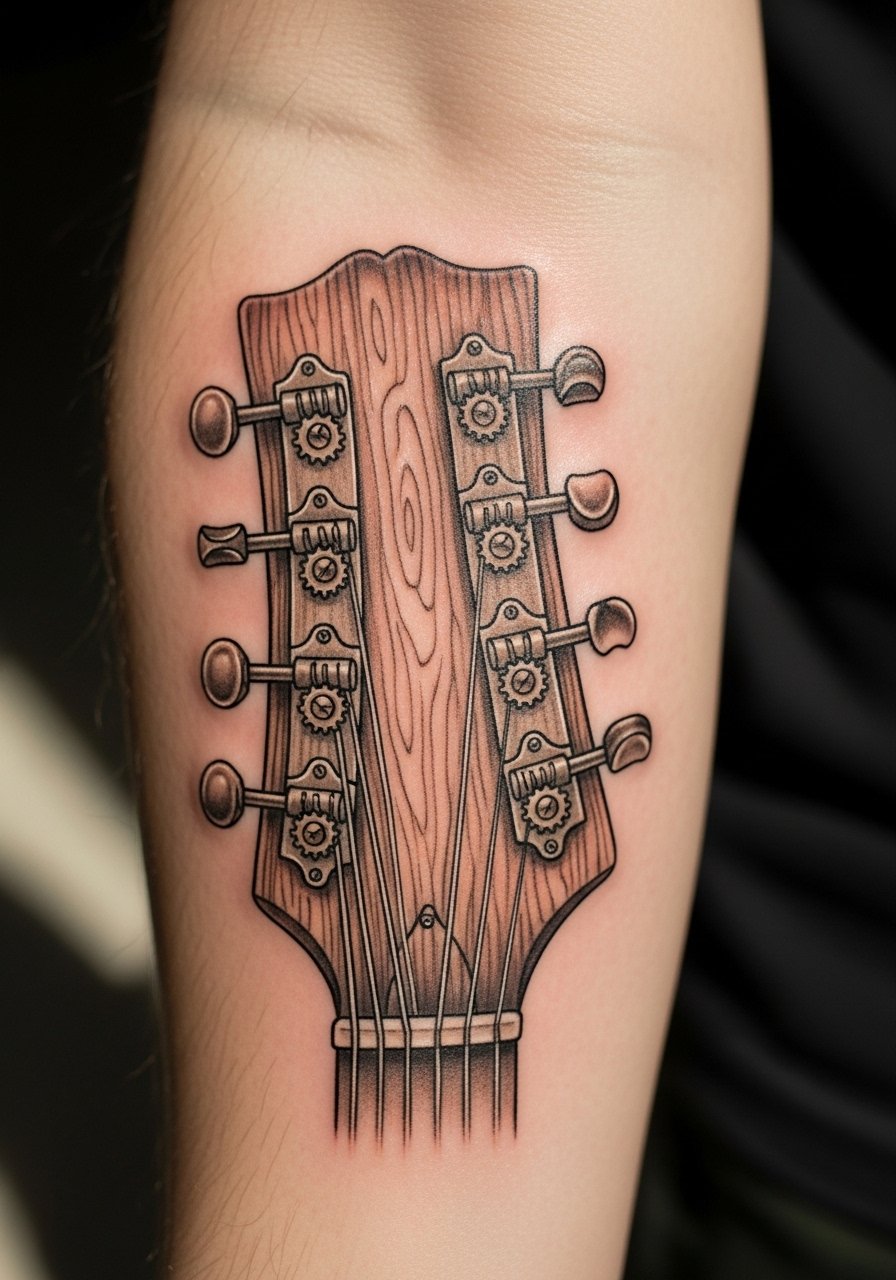
Headstock tattoos show brand-neutral detail—tuners, strings, and logo-free wood grain. Forearm placement is ideal. Overly fine wood grain can blur; ask for decisive shadowing and crisp tuner outlines. Heals predictably with proper aftercare.
19. Colorful Strat-Style Guitar on Thigh
Style/Technique: Neo-Traditional / Color Pop
Pain Level: Low-Medium (3-4/10)
Session Time: 2-3 hours
Best For: Bold color, hidden placements
Thigh canvas allows for larger, colorful guitars that remain private. Color fades a bit but retains vibrancy if sun exposure is minimal. Avoid tiny color gradients that don’t translate well—request clean fills and saturated outlines.
20. Frets as Finger Rings Around Forearm
Style/Technique: Minimalist / Band Tattoo
Pain Level: Low-Medium (3/10)
Session Time: 1 hour
Best For: Subtle, wrap-around designs
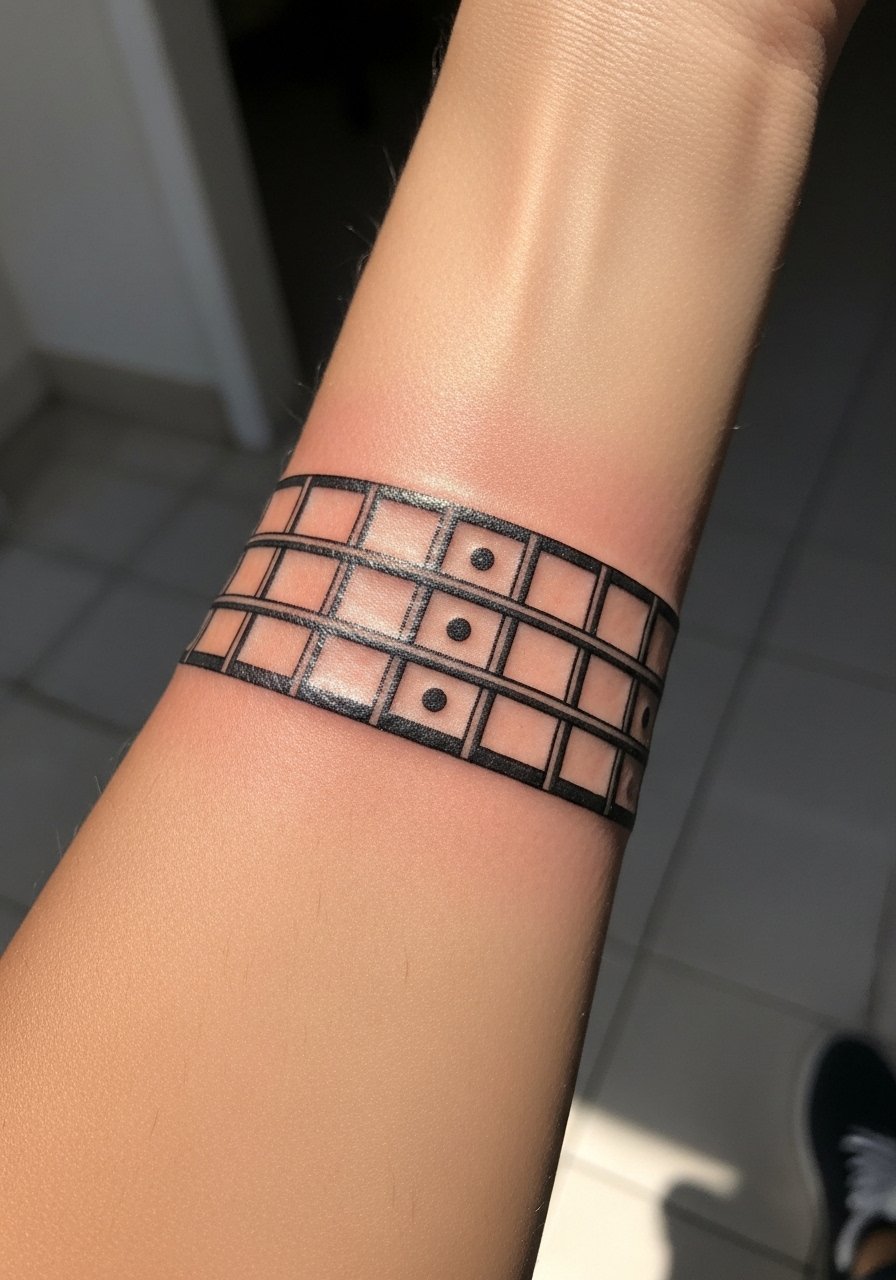
Fret bands wrap the arm and read like a wearable reference. They age well if lines are bold and evenly spaced. Thin bandwork can blur into one line over years; ask for small negative breaks to keep each fret distinct.
21. Tiny Acoustic Body on Thumb
Style/Technique: Minimalist / Tiny Icon
Pain Level: High (6-7/10)
Session Time: 30–45 minutes
Best For: Cute, very small placements
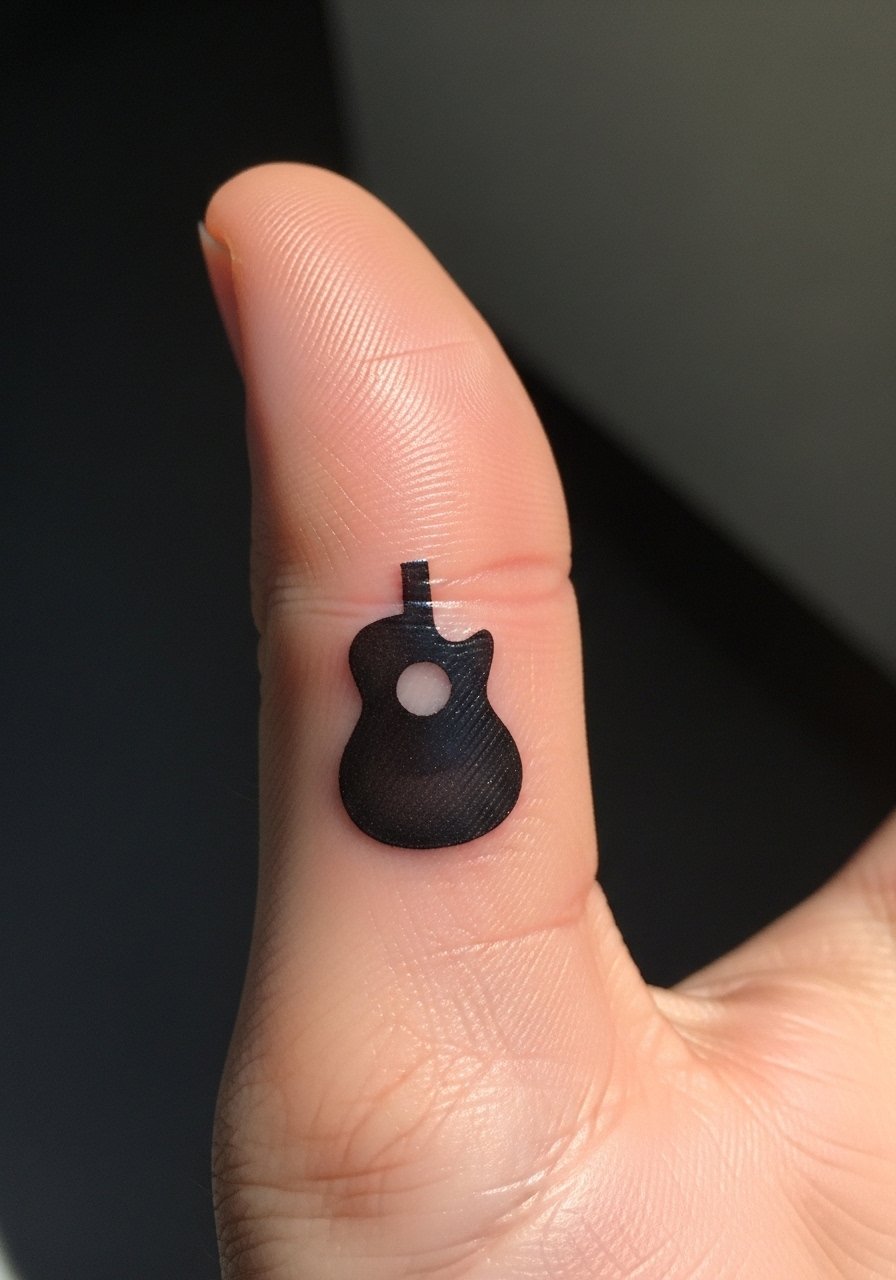
Thumb tattoos are adorable but fade fast. If you want something discrete, be prepared for touch-ups. Keep the shape bold and solid—tiny interior details won’t last. Hydration and limited friction from gloves help early healing.
22. Single-String Line Running Down Collarbone
Style/Technique: Minimalist / Fine Line
Pain Level: Medium (4/10)
Session Time: 30–60 minutes
Best For: Sleek, linear placements
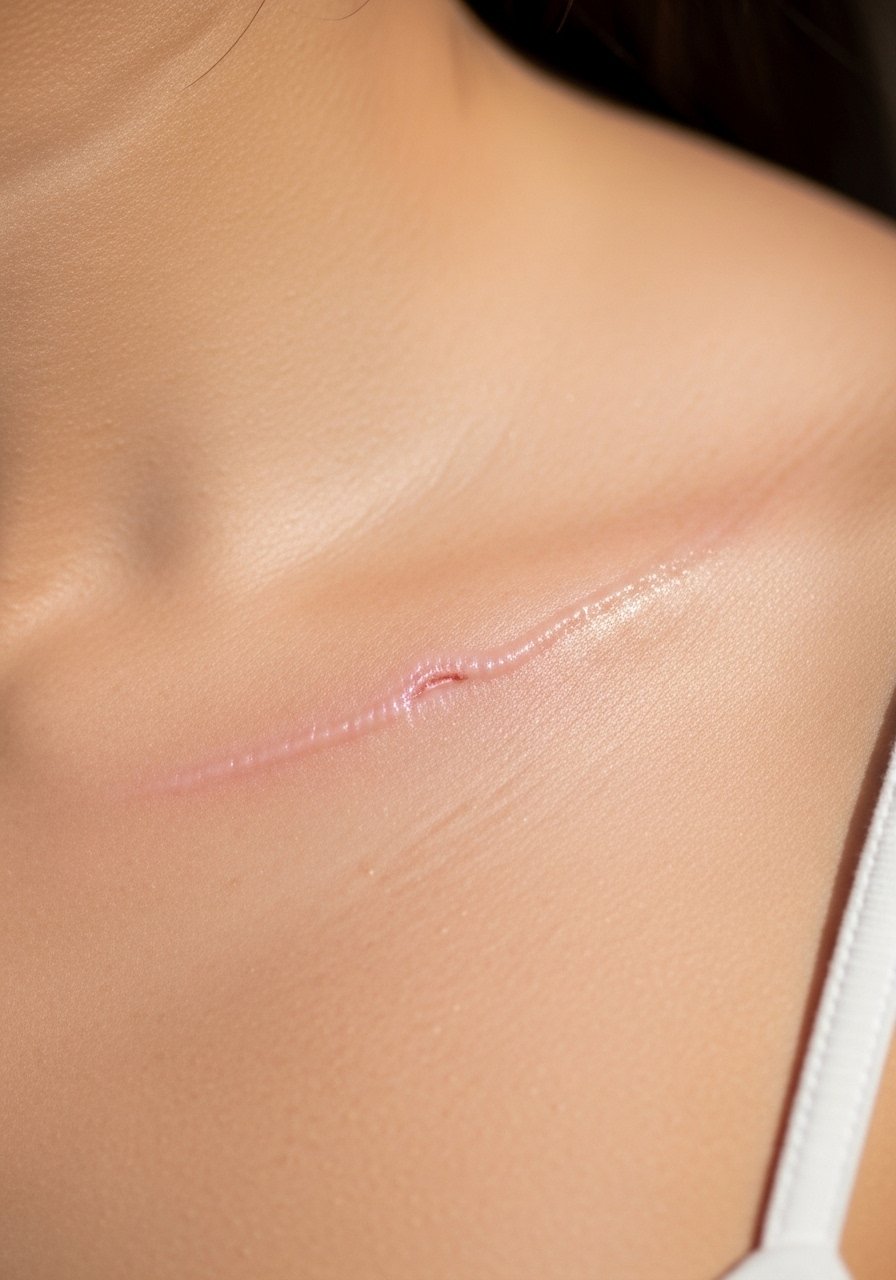
A single-string motif is sleek and modern. Collarbone placement shows beautifully but gets sun exposure—sunscreen is a must. Lines should be slightly stronger than you think to avoid premature blurring. Ask artists for healed examples of linear work.
23. Guitar And Raven Blackwork On Shoulder Blade
Style/Technique: Blackwork / Neo-Folk
Pain Level: Medium (4/10)
Session Time: 2-3 hours
Best For: Mythic, storytelling shoulder pieces
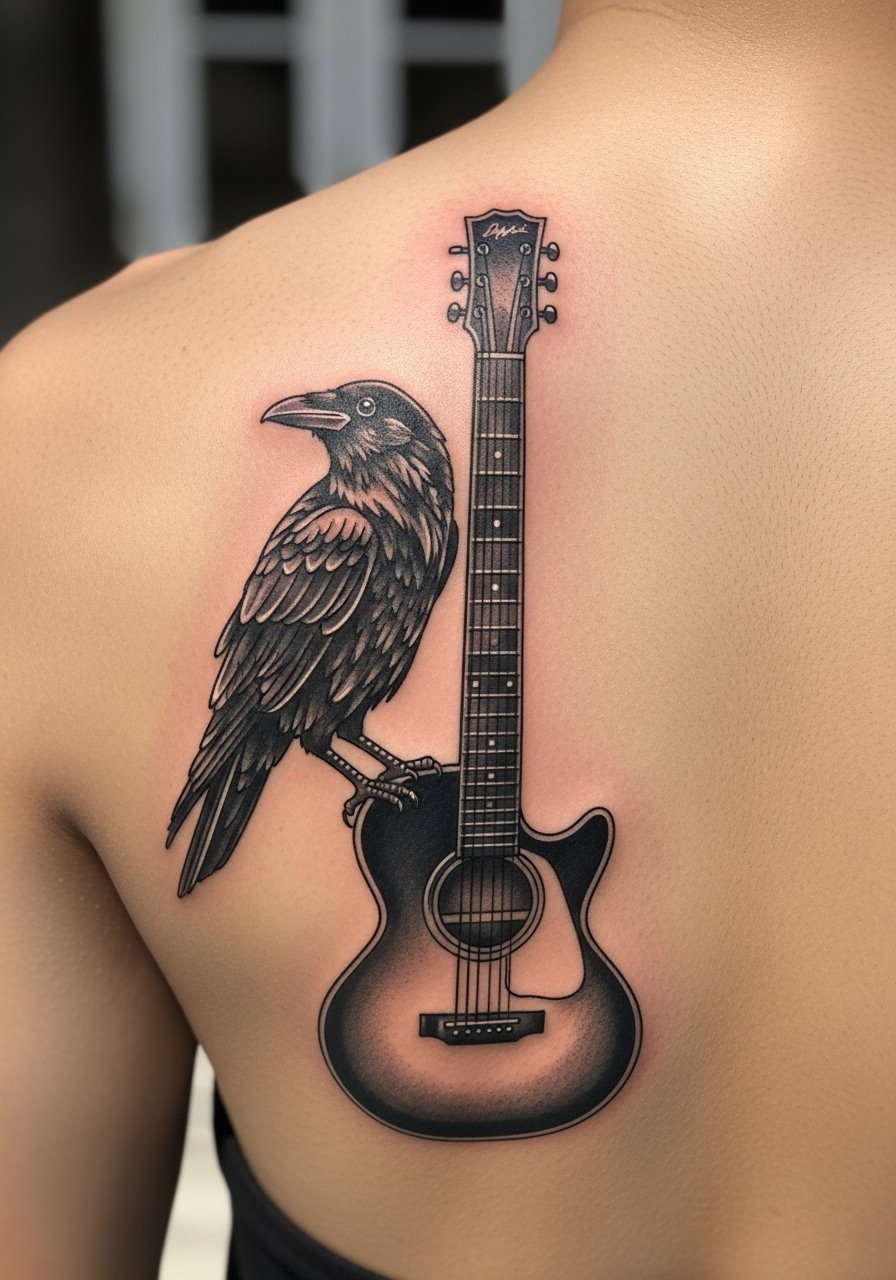
Combining instrument imagery with animal motifs adds narrative weight. The shoulder blade wears well and allows for striking blackwork. Heavy solid blacks keep the design readable as it ages. Don’t overcrowd small negative spaces—ask for bold silhouettes and clear separation.
Tattoo Prep and Aftercare Essentials
Aftercare Essentials:
- Aquaphor Healing Ointment, 14oz tube — For first 3–5 days to protect fresh ink
- Saniderm Transparent Adhesive Bandage, 6-inch roll — Second-skin healing for the initial phase
- CeraVe Fragrance-Free Moisturizing Lotion, 12oz — Daily moisture after initial healing
- Dr. Bronner's Unscented Castile Soap, 32oz — Gentle cleaning during first week
Before Your Appointment:
- Tattoo Numbing Cream 5% Lidocaine — Use only if your artist approves, 30–45 min before
- Stencil Transfer Paper (Tattoo Stencil Paper) — If you’re testing placements at home
Long-Term Maintenance:
- SPF 50 Sunscreen Stick for Tattoos — Daily protection to prevent fading
- Mad Rabbit Tattoo Balm, 2oz — Keeps healed tattoos vibrant
- Hustle Butter Deluxe, 2.5oz — Vegan aftercare alternative
Optional Comfort & Repair:
- Hydrocolloid Bandages (Large) — For small spots that need extra protection
- Tattoo Aftercare Travel Kit — Handy for gigs or travel
Artists I’ve spoken with point to Saniderm and Aquaphor for initial healing, then a fragrance-free lotion and daily SPF for long-term vibrancy. Always check product instructions and run a patch test if you have sensitive skin.
Frequently Asked Questions
Q: How bad does a guitar tattoo actually hurt?
A: Pain depends mostly on placement. Outer forearm or bicep is around 2–4/10 for most people; ribs, sternum, fingers are 7–9/10. I’ve seen first-timers surprised by how tolerable arm sessions are. For sensitive spots, ask about numbing cream 5% lidocaine but always check with your artist first.
Q: How do I make sure my guitar tattoo ages well?
A: Choose strong line weight or solid black for small details, avoid super-fine lines in high-friction areas, and protect the tattoo from sun using an SPF 50 sunscreen stick. From what I’ve noticed, bold shapes and contrast keep their clarity longest.
Q: What if I want a meaningful riff or lyric included?
A: Soundwaves and short lyric lines work great but keep them concise and bold enough to remain legible. For lyrics on wrists or fingers, choose thicker script and ask to see healed script samples from the artist.
Q: Can I work out after getting a guitar tattoo?
A: Wait at least 48–72 hours before light activity, longer if the tattoo is in a flex area. Sweat and friction can cause scabbing and ink loss. Keep the area clean with Dr. Bronner's unscented soap during the first week.
Q: How long until my tattoo looks “normal” healed?
A: Surface healing is usually 2–3 weeks; deeper settling can take 2–3 months. Colors often look dull while skin regenerates and then brighten again. I tell people to expect gradual improvement and to avoid heavy sun exposure during that early period.
Q: Do tattoos look different on different skin tones?
A: Yes. Black and gray read well across tones. Bright colors can appear more muted on deeper skin; white ink isn’t reliable as a highlight on darker tones. I always recommend reviewing an artist’s healed portfolio on your skin tone before deciding on heavy color.
