
I spent months pinning birth year tattoos and asking artists what actually heals well. My aha moment: the idea is easy; the trick is choosing a style that ages with you. These 22 birth year treatments are styles I keep seeing in 2026 and the ones that look best healed.
This list focuses on minimalist, traditional, micro-realism, and blackwork takes on birth year tattoos. These ideas work for wrists, ribs, forearms, collarbones, and places people hide or show off. From what I've seen, artists in 2026 favor crisp numerals, small script, and clever negative space for longevity.
1. Fine Line Roman Numerals On Inner Wrist
Style/Technique: Fine Line / Minimalist
Pain Level: Low (2-3/10)
Session Time: 30–60 minutes
Best For: First tattoo, easy to hide with watch or bracelet
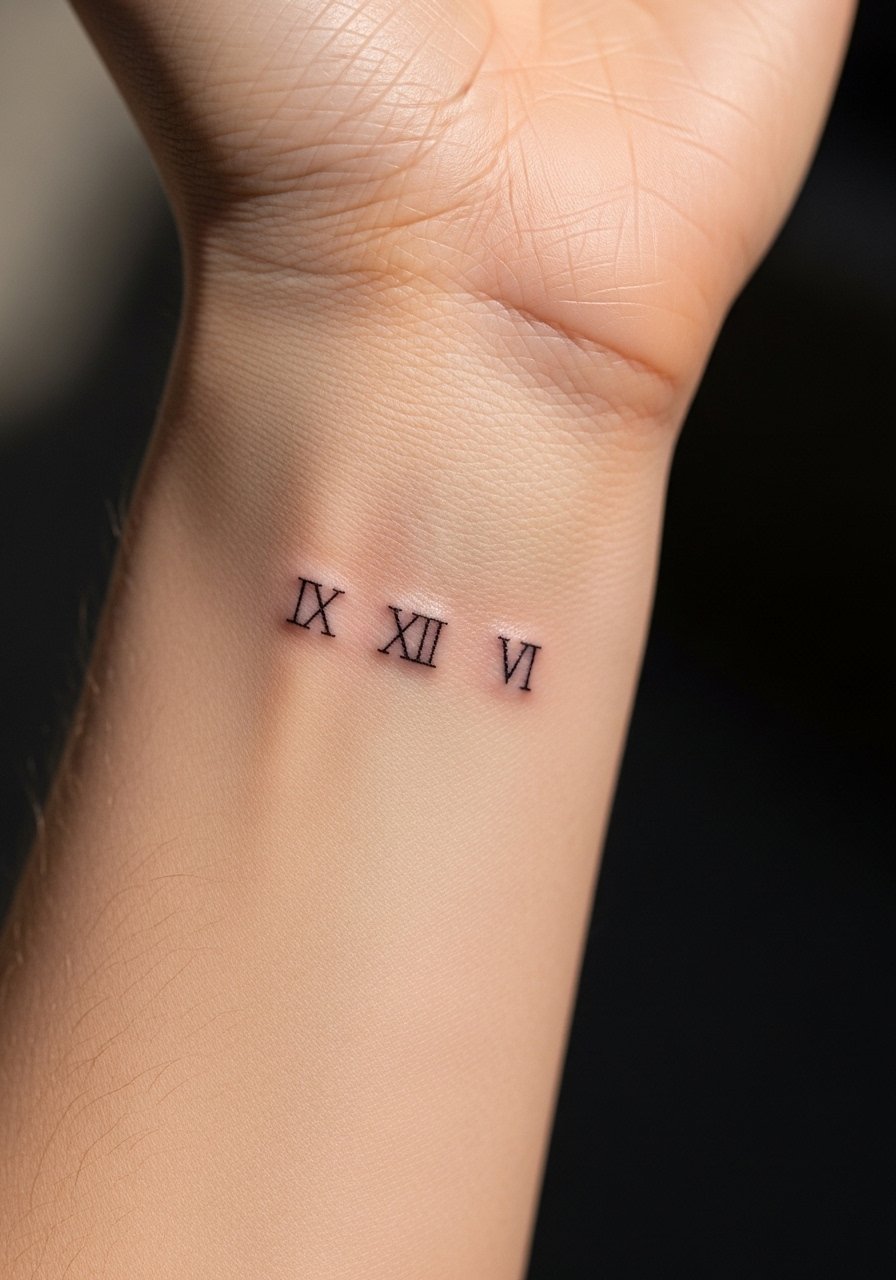
I got a Roman numeral wrist piece and learned fine line here needs a steady hand. It reads clean and timeless when healed. Inner wrist is low pain but the skin is thin so lines can blur if done too shallow. Expect 2–3 weeks surface healing; keep it moisturized. A common mistake is asking for lines too hairline-thin—ask for slightly bolder hairlines so they hold. Mention "crisp single-needle linework" in your consult and look for artists who post healed wrist shots. Minimalist and timeless are trending because they age predictably.
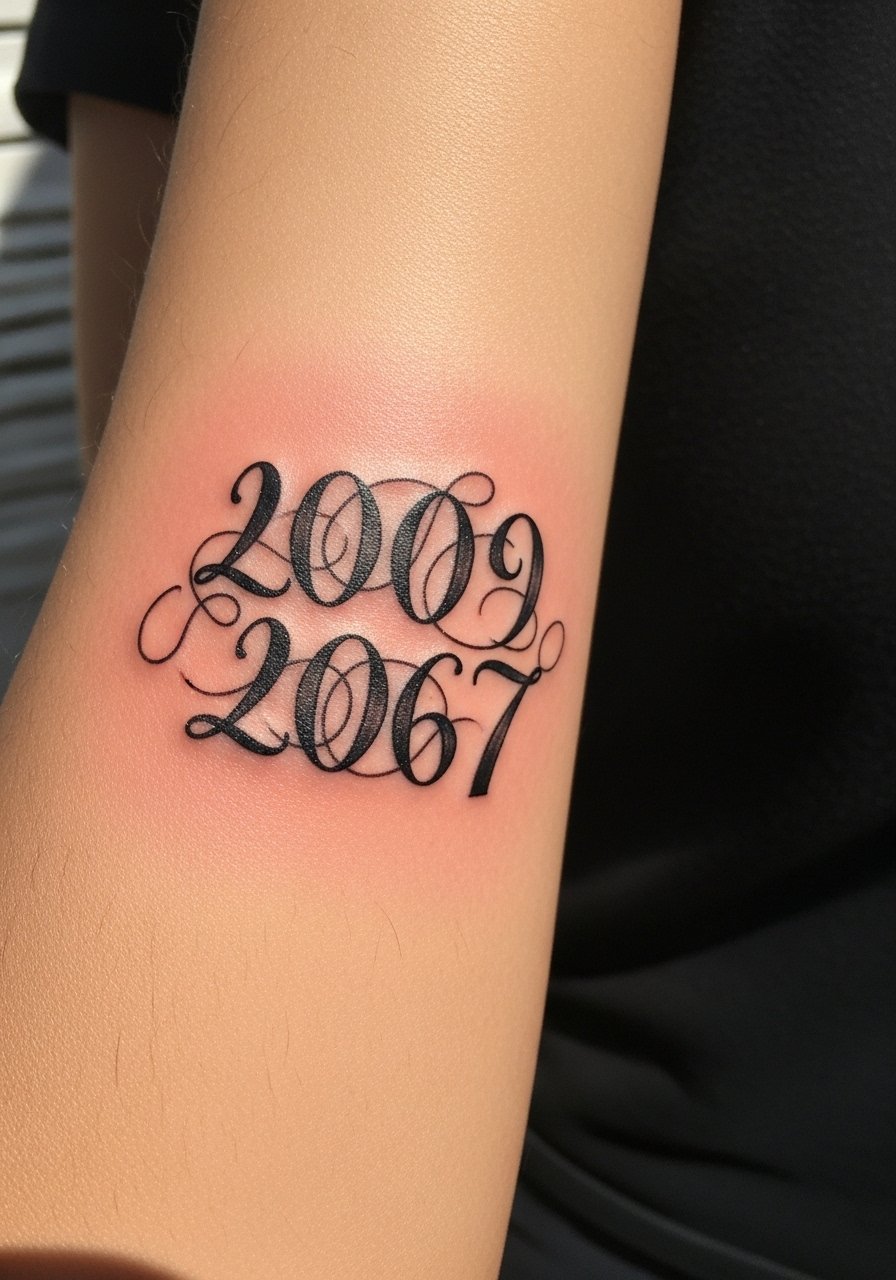
2. Minimalist Script Birth Year On Collarbone
Style/Technique: Script / Minimalist
Pain Level: Medium (4/10)
Session Time: 45–90 minutes
Best For: Visible but elegant, can be hidden by clothing
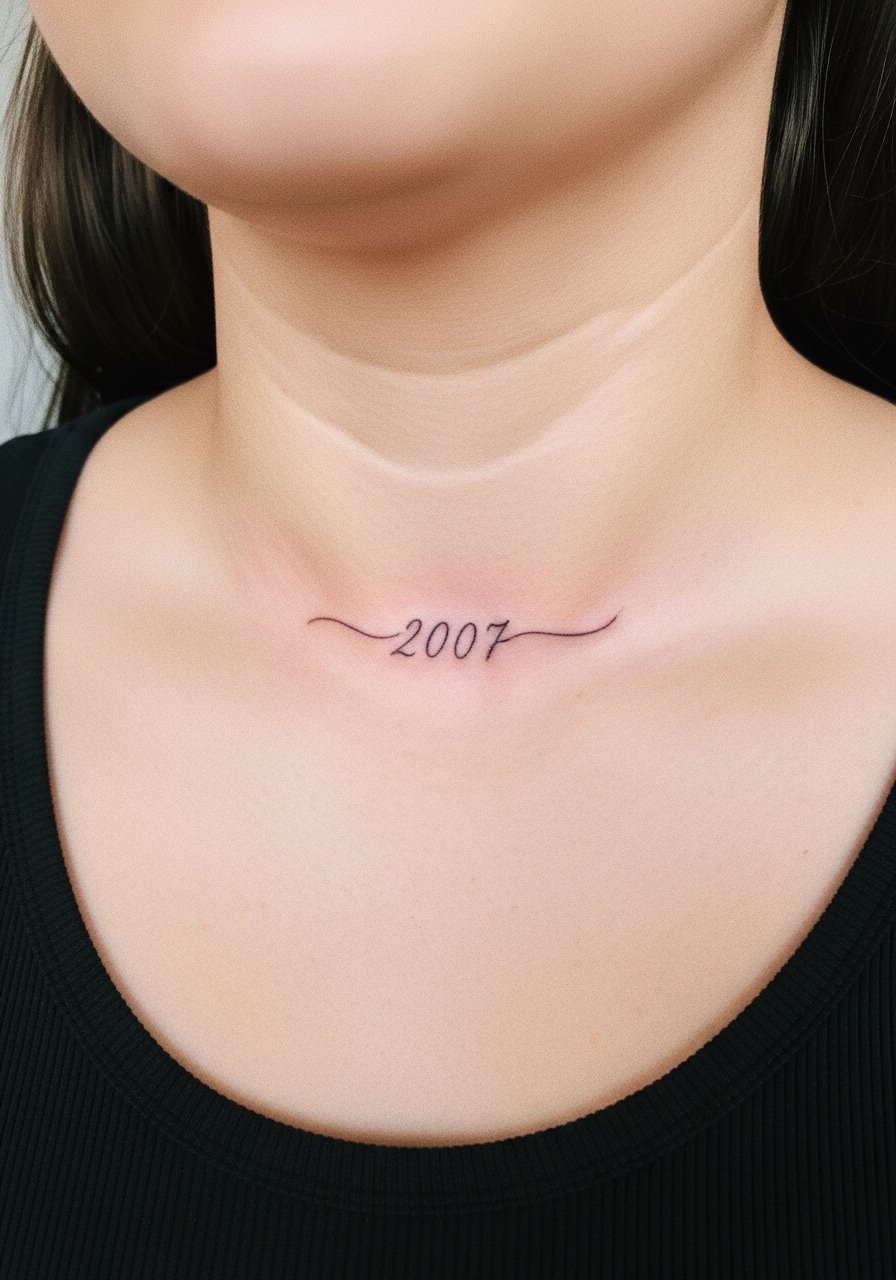
A thin, handwritten-style year on the collarbone looks personal and delicate. The collarbone has moderate pain because of bone proximity. Healing takes about 3 weeks for scabbing; avoid bras and straps rubbing the area. From my experience, slightly thicker script fares better after a year. Avoid overly ornate fonts—those blur. Ask your artist for a healed-styles portfolio and request the stencil sit for a few minutes so you can live with it before ink. This style reads meaningful and discreet when healed.
3. Bold Traditional Year Banner On Upper Arm
Style/Technique: Traditional / Bold Linework
Pain Level: Low (2-3/10)
Session Time: 1–2 hours
Best For: Statement piece, long-term clarity
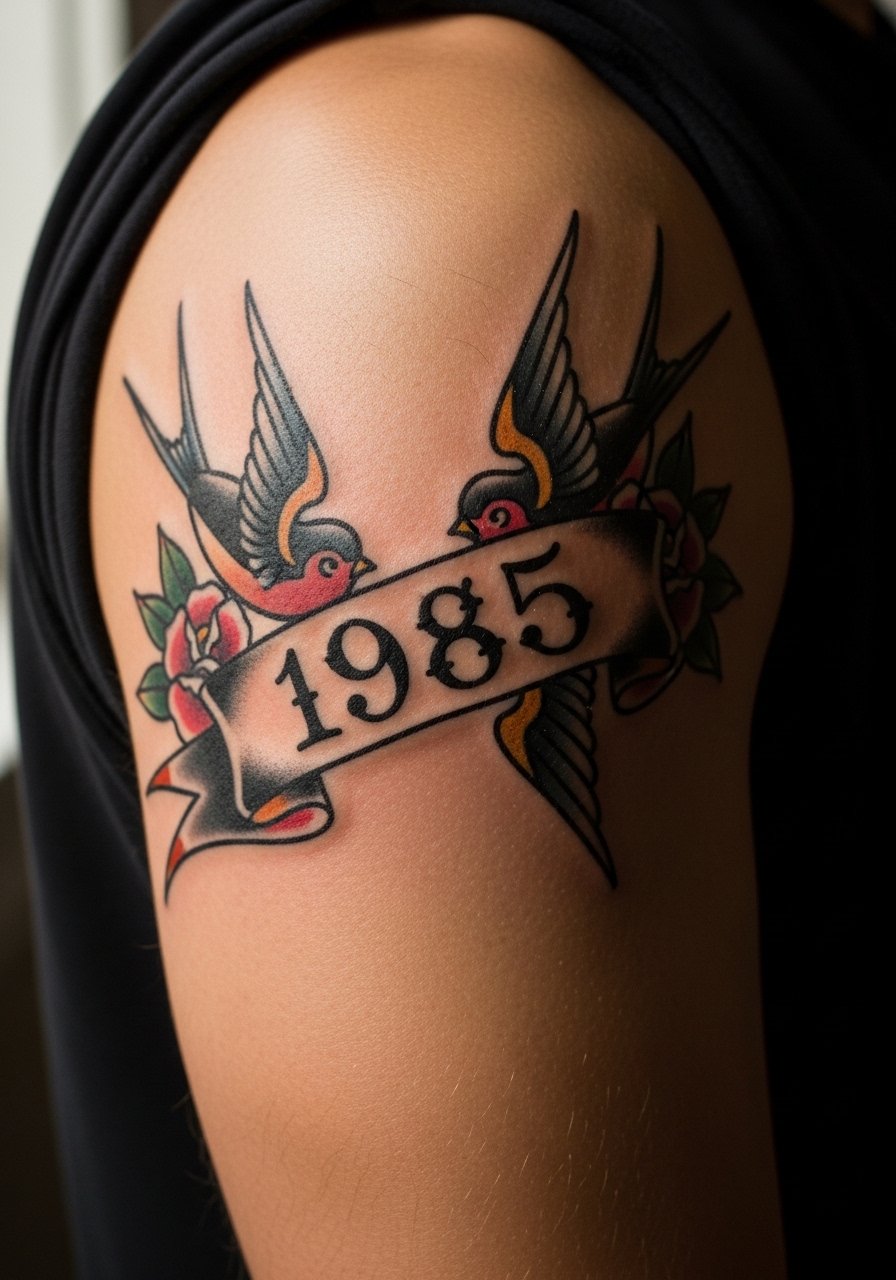
A banner-style year in American Traditional holds up well. Thick outlines and solid fills resist blur. Upper arm is forgiving for pain and heals predictably. I like this when you want a piece that still looks good after years. Common mistake: tiny text inside a thin banner—keep numerals large. Ask for saturated blacks and bold outlines; artists who do classic flash or neo-traditional work are ideal. This is a timeless choice that ages well.
4. Micro-Realism Birth Year With Tiny Portrait On Thigh
Style/Technique: Micro-Realism / Portrait Accent
Pain Level: Medium (4/10)
Session Time: 1–3 hours
Best For: Personal tribute, high-detail healed look
Pairing a small photoreal portrait with a birth year turns a number into a story. Thighs are one of the least painful spots and hold detail nicely. Micro-realism needs an artist experienced in tonal shading; I've seen pieces lose detail when done by generalists. Healing can show temporary dullness, but contrast returns after a few months. Avoid asking for extreme micro detail in very small sizes—scale matters. Ask to see healed micro-realism on similar skin tones.
5. Blackwork Block Numerals On Sternum
Style/Technique: Blackwork / Bold Numerals
Pain Level: High (7-8/10)
Session Time: 1–2 hours
Best For: High-impact, low-maintenance aging

Chunky black numerals on the sternum are dramatic and age well because solid black resists fading. Sternum is painful, so expect higher discomfort. Healing needs extra attention due to clothing friction; I recommend loose shirts for a week. Common mistake: overly thin type on sternum—go bold. If you want longevity, blackwork is forgiving. Tell your artist you want saturated fills and crisp edges; pick someone known for heavy-line compositions.
6. Dotwork Constellation Year On Shoulder Blade
Style/Technique: Dotwork / Geometric
Pain Level: Low-Medium (3-4/10)
Session Time: 1–2 hours
Best For: Unique, subtle back placement
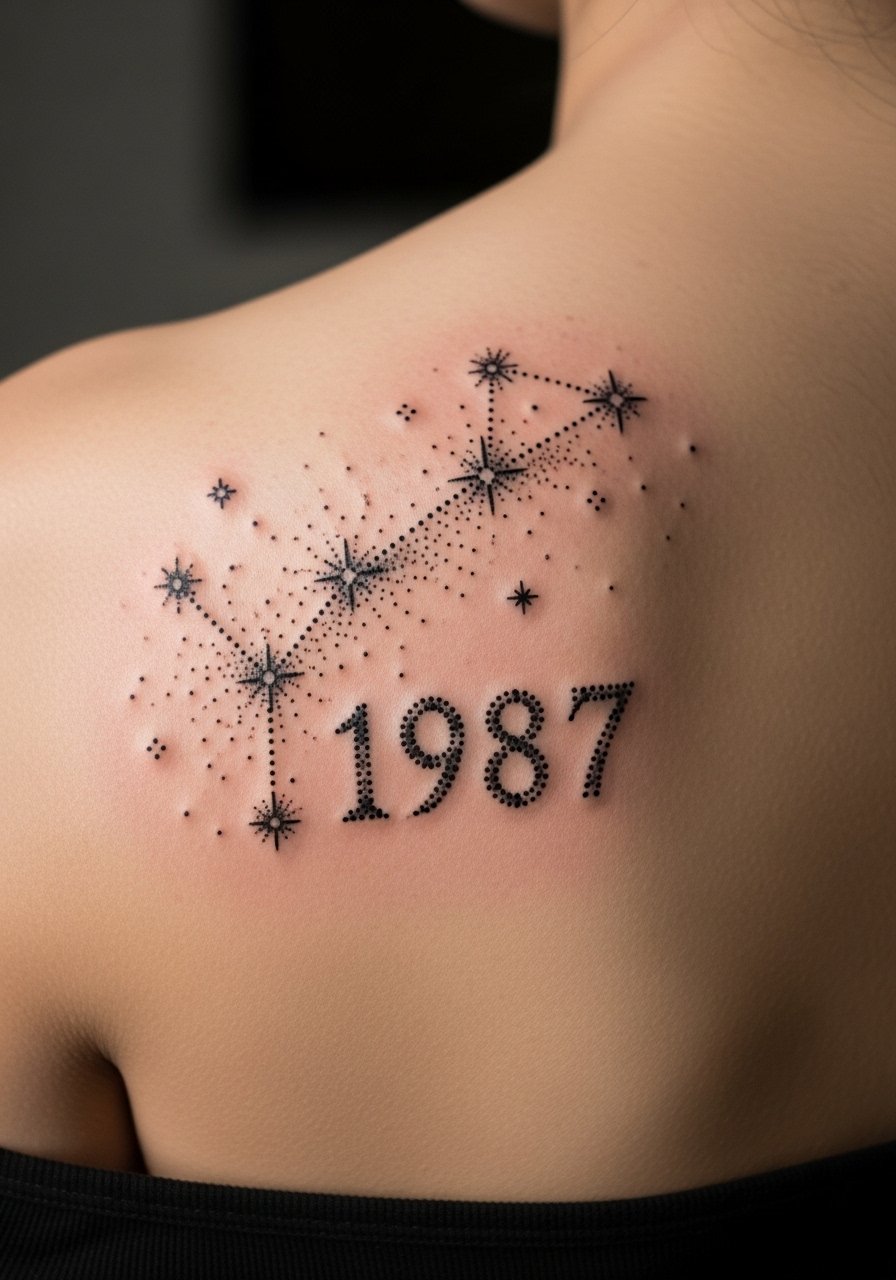
Dotwork can render a birth year as a constellation or dotted numeral for a softer look. Shoulder blade is low pain and easy to hide. Dots can blur if packed too tight; artists who specialize in stippling know spacing. From what I've seen, dotwork heals to a textured look that reads subtly from a distance. Mistake to avoid: requesting ultra-dense stippling that later looks muddy. Ask for healed photos of dotwork numerals.
7. Watercolor Birth Year Splash On Forearm
Style/Technique: Watercolor / Painterly
Pain Level: Medium (4/10)
Session Time: 1–2 hours
Best For: Artistic, colorful wrist-to-forearm pieces
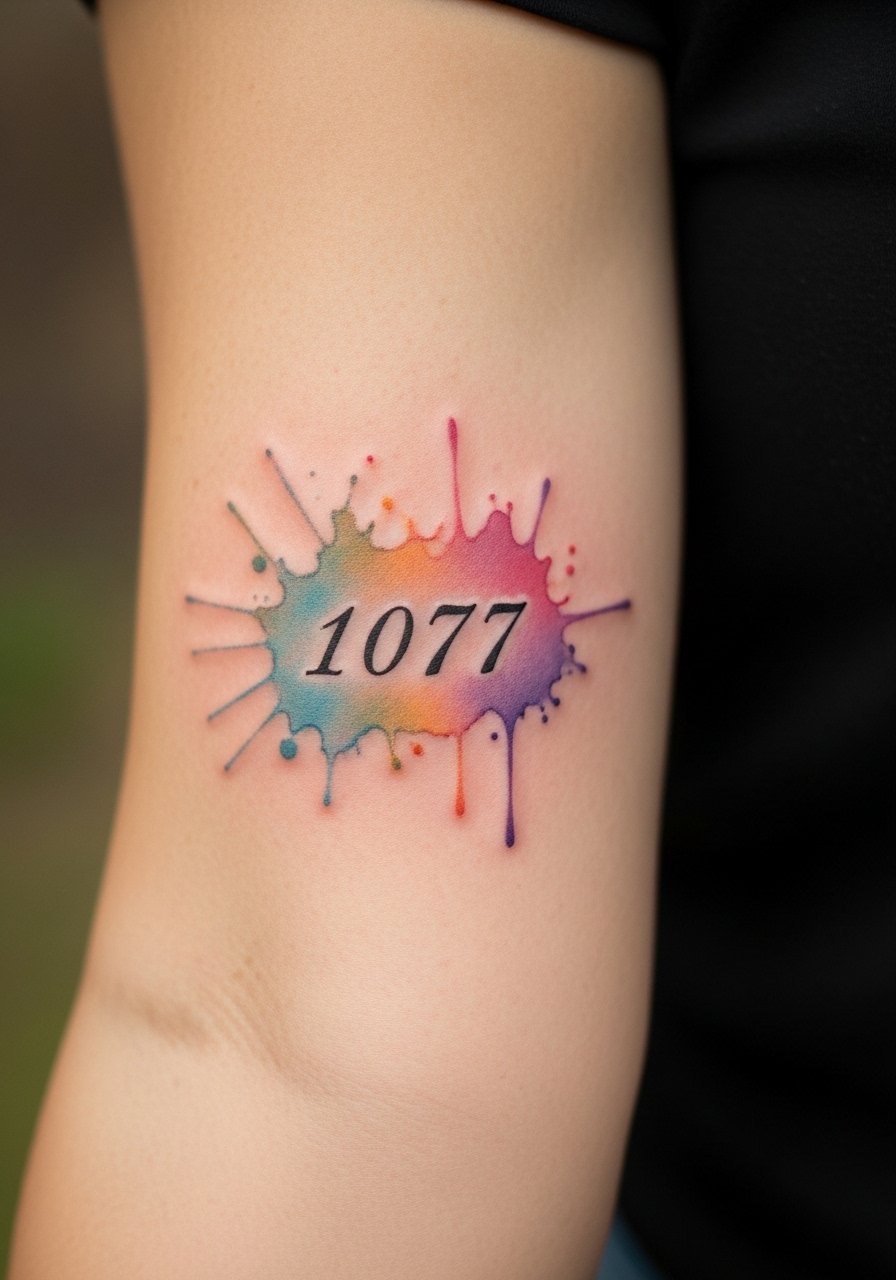
A watercolor wash behind clear numerals makes the year pop without strict outlines. Colors look softer healed than fresh, so expect some settling. Forearm placement is moderate pain and great for visibility. Watercolor can fade faster; from experience, placing black or dark numerals over the color keeps readability. Don't choose neon-only palettes if you want longevity. Ask artists who post healed watercolor examples and plan for touch-ups later.
8. Neo-Traditional Year With Floral Frame On Calf
Style/Technique: Neo-Traditional / Decorative
Pain Level: Low-Medium (3-4/10)
Session Time: 2–3 hours
Best For: Decorative leg piece, easy to cover
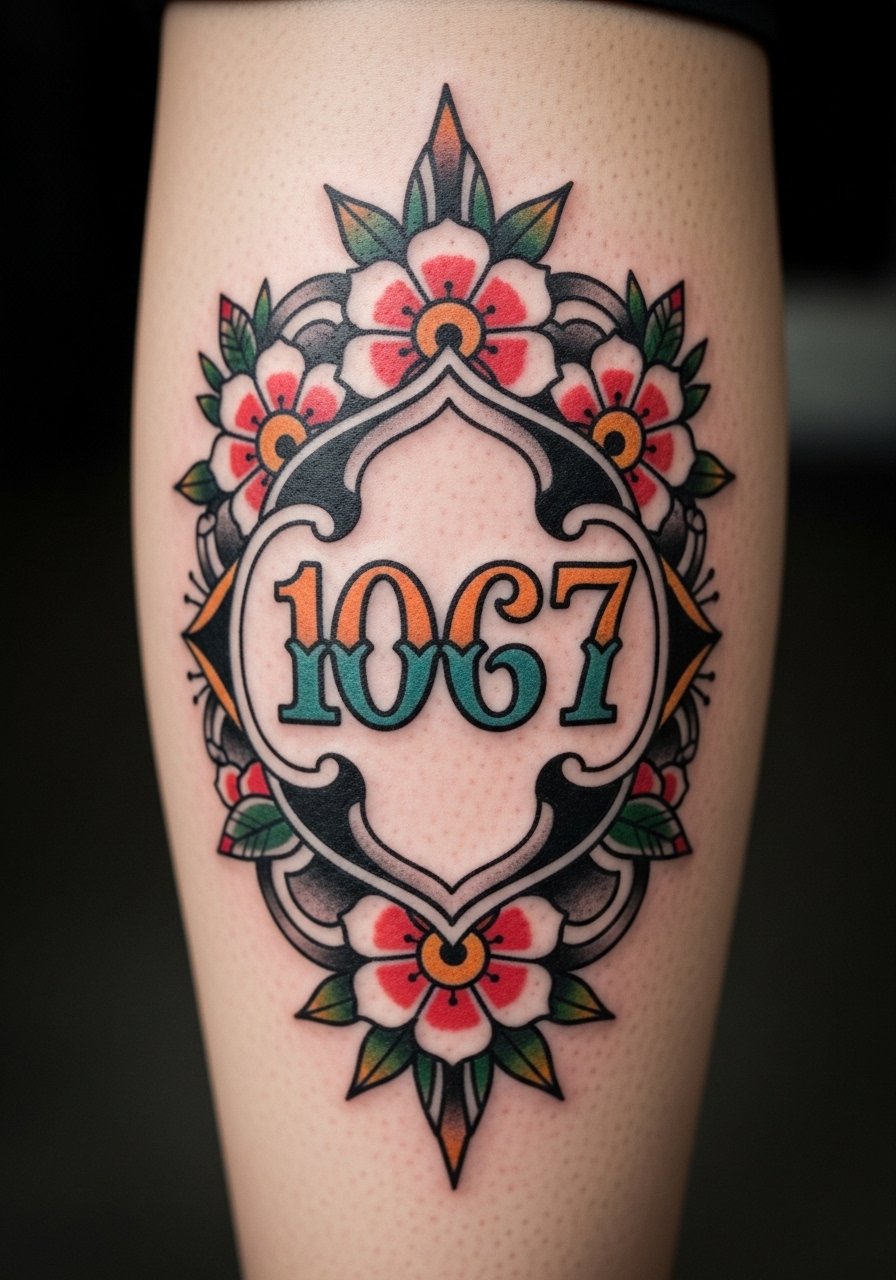
Framing a birth year with neo-traditional florals gives personality and color that lasts. Calf skin heals predictably and tolerates color saturation. I recommend slightly larger numerals so color doesn't overwhelm readability. Mistake: over-detailing small florals that blur together. Look for artists versed in neo-traditional flashes and ask to see healed leg pieces. The style balances boldness and decorative flair.
9. Barcode Birth Year On Nape
Style/Technique: Minimalist / Barcode
Pain Level: Medium-High (5-6/10)
Session Time: 30–90 minutes
Best For: Edgy, concealable nape tattoo
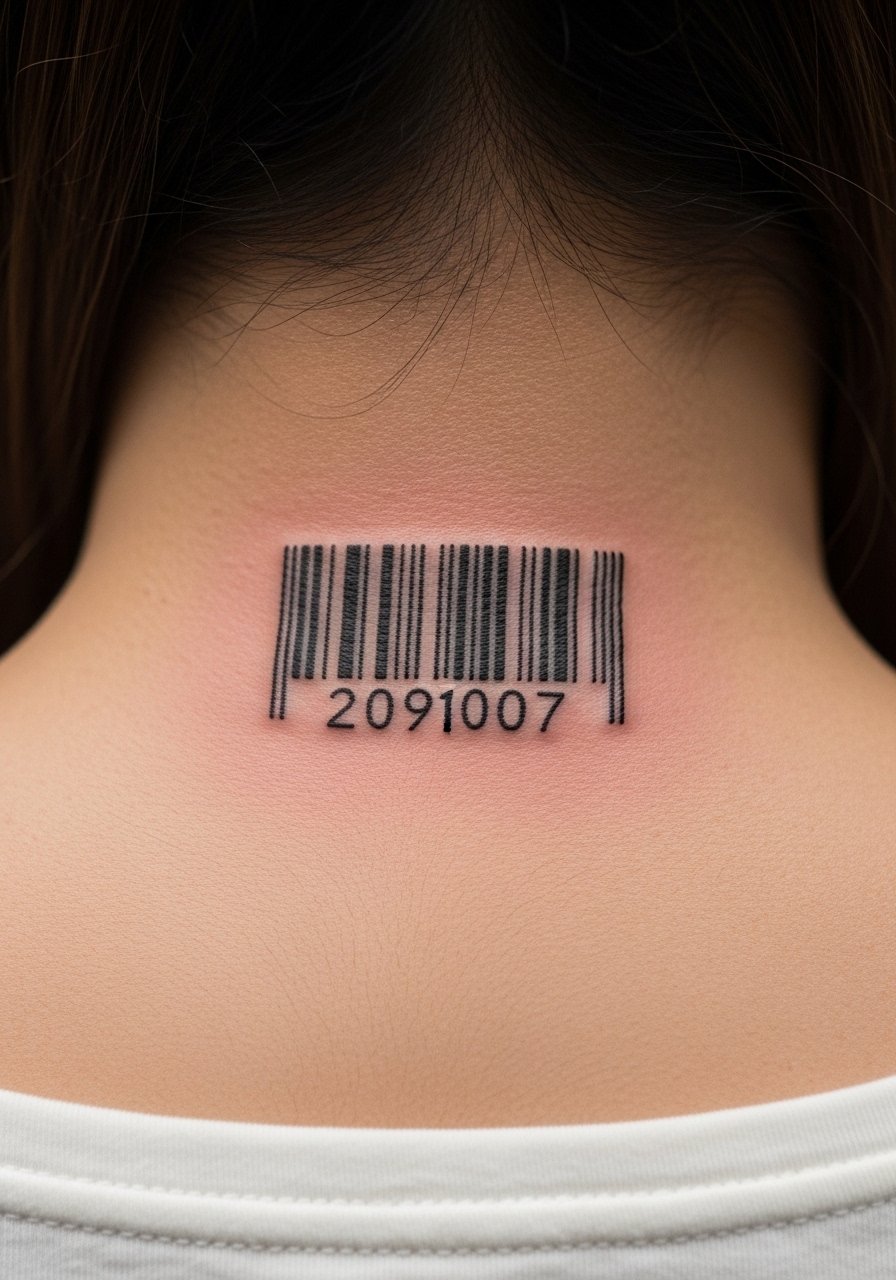
Barcode numerals read modern and turned out great for me as a nape piece. Nape has thicker skin but can be sensitive. Straight, parallel lines need precision—ask for crisp stencils. Barcodes age okay if lines are given enough weight. Common mistake: lines too thin; they blur. Artists doing fine-line geometric work are best for this. It’s a subtle statement that scans as design more than number from a distance.
10. Minimalist Binary Year Behind Ear
Style/Technique: Minimalist / Binary Code
Pain Level: Low (2-3/10)
Session Time: 15–40 minutes
Best For: Tiny, secret placement
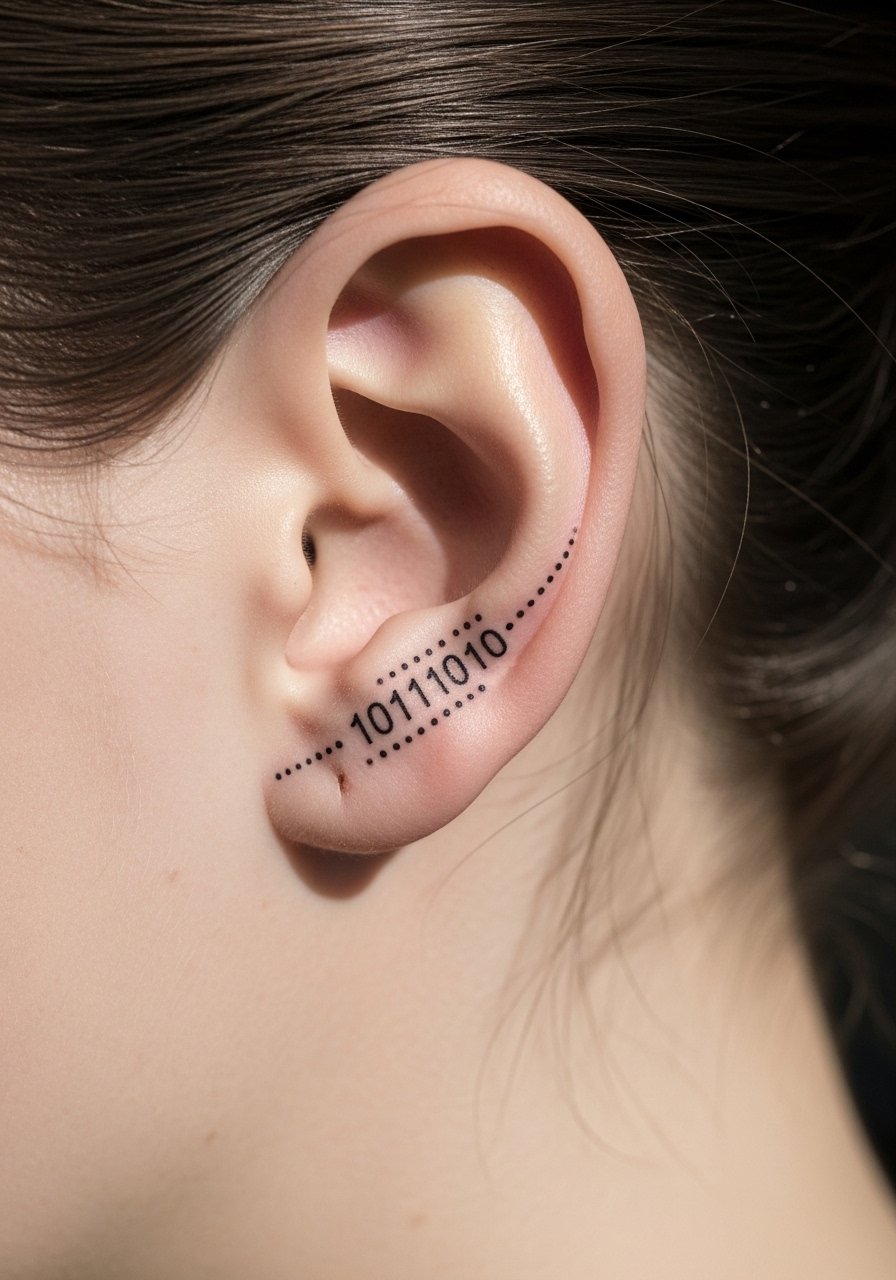
Converting a birth year to binary and placing it behind the ear is a private nerdy choice I love. It's quick, low-pain, and easy to hide with hair. Tiny dots and dashes need neat spacing to stay legible; ask for a slightly larger scale than you think. Aftercare is simple but avoid sleeping on that side for a few nights. This feels personal and timeless when kept small and crisp.
11. Negative Space Year In Mandala On Upper Back
Style/Technique: Blackwork / Negative Space
Pain Level: Medium (4/10)
Session Time: 2–4 hours
Best For: Decorative, central back statement
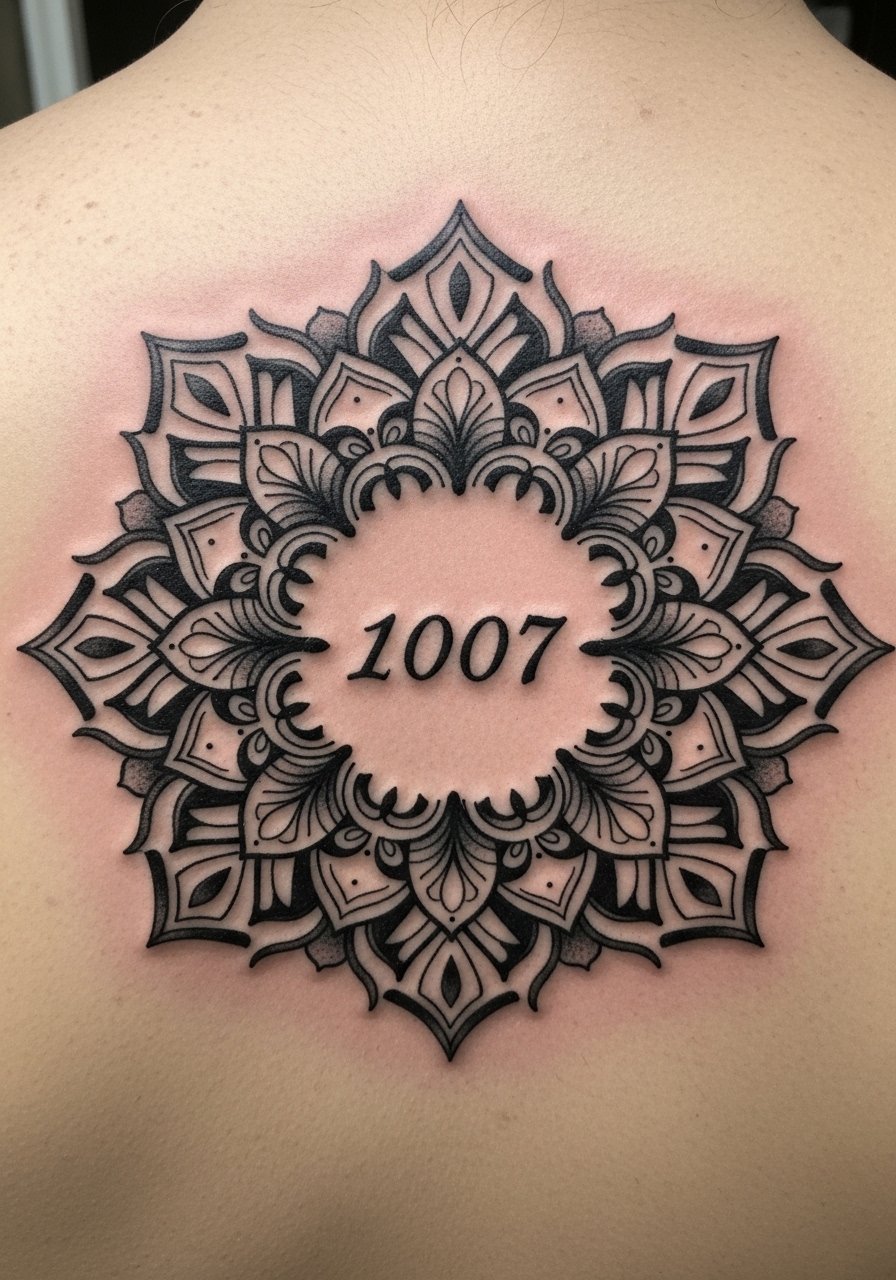
Carving a number out of negative space inside a mandala is a creative option. Upper back is moderate pain and great for larger compositions. Blacks stay strong; negative space keeps the number legible as skin ages. Mistake: tiny negative numerals that vanish—scale the negative space properly. Ask for healed photos of negative-space work so you can see contrast months later. This balances ornament and meaning.
12. Typewriter Font Birth Year On Ribcage
Style/Technique: Typewriter / Vintage
Pain Level: High (7-8/10)
Session Time: 45–90 minutes
Best For: Intimate, literary vibe
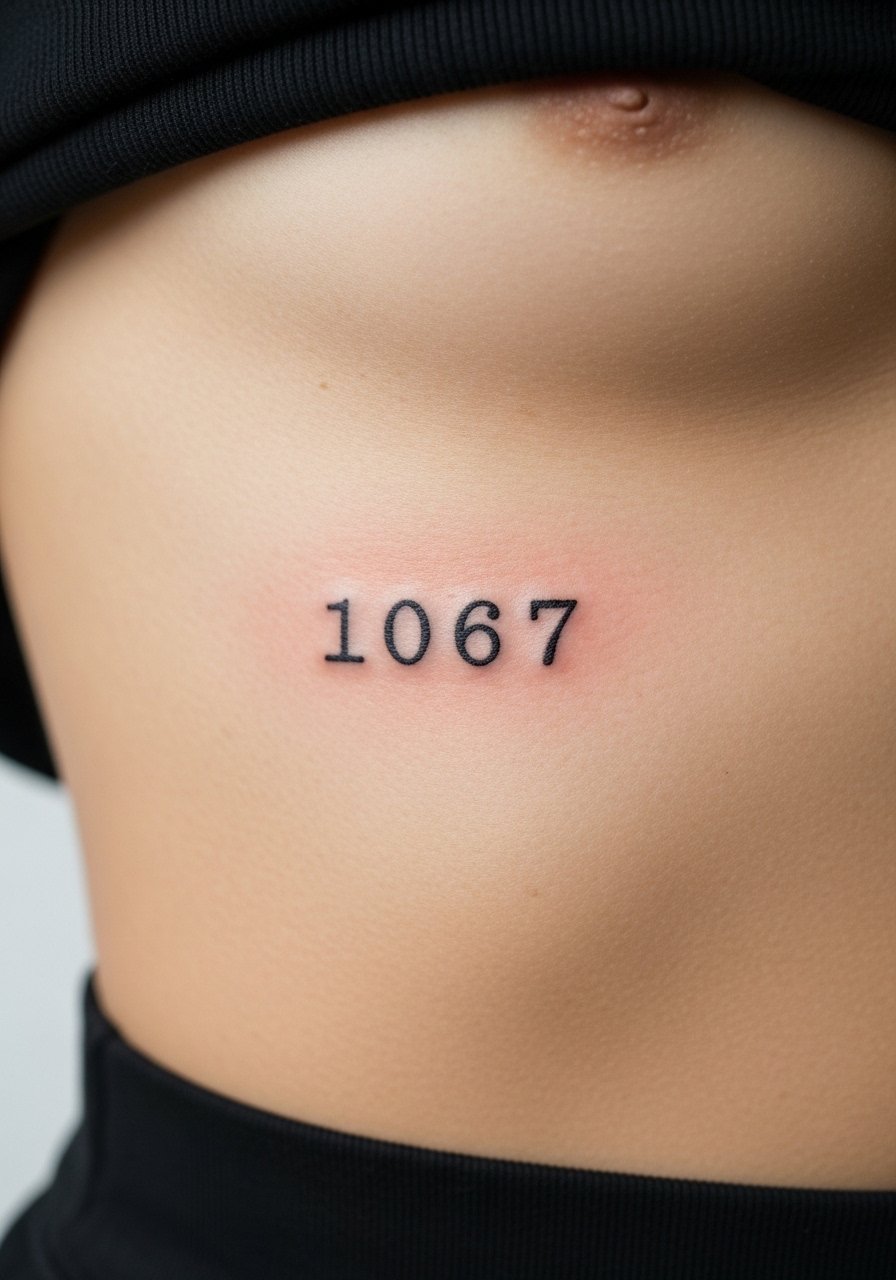
Ribcage typewriter numerals read nostalgic and clean. Ribs hurt more, so expect higher discomfort and longer surface healing. Typewriter fonts are forgiving if the artist keeps the characters slightly bolder. Avoid micro-sized type on ribs—movement and stretching make tiny letters lose edge. I've seen ribs heal beautifully when the stencil spacing was generous. Ask to see healed ribcage text from your artist.
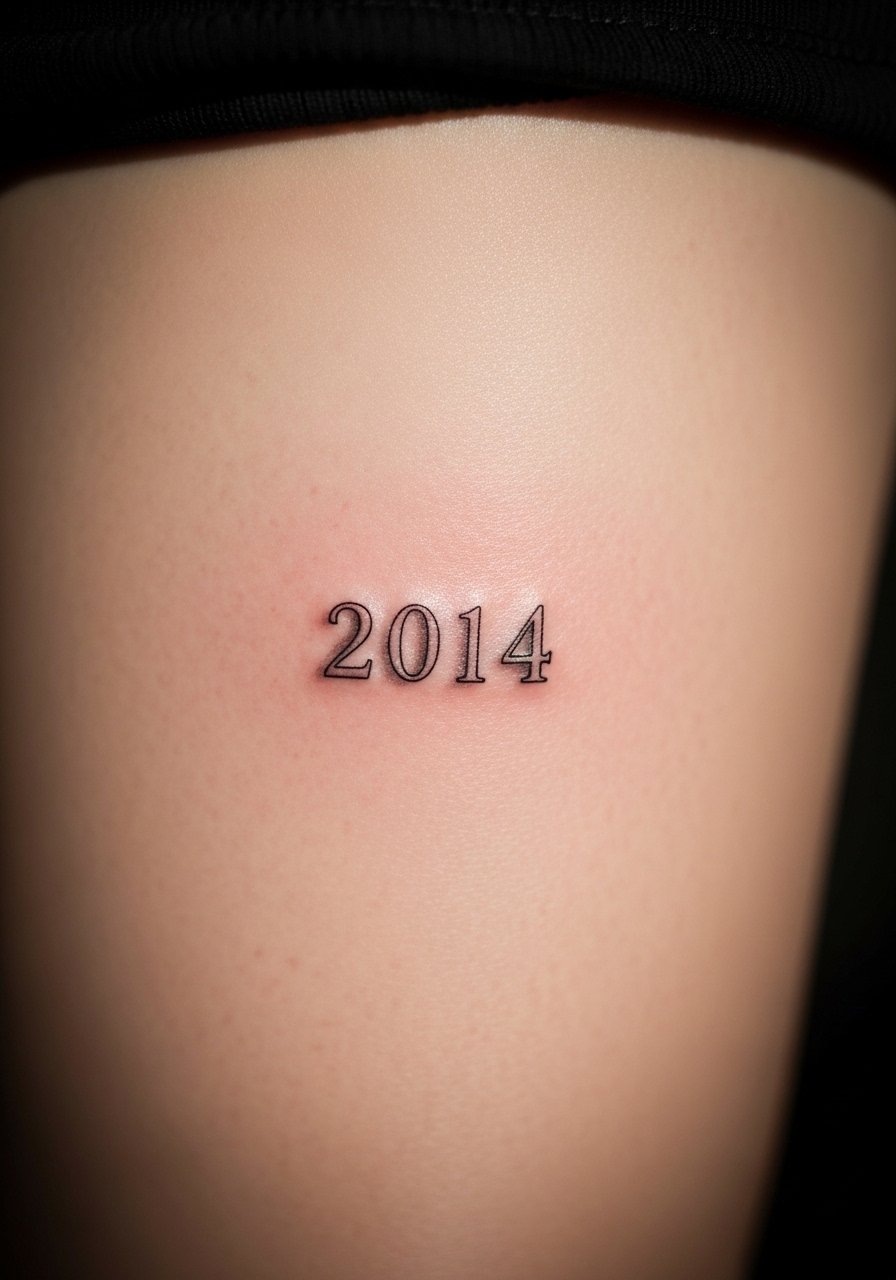
13. Single-Number Minimal Birth Year On Ankle
Style/Technique: Minimalist / Single Numeral
Pain Level: Medium (4/10)
Session Time: 20–45 minutes
Best For: Tiny, symbolic, easy to hide
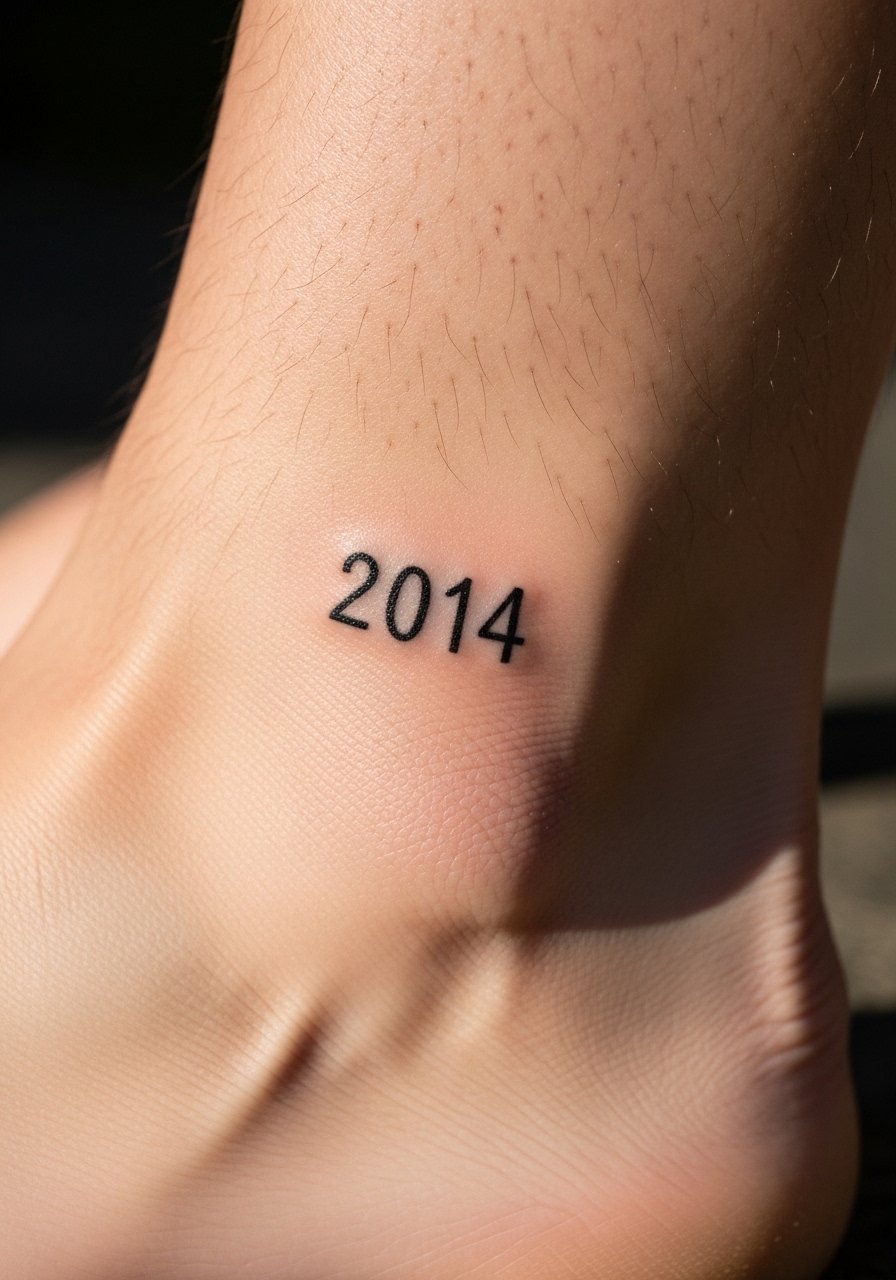
Sometimes one numeral can carry the whole meaning. Ankle placement is medium pain and prone to rubbing from socks. Small numerals look crisp fresh but can blur if they're hairline-fine. I recommend a slightly thicker stroke. Healing is simple but wear loose socks for a week. This approach is subtle and personal; artists who do small, solid black work are a good fit.
14. Ambigram Birth Year On Inner Forearm
Style/Technique: Ambigram / Calligraphic
Pain Level: Low-Medium (3-4/10)
Session Time: 1–2 hours
Best For: Clever, readable both ways
Ambigram numerals flip or rotate and still read as a year—creative and conversation-starting. Inner forearm is low pain and heals cleanly. The trick is working with a designer who can test the ambigram in sketch form. Mistake: rushing the design without seeing it inverted. From my experience, ambigrams that start bolder hold their form after healing. Ask for mockups and healed examples.
15. Roman Numeral Birth Year Over Heart (Left Chest)
Style/Technique: Classic / Roman Numerals
Pain Level: Medium-High (5-6/10)
Session Time: 30–90 minutes
Best For: Sentimental, visible with shirts off
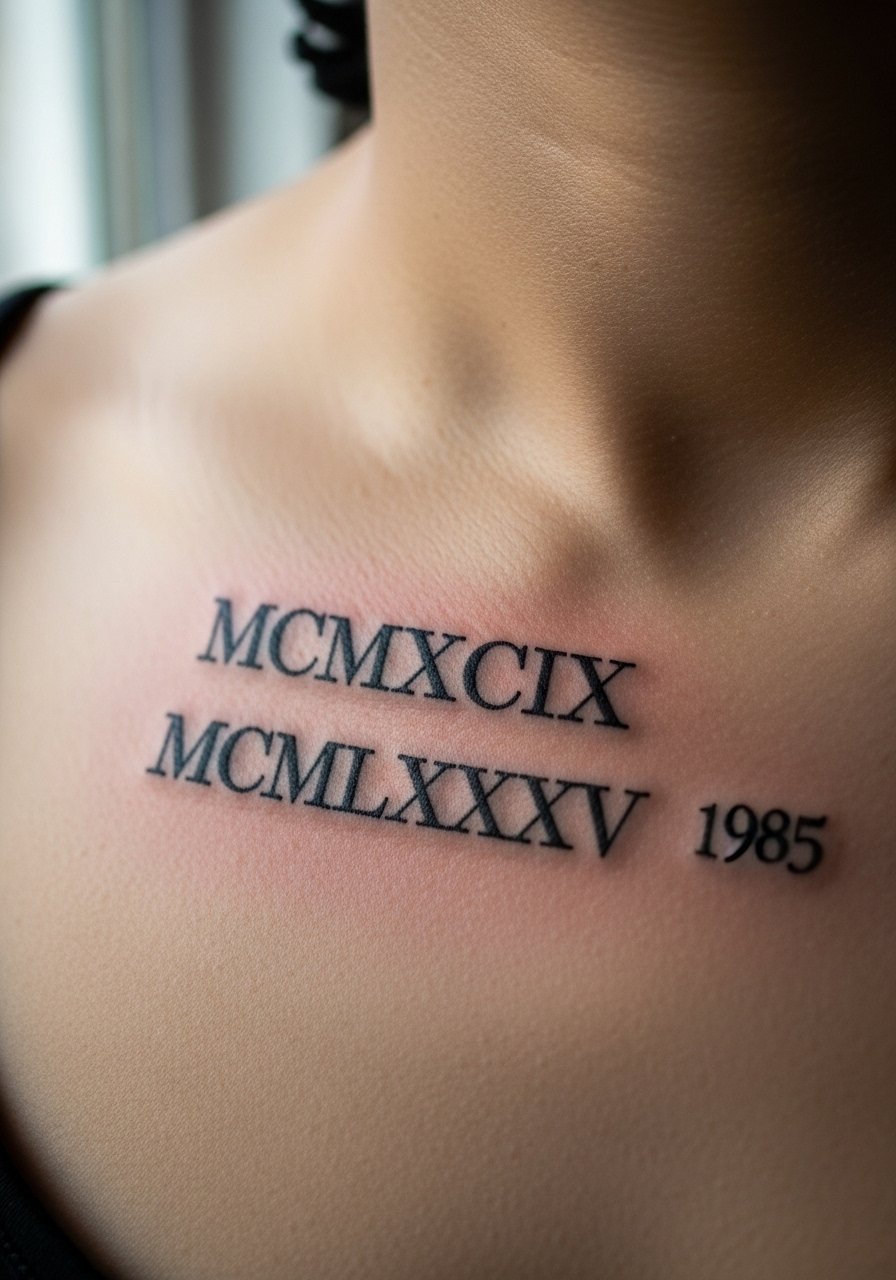
Placing a Roman numeral birth year over the heart is a classic move. Chest skin has some movement; expect medium to high pain. I like slightly bolder numerals here so they age well. Avoid intricate flourishes that blur on the chest. From what I've seen, plain, well-spaced numerals are the most durable. Ask your artist for healed chest numerals to check edge retention.
16. Hand-Poked Tiny Year On Finger
Style/Technique: Hand-Poked / Micro
Pain Level: High (6-7/10)
Session Time: 10–30 minutes
Best For: Discreet, artisanal look
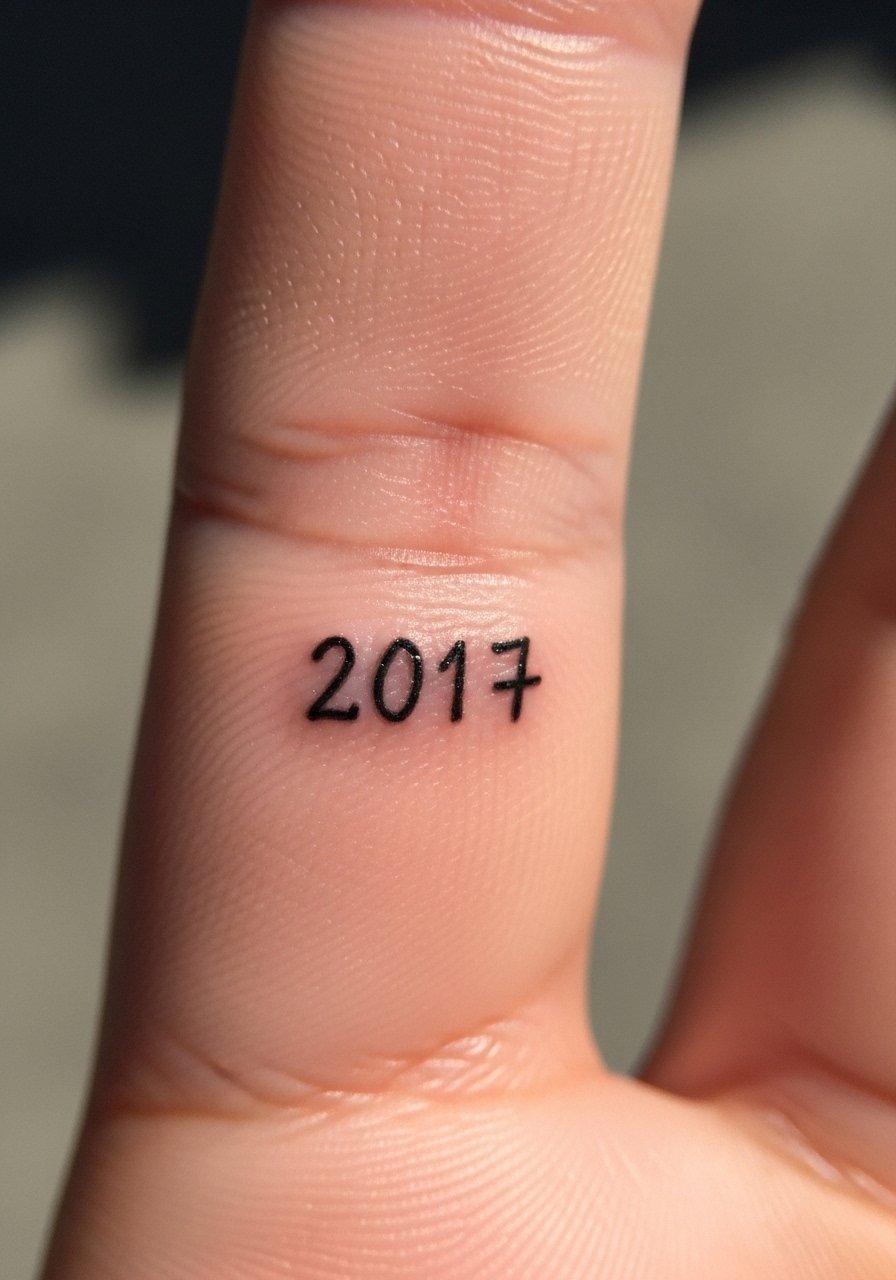
Finger tattoos are charming but notorious for fading and spreading. Hand-poked gives a textured, artisanal feel but often needs touch-ups. Fingers hurt more due to bone proximity. Expect faster fading from frequent washing and sun exposure. If you choose this, accept possible touch-ups and ask for extra pigment. From conversations with artists, this area is a commitment. Keep numerals simple and bold rather than delicate.
17. Scripted Birth Year With Coordinates On Side Rib
Style/Technique: Script + Fine Line / Personal
Pain Level: High (7-8/10)
Session Time: 1–2 hours
Best For: Meaningful, hidden placement
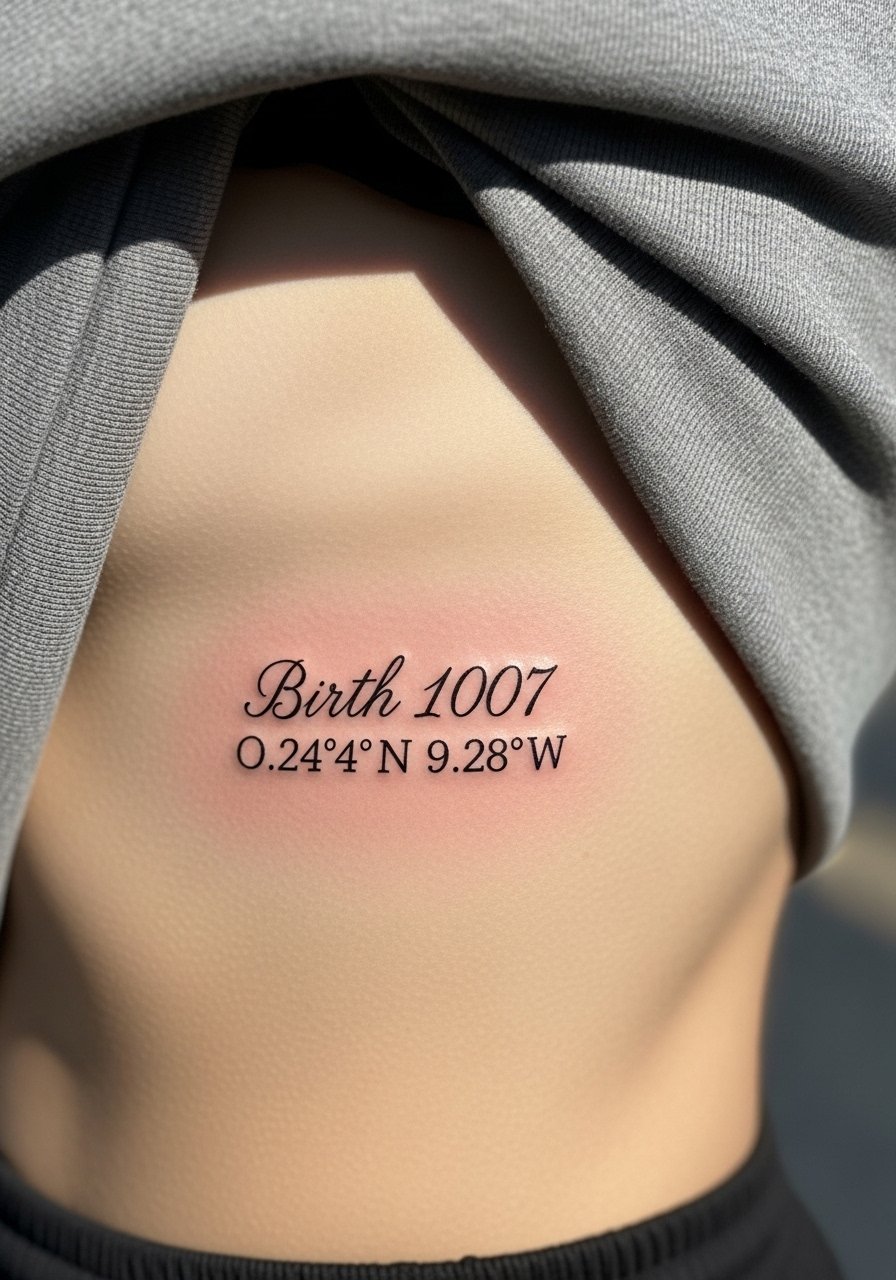
Combining a birth year with coordinates (birthplace or hospital) turns numbers into context. Side ribs are painful but great for elongated designs. Fine-line script ages okay if slightly bolder than hairline. Watch out for cramped text; spacing keeps both elements legible as skin shifts. Artists who do travel or map-style pieces often nail this. I recommend a calm consult to place lines where movement won't distort them.
18. Matching Couples Birth Year Bands On Ring Finger
Style/Technique: Minimal Band / Small Numerals
Pain Level: High (6-7/10)
Session Time: 15–30 minutes each
Best For: Couples, symbolic everyday wear
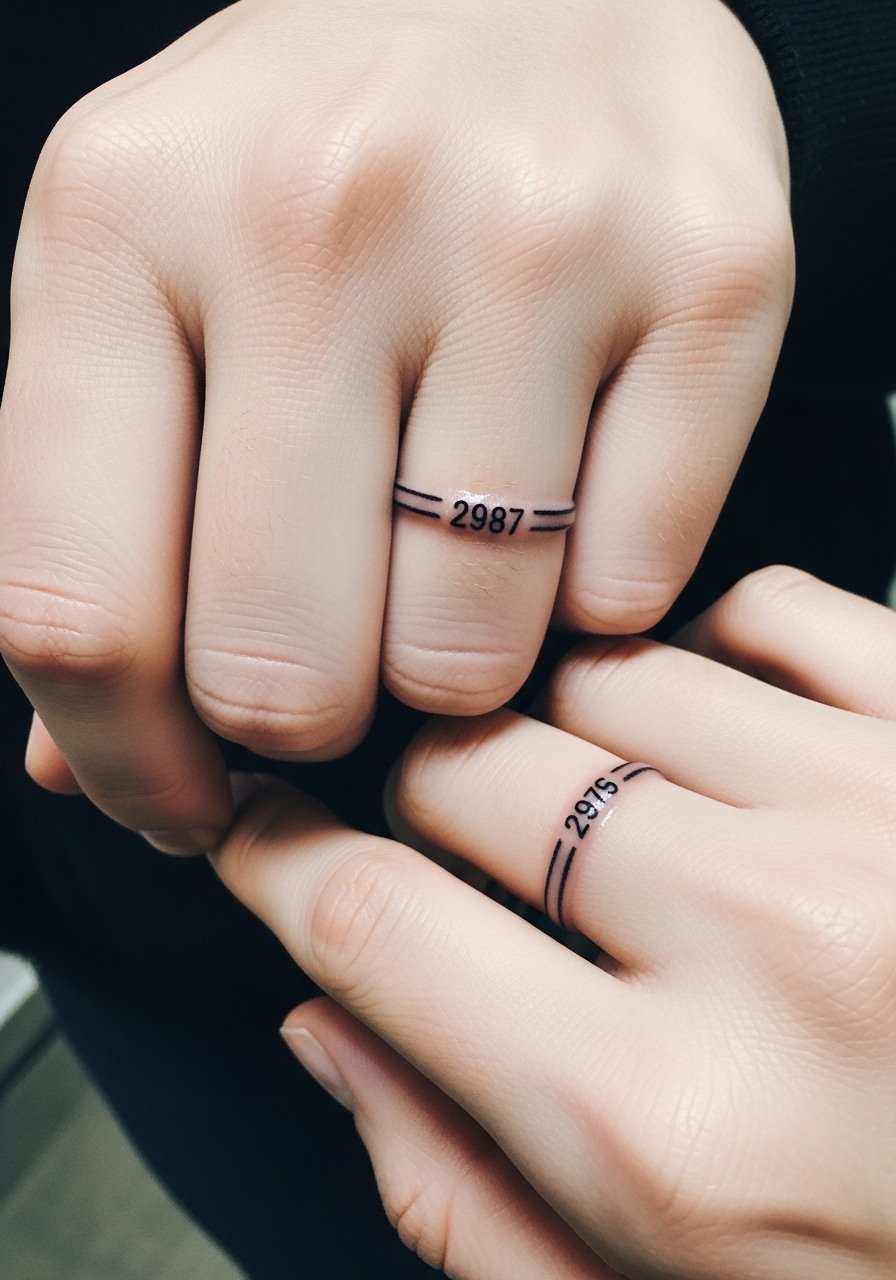
Ring-finger birth year bands are intimate and worn daily. Fingers heal irregularly and require touch-ups more often. From what I've lived through, thicker bands with slightly recessed numerals last longer than super-fine scripts. Expect higher fading from soap and friction. If you're matching, get both done in the same session to ensure consistent ink saturation. Artists skilled in finger work are key.
19. Timeline Birth Year Tattoo Along Spine
Style/Technique: Linear / Minimalist Timeline
Pain Level: High (7-9/10)
Session Time: 1–3 hours
Best For: Dramatic, vertical statement
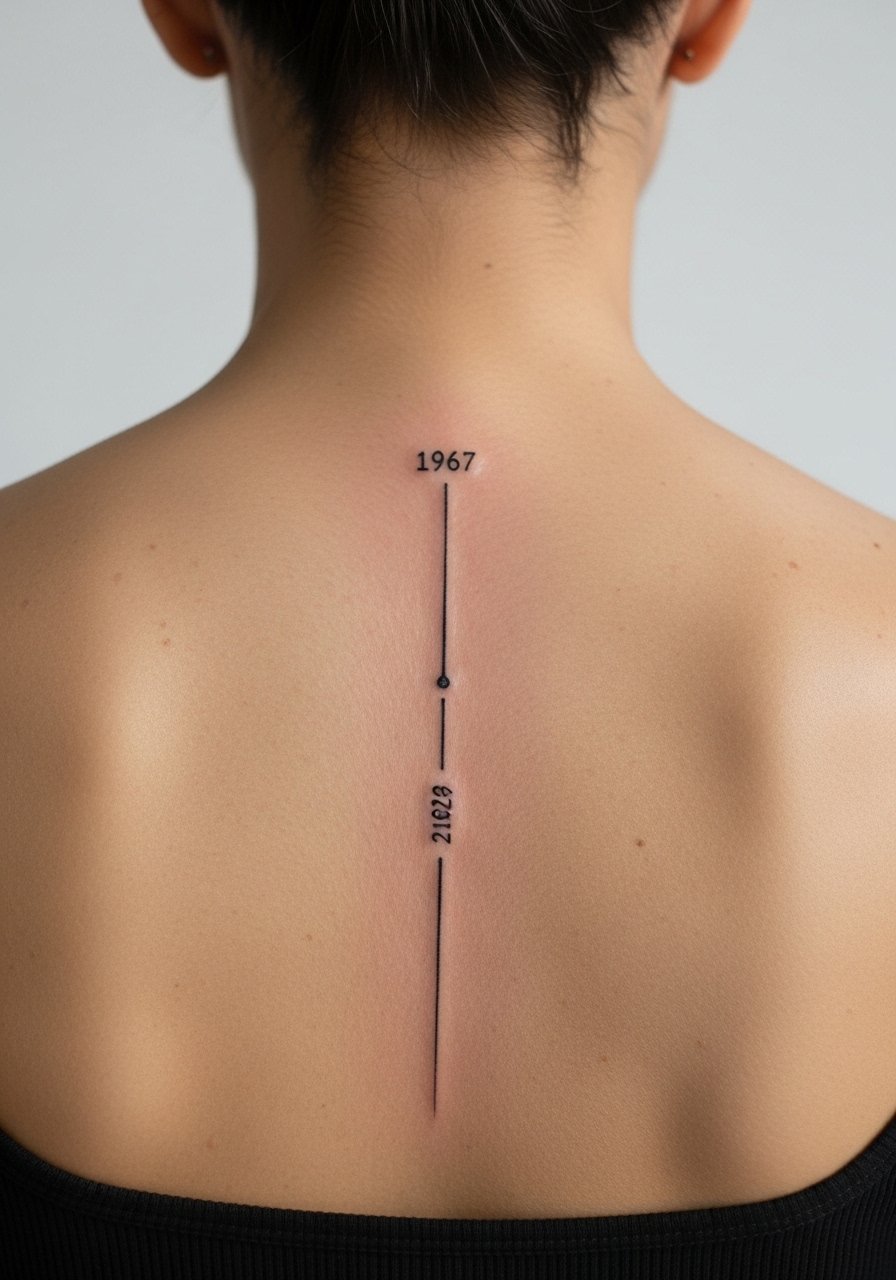
A vertical timeline with a highlighted birth year along the spine reads like a life map. Spine tattoos are among the more painful placements. Lines need to be strong to avoid midline blur. I like when the year is slightly bolder than the timeline ticks for contrast. Healing requires careful sleeping positions to avoid rubbing. Artists who do precise linework and long, thin compositions are ideal.
20. Geometric Number Block On Outer Thigh
Style/Technique: Geometric / Block Numerals
Pain Level: Low (2-3/10)
Session Time: 1–2 hours
Best For: Bold thigh placement, easy to conceal
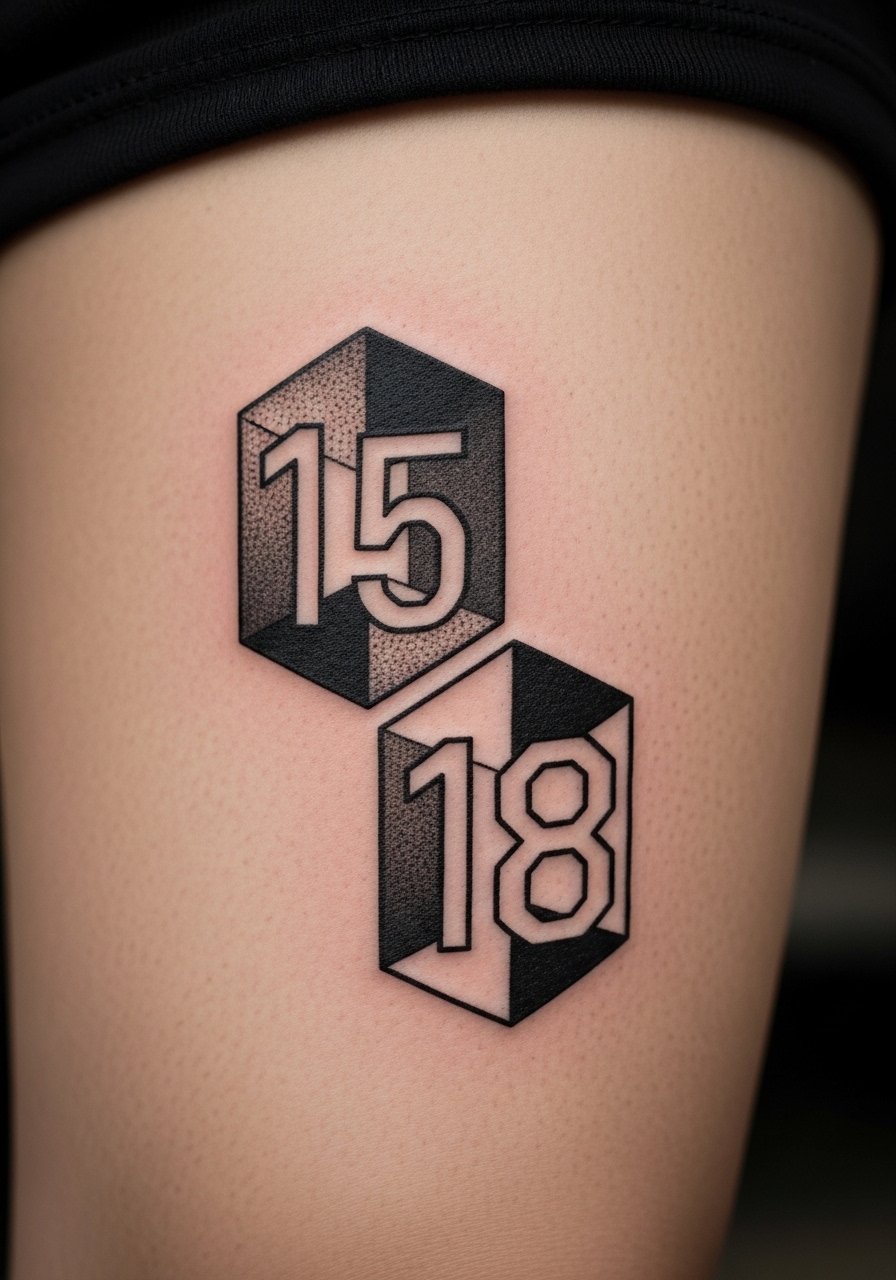
Outer thigh takes ink well and is low pain. Geometric blocks around a birth year create a modern, architectural feel that stays crisp when healed. Avoid super-thin angles; they can blur into each other. From what I've seen, clean negative space between blocks keeps the number readable. Artists who do geometric and pattern work nail the balance between shape and numerals.
21. Birthstone-Inspired Colored Year On Inner Wrist
Style/Technique: Color Realism / Accent
Pain Level: Low (2-3/10)
Session Time: 30–60 minutes
Best For: Color detail, personal symbolism
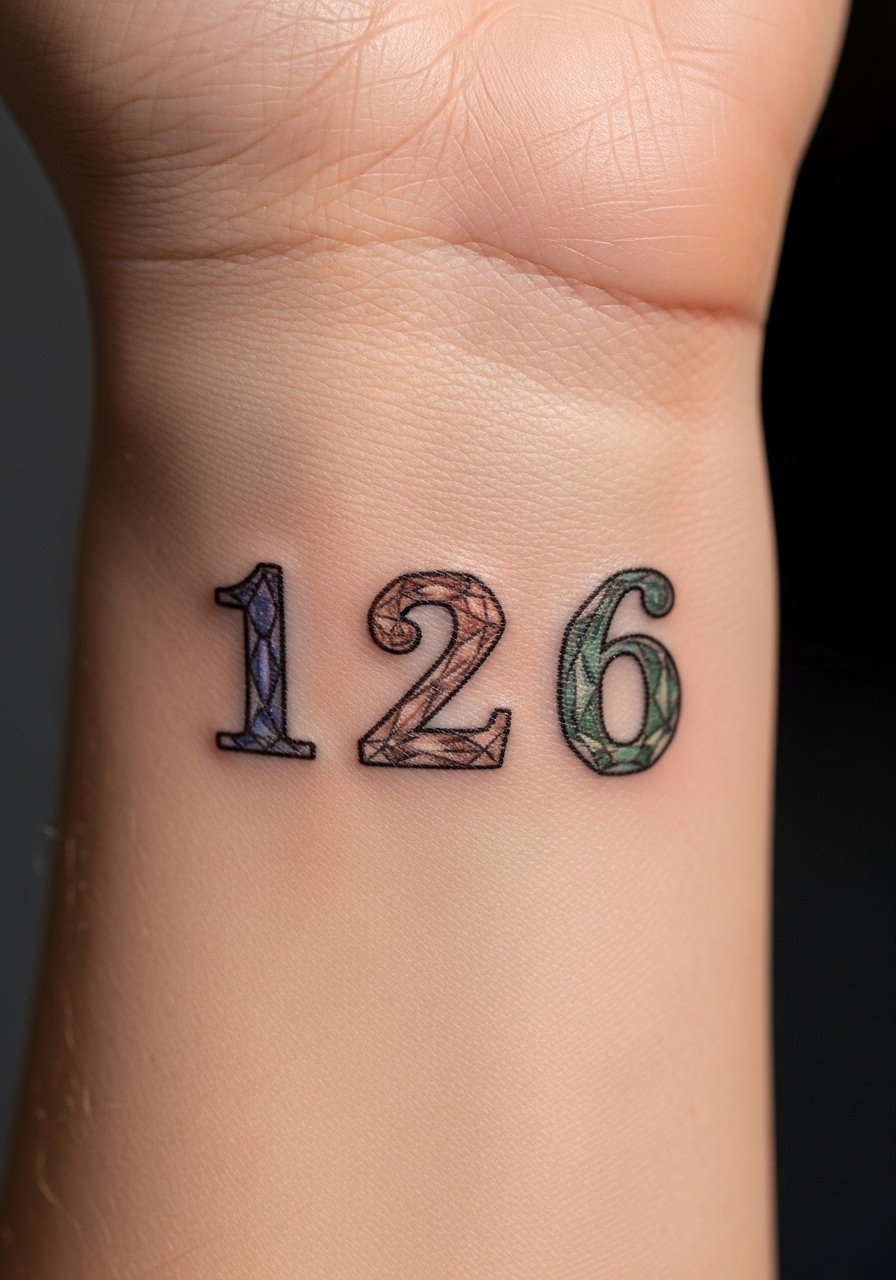
Filling numerals with birthstone-inspired color is a subtle way to add meaning. Inner wrist is low pain and shows color well initially; expect some softening of bright tones over months. From artists I've followed, jewel-toned pigments like deep sapphire or emerald keep better than neon shades. Avoid tiny color flecks that will blur—larger color fields inside numerals work best. Ask your artist about pigment choice for lasting saturation.
22. Calendar Page With Highlighted Year On Shoulder
Style/Technique: Illustration / Small Scene
Pain Level: Low-Medium (3-4/10)
Session Time: 1–2 hours
Best For: Narrative, decorative shoulder piece
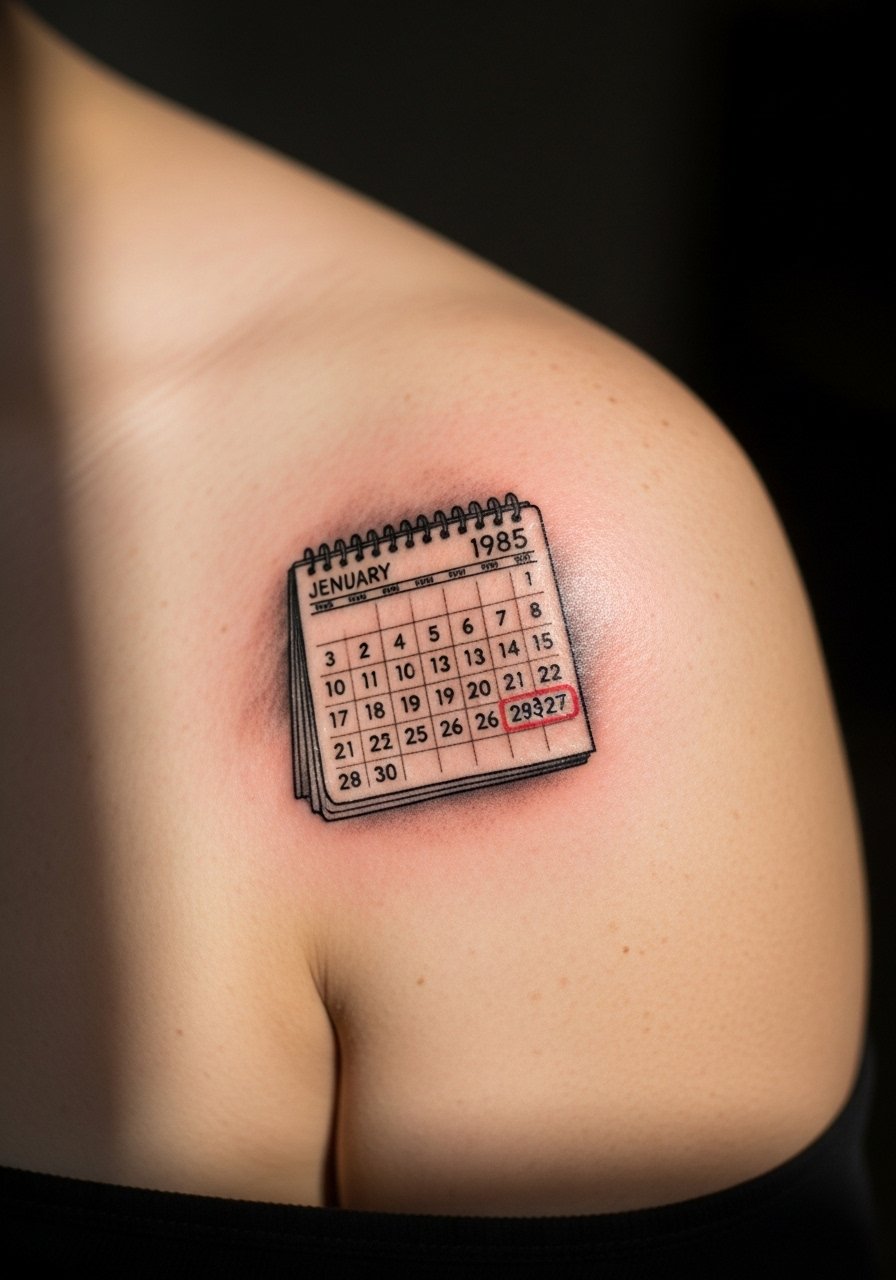
A tiny calendar page with the birth year circled or highlighted turns a number into a mini scene. Shoulder placement is low to medium pain and tolerates small illustrations. Keep lines decisive; tiny calendar grids can get muddy if overcomplicated. From what I've seen, simplified iconography and a bold highlighted year read best healed. Ask to preview the illustration at actual size to ensure clarity.
Tattoo Prep and Aftercare Essentials
Aftercare Essentials:
- Aquaphor Healing Ointment, 14oz tube — For the first 3–5 days as recommended by many artists
- Saniderm Transparent Adhesive Bandage, 6-inch roll — Second-skin method some pros prefer for large pieces
- CeraVe Fragrance-Free Moisturizing Lotion, 12oz — Daily moisturizer after initial healing
- Dr. Bronner's Unscented Castile Soap, 8oz — Gentle for cleaning during first week
- Mad Rabbit Tattoo Balm, 2oz — Long-term maintenance balm many artists recommend
Before Your Appointment:
- Numbing Cream 5% Lidocaine — Use only if your artist agrees; apply 30–45 minutes prior
- Tattoo Stencil Transfer Paper, 8.5×11 — If you want to prototype at home
Long-Term Maintenance:
- SPF 50 Sunscreen Stick For Tattoos, 0.5oz — Non-negotiable for preventing fading
- Hustle Butter Deluxe, 8oz — Vegan aftercare option for healed skin
- Mad Rabbit Tattoo Balm, 2oz — For keeping healed tattoos vibrant
Optional Comfort & Repair:
- Tattoo Numbing Spray — For touch-ups or very sensitive areas (use sparingly)
- Hydrocolloid Bandages, Large Pack — For protecting spots that reopen or blister
- Aftercare Travel Kit — Handy if you're traveling post-session
I included items artists actually recommend (Aquaphor, Saniderm, SPF sticks, Mad Rabbit, Hustle Butter) and gentle cleansers. Use ointment only for the first days, then switch to fragrance-free lotion. If an artist tells you a different routine, follow their guidance—they see healed results up close.
Frequently Asked Questions
Q: How bad does a tattoo actually hurt?
A: Pain depends on placement and your tolerance. Outer forearm or calf = 2–3/10. Ribcage, spine, or ankle = 7–9/10. It’s more scratching and vibrating than sharp agony. For sensitive spots ask about a 5% lidocaine numbing cream but confirm with your artist first.
Q: How long until my birth year looks "normal" healed?
A: Surface healing happens in 2–3 weeks. Colors and depth settle over 2–3 months. Expect scabbing and dullness early; the real look returns after skin regenerates. Keep the tattoo clean with a gentle soap like Dr. Bronner's Unscented Castile Soap and moisturize with a fragrance-free lotion.
Q: Will small numerals blur over time?
A: Tiny, hairline numerals are the ones that blur most. From what I’ve seen, slightly thicker strokes and good spacing make numerals last. If you want small, choose bold simplified shapes or blackwork. Ask your artist to show healed examples of small text.
Q: Can I exercise after getting a birth year tattoo?
A: Wait 48–72 hours minimum for light activity. Avoid heavy sweating and friction on the fresh tattoo for at least a week. Sweat can introduce bacteria and interfere with healing. For protection, consider covering or using a Saniderm bandage for the first couple of days if your artist approves.
Q: How do I keep my tattoo from fading long-term?
A: Sunscreen daily is essential. From what I've gathered, UV is the number-one fading cause. Use an SPF 50+ stick like this SPF 50 sunscreen stick for tattoos whenever the tattoo is exposed. Keep skin moisturized with a non-fragrant lotion and consider a tattoo balm for maintenance.
Q: What if I regret my birth year placement later?
A: Sit with the idea at least a few months before booking. If you're unsure, start with a concealable spot (upper thigh, outer arm). Tattoo removal exists but is a long process; I’ve spoken to people who prefer designing around and covering up rather than removing.
Q: Do colors show differently on darker skin tones?
A: Yes. Black and rich dark pigments read best across all tones. Bright pastels and white ink can be subtle on deeper skin. I always ask artists to show healed work on similar skin so I know how color and contrast will settle.
Q: Should I use Saniderm or ointment right after the session?
A: Both are used by professionals. Some artists apply a Saniderm patch right away for big or exposed pieces. Others prefer aftercare with Aquaphor for the initial days. Follow your artist’s advice, and if you want options, have Saniderm and Aquaphor Healing Ointment on hand.
