
I spent months narrowing down exactly how to wear a birth flower so it still looks great years from now. The real problem I had wasn't finding pretty designs—it was finding styles and placements that heal well and stay meaningful. These 28 birth flower tattoo ideas show how to pair style, placement, and meaning so your ink ages the way you want.
This list focuses on birth flower tattoos in fine line, traditional, neo-traditional, and micro-realism styles. Placements span wrist, ribcage, ankle, and behind-ear—choices I’ve seen hold up in real life. From what I’ve gathered in tattoo communities, these are the birth flower approaches artists still recommend in 2026.
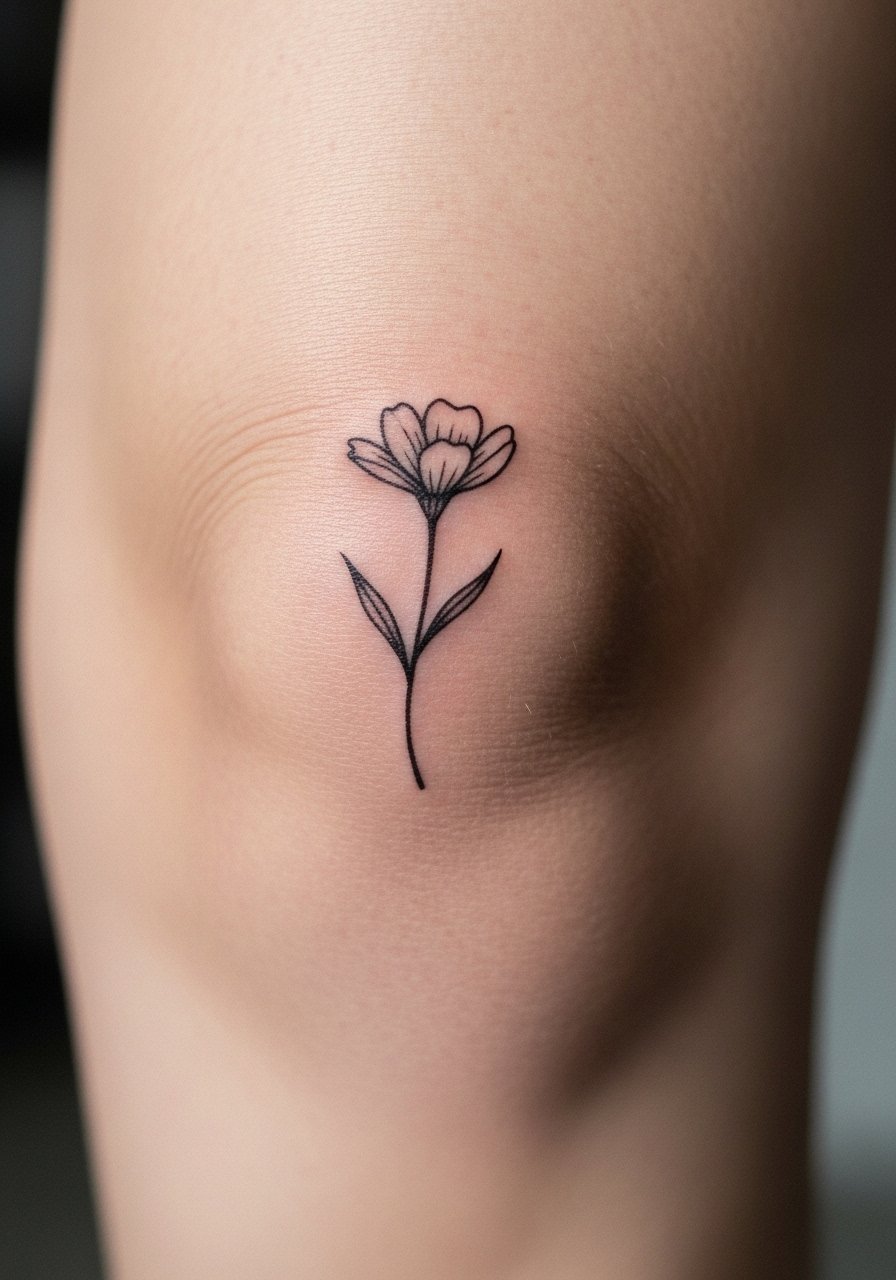
1. Fine Line Single Birth Flower on Inner Wrist
Style/Technique: Fine Line / Illustrative
Pain Level: Low (2-3/10)
Session Time: 30–90 minutes
Best For: First tattoo, visible, delicate
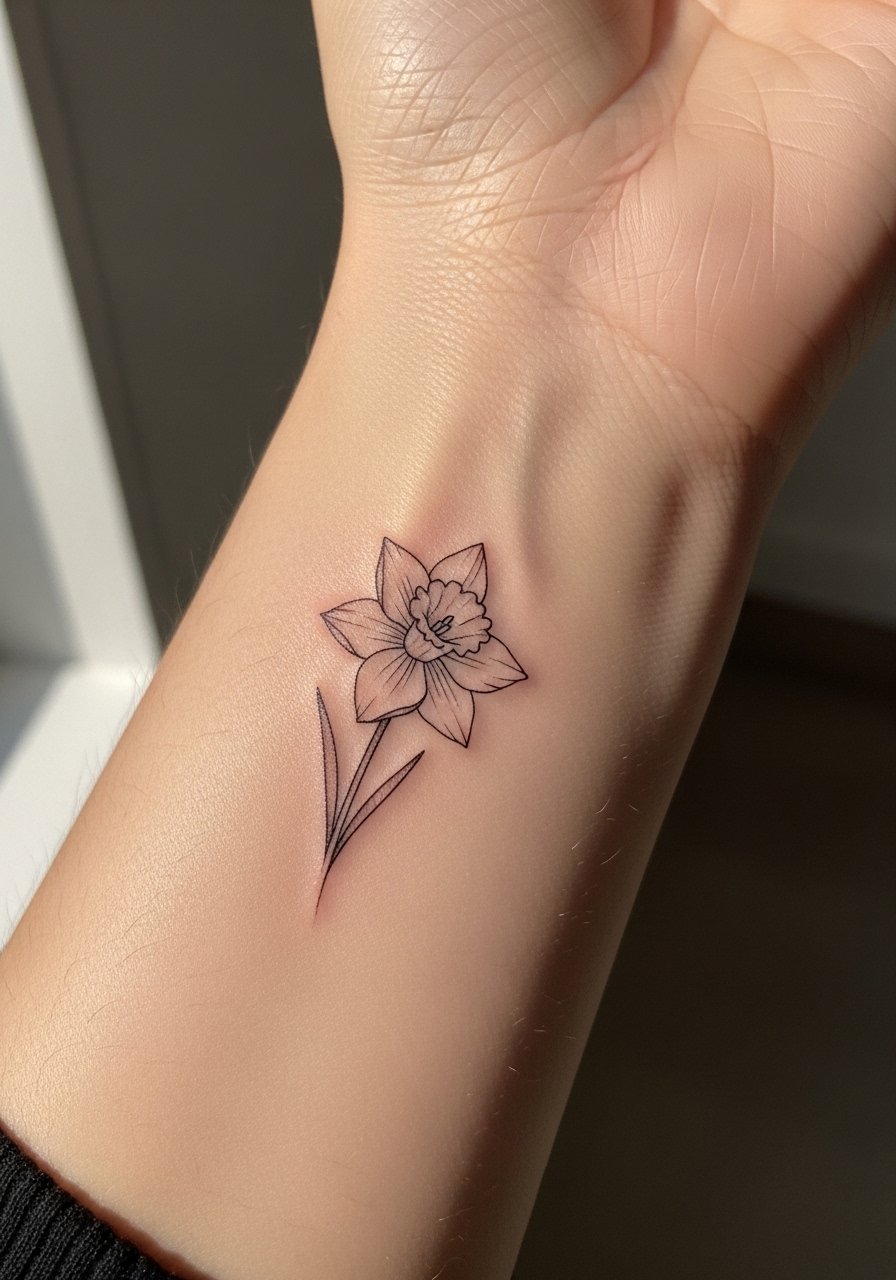
I got a tiny birth flower on my wrist to test line longevity. Fine line looks delicate fresh, but lines can blur if done too thin. This placement is low pain and easy to show or hide with a watch. Ask your artist for slightly bolder main lines so it ages cleanly. Keep it moisturized and out of direct sun during healing.
2. Micro-Realism Birth Flower on Ankle
Style/Technique: Micro-Realism / Color
Pain Level: Medium (4-5/10)
Session Time: 1–3 hours
Best For: Statement detail, color lovers
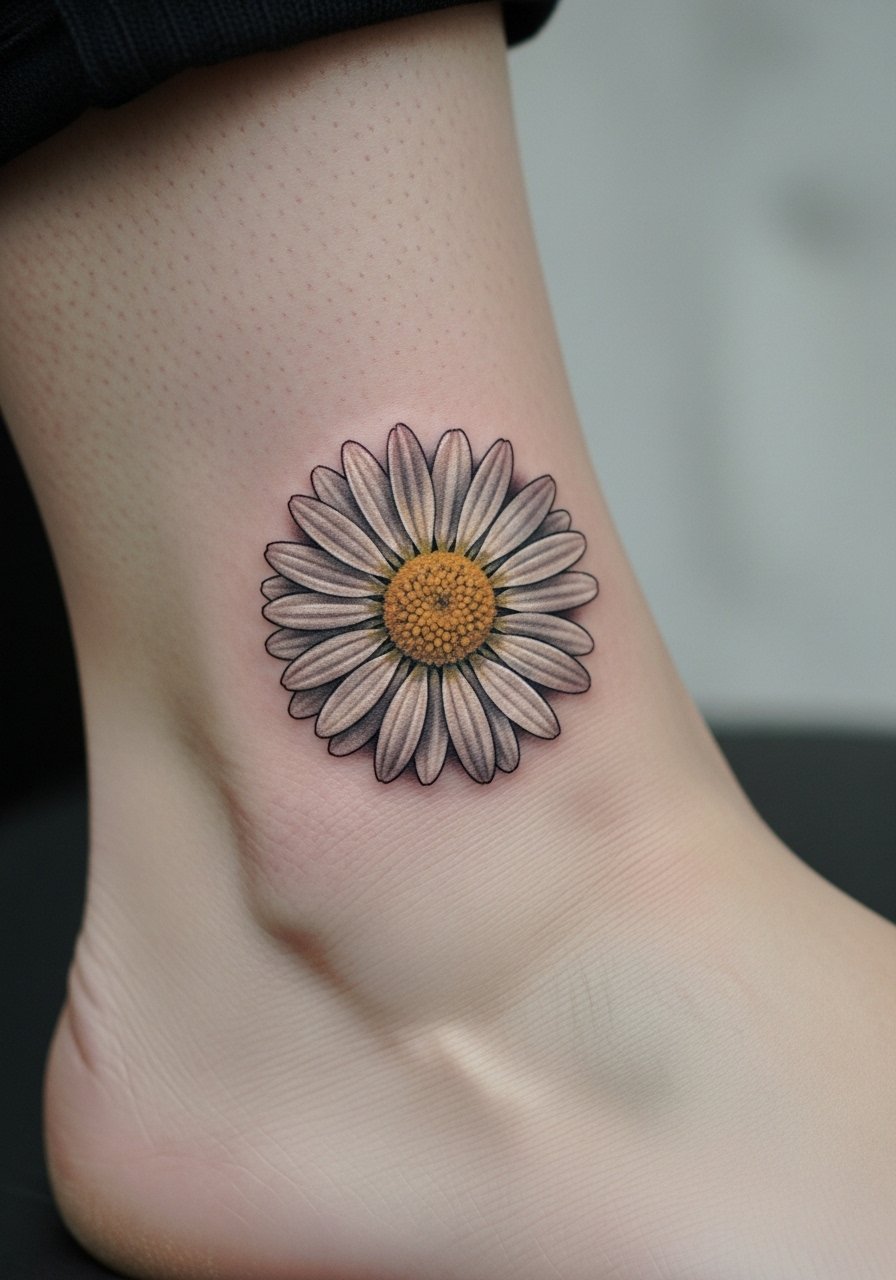
Micro-realism captures petal texture and tiny color shifts. On the ankle it looks like a wearable charm. Expect more session time and a bit more pain near bone. Colors may dull some on darker skin tones, so ask about saturation and healed examples. Avoid tiny text with micro-realism—details photograph better than they last.
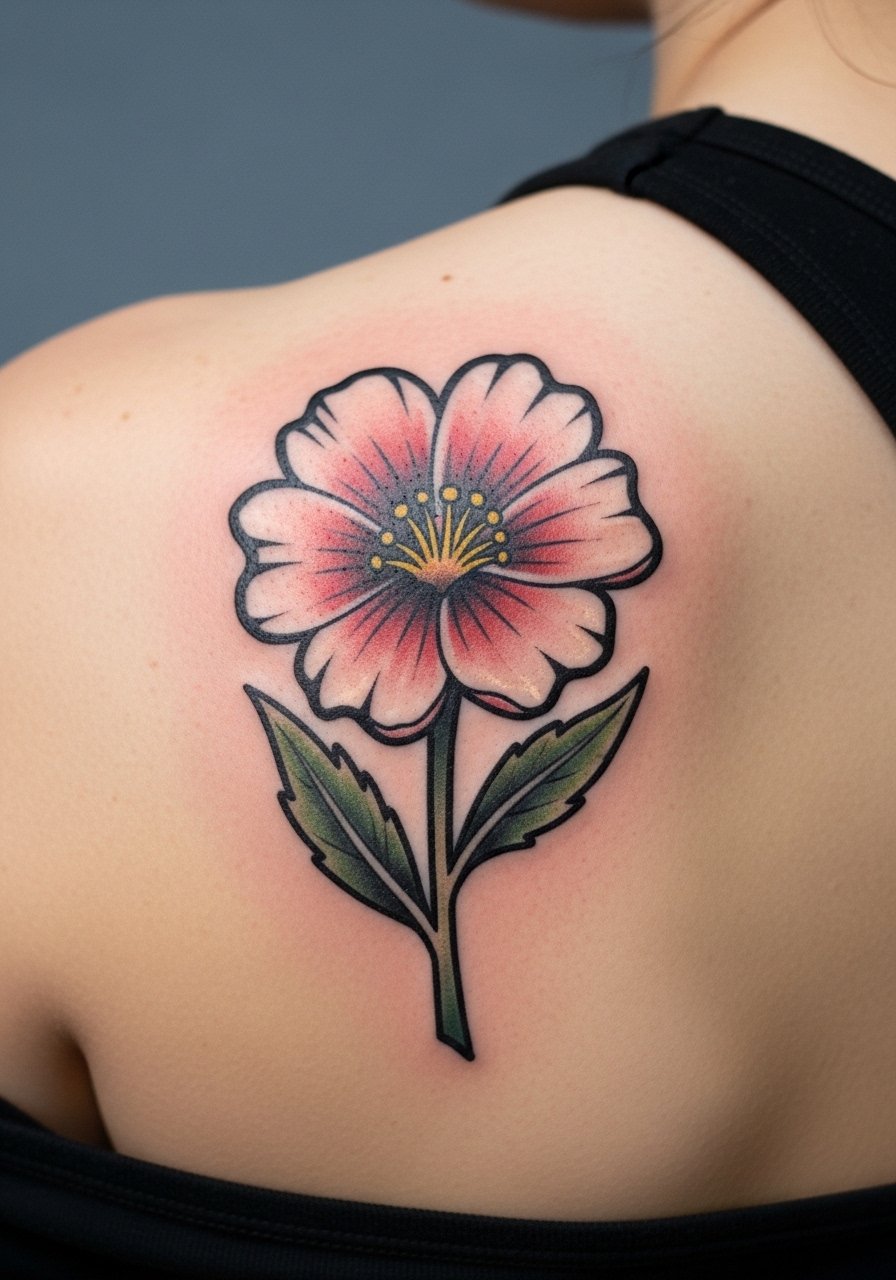
3. Bold Traditional Birth Flower on Upper Arm
Style/Technique: Traditional / American Traditional
Pain Level: Low (2-3/10)
Session Time: 1–3 hours
Best For: Timeless look, longevity
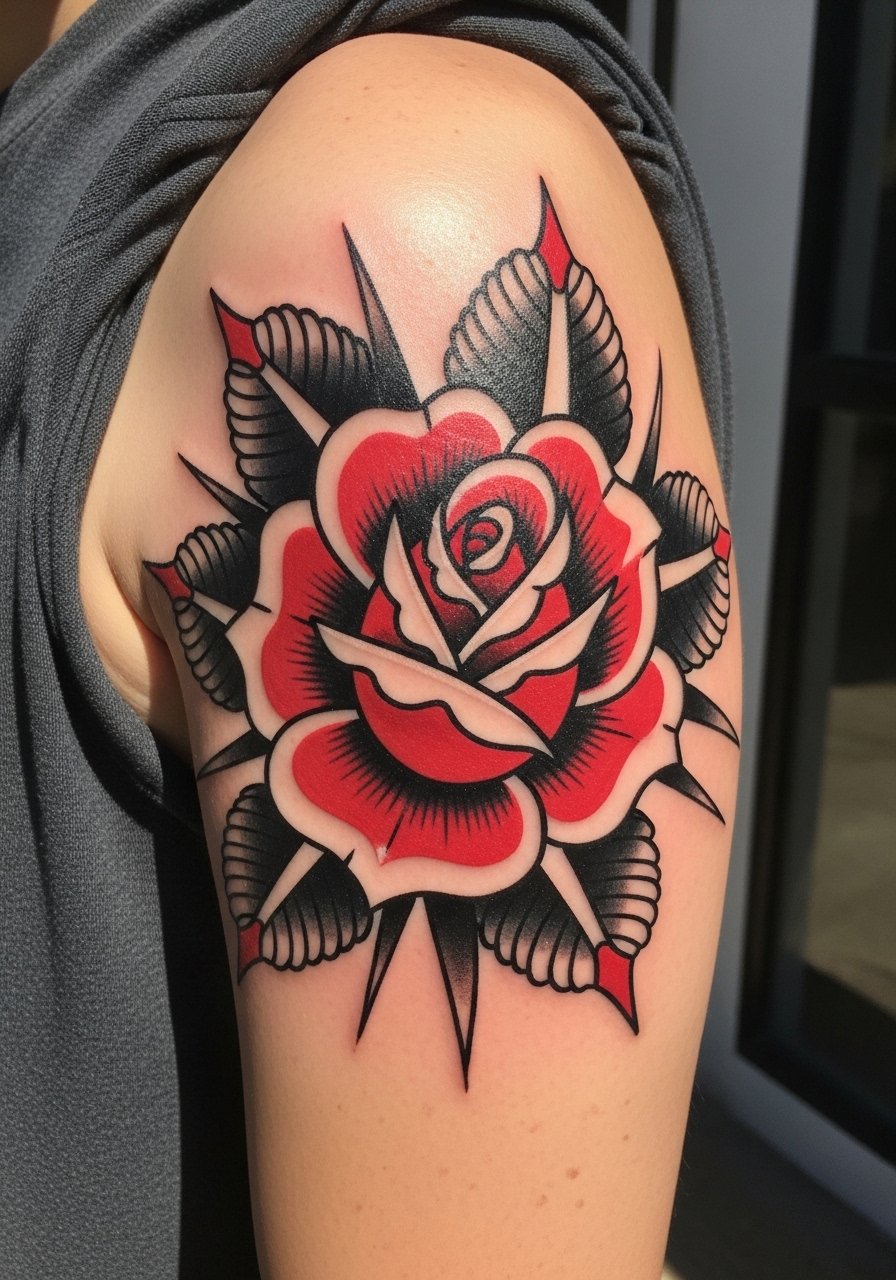
Traditional pieces wear well. Bold outlines keep shape as skin ages. I’ve seen traditional birth flowers stay readable decades later. Upper arm is forgiving for first-timers. Avoid overly fine shading in this style—stick to solid color blocks for longevity.
4. Watercolor Birth Flower Splash on Shoulder Blade
Style/Technique: Watercolor / Painterly
Pain Level: Low-Medium (3-4/10)
Session Time: 1–3 hours
Best For: Artistic, soft color
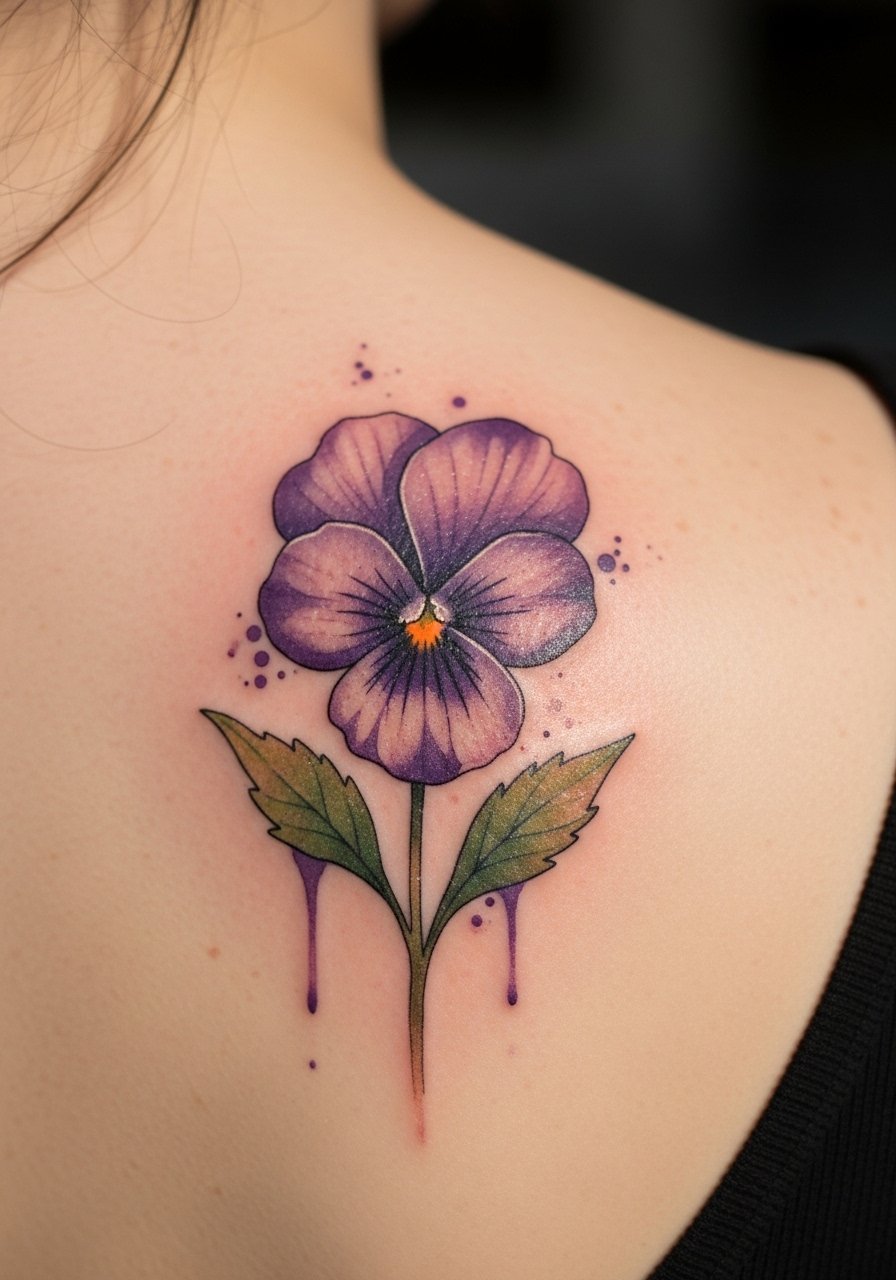
Watercolor gives a soft, painterly feel to your birth flower. It looks ethereal fresh but can blur at the edges over time. Shoulder blade is low friction and heals nicely. Ask for stronger anchor lines or subtle blackwork to keep form as colors fade.
5. Minimalist Line Birth Flower Behind Ear
Style/Technique: Minimalist / Single Line
Pain Level: Low (2/10)
Session Time: 30–60 minutes
Best For: Hidden, subtle meaning
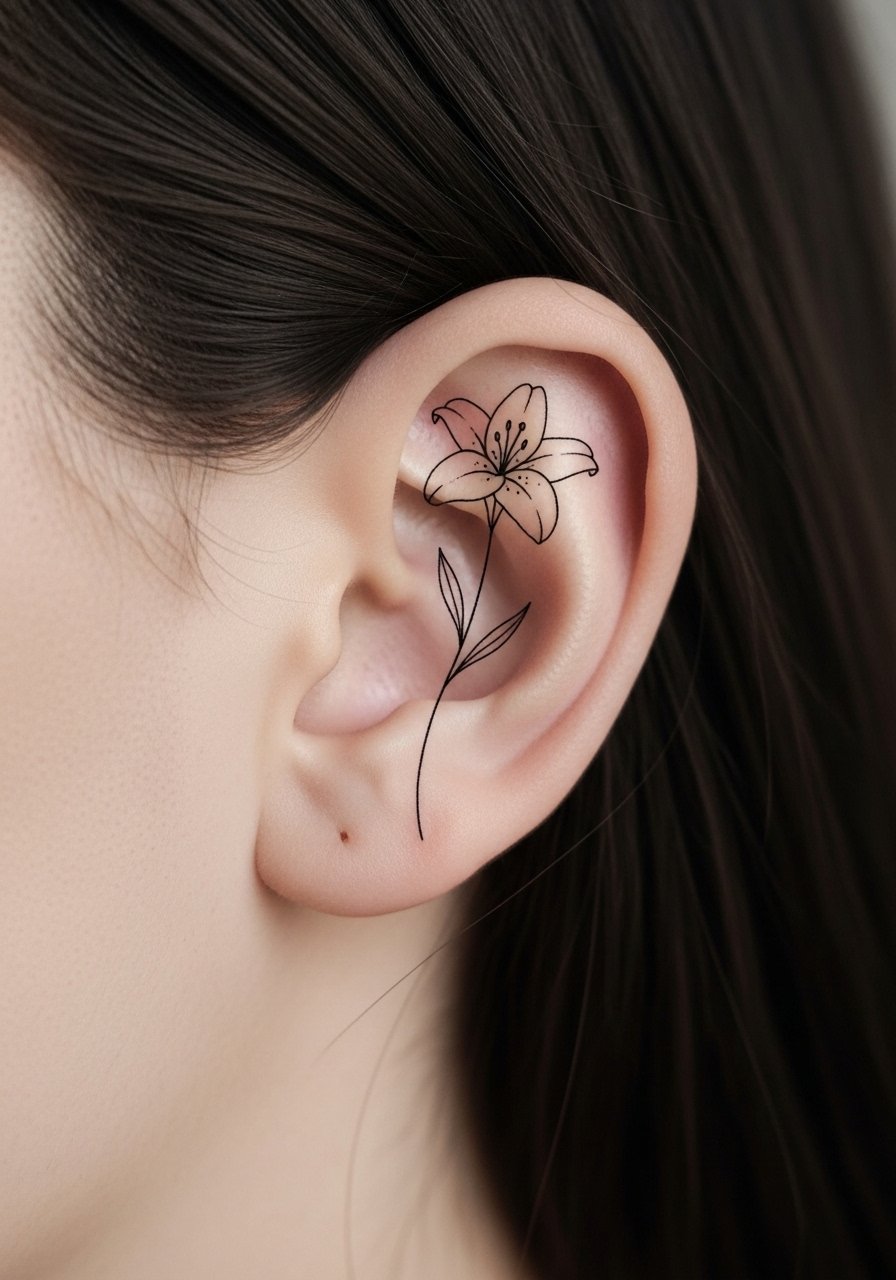
A behind-ear birth flower is discreet and personal. Minimalist single-line tattoos are low pain and quick to heal. They can fade faster due to sun exposure when hair parts—plan to touch up if you want perfect lines long-term.
6. Neo-Traditional Birth Flower on Thigh
Style/Technique: Neo-Traditional / Bold Color + Detail
Pain Level: Medium (4/5)
Session Time: 2–4 hours
Best For: Large, decorative pieces
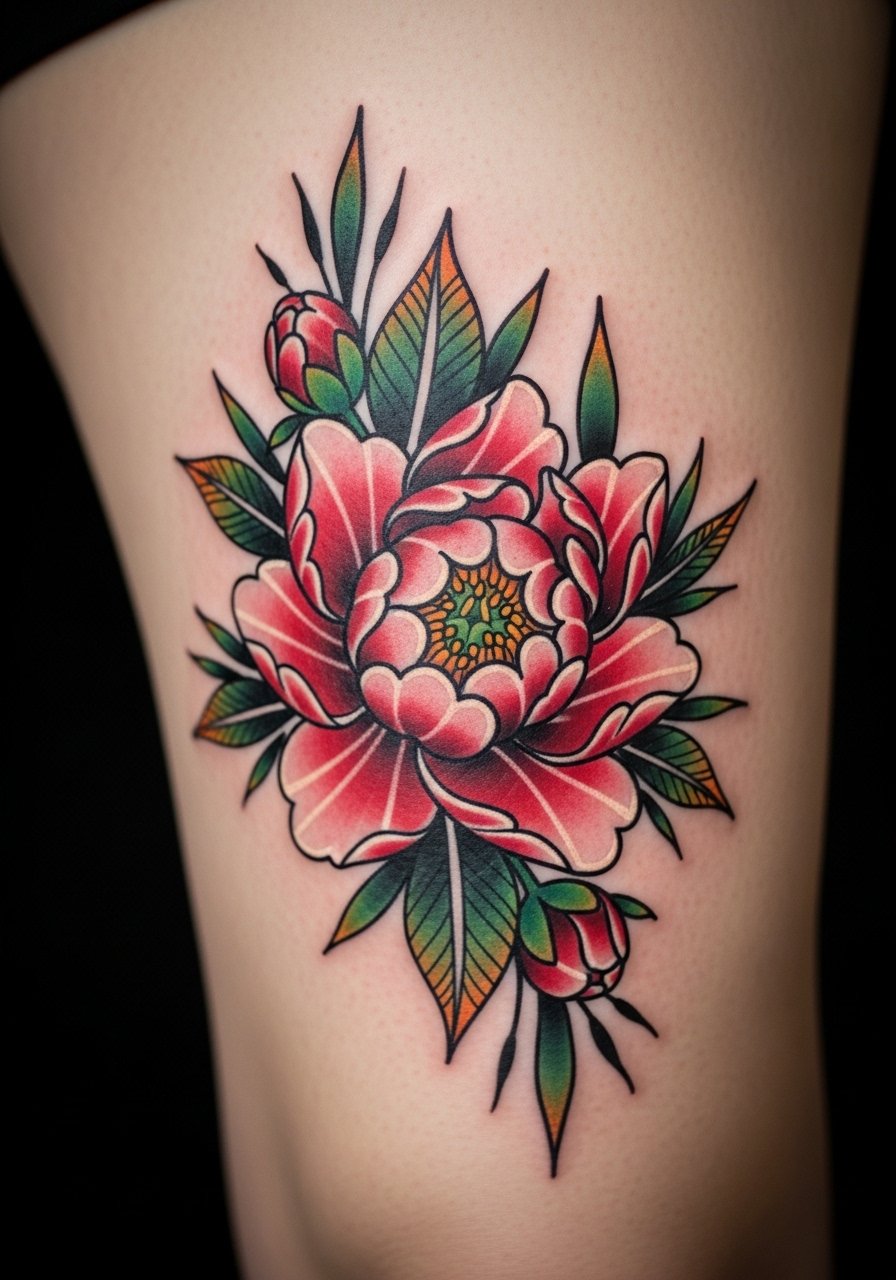
Neo-traditional adds decorative flourishes to your birth flower. Thigh flesh handles long sessions well and heals quickly. Colors and shading look great healed, but bright pastels may need touch-ups. This is a strong choice for meaningful, statement pieces.
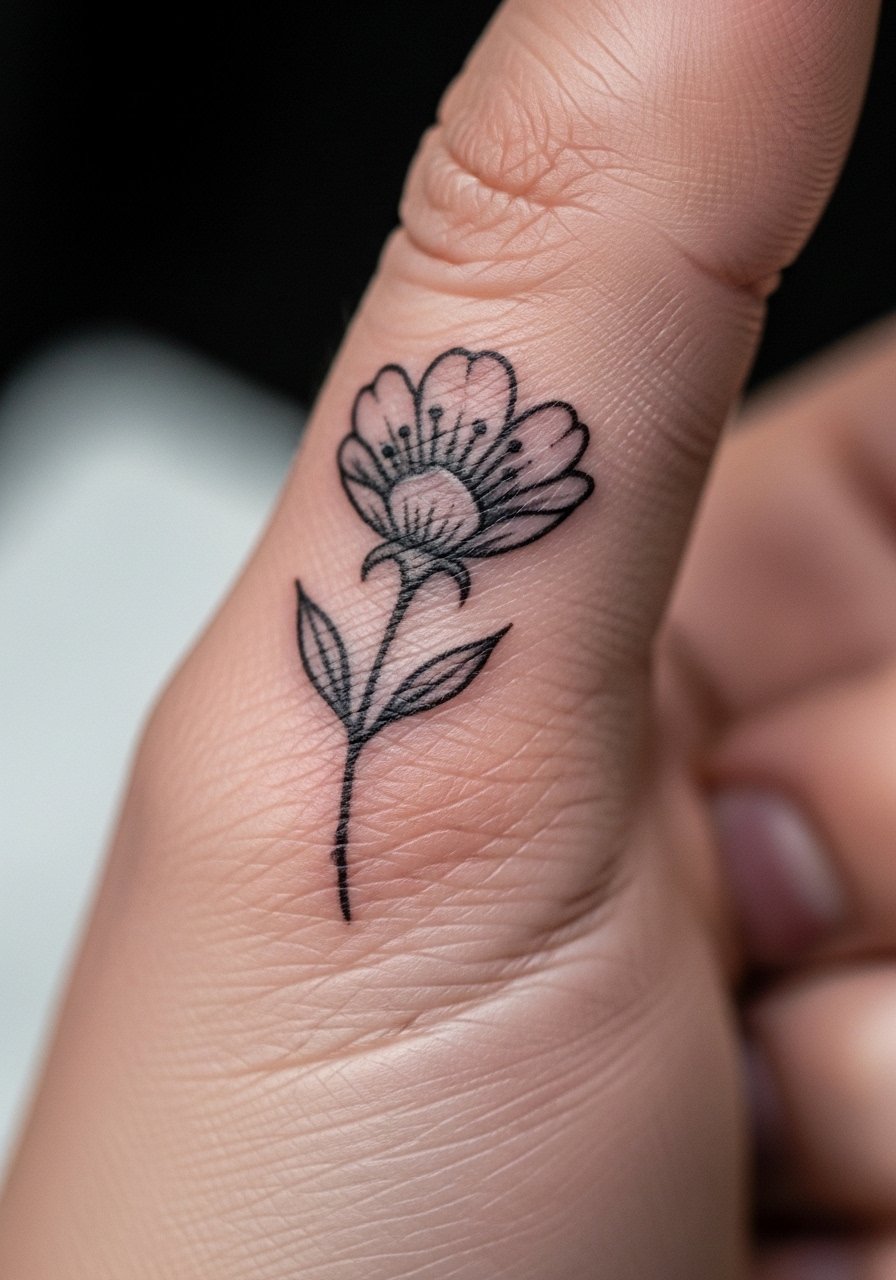
7. Tiny Birth Flower Finger Tattoo (Negative Space)
Style/Technique: Minimalist / Negative Space
Pain Level: Medium-High (5-7/10)
Session Time: 20–40 minutes
Best For: Symbolic, very visible
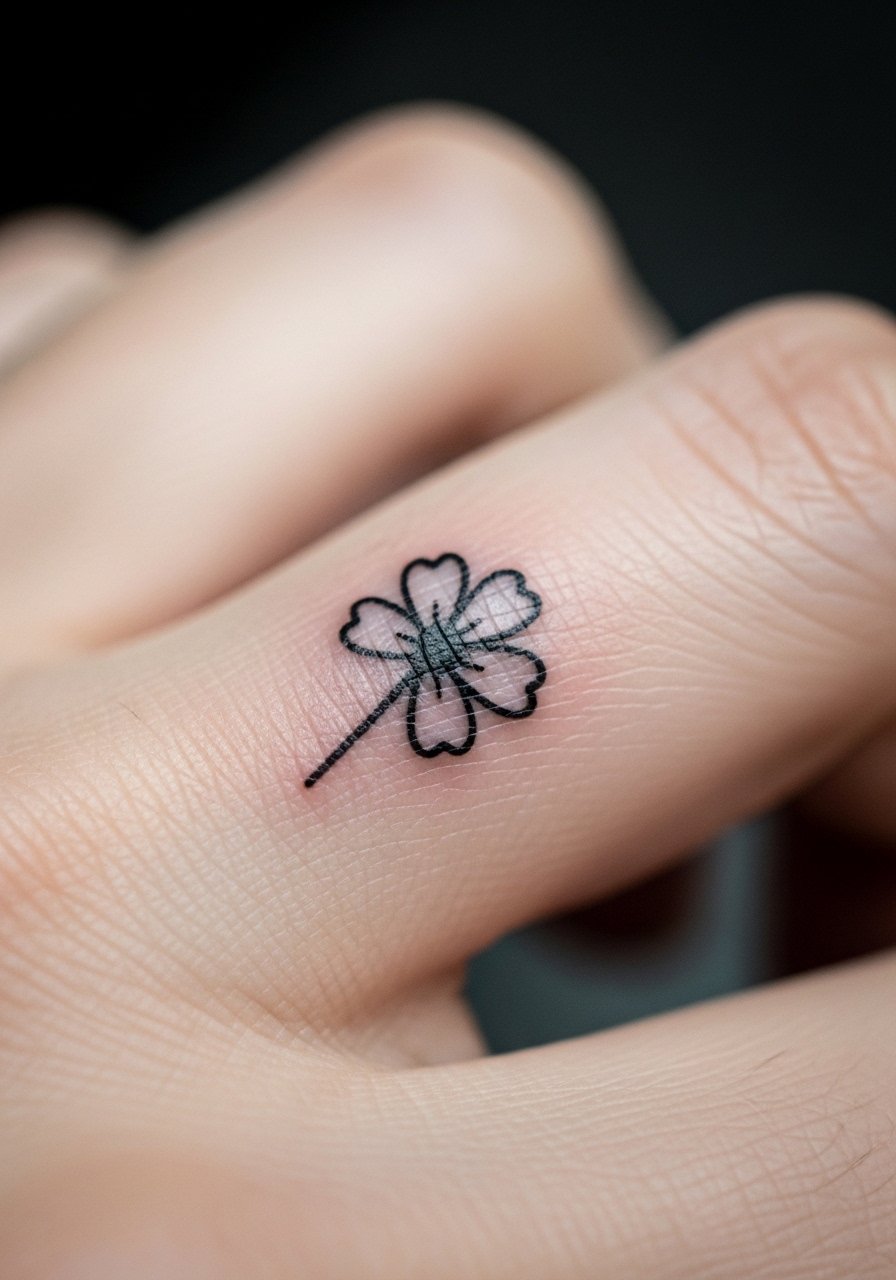
Finger tattoos are tempting for meaning but I’ve seen them fade and blur fast. Negative space can look crisp initially but requires touch-ups. If you pick finger placement, accept it as semi-permanent and plan on maintenance.
8. Birth Flower Bouquet on Ribcage
Style/Technique: Fine Line + Color / Illustrative
Pain Level: High (7-9/10)
Session Time: Multiple sessions
Best For: Personal statement, coverable
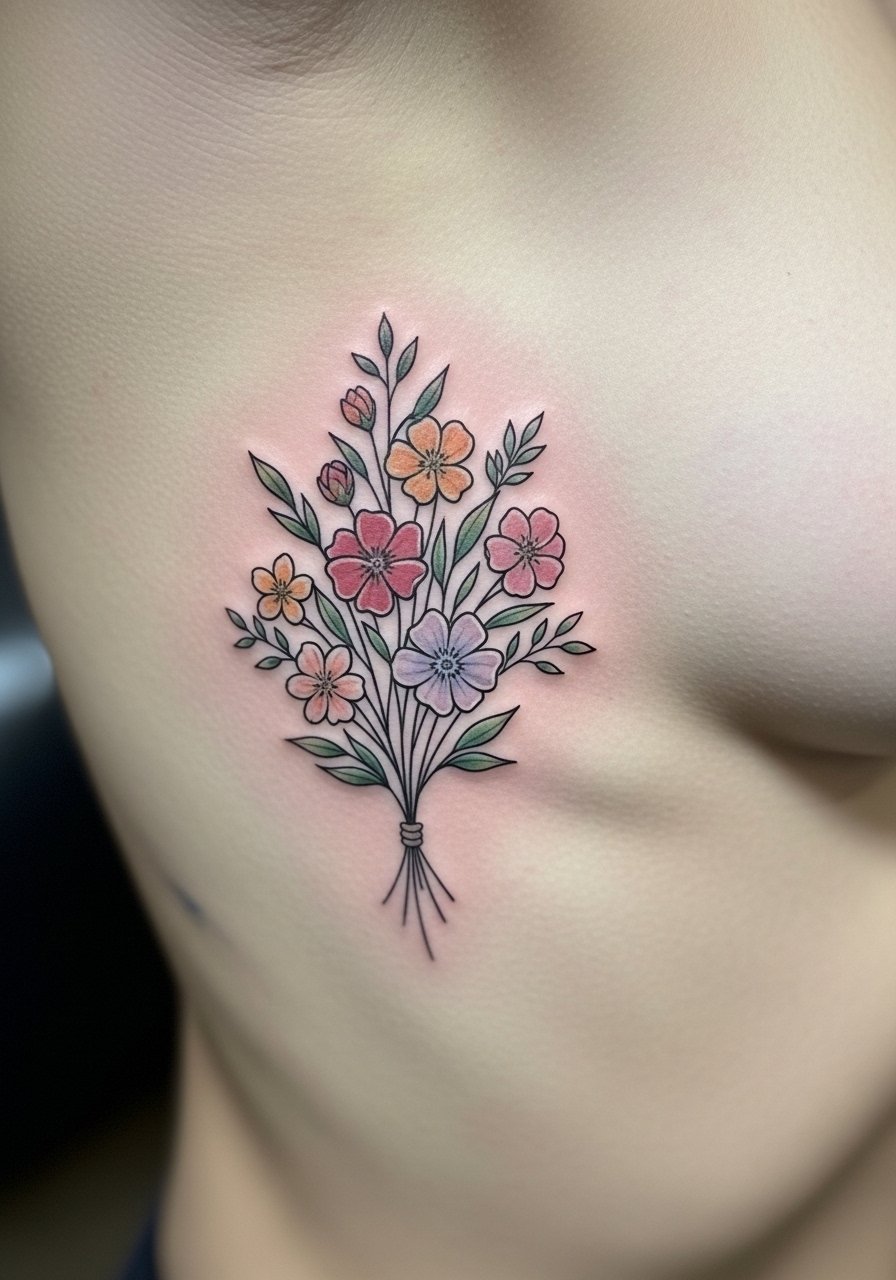
Ribcage tattoos hurt more but are private and dramatic. A bouquet of birth flowers reads like a personal family chart. Expect longer healing due to movement and clothing friction. Keep clothing soft and loose during first two weeks.
9. Birth Flower and Birthstone Micro-Tattoo on Collarbone
Style/Technique: Micro-Realism + Dotwork
Pain Level: Medium (4/10)
Session Time: 1–2 hours
Best For: Elegant, visible
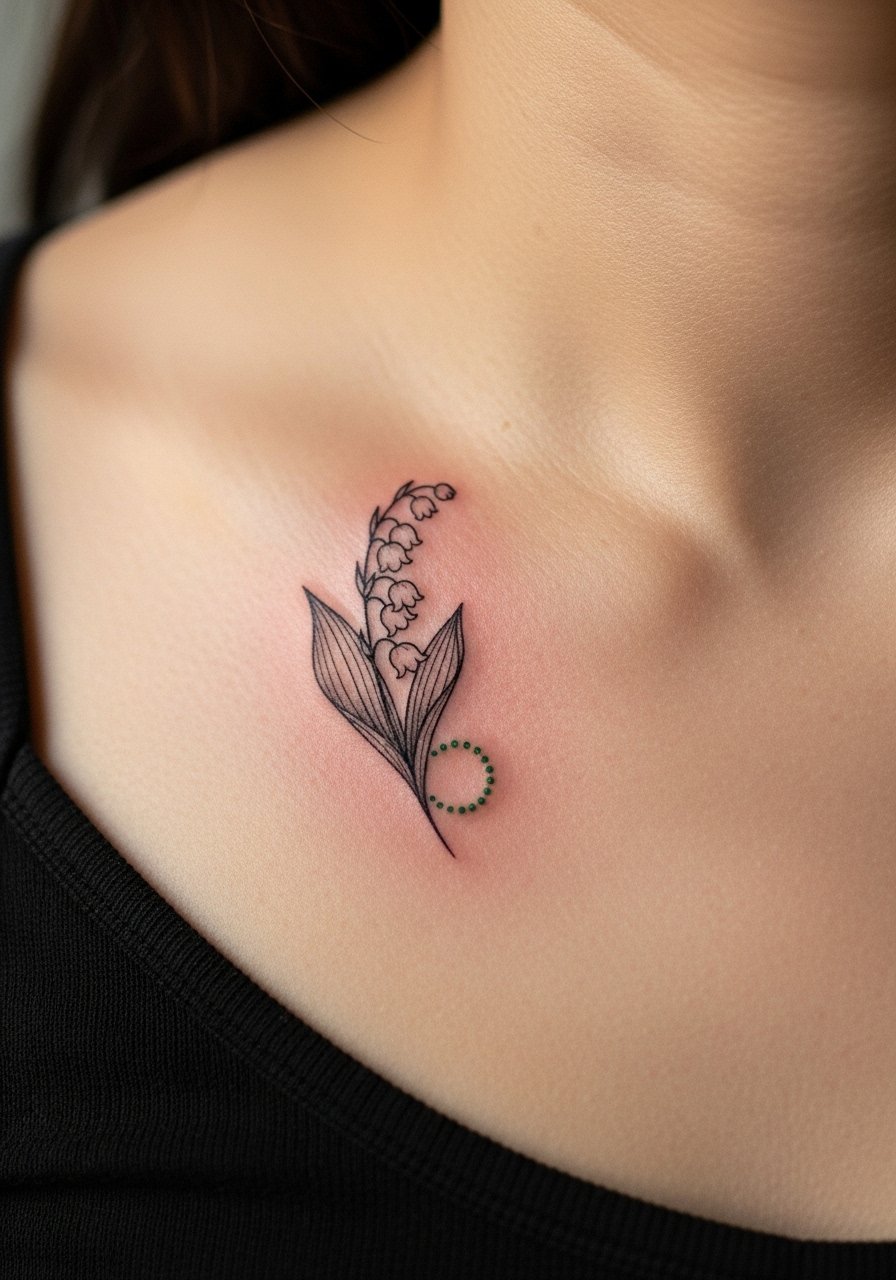
Pairing a birth flower with a tiny dot or jewel mimics a birthstone. Collarbone holds detail well and frames the neckline. Ask for slightly bolder contrast so the piece stays legible as it settles.
10. Blackwork Silhouette Birth Flower on Calf
Style/Technique: Blackwork / Silhouette
Pain Level: Low-Medium (3-4/10)
Session Time: 1–2 hours
Best For: High-contrast, low-maintenance
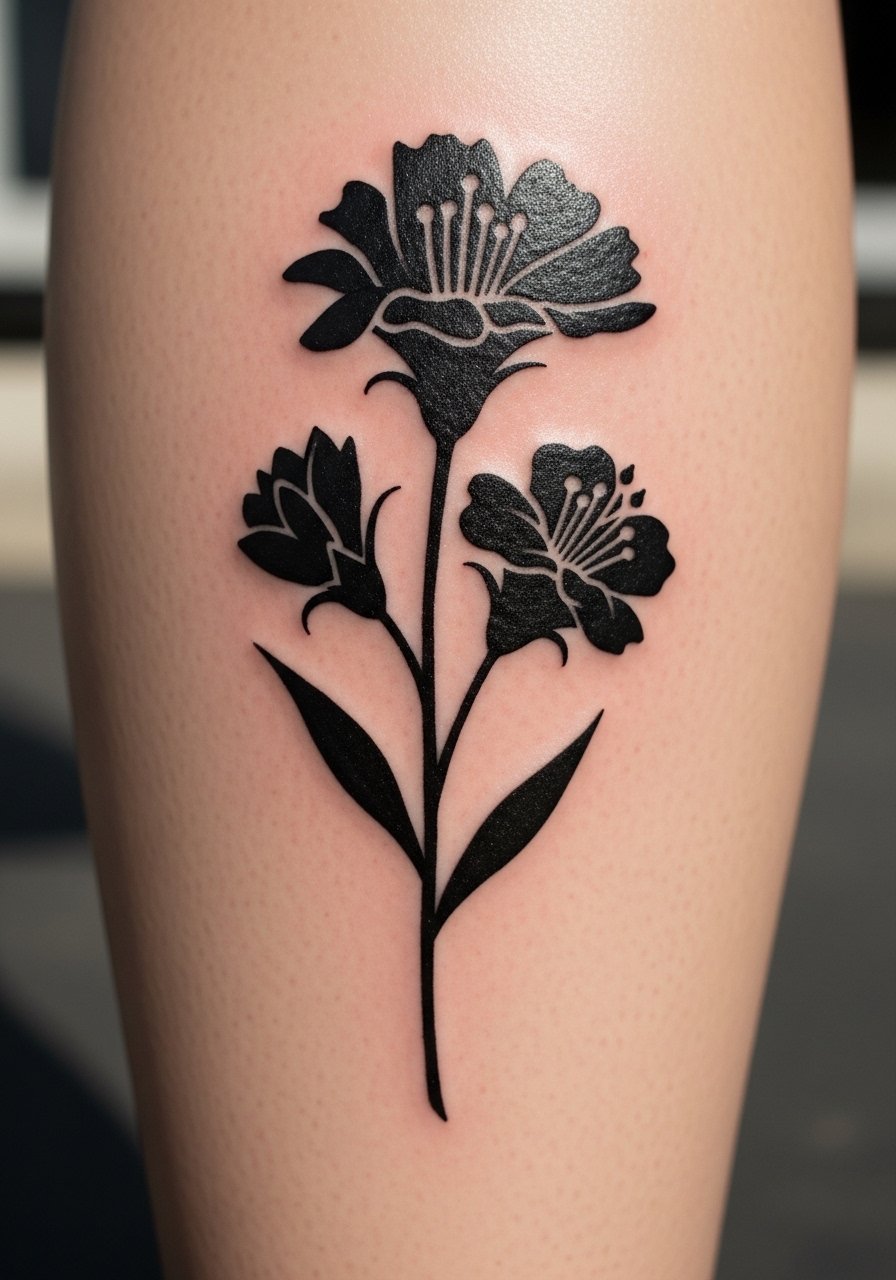
Solid black silhouettes age slowly and resist color fade. Calf placement avoids constant sun and friction. This style is forgiving if you prefer low upkeep. Avoid tiny interior details that can fill in over time.
11. Stacked Birth Flowers Down Spine (Family Tribute)
Style/Technique: Illustrative / Linear Composition
Pain Level: High (7/9/10 depending on area)
Session Time: Multiple sessions
Best For: Tribute pieces, long-read designs

Stacking birth flowers down the spine reads as a timeline or family tree. Spine work is intense but visually stunning. Plan for multiple sessions and slower healing. Ask your artist about spacing so pieces don’t merge as they age.
12. Watercolor Birth Flower Ankle Wrap
Style/Technique: Watercolor + Fine Line
Pain Level: Medium (4/10)
Session Time: 1–2 hours
Best For: Feminine wrap, ankle jewelry look
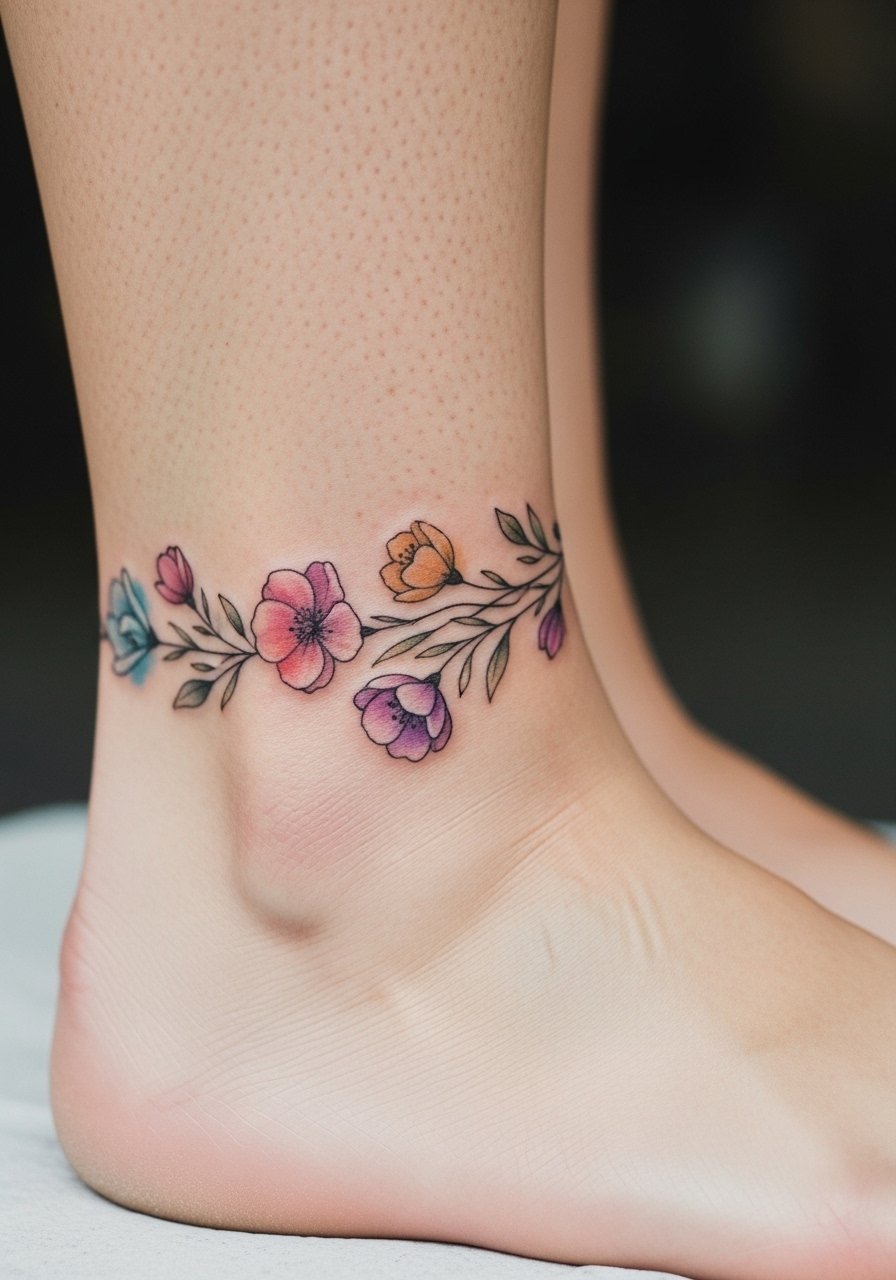
An ankle wrap feels like jewelry and shows nicely with shoes. Watercolor strokes add softness, but edges may feather. I recommend a faint outline to preserve shape as colors soften.
13. Birth Flower and Constellation on Forearm
Style/Technique: Fine Line + Dotwork
Pain Level: Medium (3-4/10)
Session Time: 1–2 hours
Best For: Personal symbolism, visible sleeve additions
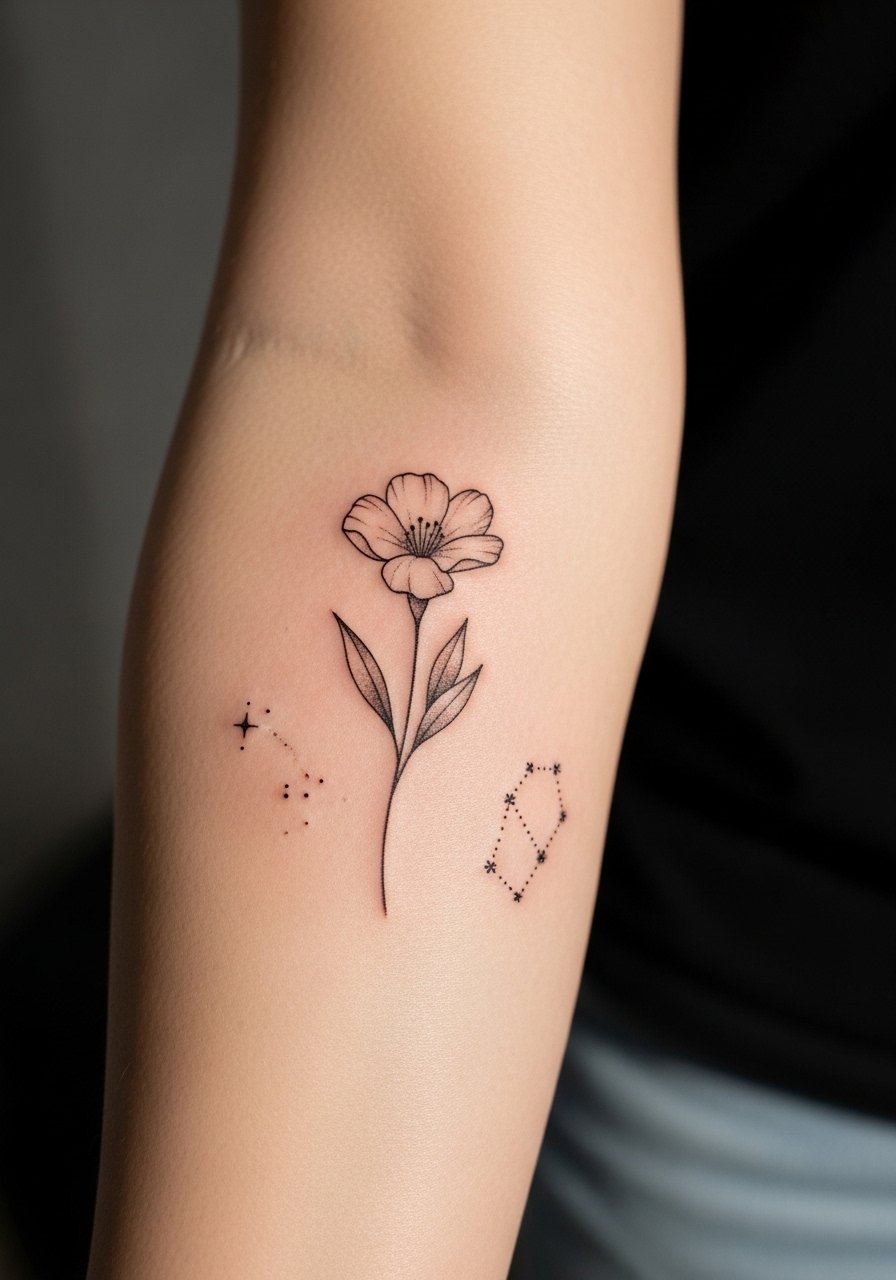
Combining your birth flower with a constellation ties personal symbols together. Forearm placement is low pain and shows healed detail well. Use dotwork for subtle texture—ask for healed photos of similar combos.
14. Single Stem Birth Flower Behind Knee
Style/Technique: Minimalist / Single Stem
Pain Level: High (6-8/10)
Session Time: 1–2 hours
Best For: Hidden, sensual placement
Behind-the-knee tattoos are intimate and tricky to heal because of movement. They can look amazing but expect more discomfort and longer healing. Keep skin moisturized and avoid tight clothing while it heals.
15. Geometric Birth Flower Mandala on Sternum
Style/Technique: Blackwork / Geometric + Floral
Pain Level: High (8/10)
Session Time: Multiple hours
Best For: Centerpiece, symmetrical work
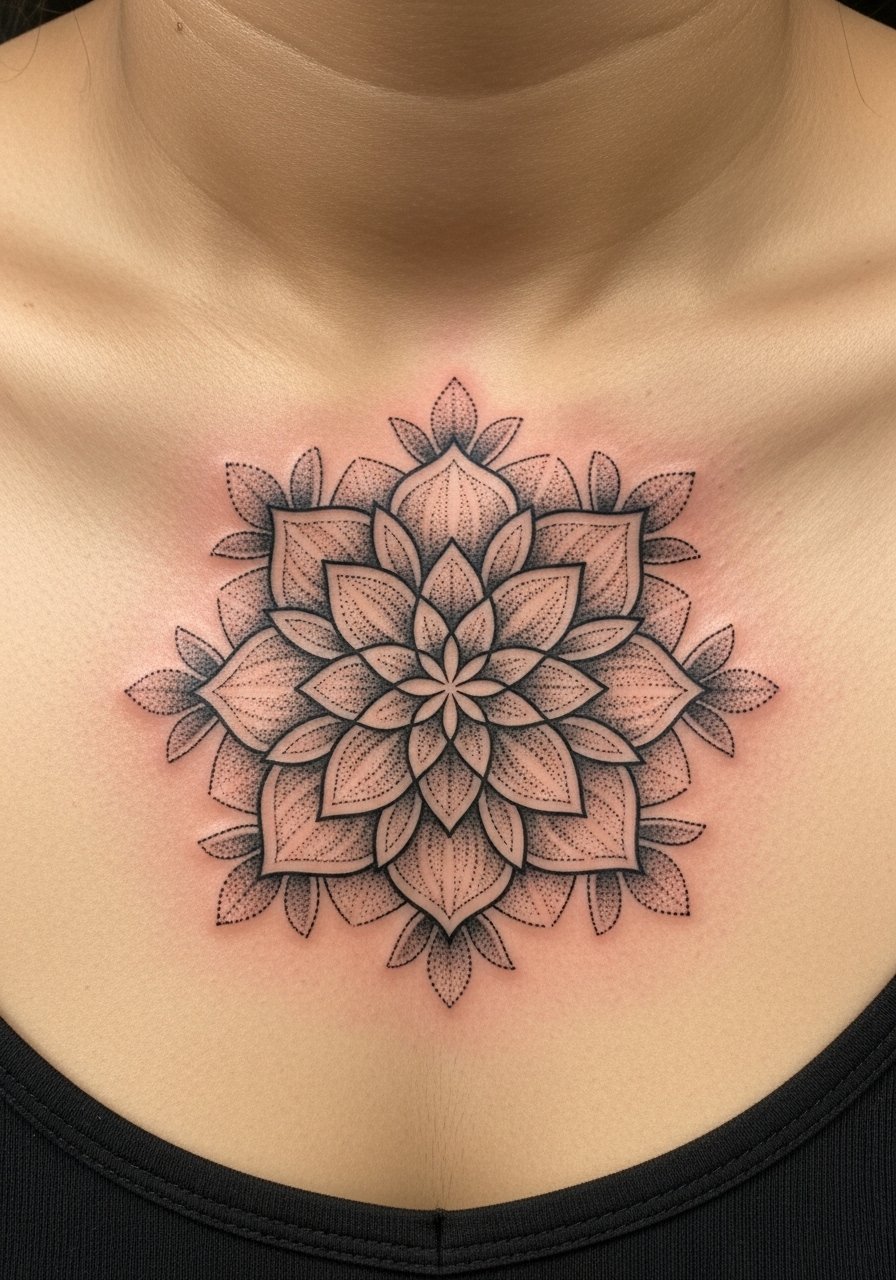
A mandala center piece ties symmetry with meaning. Sternum work is painful but rewards with dramatic placement. Precision matters—pick an artist skilled in symmetry and healed blackwork samples.
16. Tiny Birth Flower Behind Ear with Initial
Style/Technique: Minimalist / Tiny Script + Line
Pain Level: Low (2-3/10)
Session Time: 20–40 minutes
Best For: Personal, discreet
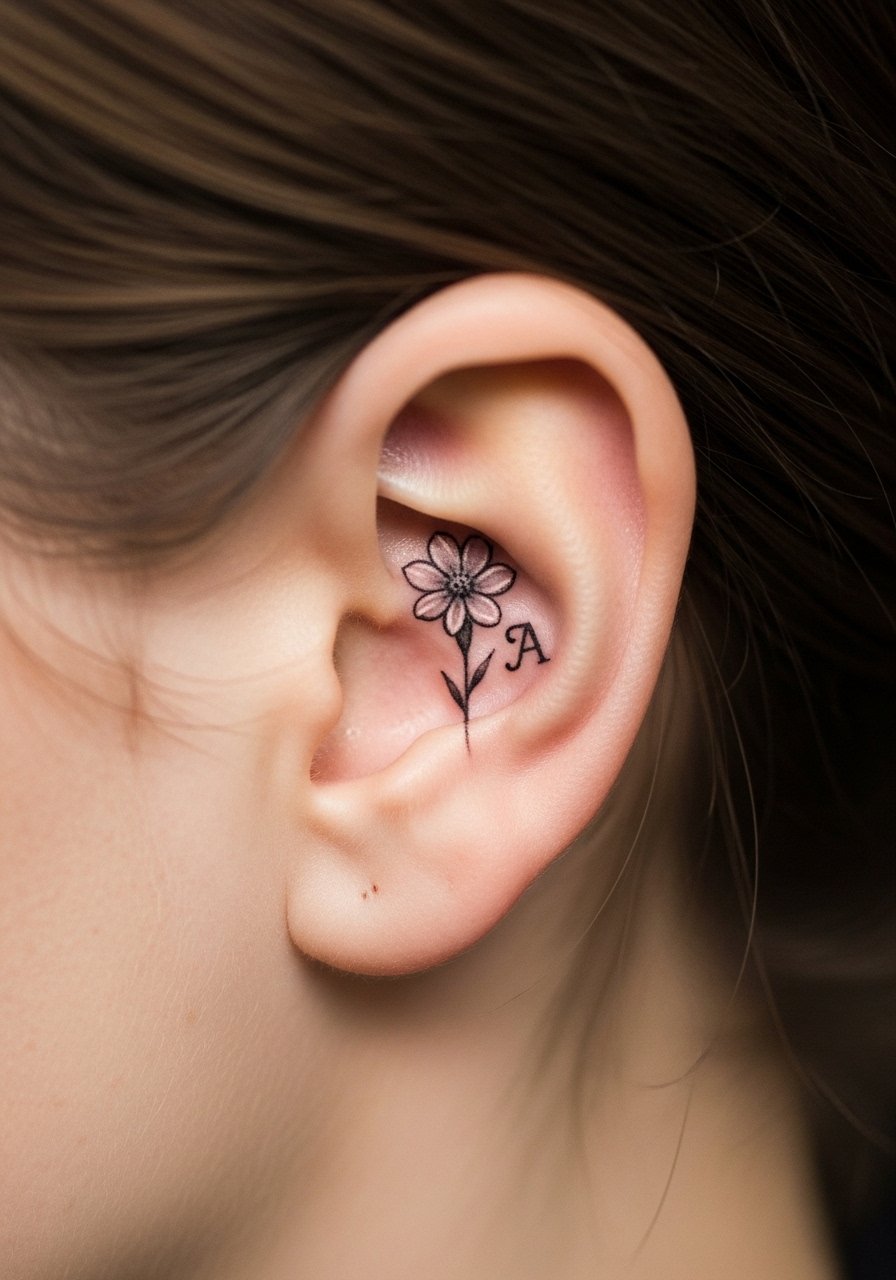
Adding an initial to a tiny birth flower makes it feel personal without shouting. Behind-ear heals fast if kept clean. Avoid placing too close to hairline to reduce irritation.
17. Botanical Sleeve of Birth Flowers on Full Arm
Style/Technique: Illustrative / Botanical Sleeve
Pain Level: Medium-High (4-7/10 across areas)
Session Time: Multiple sessions over months
Best For: Collectors, detailed storytelling
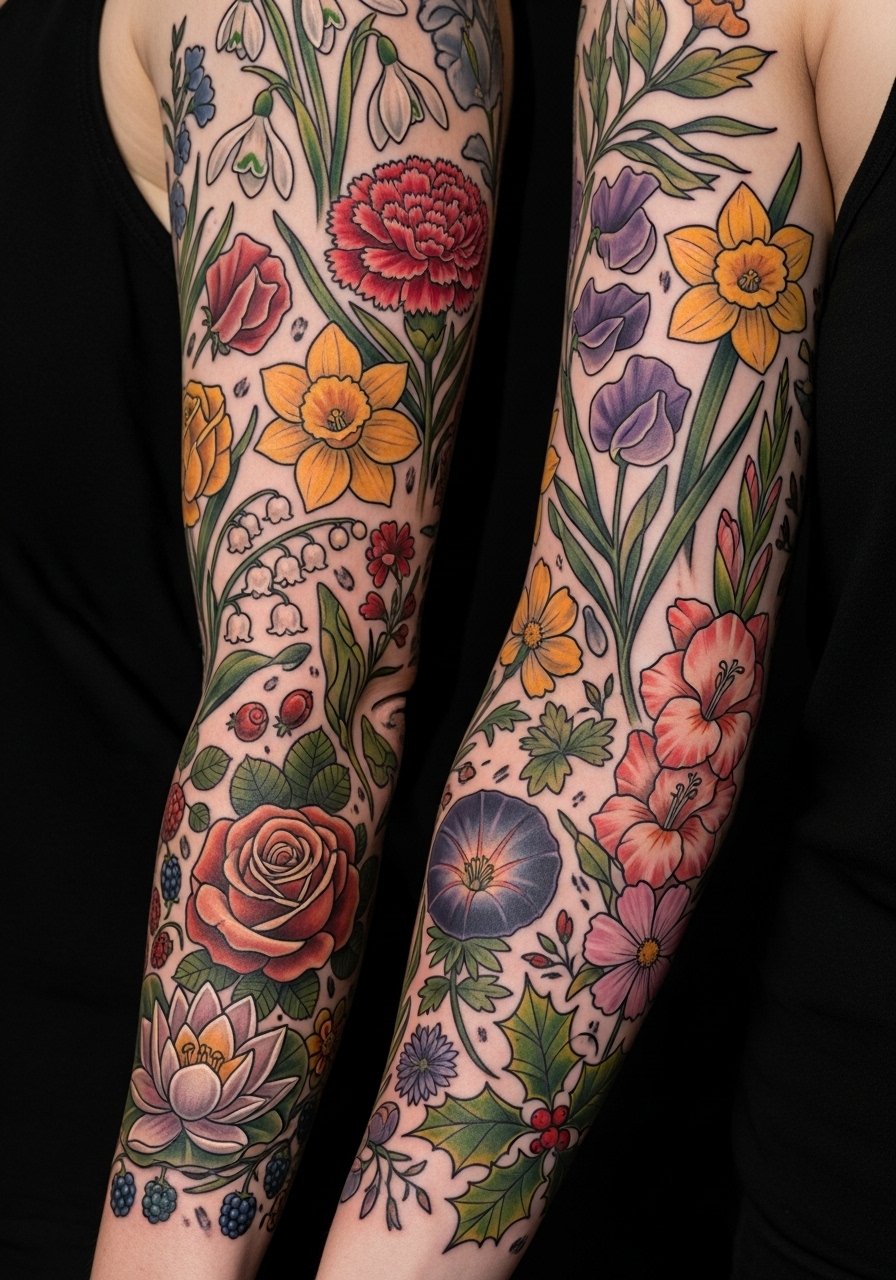
A full sleeve lets you tell a floral story—birth flowers woven with leaves and text. This is a commitment but shows beautifully as it heals. Plan sessions seasonally and expect touch-ups years later.
18. Birth Flower Watercolor Wrist Band
Style/Technique: Watercolor / Band
Pain Level: Low (2-3/10)
Session Time: 30–90 minutes
Best For: Bracelet-like look, delicate color
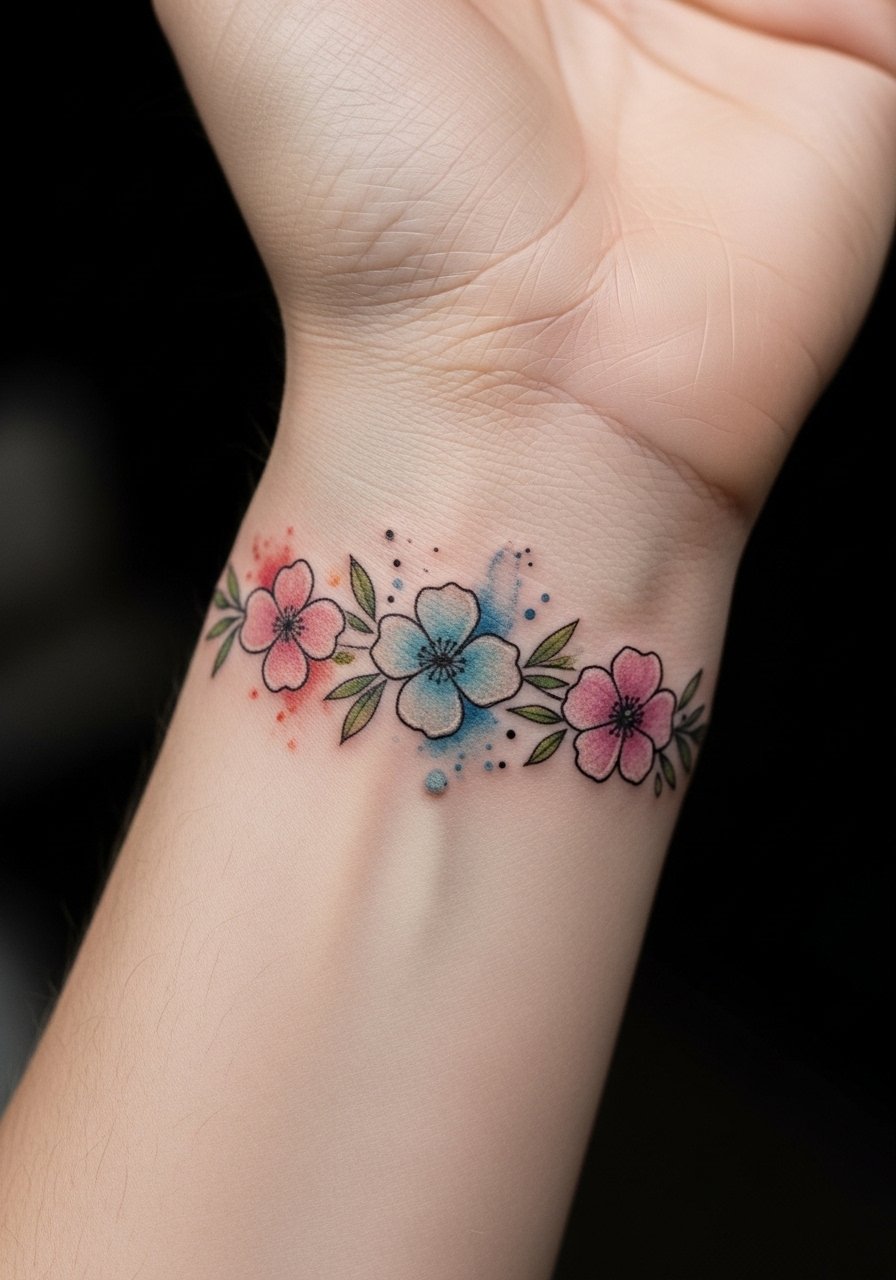
A wrist band mimics jewelry and draws attention to your hands. Watercolor bands look airy but can fade—consider a thin dark anchor line to retain shape.
19. Birth Flower in Black and Gray on Thigh
Style/Technique: Black & Gray / Shaded Realism
Pain Level: Medium (4/5)
Session Time: 1–3 hours
Best For: Subtle, classic portraiture
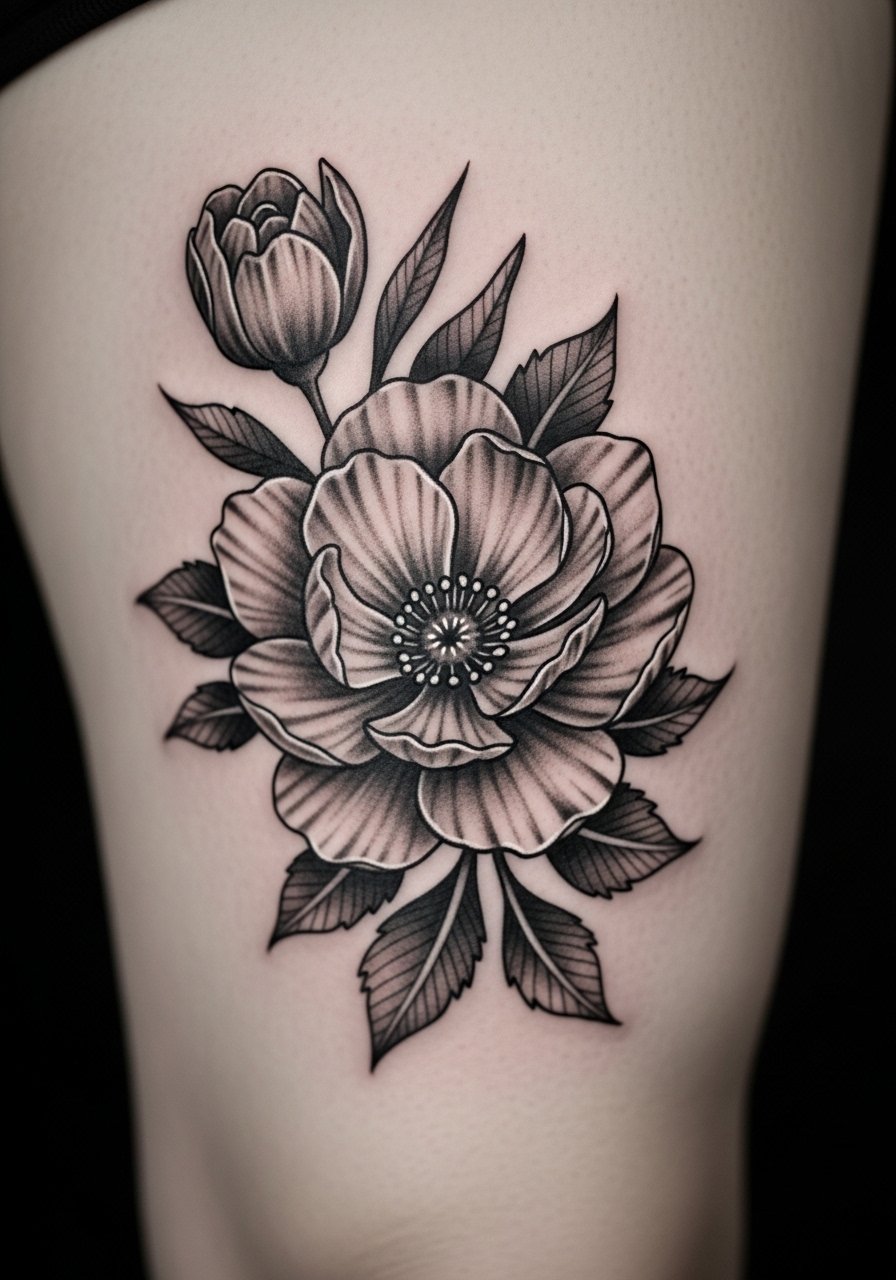
Black and gray realism focuses on form over color and ages well. Thigh placement keeps it private and low-sun-exposure. Healed contrast holds up nicely when ink depth is correct.
20. Small Birth Flower with Ribbon on Ribcage
Style/Technique: Neo-Traditional / Decorative Ribbon
Pain Level: High (7-9/10)
Session Time: 1–2 hours
Best For: Dedication pieces, hidden messages

A ribbon lets you add names or dates. Ribs hurt but allow tasteful placement. Keep ribbon thickness adequate to avoid it turning into a smudge line over time.
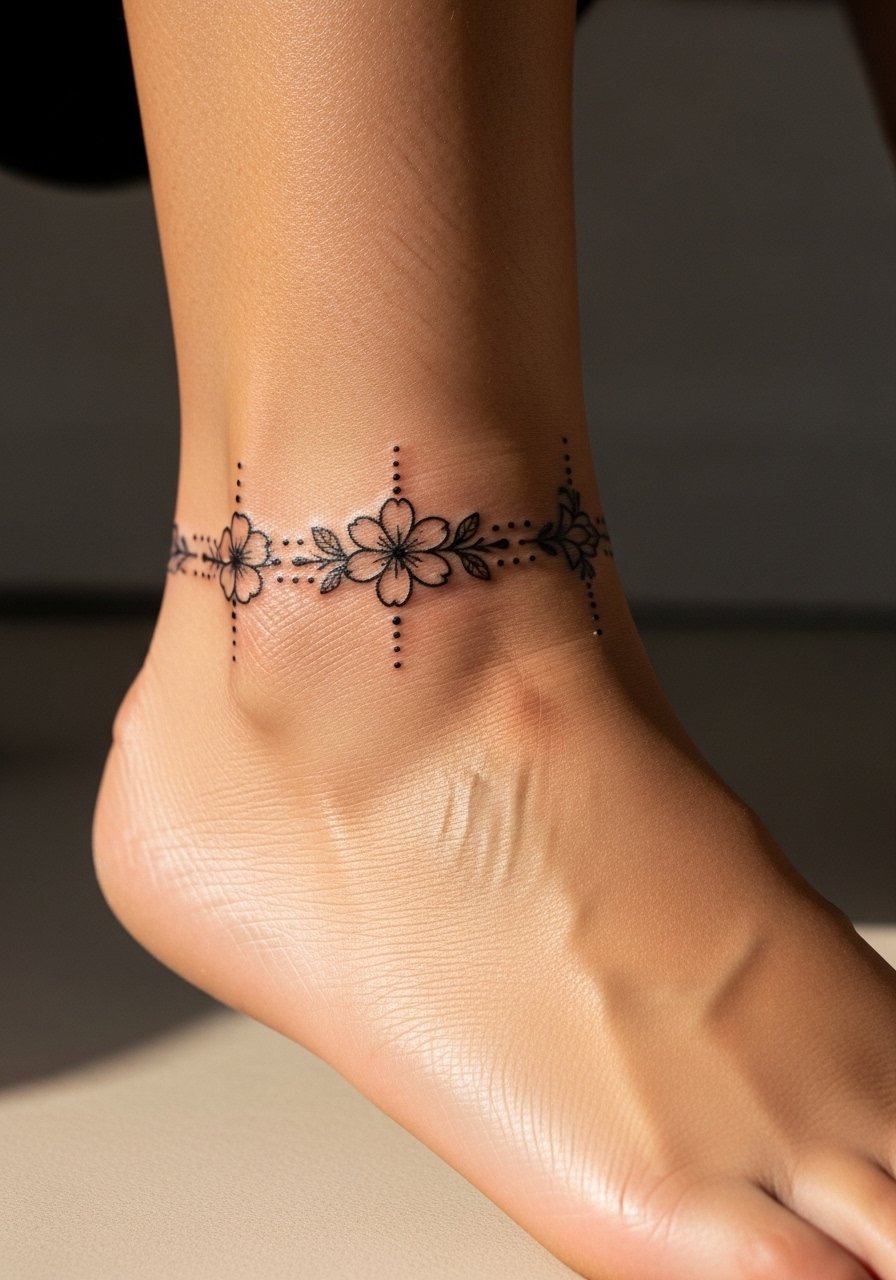
21. Birth Flower Ankle Dainty Chain
Style/Technique: Minimalist / Decorative Chain
Pain Level: Low (3/10)
Session Time: 30–60 minutes
Best For: Jewelry mimic, low-key
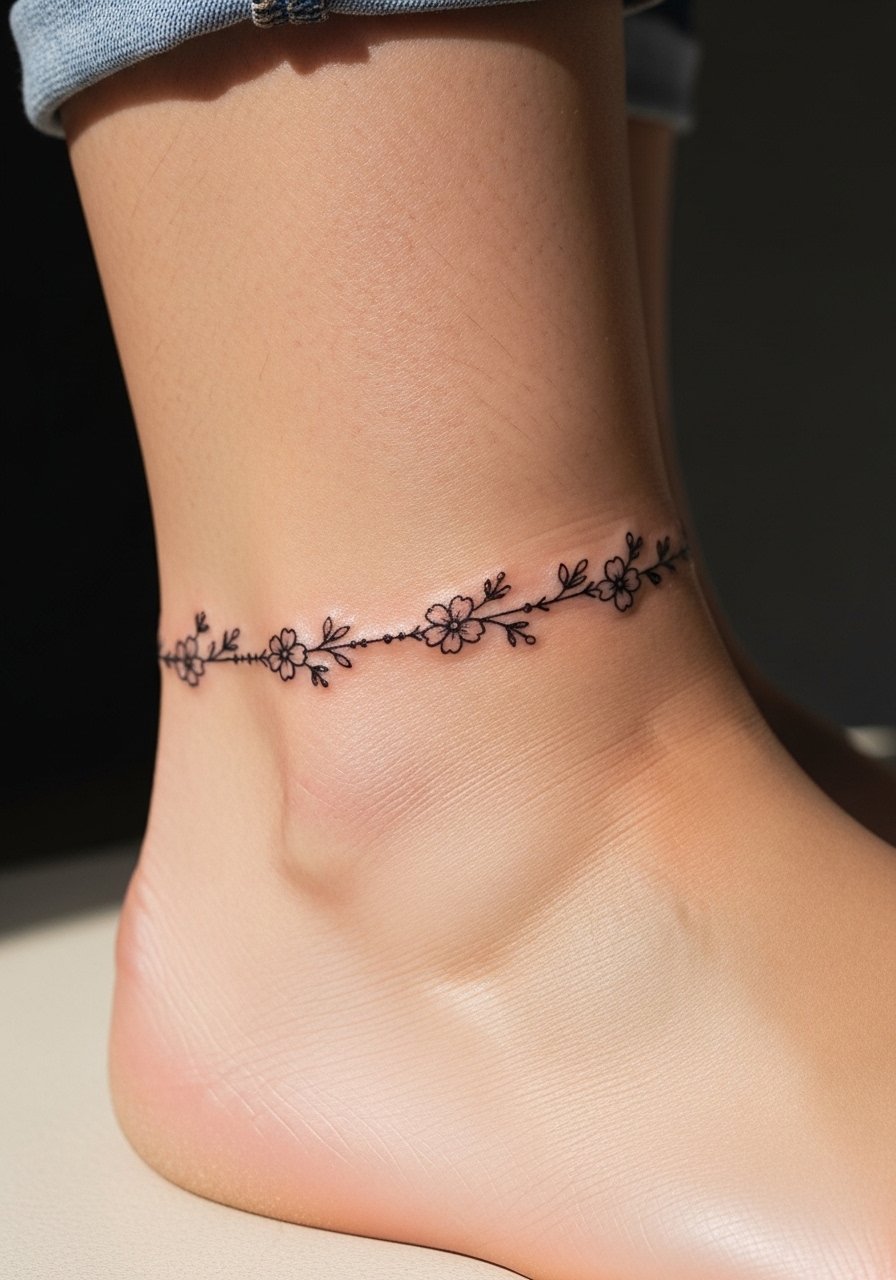
Chains and tiny blooms look like permanent jewelry. They’re low profile and heal quickly. Be wary of very thin chains—they can break visually as lines blur.
22. Single Petal Birth Flower on Collarbone
Style/Technique: Minimalist / Single Petal Detail
Pain Level: Low (3/10)
Session Time: 20–45 minutes
Best For: Subtle symbolism, modern look
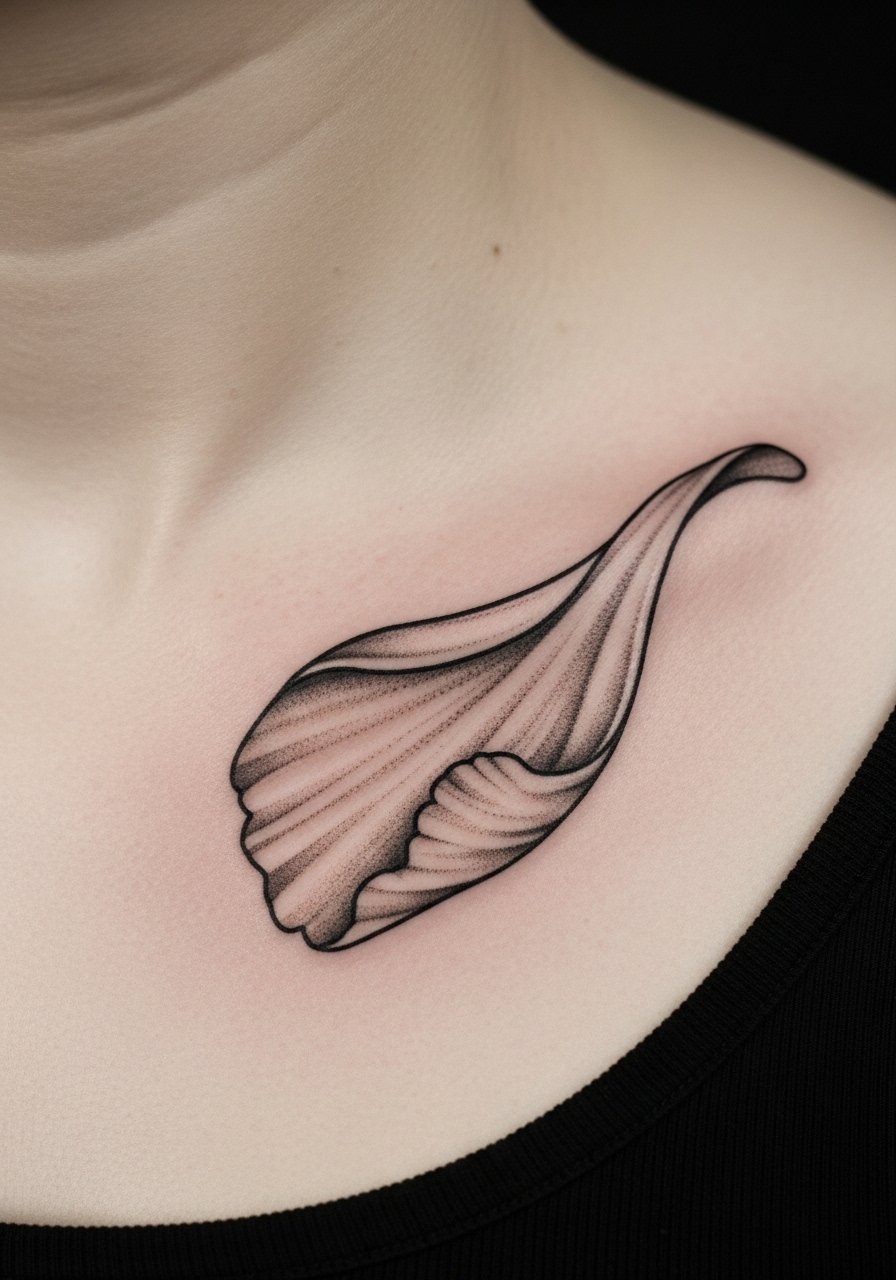
A single petal can represent part of a story—loss, growth, or birth. Collarbone placement sits well with necklaces. Ask for healed photos because collarbone skin moves and can affect fine lines.
23. Birth Flower and Quote on Ribcage Side
Style/Technique: Fine Line + Script
Pain Level: High (7/10)
Session Time: 1–2 hours
Best For: Emotional phrasing, hidden text

Pairing a birth flower with a short quote adds narrative. Keep script size readable—small script often blurs. Rib placements hide well under clothing during healing.
24. Birth Flower Mandala Wristpiece
Style/Technique: Dotwork / Mandala + Floral
Pain Level: Low-Medium (3-4/10)
Session Time: 1–2 hours
Best For: Symmetry, wrist detail
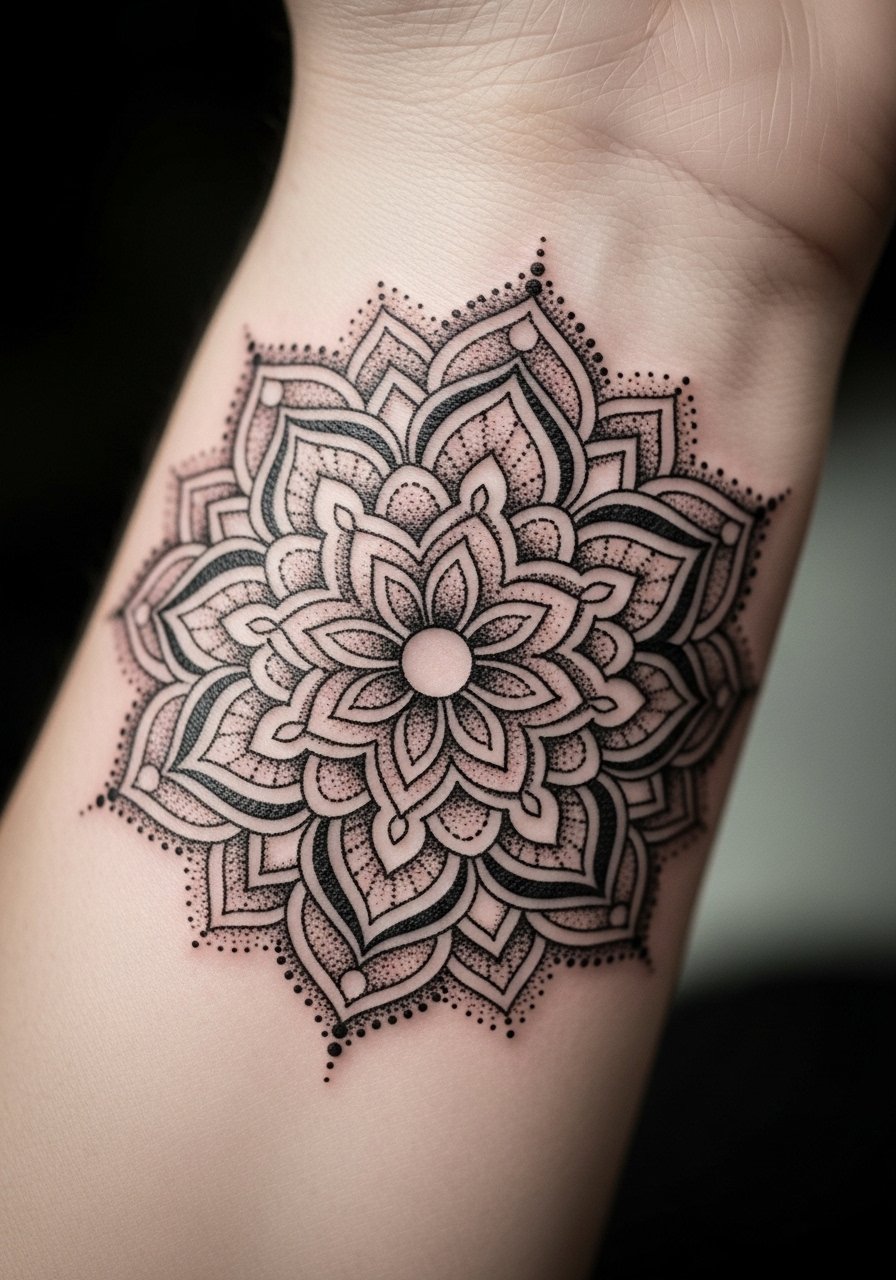
Mandala-wrapped wrists are meditative and symbolic. Dotwork ages predictably when dots are spaced properly. Avoid overly dense dotting that can merge.
25. Birth Flower Patch on Back Shoulder
Style/Technique: Illustrative / Patchwork
Pain Level: Medium (4/5)
Session Time: 1–2 hours
Best For: Easy to cover, versatile
Shoulder patches sit well under shirts and show in sleeveless looks. This placement tolerates color and detail. Ask for reference photos of healed shoulders to judge saturation.
26. Birth Flower Anklet Tattoo with Dots
Style/Technique: Minimalist / Dots + Tiny Stems
Pain Level: Low (3/10)
Session Time: 30–60 minutes
Best For: Subtle, continuous design
Anklet designs make small elements read as a set. Dots age well if spaced. Avoid putting major elements on sole or high-friction spots.
27. Birth Flower on Inner Bicep with Shadowing
Style/Technique: Black & Gray + Soft Shading
Pain Level: Medium (4/5)
Session Time: 1–2 hours
Best For: Private display, arm flex coverage
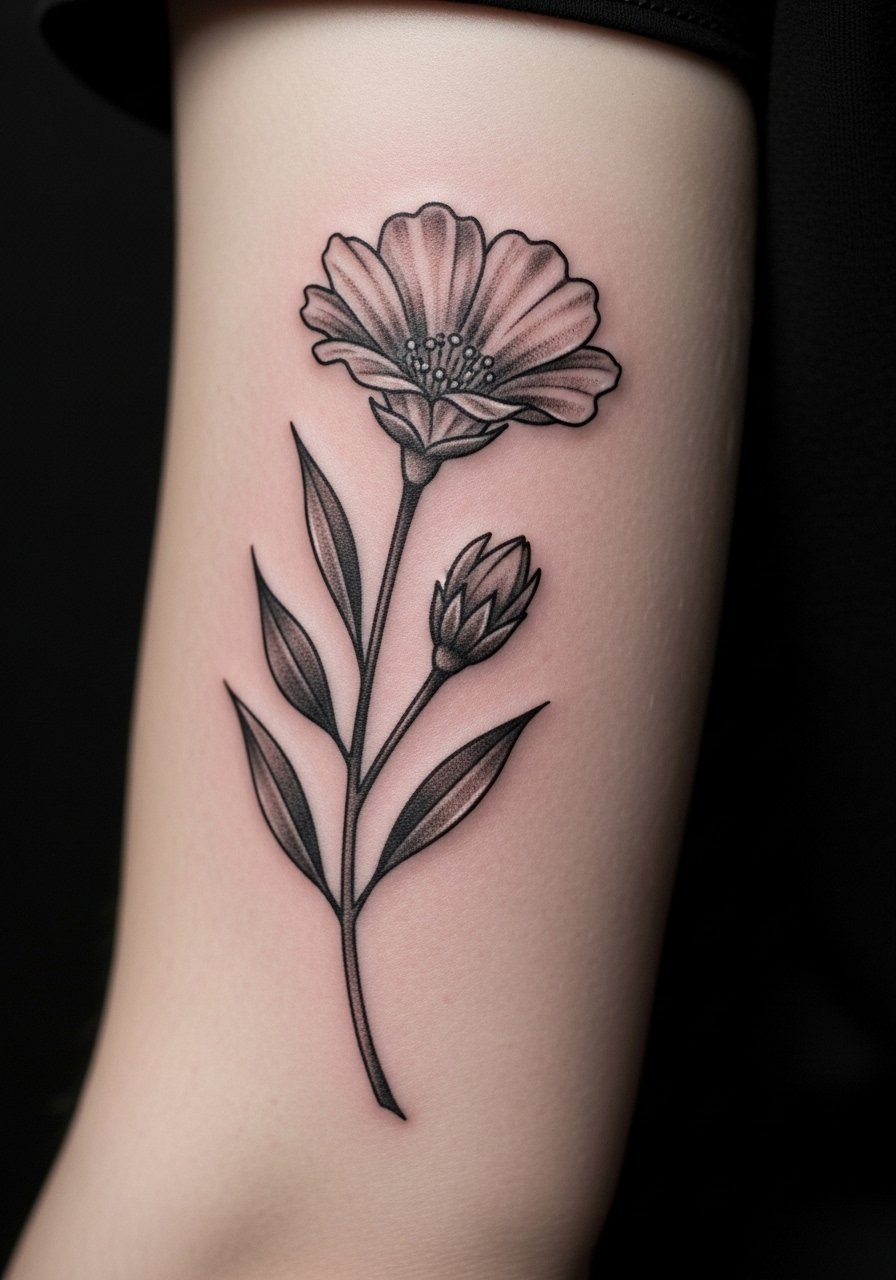
Inner bicep holds detail and stays mostly out of sun. It’s a great spot for a personal birth flower. Expect moderate pain and comfortable healing when you avoid heavy lifting.
28. Birth Flower Thumb Base Accent
Style/Technique: Minimalist / Small Accent
Pain Level: Medium-High (5-7/10)
Session Time: 20–40 minutes
Best For: Tiny meaningful spot, visible day-to-day
Thumb-base tattoos show often and can blur faster due to friction. If you want daily visibility, choose a slightly bolder line and accept potential touch-ups.
Tattoo Prep and Aftercare Essentials
Aftercare Essentials:
- Aquaphor Healing Ointment, 14oz tube — Recommended for first 3–5 days by many artists I follow
- Saniderm Transparent Adhesive Bandage, 6-inch roll — Great second-skin option some artists use
- CeraVe Fragrance-Free Moisturizing Lotion, 12oz — For days 4–14 to keep skin supple
- Dr. Bronner's Unscented Castile Soap, 8oz — Gentle cleaning during first week
Before Your Appointment:
- Tattoo Numbing Cream 5% Lidocaine — Use only after asking your artist if it's suitable
- Tattoo Stencil Transfer Paper, 12 Pack — Helpful if you plan a custom layout at home
Long-Term Maintenance:
- SPF 50+ Sunscreen Stick — From my experience, daily sunscreen slows fading dramatically
- Mad Rabbit Tattoo Balm, 1.8oz — Artists recommend for maintaining vibrancy after healing
- Hustle Butter Deluxe, 2oz — Vegan alternative many people use
Optional Comfort Items:
- Tattoo Numbing Spray — For touch-ups or very sensitive areas
- Hydrocolloid Bandages, Large Pack — Good alternative to Saniderm for small spots
Artists I trust often name Aquaphor, Saniderm, and SPF as non-negotiable. I’ve tried several and kept coming back to those for different phases of healing.
Frequently Asked Questions
Q: How bad does a tattoo actually hurt?
A: Pain depends on placement and your tolerance. Outer arm/upper thigh = 2–4/10. Ribcage/inner bicep/ankle = 7–9/10. It's more a constant scratching or burning than a sharp shock. For sensitive spots, ask about tattoo numbing cream 5% lidocaine—it helps but doesn't erase feeling.
Q: How long will my birth flower take to heal?
A: Surface healing is usually 2–3 weeks. Full settling is 2–3 months. The first week is the most important—clean gently with unscented soap like Dr. Bronner's Unscented Castile Soap and use a thin layer of Aquaphor for the first few days.
Q: Will color hold on darker skin tones?
A: Black and gray show well across skin tones. Bright colors can appear more muted; I've seen artists pack color more densely for deeper tones. Ask to see healed photos from your artist for similar skin tones.
Q: Can I work out after getting my birth flower?
A: Wait 48–72 hours at minimum. If the tattoo sits in a flex area (knee, elbow, ribs), wait longer—sweat and friction can irritate healing ink. Keep it clean and dry; use a breathable bandage if you need short-term protection.
Q: How do I keep my tattoo from fading?
A: Sunscreen is non-negotiable. From what I’ve seen, UV exposure is the biggest fading factor. Use an SPF 50+ sunscreen stick whenever your tattoo is exposed. Moisturize with a fragrance-free lotion like CeraVe.
Q: Should I get a small birth flower first to test pain?
A: Only if you actually want a small piece. Pain varies by placement more than size. A small wrist tattoo might hurt less than a tiny ankle piece. Decide based on where you want visibility and how comfortable you feel committing to potential touch-ups.
Q: What if I change my mind later?
A: Pick a design with personal meaning and sit on it for a few months. Tattoo removal exists but takes multiple sessions. If you want flexibility, choose placements that are easy to cover with clothing while you decide.
