
I spent months bookmarking optical illusion tattoos before I finally pulled the trigger on a small trompe-l'œil piece. The real challenge wasn't choosing a design—it was understanding what actually reads as 3D on skin and what just looks messy after healing. These 25 tricky illusion tattoos break reality in ways I’ve seen and tested on healed skin.
This list focuses on optical illusion tattoos across fine line, blackwork, and micro-realism. I picked placements that work for bold statement pieces and for subtle, hidden tricks. From what I’ve seen in 2026 trends, artists lean into negative space, anamorphic angles, and shadow play for long-term impact.
1. Fine Line Anamorphic Zipper on Forearm
Style/Technique: Fine Line / Anamorphic
Pain Level: Medium (4/10)
Session Time: 1-2 hours
Best For: Visible statement, forearm display
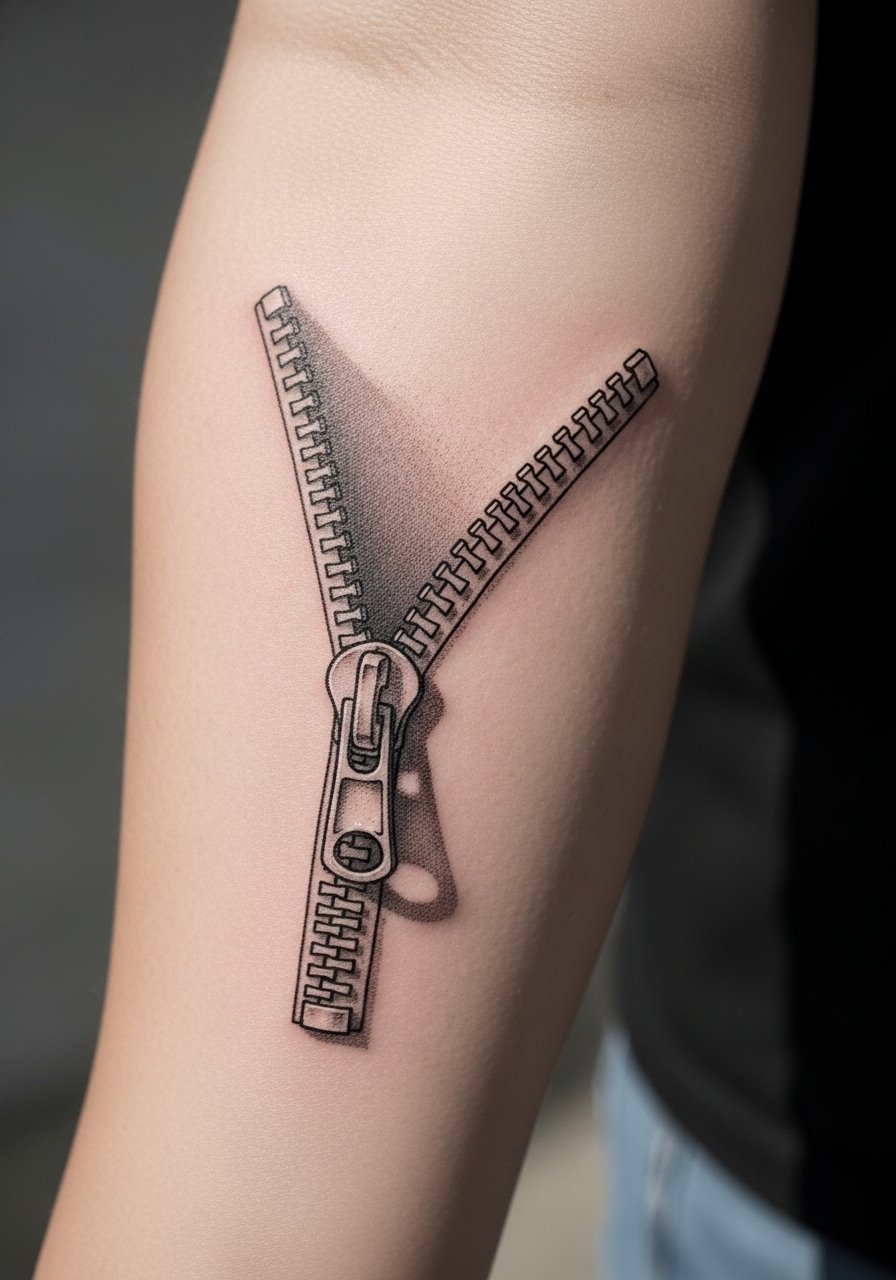
I love this as a subtle trick—when angled right it looks like skin is unzipping. Fine line detail sells the illusion, so pick an artist comfortable with single-needle work. Forearm placement is forgiving for healing. Expect 2–3 weeks of surface peeling; keep the lines moisturized. Common mistake: overloading the zipper with heavy shading—keep shadows soft for lifted depth. Ask your artist for healed examples of anamorphic pieces.
2. Trompe-l’Œil Rope Knot on Bicep
Style/Technique: Micro-Realism / Blackwork
Pain Level: Low-Medium (3/10)
Session Time: 2-3 hours
Best For: Bold, durable illusion
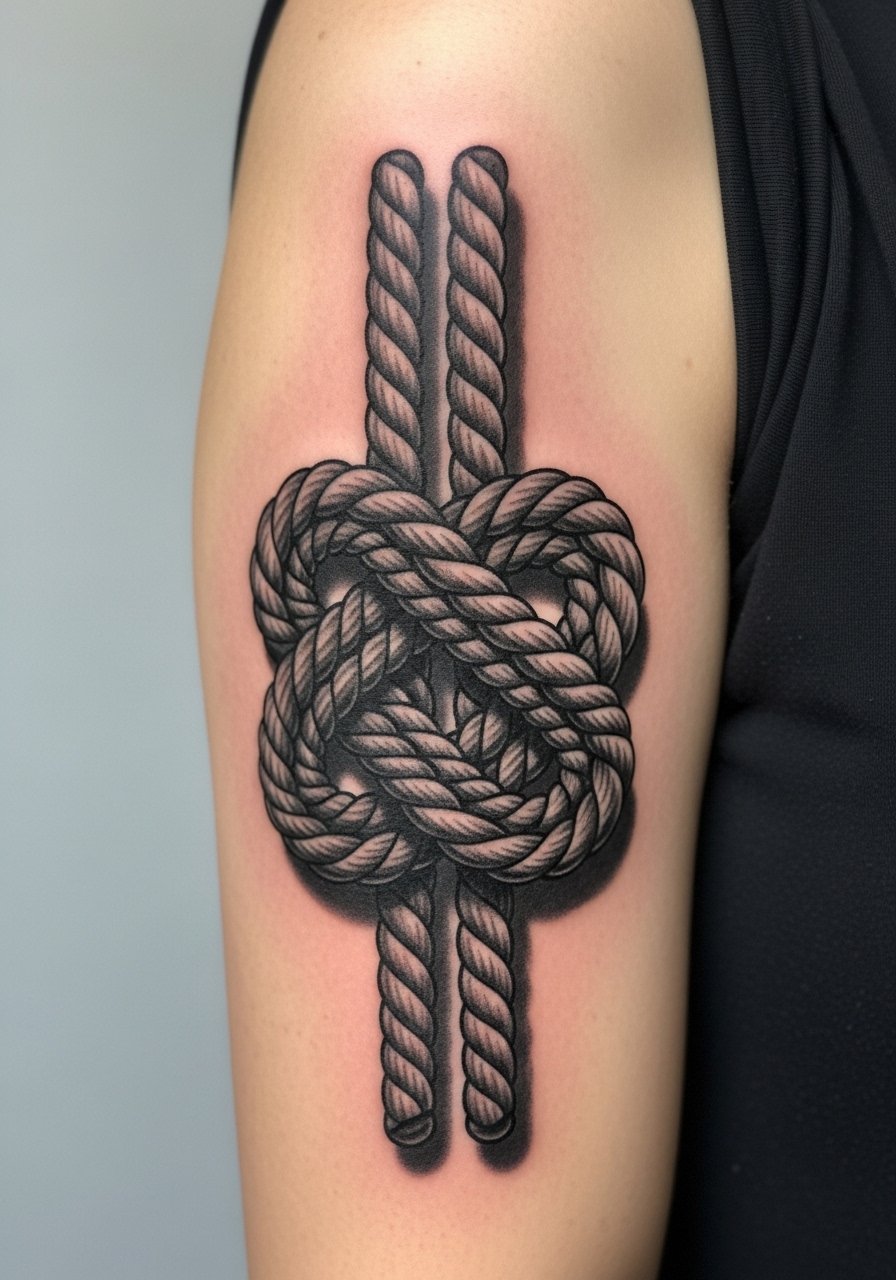
A thick rope knot looks tangibly lifted when crisp blackwork meets smart shadows. Bicep skin heals well and keeps contrast strong. Pain is manageable. Healed photos I’ve seen show black holds best—tiny gray shading may blur slightly over years. Avoid fuzzy edges; insist on tight linework and contrast. This is great if you want a bold optical illusion that reads from across a room.
3. Floating Geometric Cube on Wrist
Style/Technique: Geometric / Minimalist
Pain Level: Medium (4/10)
Session Time: 1 hour
Best For: Subtle, visible trick
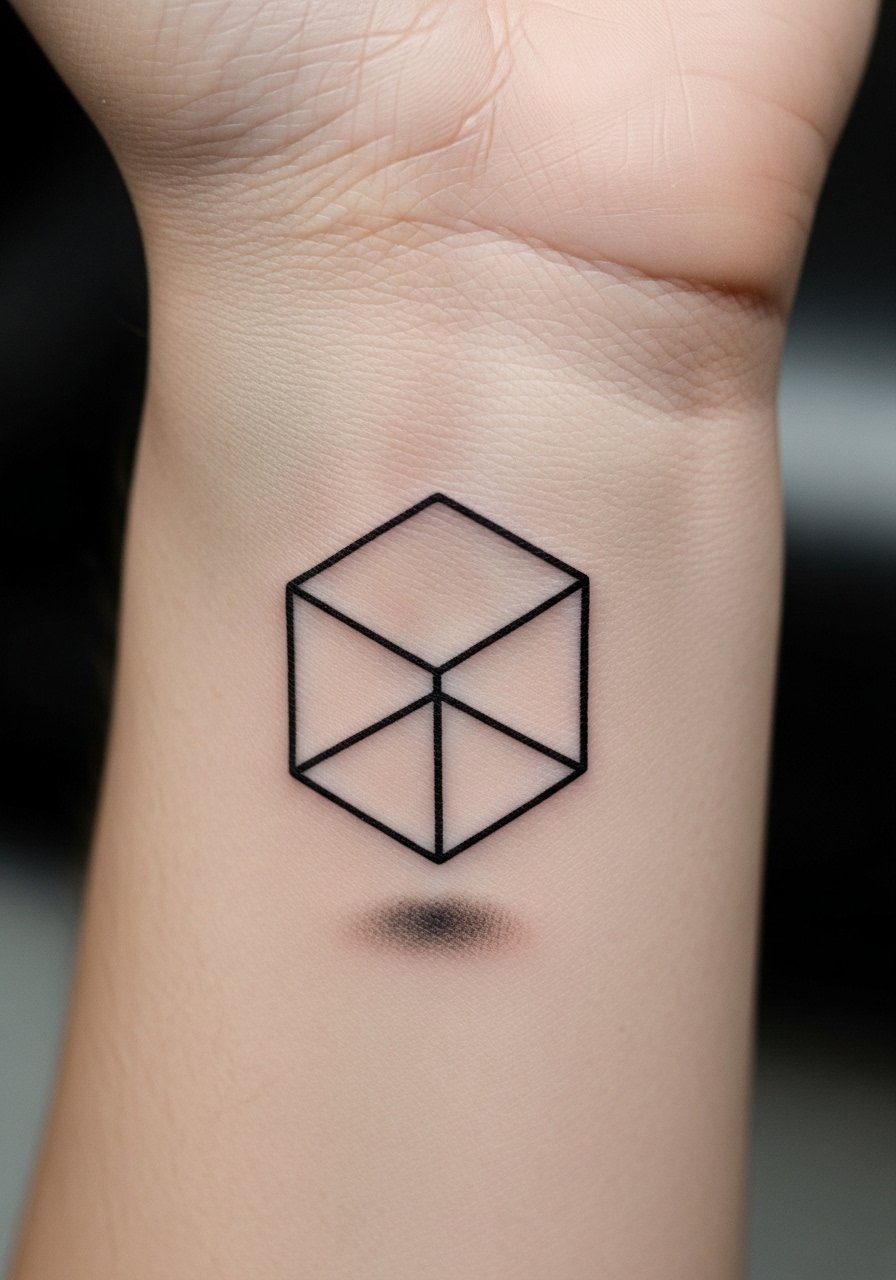
A small cube uses isometric lines and a tiny shadow to appear suspended over skin. Wrist arteries and motion mean some lines can blur; pick slightly thicker line weight than pure single-needle for longevity. Healing is quick—watch for scabbing on the inner wrist. This style reads as modern and timeless if executed with steady symmetry.
4. 3D Cracked Skin Blackwork on Chest
Style/Technique: Blackwork / Horror-Realism
Pain Level: Medium-High (5/10)
Session Time: Multiple sessions
Best For: Dramatic statement, chest display
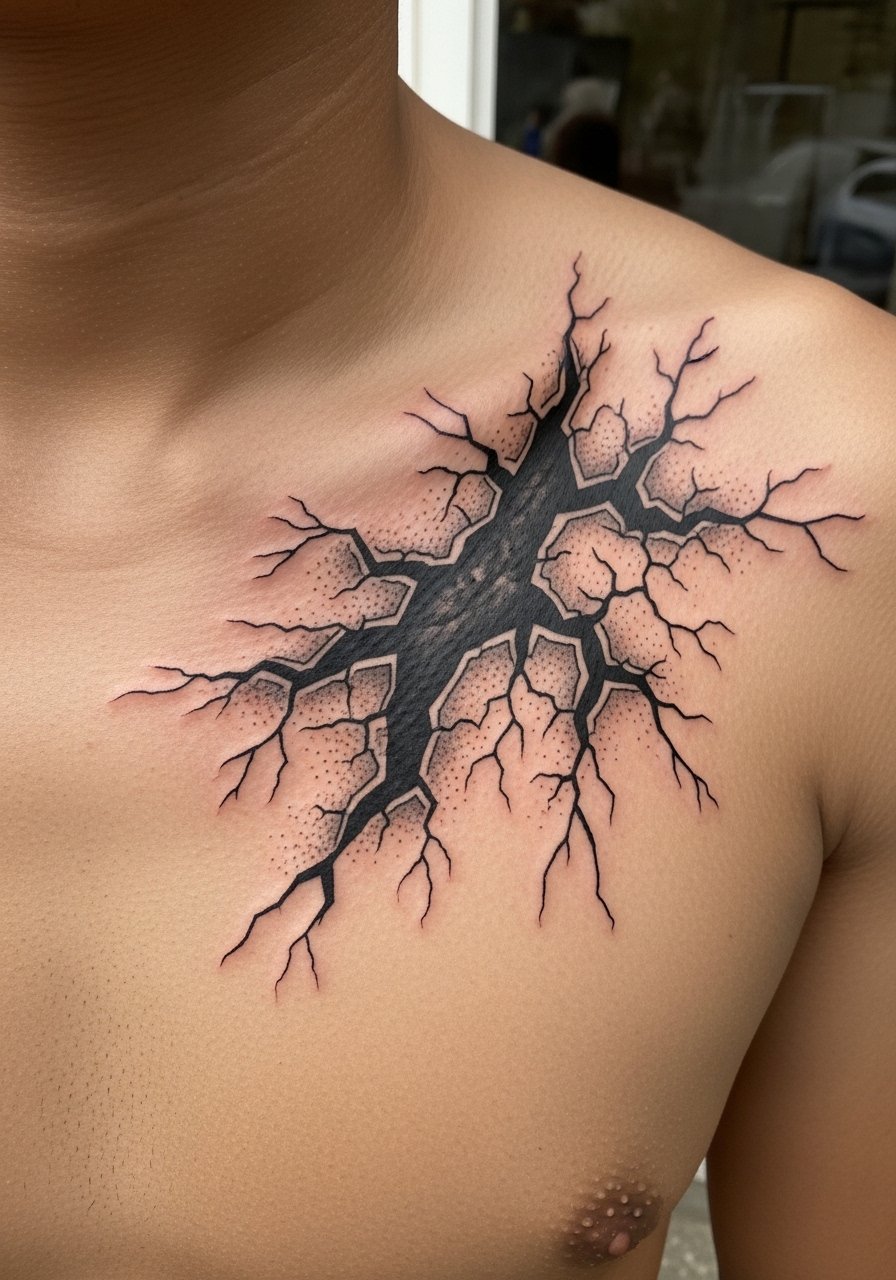
This one looks like your skin is breaking open. It’s heavy on shadow and contrast, so blackwork holds up best. Chest moves with breathing—expect longer healing. Artists I follow recommend staging this over sessions to keep edges crisp. Common mistake: too-soft shadow that reads flat; insist on layered contrast and healed photos of similar pieces.
5. Micro-Realism Paper Tear on Thigh
Style/Technique: Micro-Realism / Negative Space
Pain Level: Low (3/10)
Session Time: 1-2 hours
Best For: Hidden trick, easy to cover
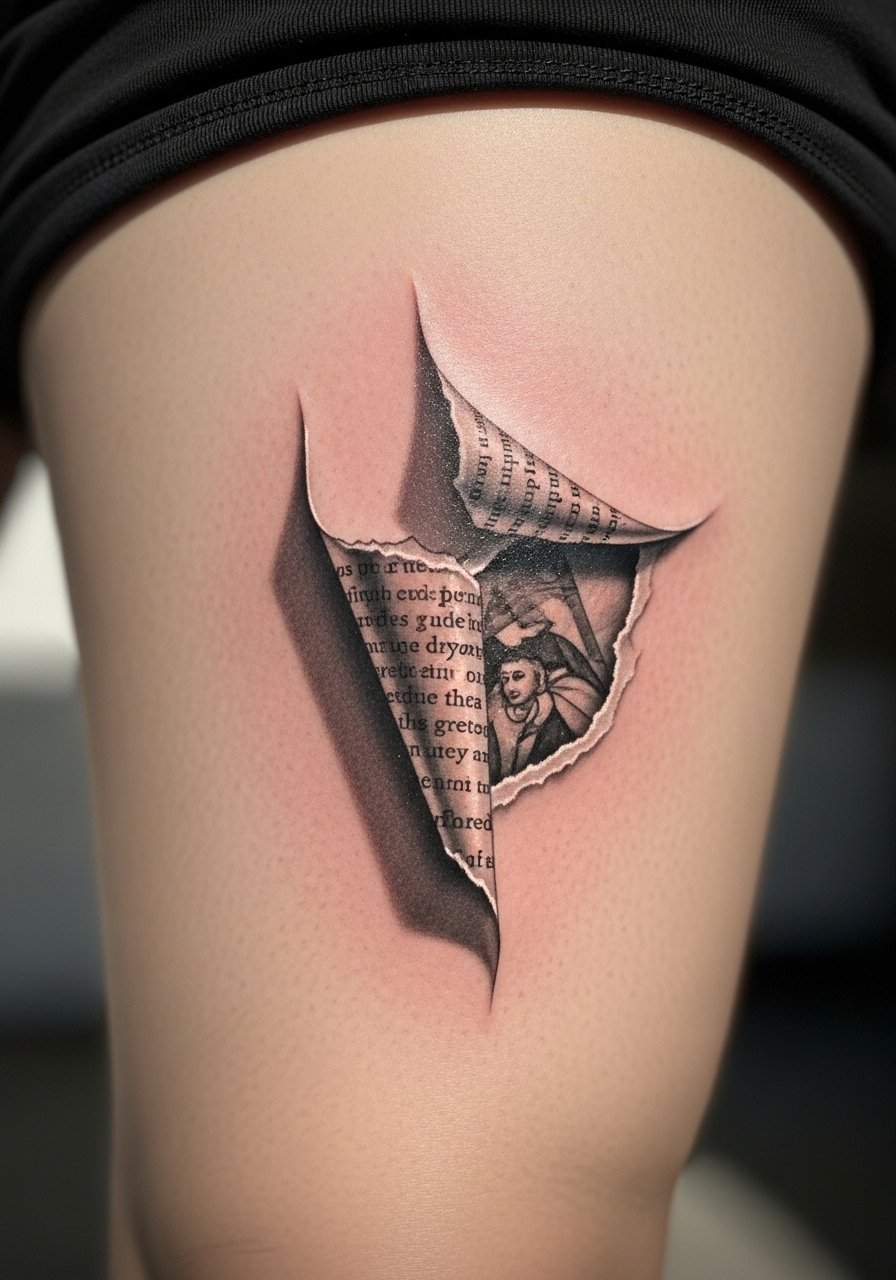
The thigh offers a canvas for delicate torn-paper illusions. Negative space creates the “hole” and shadowing sells depth. Healing is comfortable—thigh skin tolerates sessions well. Expect subtle softening of micro shading over time; ask for slightly bolder contrast if you want longevity. Don’t overcomplicate the inner reveal; simple imagery reads better healed.
6. Optical Clock Face with Moving Hands on Wrist
Style/Technique: Neo-Traditional / Micro-Realism
Pain Level: Medium (4/10)
Session Time: 2-3 hours
Best For: Statement wrist piece
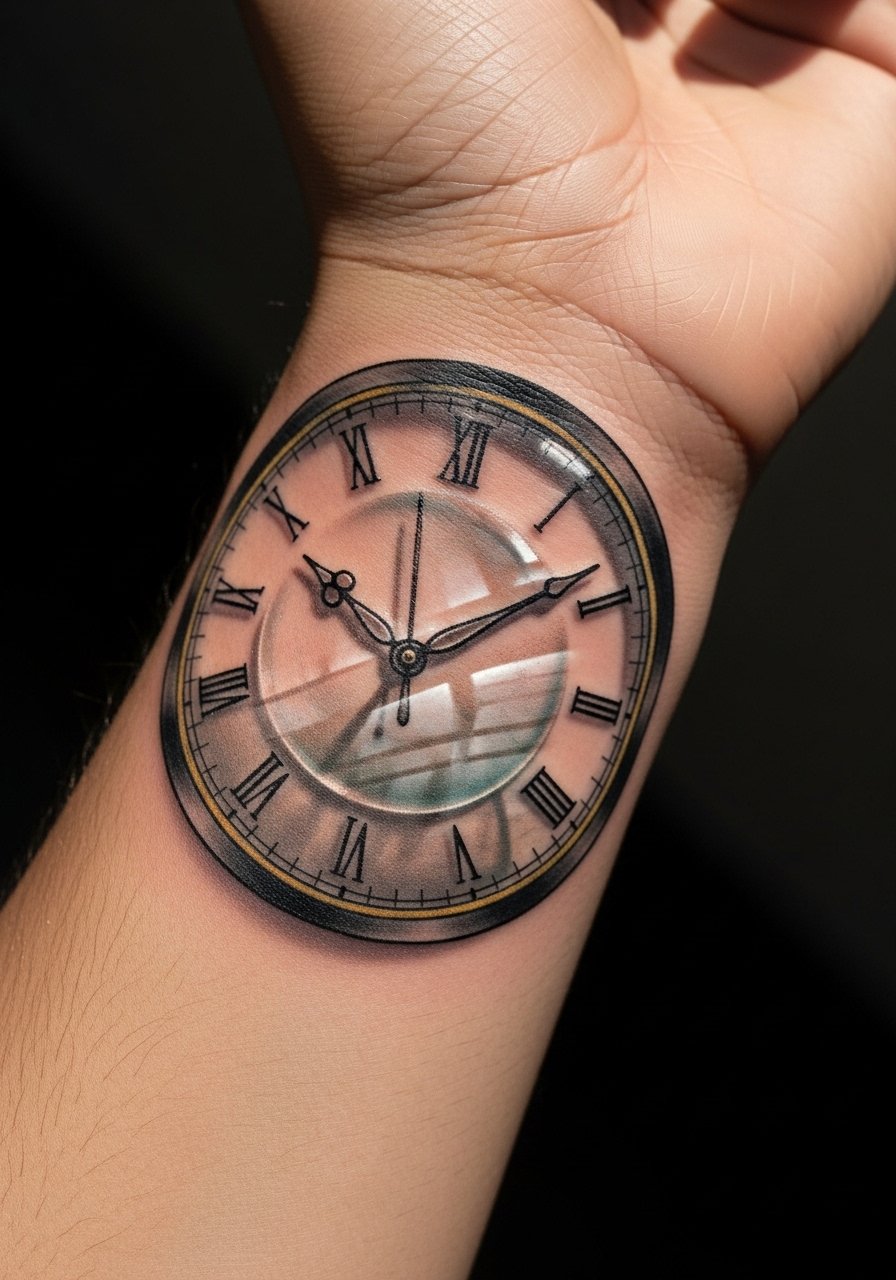
This uses reflections and shadow to suggest glass and depth. Fine highlights and soft shadows are essential. Wrist placement risks line migration—pick an artist who shows healed wrist work. Expect peeling the first week. Avoid tiny text or roman numerals that can blur; bold, clean numerals last longer.
7. Negative Space Portrait on Ribcage
Style/Technique: Fine Line / Negative Space
Pain Level: High (7/10)
Session Time: 2-4 hours
Best For: Intimate, hideable piece
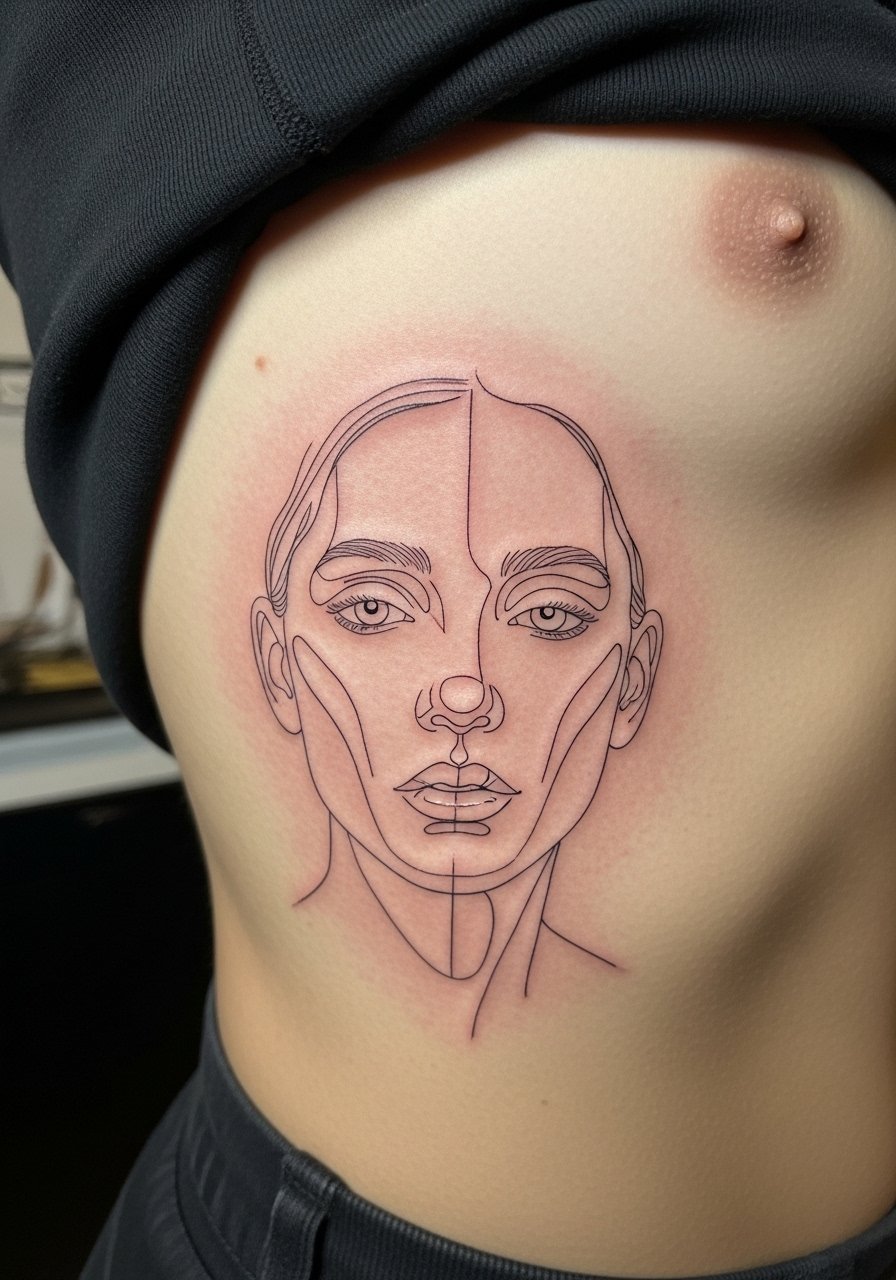
Ribcage gives dramatic movement to negative-space illusions. Pain is real here, but the result can be stunning. Healing can be tricky because rubbing from clothing may irritate. Artists who do optical illusion tattoos often use stippling and careful gaps to keep the portrait readable healed. A common error is over-detailing the negative space—simpler shapes read better after healing.
8. 3D Mechanical Gear Inside Forearm
Style/Technique: Micro-Realism / Steampunk
Pain Level: Medium (4/10)
Session Time: 2-3 hours
Best For: Visible mechanical illusion
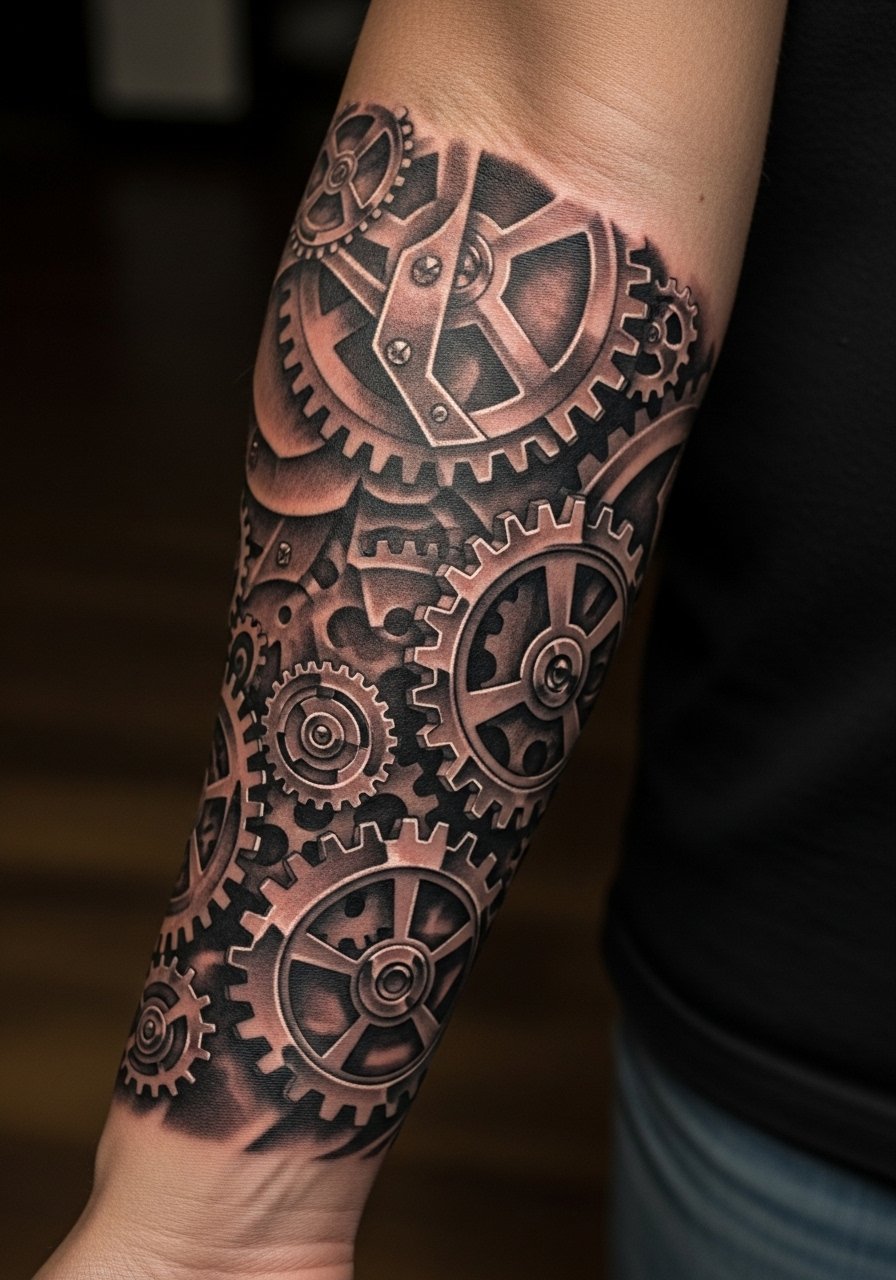
This gives the impression your arm is mechanical beneath the skin. Metallic highlights and contrast make the illusion. Forearm places well for regular touch-up photos; black and gray hold strongly. Avoid tiny pinions that will blur—go for medium-sized gear teeth. Ask your artist for healed macro shots of metalwork pieces.
9. Mirror Reflection Pair behind Ear
Style/Technique: Minimalist / Fine Line
Pain Level: Low (2/10)
Session Time: 30-45 minutes
Best For: Small, playful illusion
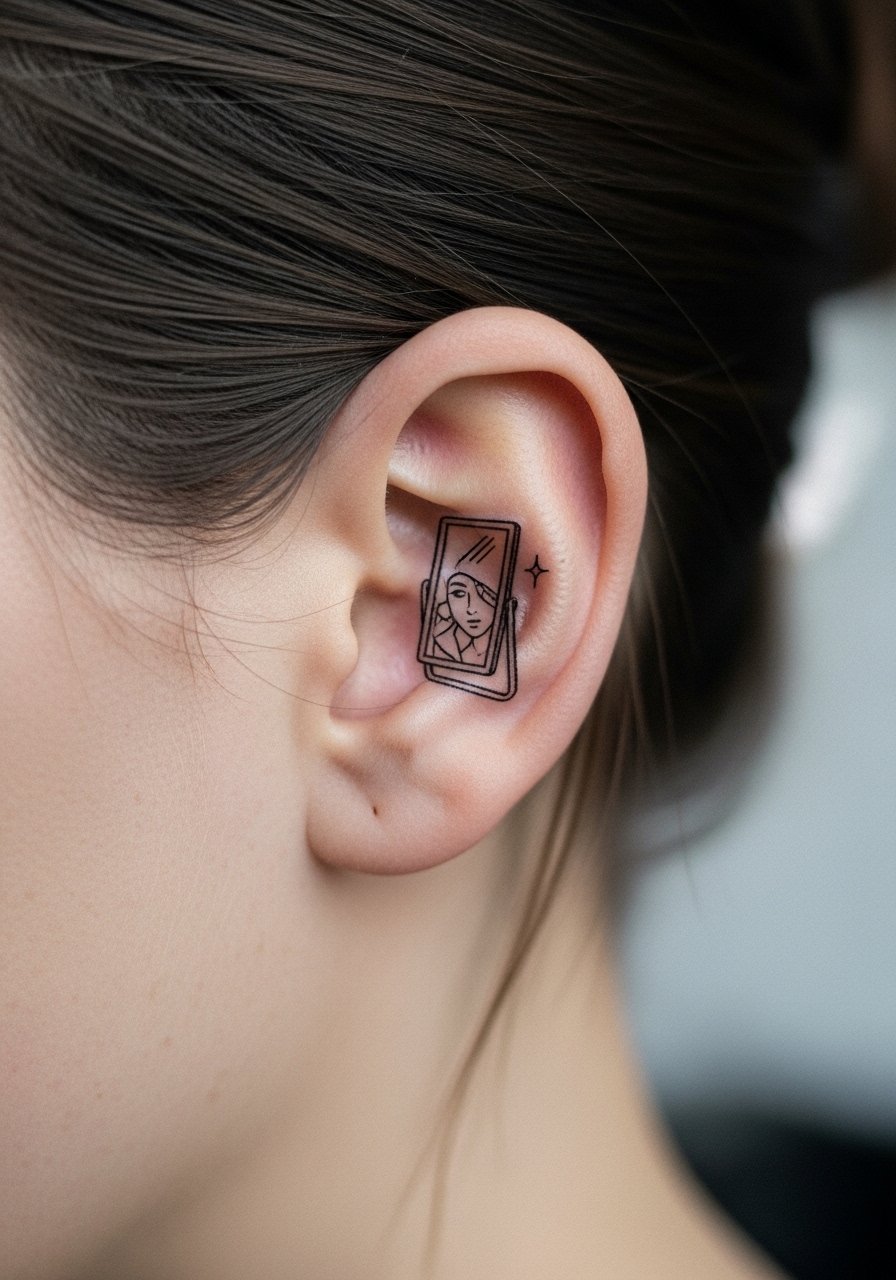
Behind-the-ear mirror illusions are delicate and charming. Pain is low; sessions are short. However, small fine lines may blur faster—ask for slightly bolder line weight to preserve the trick. Heals quickly if you avoid sleeping on that side. This is a fun way to test how illusions read on your skin.
10. Optical Staircase on Calf
Style/Technique: Geometric / Blackwork
Pain Level: Low-Medium (3/10)
Session Time: 1-2 hours
Best For: Bold leg statement
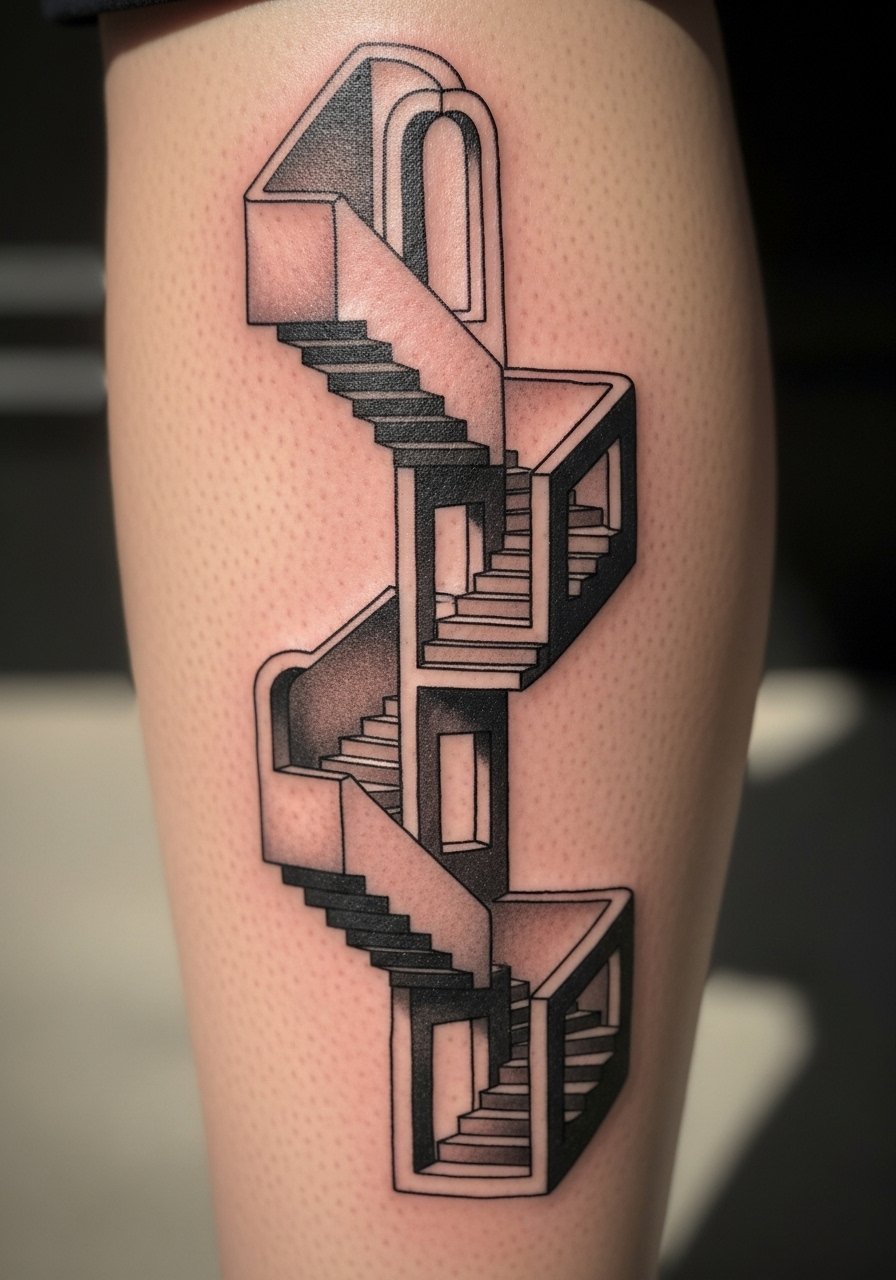
Escher-inspired staircases rely on perfect angles. Calf offers a flat plane and low motion during healing. Blackwork keeps lines readable long-term. Common mistake: inconsistent perspective—get mockups shown on your leg position. Expect the illusion to look best from certain vantage points; try standing poses during consultation.
11. Floating Ring Illusion on Finger
Style/Technique: Minimalist / Fine Line
Pain Level: High (6/10)
Session Time: 30-60 minutes
Best For: Tiny visible trick, ring alternative
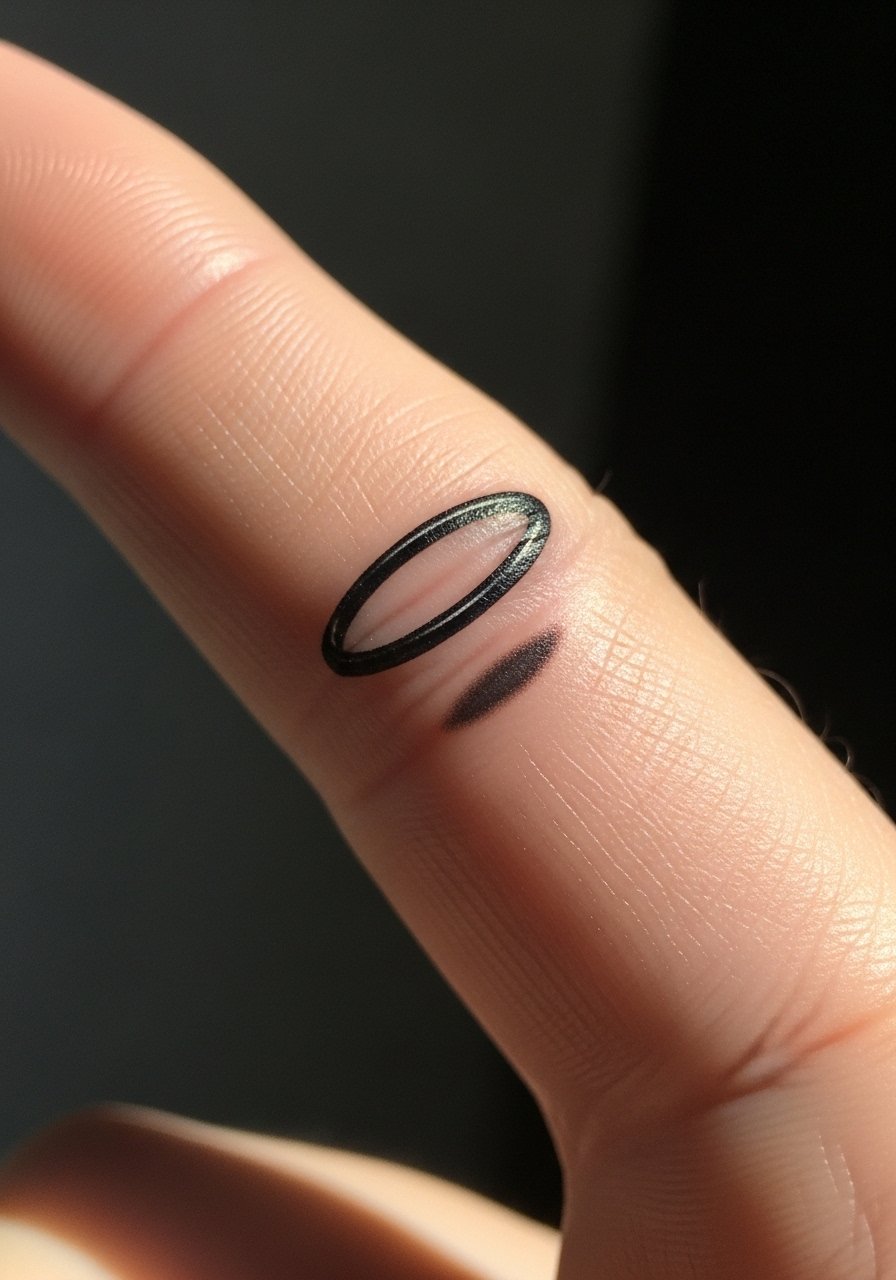
Fingers move and blur ink over time. I’d only do this if you accept touch-ups down the line. The visual payoff is huge—looks like a ring without metal. Pain is sharp but brief. Keep line thickness enough to survive finger skin turnover. Avoid overly thin details that vanish after healing.
12. Shadow Silhouette Under Collarbone
Style/Technique: Blackwork / Minimalist
Pain Level: Medium (4/10)
Session Time: 1 hour
Best For: Subtle clavicle illusion
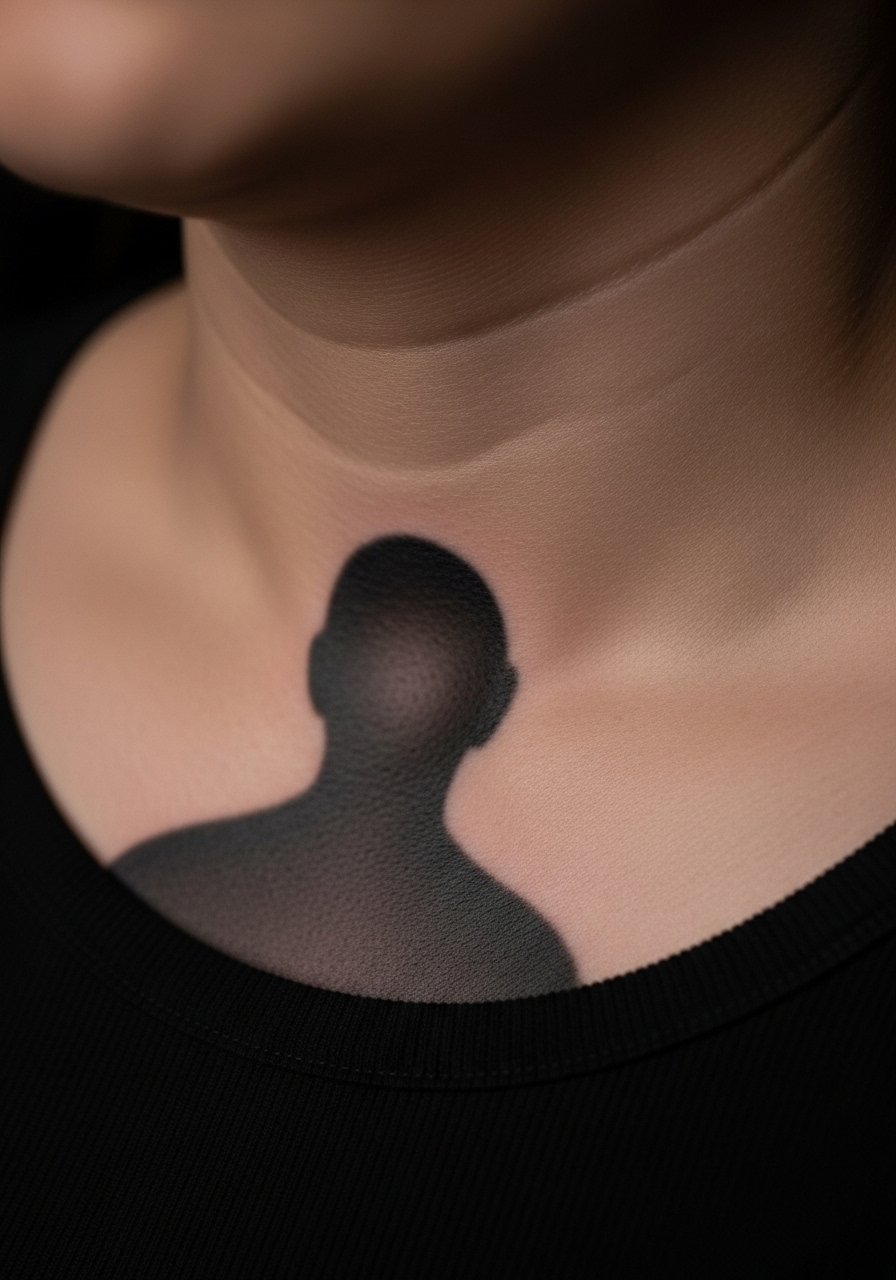
This uses subtle shading to mimic a shadow of an object resting on you. Collarbone placement is flattering and heals predictably. Keep edges soft for realism. A common mistake is using hard lines for shadows; they should be diffused. Great if you want an illusion that’s simple but conceptually clever.
13. 3D Butterfly Landing on Shoulder Blade
Style/Technique: Micro-Realism / Color
Pain Level: Medium (4/10)
Session Time: 1-2 hours
Best For: Colorful, feminine illusion
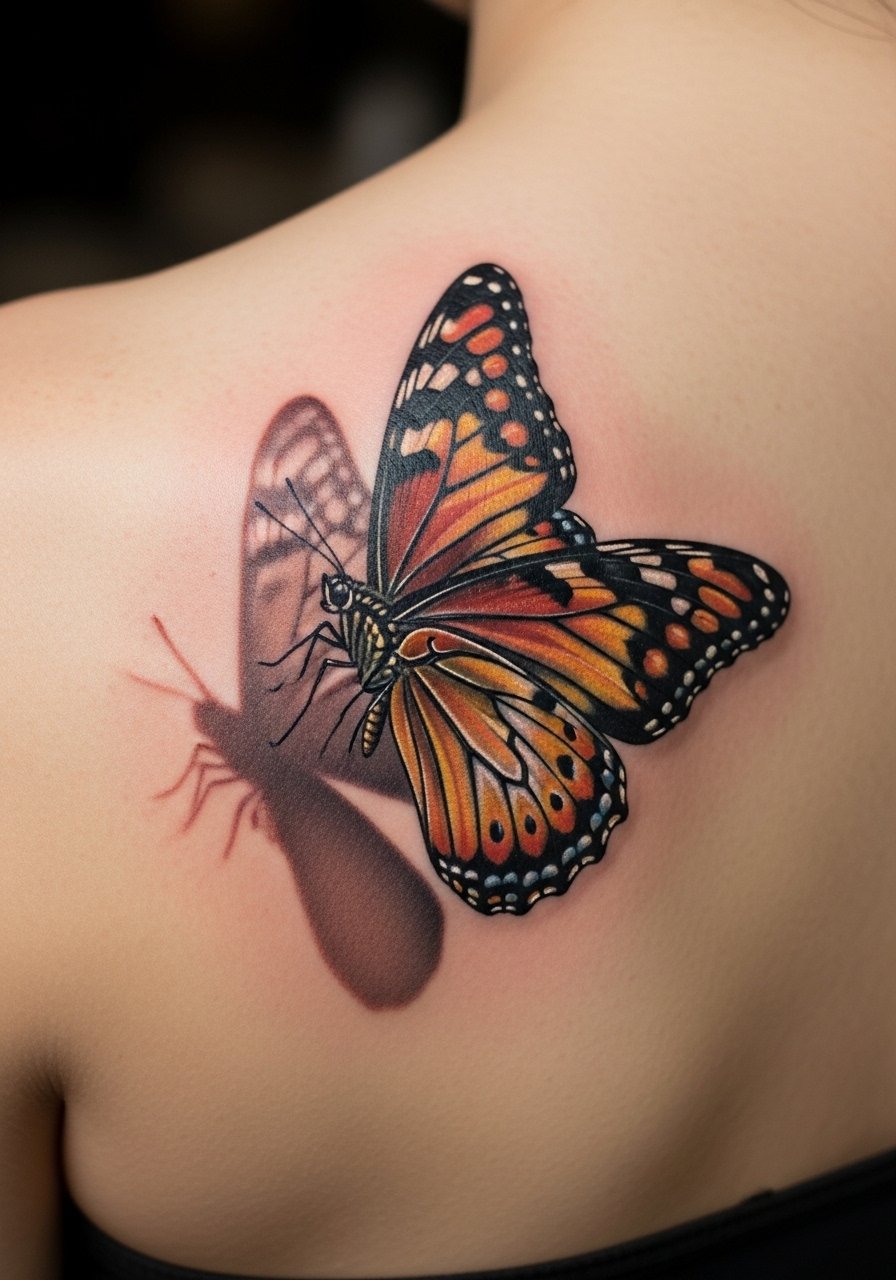
Color can sell lift—tiny white highlights on wings and a soft drop shadow make the butterfly read airborne. Shoulder blade is low-movement, so color retention is good. Note: bright palettes may soften over years; black outlines keep definition. Ask for healed color photos on similar skin tones.
14. Layered Window Pane on Back of Hand
Style/Technique: Geometric / Fine Line
Pain Level: High (6/10)
Session Time: 1-2 hours
Best For: Visible, edgy piece
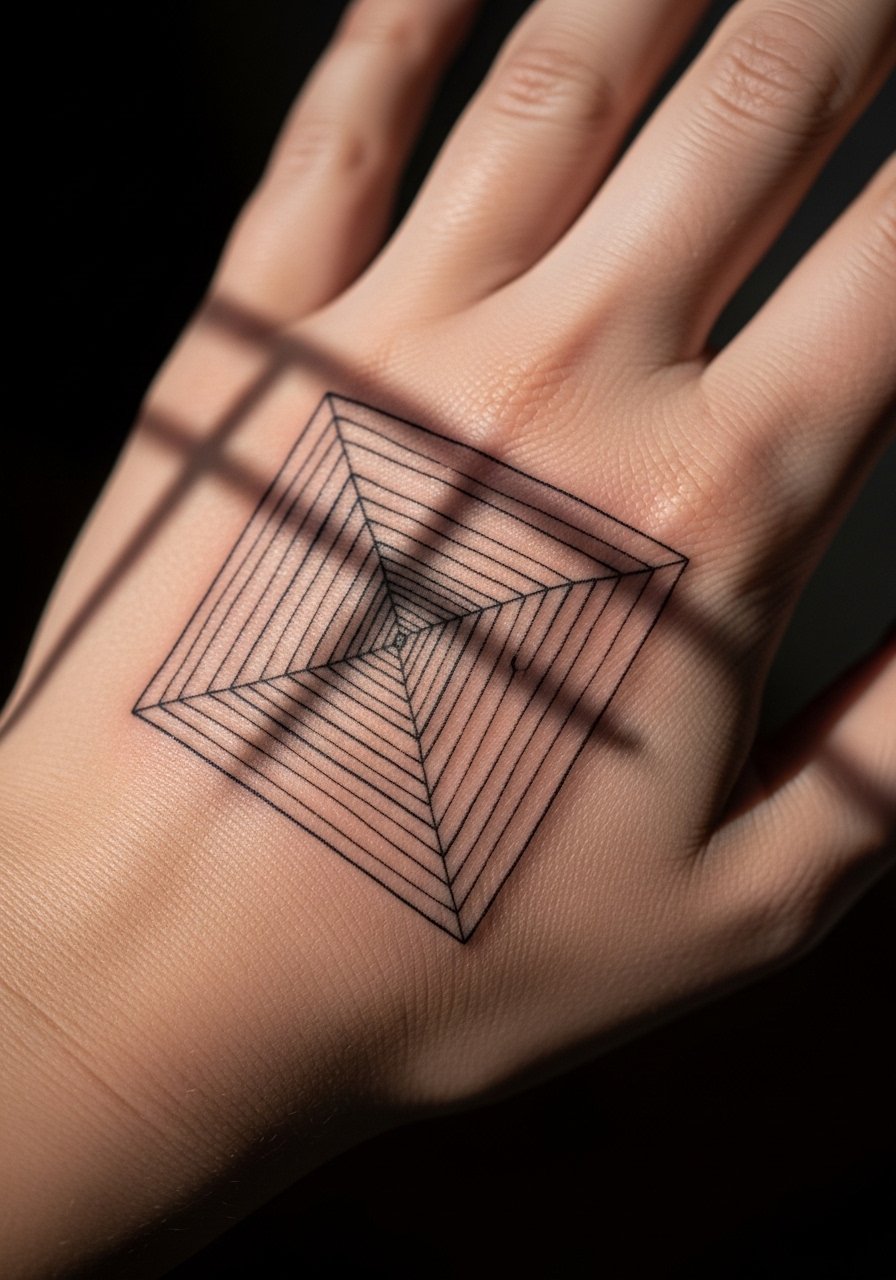
Hands heal unpredictably, but the illusion is striking. Use slightly thicker lines and avoid super-tiny interiors to prevent blurring. Expect surface peeling in the first week and be diligent with aftercare. The effect looks great fresh and still readable healed if lines are bold enough.
15. Hidden UV Constellation on Ribcage
Style/Technique: UV Ink / Micro-Realism
Pain Level: High (7/10)
Session Time: 1-2 hours
Best For: Secret illusion visible under blacklight
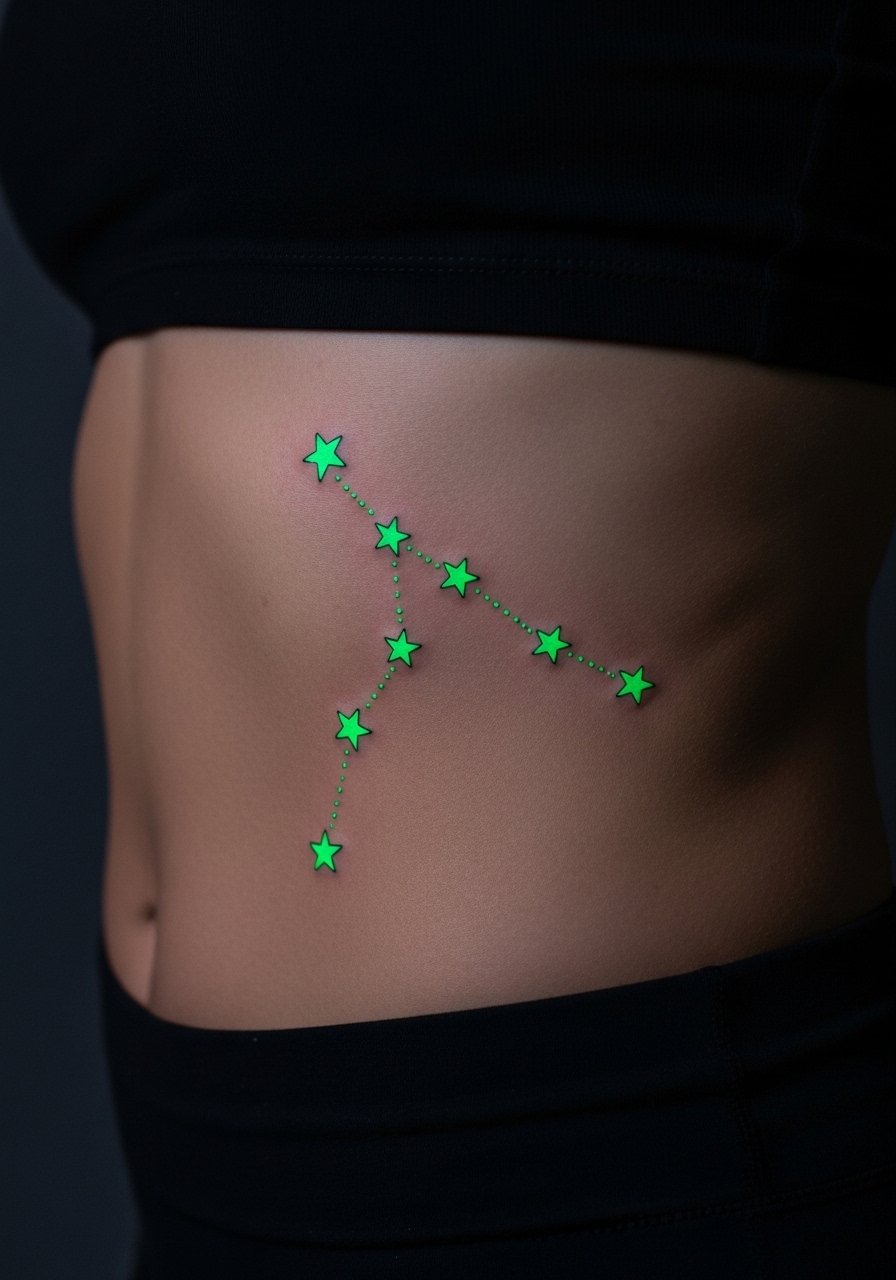
UV or “blacklight” ink creates a private layer to your illusion. Ribcage is great for hidden placements. Be aware UV pigments can fade differently; I’ve seen artists recommend touch-ups every few years. Ask to see healed UV work under blacklight on your artist’s clients. This is one of the freshest angles I’ve seen trending.
16. Optical Book Page Folding on Thigh
Style/Technique: Fine Line / Micro-Realism
Pain Level: Low (3/10)
Session Time: 1-2 hours
Best For: Narrative illusion, writable space
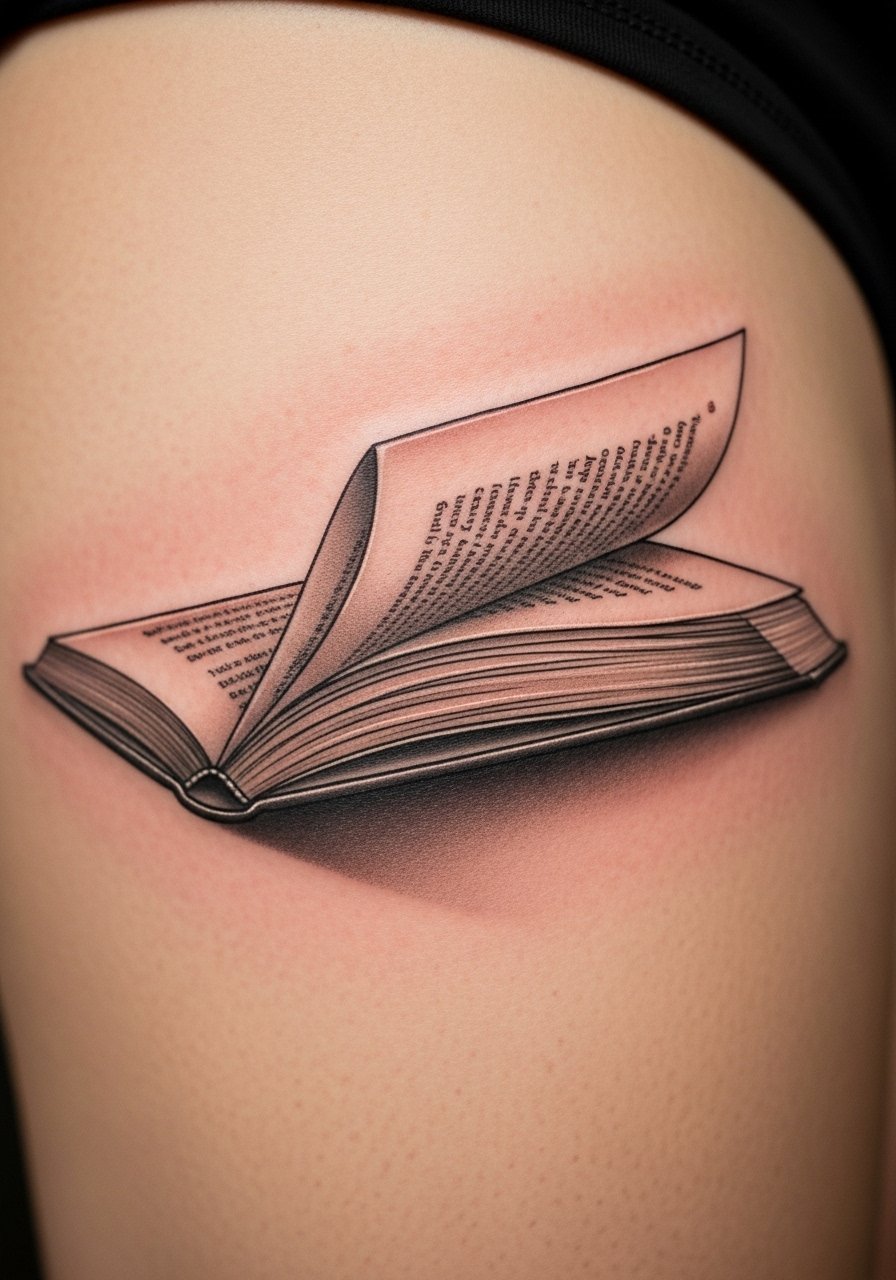
A folded page illusion reads as a tactile gesture on your skin. Thigh placement keeps the piece private and safe from constant sun. Heals well with minimal blurring if lines are crisp. Avoid overly small text in the fold; readable type tends to blur.
17. Mirror Maze Optical Pattern on Upper Arm
Style/Technique: Geometric / Blackwork
Pain Level: Low-Medium (3/10)
Session Time: 2-3 hours
Best For: Statement sleeve starter
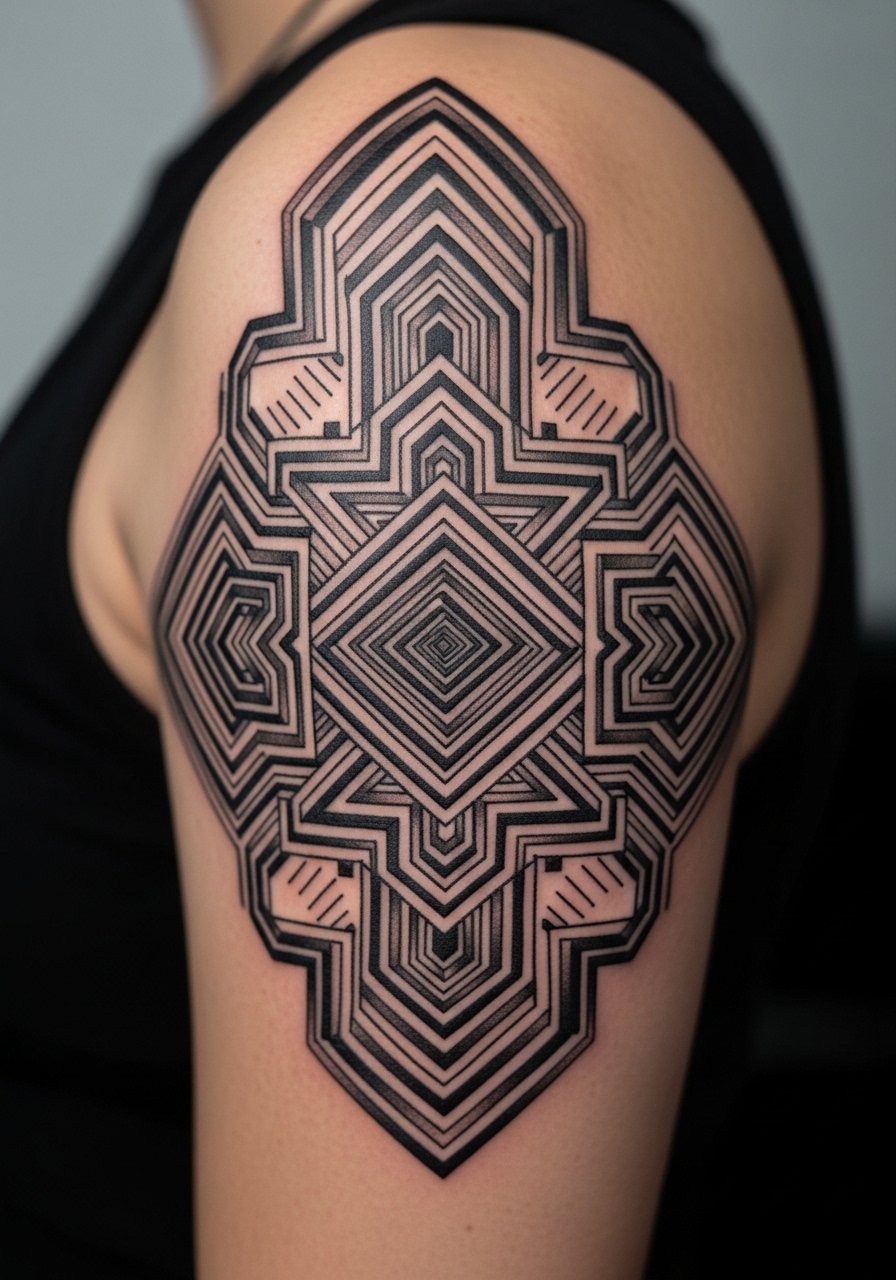
Repeating patterns trick the eye into motion. Upper arm is forgiving and holds contrast well. This works as a sleeve starter. Keep negative space intentional—too many lines will muddle. Artists skilled in geometric work will show you stencils on arm curves to ensure the illusion reads correctly.
18. Floating Keyhole with Portrait Behind on Sternum
Style/Technique: Micro-Realism / Negative Space
Pain Level: High (7/10)
Session Time: Multiple sessions
Best For: Intimate, complex illusion
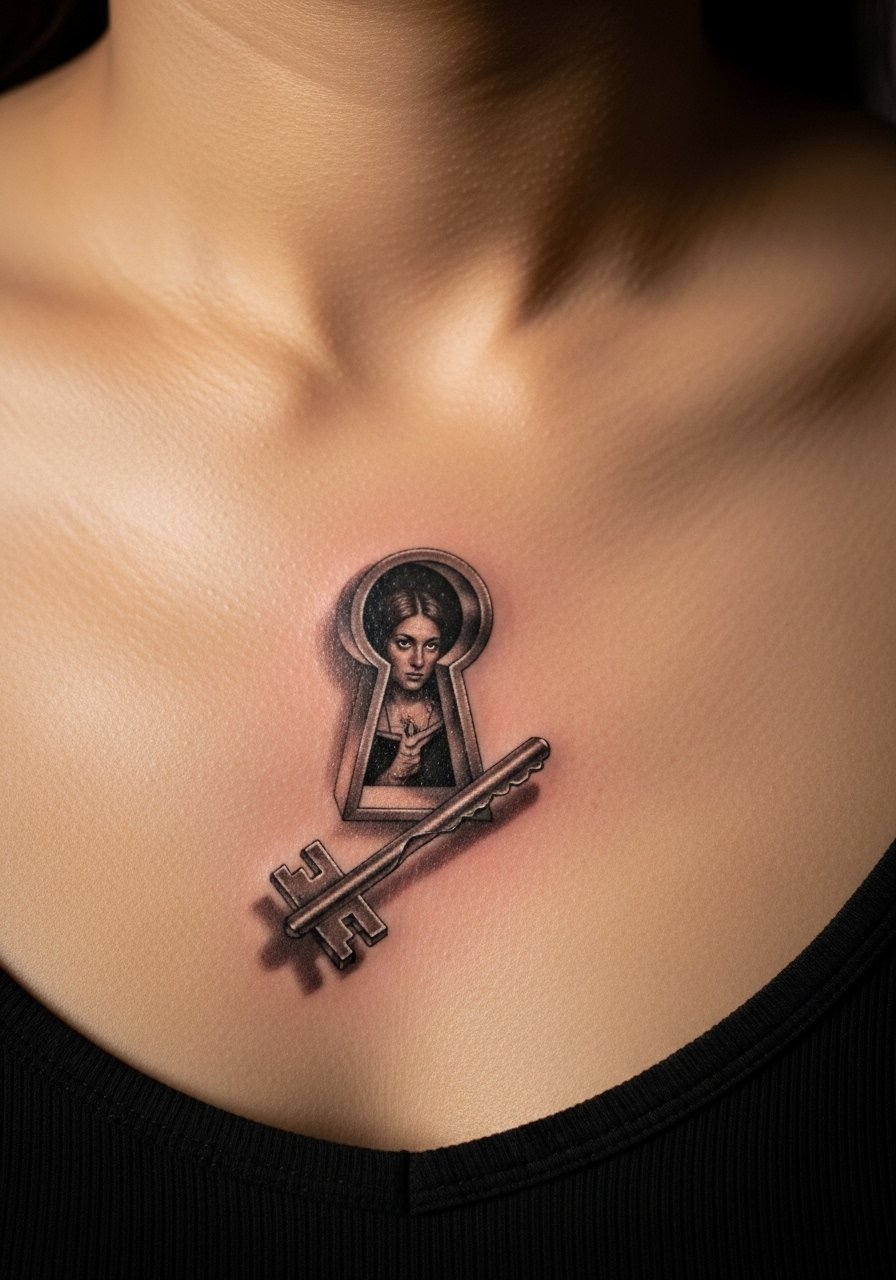
Sternum is painful but ideal for intimate, layered illusions. Keep the portrait simple—micro details can vanish if overworked. Healed photos I’ve collected show that modest contrast makes the keyhole pop. Expect longer surface healing and tenderness.
19. Optical Ripple Water Droplet on Shoulder
Style/Technique: Micro-Realism / Color
Pain Level: Medium (4/10)
Session Time: 1-2 hours
Best For: Soft, organic illusion
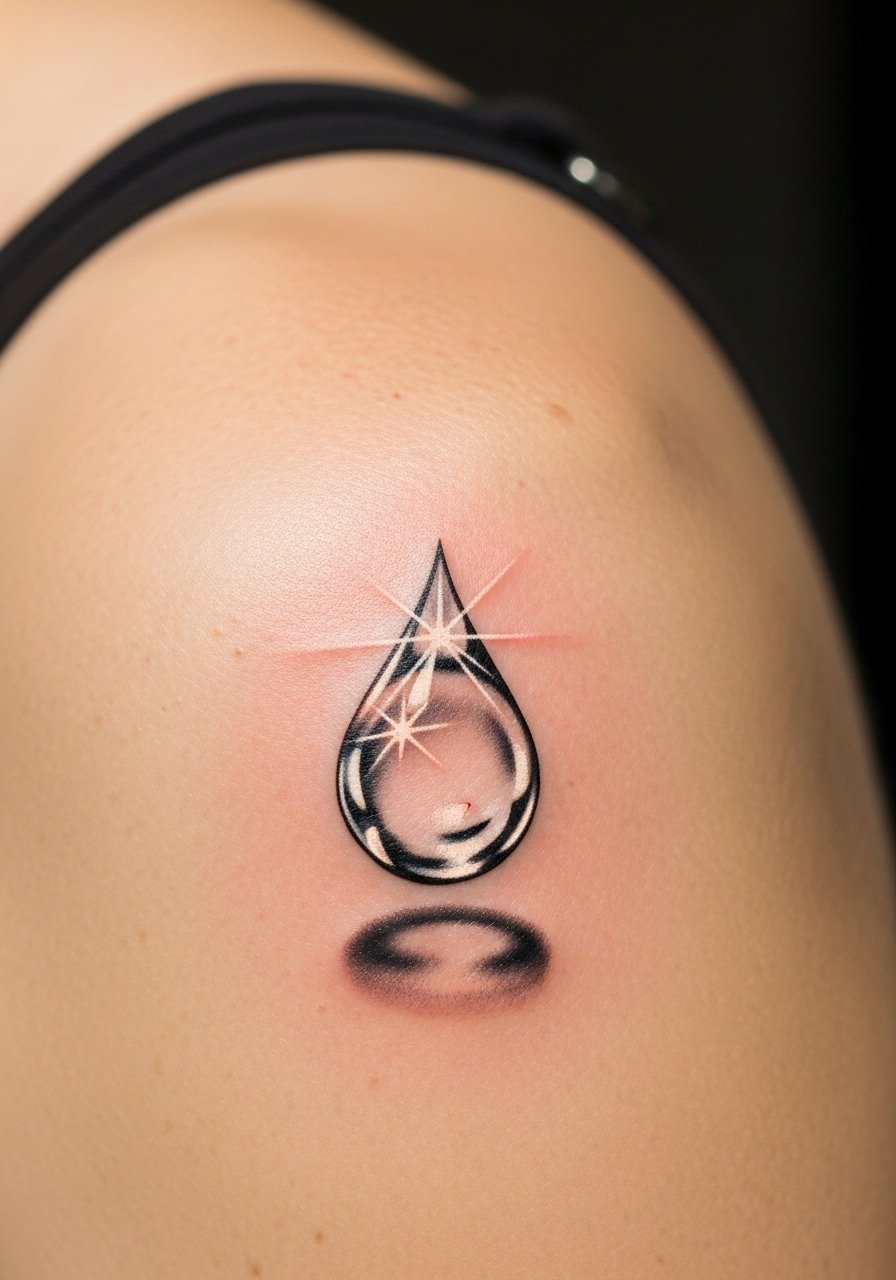
Droplets rely on highlights and crisp shadow to read as raised. Shoulder skin tolerates motion well. Color and white highlights should be used sparingly—white can fade. A common error is over-blending highlights; keep them sharp but subtle. This creates a delicate, realistic effect when healed.
20. Interlocking Hands in Negative Space on Upper Thigh
Style/Technique: Fine Line / Negative Space
Pain Level: Low (3/10)
Session Time: 1-2 hours
Best For: Symbolic, hideable piece

I love negative-space hands—they’re meaningful and graphic. Thigh placement protects them from sun and accelerates color retention. Keep the surrounding shading soft so the hands remain the focal point. Artists who do optical illusion tattoos often use this for emotional statements that age gracefully.
21. Escher-Style Impossible Triangle on Collarbone
Style/Technique: Geometric / Fine Line
Pain Level: Medium (4/10)
Session Time: 1 hour
Best For: Neckline-visible illusion

Impossible shapes depend on flawless geometry. Collarbone gives a high-visibility canvas but moves during breathing—insist on a stencil placed while you’re standing. Lines should be slightly bolder than pure single-needle. Heals predictably with routine care.
22. 3D Ribbon Weave around Ankle
Style/Technique: Blackwork / Micro-Realism
Pain Level: Medium-High (5/10)
Session Time: 1-2 hours
Best For: Ankle wrap illusion
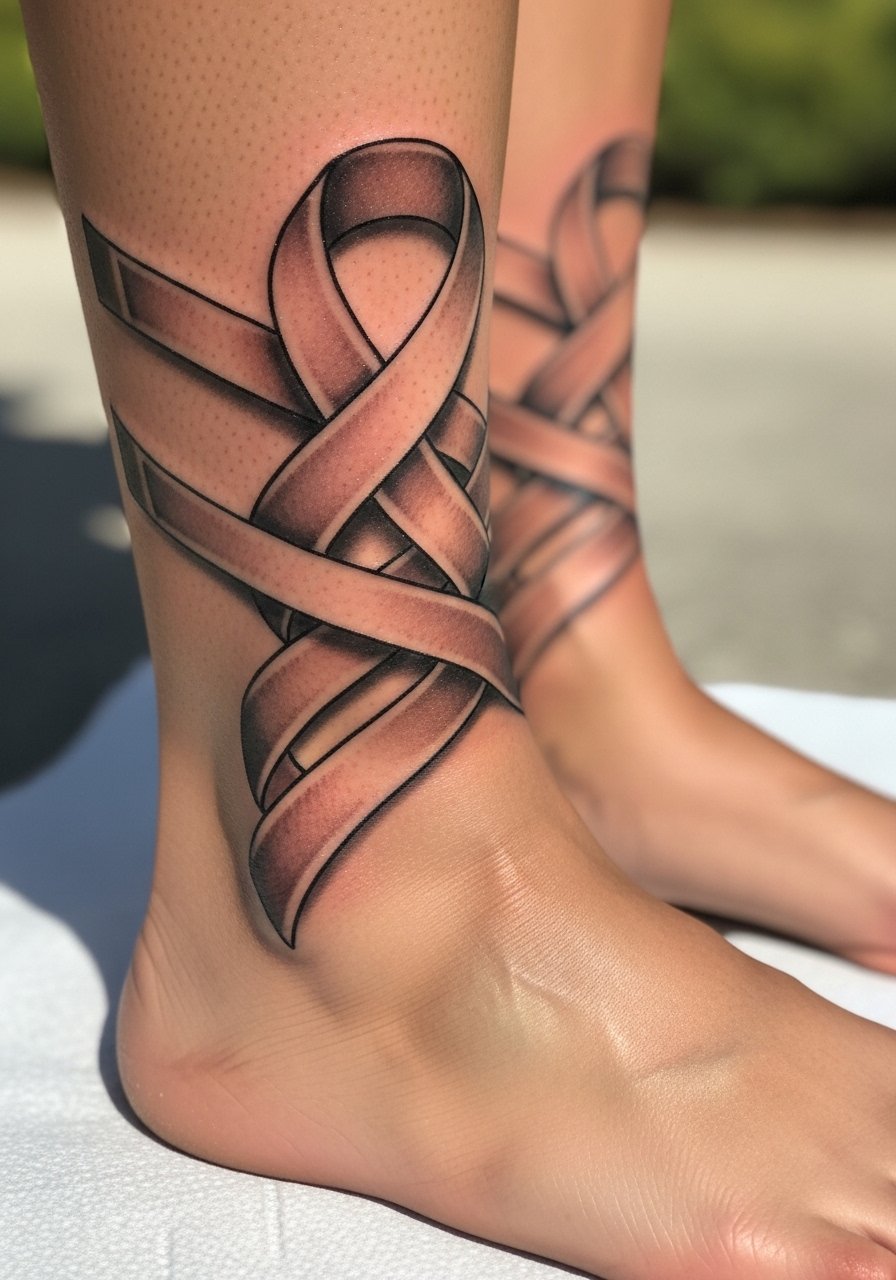
An ankle wrap reads like jewelry without metal. The tricky part is movement and footwear rubbing during healing. Expect a week of careful dressing. Ask for healed ankle photos from your artist because this area can soften lines over time.
23. Mirrored Typography Split Across Fingers
Style/Technique: Minimalist / Fine Line
Pain Level: High (6/10)
Session Time: 30-60 minutes
Best For: Short word illusions split into halves
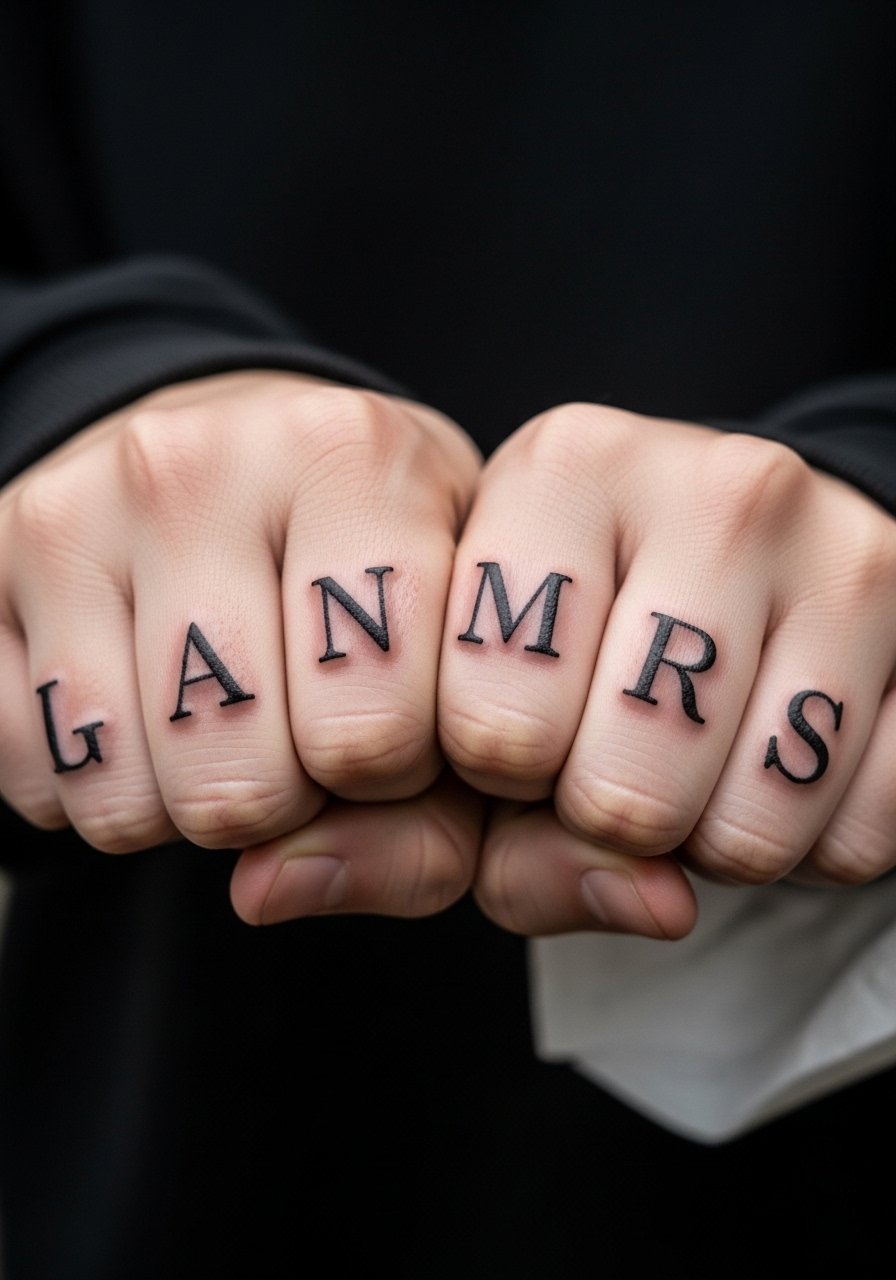
Split finger typography is clever but vulnerable. Fingers shed skin more quickly. Choose bold letterforms and accept periodic refreshers. Test the font at life-size on your fingers before inking. The illusion works best with short words.
24. Optical Shelf with Tiny Objects on Inner Forearm
Style/Technique: Micro-Realism / Illustrative
Pain Level: Medium (4/10)
Session Time: 1-3 hours
Best For: Storytelling, displayable illusion
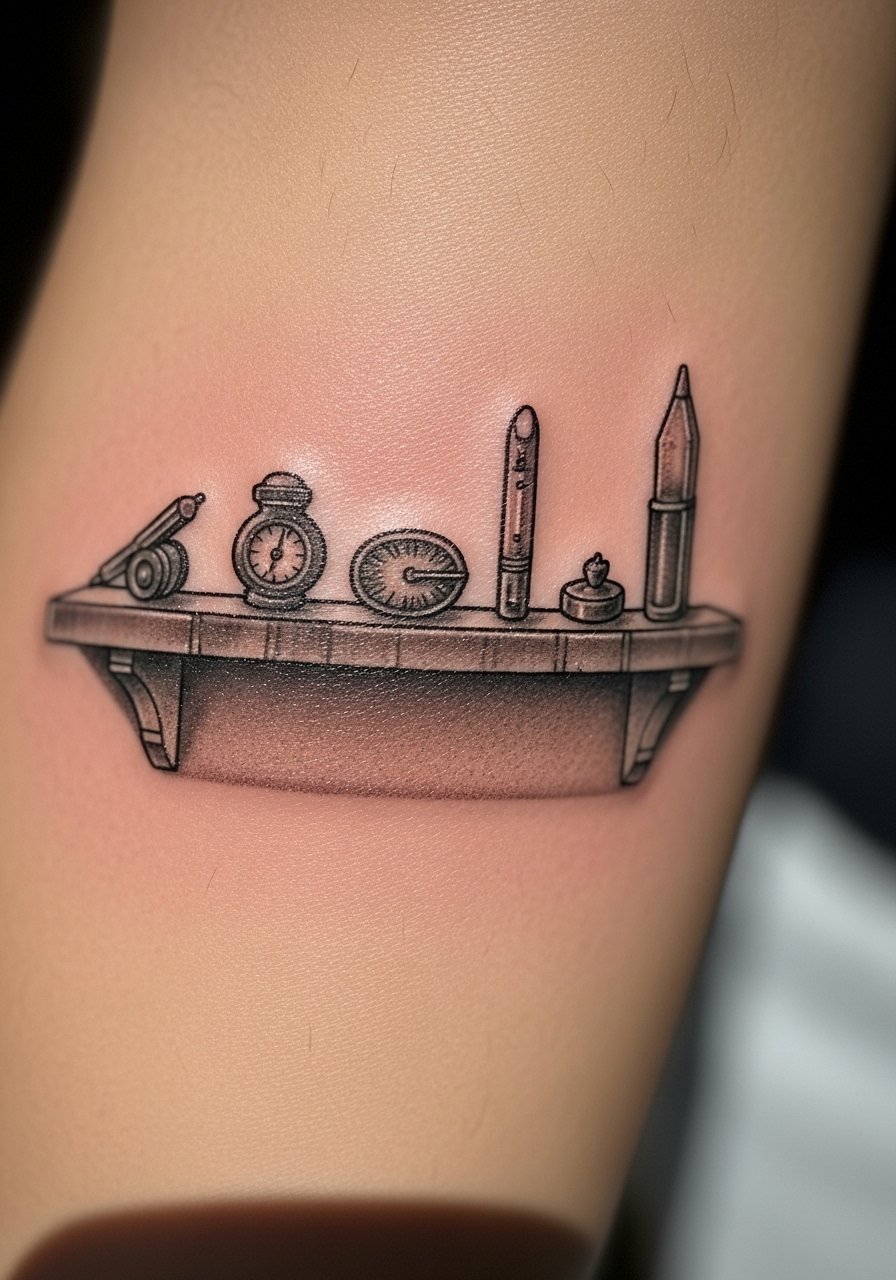
A tiny shelf with objects looks playful and personal. Forearm gives good visibility and heals well. Keep objects simple—detailed miniatures can blur. I’ve seen healed shelves retain charm if spacing is wide enough between items.
25. Mirror Frame Portal on Back
Style/Technique: Neo-Traditional / Micro-Realism
Pain Level: Medium-High (5/10)
Session Time: Multiple sessions
Best For: Dramatic back piece
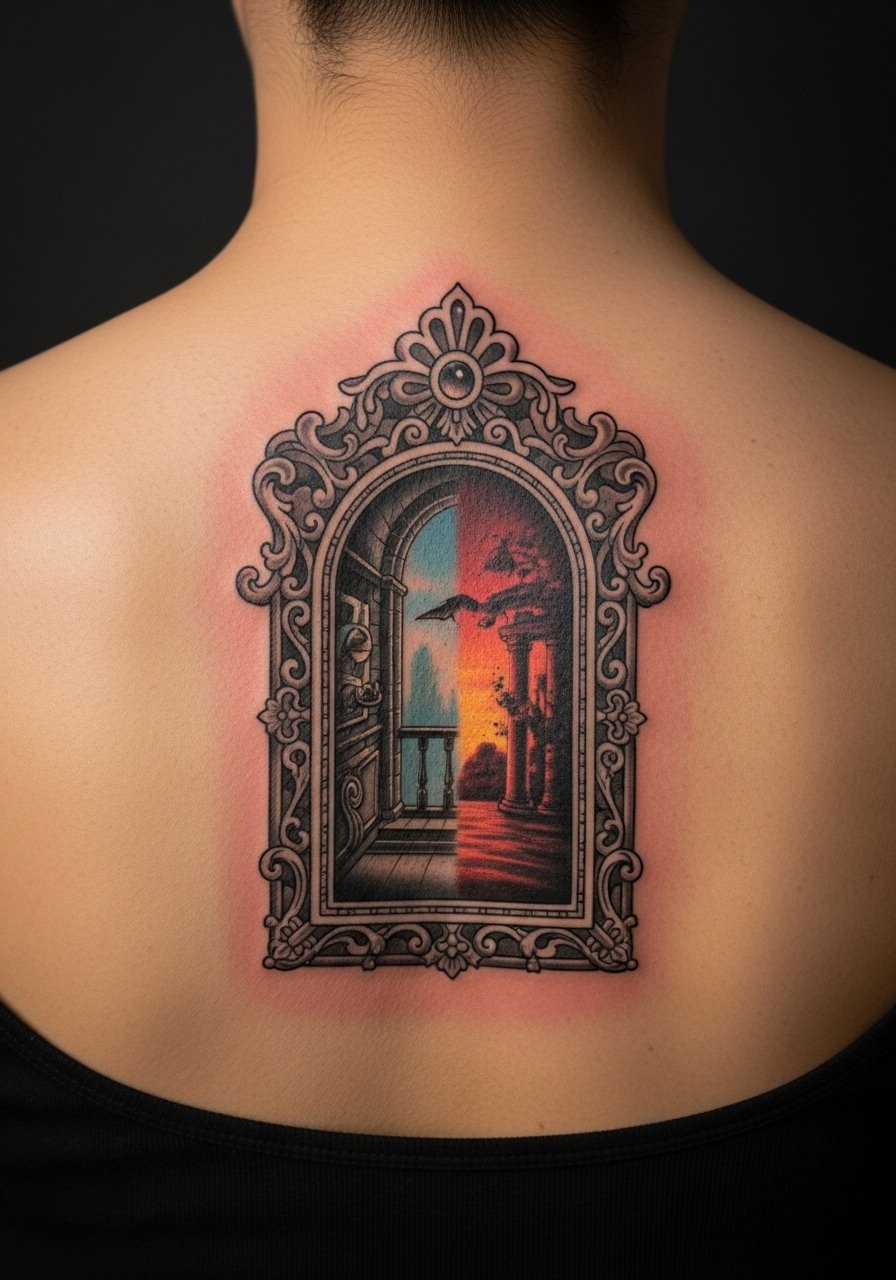
A mirror/portal is theatrical and plays with depth. Back skin is forgiving and keeps detail, making it ideal for larger optical illusions. Plan for multiple sessions. Avoid tiny ornate filigree that can muddle—bold detail reads better healed. This is one of the more cinematic illusions and ages well when spaced properly.
Tattoo Prep and Aftercare Essentials
Aftercare Essentials:
- Aquaphor Healing Ointment, 14oz tube — For first 3–5 days to protect fresh ink
- Saniderm Transparent Adhesive Bandage, 6-inch roll — Second skin method for early healing
- CeraVe Fragrance-Free Moisturizing Lotion, 12oz — Daily moisturizer for days 4–30
- Dr. Bronner's Unscented Castile Soap, 8oz — Gentle cleaning during first week
Before Your Appointment:
- Tattoo Numbing Cream with 5% Lidocaine, 30g — Ask your artist before using
- Tattoo Stencil Transfer Paper, 8.5x11in pack — Handy if you want pre-visuals
Long-Term Maintenance:
- SPF 50 Sunscreen Stick for Tattoos, 0.5oz — Daily protection to prevent fading
- Mad Rabbit Tattoo Balm, 2oz — Keeps healed ink vibrant
- Hustle Butter Deluxe, 8oz — Vegan aftercare option
Optional Comfort Items:
- Tattoo Numbing Spray, travel size — For touch-ups or sensitive areas
- Hydrocolloid Bandages, pack of 10 large — Alternative to Saniderm for small areas
Frequently Asked Questions
Q: How bad does a tattoo actually hurt?
A: Pain varies by placement. Outer arm and thigh feel like 2–4/10. Ribcage, sternum, fingers = 7–9/10. It’s often a sharp scratching or burning, not unbearable. For sensitive spots, consider numbing cream with lidocaine but check with your artist first.
Q: How long before an optical illusion tattoo looks its best healed?
A: Surface healing is 2–3 weeks. The full effect—where shadows settle and colors even out—often appears at 2–3 months. I’ve noticed micro highlights and subtle shading take the longest to “settle” visually.
Q: Will an optical illusion tattoo fade faster than a regular tattoo?
A: Not inherently. Thin fine-line illusions can blur if placed on high-motion or sun-exposed areas. From what I’ve seen, bold contrast and blackwork illusions last longest. Daily SPF 50 sunscreen is essential to prevent UV fading.
Q: Can I exercise after getting one of these?
A: Wait at least 48–72 hours before light exercise. If the tattoo is in a flex area or you’ll sweat heavily, wait a week. Sweat can irritate and pull ink during the critical first days.
Q: Should I get a small illusion first to test my tolerance?
A: Only if you actually want a small piece. Size doesn’t predict pain—placement does. A tiny finger tattoo can hurt more than a large forearm piece. Pick something you’ll be happy with, not a test you’ll regret.
Q: Do illusion tattoos look different on darker skin tones?
A: Yes. High-contrast blackwork and negative space often translate best. Bright colors can read differently—talk to artists who tattoo your skin tone and ask for healed examples. I’ve seen black and gray optical work read beautifully across tones.
Q: How do I prevent my fine-line illusion from blurring?
A: Ask your artist to avoid ultra-thin single-needle lines for high-motion areas. Slightly thicker lines and good contrast help. Follow aftercare: gentle cleaning with Dr. Bronner's Unscented Castile Soap and moisturize with CeraVe lotion.
Q: What’s a common rookie mistake with illusion tattoos?
A: Over-detailing tiny areas. Complexity can look great fresh but often blurs. Simpler, high-contrast shapes tend to read better healed. Ask to see healed photos of similar illusions before you commit.
