
I spent months scrolling fan pages and convention halls before I realized the real challenge wasn't finding an anime design I loved. It was picking a style and placement that would still look great after years of sun, sweat, and life. These 29 anime tattoo ideas are what I've seen fans get most—and which ones heal and age the best.
This list leans into fine line, neo-traditional, and micro-realism anime styles. I focused on placements that work for first-timers and collectors alike—forearm, ribs, thigh, behind the ear. From what I've seen in 2026 tattoo circles, bold silhouettes and minimalist character silhouettes are trending and tend to hold up best healed.
1. Fine Line Character Silhouette on Inner Forearm
Style/Technique: Fine Line / Minimalist
Pain Level: Low-Medium (3-4/10)
Session Time: 1-2 hours
Best For: First tattoo, easy to hide with long sleeves
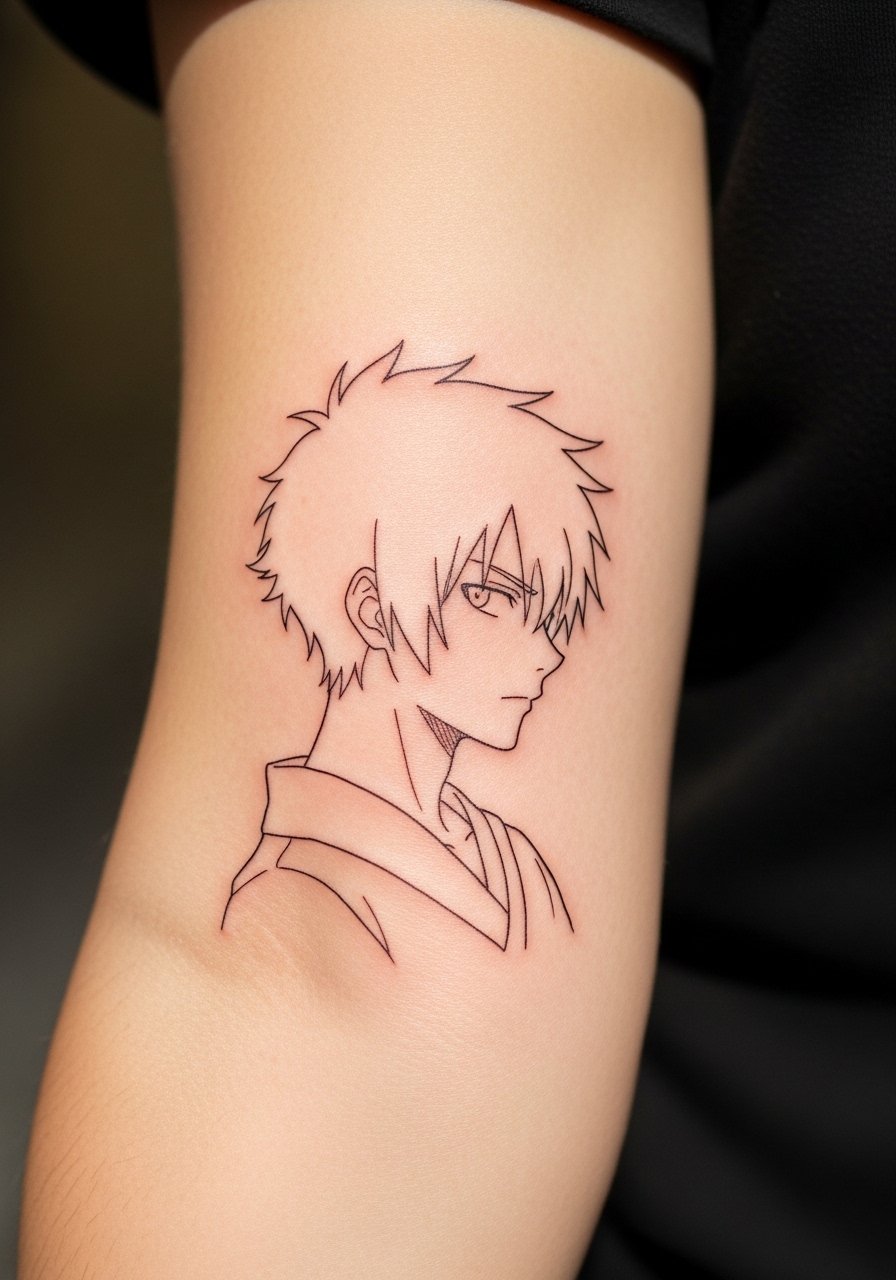
I love silhouettes for anime fans who want subtle nods to favorite characters. Fine lines give a delicate, modern vibe. Inner forearm is forgiving for pain and shows well without being aggressive. Expect light scabbing first week and settled lines at 3 months. From what I've seen, keep line density conservative—too many thin lines close together blur over time. Ask for slightly stronger line-weight from artists who specialize in fine line work.
2. Micro-Realism Portrait on Upper Arm
Style/Technique: Micro-Realism / Portrait
Pain Level: Low (2-3/10)
Session Time: 2-4 hours
Best For: Statement piece, color retention
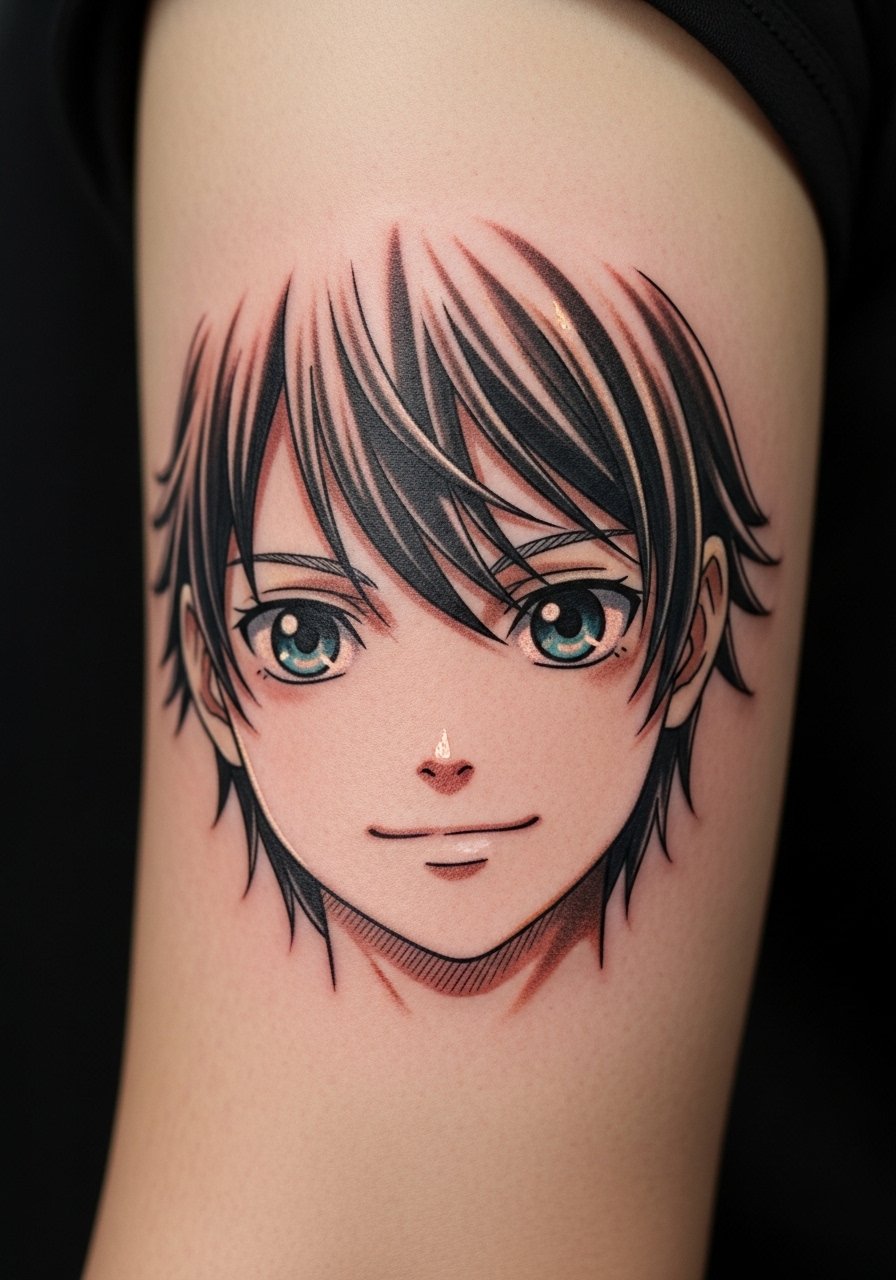
Portrait-style anime tattoos capture facial detail and expression. Upper arm is ideal—less painful and plenty of canvas for shading. Micro-realism needs an artist experienced in small-scale portraits; otherwise faces can look muddy once healed. Healing takes a few weeks to smooth out; colors look richer after full healing. Common mistake: asking for too much detail at tiny scale. Bring clear reference art and ask your artist about line simplification.
3. Neo-Traditional Chibi on Calf
Style/Technique: Neo-Traditional / Bold Color
Pain Level: Medium (4/5/10)
Session Time: 1-3 hours
Best For: Playful piece, visible calf display
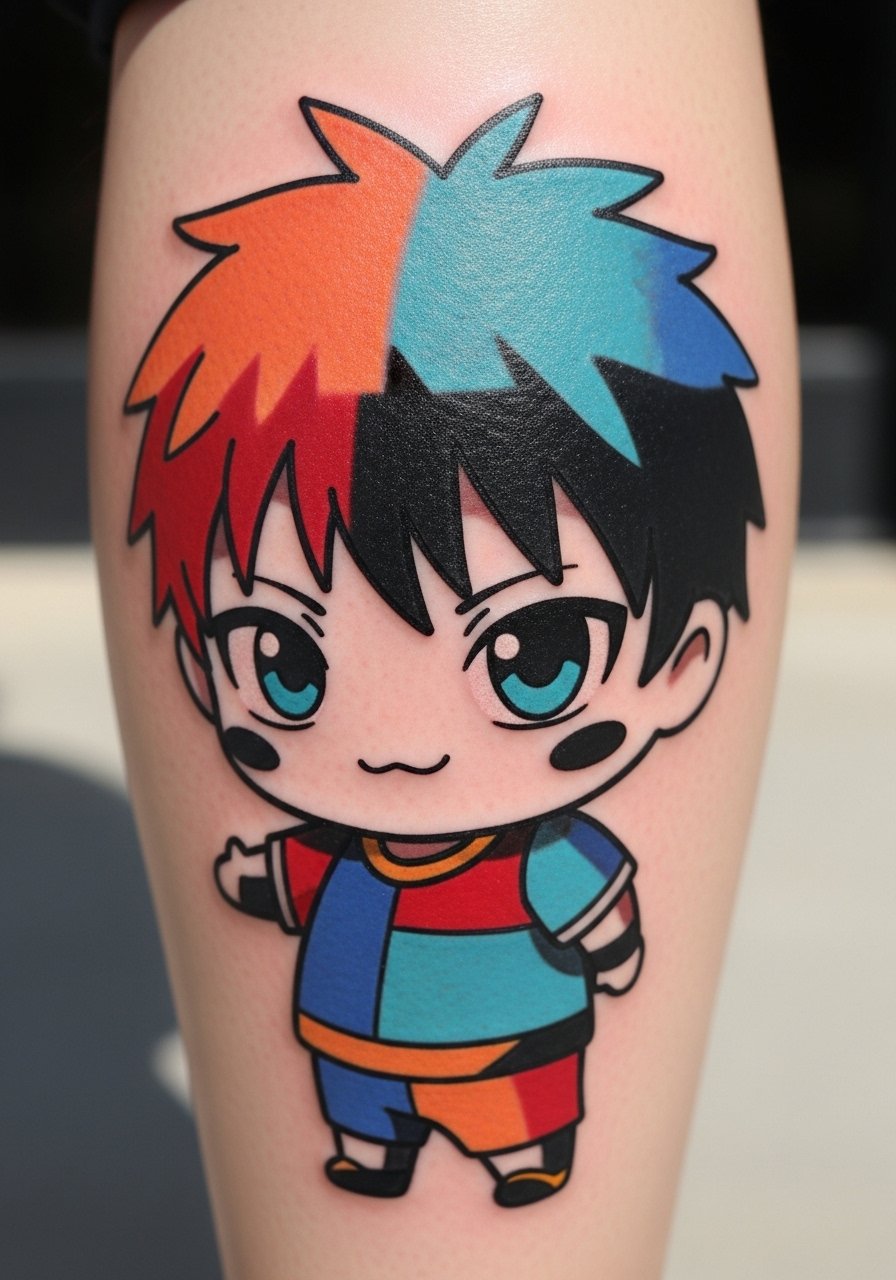
Chibi characters in neo-traditional style are bright and playful. The calf takes color well and heals relatively easily. Expect moderate discomfort—calf sessions are tolerable but can vibrate during long shading. Colors age well if you avoid constant sun exposure. Avoid tiny decorative details that bleed into color blocks. Look for artists known for bold color packing and solid black outlines.
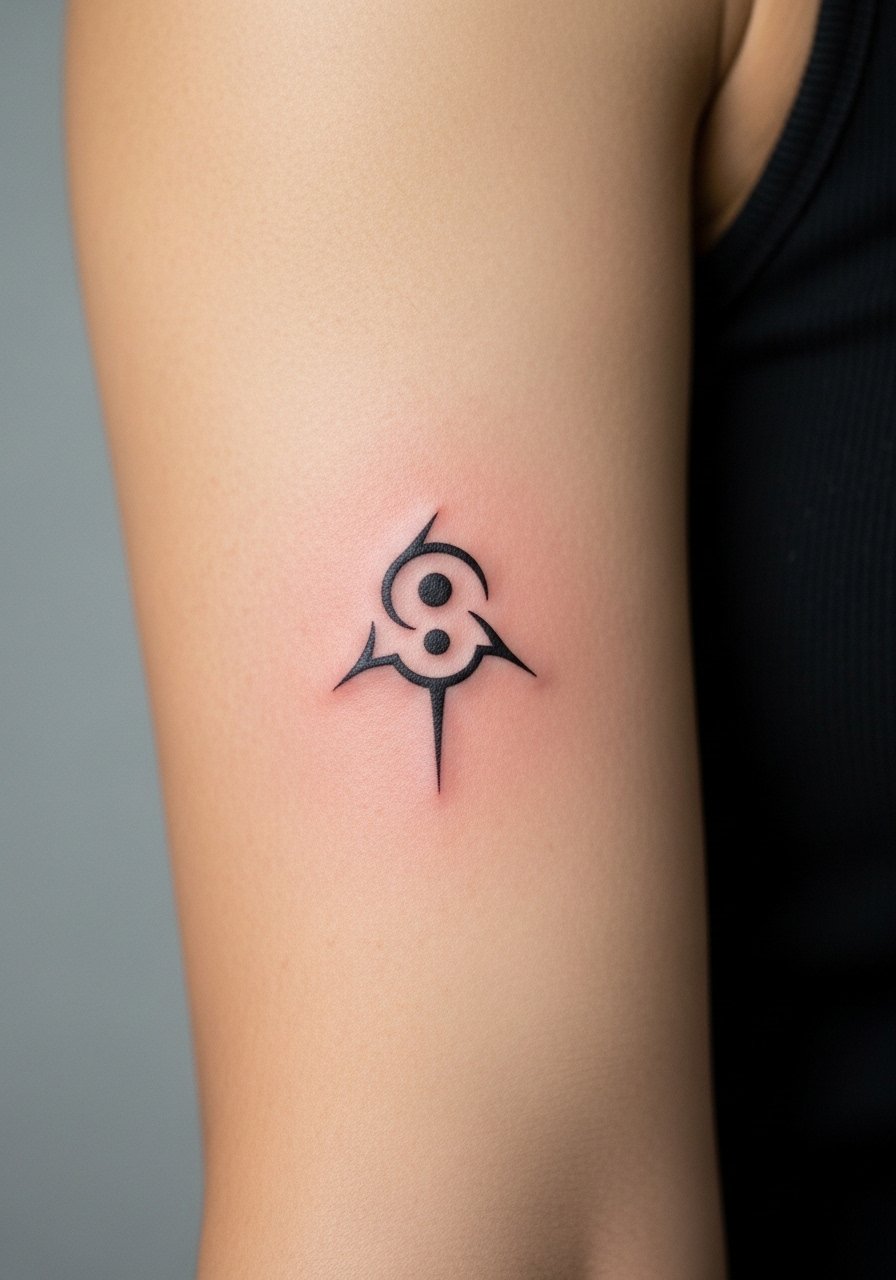
4. Blackwork Symbol on Back of Neck
Style/Technique: Blackwork / Minimalist Symbol
Pain Level: High (6/10)
Session Time: 30–90 minutes
Best For: Hidden or easily covered, striking silhouette
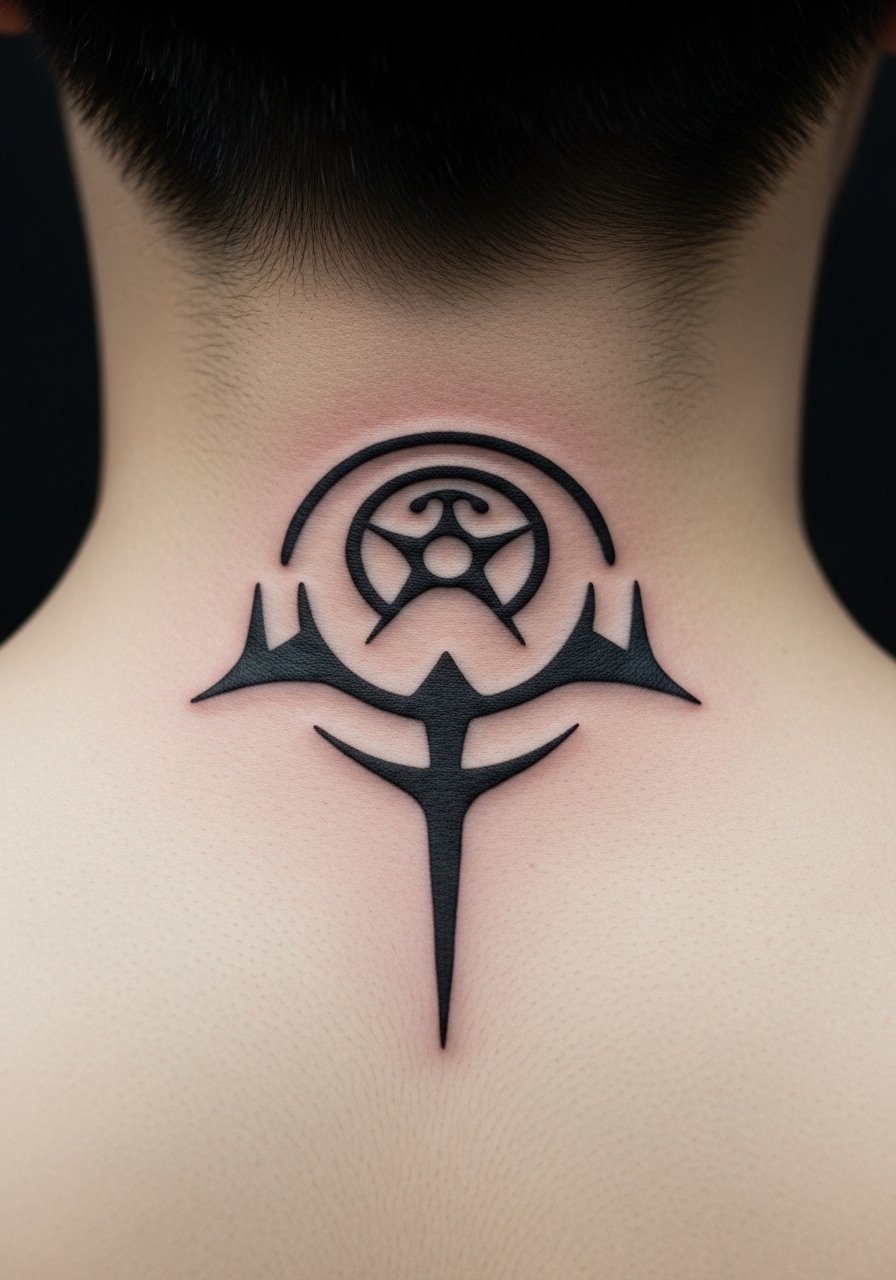
A blackwork symbol—like a clan crest or sigil—reads clearly from a distance. Back of neck is striking but sensitive. Expect more pain and quick healing. Black holds up best over time; crisp shapes resist blurring. Common mistake: overly thin negative spaces that collapse. Ask for bold shapes and solid fills from artists experienced in blackwork.
5. Watercolor Magic Effect on Shoulder Blade
Style/Technique: Watercolor / Painterly
Pain Level: Medium (4/10)
Session Time: 2-3 hours
Best For: Artistic fans, soft blending
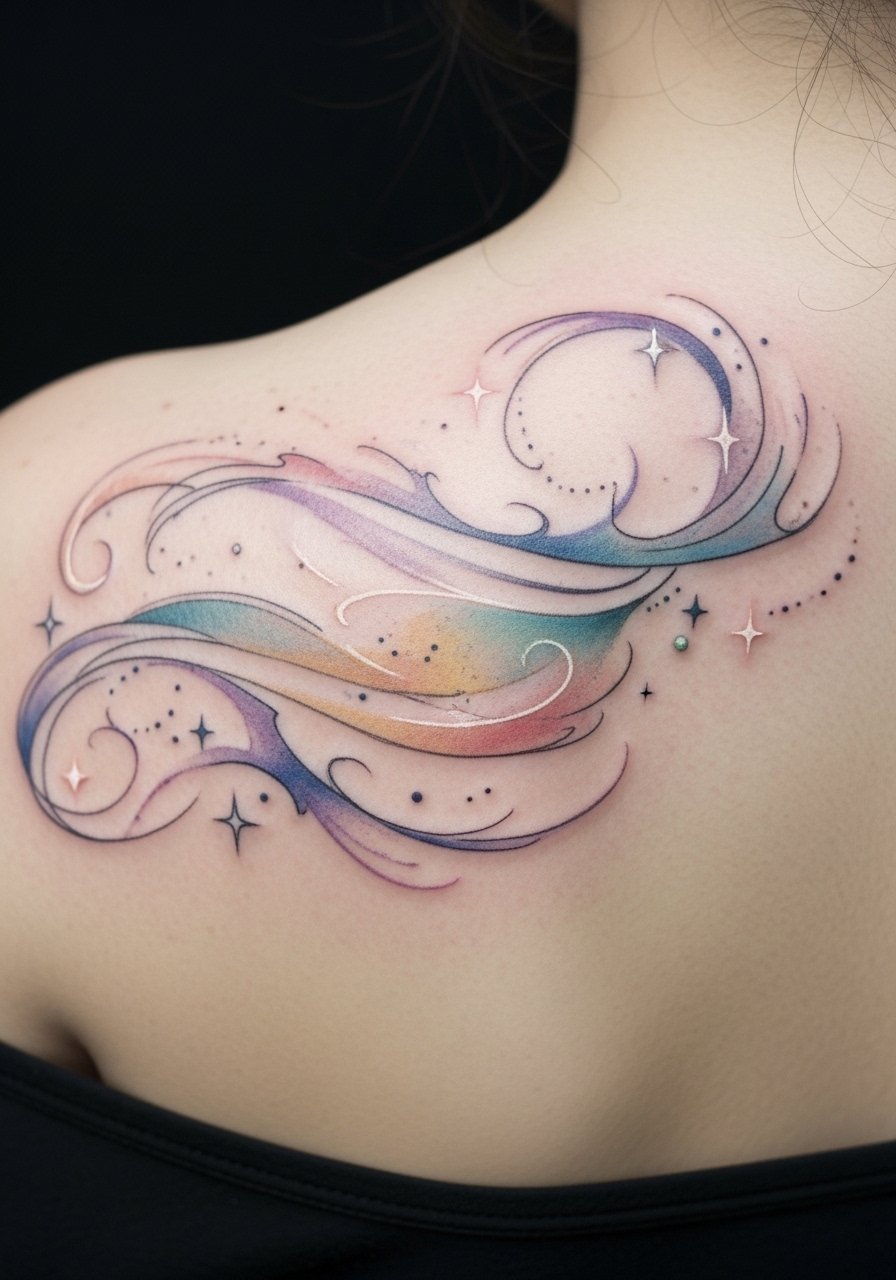
Watercolor works great for ethereal energy effects from anime—glows, magic, aura. Shoulder blade gives room and heals with minimal rubbing. Colors can fade faster, so plan for touch-ups. From what I've seen, artists who pair subtle outlines with watercolor washes get the best long-term results. Avoid tiny color splatters without anchoring lines—those can lose definition.
6. Minimalist Line Art Eye on Wrist
Style/Technique: Minimalist / Single Line
Pain Level: Medium (4/10)
Session Time: 30–60 minutes
Best For: Discreet, symbolic piece
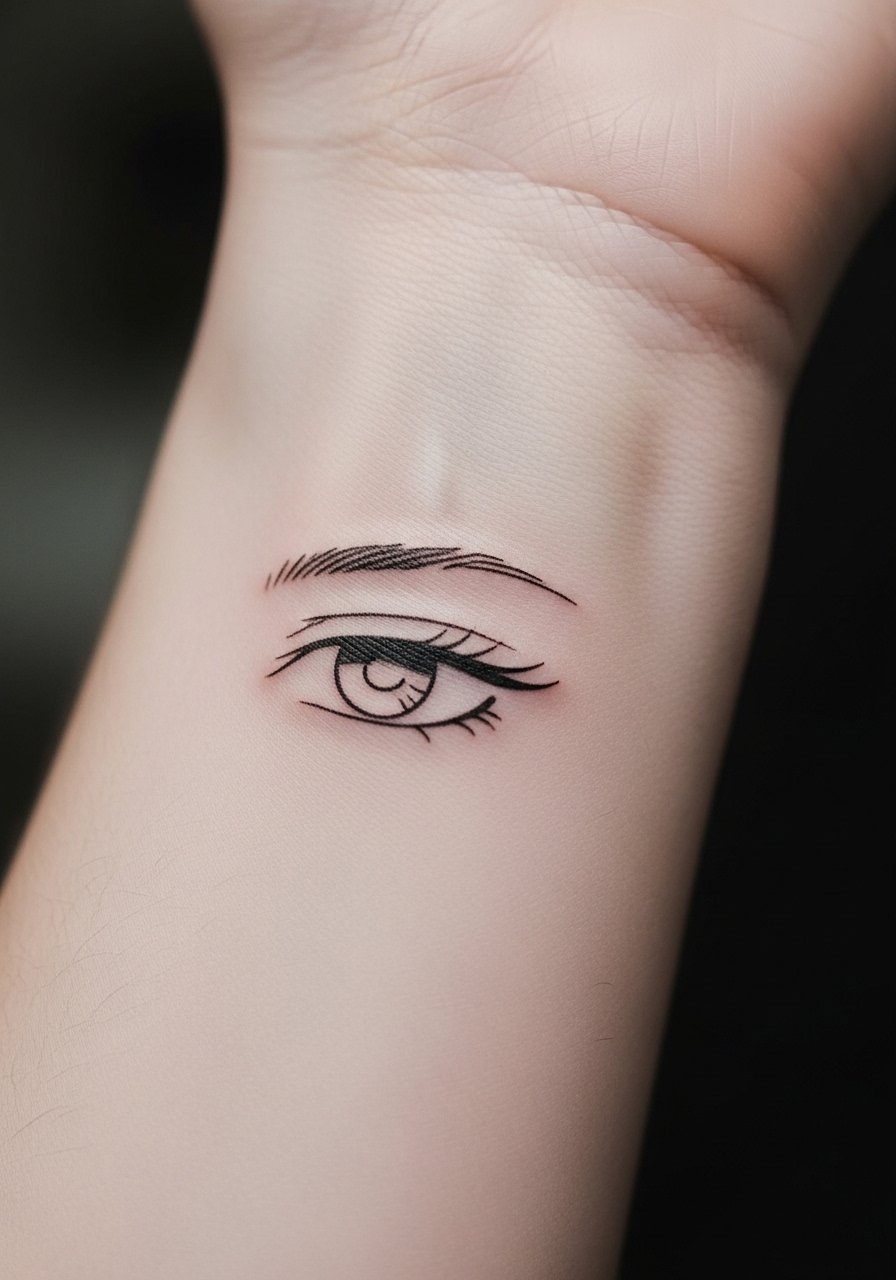
A single-line anime eye reads as a strong symbol. Wrist placement is visible and sensitive; expect sharper pain but fast sessions. Fine line tattoos here can blur if too delicate—artists often recommend slightly bolder single strokes. Keep aftercare strict during the first week to prevent scabbing from lifting lines.
7. Traditional Fan Emblem on Upper Chest
Style/Technique: Traditional / Bold Lines
Pain Level: High (6-7/10)
Session Time: 1-3 hours
Best For: Visible homage, chest display
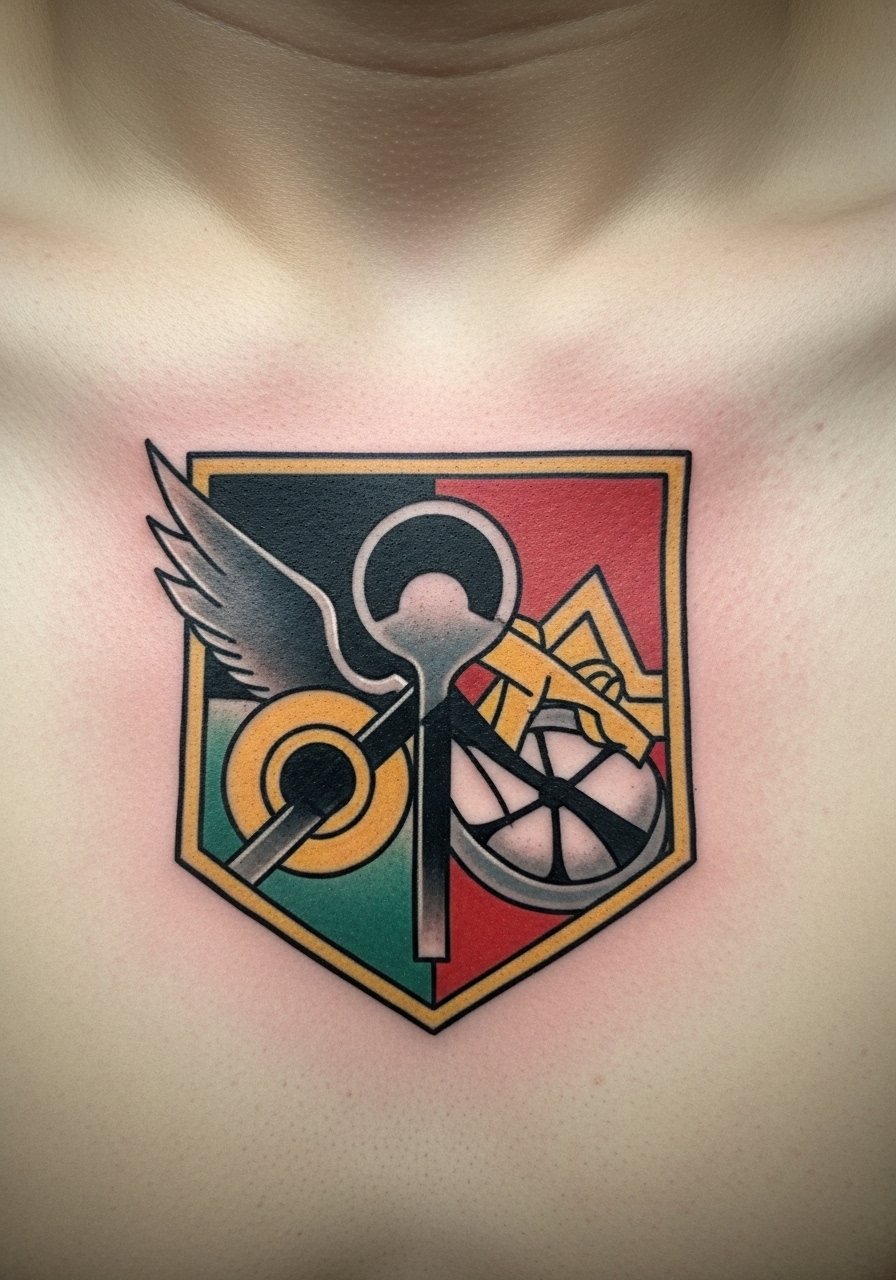
Classic American-traditional shading gives anime emblems weight and longevity. Upper chest can be painful near the sternum but looks impressive healed. Bold black outlines help keep the design readable as skin ages. A common misstep is cramping too many small details into a chest emblem—keep compositions simple for longevity.
8. Micro Script Quote Behind Ear
Style/Technique: Fine Line / Script
Pain Level: Medium (4/10)
Session Time: 30–60 minutes
Best For: Tiny, meaningful text, hidden placement
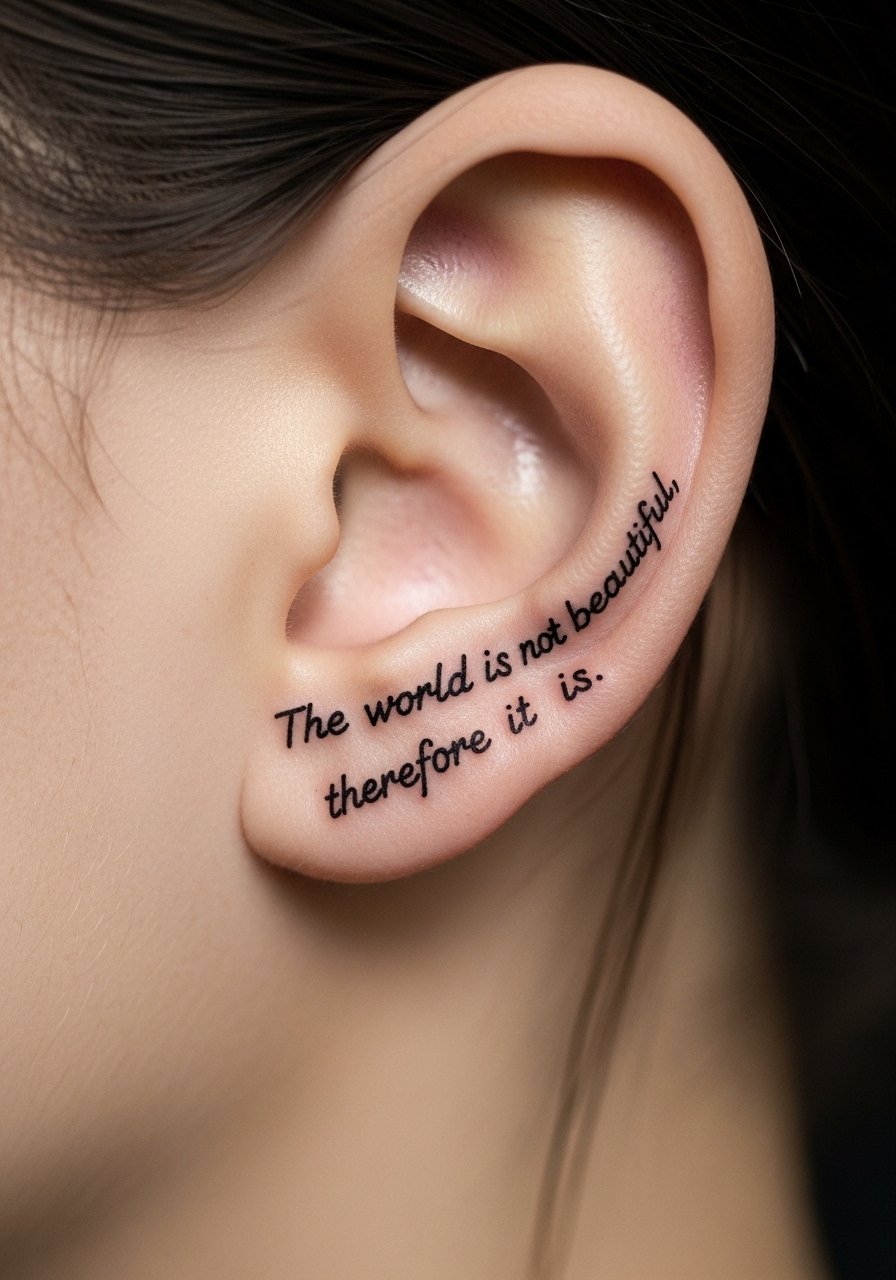
Tiny quotes from shows work well behind the ear if you want subtlety. Pain is manageable but area is sensitive. Micro script needs an artist who does legible lettering; blurred script is a common regret once healed. Ask for slightly thicker strokes than what looks perfect fresh—ink settles and softens.
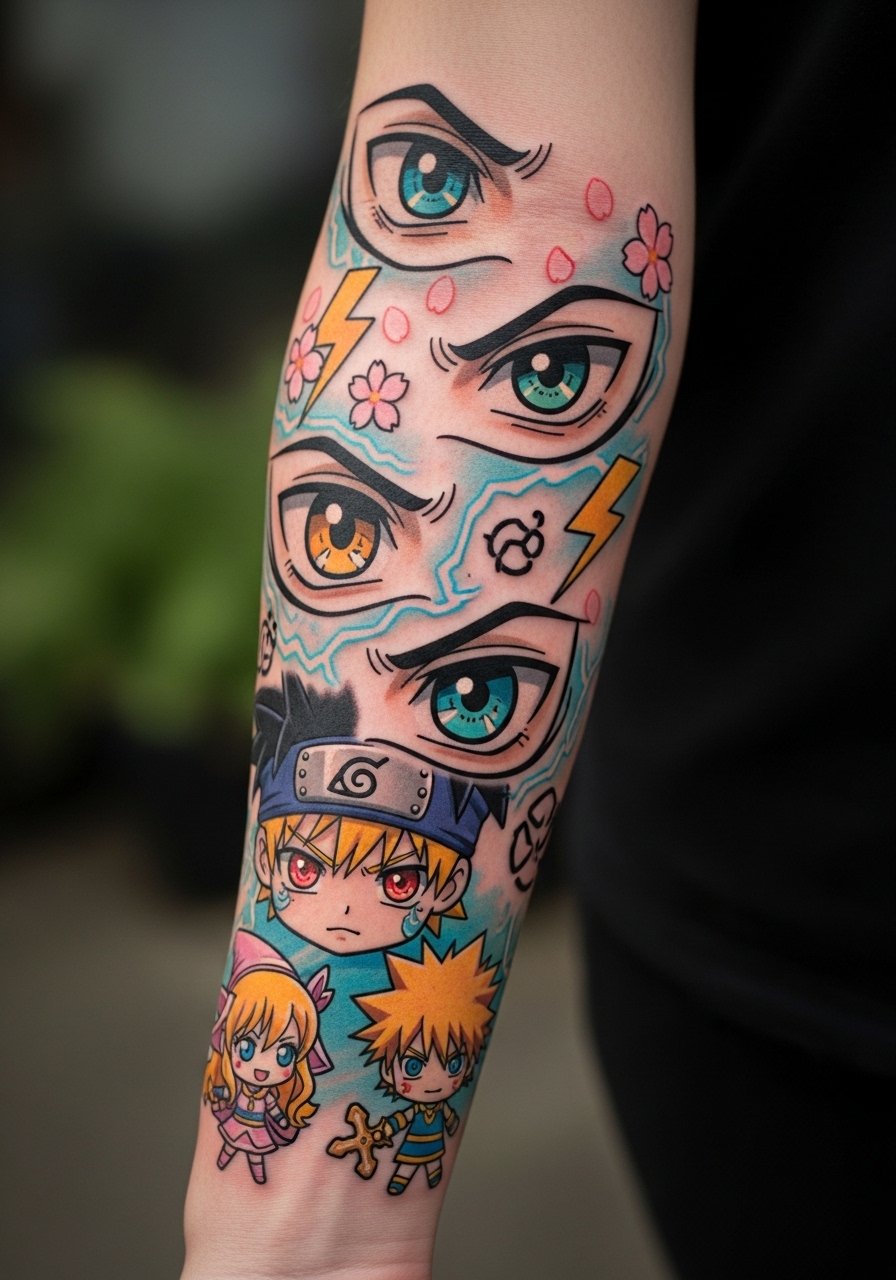
9. Sleeve Collage of Panels on Full Arm
Style/Technique: Mixed Styles / Sleeve
Pain Level: High (6-8/10 cumulative)
Session Time: Multiple sessions
Best For: Collectors, statement pieces
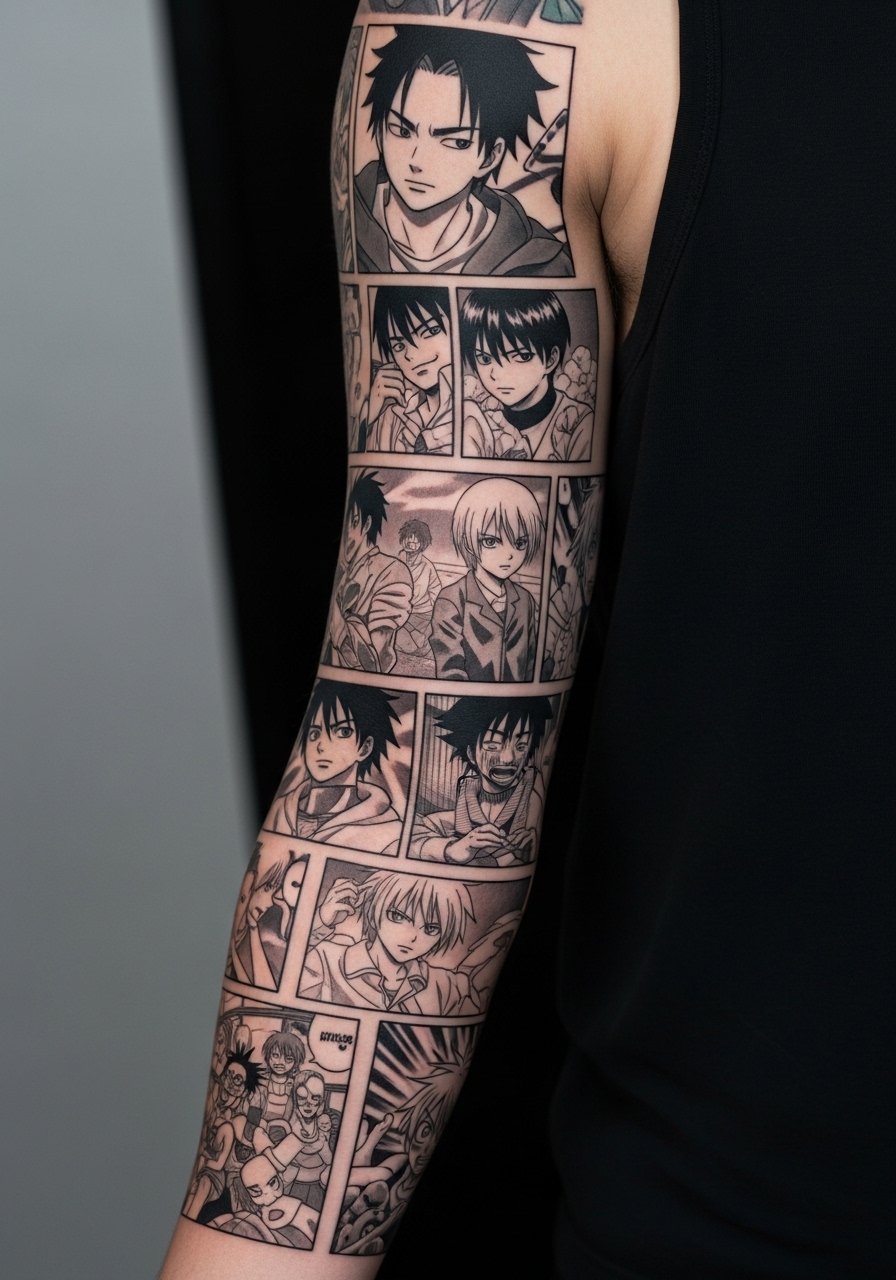
A sleeve lets you combine character portraits, scenes, and symbols. It’s a commitment—multiple sessions and layered healing. Sleeves age well if you use solid anchors (bold outlines) and balance detail density. Pain varies across the arm; inner elbow and wrist are tougher. Plan layout with your artist to avoid crowded panels that lose contrast over time.
10. Anime Pet Portrait on Thigh
Style/Technique: Micro-Realism / Portrait
Pain Level: Low-Medium (3-4/10)
Session Time: 2–4 hours
Best For: Personal, private tribute
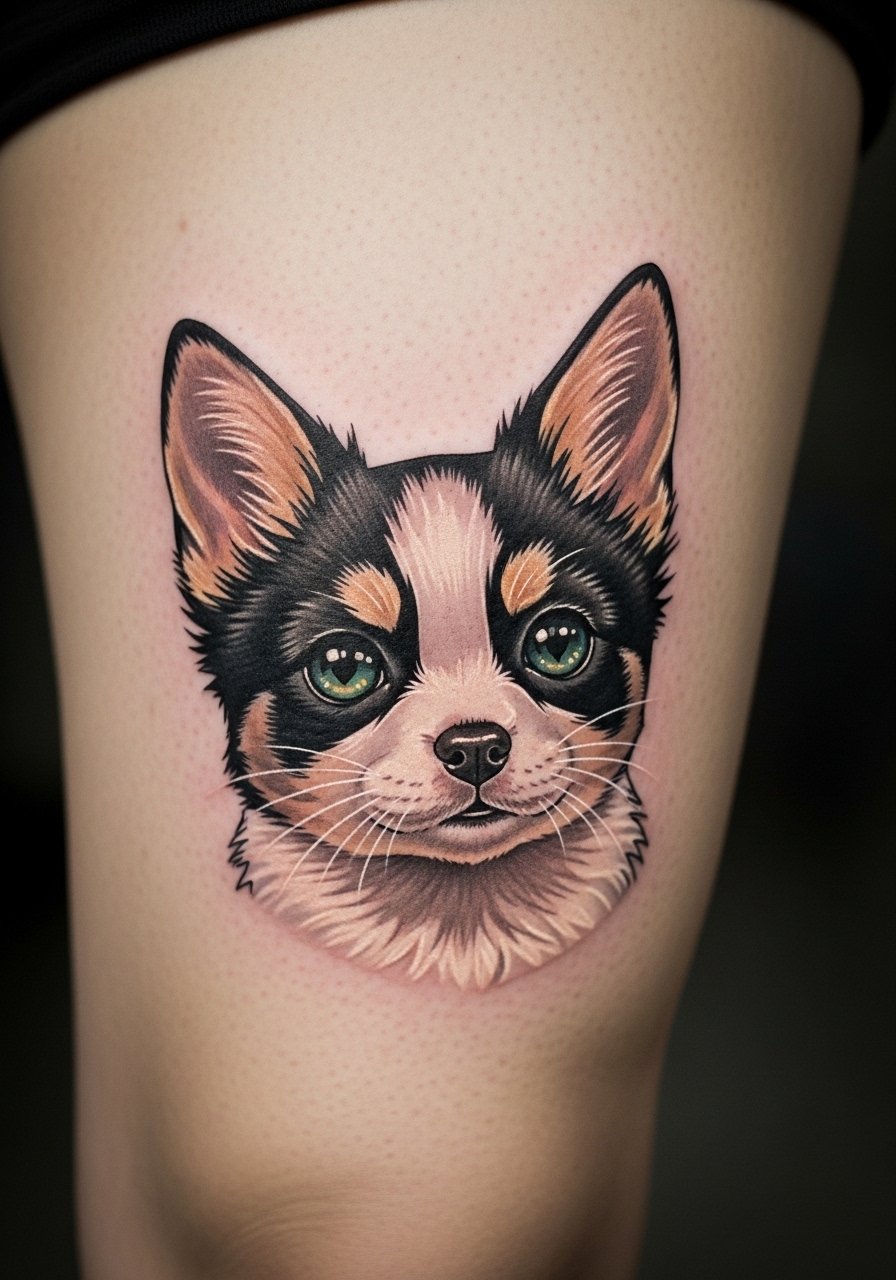
A thigh portrait gives space and hides easily. Pain is generally low and healing is straightforward. Portrait clarity depends on artist skill; bring good reference images. Thigh tattoos hold color fairly well; keep moisturized during healing to maintain saturation. Avoid overly tiny facial details that can blur.
11. Blackwork Full Back Silhouette
Style/Technique: Blackwork / Large Block
Pain Level: High (7/10)
Session Time: Multiple long sessions
Best For: Dramatic statement, high-contrast piece
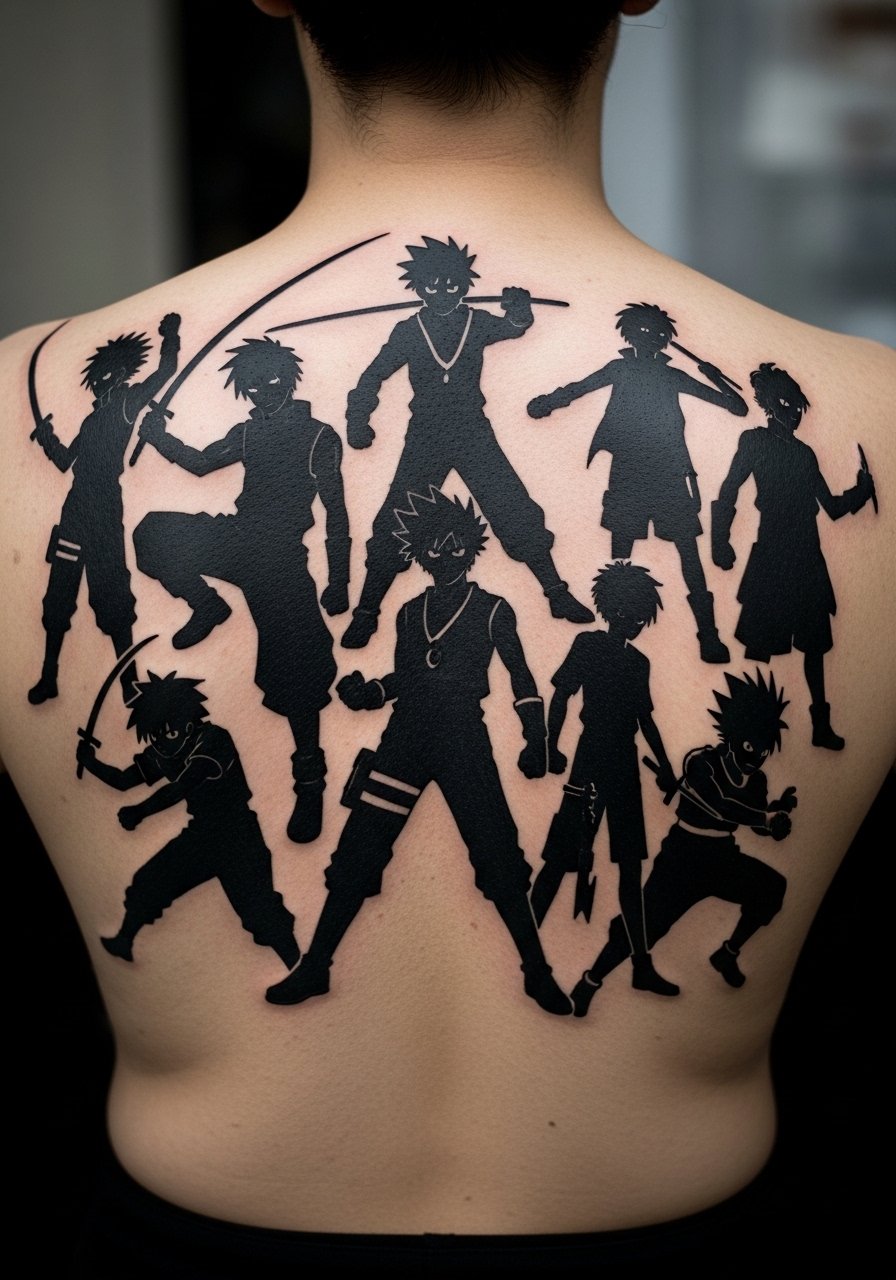
Large black silhouettes read bold and stay legible far longer than fine detail. Back work is a heavy commitment—expect multiple sessions and soreness. Black holds up great, but block work requires even saturation to avoid patchiness. Artists who specialize in large-scale blackwork can plan shading to avoid blowouts.
12. Anime Emblem Ring on Finger
Style/Technique: Minimalist / Tiny Emblem
Pain Level: High (6-7/10)
Session Time: 30–60 minutes
Best For: Tiny visible symbol, ring alternative
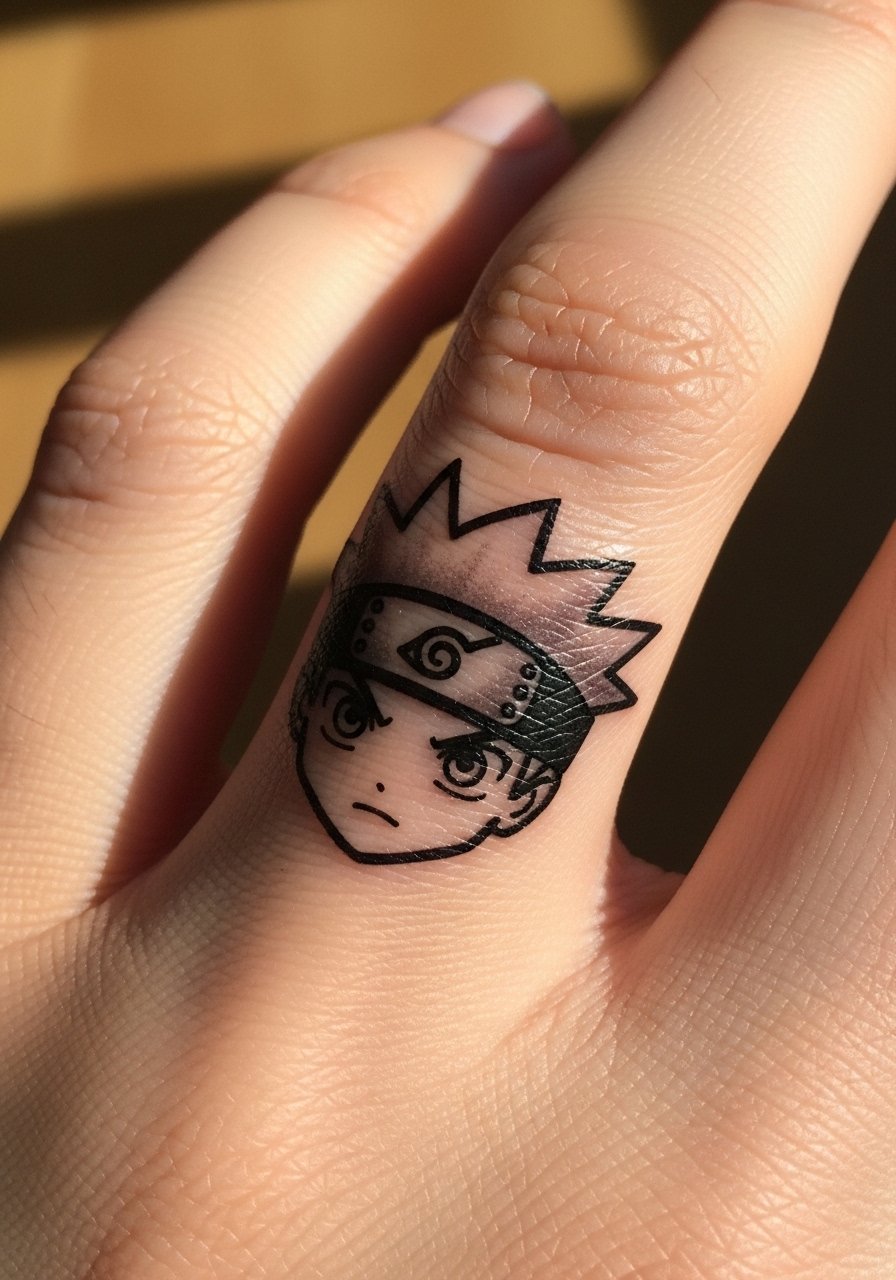
Finger tattoos are trendy but finicky. They fade faster and sometimes need touch-ups. I advise simple, bold shapes for best longevity. Pain is sharp and concentrated. Avoid intricate shading here—solids read clearer. Ask your artist about expected touch-ups since fingers are high-movement areas.
13. Neo-Japanese Koi With Anime Eyes on Calf
Style/Technique: Neo-Japanese / Illustrative
Pain Level: Medium (4-5/10)
Session Time: 2–4 hours
Best For: Hybrid traditional/anime aesthetic
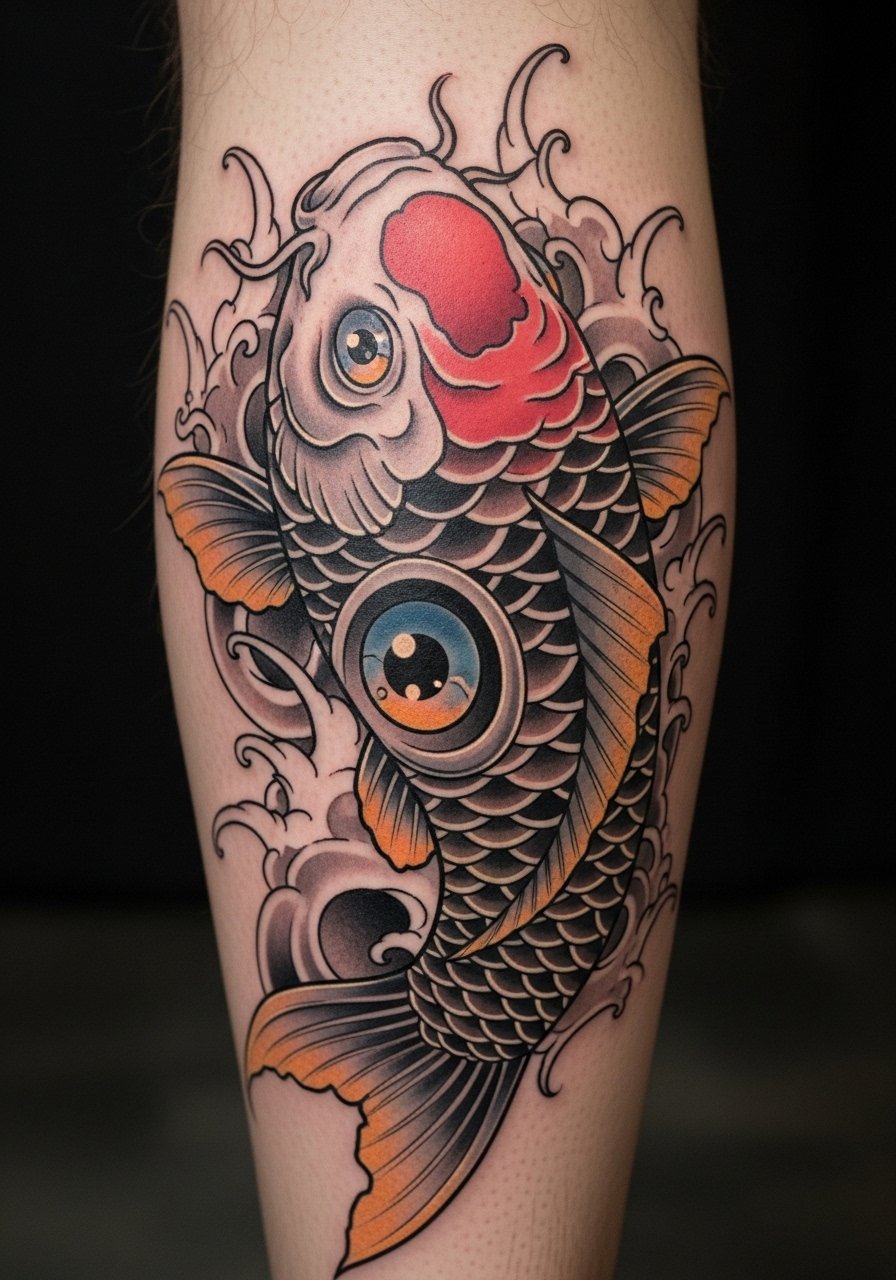
I’ve seen artists merge classic koi with anime facial traits for a fresh vibe. Calf placement gives movement and shows off line flow. Bold color blocks help maintain contrast as skin changes. Don’t cram tiny ornamental lines into scales—scale patterns should be simplified for lasting clarity.
14. Anime Sound Effect Kanji on Ribcage
Style/Technique: Calligraphic / Blackwork
Pain Level: High (7-8/10)
Session Time: 1–2 hours
Best For: Dramatic placement, meaningful kanji
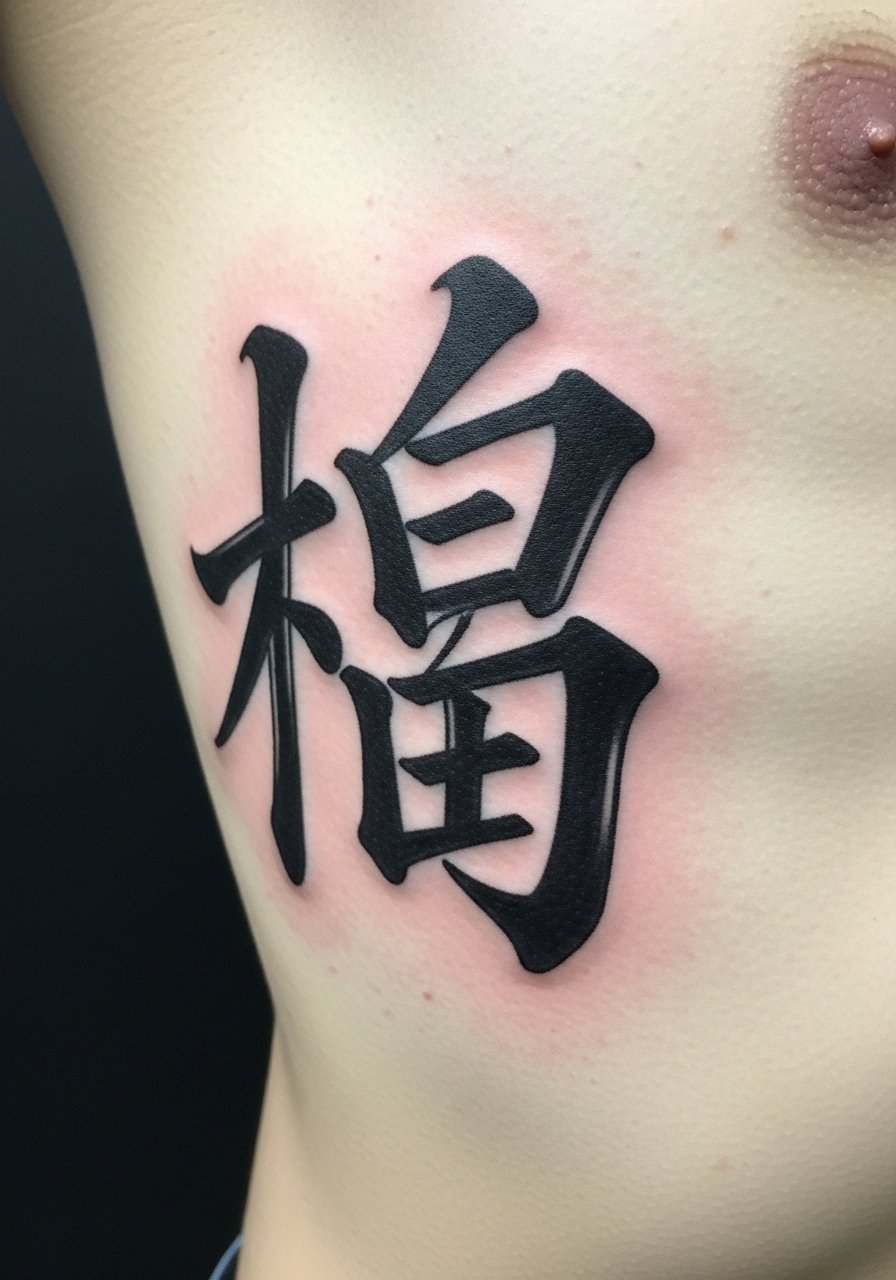
Ribcage text makes a statement but is one of the more painful spots. Calligraphic kanji looks powerful and ages well if strokes are bold. Avoid ultra-fine brushstrokes—the ribs can blur delicate ends. Verify translation and character meaning thoroughly and bring multiple references.
15. Pixel-Art Sprite on Ankle
Style/Technique: Minimalist / Pixel Art
Pain Level: Medium (4/10)
Session Time: 30–60 minutes
Best For: Nostalgic, low-profile design
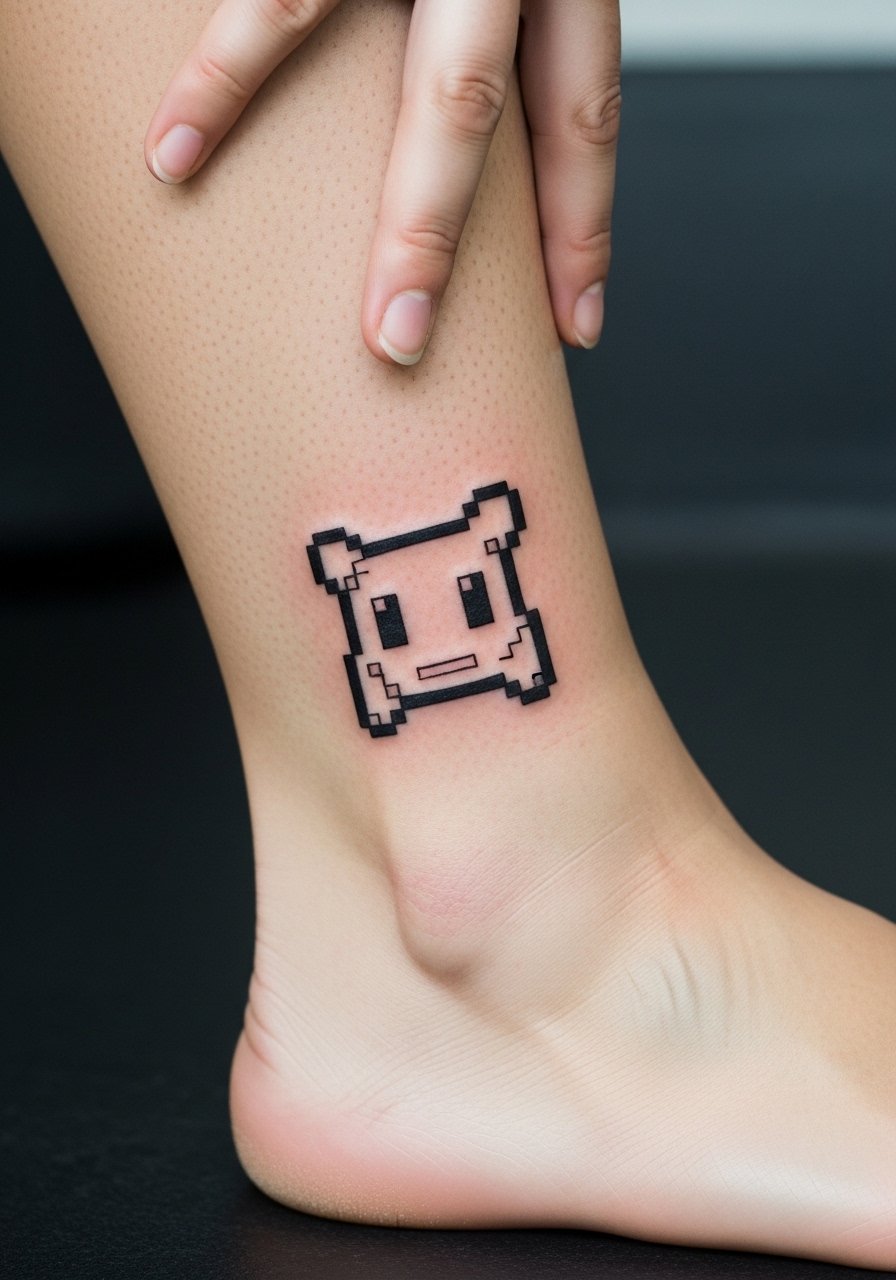
Pixel sprites are nostalgic and low-fuss. Ankle placement can be bony and prickly, but small pieces heal fast. Keep pixels as solid squares—irregular dots tend to blur. This style ages surprisingly well when lines are boxy and high-contrast.
16. Manga Panel Strip on Side Rib
Style/Technique: Linework / Sequential Art
Pain Level: High (7/8/10)
Session Time: Multiple sessions
Best For: Narrative-heavy, dramatic panels
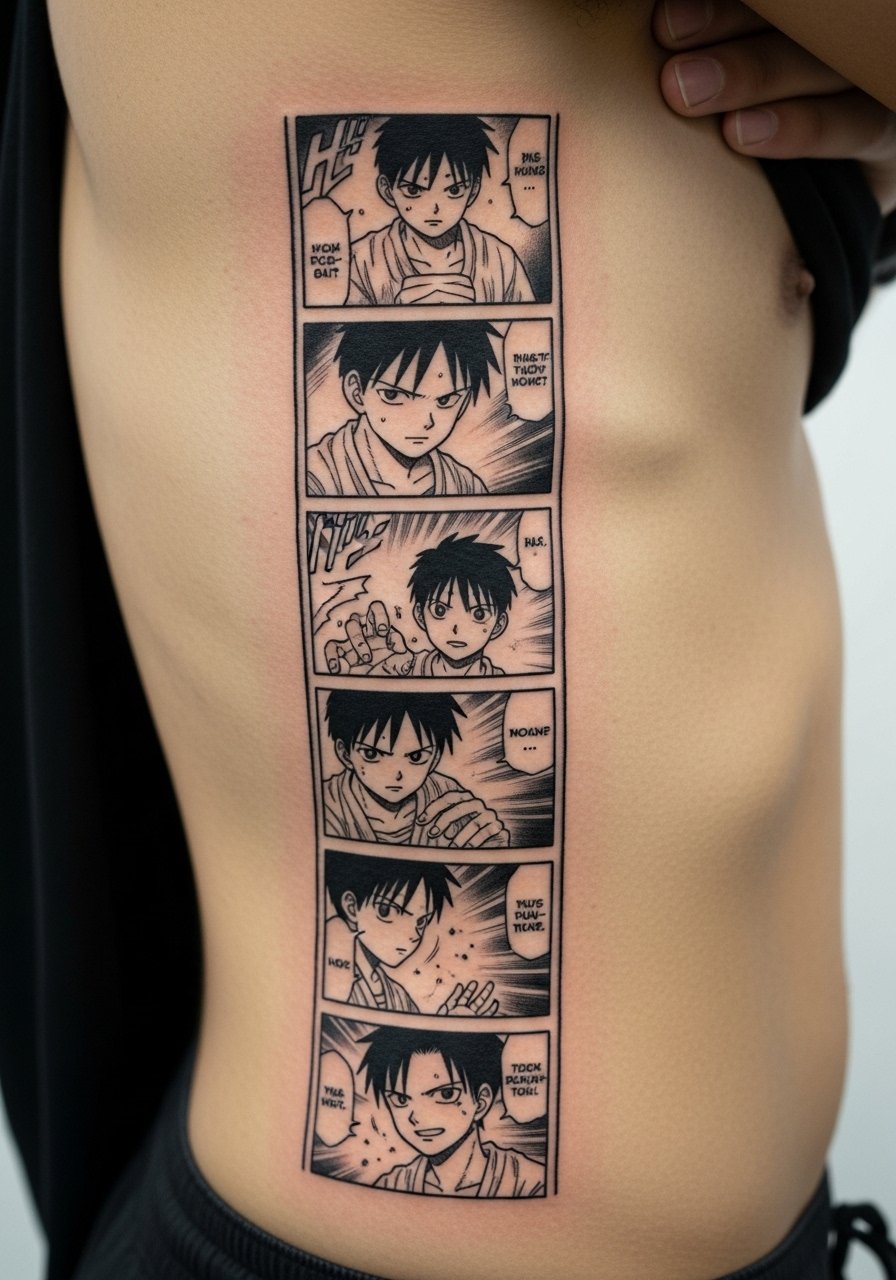
A panel strip tells a short story across your ribs. It’s emotional and very visible when you want it to be. Ribs are painful and need careful aftercare to prevent stretching during sleep. Thin panel borders can soften—ask your artist to balance line weight for longevity.
17. Small Mecha Outline Behind Calf
Style/Technique: Minimalist / Technical Linework
Pain Level: Low-Medium (3-4/10)
Session Time: 1–2 hours
Best For: Fans of mechanical designs, hidden detail
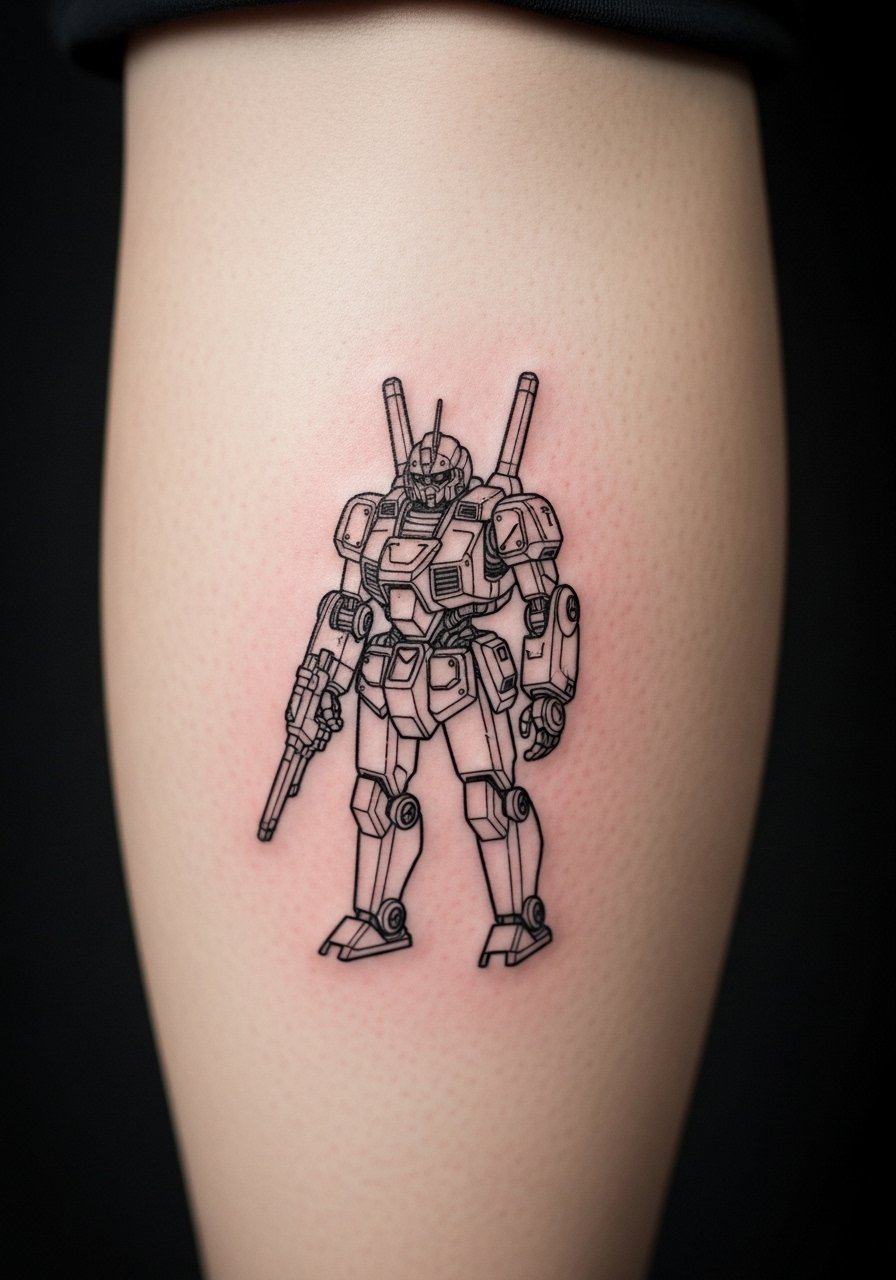
Mechanical anime designs look sharp as outlines. Behind the calf is low-pain and easy to cover. Keep line intersections simple—too many tiny gears become muddy. Artists adept at technical linework will preserve crisp edges that age better than dense detail.
18. Colored Hair Strand Accent on Collarbone
Style/Technique: Minimalist / Color Accent
Pain Level: High (6/10)
Session Time: 30–60 minutes
Best For: Subtle color pop, fashionable placement
A single colored strand from a character is a subtle way to show fandom. Collarbone is sensitive and visible. Bright pigments can fade faster—I recommend durable red or blue inks and strict SPF after healing. Avoid tiny stippled shading; solid streaks keep better saturation.
19. Monochrome Storm Cloud on Upper Arm
Style/Technique: Blackwork / Atmospheric
Pain Level: Low (2-3/10)
Session Time: 1–2 hours
Best For: Mood piece, sleeve filler
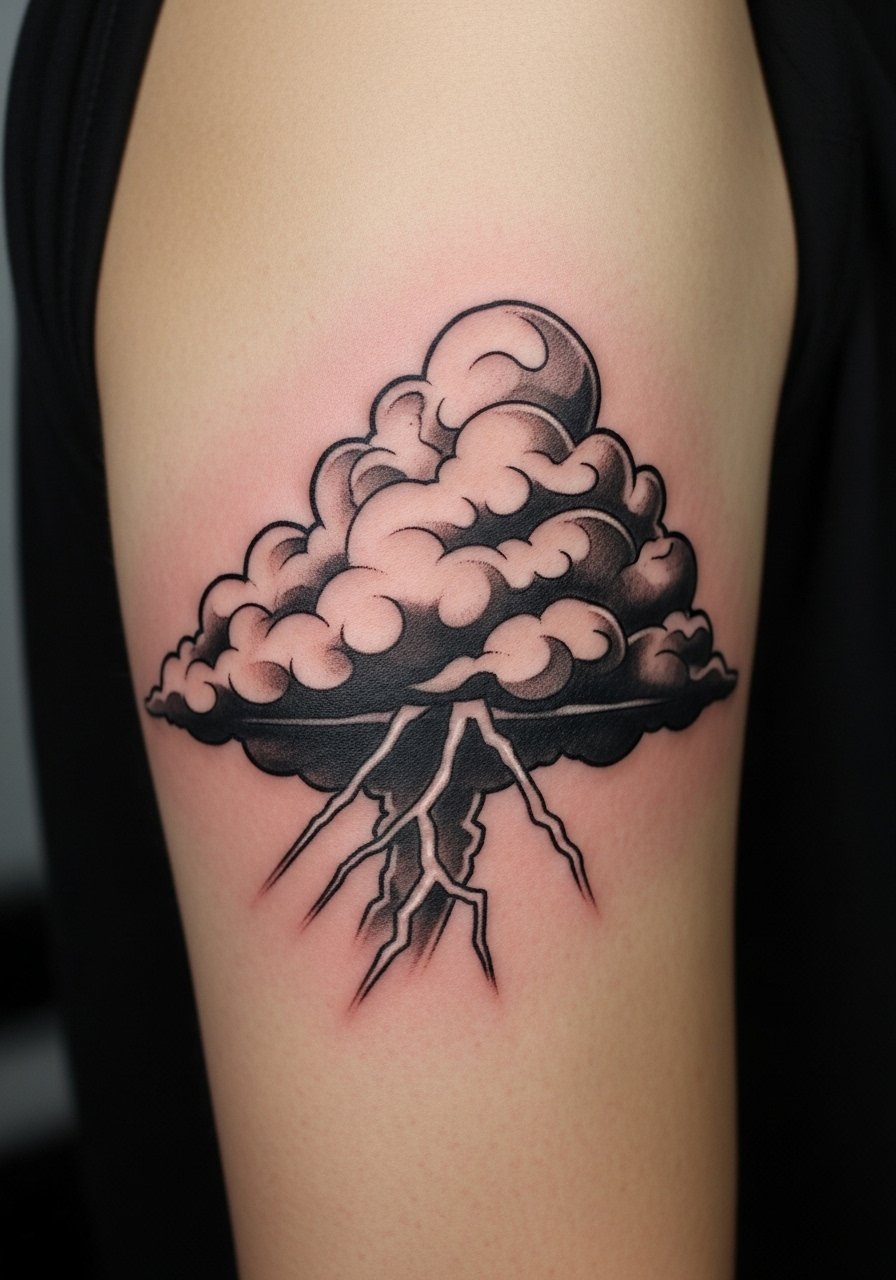
Atmospheric blackwork pieces work as fillers or standalone mood tattoos. Upper arm placement is low-pain and durable. Smooth gradients age well when the artist uses appropriate shading density. Skip overly fine stippling across large areas; it can fade unevenly.
20. Minimal Crest on Sternum
Style/Technique: Fine Line / Geometric
Pain Level: High (7/10)
Session Time: 1–2 hours
Best For: Centerpiece, symmetrical design
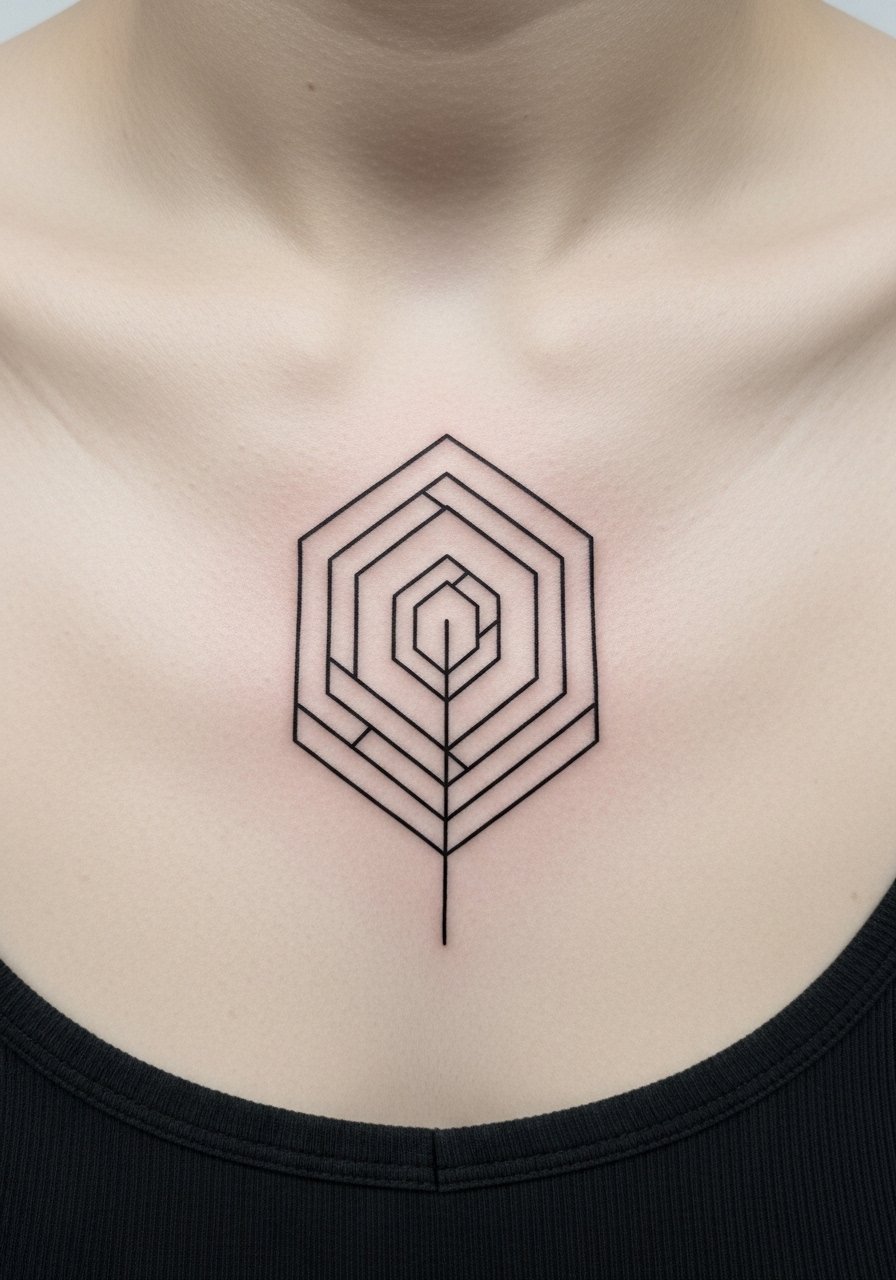
Sternum pieces are bold and central. Pain is high but healing yields a striking centerpiece. Geometric crests need symmetric layouts—ask artists to stencil carefully. Thin symmetry lines can warp on the chest; slightly bolder strokes fare better.
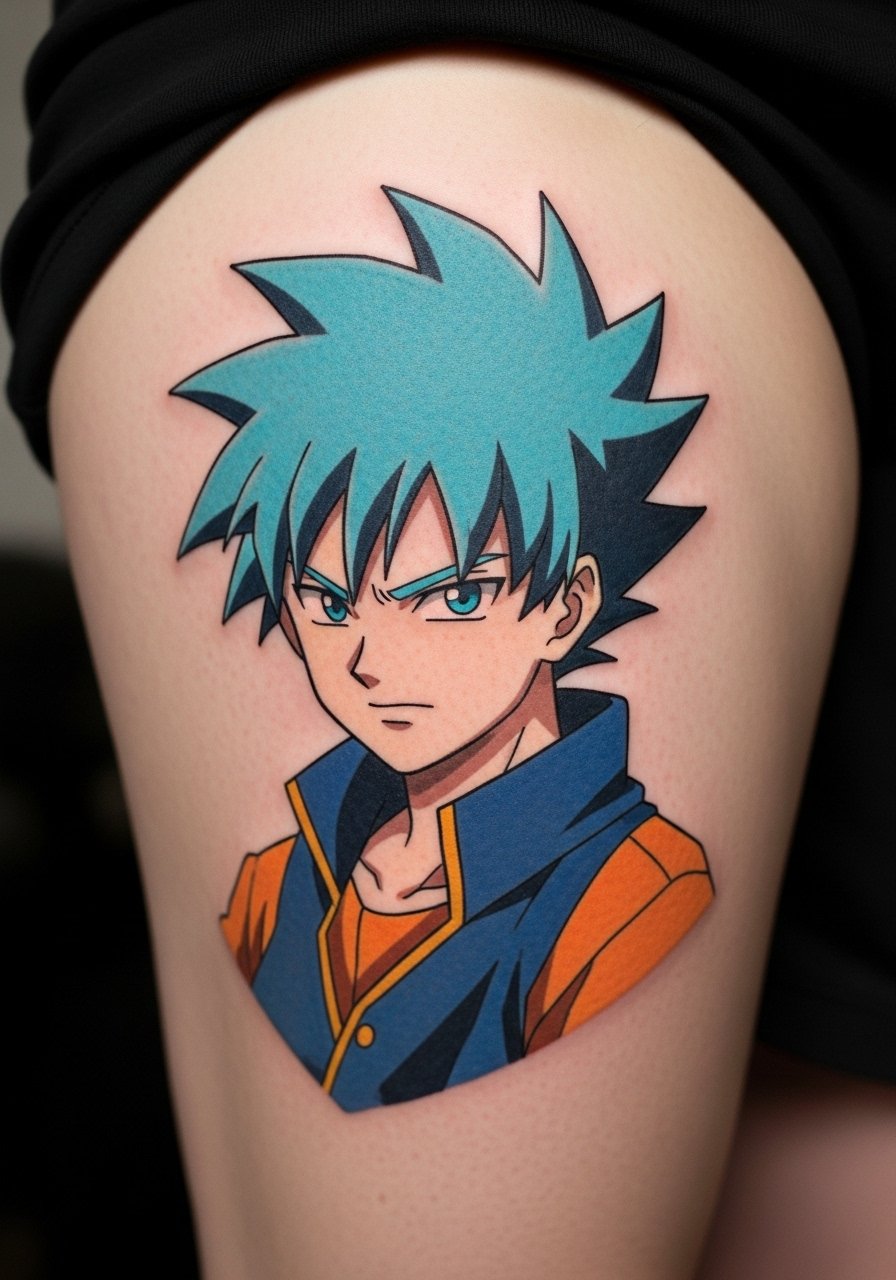
21. Anime Eye Half Sleeve on Forearm
Style/Technique: Illustrative / Mixed Styles
Pain Level: Medium (4-6/10 cumulative)
Session Time: Multiple sessions
Best For: Iconic visuals, expressive detail
Eyes are iconic in anime art and translate well into sleeve motifs. Forearm placement shows off detail and has moderate pain. Varying line weights helps maintain readability as the piece ages. Avoid cramming too many tiny lashes—simpler lash architecture ages cleaner.
22. Cel-Shaded Character on Thigh
Style/Technique: Neo-Traditional / Cel Shading
Pain Level: Low-Medium (3-4/10)
Session Time: 2–4 hours
Best For: Bold color and silhouette
Cel shading mimics animation cells and looks crisp on skin. Thigh placement is forgiving and retains color well. Large flat colors can dull if neglected, so long-term sunscreen and moisturizer matter. Ask artists to keep black anchors to prevent color bleed.
23. Minimal Symbol on Inner Bicep
Style/Technique: Minimalist / Tiny Symbol
Pain Level: Medium (4/10)
Session Time: 30–60 minutes
Best For: Hidden, meaningful mark
Inner bicep symbols are private and personal. Pain is moderate but healing is protected from friction. Small symbols should be bold enough to resist softening. Artists who work with compact tattooing will guide ideal scale.
24. Kawaii Sticker-Style Patch on Knee Cap
Style/Technique: Cute/Sticker / Colorful
Pain Level: High (6-7/10)
Session Time: 1–2 hours
Best For: Playful, visible on movement
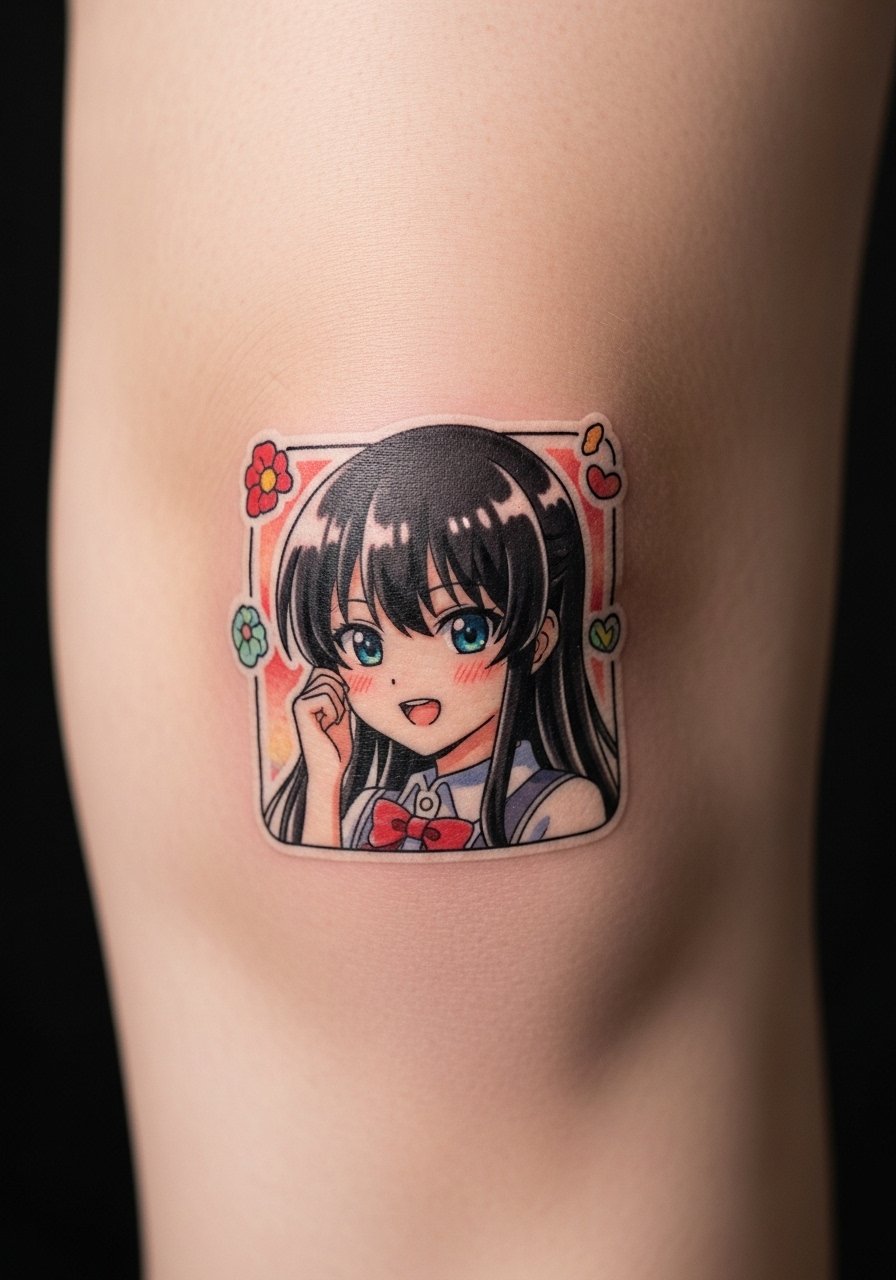
Knee tattoos are fun but tough—joint movement causes more wear. Sticker-style art reads well when outlines are bold and shapes are simple. Expect potential touch-ups. Avoid tiny interior shading that will break up with joint flex.
25. Scripted Opening Line on Hip
Style/Technique: Calligraphic / Script
Pain Level: High (6/10)
Session Time: 1 hour
Best For: Hidden, poetic placement

Hip scripts are intimate and can be easily covered. Pain is higher but sessions are short. Legibility depends on stroke thickness—choose artists who do fine script and discuss letter spacing to avoid later blurring.
26. Retro Anime Logo on Upper Back
Style/Technique: Retro / Vintage Logo
Pain Level: Medium (4/10)
Session Time: 1–2 hours
Best For: Nostalgia, bold branding
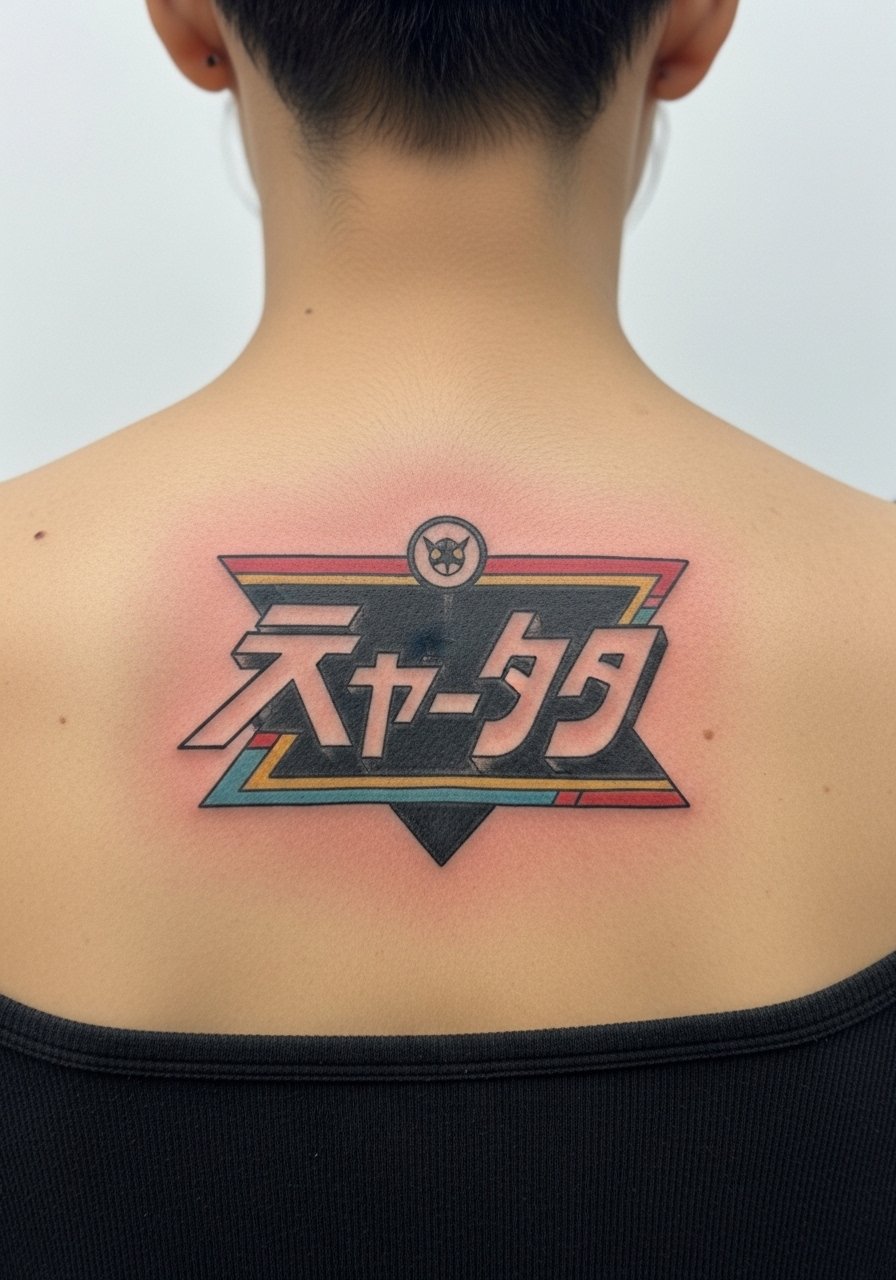
Logo tattoos are all about silhouette recognition. Upper back sits flat and heals well. Bold logos maintain identity over time. Avoid tiny text under logos—readability drops fast.
27. Floral-Frame Character Bust on Thigh
Style/Technique: Neo-Traditional / Floral Frame
Pain Level: Low-Medium (3-4/10)
Session Time: 2–3 hours
Best For: Feminine framing, large canvas
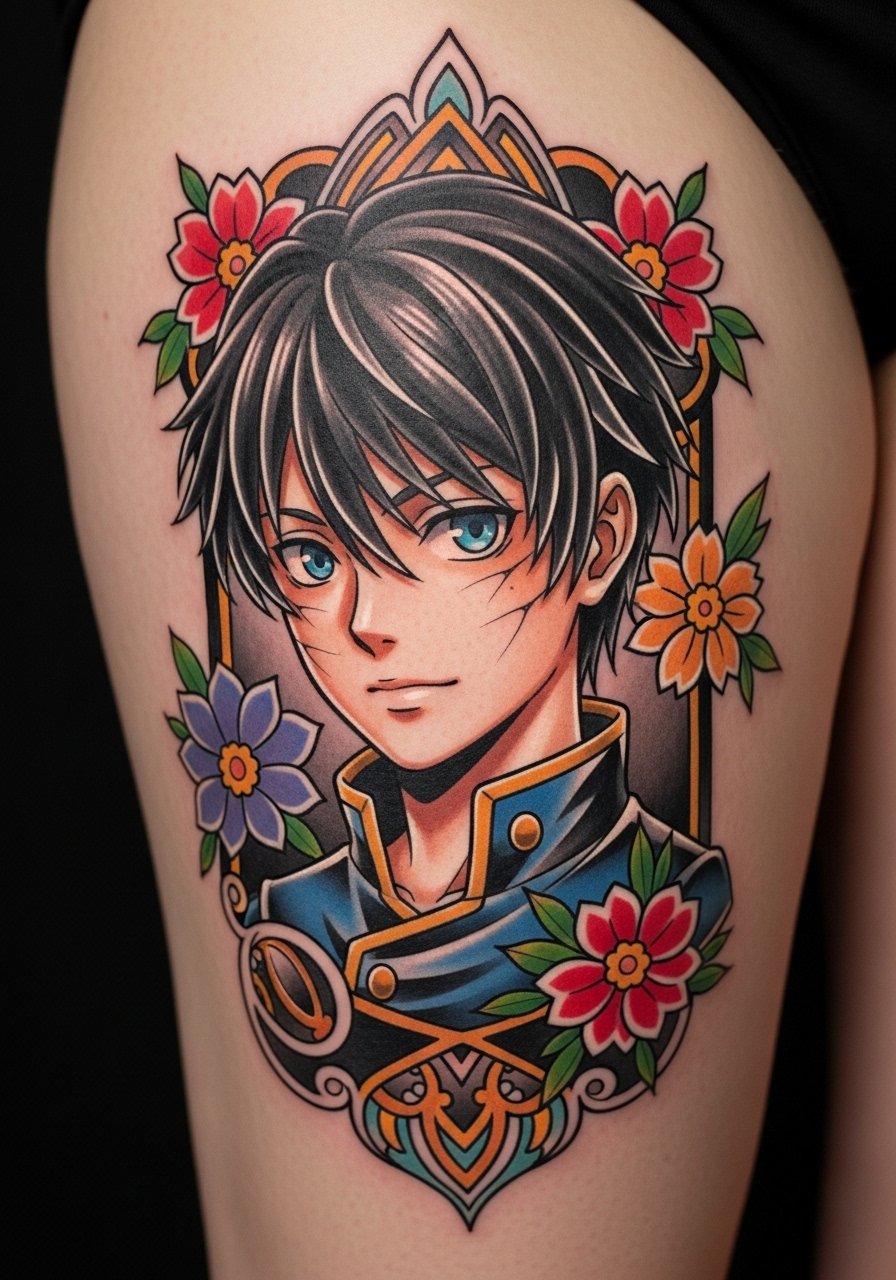
Framing a character with flowers softens portraits and adds timelessness. Thigh placement keeps details safe and visible when wanted. Balance floral density so the portrait doesn't get lost in petals.
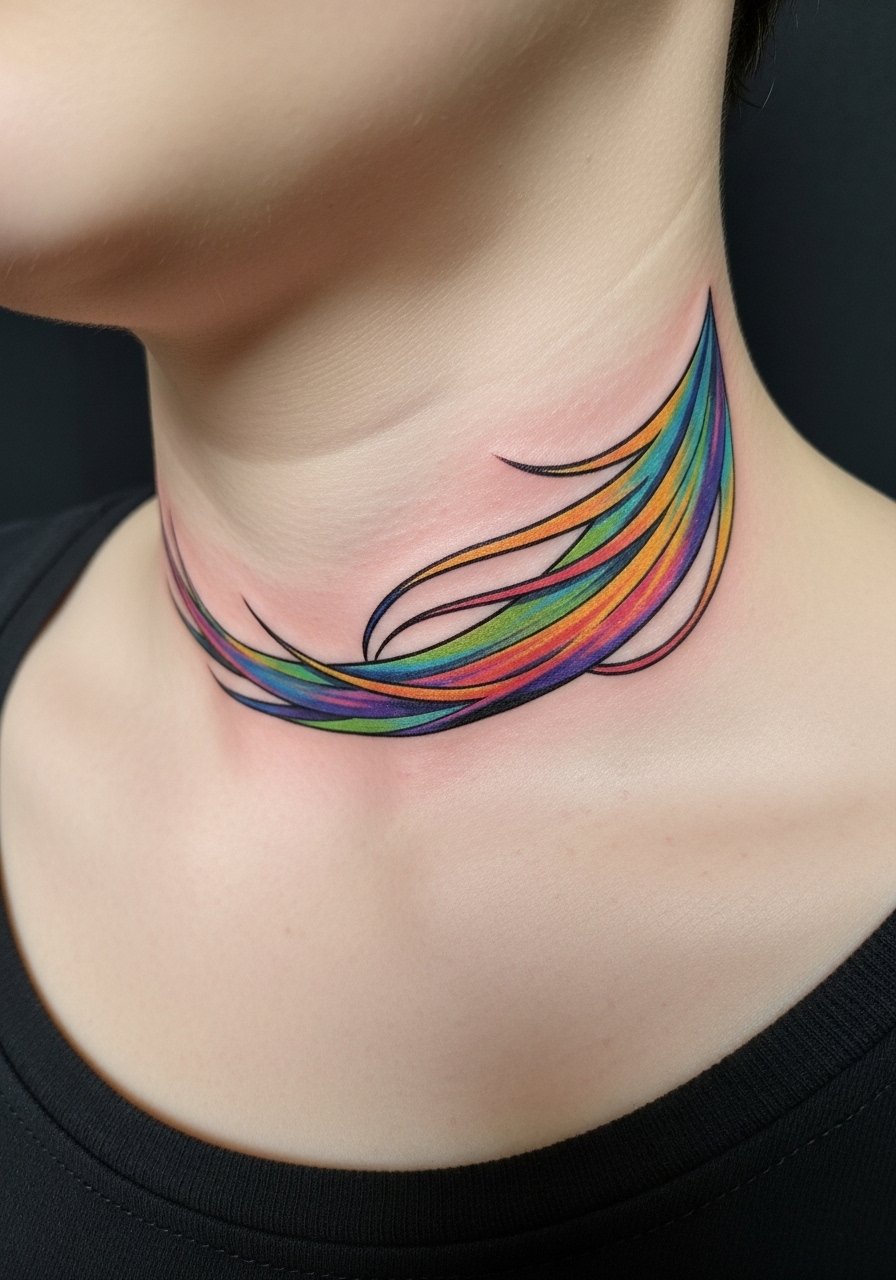
28. Gradient Aura Around Wrist Tattoo
Style/Technique: Watercolor / Gradient Accent
Pain Level: Medium (4/10)
Session Time: 1–2 hours
Best For: Accent visuals, layered with other tattoos
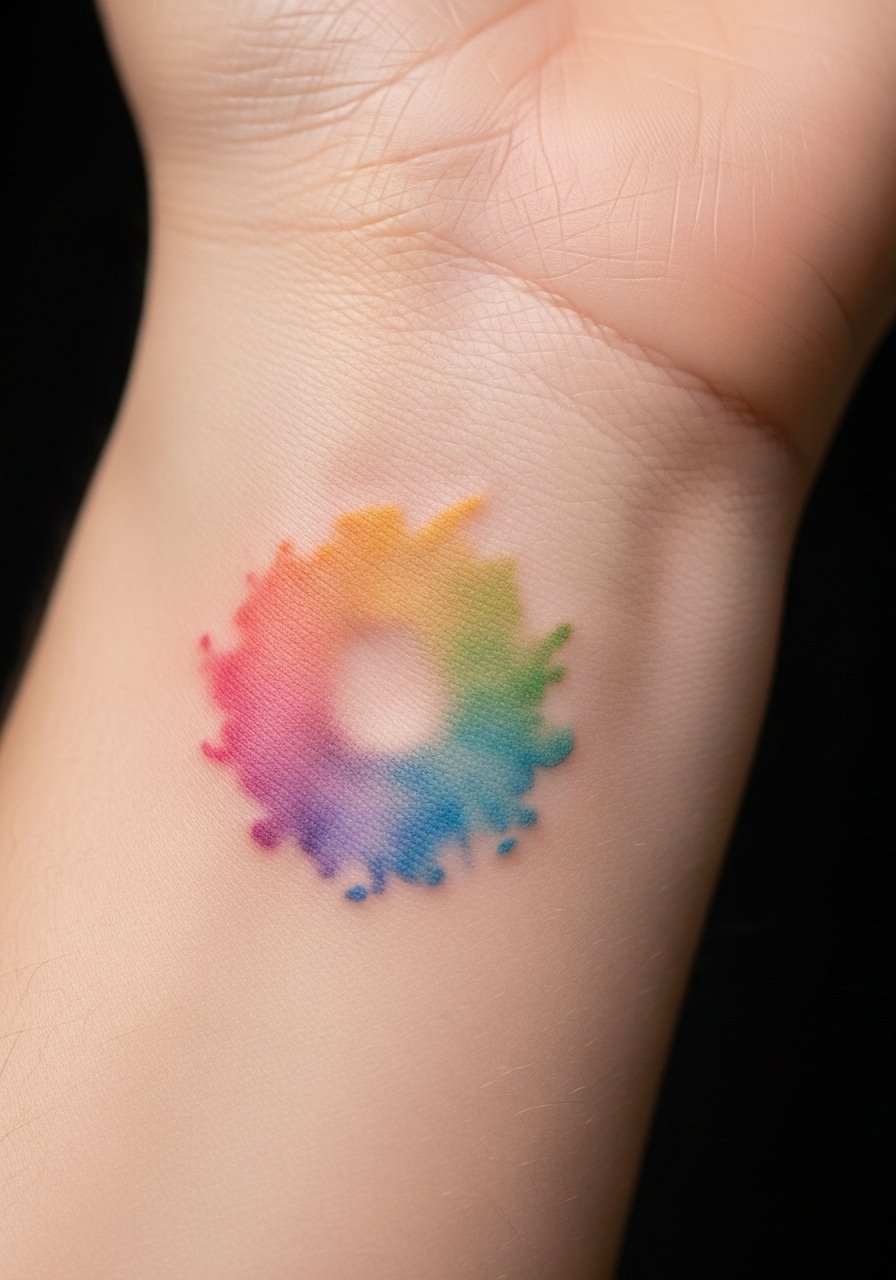
A colored aura adds movement and drama to small wrist tattoos. Gradients fade faster; pick pigments known for longevity and commit to sunscreen. Artists who do watercolor with anchors (subtle outlines) deliver longer-lasting results.
29. Hidden Neckline Script Along Hairline
Style/Technique: Fine Line / Hidden Script
Pain Level: High (7/10)
Session Time: 30–60 minutes
Best For: Subtle reveal, intimate placement
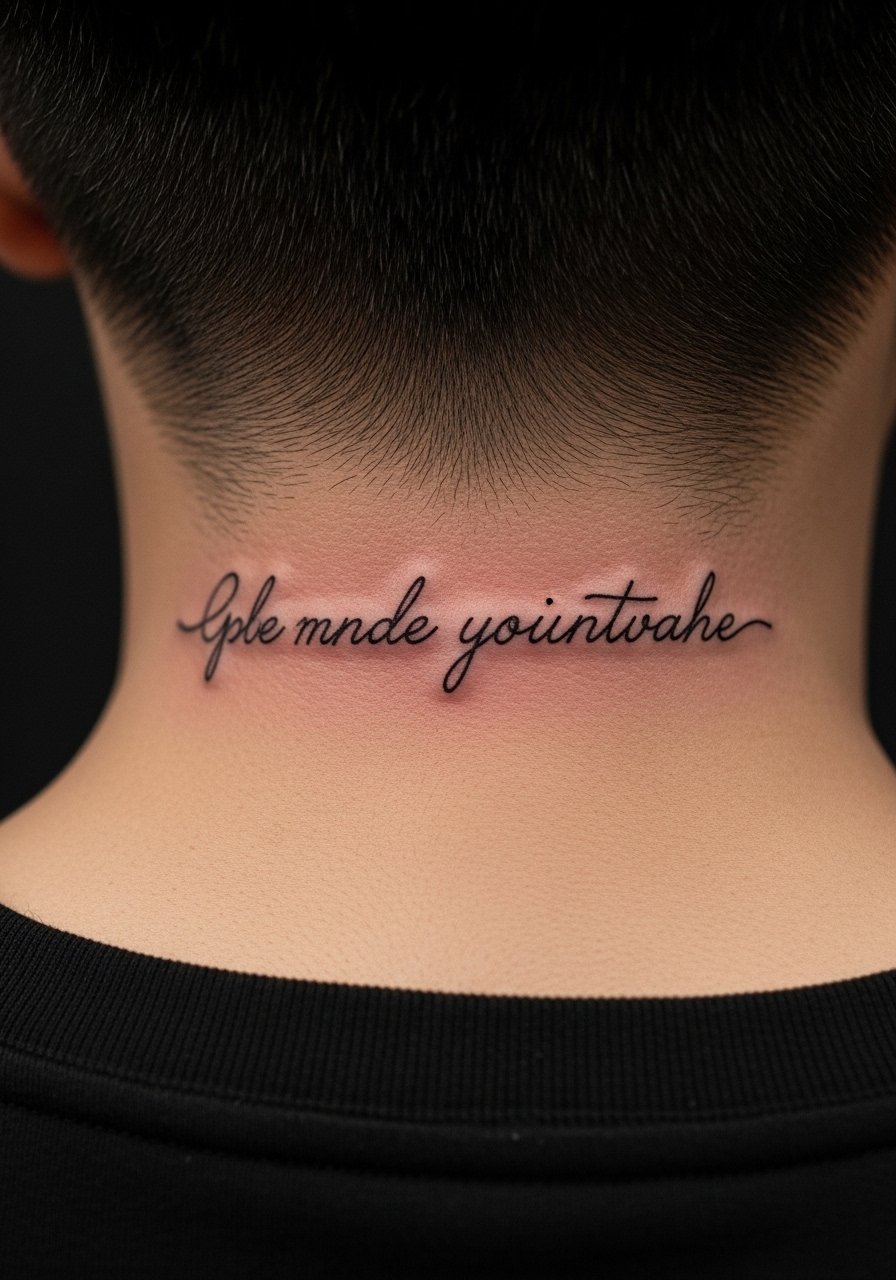
A hidden hairline script is a private nod to fandom. Nape skin can be sensitive; expect higher pain. Hair growth and scalp oils affect healing—keep the area clean and dry. Ask your artist about ink choice for mobile skin near hair follicles.
Tattoo Prep and Aftercare Essentials
Aftercare Essentials:
- Aquaphor Healing Ointment, 14oz tube — Ideal first 3-5 days for thicker coverage
- Saniderm Transparent Adhesive Bandage, 6-inch roll — Second-skin healing method many artists recommend
- CeraVe Fragrance-Free Moisturizing Lotion — Daily moisturizer for days 4–14
- Dr. Bronner's Unscented Castile Soap, 32oz — Gentle cleaning during first week
Before Your Appointment:
- Tattoo Numbing Cream 5% Lidocaine — Ask your artist before use
- Tattoo Stencil Transfer Paper, 8.5×11 — Useful if you’re prepping design mockups
Long-Term Maintenance:
- SPF 50 Sunscreen Stick for Tattoos — Non-negotiable for preventing fading
- Mad Rabbit Tattoo Balm 2oz — Keeps healed ink vibrant
- Hustle Butter Deluxe 2oz — Vegan aftercare alternative
Optional Comfort Items:
- Tattoo Numbing Spray — For touch-ups or sensitive spots
- Hydrocolloid Bandages, Large — For spot protection during scabbing
From what I've gathered, Aquaphor and Saniderm are commonly recommended by seasoned artists. Use fragrance-free lotion after day three. Sunscreen daily keeps colors true.
Frequently Asked Questions
Q: How bad does a tattoo actually hurt?
A: Pain depends on placement and your tolerance. Outer arm/thigh = lower (2–4/10). Ribs/ankle/sternum = higher (6–8/10). It's more steady scratching than sharp jolts. For sensitive spots, consider tattoo numbing cream 5% lidocaine but ask your artist first.
Q: How long does a tattoo take to heal?
A: Surface healing is usually 2–3 weeks. Full skin regeneration can take 2–3 months. First week is the most crucial—keep it clean with unscented castile soap and moisturize with CeraVe lotion.
Q: Will my anime tattoo fade quickly?
A: Colors fade faster than black. From what I've seen, sun exposure is the main culprit. Use an SPF 50 sunscreen stick daily and keep skin hydrated with Mad Rabbit balm.
Q: Can I exercise after getting inked?
A: Wait 48–72 hours at minimum, longer if the tattoo sits on a flex point like knees or elbows. Sweating can irritate fresh ink and increase infection risk. Keep the area clean and dry during the first week.
Q: Should I get a tiny tattoo first to test pain?
A: Only if you actually want that piece. Pain varies more by placement than size—a tiny wrist tattoo can hurt more than a bigger thigh piece. If nervous, pick a forgiving area like outer upper arm.
Q: Do tattoos look different on darker skin tones?
A: Yes. Bold black and saturated colors read best across skin tones. Pastel shades and white ink often show less on deeper skin. I've seen the best results from artists who regularly work on your skin tone—ask to see healed examples.
Q: What common mistakes should I avoid with anime tattoos?
A: Avoid cramming super-fine detail into tiny designs, choosing unreadable script, or picking pigments without considering long-term fading. From spending time in communities, the advice I hear most: simplify details and prioritize bold anchors for longevity.
