
I spent months bookmarking clock tattoos before I finally understood why they stuck with me: clocks tell stories—of loss, of timing, of the moments that changed us. Finding a design that actually ages well matters more than a trendy detail. These 26 clock tattoo ideas are what I've been saving from artists I follow and the studios I visited—they focus on meaning, placement, and how the work looks healed.
This list leans into fine line, traditional, neo-traditional, and surreal styles. These ideas work on forearm, chest, ribcage, thigh, and back—placements I see artists favor in 2026. From what I've seen, pairing clocks with roses, skulls, or compasses gives the strongest narrative and holds up healed.
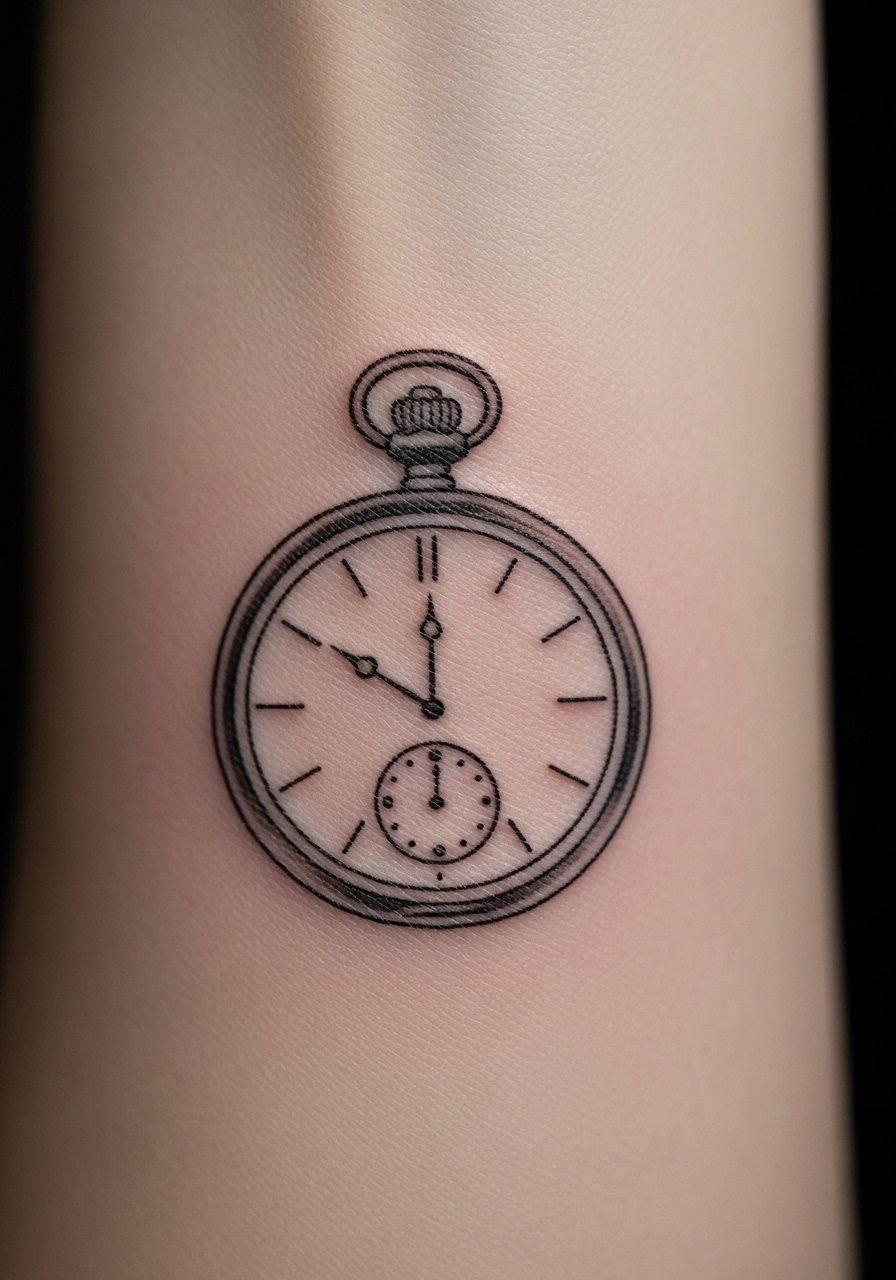
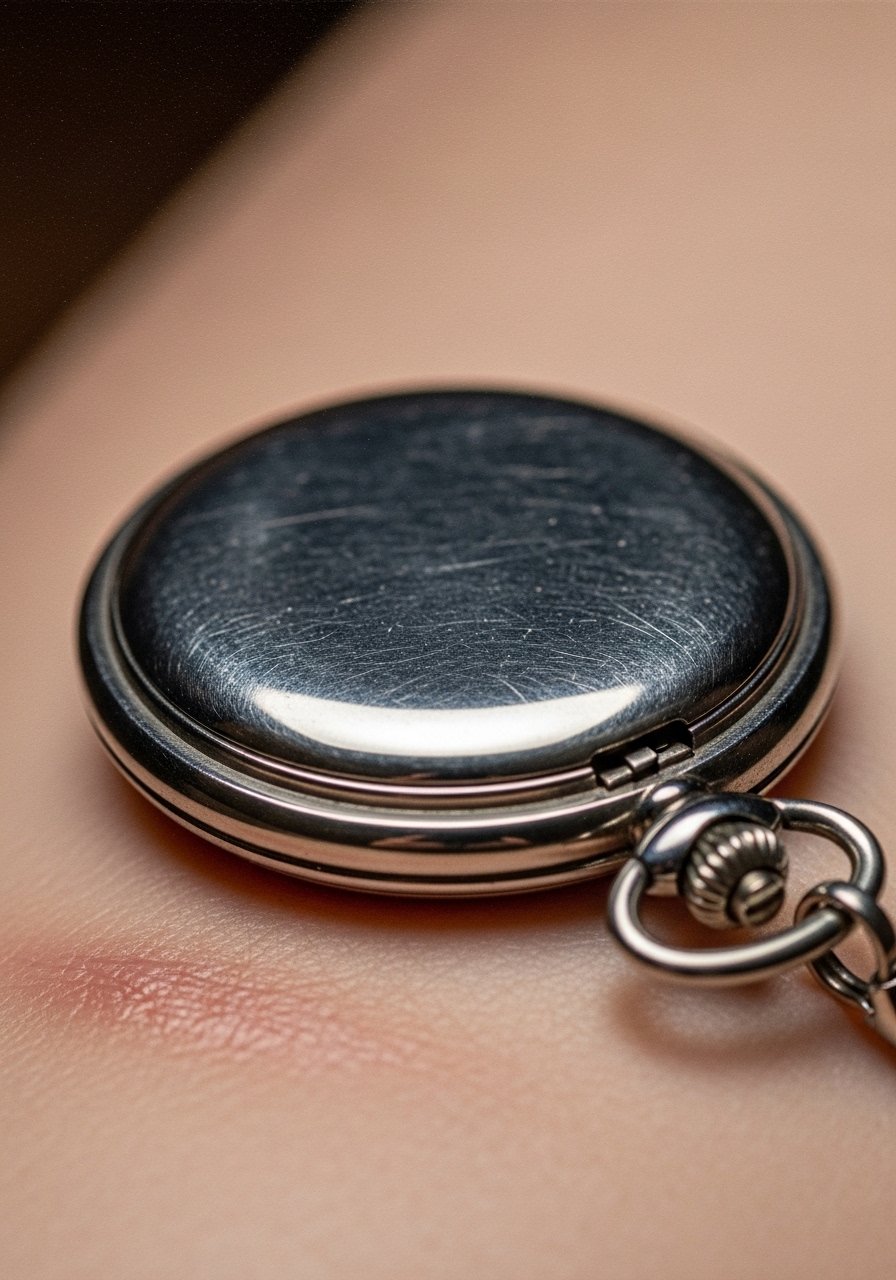
1. Fine Line Pocket Watch on Inner Wrist
Style/Technique: Fine Line / Illustrative
Pain Level: Low-Medium (3/10)
Session Time: 1-2 hours
Best For: First tattoo, subtle everyday reminder
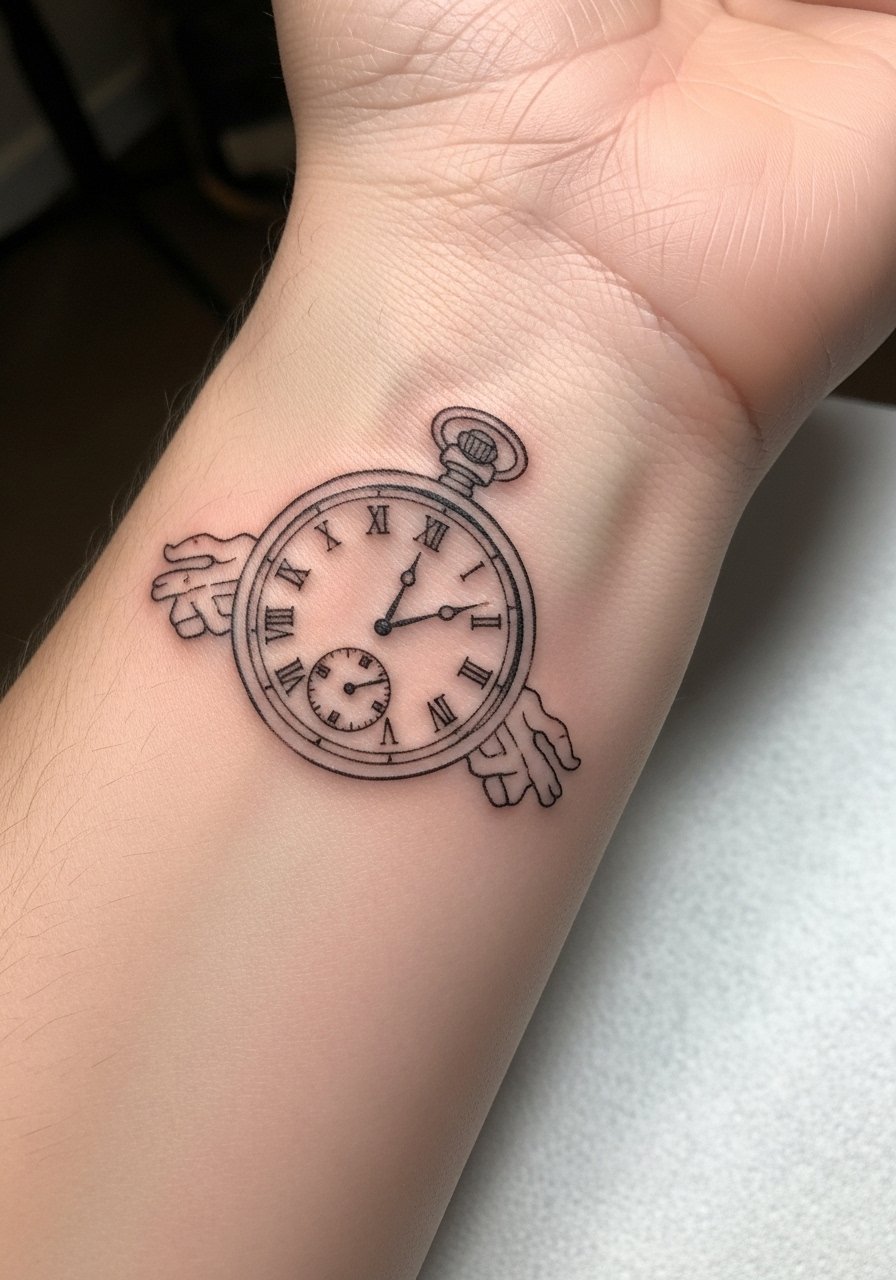
I fell for this style because it's delicate and personal—a pocket watch with a set time reads like a private message. On the inner wrist the visual is intimate and easy to hide with sleeves. Pain is manageable; the wrist is more sensitive than the forearm but not brutal. Expect surface healing in 2-3 weeks; fine lines can blur slightly over time, so ask for slightly bolder line weight if you want longevity. A common mistake is asking for hairline script and expecting it to stay razor-sharp for years—talk to your artist about reinforcing key lines. Look for an artist experienced in fine line and micro-detail; I've learned that steady hands and a portfolio of healed examples matter more than flash photos.
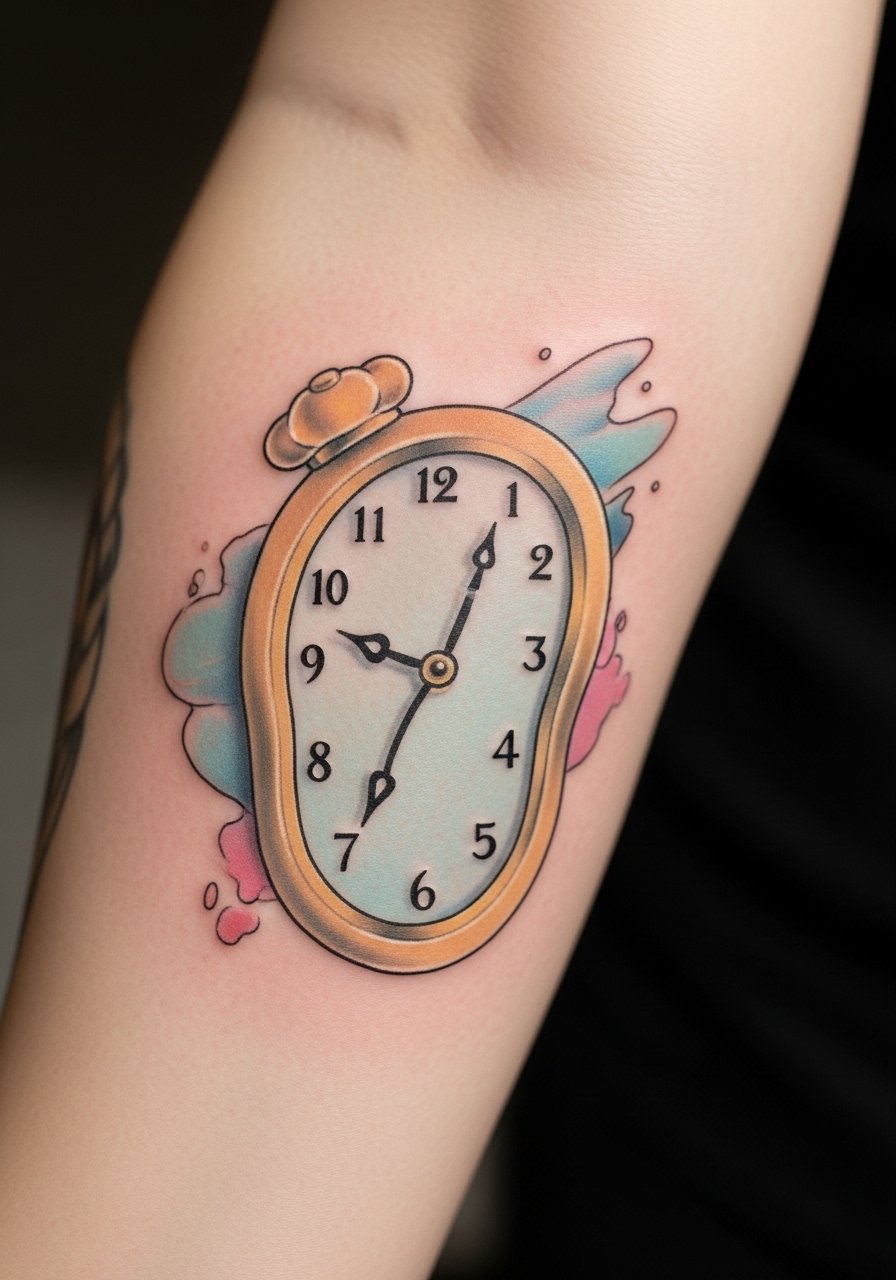
2. Melting Surreal Clock on Outer Forearm
Style/Technique: Surreal / Watercolor Accents
Pain Level: Medium (4/10)
Session Time: 2-4 hours
Best For: Statement forearm piece, visible art

I first saw a melting clock in a studio window and knew the surreal vibe would suit people who want symbolism over literal timekeeping. The forearm gives room for the drooping form and watercolor blends. Expect moderate pain; forearm bone is forgiving but shading can sting. Watercolor hues can fade faster than black, so plan touch-ups down the road. Avoid asking for color gradients too tiny—those details can bleed into skin texture as it heals. In a consultation, ask for photos of the artist's healed watercolor work and how they plan to anchor the design with black linework so the piece ages with structure.
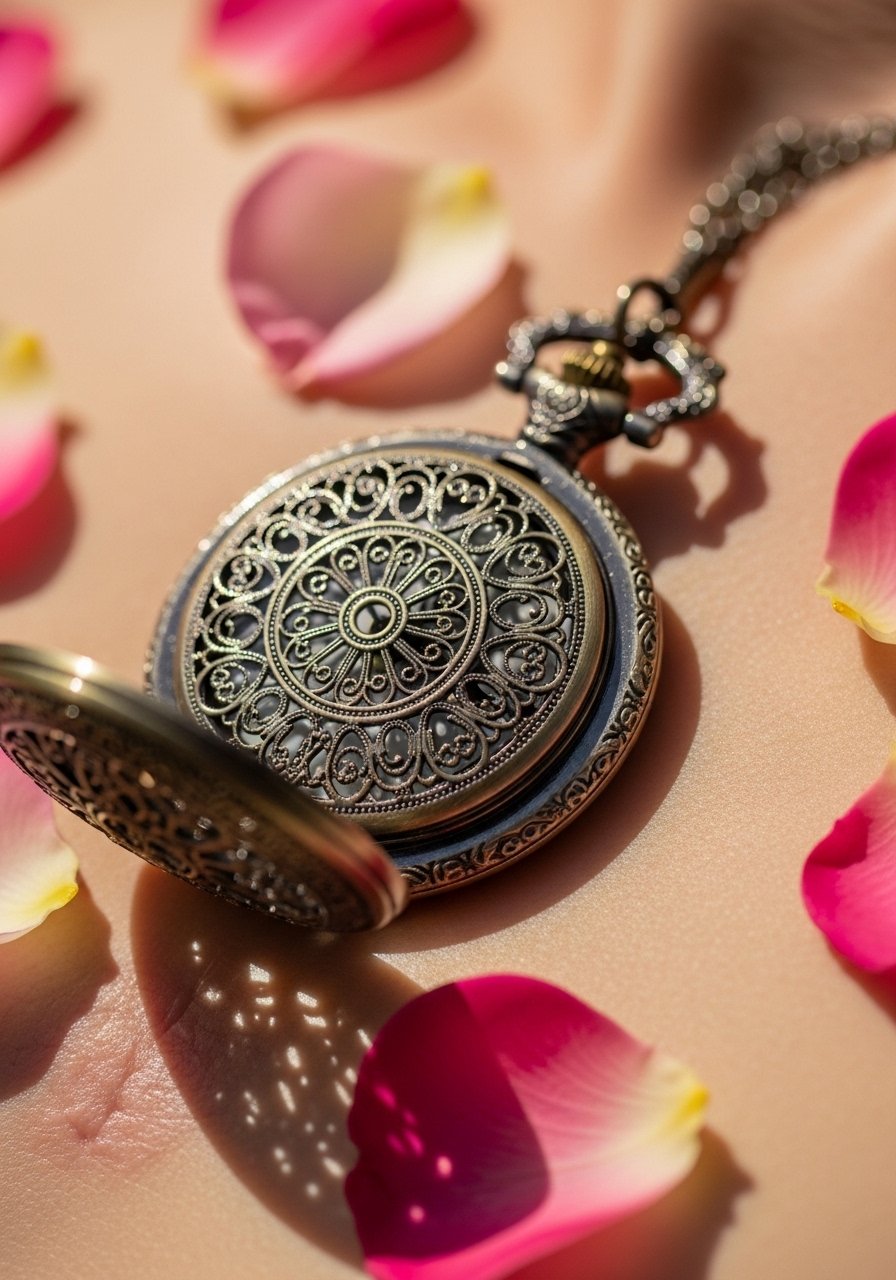
3. Victorian Pocket Watch with Roses on Chest
Style/Technique: Neo-Traditional / Micro-Realism Blend
Pain Level: Medium-High (5-6/10)
Session Time: 2-5 hours
Best For: Memorial pieces, directional chest art
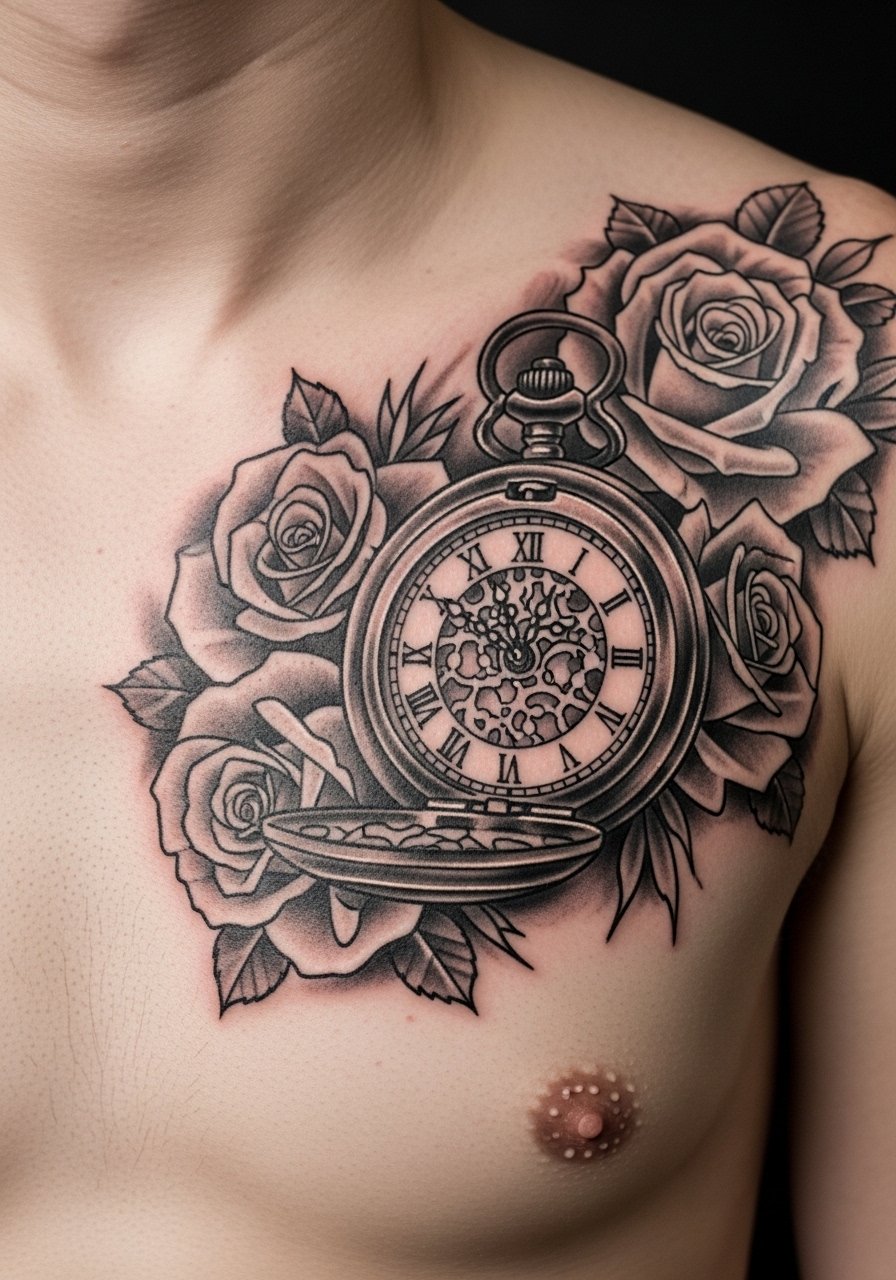
A Victorian pocket watch framed by roses reads like a family heirloom—I've seen this used for memorial tattoos or anniversaries. Chest placement makes it feel close to the heart, though it pushes into higher pain zones near the sternum. Healing takes longer if your chest rubs against clothing; expect tenderness for 1-2 weeks. The micro-realism detail looks incredible fresh but needs expert shading to keep depth as it ages. A common mistake is cramming too many tiny filigree elements—ask for simplified details that read as texture from a distance. I recommend finding an artist who shows healed chest work, because skin tension and movement change how ornate pieces settle.
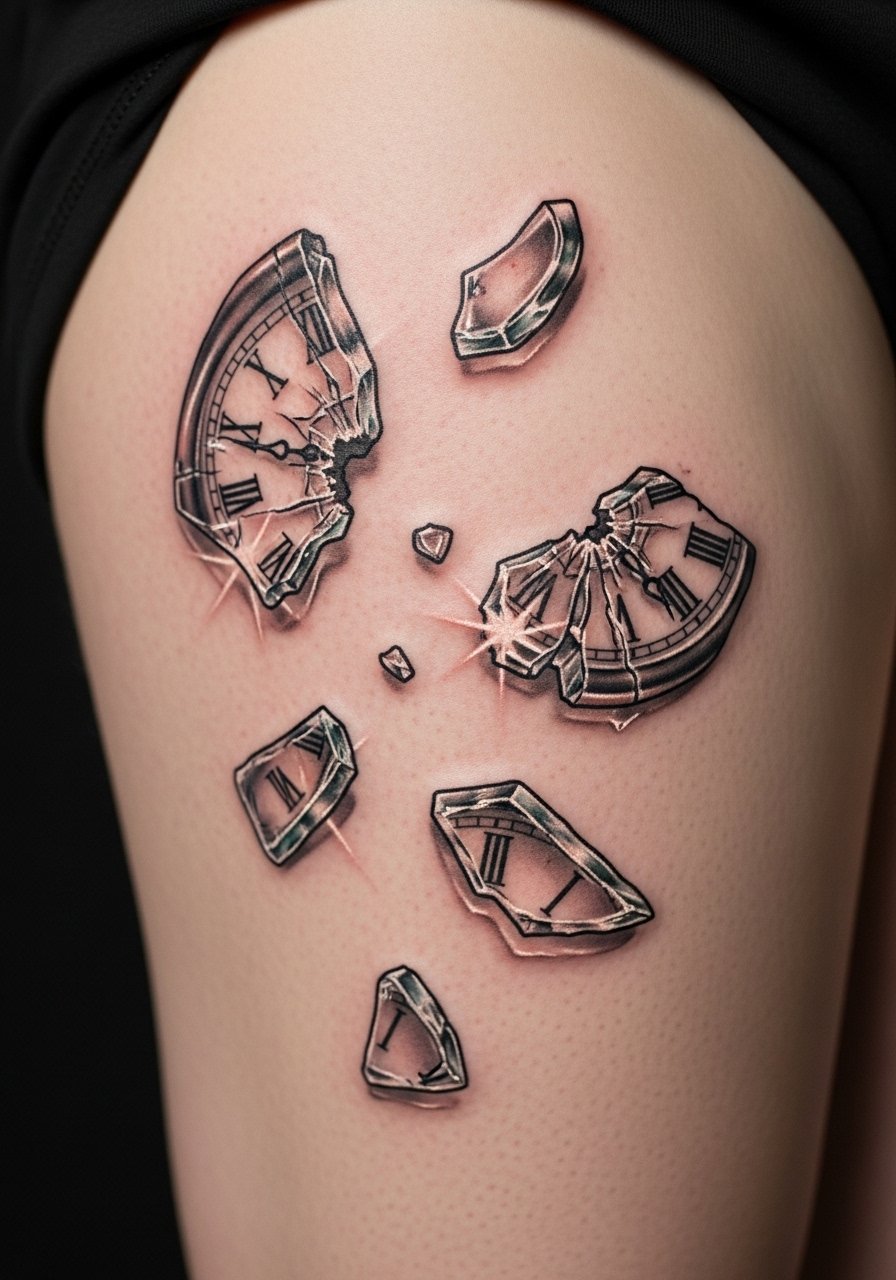
4. Broken Roman Numeral Clock on Ribcage
Style/Technique: Blackwork / Illustrative
Pain Level: High (7-8/10)
Session Time: 2-4 hours
Best For: Hidden statement pieces, dramatic placements
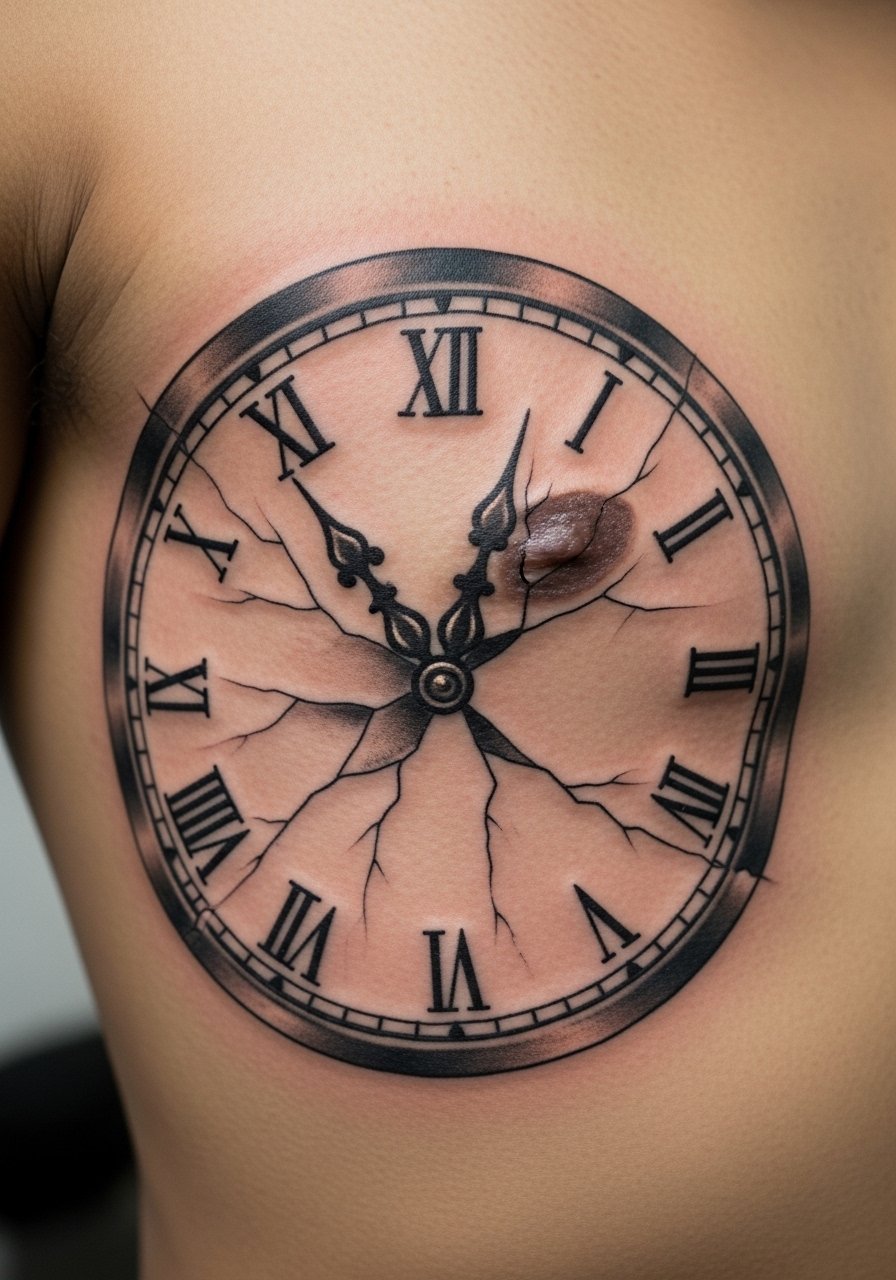
I've watched friends choose the ribs for dramatic tattoos—this area gives space for a large, fragmented clock that reads like time stopped. Pain is real on the ribs; be prepared. Healing is trickier because clothing rub and breathing stretch the skin. Blackwork holds up best here—heavy blacks age better than thin colored details. A mistake I see often is underestimating aftercare for ribs; avoid tight garments while healing. When consulting, ask how the artist plans to manage curvature so numerals don't warp as you move. This placement is powerful if you want something private with a strong visual language.
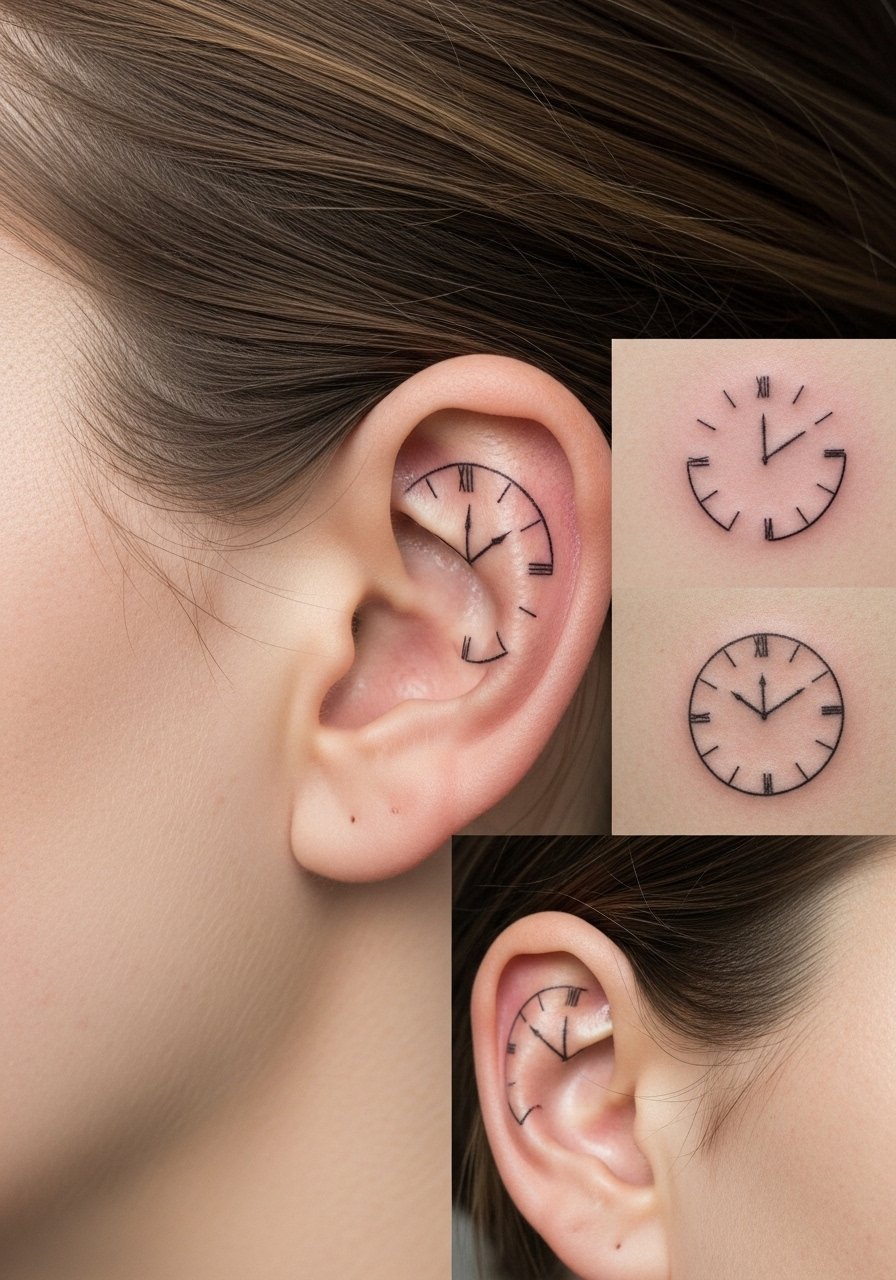
5. Minimalist Line Clock Behind Ear
Style/Technique: Minimalist / Single Needle
Pain Level: Medium (5/10)
Session Time: 30-60 minutes
Best For: Discreet symbolic tattoos, easy-to-hide
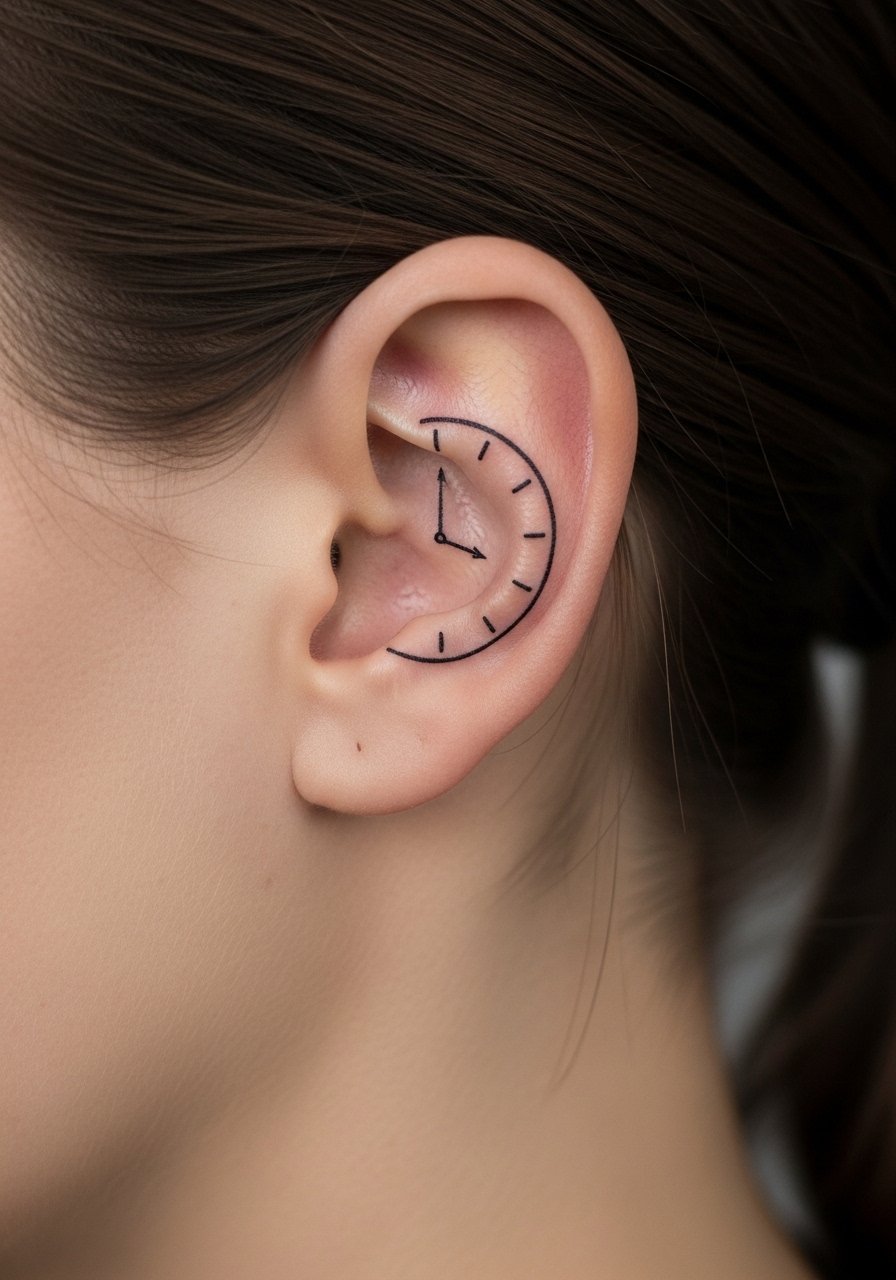
A tiny clock behind the ear is my go-to suggestion for people who want something discreet but meaningful. It's subtle—great for first-timers or those who need to hide at work. Pain can be sharper than you'd expect because the area is thin-skinned and near cartilage. Lines here must be bold enough to survive healing; ultra-fine single-needle work can lose definition, so discuss slightly heavier lines. Expect surface healing quickly but be careful sleeping on that side for a week. Artists I trust will show healed photos from similar spots—if they only show fresh photos, ask more questions.
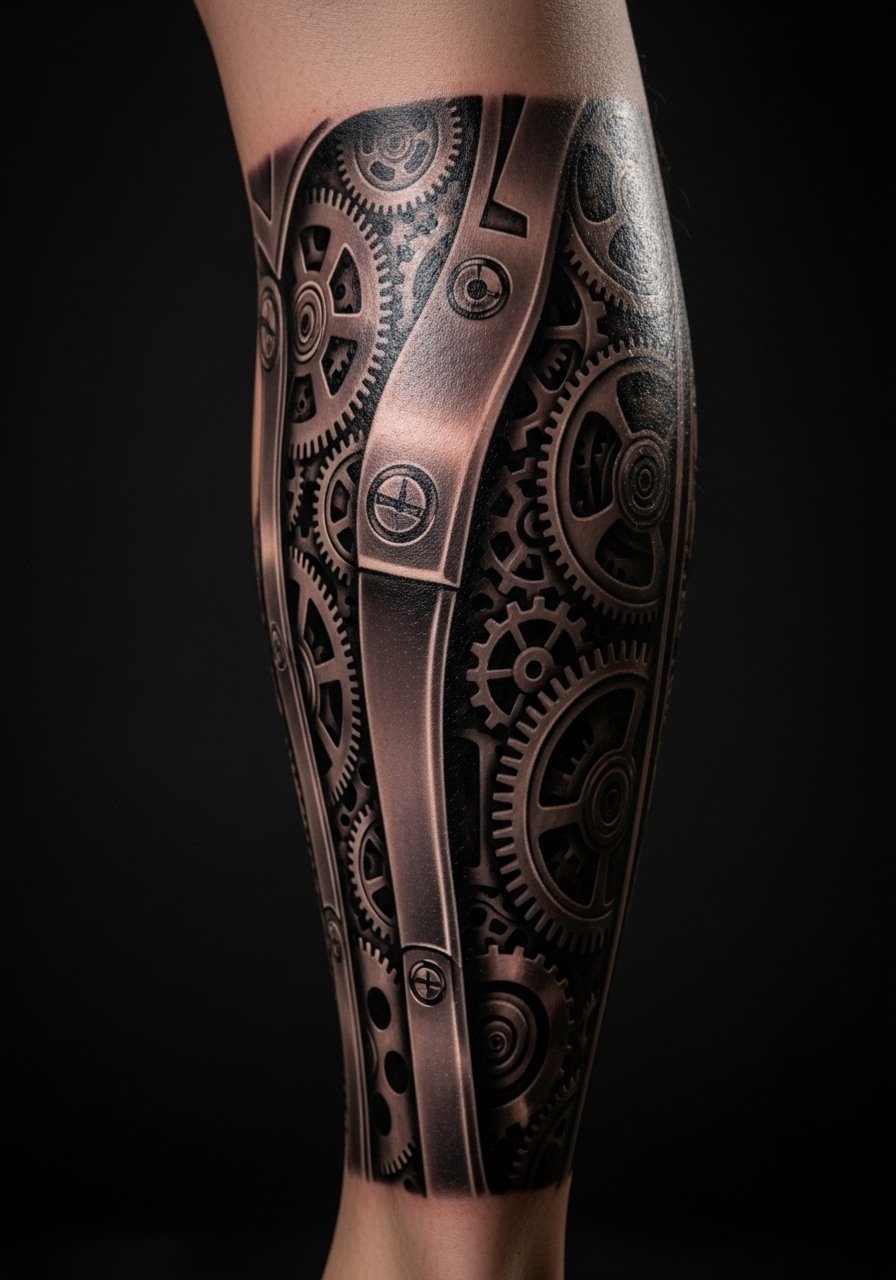
6. Blackwork Gear Clock on Upper Arm
Style/Technique: Blackwork / Mechanical
Pain Level: Low-Medium (3/10)
Session Time: 2-4 hours
Best For: Bold statement, ages well
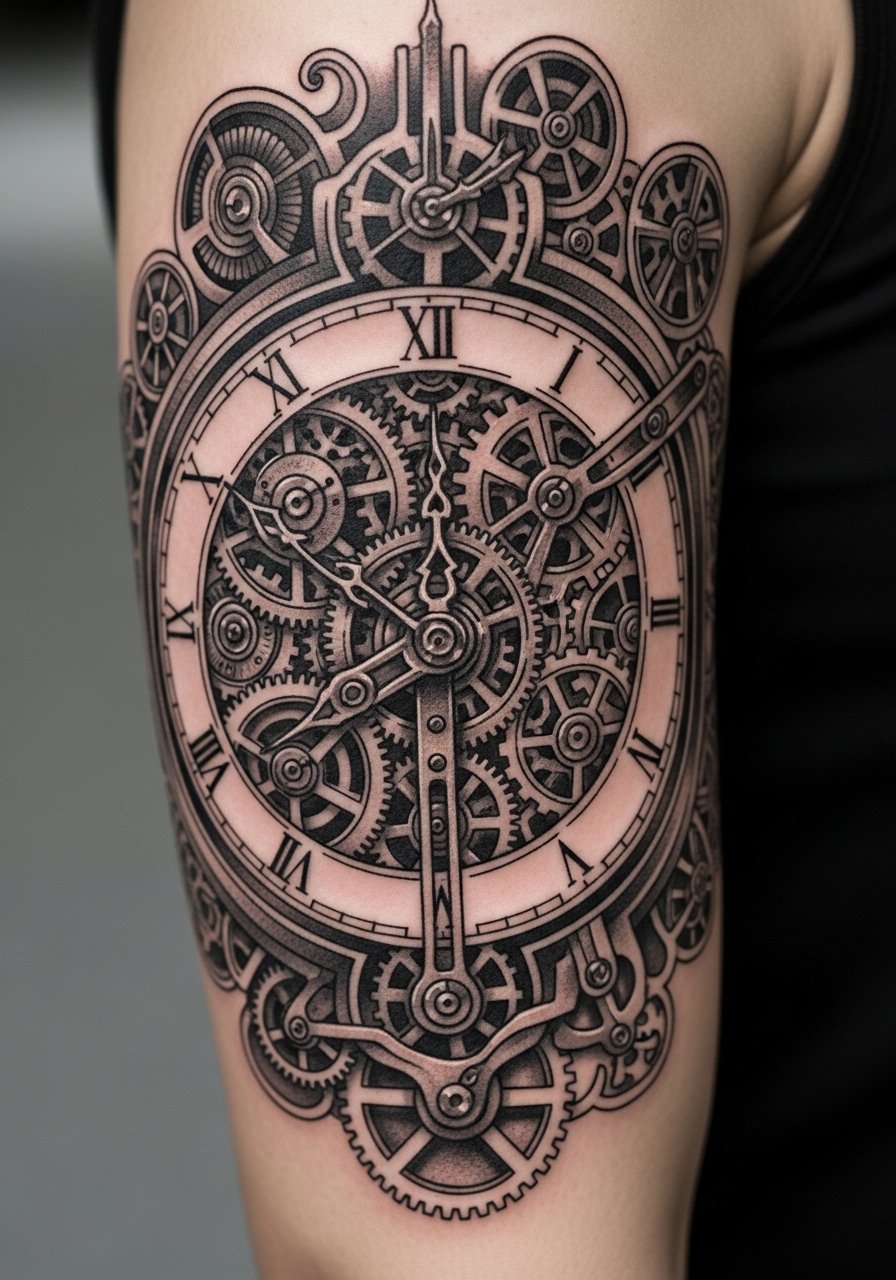
I recommend blackwork for longevity—solid blacks read clearly as tattoos age. A gear-heavy clock on the upper arm gives industrial aesthetic without being overly delicate. Pain is manageable; upper arm is one of the easiest spots. Black saturation protects against early fading and keeps contrast. One mistake is over-detailing tiny gears that blur together over time—ask your artist to ladder detail sizes so the main elements remain legible. I like artists who sketch mechanical parts to scale on your arm first so the composition reads both up close and from a distance.
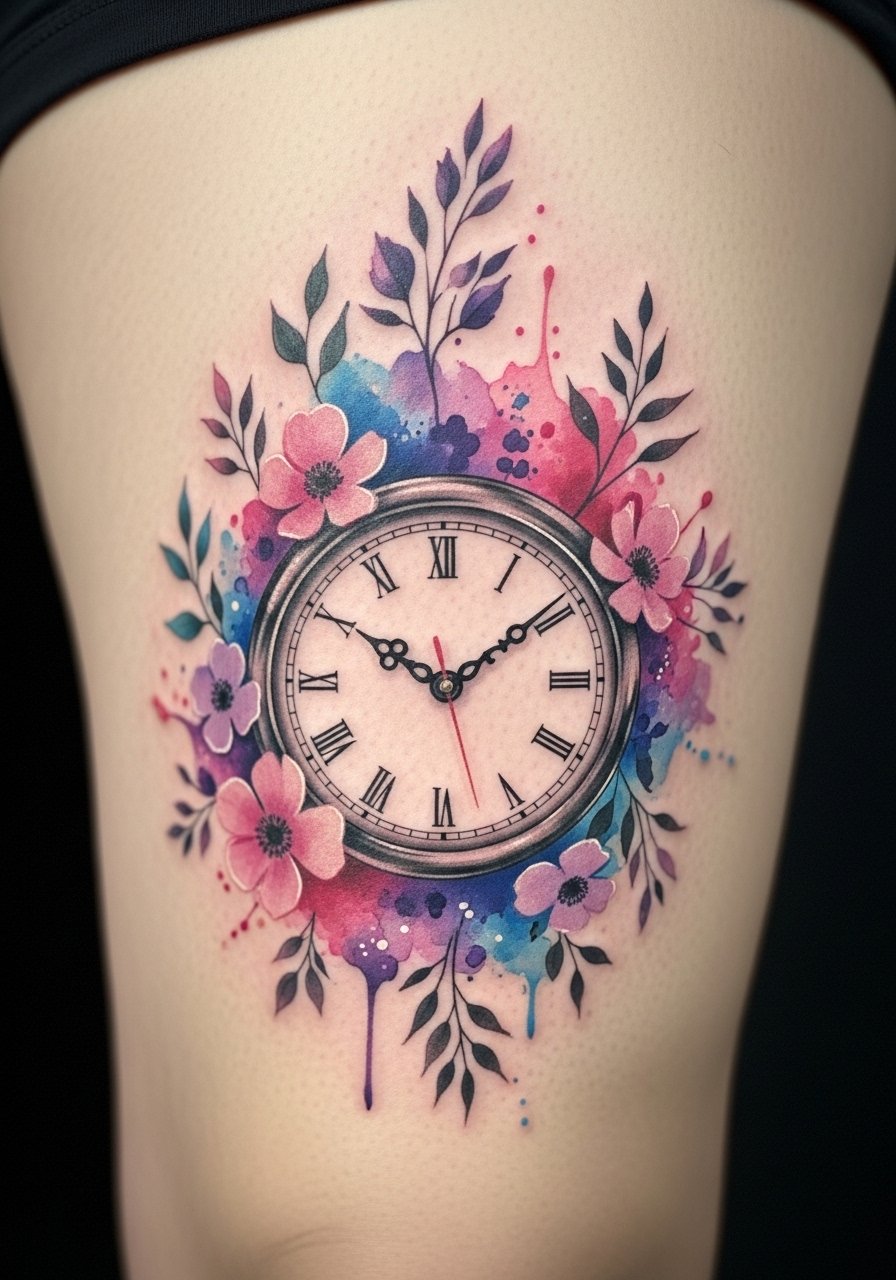
7. Watercolor Clock Bouquet on Thigh
Style/Technique: Watercolor / Illustrative
Pain Level: Medium (4/10)
Session Time: 2-5 hours
Best For: Feminine statement pieces, large color work
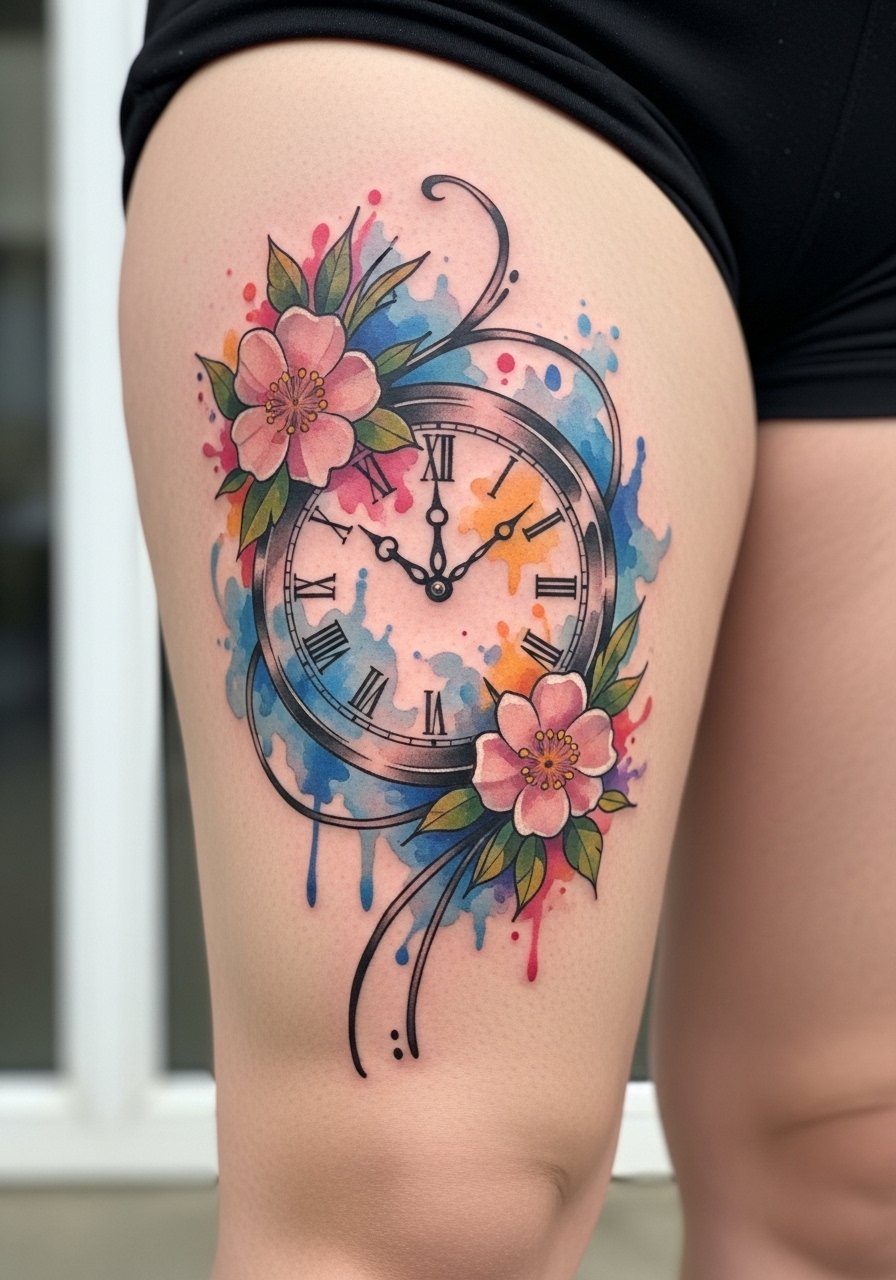
I often see watercolor clocks paired with florals for a softer take on time—thigh placement suits expansive compositions. Pain is moderate; thigh flesh is forgiving but large color fields mean longer sessions. Colors can soften with sun exposure, so plan for maintenance if you want saturation long-term. Avoid tiny color patches that depend on crisp outlines—watercolor relies on blended color fields supported by silhouette lines. Ask your artist about pigment choices and show them healed color pieces they've done on thighs; that insight matters more than flashy portfolio shots.
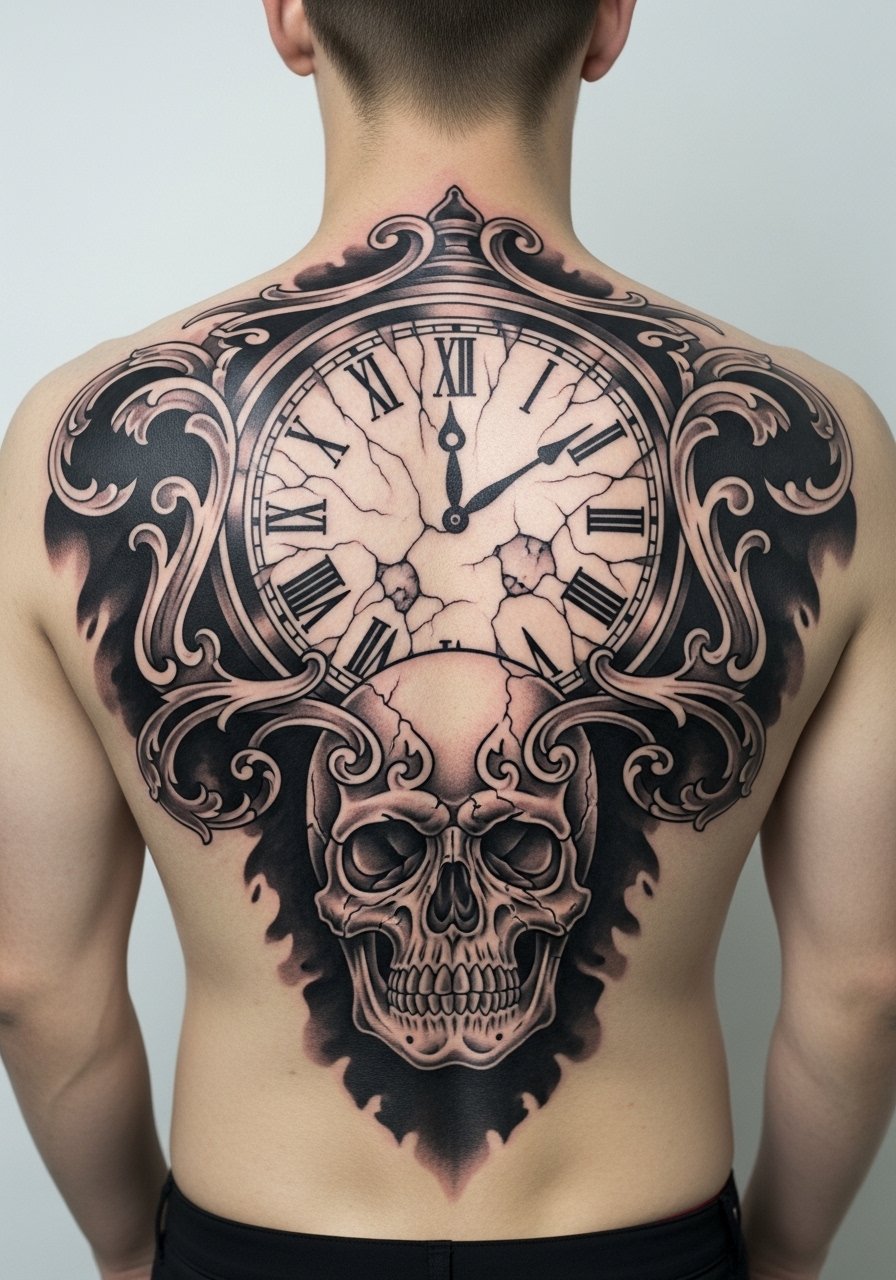
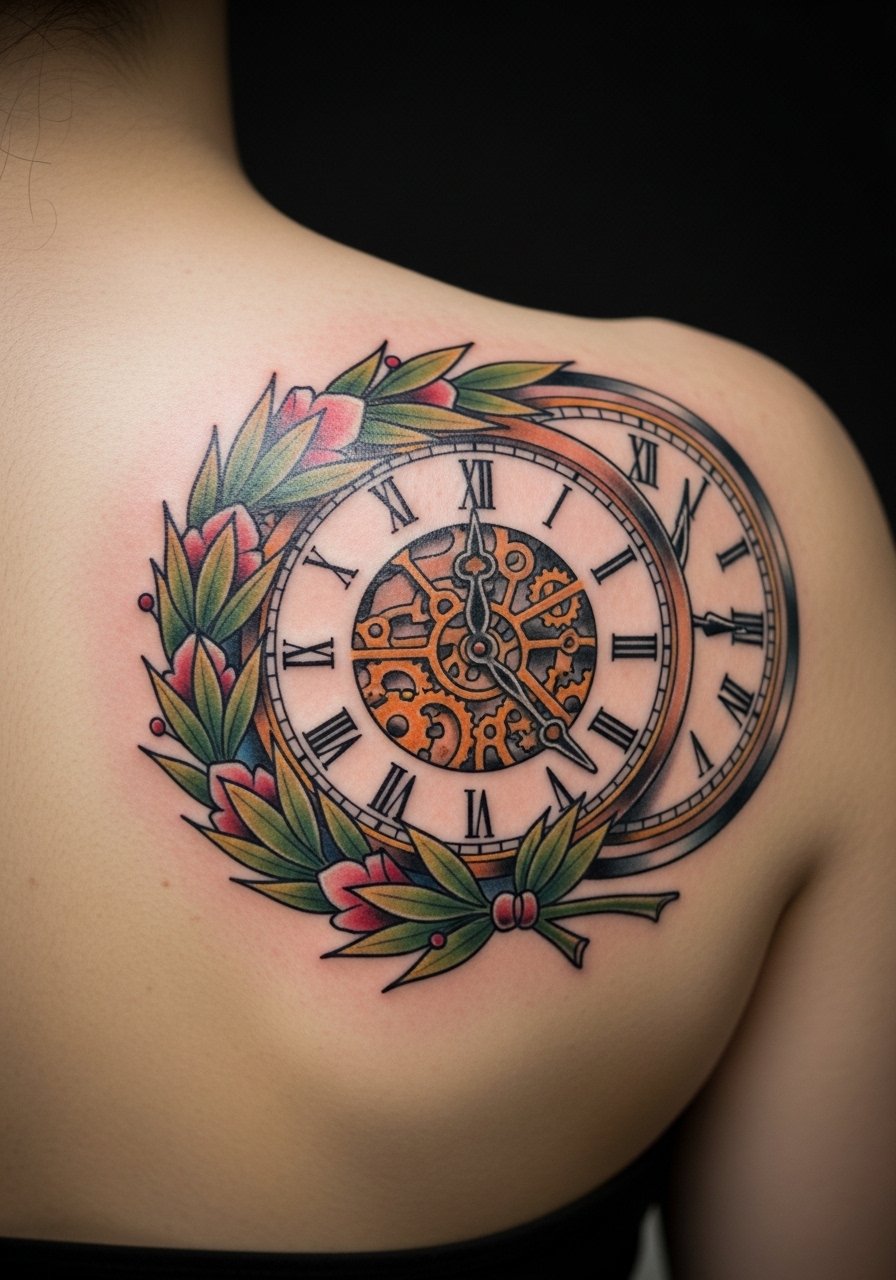
8. Neo-Traditional Clock and Skull on Upper Back
Style/Technique: Neo-Traditional / Bold Color
Pain Level: Medium (5/10)
Session Time: 3-6 hours
Best For: Statement back pieces, narrative imagery
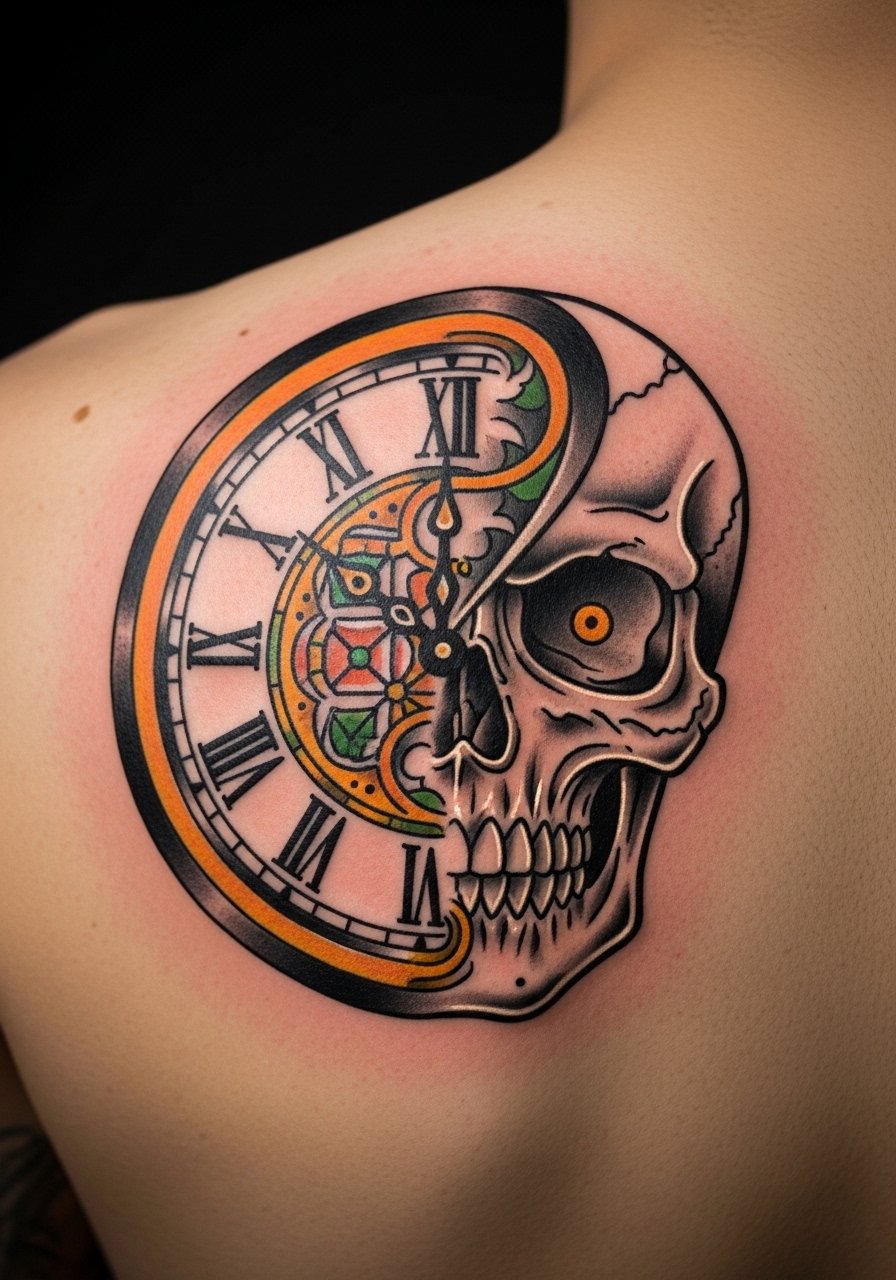
Combining a clock with a skull says mortality and the passage of time in a clear visual shorthand. Upper back gives room for scale and color depth. Expect medium pain—back muscles tolerate needle work but reach for higher pain near the spine. Strong outlines in neo-traditional work help the piece read well healed; flat color fills age predictably. A common error is overcrowding the composition—leave breathing room between elements so the skull and clock remain distinct as ink settles. I've seen artists recommend a test patch of color if you're unsure about saturation on your skin tone.
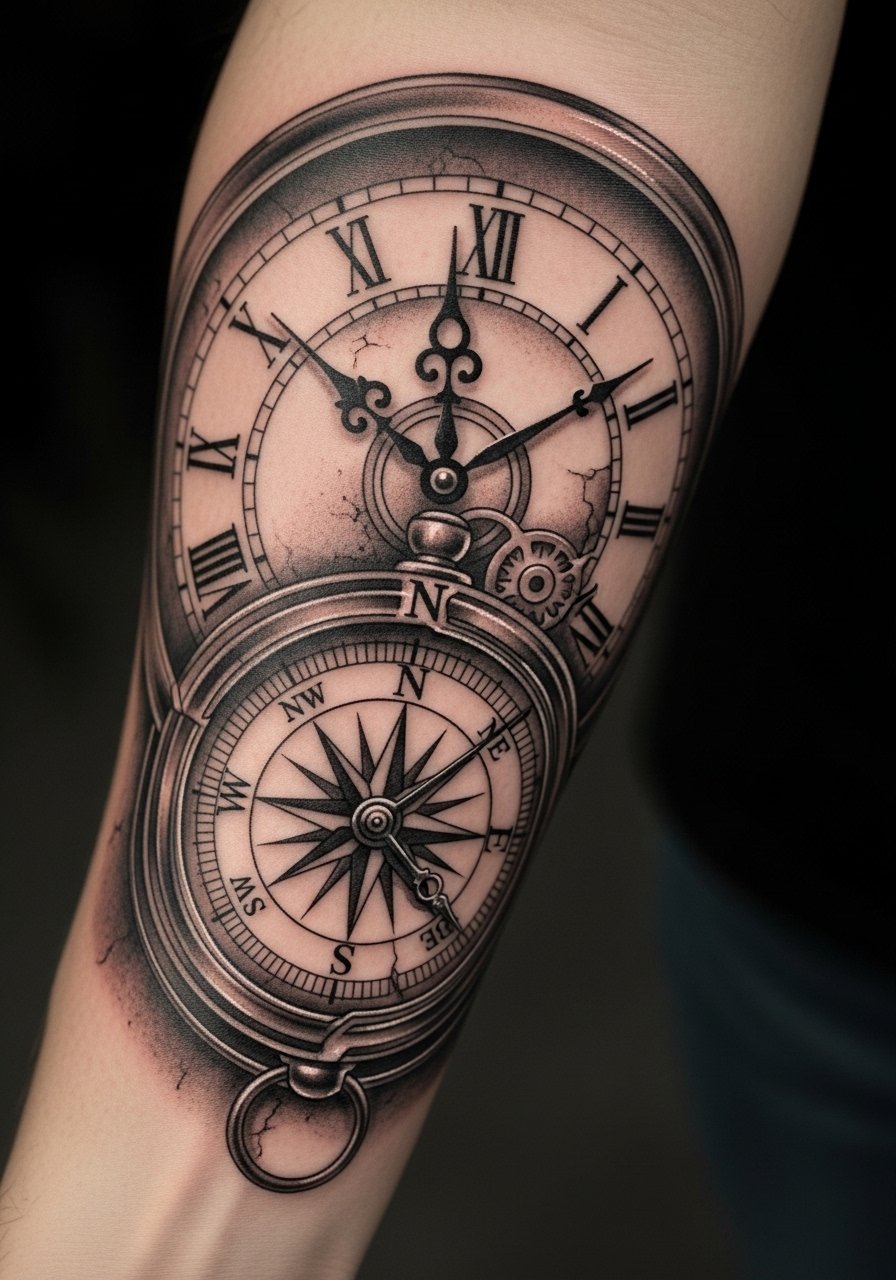
9. Micro-Realism Pocket Watch on Thigh
Style/Technique: Micro-Realism / Fine Shading
Pain Level: Medium (4/10)
Session Time: 3-5 hours
Best For: Healed detail, intimate realism

Micro-realism looks incredible when done right—I've followed artists who specialize in pocket watches rendered like photos. The thigh gives the canvas size for subtle highlights and metal reflections. Pain is moderate; inner thigh can be more sensitive. Realism requires impeccable shading and depth; small errors show up once healed. Mistake to avoid: picking an artist who only shows fresh photos—demand healed examples at least six months old. Expect the shine and contrast to mellow slightly as skin regenerates, but good shading planning preserves the 3D effect.
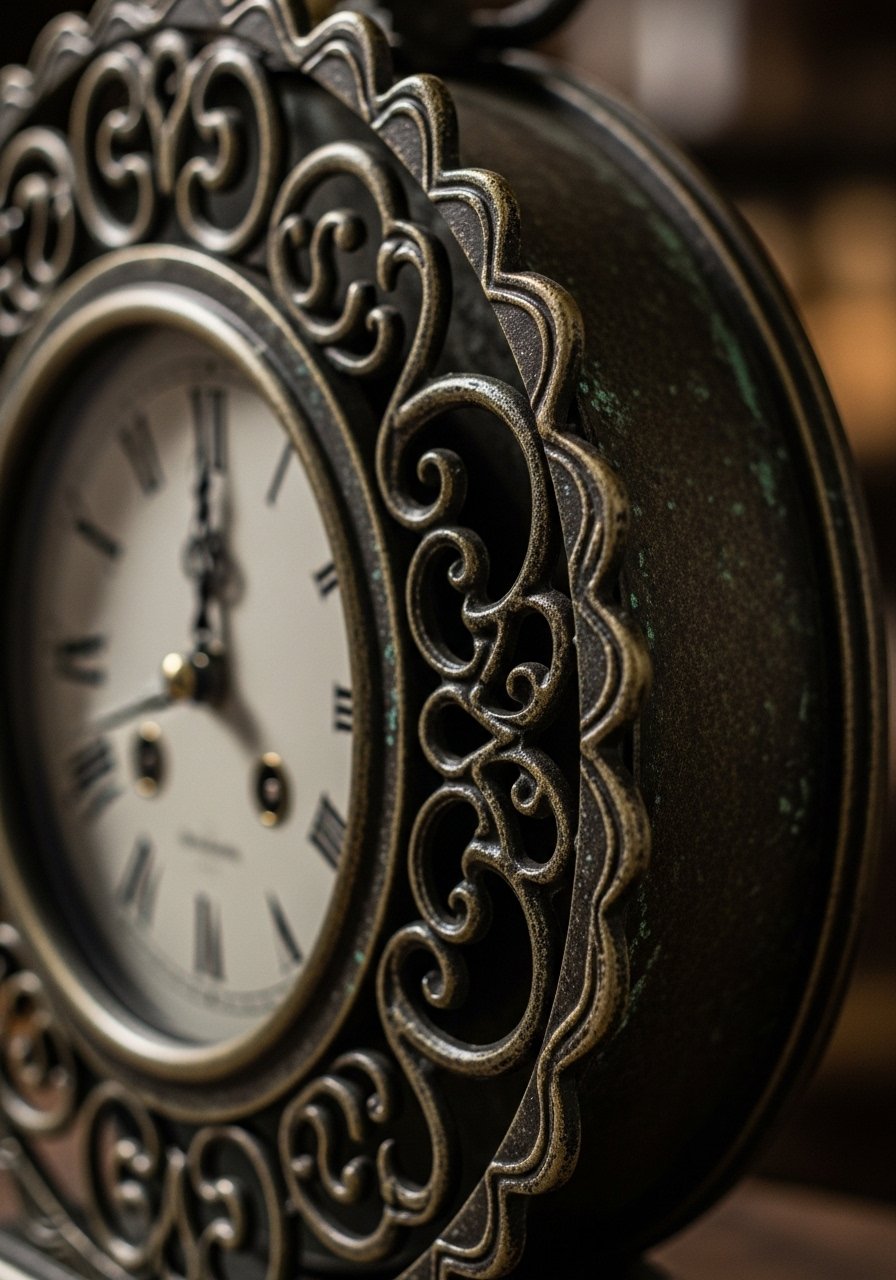
10. Antique Wall Clock on Back Shoulder
Style/Technique: Traditional / Illustrative
Pain Level: Low-Medium (3-4/10)
Session Time: 2-4 hours
Best For: Decorative shoulder pieces, readable from distance
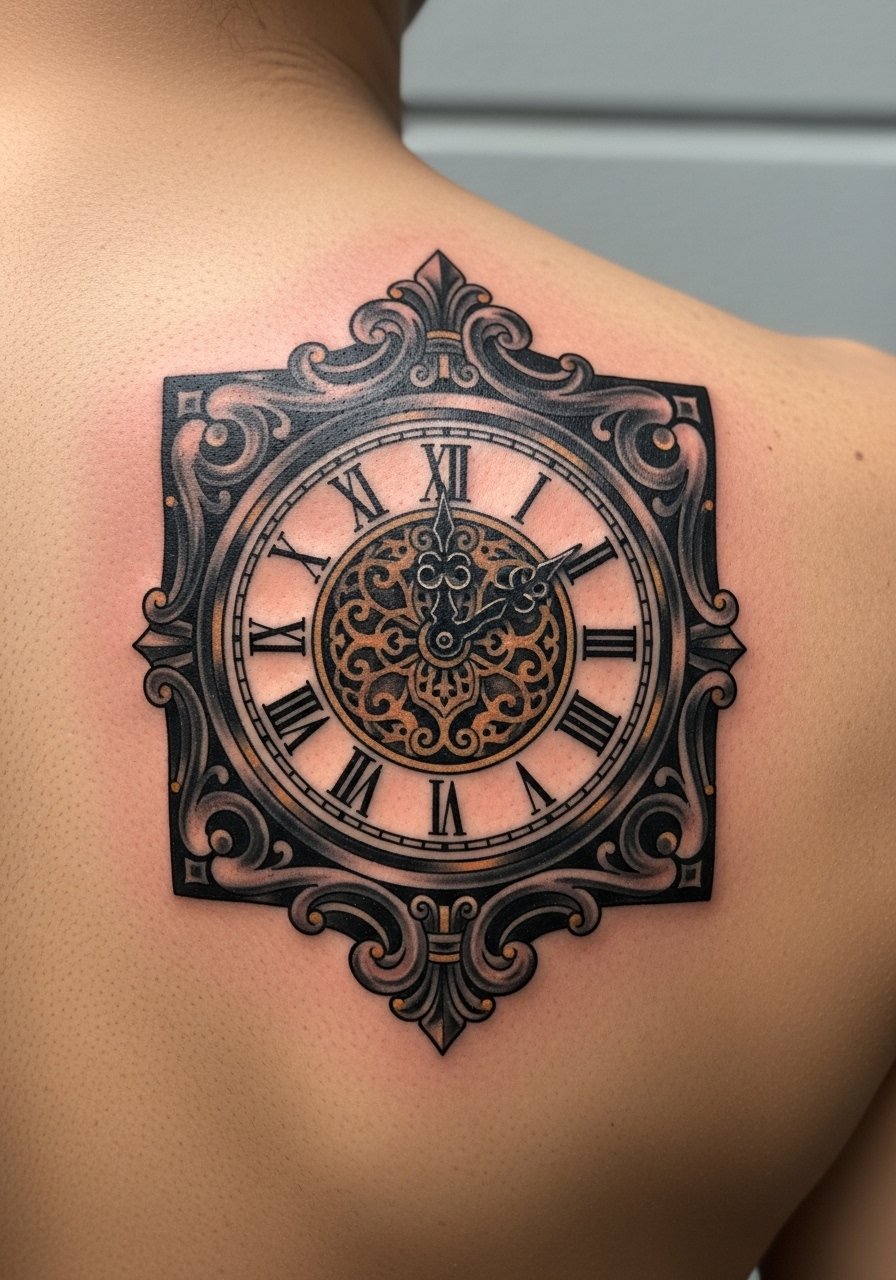
An antique wall clock has architectural charm and reads well on the shoulder where curvature adds drama. Pain is mild on muscle, and the piece ages predictably if the lines are bold. I've seen this design paired with banners or dates for a commemorative feel. A mistake is asking for too many small decorative flourishes that blend after healing; clearer shapes read longer. Check your artist's healed portfolio to ensure ornaments keep definition after at least a year.
11. Hourglass and Clock Combo on Sternum
Style/Technique: Illustrative / Symbolic
Pain Level: High (7-8/10)
Session Time: 2-4 hours
Best For: Personal symbolism, center-chest placement
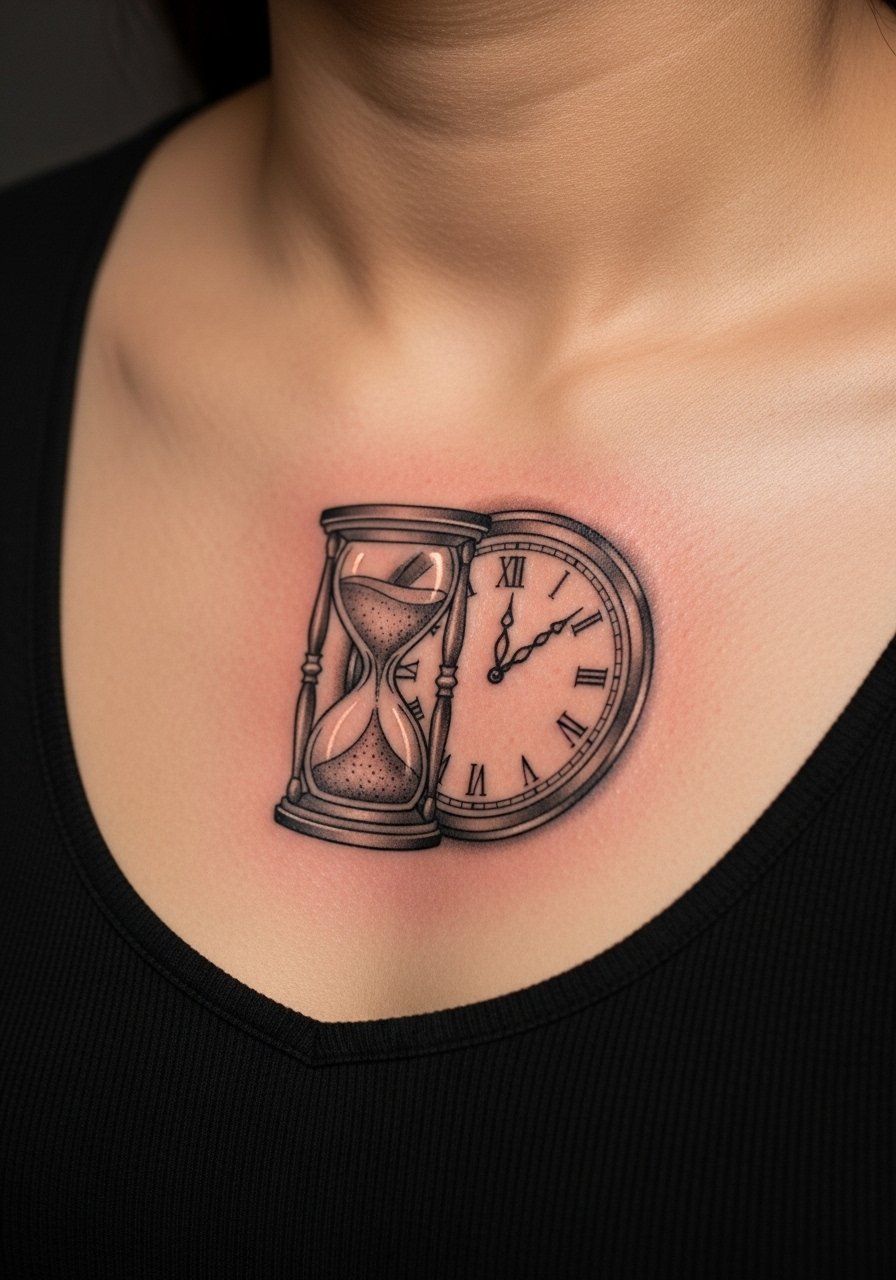
Putting an hourglass and clock together emphasizes time slipping away—sternum placement makes it literally over the center of your body. Pain here is higher due to thin skin and proximity to bone. Healing requires care because shirts rub the area; expect tenderness for a couple weeks. Visually this combo can be gorgeous, but tiny details near the sternum can blur—hold your artist to composition that balances linework and negative space. From what I've seen, darker anchors (bold outlines or shadow) help keep the design legible as it ages.
12. Compass and Clock on Outer Forearm
Style/Technique: Neo-Traditional / Functional Symbolism
Pain Level: Low-Medium (3-4/10)
Session Time: 2-3 hours
Best For: Travel symbolism, visible forearm art
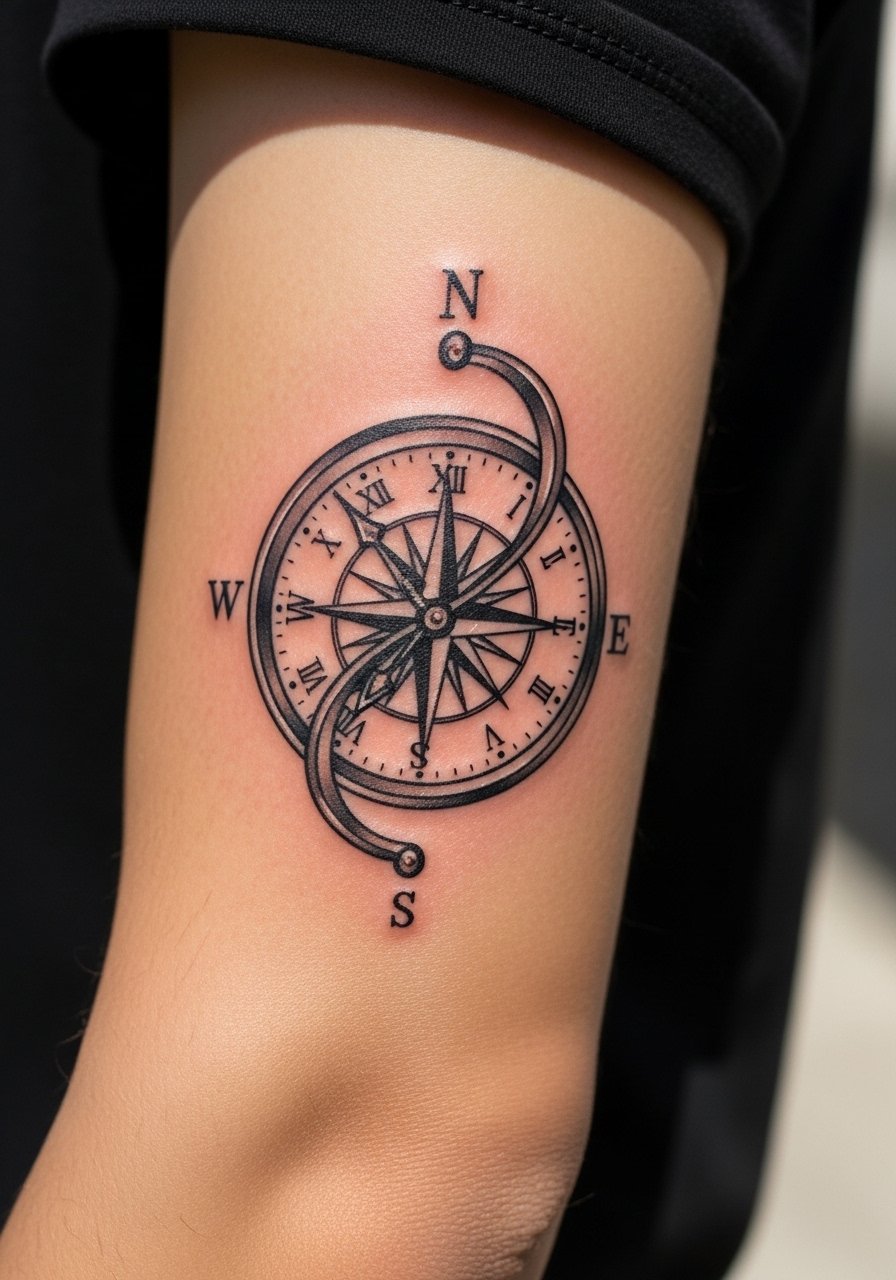
Combining a compass with a clock signals direction and timing—great for people who travel or mark a life pivot. Outer forearm is an easy-to-view spot and is relatively low pain. This combo holds up nicely if you avoid micro-detail in the compass points. The main mistake is overcomplicating the center—keep the clock face readable. I like artists who show healed forearm collages so you can see how elements sit together after movement and daily wear.
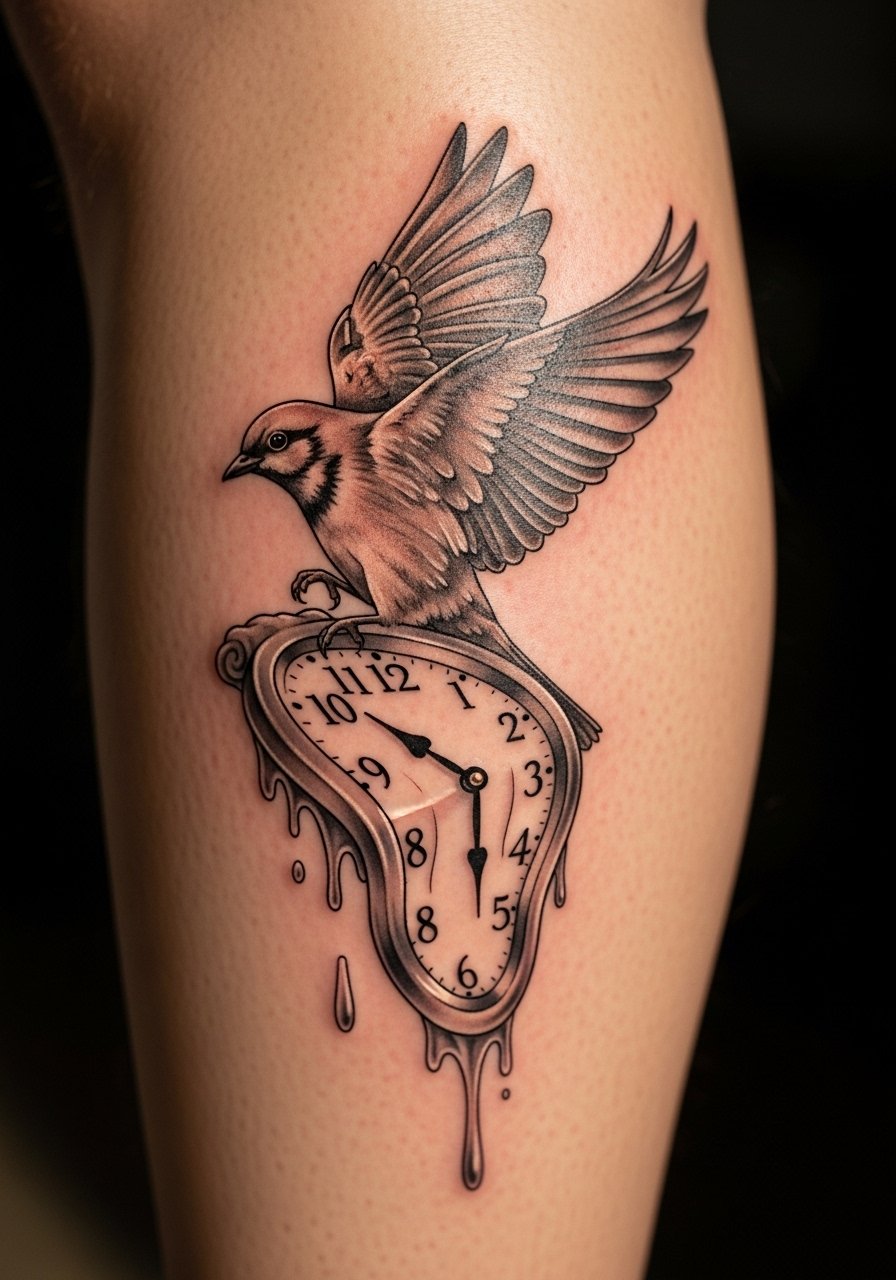
13. Melting Clock with Bird on Calf
Style/Technique: Surreal / Fine Line with Color Accent
Pain Level: Medium (4/10)
Session Time: 2-3 hours
Best For: Story-driven leg pieces, visible in shorts
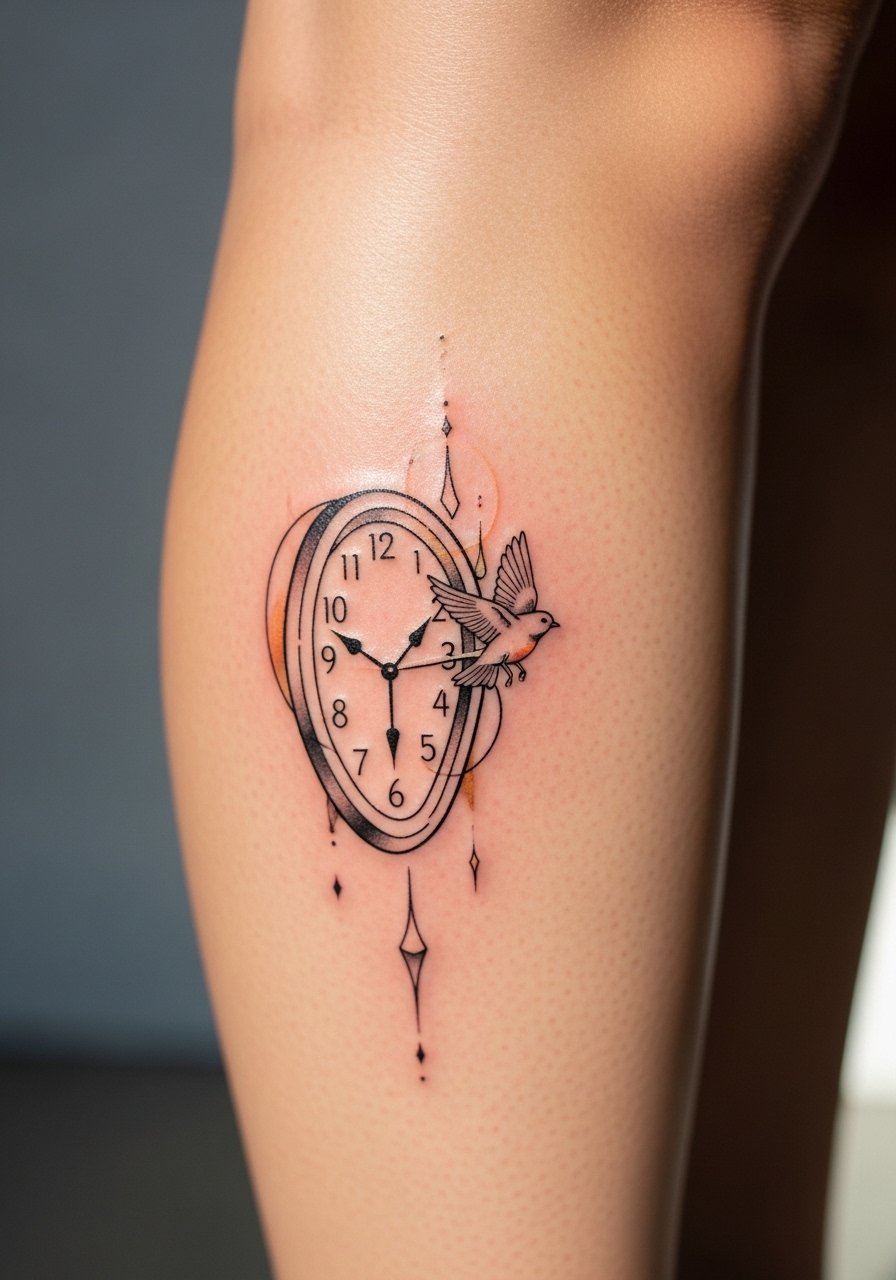
A melting clock releasing a bird reads like liberation from time—it's poetic in images I keep returning to. Calf placement allows movement and visibility. Pain is tolerable; calves are fleshy and heal reliably. Fine lines combined with a small color bird can create focal contrast, but be wary: tiny feathers and watercolor wings can fade faster. Don't cram narrative elements too closely—let the bird breathe. Ask to see healed leg pieces to set expectations for color longevity and line clarity.
14. Clock Face with Floral Wreath on Shoulder Blade
Style/Technique: Illustrative / Delicate Color
Pain Level: Low-Medium (3/10)
Session Time: 1.5-3 hours
Best For: Feminine-back pieces, elegant statements
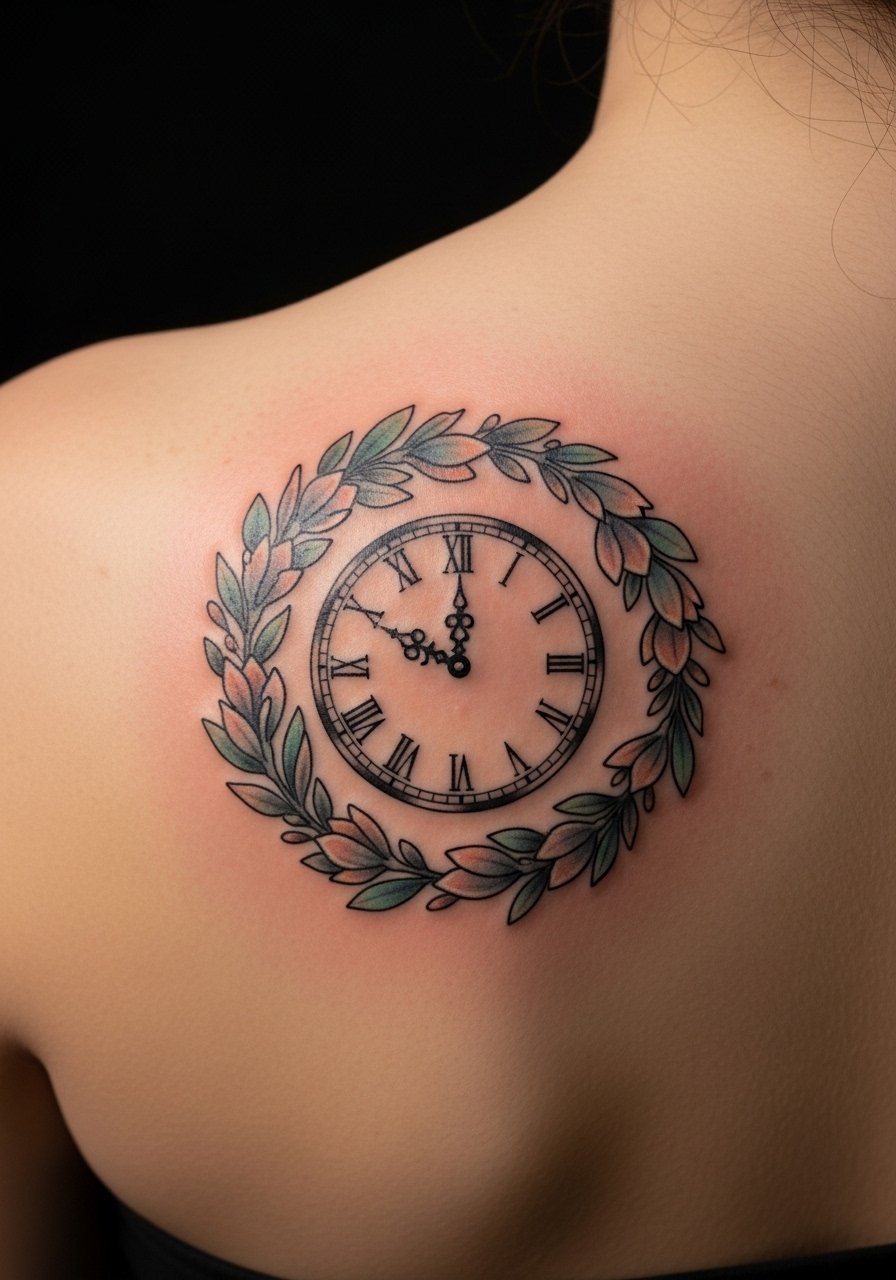
This is one of my favorite subtle shoulder pieces—floral wreaths soften the mechanical feel and photograph beautifully. Shoulder blade skin is forgiving and heals well if you avoid heavy friction. Expect modest pain and predictable healing. Mistakes I see: choosing flowers with tiny petal veins that don't translate into healed ink. Ask your artist for slightly simplified petal shapes so the wreath remains crisp over time. Artists who photograph healed back work are invaluable for setting expectations.
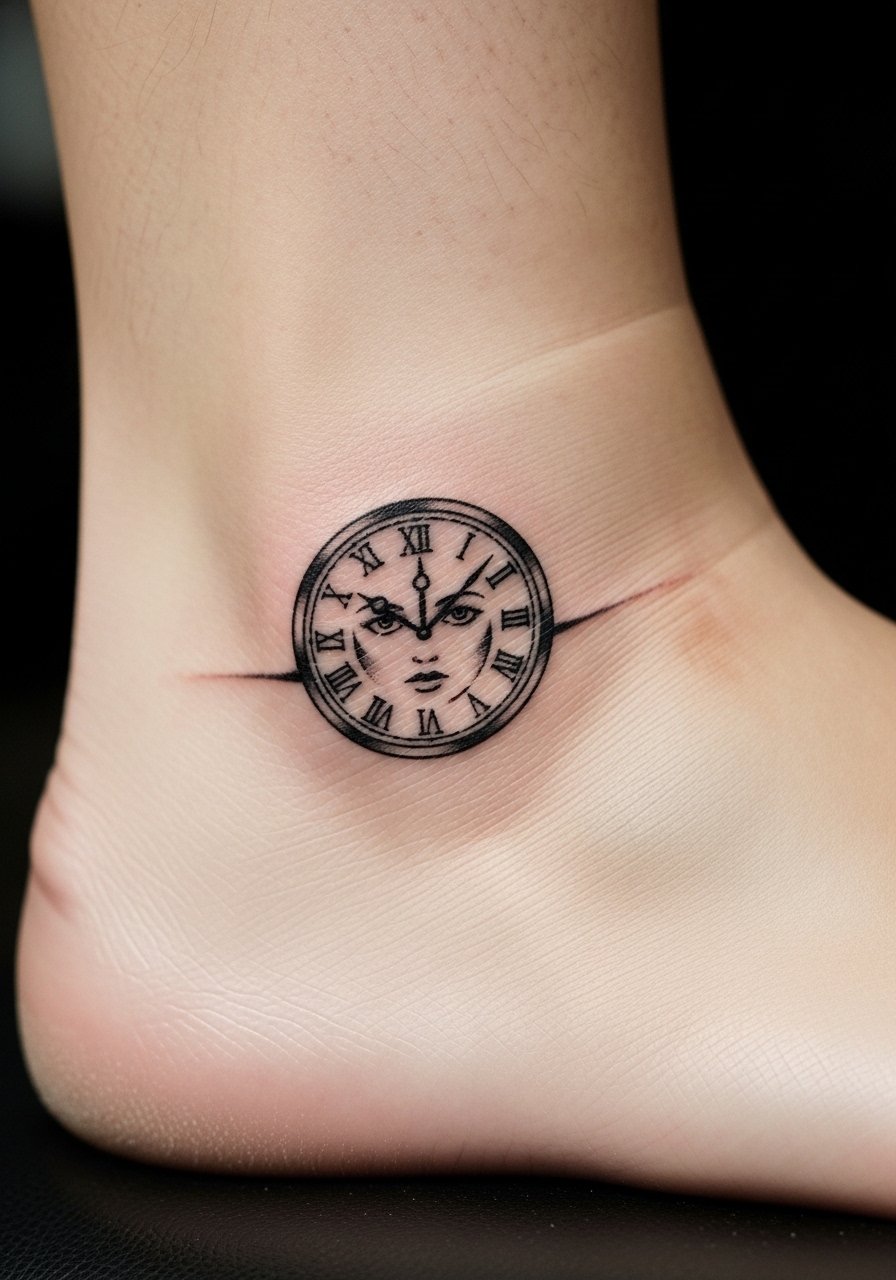
15. Small Minimal Clock on Ankle
Style/Technique: Minimalist / Tiny Blackwork
Pain Level: Medium (5/10)
Session Time: 30-60 minutes
Best For: First tattoos, easily hidden designs
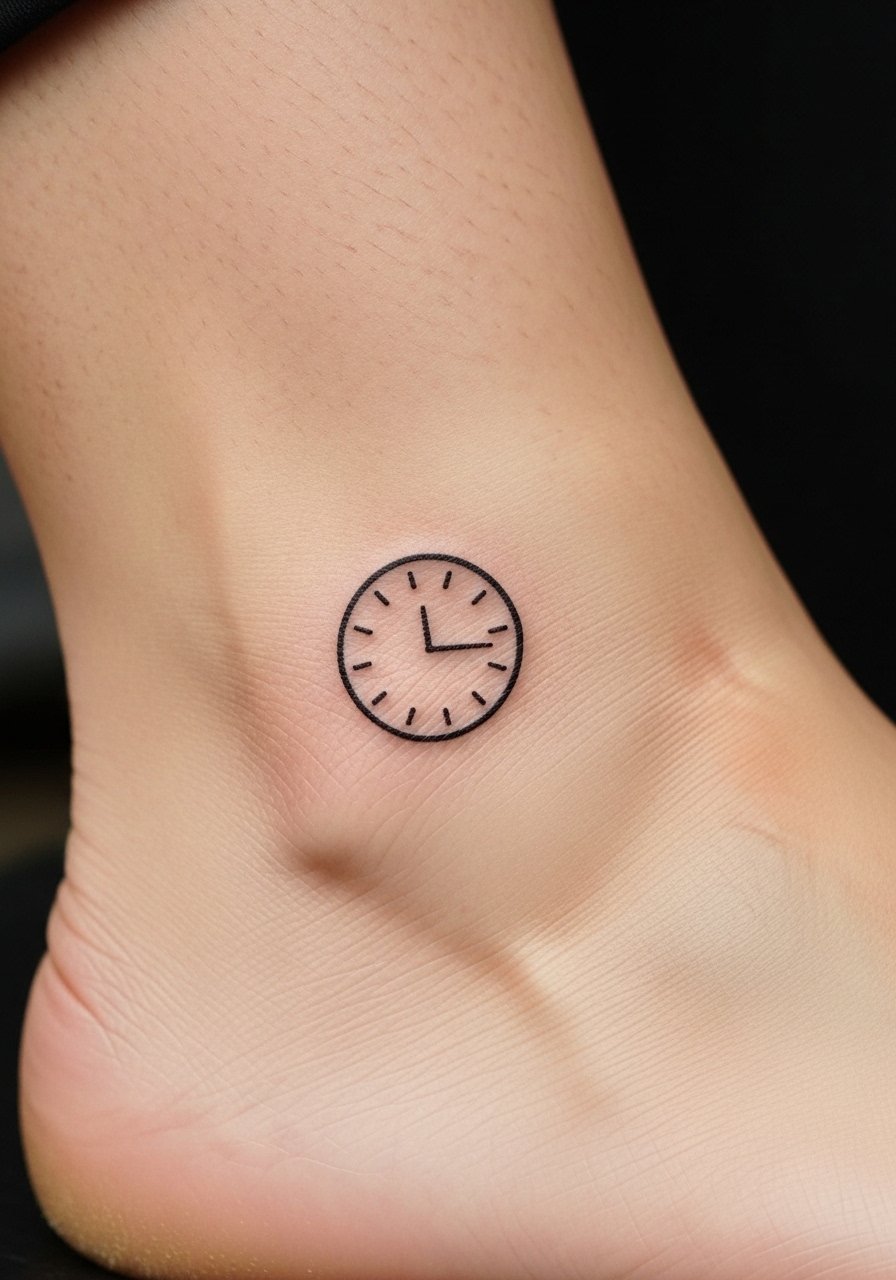
Ankle tattoos look delicate but can be surprisingly painful—thin skin and bone make it sting. Small minimal clocks here are an easy way to test tolerance while keeping meaning. Longevity is the issue: ankles get rubbed by socks and shoes, so fine points can blur. The common error is insisting on needle-thin lines; instead, choose a slightly bolder outline to ensure the clock still reads after a year. I always advise clients to see healed ankle examples from their artist before committing.
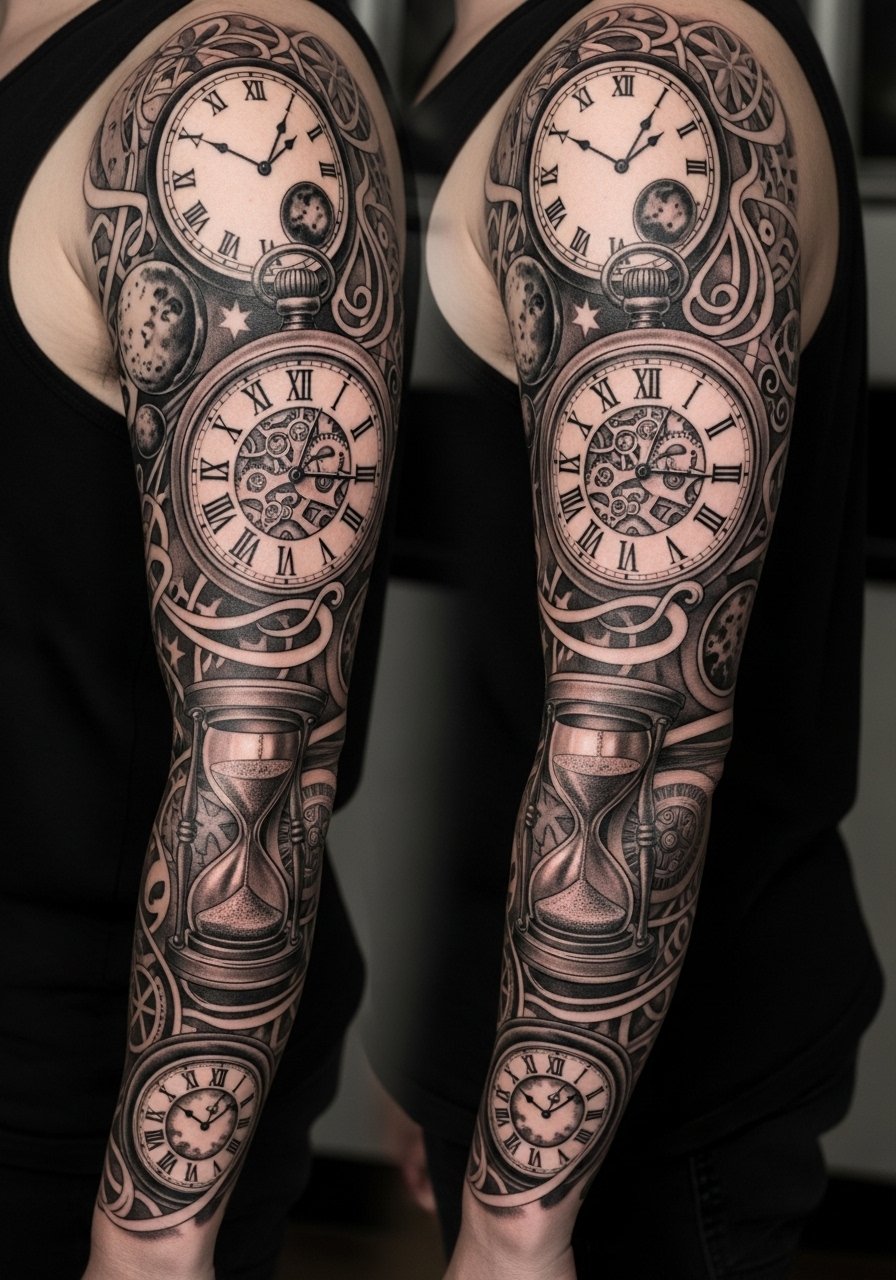
16. Full Sleeve Timepiece Collage on Arm
Style/Technique: Mixed Styles / Collage
Pain Level: Medium-High (5-7/10)
Session Time: Multiple sessions over months
Best For: Collectors, large narrative work
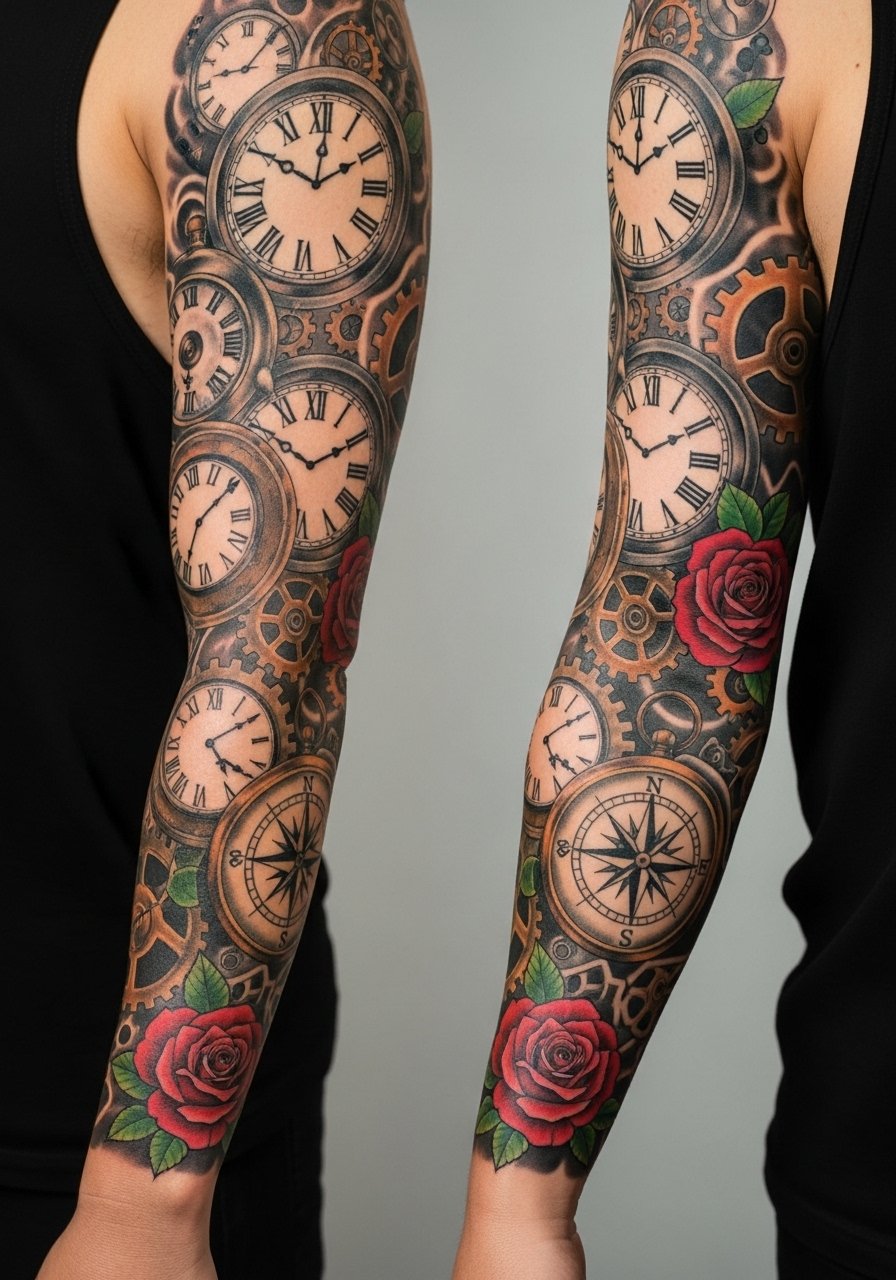
Sleeves let you tell a long story with multiple clocks, dates, and motifs. I’ve sat through consultations where people map life chapters across the arm. Expect multiple sessions; pain varies with placement on the arm. Aging is manageable if the artist plans visual hierarchy—main elements with thicker outlines, supporting details softer. Mistake to avoid: mixing too many unrelated styles without a unifying palette or anchor motifs. Pick an artist who sketches sleeve flow and shows healed full-sleeve photos so you know how the collage reads in motion.
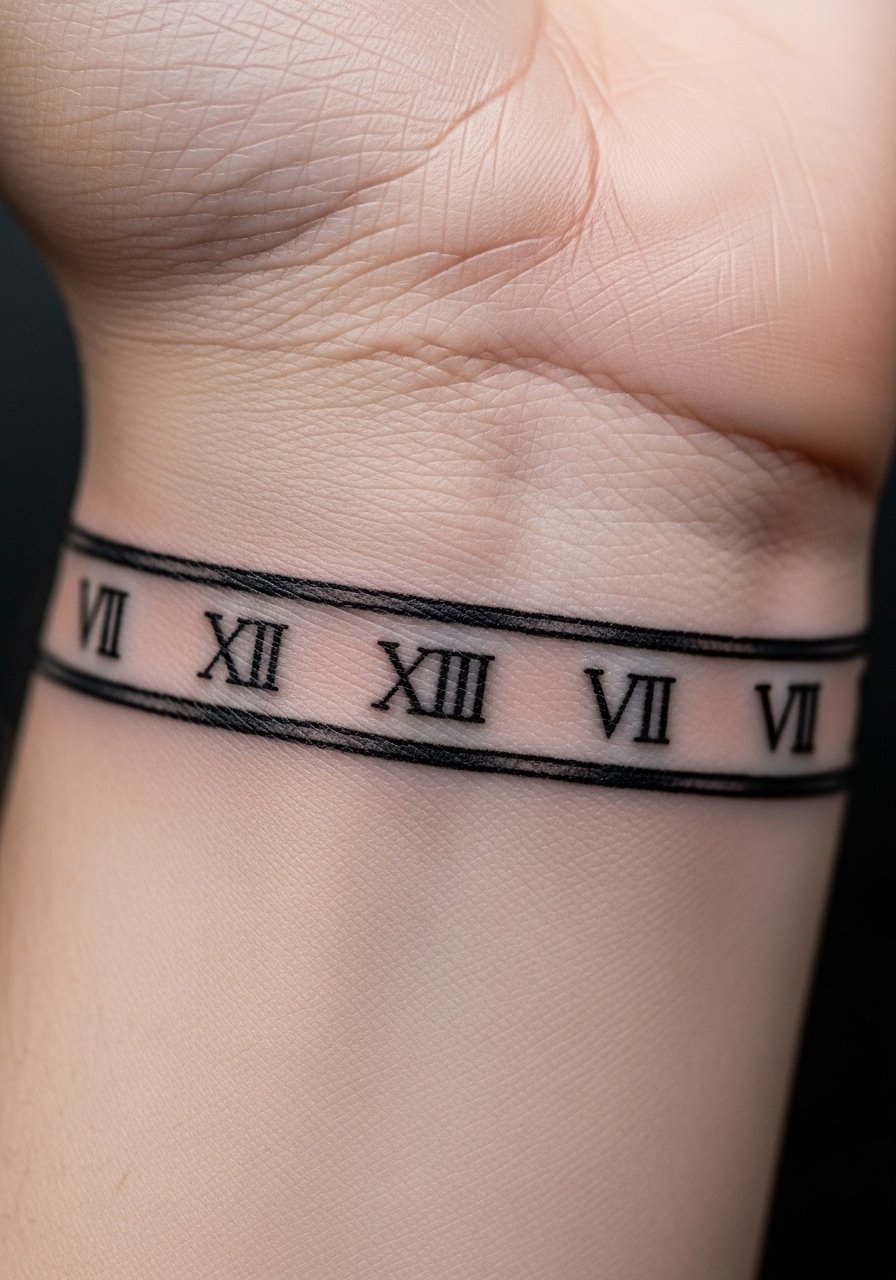
17. Roman Numeral Band Around Wrist
Style/Technique: Minimalist / Numeric Band
Pain Level: Medium (4-5/10)
Session Time: 1-2 hours
Best For: Symbolic bands, anniversary or date markers
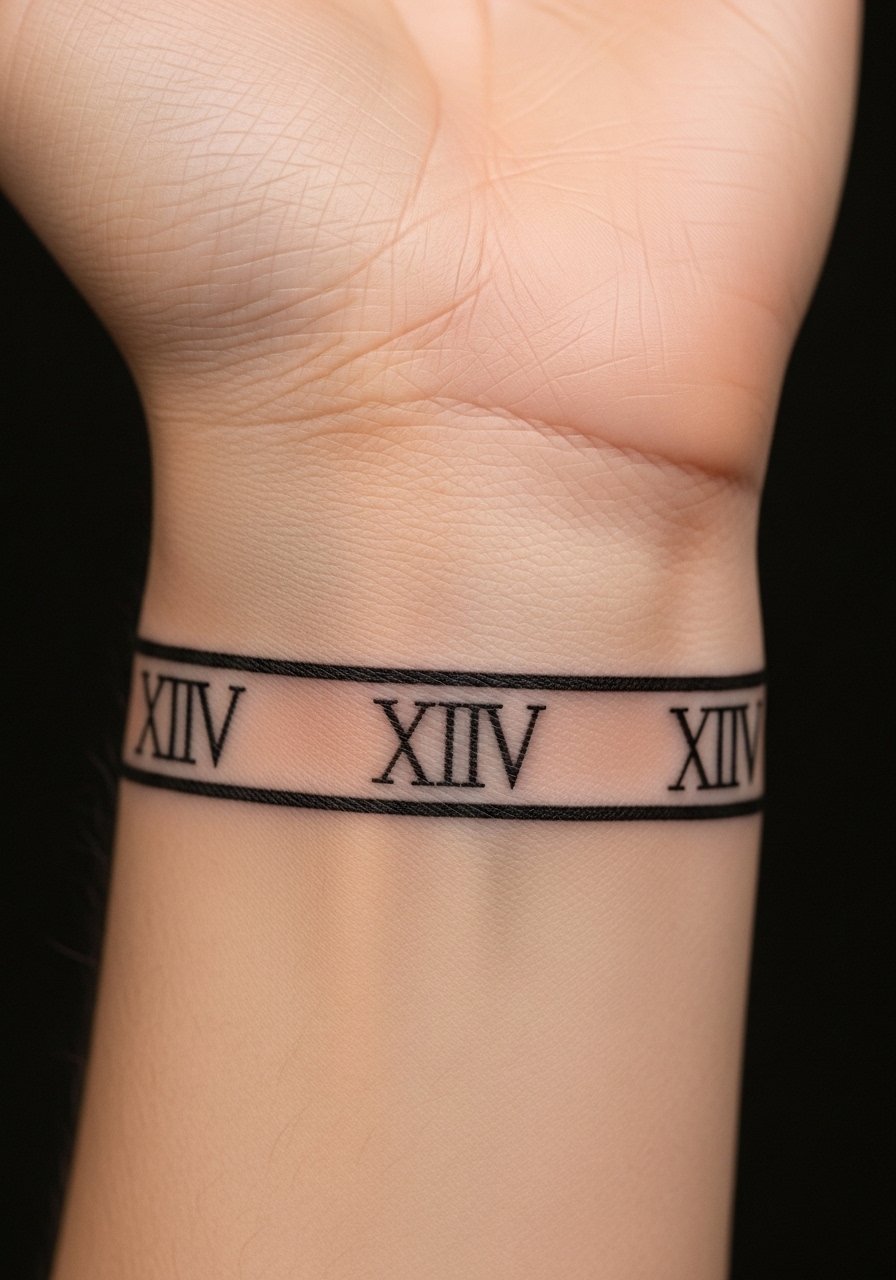
A Roman numeral band feels like a signature time anchored to your body. It's subtle but visible and works well for anniversaries or birthdates. Wrist skin moves a lot—lines need to be bold enough to survive flexing. Expect mild discomfort. A common mistake is making numerals too small or too close together; they blur and merge as the wrist ages. Talk to your artist about spacing and line weight to ensure the band stays legible.
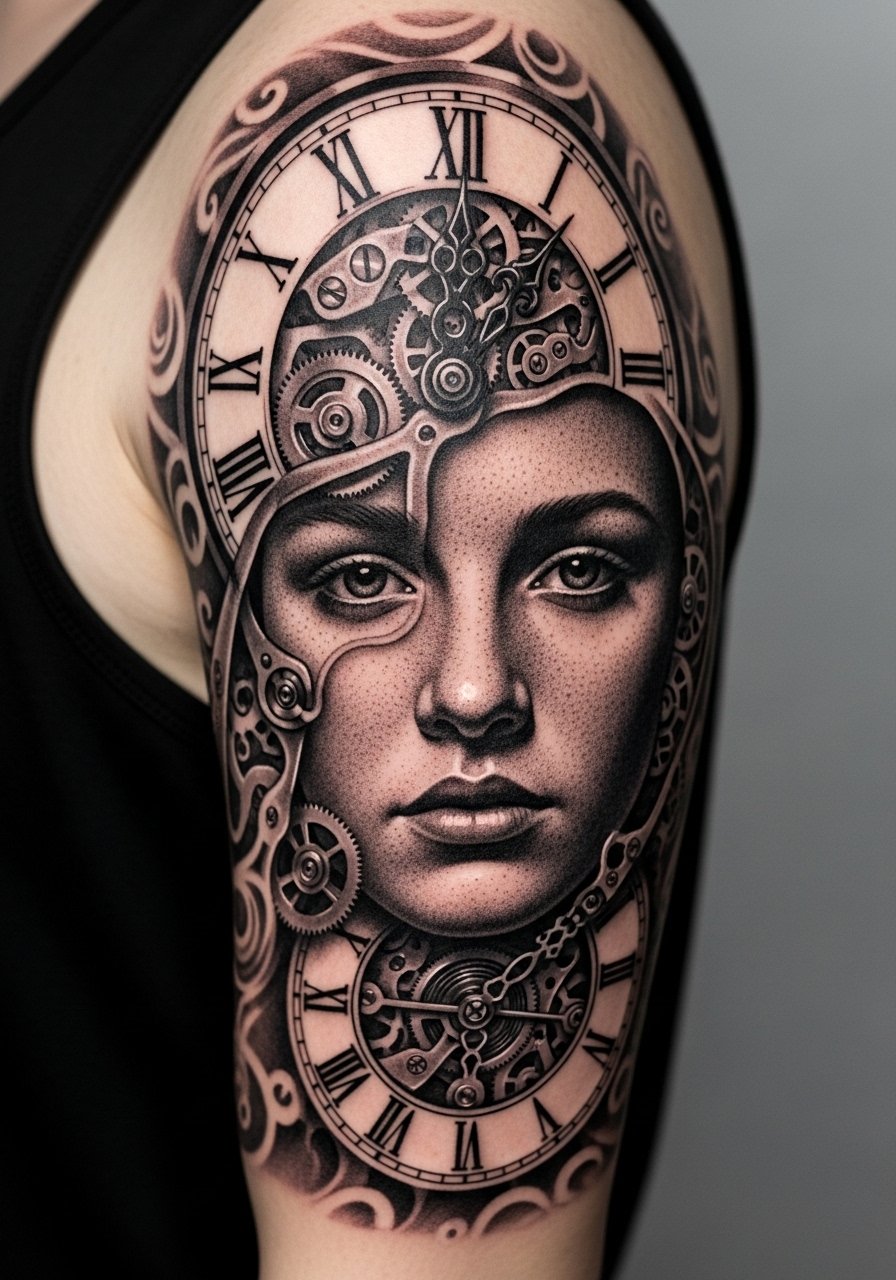
18. Clock Tattoo with Portrait (Memorial) on Upper Arm
Style/Technique: Micro-Realism / Portraiture
Pain Level: Low-Medium (3-4/10)
Session Time: 3-6 hours
Best For: Memorial tattoos, deeply personal pieces

Combining a portrait with a clock creates a memorial focal point—I've seen this done sensitively when people want to freeze a moment. Upper arm placement is forgiving and visible when you want it to be. Portrait realism requires an artist skilled in skin tones and healed texture; always ask for healed portraits on similar skin tones. A mistake is compressing too many elements into the same area; portraits need space to breathe. Expect longer sessions and a careful consultation about reference photos.
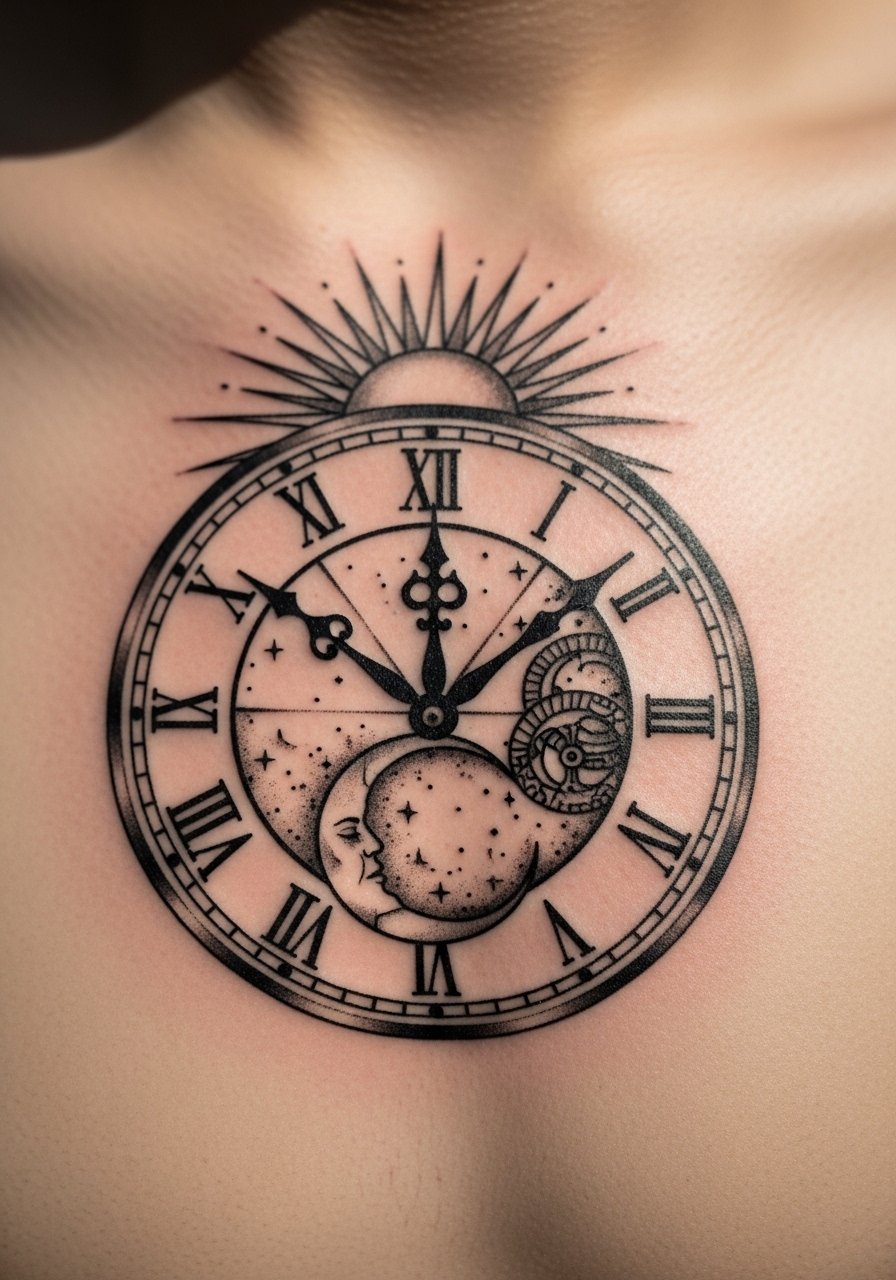
19. Sun and Moon Clock on Center Chest
Style/Technique: Illustrative / Symbolic Duality
Pain Level: High (7/10)
Session Time: 2-4 hours
Best For: Central body statements, symbolism of cycles
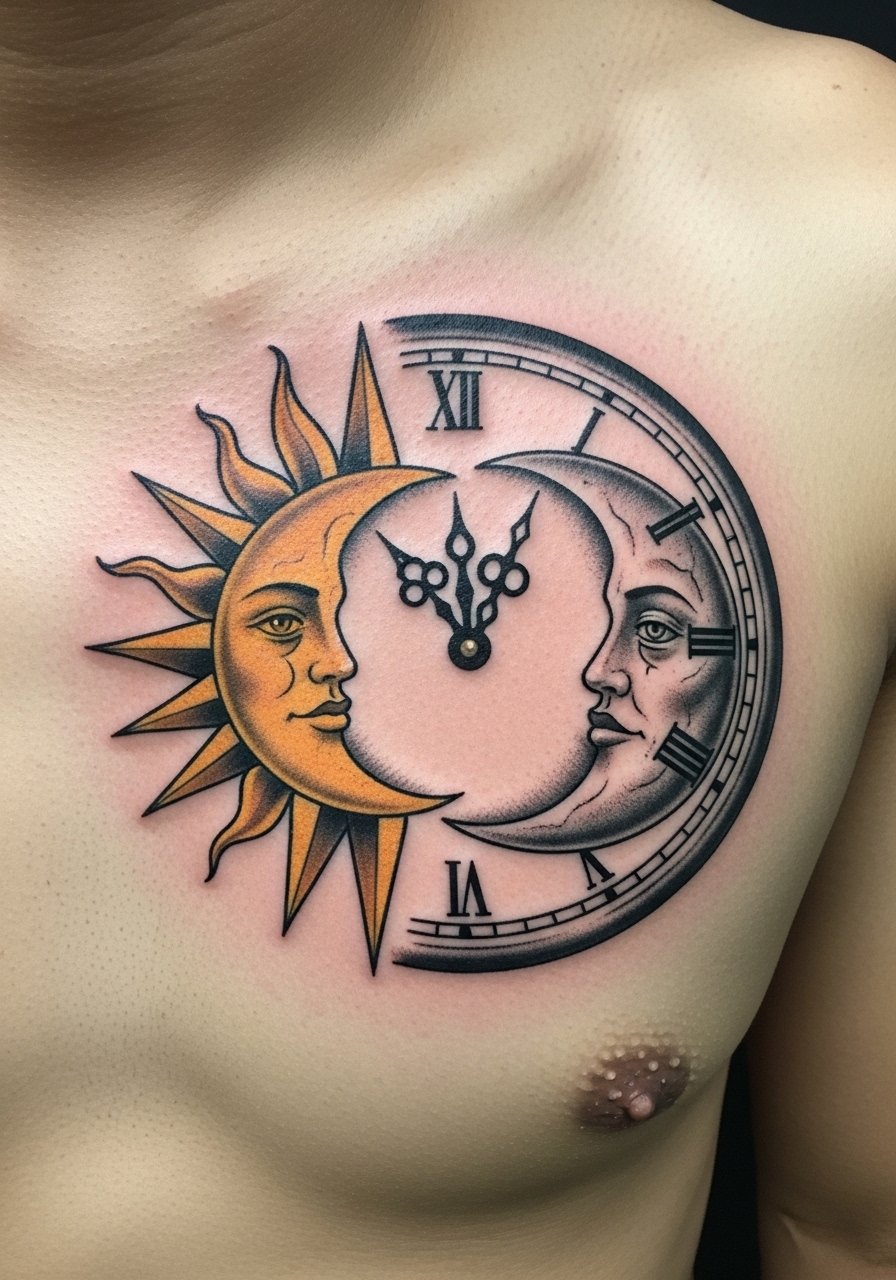
A sun-and-moon clock captures cycles and contrast—placing it center chest emphasizes balance. Pain is higher toward the sternum, but the visual payoff is strong. Colors should be chosen carefully for skin tone; brighter hues can fade faster. I've seen artists advocate for strong black anchors to maintain contrast. Avoid tiny star or celestial details that can blend; larger, clearer shapes hold their identity as the piece heals.
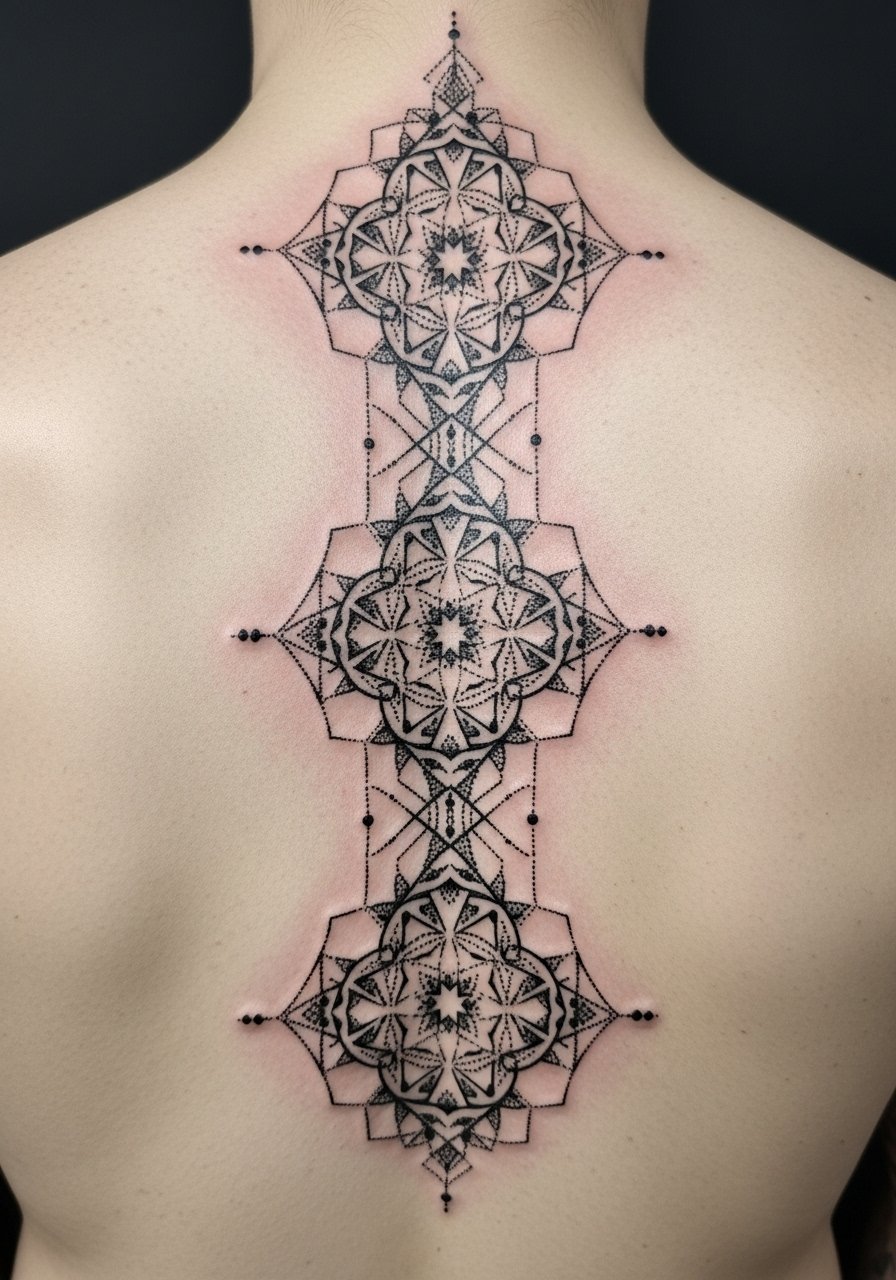
20. Geometric Dotwork Clock Down Spine
Style/Technique: Geometric / Dotwork
Pain Level: High (7-8/10)
Session Time: Multiple sessions, 3-6 hours total
Best For: Vertical placements, meditative designs
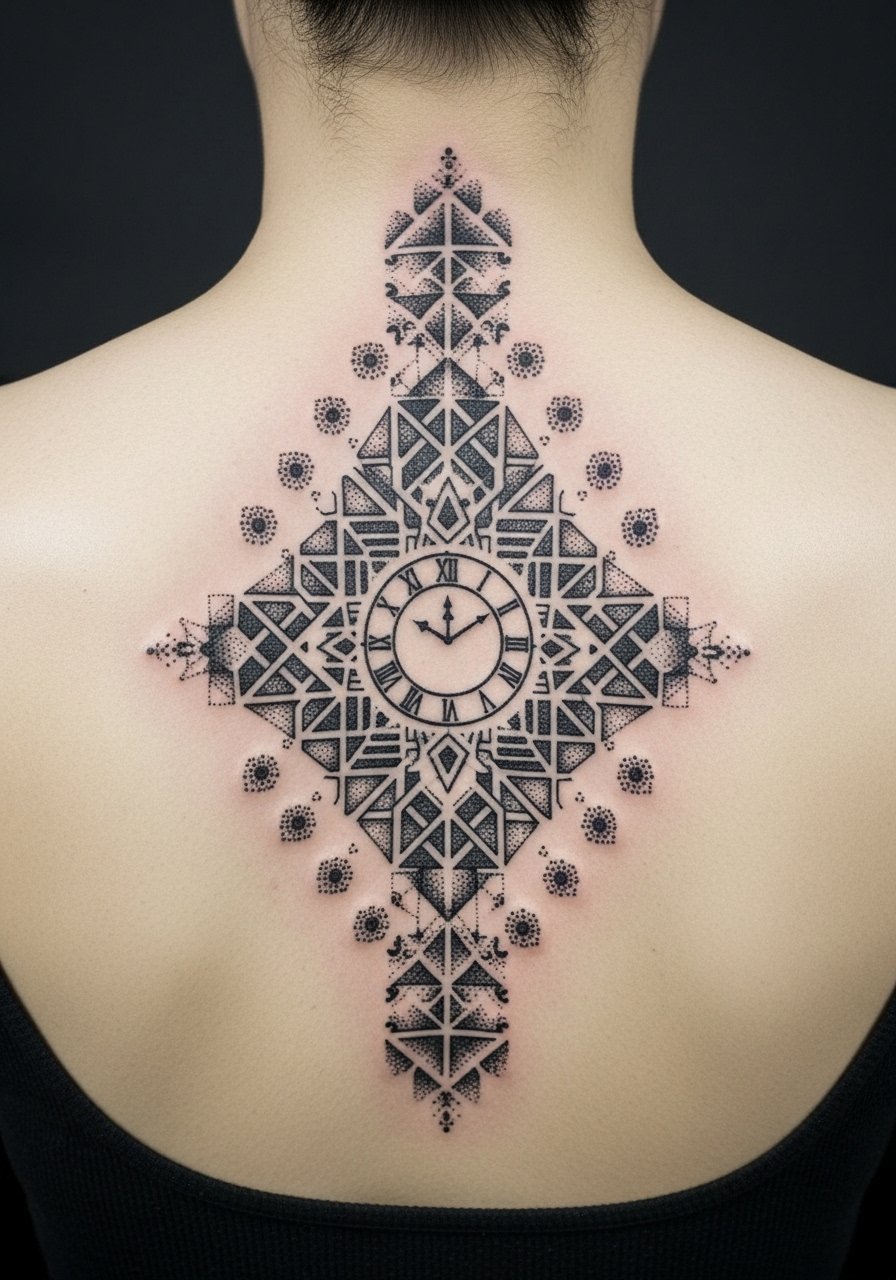
Spinal work reads elegantly for long, vertical clock designs and geometric mandalas. Pain is high over bone, but dotwork can be meditative for some. Healing needs extra care due to friction from clothing and sleeping positions. Dotwork ages uniquely—stippling can soften, so artists often plan density shifts to preserve shape. Common mistakes include too-fine dot spacing that becomes muddy; ask about long-term dot contrast and healed examples.
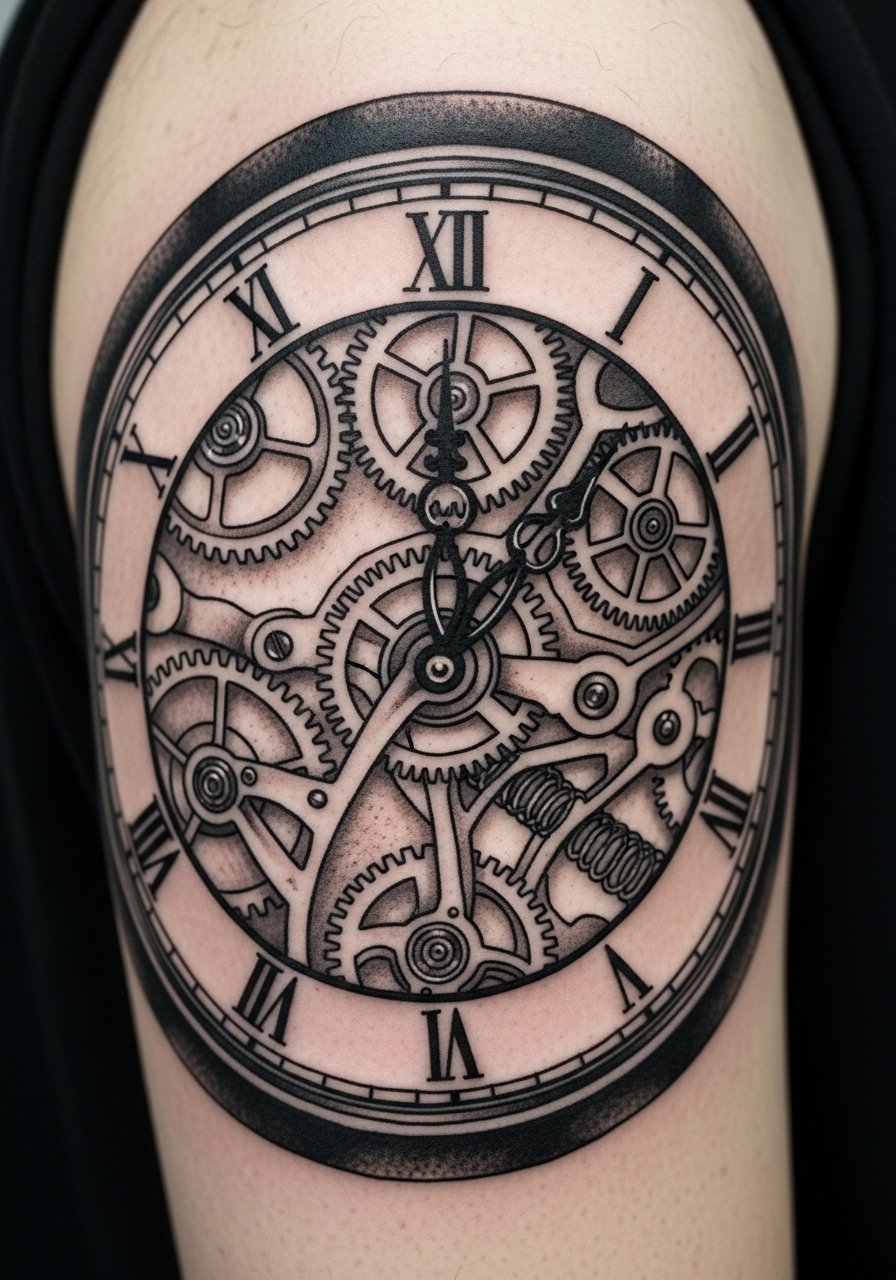
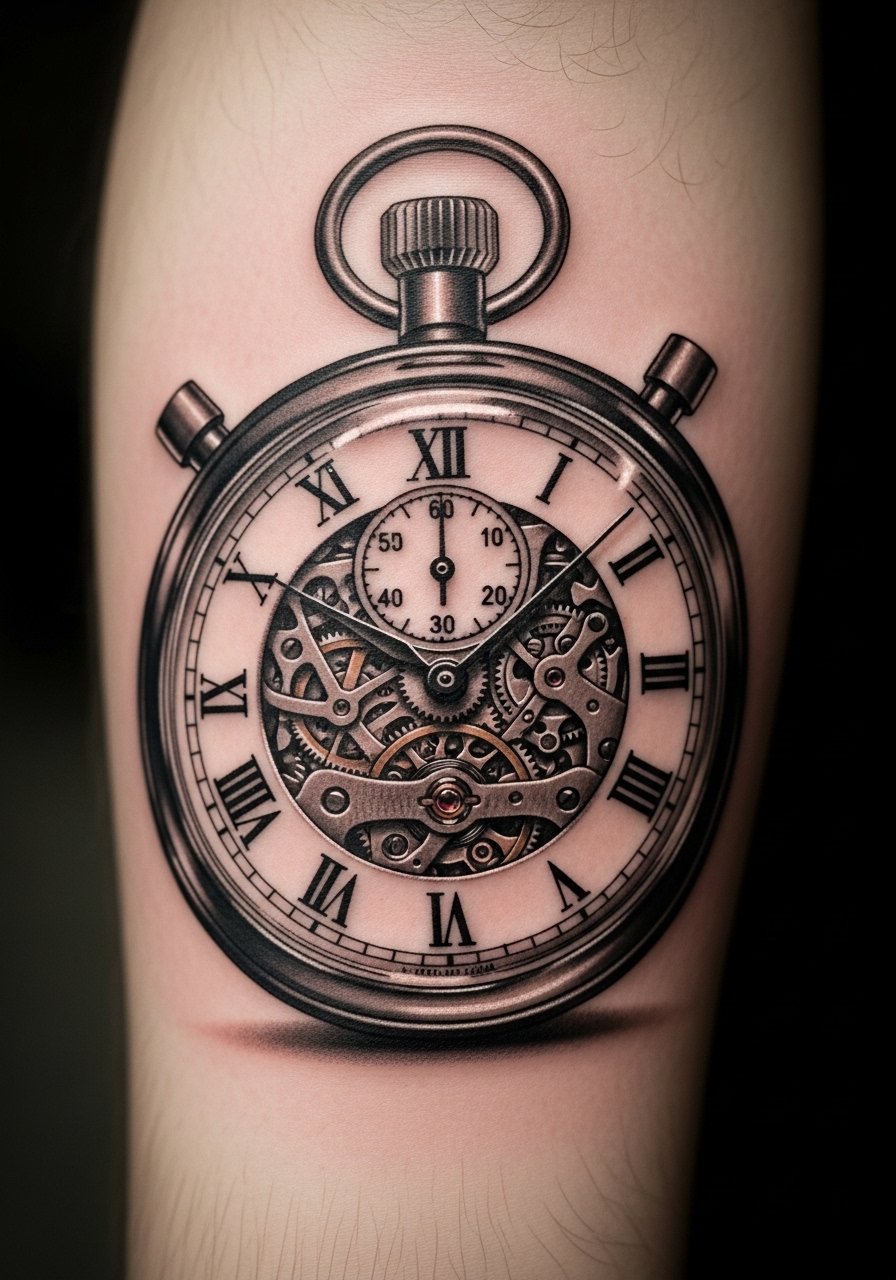
21. Mechanical Pocket Watch with Exposed Gears on Calf
Style/Technique: Mechanical Realism / Black & Gray
Pain Level: Medium (4/10)
Session Time: 2-4 hours
Best For: Visible leg art, technical detail lovers
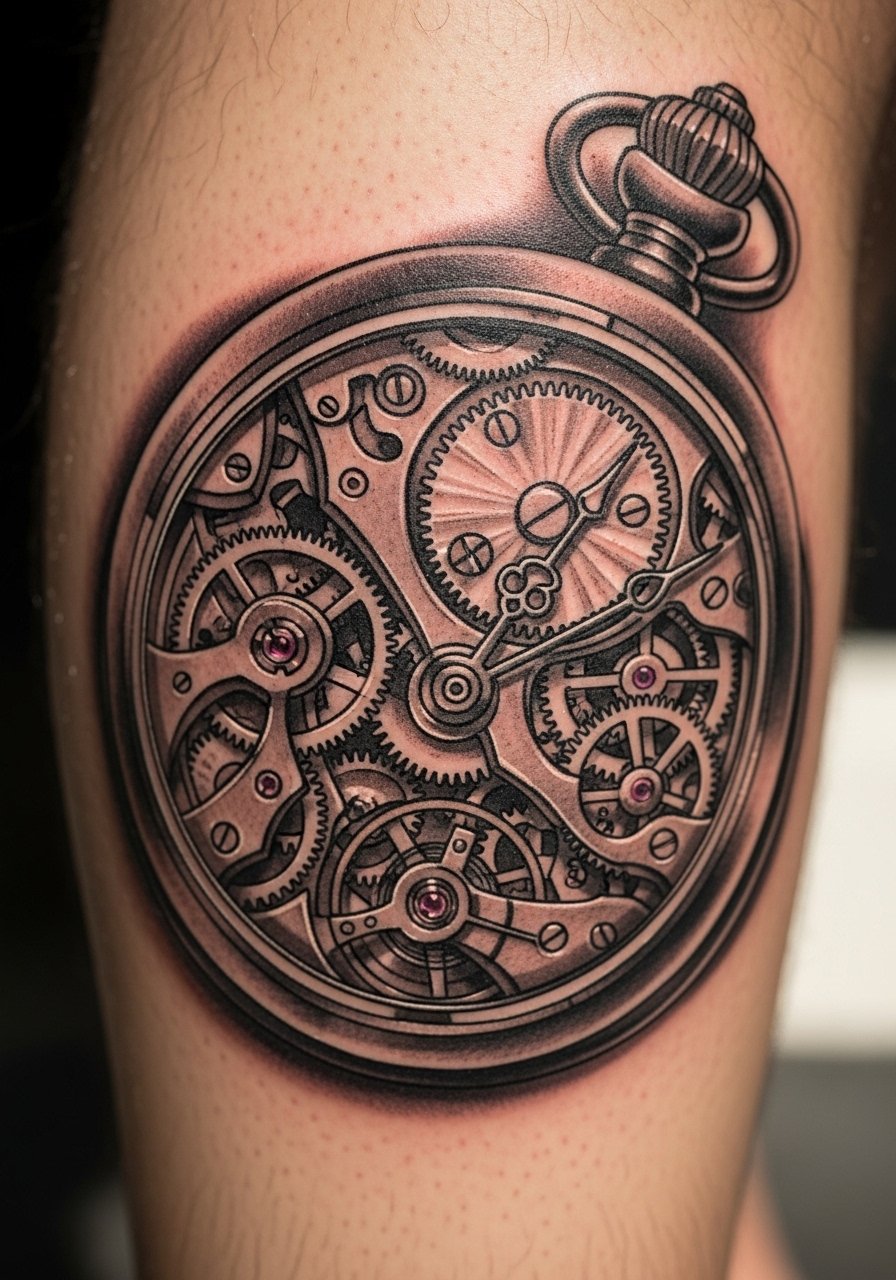
If you love the inner workings of time, an exposed-gear pocket watch on the calf shows craftsmanship. Calf placement tolerates detail and is low pain for most people. Black and gray realism holds up better than color here; metal reflections need precise contrast to read. A typical error is stacking tiny gear teeth that merge—insist on varied gear sizes and clear focal points. I recommend seeing healed calf pieces to gauge how metallic shadings settle.
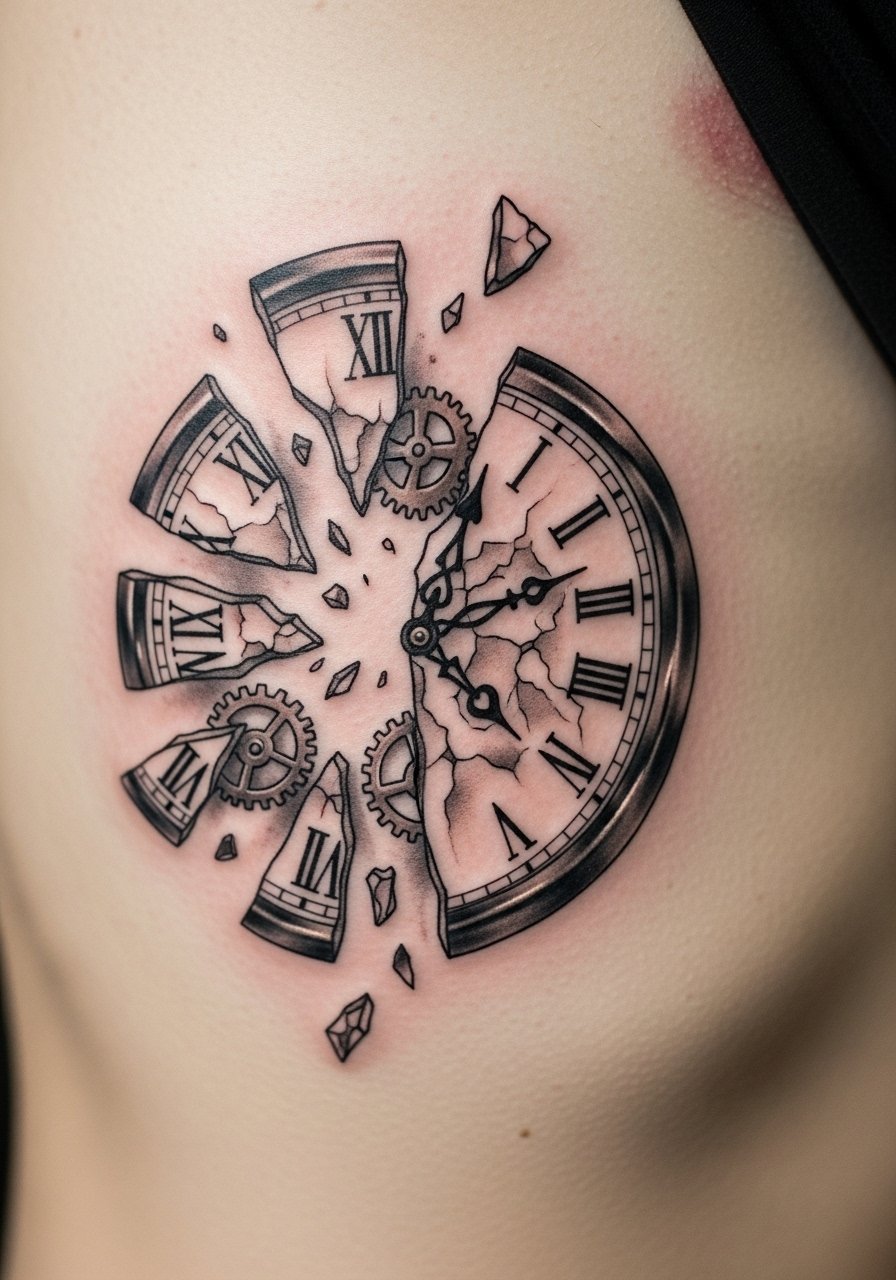
22. Broken Glass Clock Fragmented on Thigh
Style/Technique: Fragmented Realism / Illustrative
Pain Level: Medium (4/10)
Session Time: 2-3 hours
Best For: Dramatic thigh pieces, symbolic rupture
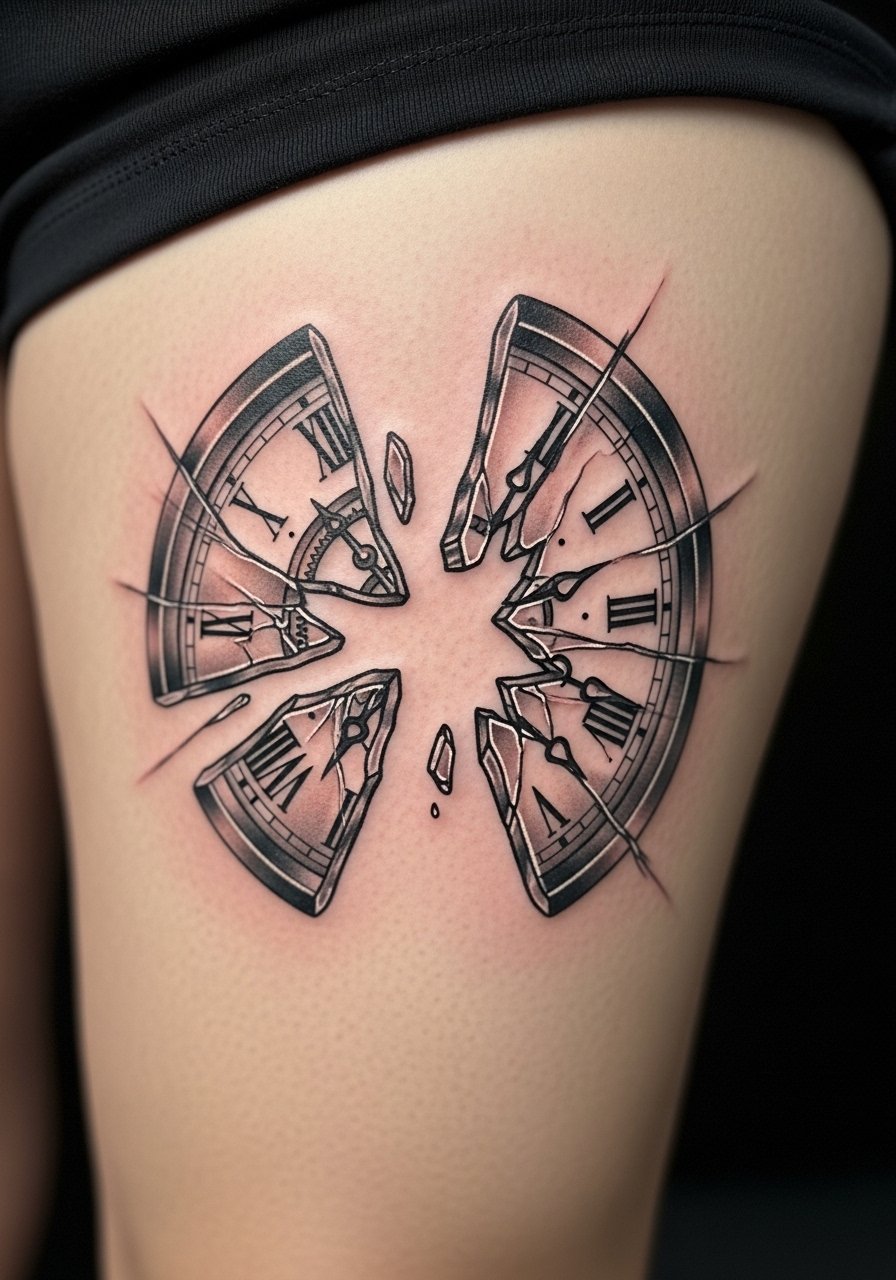
Shattering a clock into glass fragments reads like a rupture or turning point—thigh placement allows the drama to unfold. Pain is manageable; healing is straightforward if clothing isn't tight. Glass lines need to be bold enough to remain distinct; thin shards can blur. One mistake is over-rendering tiny cracks—simpler shards often read better long-term. Ask how the artist will balance negative space to let the shards breathe.
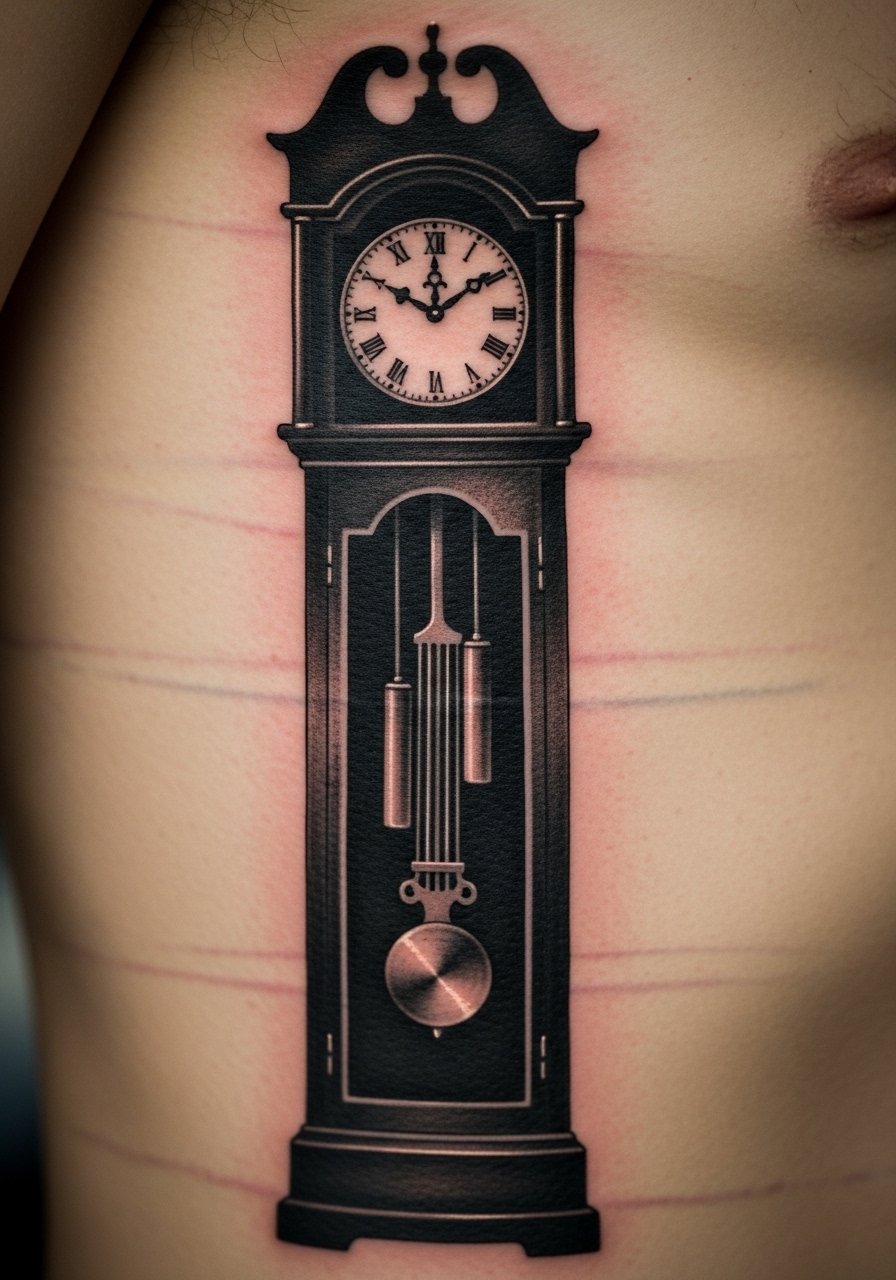
23. Classic Grandfather Clock on Side Rib
Style/Technique: Traditional / Illustrative
Pain Level: High (7-8/10)
Session Time: 3-5 hours
Best For: Tall vertical pieces, classic aesthetics
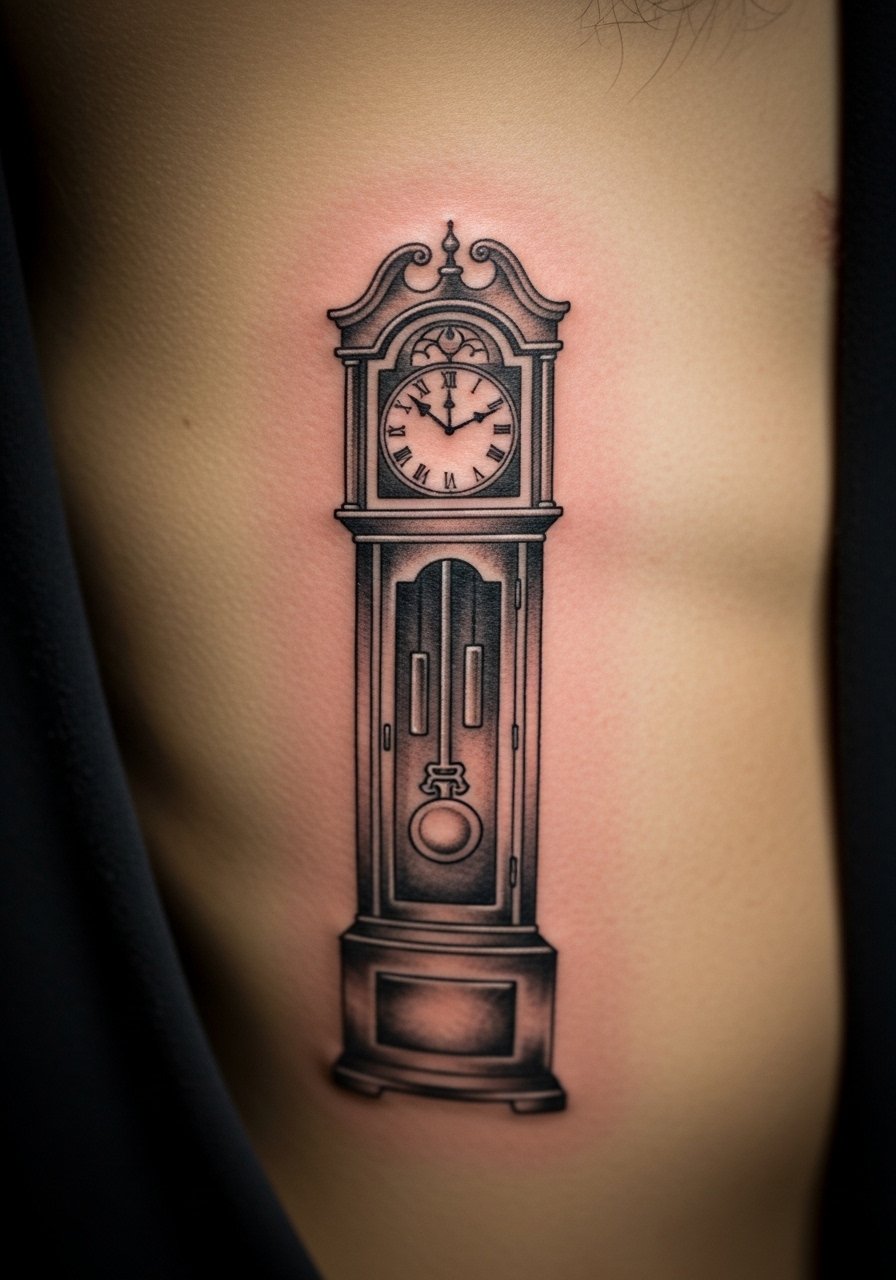
A grandfather clock makes a striking vertical statement down the ribs. Expect significant discomfort during the session—this area is sensitive—but the silhouette is timeless. Movement from breathing affects healing; take extra care with clothing. The mistake I see is trying to cram ornate carvings into too-narrow a column; simpler architectural lines read better over time. Ask for compositional mock-ups to ensure proportions suit your ribcage.
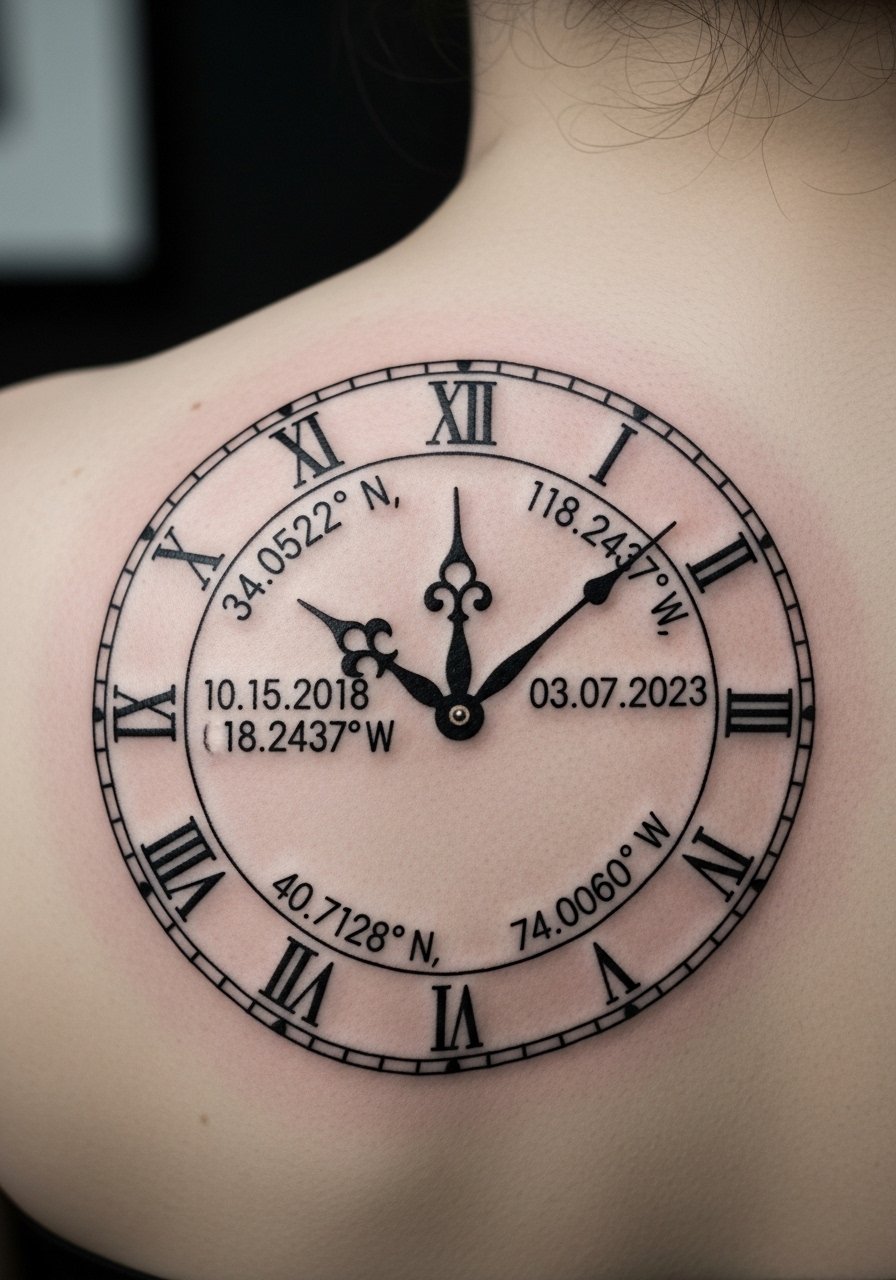
24. Clock with Calendar Dates and Coordinates on Upper Back
Style/Technique: Fine Line / Personalized Script
Pain Level: Low-Medium (3-4/10)
Session Time: 1.5-3 hours
Best For: Commemorative pieces, travel or milestone markers
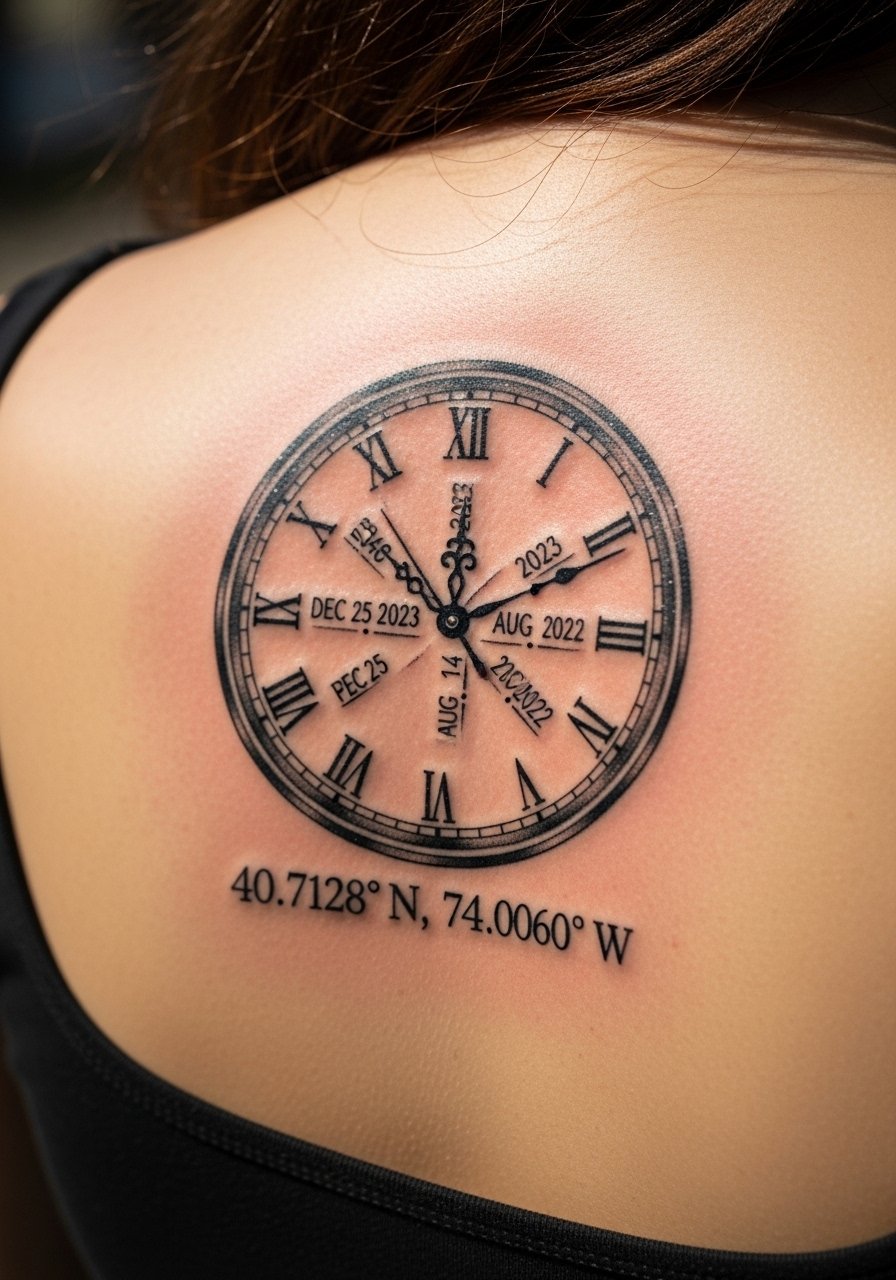
This is a practical way to anchor a memory: set the clock to a specific time and add dates or coordinates. Upper back gives space for readable numerals and script. Pain is mild, and healing is reliable if you avoid backpacks for a week. Small script can fade if overly thin—ask for slightly bolder strokes for dates. Artists who regularly do personalization can show you examples of how script looks healed on similar skin tones.
25. Stopwatch Sports-Inspired Forearm Tattoo
Style/Technique: Illustrative / Functional Aesthetic
Pain Level: Low-Medium (3-4/10)
Session Time: 1-2 hours
Best For: Athletes, timing milestones, visible forearm
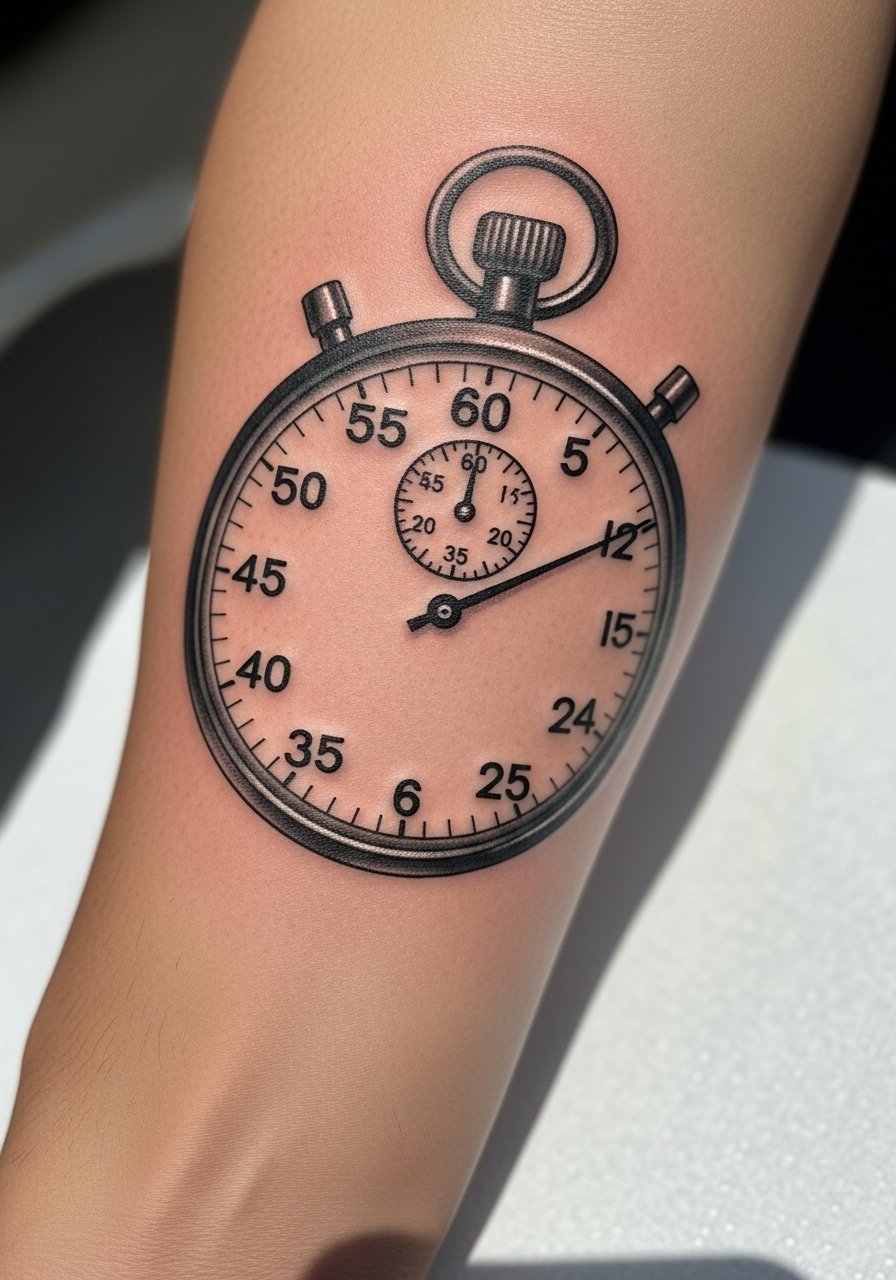
For athletes or anyone marking a personal record, a stopwatch on the forearm is functional and symbolic. Forearm placement is easy to show and relatively low discomfort. Lines need to be strong so numbers stay legible. Avoid tiny indicator ticks that blend with skin texture over time. In my experience, artists who do sports-themed ink often suggest bold numerals and a clear focal time for best long-term readability.
26. Abstract Blackwork Clock with Negative Space on Sternum
Style/Technique: Abstract Blackwork / Negative Space
Pain Level: High (7-8/10)
Session Time: 2-4 hours
Best For: Bold central pieces, graphic statements
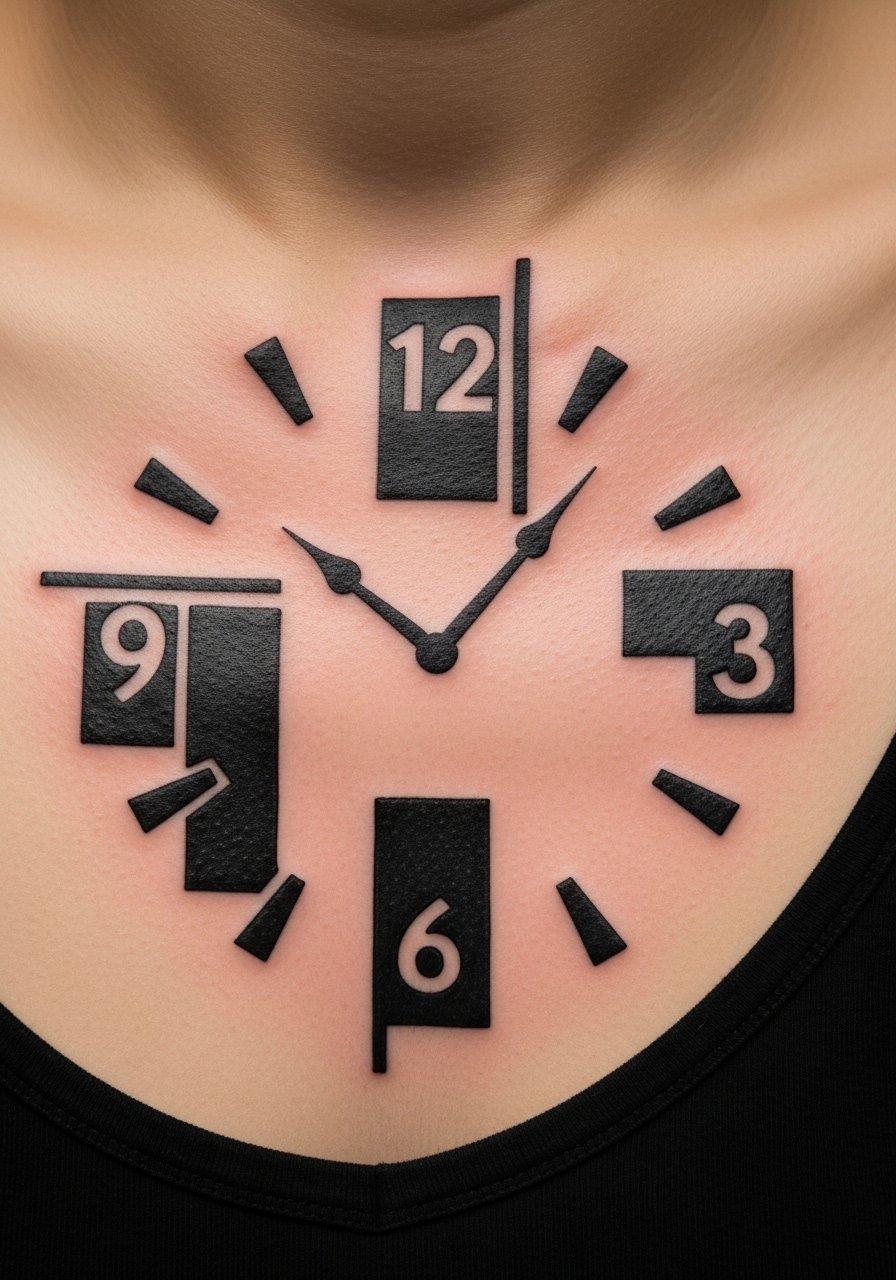
An abstract blackwork clock uses negative space to imply time rather than depict it—this reads modern and bold across the sternum. Pain is high in the center of the chest, but the graphic nature means fewer sessions if your artist works large scales. Black fills age predictably, but heavy saturation needs proper aftercare to avoid prolonged scabbing. A mistake I see is uneven black fill—pick an artist known for solid black areas and healed examples. The result is a piece that stays striking as it settles into skin.
Tattoo Prep and Aftercare Essentials
Aftercare Essentials:
- Aquaphor Healing Ointment, 14oz tube — Use first 3-5 days for heavy moisture
- Saniderm Transparent Adhesive Bandage, 6-inch roll — For sealing fresh work as recommended by many artists
- CeraVe Fragrance-Free Moisturizing Lotion, 12oz — Daily moisturizer post-peel
- Dr. Bronner's Unscented Castile Soap, 32oz — Gentle cleaning during first week
Before Your Appointment:
- Tattoo Numbing Cream with 5% Lidocaine — Apply only if your artist approves
- Thermal Transfer Tattoo Stencil Paper — For custom at-home prep or referencing designs
Long-Term Maintenance:
- SPF 50 Sunscreen Stick, Travel Size — Daily protection for color retention
- Mad Rabbit Tattoo Balm, 2oz — Healed-tattoo moisturizer artists often recommend
- Hustle Butter Deluxe, 2oz — Vegan aftercare option for ongoing care
Optional Comfort Items:
- Tattoo Numbing Spray — For touch-ups or very sensitive spots
- Hydrocolloid Bandages (Large) — Alternative to Saniderm for small areas
Frequently Asked Questions
Q: How bad does a tattoo actually hurt?
A: Pain depends on placement and your tolerance. Outer arm and thigh are lower (around 3/10). Ribs, sternum, and spine can be 7-8/10. It's more an annoying burning/scratching than sharp agony. For sensitive areas, ask your artist about numbing cream with lidocaine—it helps but won't erase all sensation.
Q: What if I regret the design?
A: Sit with your idea for months and consider placements you can hide (upper thigh, upper arm). If you're really unsure, start with a smaller piece or temporary stencil. Laser removal exists but it's a long process. I recommend thinking about the story you want the tattoo to tell so it feels meaningful beyond trends.
Q: How do I keep my tattoo from fading?
A: Sunscreen is non-negotiable—SPF 50 stick every day preserves color. Black ink fades slowest; bright colors need extra care. Moisturize healed tattoos with a fragrance-free lotion like CeraVe and avoid prolonged sun exposure.
Q: Can I work out after getting a tattoo?
A: Wait at least 48-72 hours before heavy sweating; for flex areas (elbow, knee) wait longer. Sweating on fresh ink risks infection and ink loss. Use gentle cleaning (Dr. Bronner's unscented) and keep the area dryish while it forms its protective layer.
Q: Should I get a small tattoo first to test my pain tolerance?
A: Only if you truly want the design. Pain varies more by placement than size. A small wrist or ankle piece can be a good test, but an ankle can hurt more than a larger forearm piece. Choose an area you'd be happy with for the long term.
Q: How long does a tattoo take to heal?
A: Surface healing: 2-3 weeks. Full healing: 2-3 months. The first week is critical—keep the tattoo clean, moisturized with Aquaphor or your artist's recommended product, and avoid picking scabs. Colors look muted during healing and brighten once skin fully regenerates.
Q: Do tattoos look different on different skin tones?
A: Yes. Black and gray work shows up clearly across tones. Bright colors can appear more muted on deeper skin tones—discuss saturation and contrast with an artist experienced in your skin tone. I always ask to see healed examples on similar skin to set realistic expectations.
