
I spent weeks sketching eagle motifs and talking to artists before I finally understood why people choose an eagle: it’s not just about power or patriotism. It’s about the posture, the wings, and how a design sits on your body years after healing. These 26 eagle tattoo ideas combine style, placement, and real-world aging so you pick something that still reads bold long after the session.
This list focuses on realistic, traditional, neo-traditional, blackwork, and minimalist eagle designs. I picked placements that work for statement pieces and easy-to-hide options—chest, back, forearm, ribs, and behind the ear. From what I’ve seen in 2026, wings-outstretched compositions and geometric negative-space eagles are becoming go-to choices because they age predictably.
1. Realistic Soaring Eagle on Upper Back
Style/Technique: Realism / Photorealistic
Pain Level: Medium (4-5/10)
Session Time: 3-6 hours (may need two sessions)
Best For: Statement piece, shows movement across shoulder blades
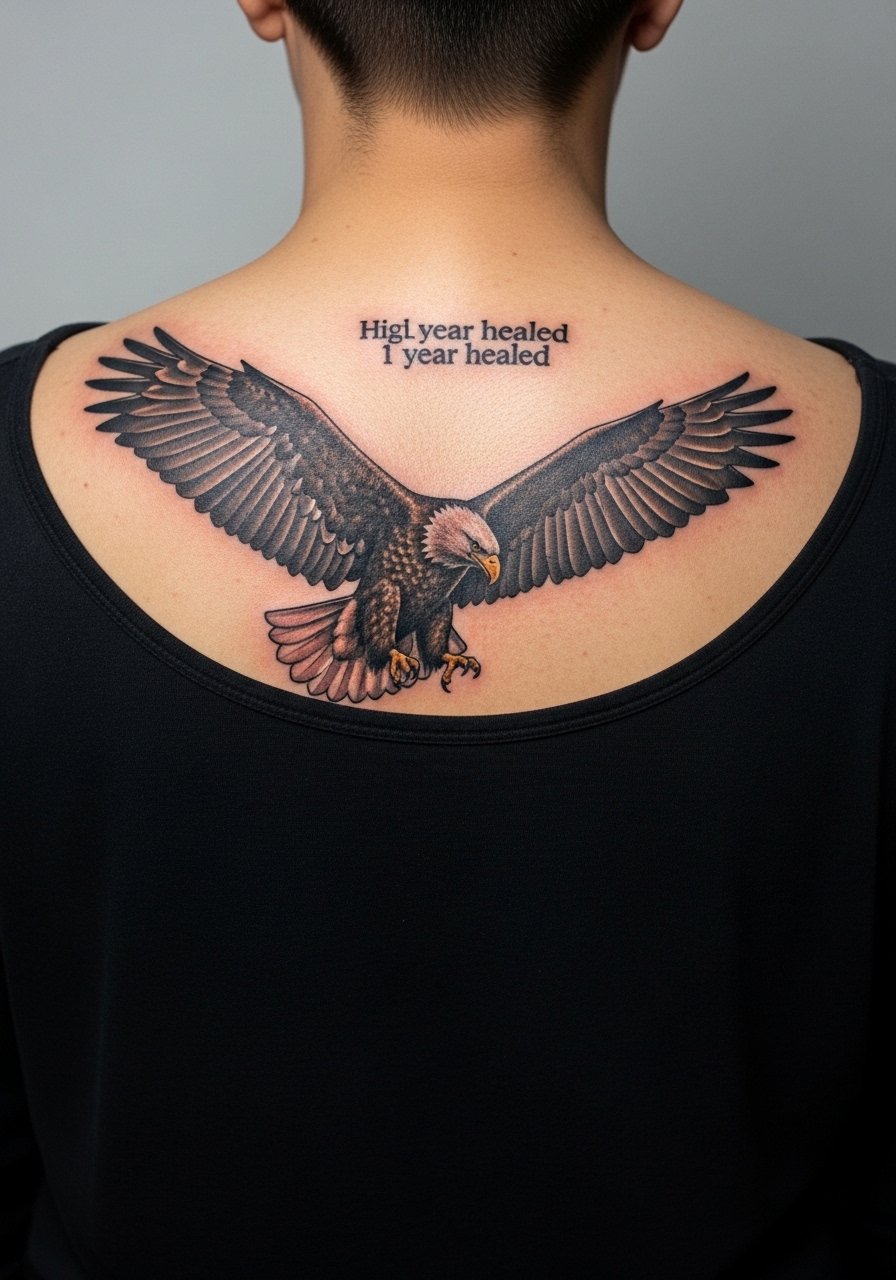
I love realistic eagles on the upper back because the canvas lets an artist show feather texture and wing span. Visually it reads powerful and dynamic—great for someone who wants symbolism of freedom and dominance. Expect moderate pain across the shoulder blades; it’s not brutal but takes endurance for long shading. Healing needs gentle washing and moisturization, and I always tell people to expect the deepest blacks to remain strongest while very fine feather detail can soften over time. Common mistake: asking for hyper-fine single-hair strokes from an inexperienced artist—realism needs someone who knows density and contrast. Ask to see healed back pieces and how they handle large smooth shading.
2. Wings Outstretched Chest Piece in Neo-Traditional Style
Style/Technique: Neo-Traditional / Bold Color & Line
Pain Level: High-Medium (5-6/10)
Session Time: Multiple sessions (3-6 hours each)
Best For: Centerpiece, bold symbolism, covers across chest
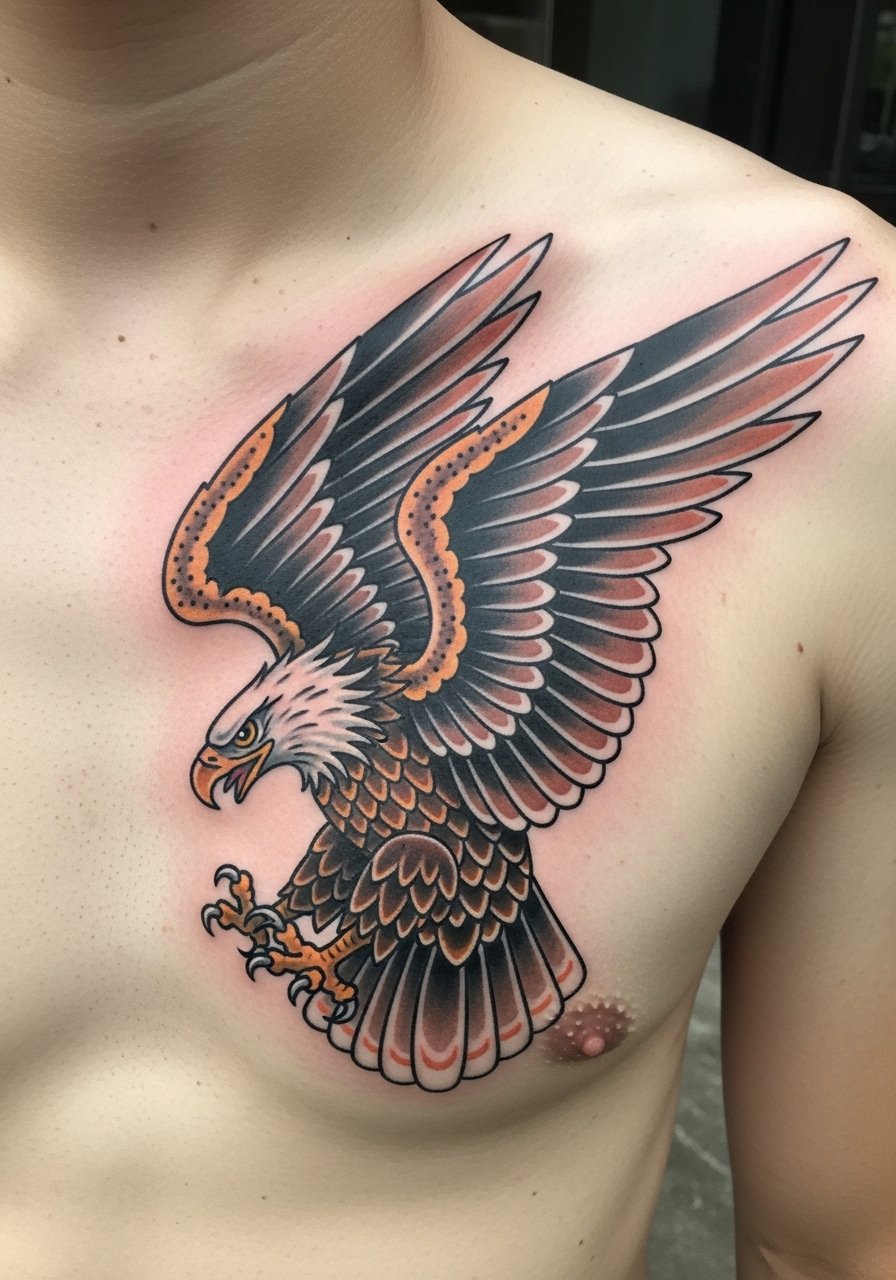
An eagle with wings outstretched across the chest reads noble and commanding. Neo-traditional color and softened shading keep it modern but with classic line weight that holds up. The sternum and ribs add pain, especially near the center, so plan sessions accordingly. Healing takes longer when the chest flexes—avoid heavy upper-body workouts for the first week. Over time, color may soften; bold outlines help maintain silhouette. A frequent mistake is cramming too much tiny detail into the chest’s curved space—ask the artist to design for distance viewing as well as close-up.
3. Traditional Eagle Clutching Arrows on Upper Arm
Style/Technique: Traditional / American Traditional
Pain Level: Low-Medium (2-3/10)
Session Time: 2-4 hours
Best For: First big piece, holds up over decades
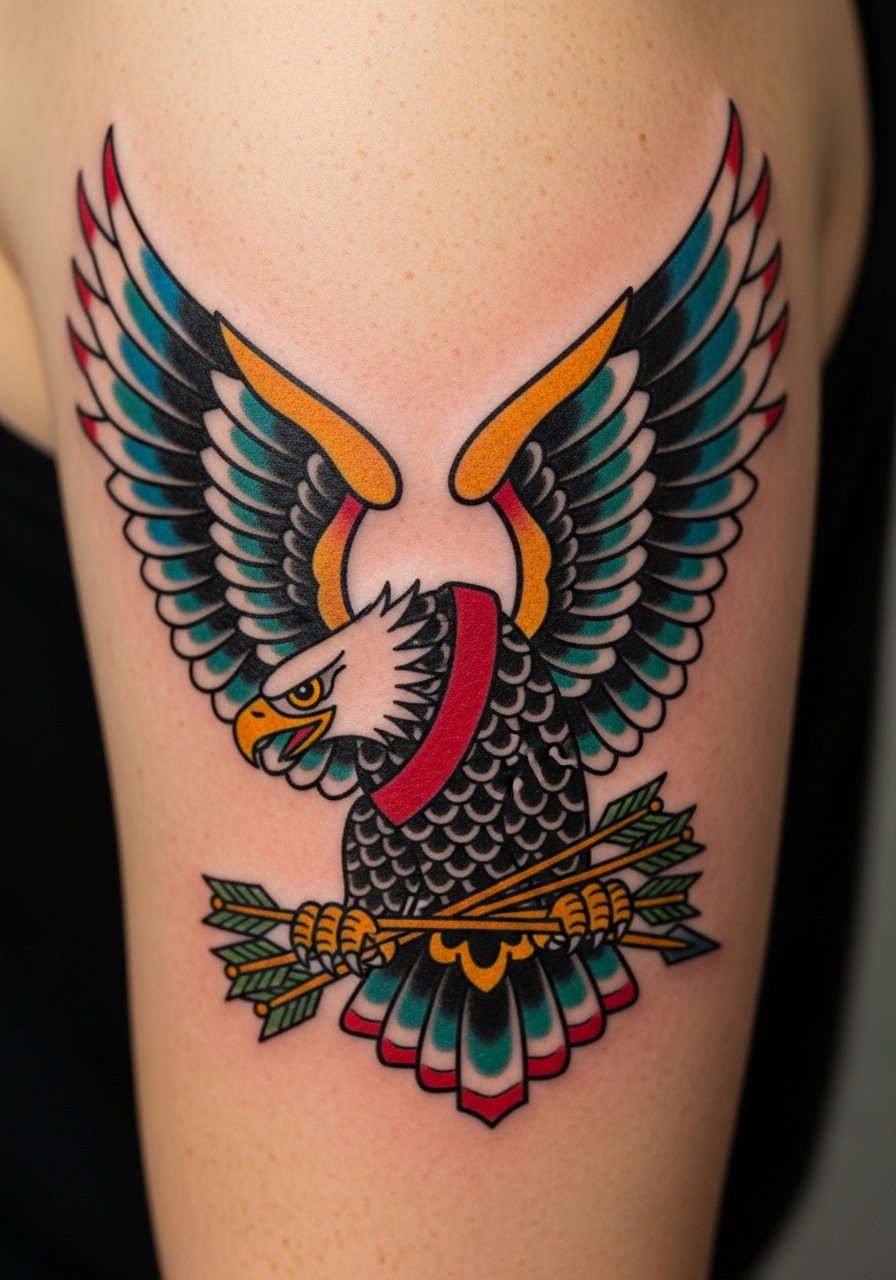
Traditional eagles are timeless for a reason: bold lines and simple palette age predictably. On the upper arm this placement has lower pain and is easy to show or hide. I’ve noticed traditional works survive sun and time better than delicate styles because the heavy outline anchors the design. Healing is straightforward—cleaning and light moisturizing for two weeks. The usual mistake is shrinking a traditional eagle’s scale so small that outlines blur; keep these medium to large for longevity. Ask to see healed examples of traditional eagles on similar skin tones.
4. Minimalist Line Art Eagle Behind Ear
Style/Technique: Minimalist / Single-Line or Fine Line
Pain Level: High (6-7/10)
Session Time: 30–60 minutes
Best For: Subtle statement, small and easily hidden
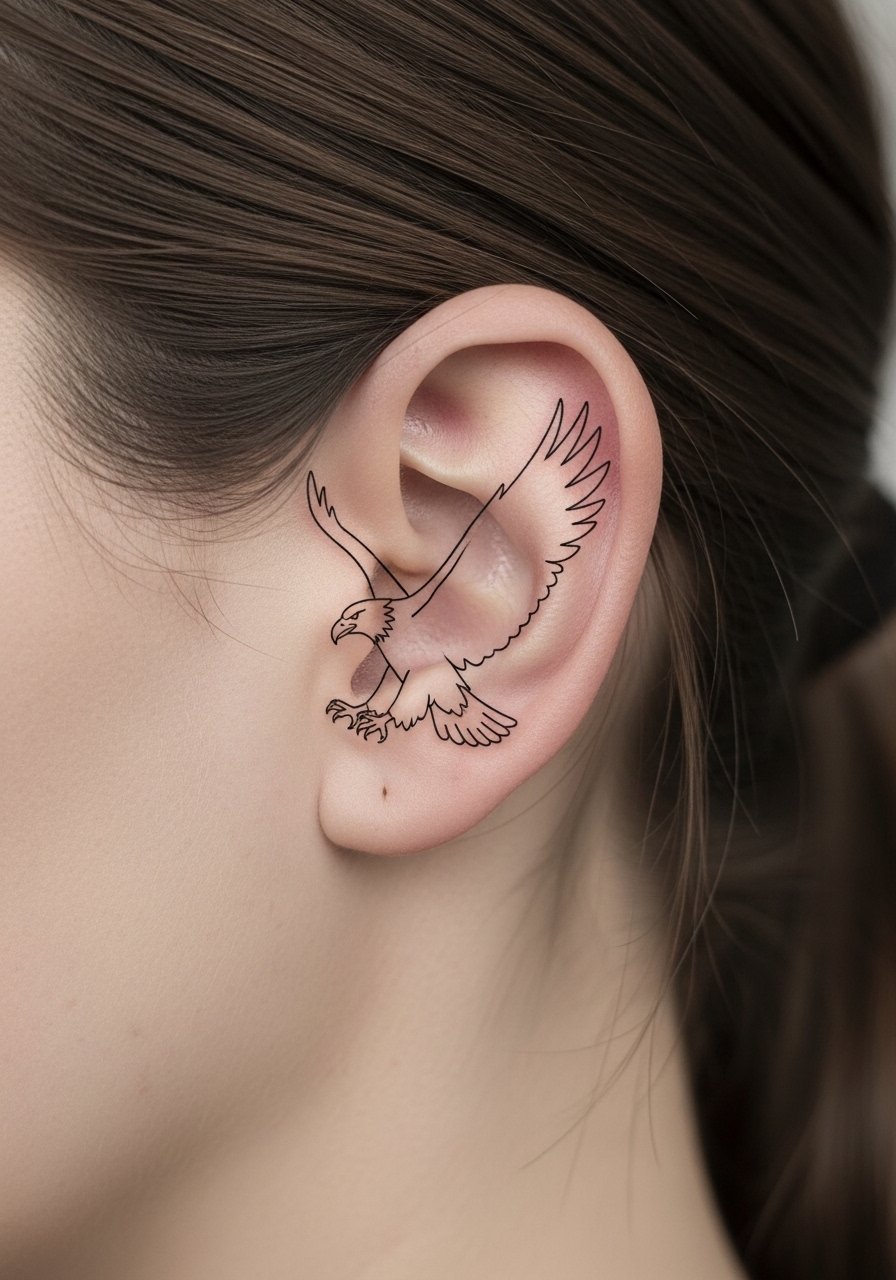
A behind-the-ear eagle in fine line is discreet and modern. The look is elegant—an outline that suggests flight more than detailed feathers. Pain is higher because the area is thin and close to bone; sessions are short though. Fine-line work can blur faster, so expect some softening and occasional touch-ups years later. I tell people to avoid overly intricate detail here; the tiny space calls for simplified shapes. One common mistake: placing a complex head/feather study behind the ear—keep it minimal and ask for an artist experienced with micro-line work.
5. Blackwork Geometric Eagle on Sternum
Style/Technique: Blackwork / Geometric & Negative Space
Pain Level: High (6-8/10)
Session Time: Multiple sessions, 2-4 hours each
Best For: Bold statement, symmetrical designs
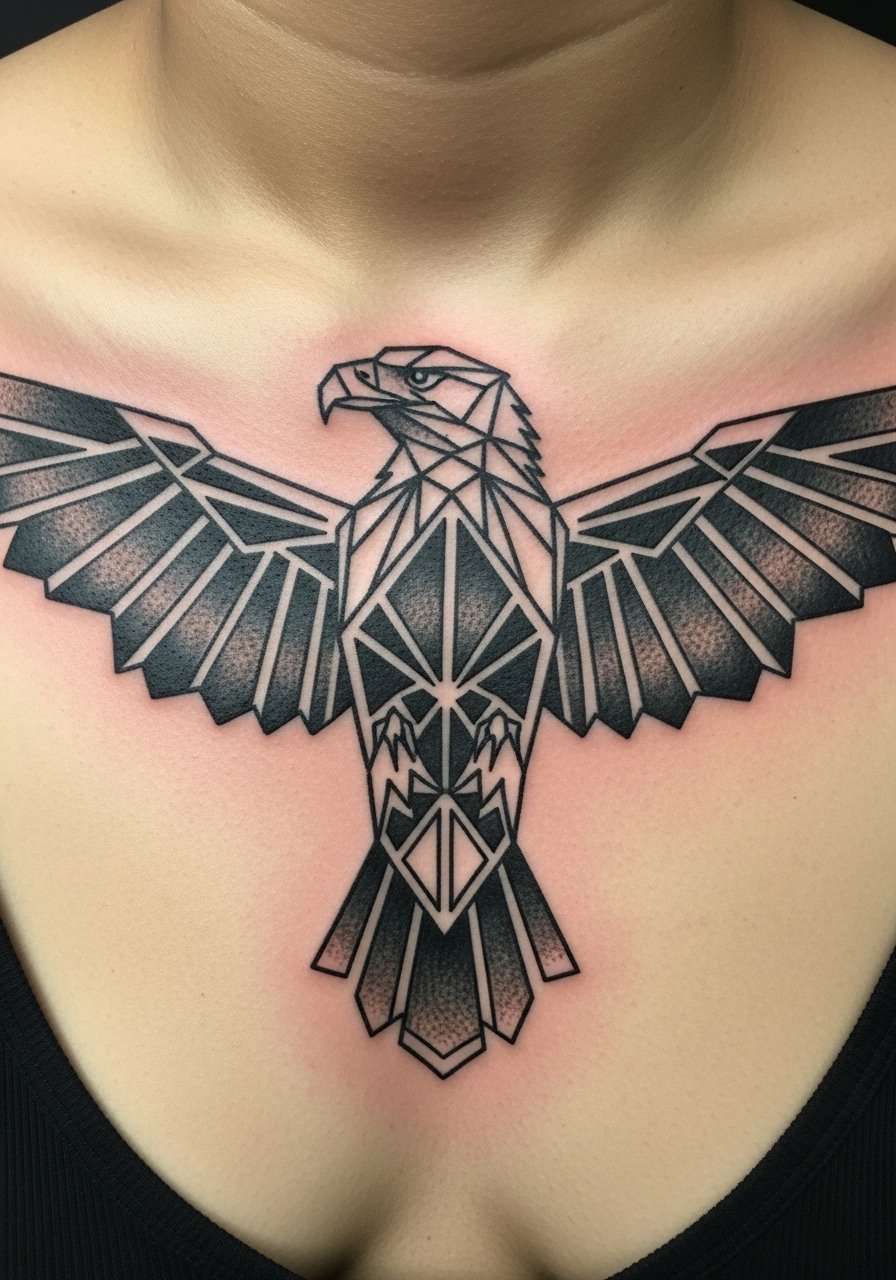
Geometric blackwork eagles use triangles and negative space to create a stylized avian form—very on-trend. Centering this on the sternum makes a dramatic symmetric piece but expect higher pain across the chest and sternum. Healing needs patience because blackwork areas can scab thicker; follow aftercare closely to avoid patchy healing. Over time, solid black holds well but crisp edges may feather a little—proper line weight helps. Mistake to avoid: asking for too many tiny negative spaces that can fill in; discuss scale with your artist.
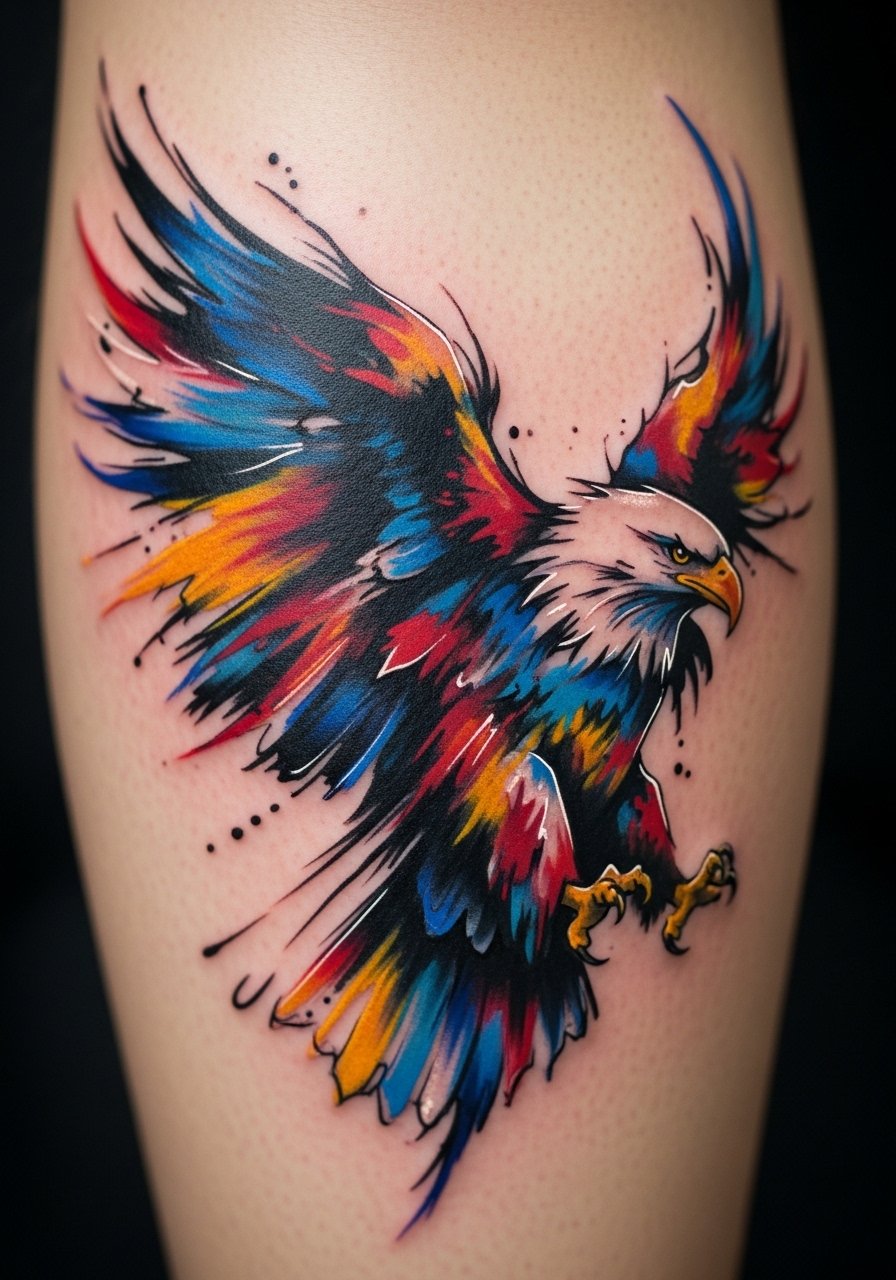
6. Watercolor Eagle Splash on Shoulder Blade
Style/Technique: Watercolor / Painterly Color
Pain Level: Medium (4/10)
Session Time: 2-4 hours
Best For: Artistic, colorful statement
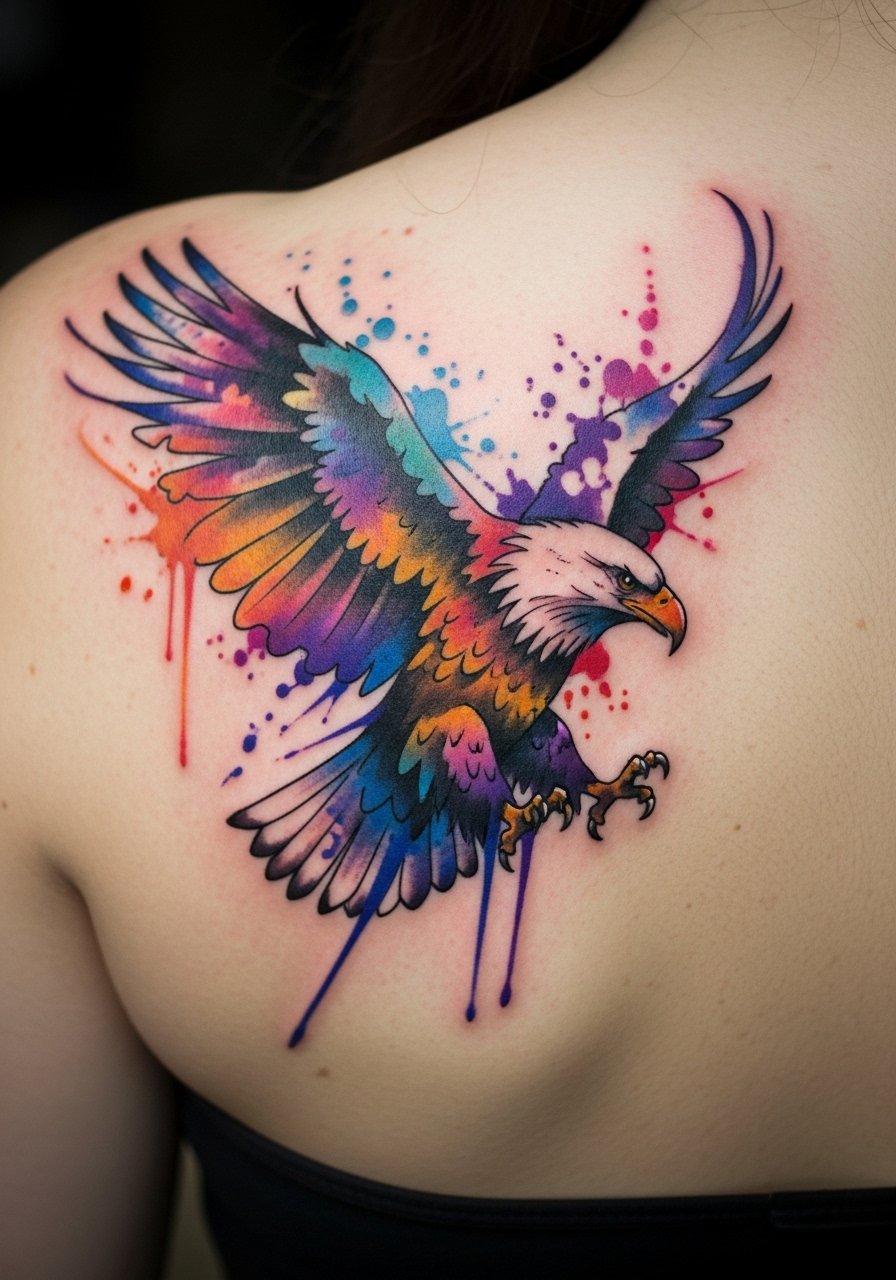
A watercolor eagle feels expressive and free—colors bleed around a defined eagle silhouette for an artistic take. Shoulder blade placement lets the colors breathe. In my experience, watercolor requires touch-ups because soft color can fade faster than saturated pigment; artists compensate with smarter color placement and stronger anchors. Pain is moderate and healing needs attentive moisturizing to prevent patchy loss of color. Common mistake: picking pastel yellows or pale colors that vanish; ask about pigment saturation and how the artist approaches healed color on your skin tone.
7. Tribal Eagle Wrap Around Forearm
Style/Technique: Tribal / Bold Black Lines & Patterns
Pain Level: Medium (4/5)
Session Time: 2–4 hours
Best For: Sleeve continuation, cultural motifs
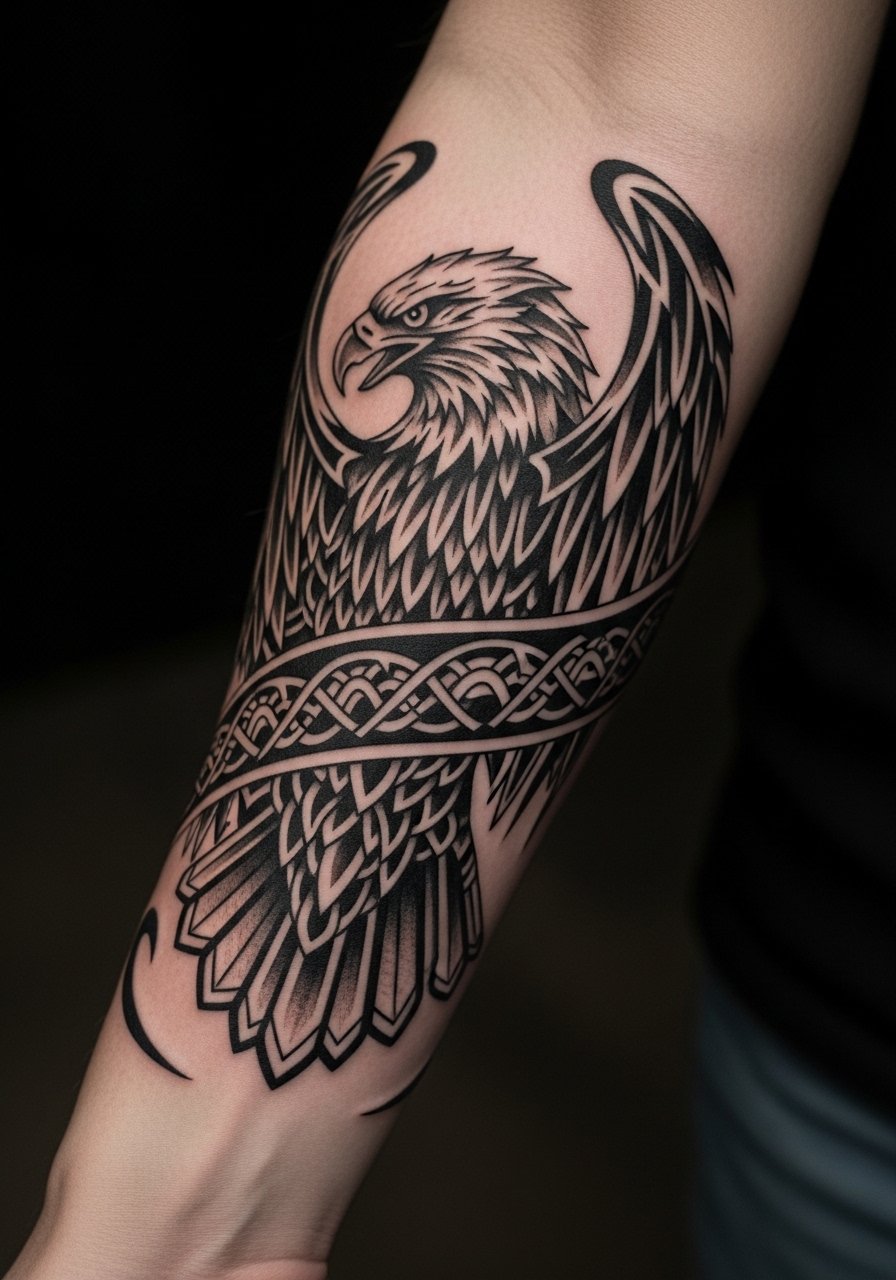
Tribal-style eagles use strong black shapes to suggest feathers and motion—great for wrapping around a forearm. I’ve seen these keep a very graphic presence healed because there’s minimal shading to soften. Pain is moderate but placement is forgiving. Keep cultural sensitivity in mind: traditional tribal motifs have meaning; discuss origins and intent. A mistake I see is mixing too many tribal languages without cohesion—stick to a consistent motif and ask for healed examples of similar patterns.
8. Micro-Realism Eagle Head on Inner Wrist
Style/Technique: Micro-Realism / High Detail Small Scale
Pain Level: Medium-High (5-6/10)
Session Time: 1–2 hours
Best For: Small, intense portrait-style detail
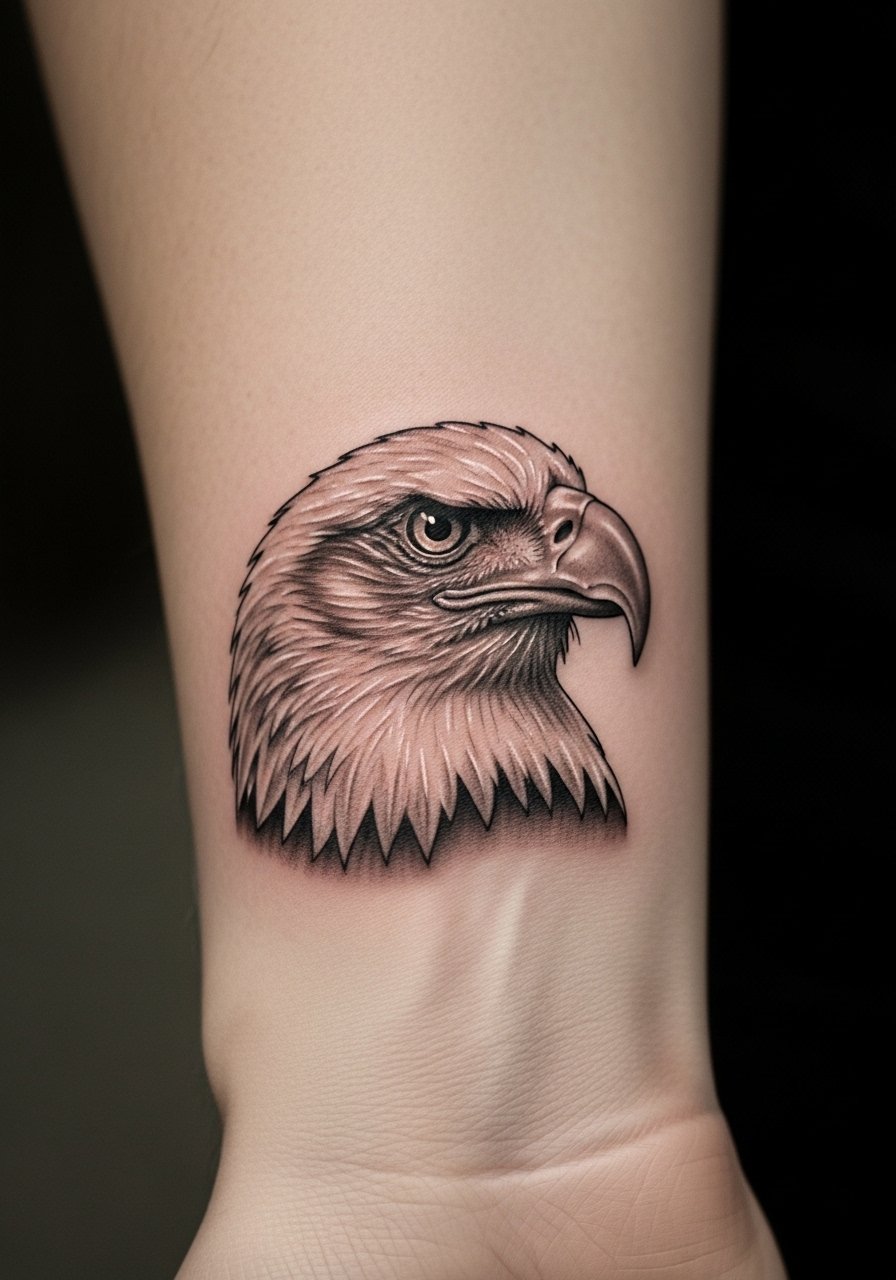
A micro-realism eagle head on the inner wrist reads intimate and focused. The wrist can be sensitive and the skin thin, so expect a sharper sensation. I tell clients that micro-detail can lose crispness faster on wrists due to movement; choose slightly bolder contrast to help longevity. Healing needs gentle care—avoid bending wrist excessively in the first week. Don’t force ultra-tiny detail; let the artist simplify where necessary. Ask to see other micro-realism work on wrists to judge how lines settle.
9. Neo-Traditional Eagle and Skull on Thigh
Style/Technique: Neo-Traditional / Bold Color & Shading
Pain Level: Low-Medium (3-4/10)
Session Time: 3-5 hours
Best For: Large, coverable statement
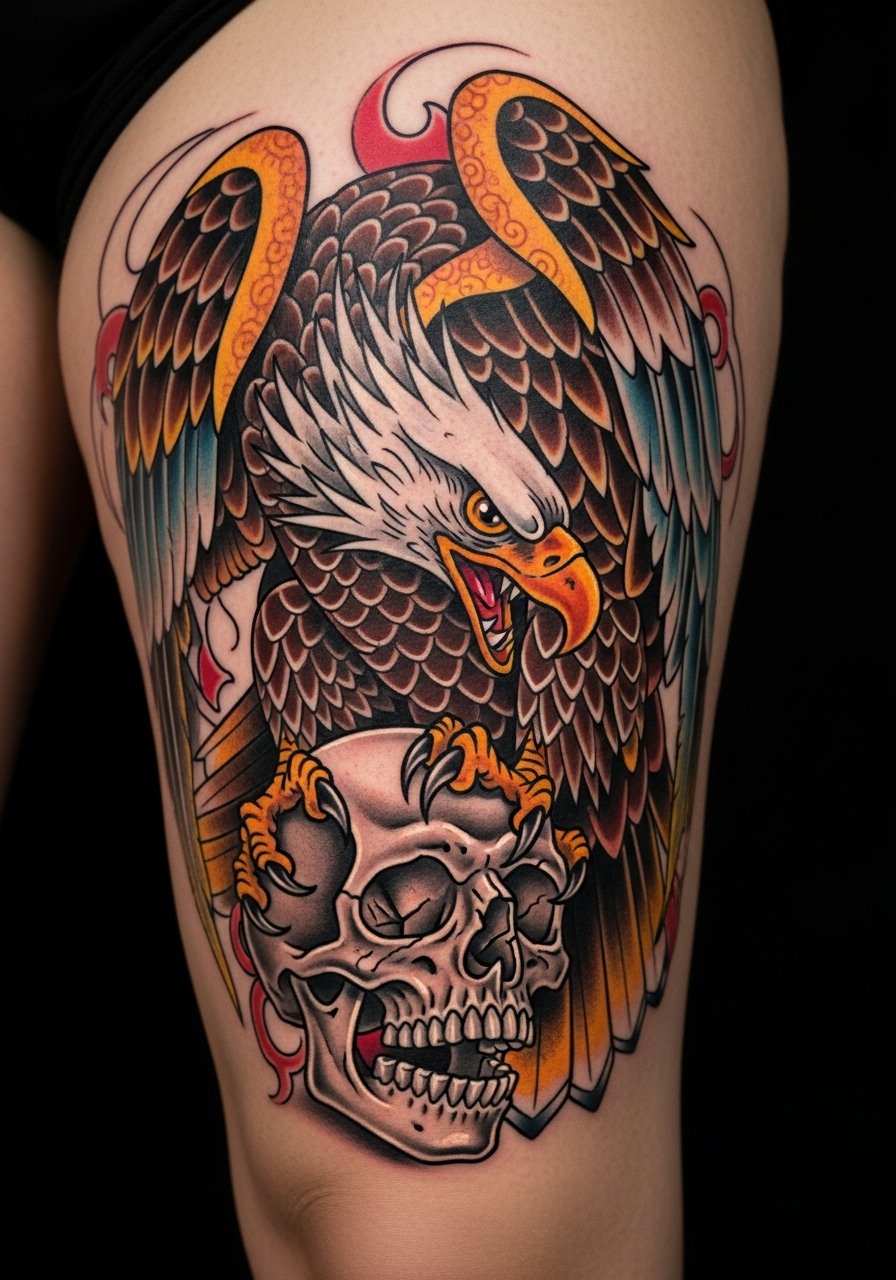
Combining an eagle with a skull in neo-traditional style makes a dramatic narrative piece—great for the thigh where size can be generous. Thigh placement is more comfortable for most people and heals well. Over time, colors on the thigh usually last nicely because sun exposure is lower. A common error: overcrowding the composition with too many elements; let the eagle remain the focal point. I recommend viewing healed photos from your artist on thigh canvases to see how color and line softened.
10. Minimalist Geometric Eagle on Inner Arm
Style/Technique: Minimalist / Geometric Fine Line
Pain Level: Medium (4/10)
Session Time: 1–2 hours
Best For: Sleek, modern aesthetics
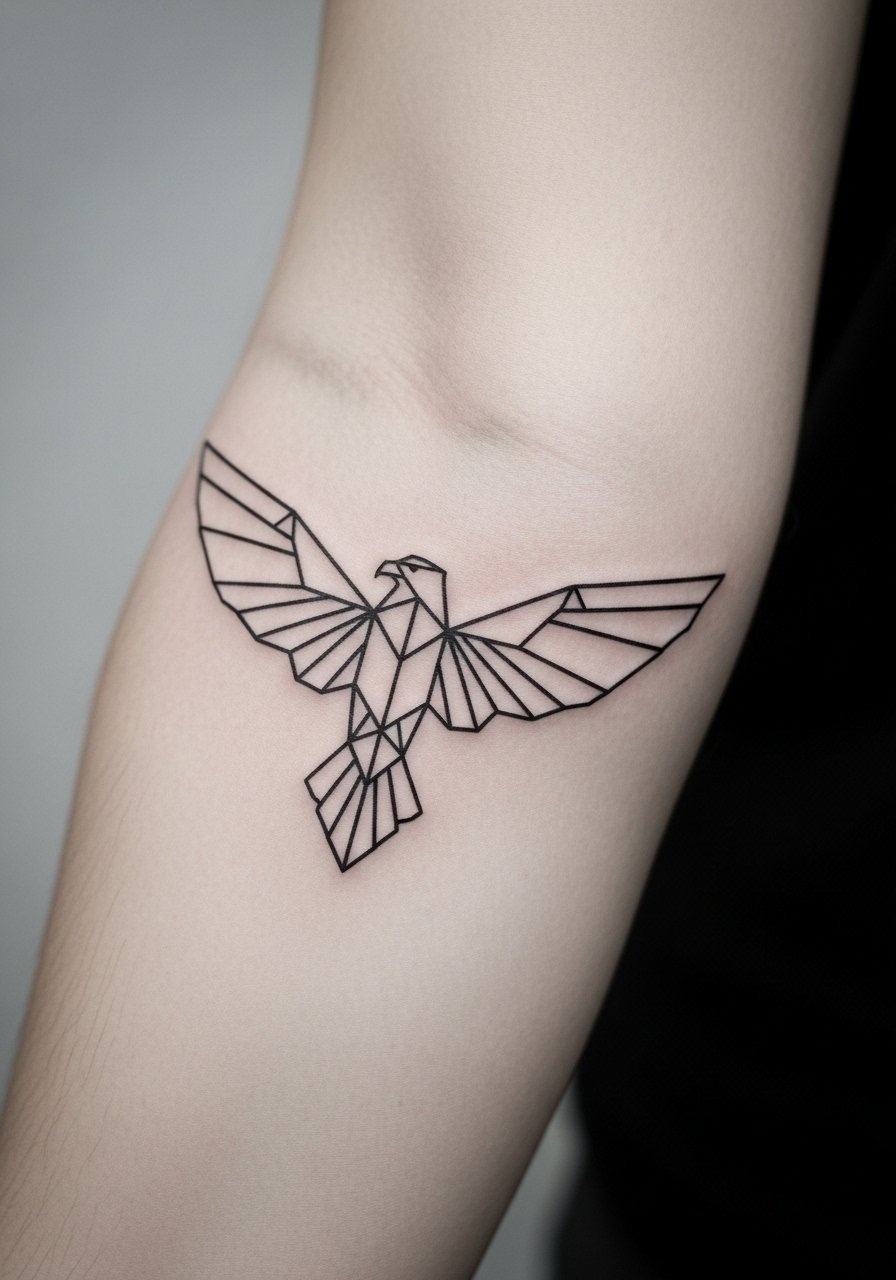
A geometric minimalist eagle on the inner arm gives a contemporary feel—sharp lines and simple shapes suggest structure and focus. Inner arm movement means the tattoo will see frequent friction, so choose line weight wisely. I’ve noticed minimalist geometric work ages best when lines are slightly bolder than you might expect; ultra-thin lines can blur. Healing is straightforward if you avoid rubbing clothing against it. Ask the artist how they adjust line weight for your skin type.
11. Eagle Talons Gripping a Compass on Forearm
Style/Technique: Realism + Illustrative / Symbolic Detail
Pain Level: Medium (4-5/10)
Session Time: 2–4 hours
Best For: Symbolic travel/purpose piece
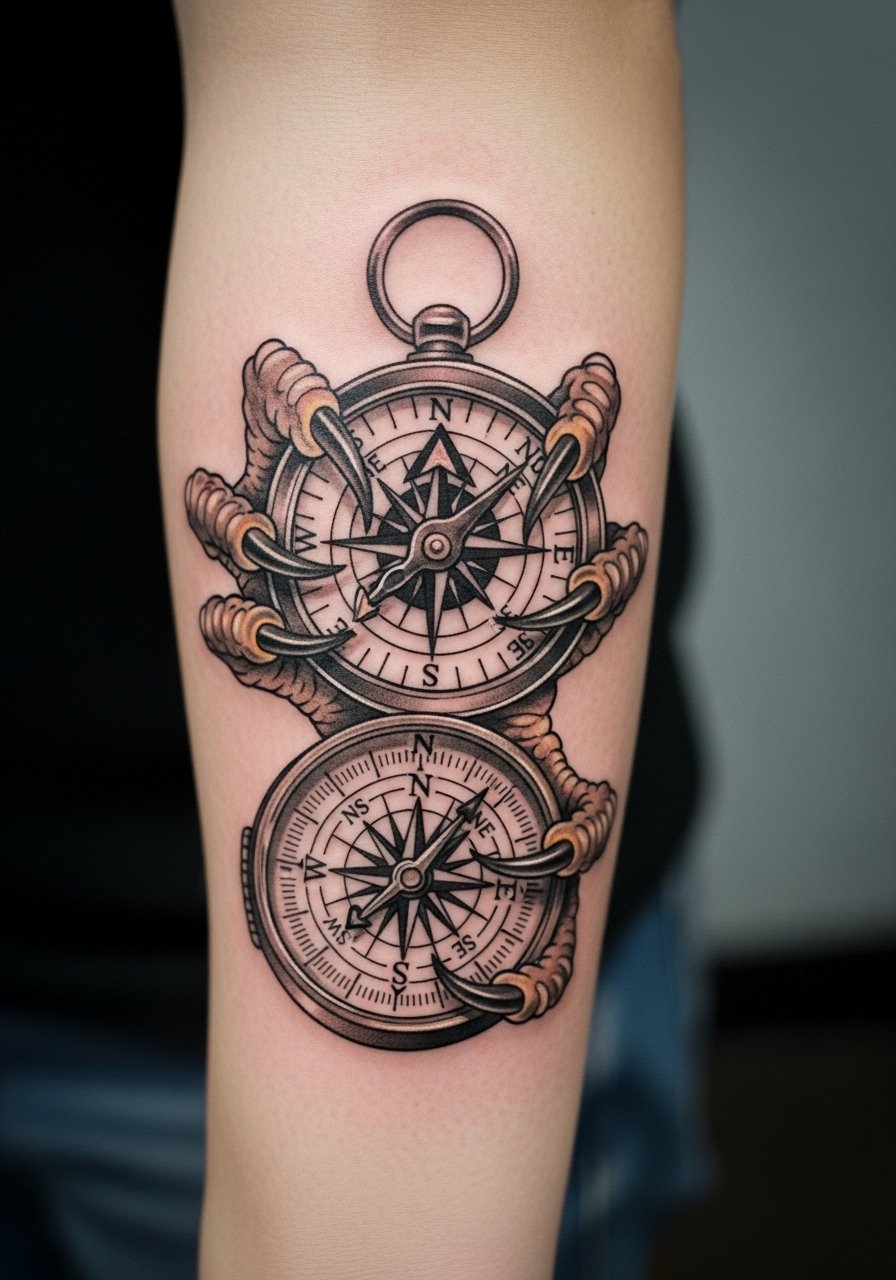
An eagle clutching a compass pairs power with direction—perfect for people who want symbolism of focus and guidance. The forearm provides a visible strip that shows both talon detail and compass face. Expect moderate discomfort but good visibility during healing. Over time, high-contrast black in the talons will hold, but tiny compass numerals might blur—avoid excessive micro-text. I tell clients to ask for simplified numerals or bolder markings for longevity.
12. Abstract Brushstroke Eagle on Calf
Style/Technique: Abstract / Brushstroke & Painterly Marks
Pain Level: Low-Medium (3-4/10)
Session Time: 1–3 hours
Best For: Artistic, elongated canvases
An abstract eagle with brushstroke style works beautifully on the calf—movement and verticality complement the leg. Pain is manageable, and the calf’s thicker skin accepts color well. From what I’ve seen, this style ages like a painting: edges soften but the composition remains recognizable. Avoid tiny, intricate details that get lost; let the brushstrokes convey energy. Ask your artist how they plan color density for healing.
13. Double-Headed Eagle on Upper Back (Heraldic)
Style/Technique: Heraldic / Bold Symmetry & Line
Pain Level: Medium (4-5/10)
Session Time: 3–5 hours
Best For: Symbolic, regal compositions
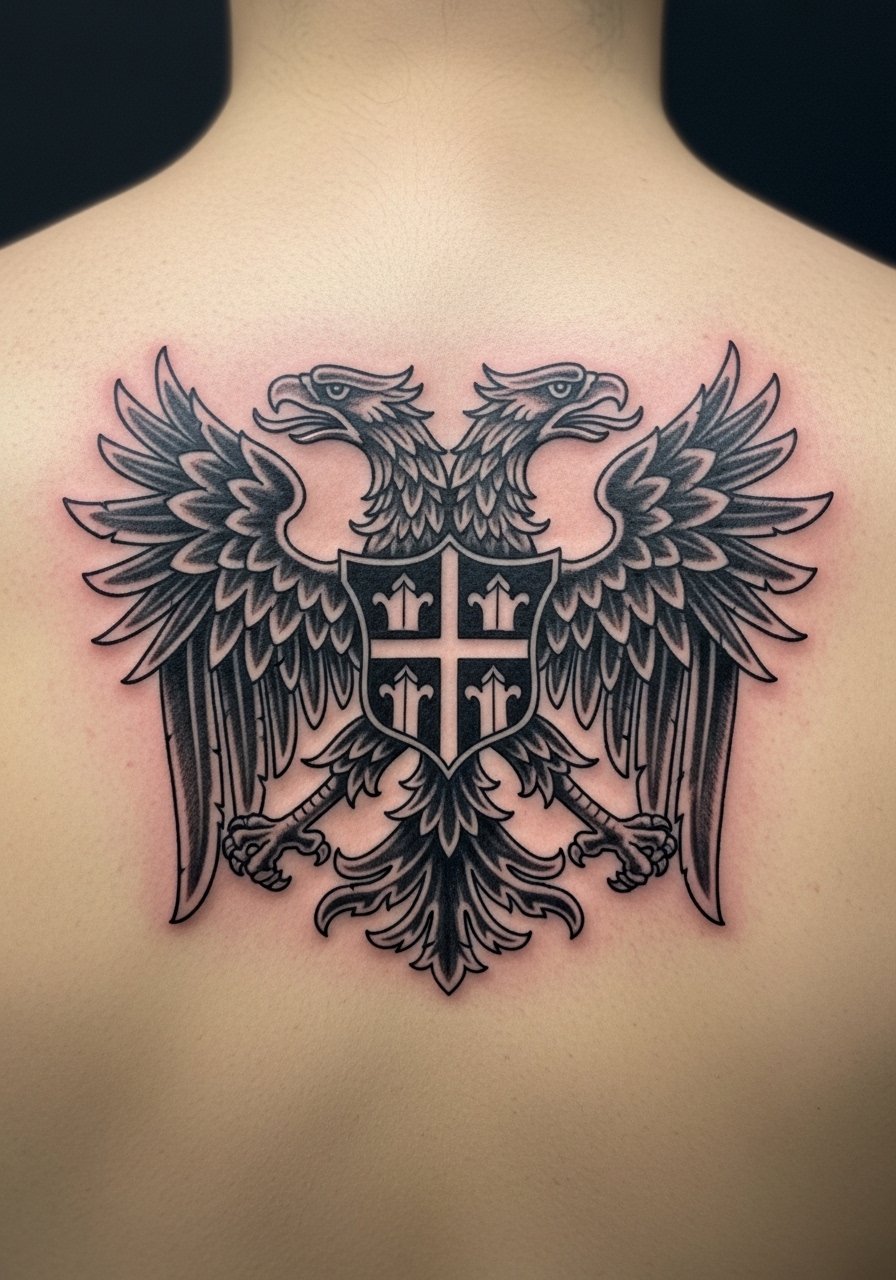
A double-headed eagle feels regal and symbolic—great if you want ancient myth or heraldry references. Upper back symmetry plays well across the spine and shoulder blades. Pain varies by proximity to spine; plan sessions to allow for break times. I’ve noticed heraldic designs with strong outlines age well because the silhouette remains readable. Avoid excessive micro-patterning inside the wings; they can blur into noise. Ask to see other heraldic pieces from the artist.
14. Small Silhouette Eagle on Collarbone
Style/Technique: Minimalist / Solid Silhouette
Pain Level: Medium-High (5-6/10)
Session Time: 30–60 minutes
Best For: Discreet yet visible placement
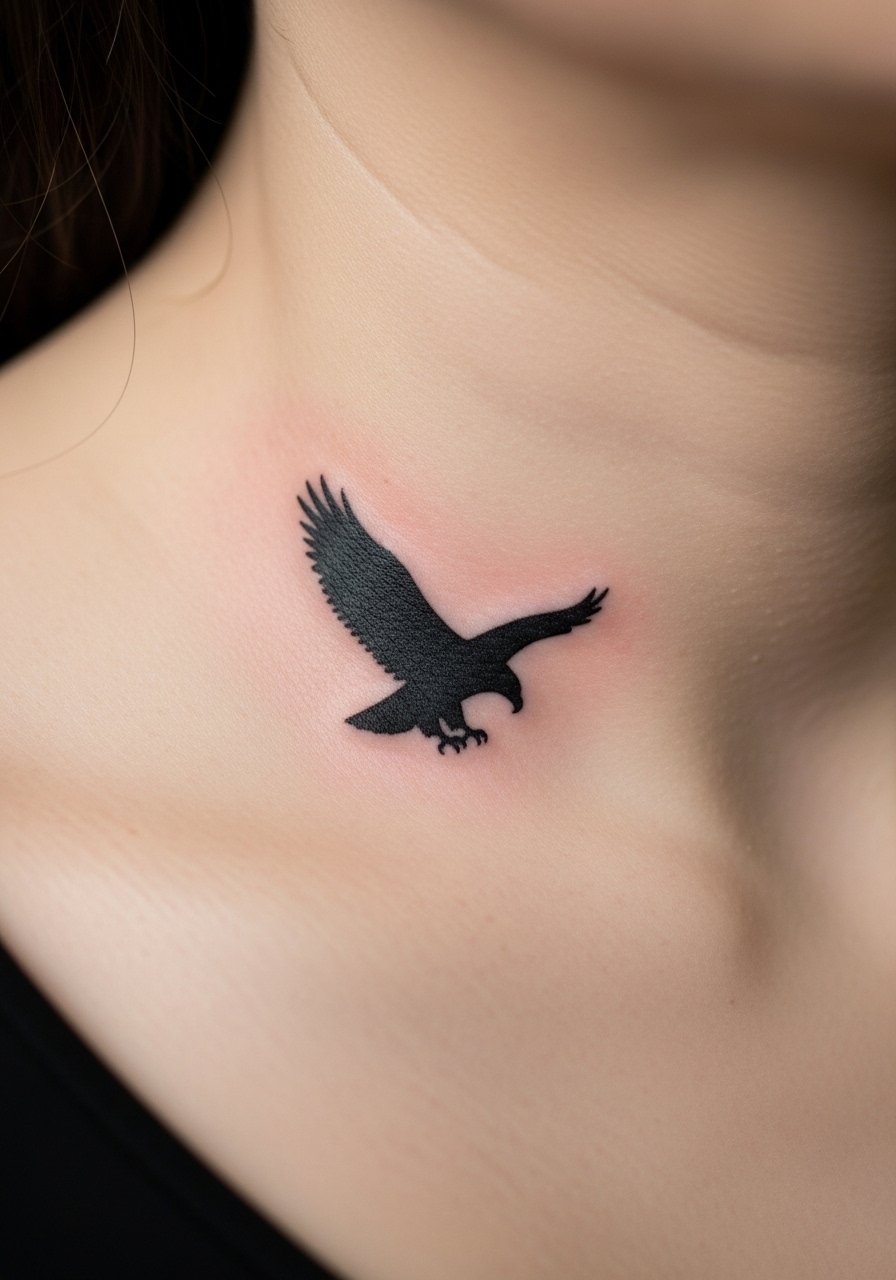
A tiny silhouetted eagle on the collarbone reads confident without shouting. Collarbone area is bony, so the sensation is sharper; sessions are brief. Solid black silhouettes fare well long-term because there’s no tiny detailing to blur. Watch for placement over the bone—adjust slightly to avoid distortion with movement. A mistake is trying to add color or tiny feathers; the silhouette is most effective as a clean shape. Ask for a stencil to preview how it sits across the clavicle.
15. Eagle and Flag Sleeve Accent on Bicep (Patriotic)
Style/Technique: Traditional / Patriotic Motif
Pain Level: Low-Medium (3-4/10)
Session Time: Multiple sessions
Best For: Fans of patriotic symbolism, visible arm placement
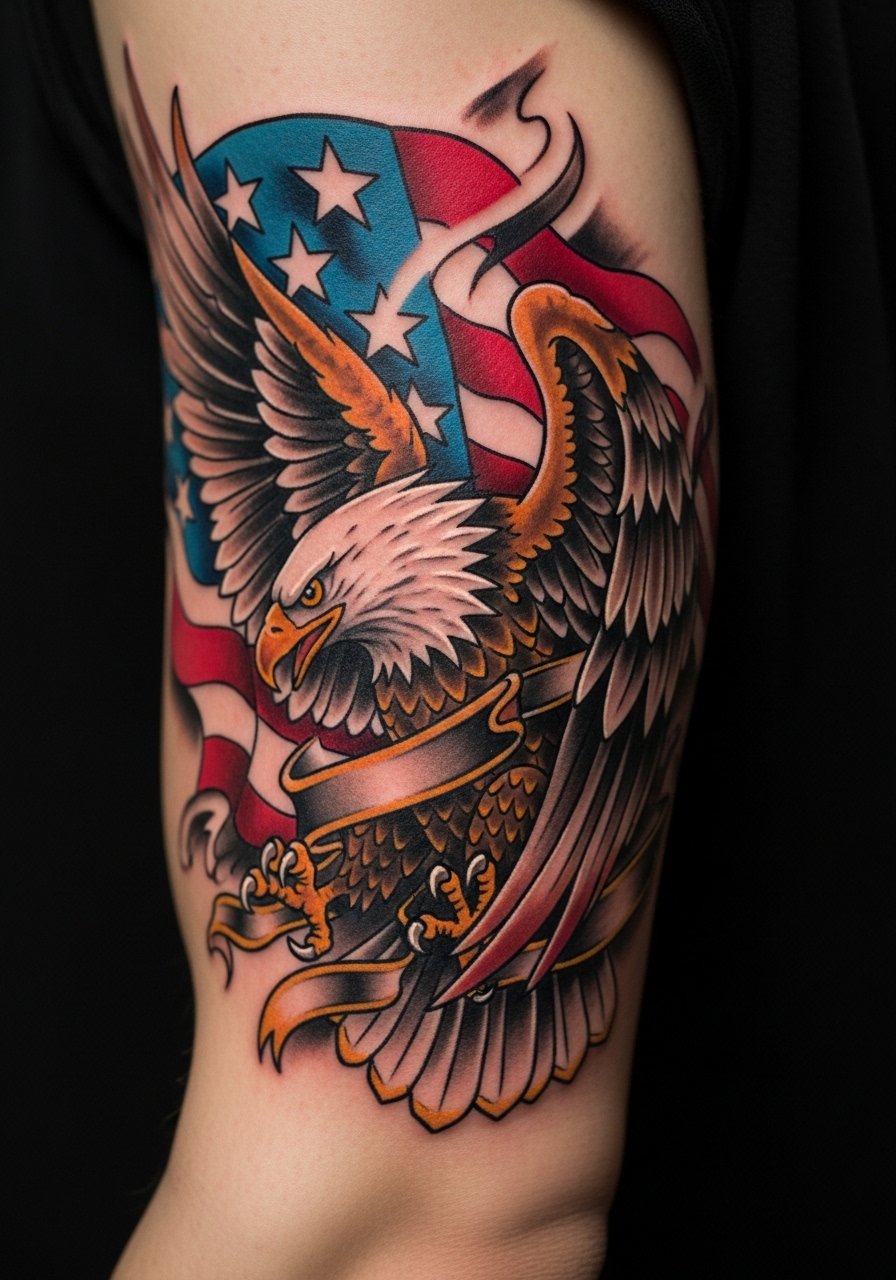
Eagles paired with flag elements are classic for expressing patriotism. As an accent on the bicep it reads proud and visible. The bicep is less painful and handles color saturation well. Long-term, color can mellow but well-saturated reds and blues stay vibrant if protected from sun. A common mistake is over-detailing the flag folds; keep shapes readable from a few feet away. Ask your artist how they balance color saturation with long-term retention on your skin tone.
16. Eclipse Eagle: Eagle with Celestial Elements on Ribcage
Style/Technique: Illustrative / Celestial Integration
Pain Level: High (7-8/10)
Session Time: Multiple sessions (2–4 hours)
Best For: Hidden symbolism, dramatic canvas
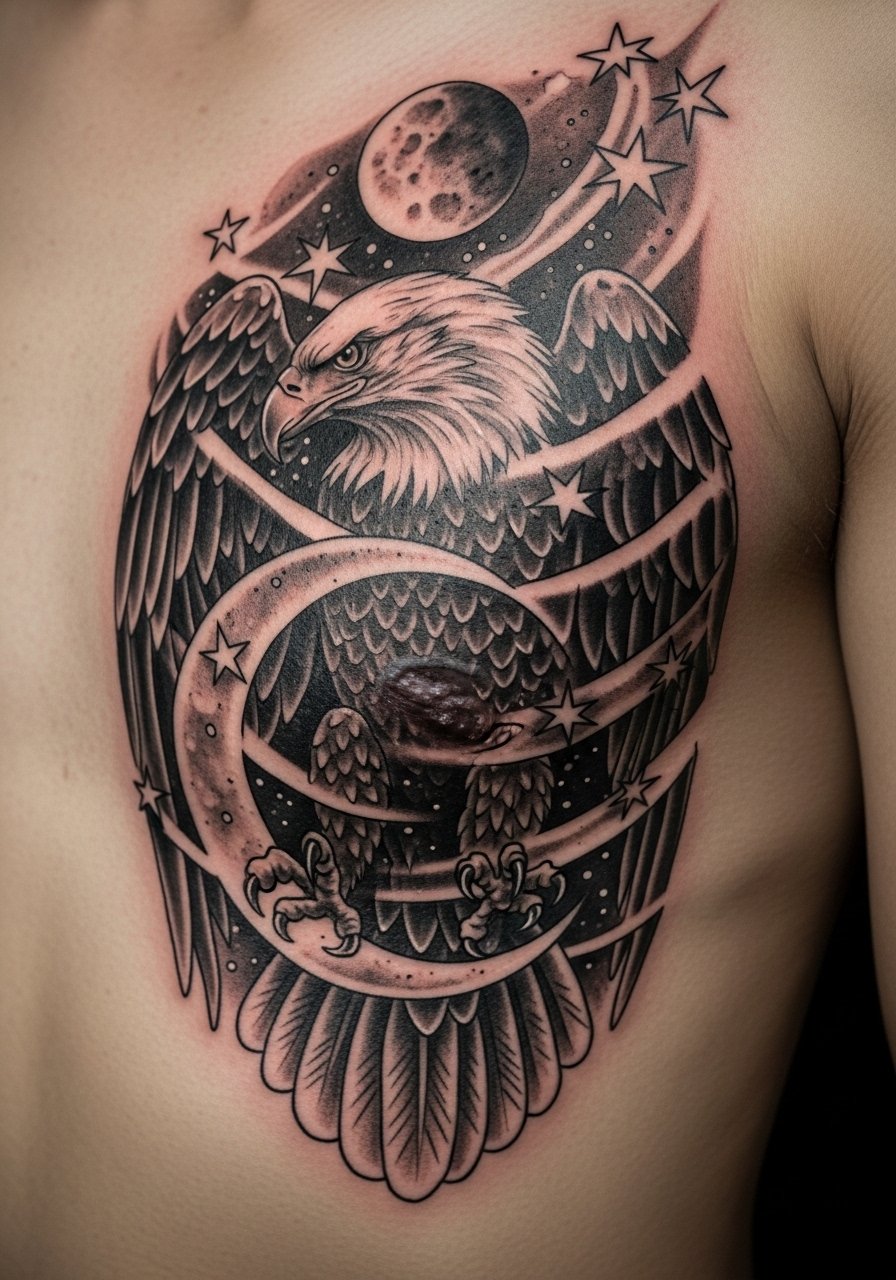
Putting an eagle with moon phases or stars on the ribcage gives an introspective edge—visibility is optional and the ribcage offers vertical scope. The ribs are one of the more painful spots, so brace for more intense sessions. Healing needs cautious movement control; the area stretches during breathing. Dark shading around the globe helps the design hold up, but delicate star dots might fade—plan for contrast. Avoid cramming too many small moons; choose a clear arrangement.
17. Abstract Negative Space Eagle on Sternum and Upper Abdomen
Style/Technique: Negative Space / Minimal Blackwork
Pain Level: High (6-7/10)
Session Time: 2–4 hours
Best For: Modern, bold negative silhouettes
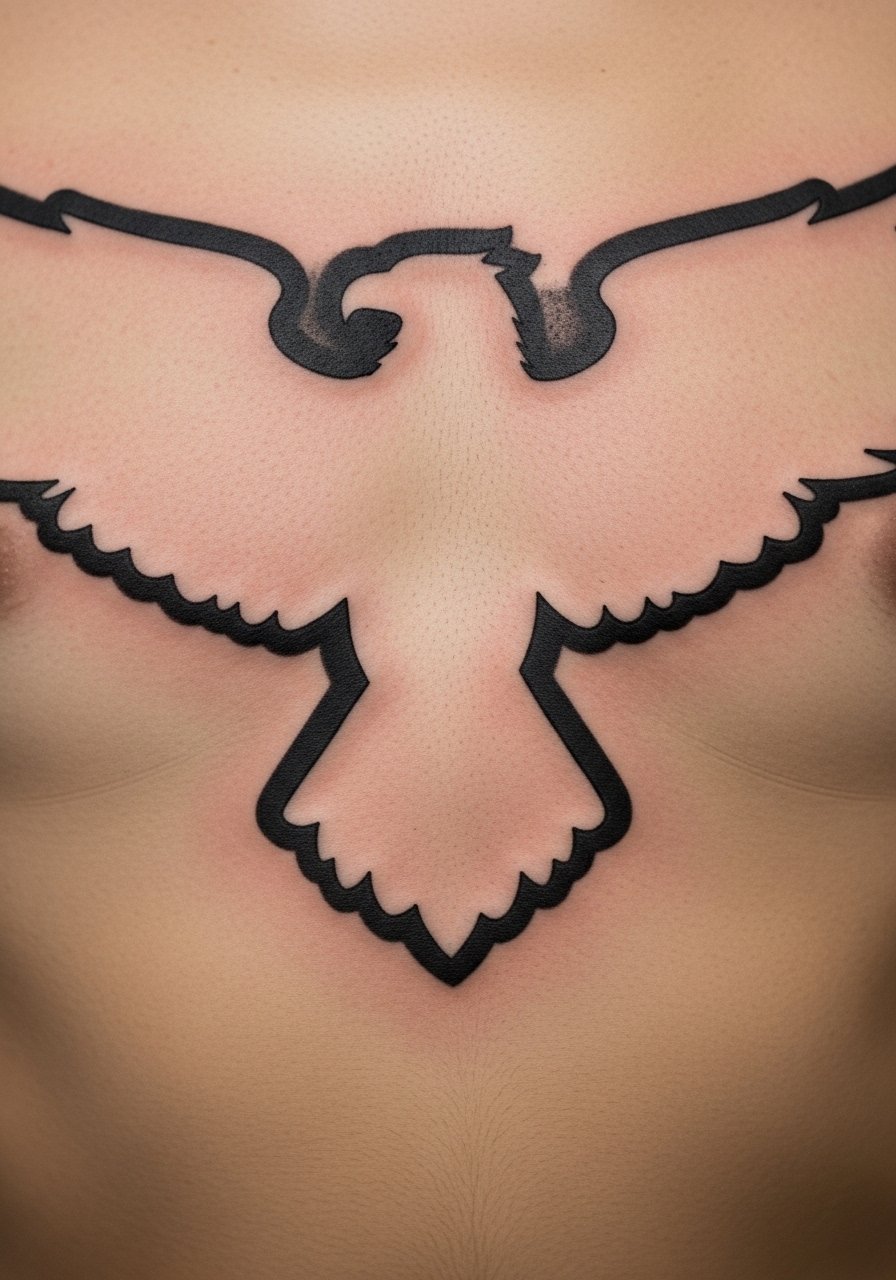
Negative-space eagles rely on the skin tone to form the image against surrounding blackwork—dramatic when done right. On sternum and upper abdomen this creates a centered, modern look. Pain is higher due to abdomen sensitivity and movement. Over time, large black fills hold well, but small negative gaps can soften—discuss scale with your artist. A common mistake: making negative spaces too intricate; keep shapes sizable.
18. Eagle Skull Hybrid on Forearm Sleeve
Style/Technique: Dark Realism / Neo-Traditional Blend
Pain Level: Medium (4-5/10)
Session Time: Multiple sessions
Best For: Edgy, narrative sleeves
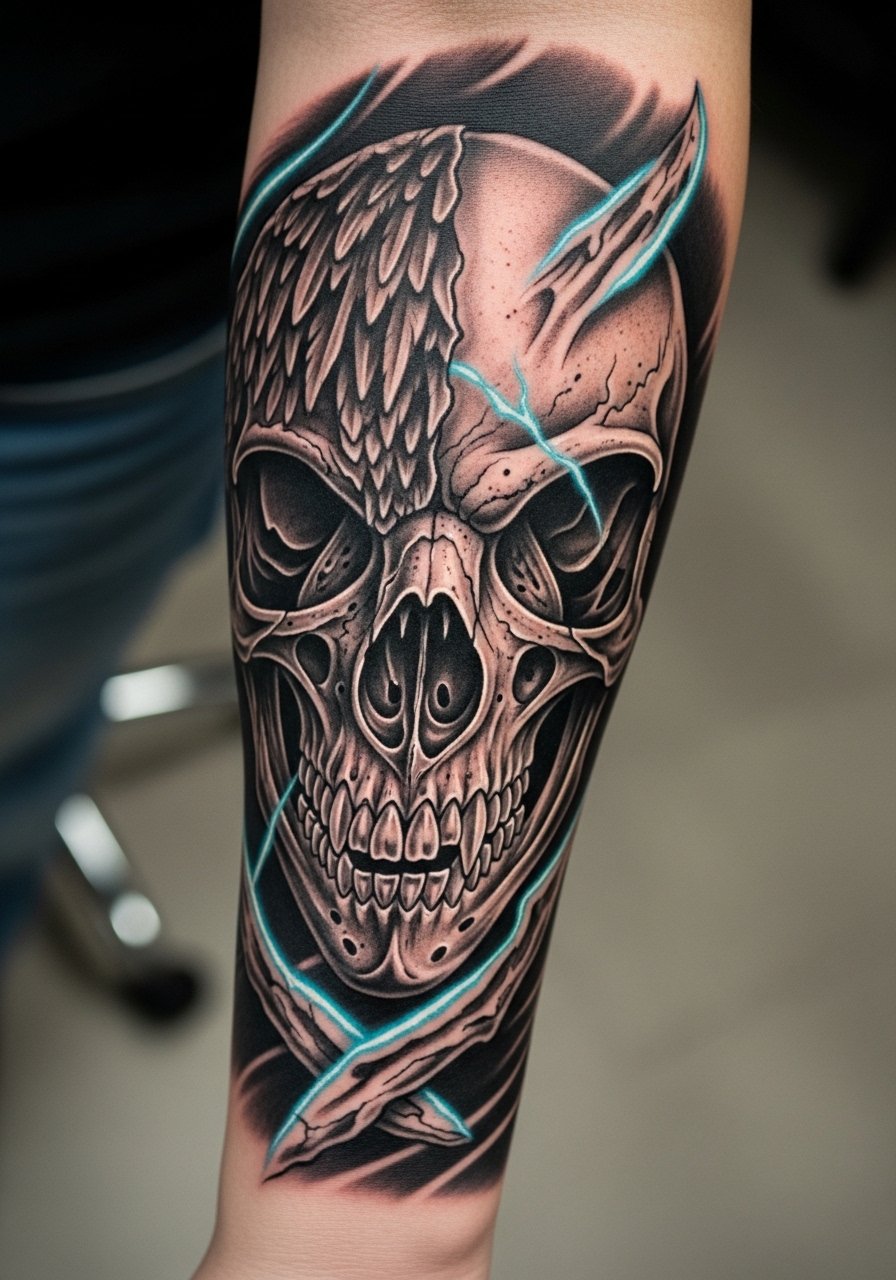
A hybrid eagle-skull merges life and mortality themes—striking as part of a forearm sleeve. The forearm heals well and is visible; plan for multiple sessions to layer contrast. I’ve seen these age nicely when artists emphasize strong highlight points. Avoid over-texturing the skull; too much micro-shading can blur. Ask the artist how they’ll separate the eagle elements from the skull so readability remains over time.
19. Eagle in Flight Over Mountains on Upper Arm/Shoulder
Style/Technique: Illustrative / Landscape Integration
Pain Level: Medium (4/5)
Session Time: 2–4 hours
Best For: Outdoor-themed symbolism, medium canvas
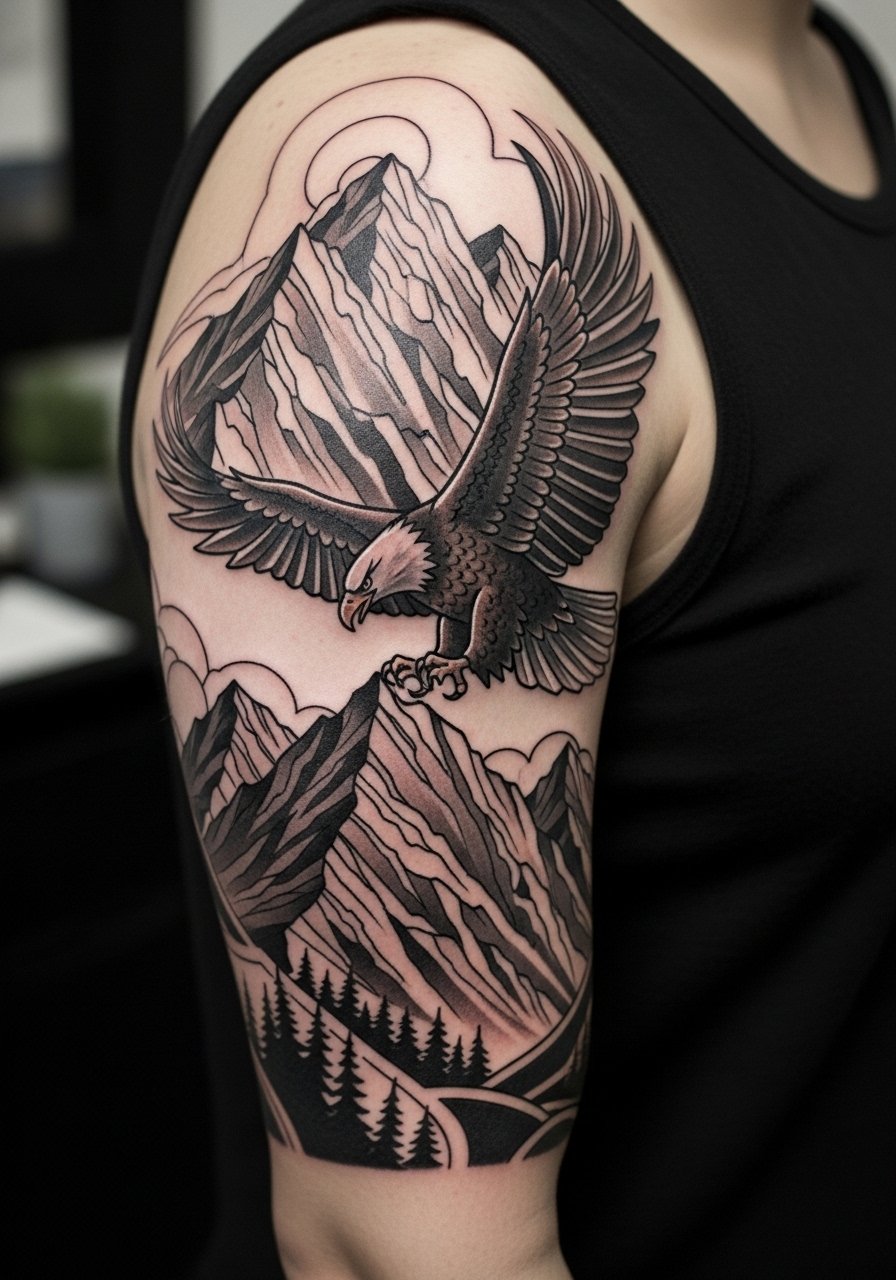
Combining an eagle with mountains ties power and freedom to landscape—great for upper arm and shoulder where the horizon wraps naturally. Pain is moderate and healing is straightforward. I recommend stronger line work in the mountains to keep distance depth readable as the piece ages. One mistake: tiny tree lines or distant detailed elements that lose clarity. Ask your artist how they’ll maintain the sense of depth without fragile detailing.
20. Dotwork Eagle Mandala on Upper Back
Style/Technique: Dotwork / Mandala Integration
Pain Level: Medium (4-5/10)
Session Time: Multiple sessions (2–5 hours)
Best For: Meditative symmetry, decorative covers
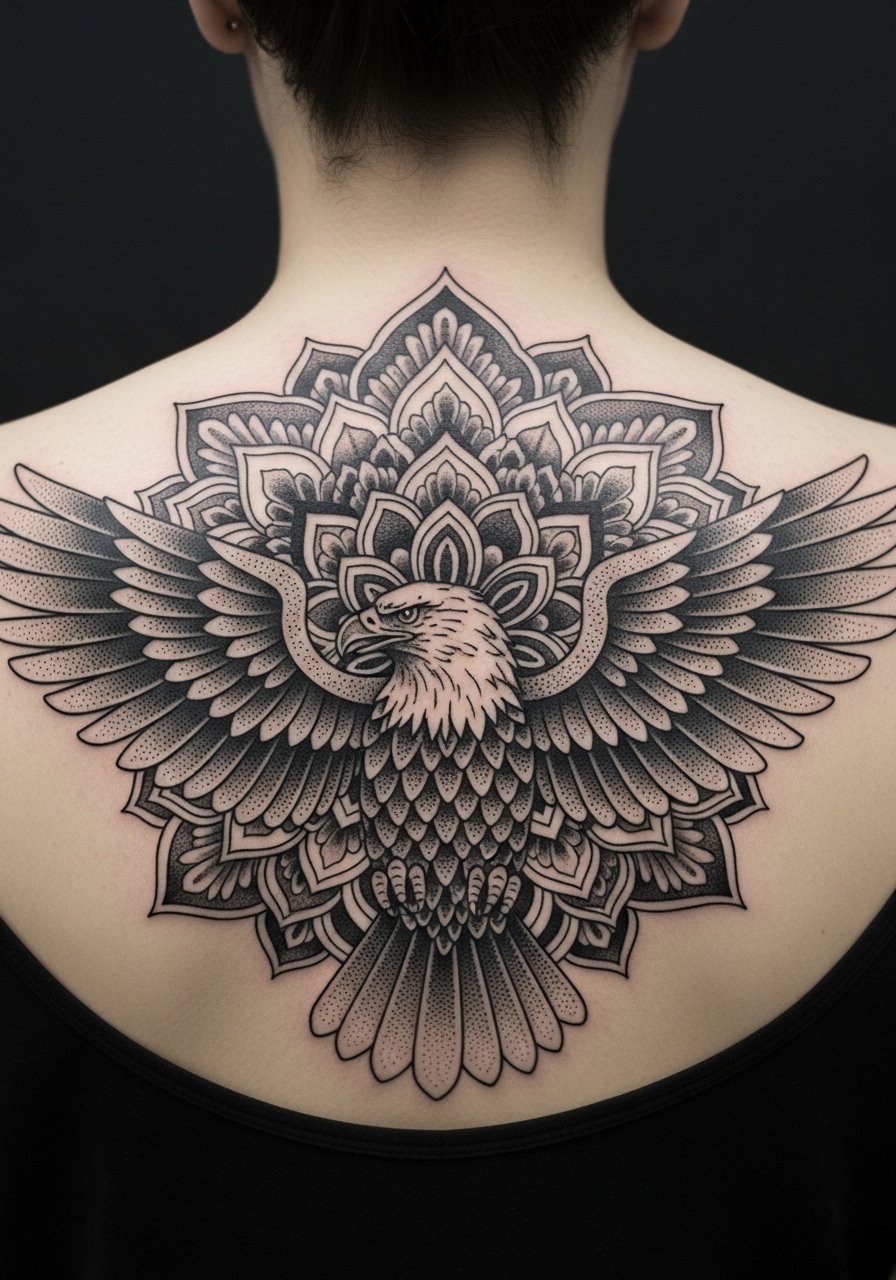
A dotwork eagle mandala blends geometry and nature—visually intricate and meditative. Upper back gives the space needed for symmetry. Dotwork ages well when dots are placed with spacing that allows for slight spreading. Pain is moderate but the repetitive technique can feel prolonged. Avoid packing dots too densely; the design needs breathing room to prevent muddying. Ask for healed close-ups of dotwork at similar scales.
21. Small Line Eagle on Ankle
Style/Technique: Fine Line / Small Silhouette
Pain Level: High (6-7/10)
Session Time: 30–60 minutes
Best For: Discreet placement, graceful movement
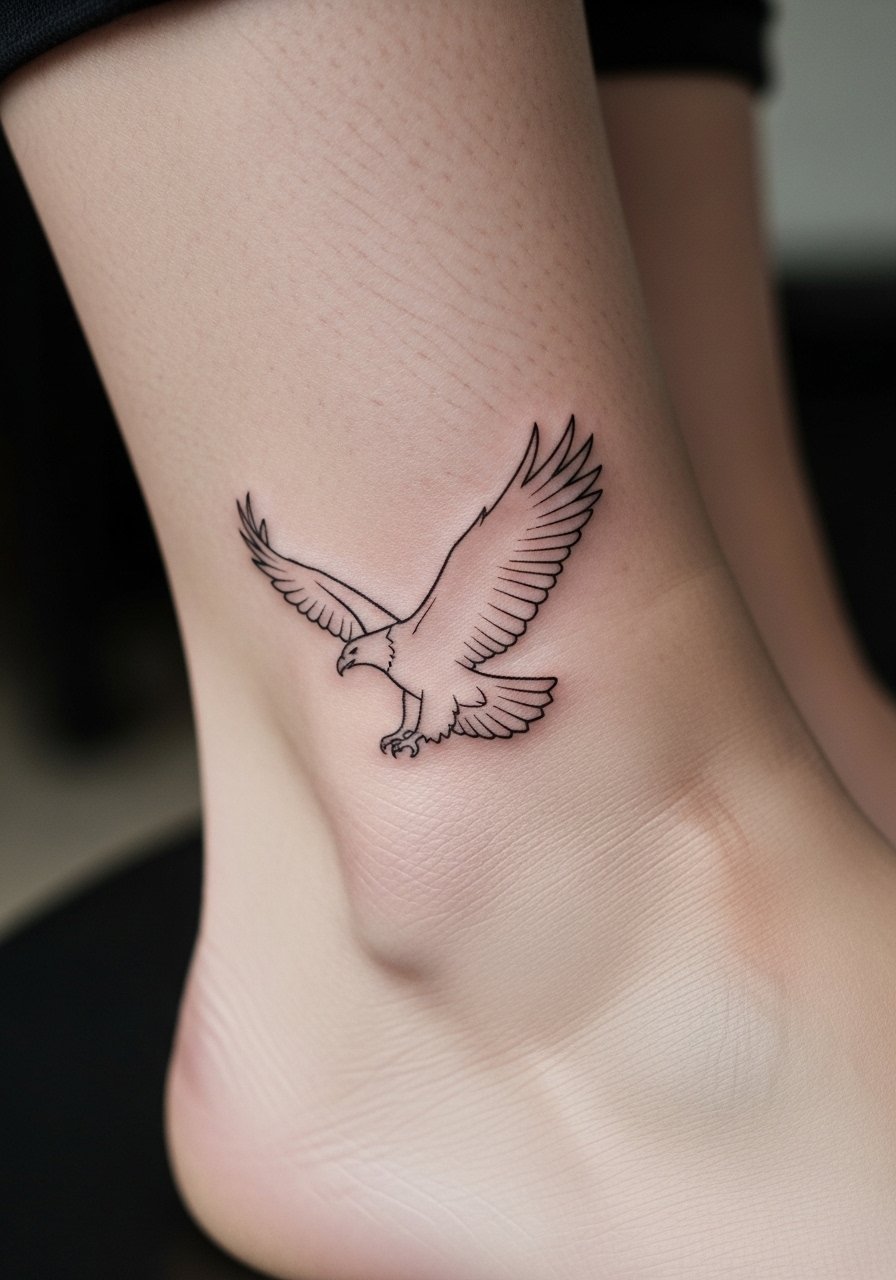
An ankle eagle is a delicate and mobile spot. The area is sensitive due to thin skin and bone, so expect sharper sensations. Small line work can blur on ankles from friction with shoes; I usually suggest a slightly bolder outline. Healing requires avoiding socks and shoes that rub the spot for a few days. Don’t insist on extremely fine feather detail—keep the silhouette simple. Ask your artist how they adapt small designs for ankle motion.
22. Eagle with Olive Branch on Wrist
Style/Technique: Illustrative / Symbolic Peace Motif
Pain Level: Medium (4-5/10)
Session Time: 1–2 hours
Best For: Symbol of peace/power, visible small piece
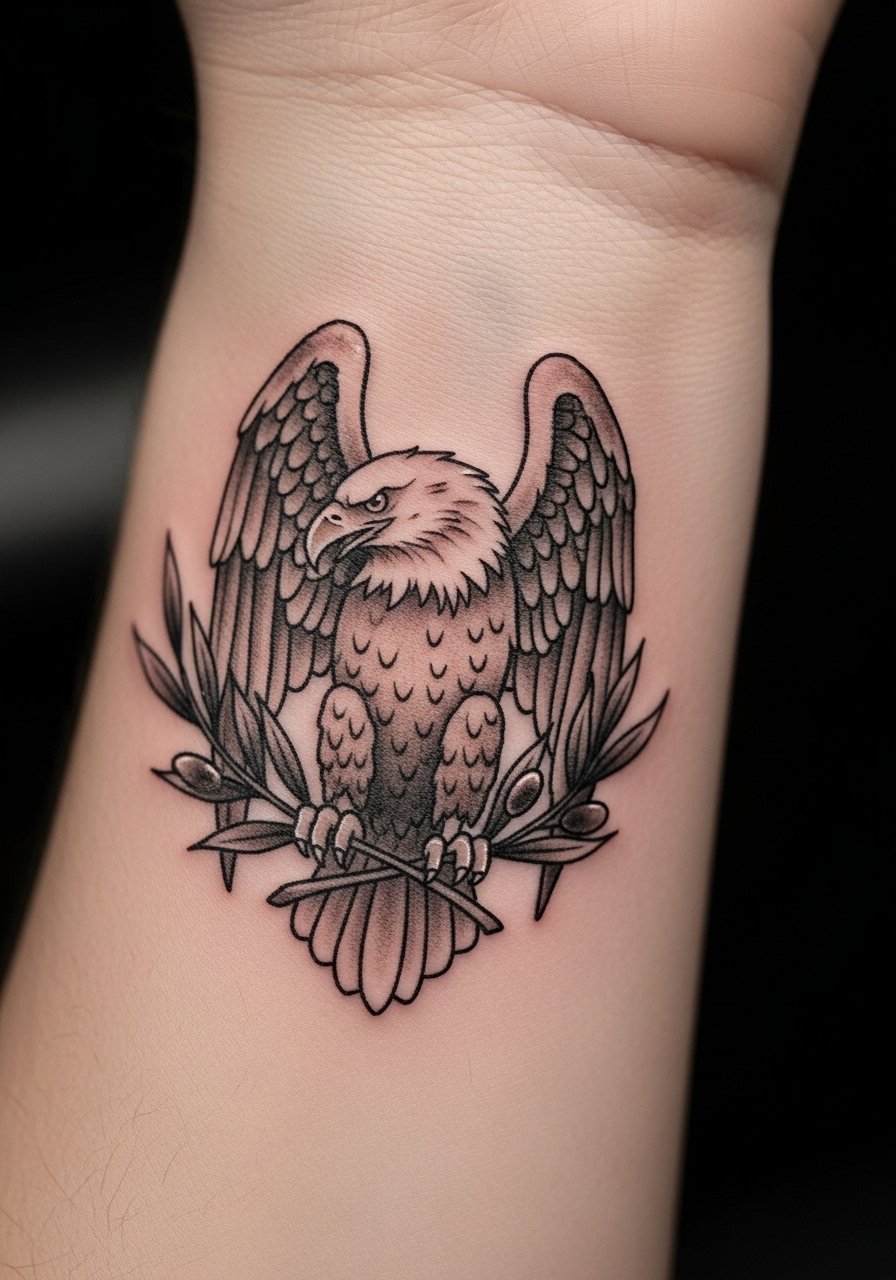
An eagle holding an olive branch pairs power with peace—subtle but meaningful on the wrist. The wrist’s thin skin means sensation is noticeable but sessions are brief. The design reads well healed if contrasts are strong; tiny leaves can fade, so opt for defined shapes. Avoid over-complicating the branch with micro-veins. Ask your artist for healed wrist examples to see how leaf shapes settle.
23. Sleeve Accent: Eagle Head Emerging from Smoke
Style/Technique: Illustrative / Dramatic Shading
Pain Level: Medium (4-5/10)
Session Time: Multiple sessions
Best For: Dynamic sleeve compositions
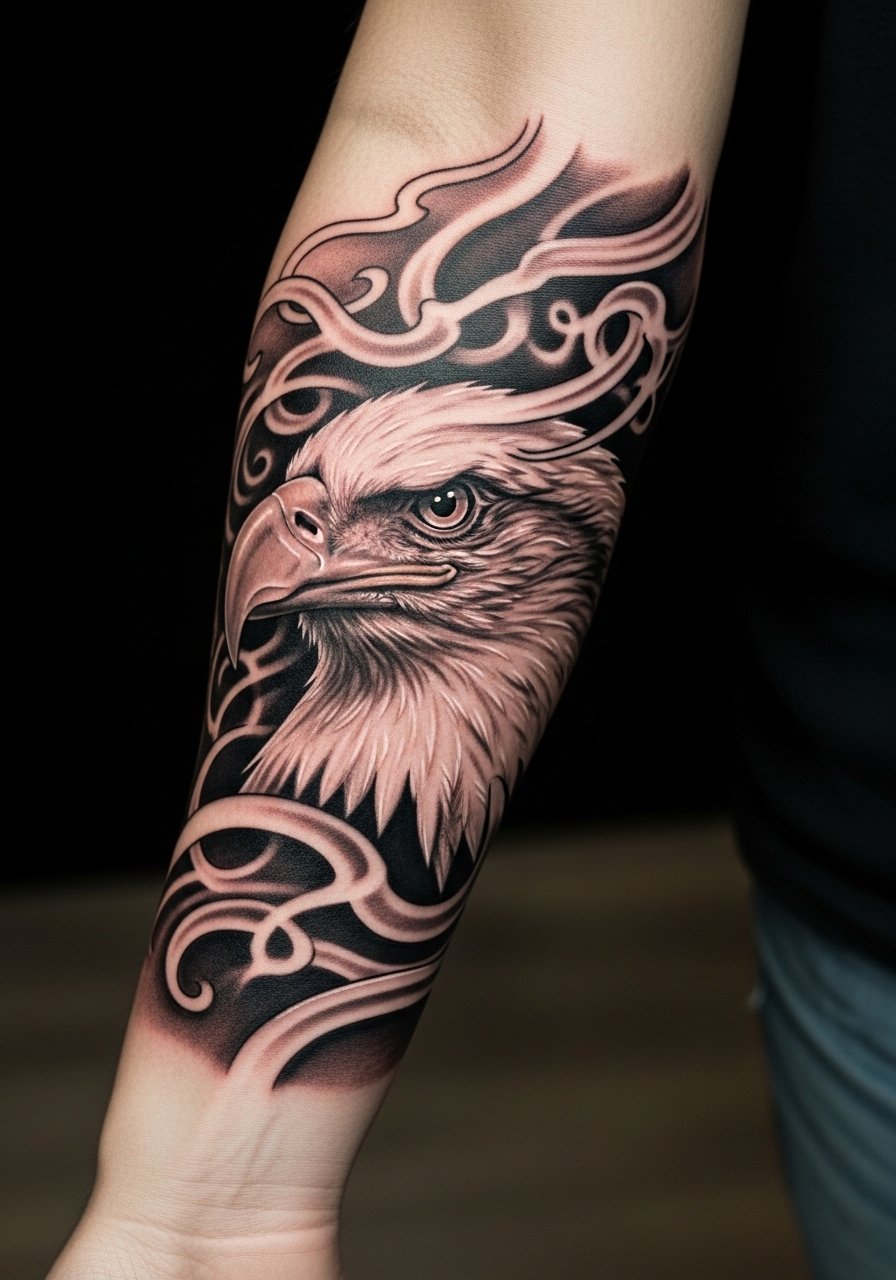
An eagle head breaking through smoke creates movement and drama—perfect as an anchor in a sleeve. Shading plays a big role here; dark smoke backgrounds make the eagle pop. Forearm placement is forgiving and heals reliably. Over time, smoky areas may soften; maintaining strong highlights keeps the focal point intact. Mistake: relying solely on very subtle graywork for definition. Ask how the artist will preserve contrast during healing.
24. Geometric Eagle Chest Medallion
Style/Technique: Geometric / Mandala Chest Medallion
Pain Level: High-Medium (5-6/10)
Session Time: 2–4 hours
Best For: Centered, symbolic chest pieces
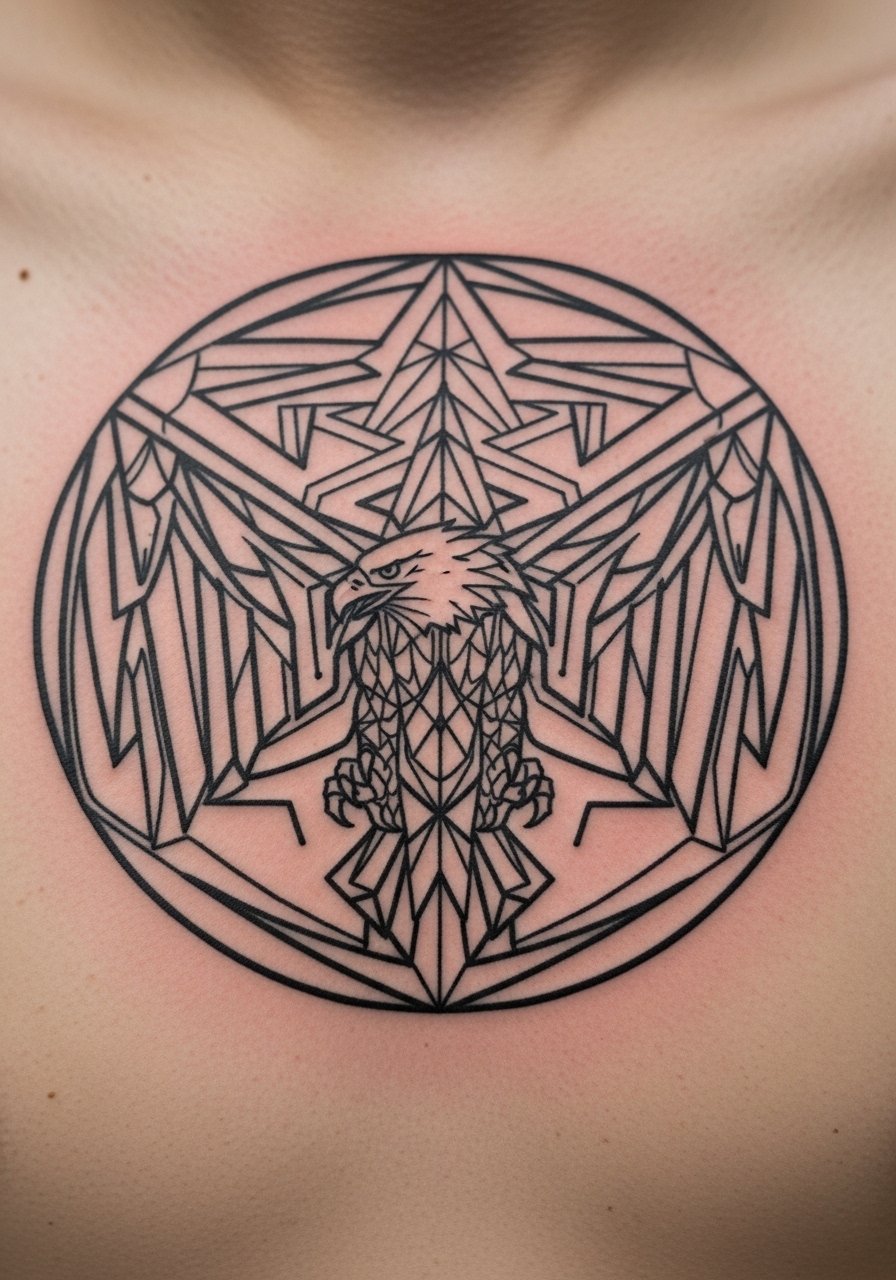
A geometric eagle medallion centers power and focus. Chest placement gives weight and symmetry. Pain is higher near the sternum, but the effect is striking. Geometric lines need crisp execution; over time, small misalignments can become visible, so choose an artist skilled with precise linework. Avoid overly tight patterns that risk blurring into each other. Ask to see healed geometric chest pieces for reference.
25. Eagle Feather Single-Needle on Behind Shoulder
Style/Technique: Fine Line / Single-Needle Feather Study
Pain Level: Low-Medium (3-4/10)
Session Time: 1–2 hours
Best For: Elegant accent, soft placement

A single eagle feather behind the shoulder feels intimate and poetic. The area is relatively low-pain and easy to conceal. Single-needle feather work looks delicate but can blur faster—so I recommend slightly boldening the quill line. Healing is simple; keep moisturized and protected from friction. A mistake is asking for micro-barbs along the feather shaft—they can fill in. Ask your artist how they balance delicacy with longevity.
26. Eagle and Compass Sternum Accent (Small Medallion)
Style/Technique: Illustrative / Small Centerpiece
Pain Level: High (6-7/10)
Session Time: 1–2 hours
Best For: Centered accent pieces, symbolic core tattoo
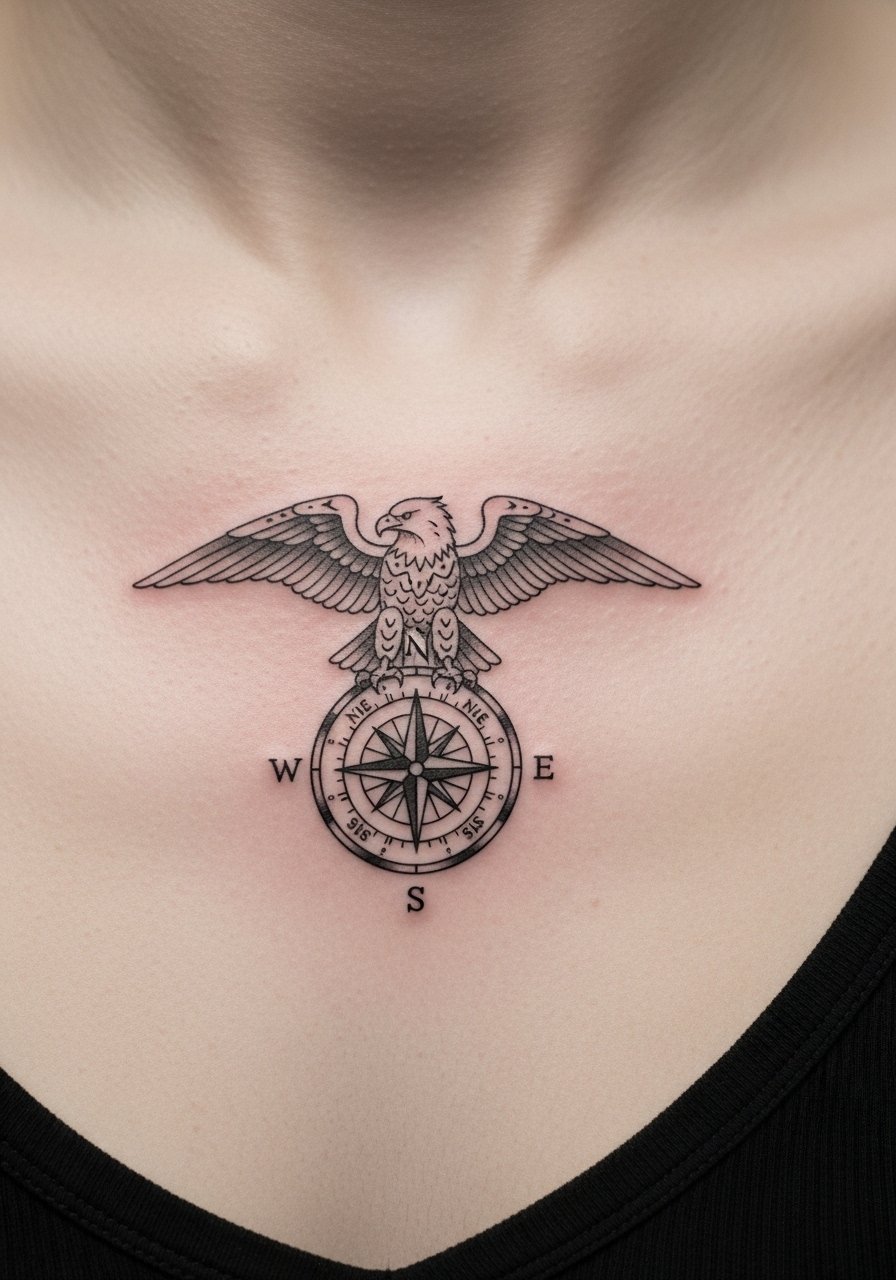
A small medallion combining an eagle and compass on the sternum makes a personal, centered talisman. The sternum is sensitive so expect a sharp sensation during the session, but it heals predictably if you limit movement. Small medallions need clear, bold lines to avoid loss of detail—tiny flourishes can blur. I advise clients to look for artists who show healed small medallions to understand how line weight settles.
Tattoo Prep and Aftercare Essentials
Aftercare Essentials:
- Aquaphor Healing Ointment, 14oz tube — Great for the first 3–5 days to prevent drying
- Saniderm Transparent Adhesive Bandage, 6-inch roll — Second-skin option many artists use for the first 24–72 hours
- CeraVe Fragrance-Free Moisturizing Lotion, 12oz — For days 4–14 to keep skin hydrated
Before Your Appointment:
- Tattoo Numbing Cream 5% Lidocaine — Use only if your artist approves; applied 30–45 minutes before session
- Tattoo Stencil Transfer Paper (Thermal Copy) — Handy if you’re testing placement at home
Long-Term Maintenance:
- SPF 50 Sunscreen Stick for Tattoos — Daily protection to prevent fading
- Mad Rabbit Tattoo Balm, 2oz — Post-healing balm to keep color vibrant
- Hustle Butter Deluxe, 4oz — Vegan aftercare for long-term moisture
Optional Comfort & Recovery:
- Tattoo Numbing Spray — For touch-ups or super-sensitive spots (ask artist)
- Hydrocolloid Bandages (Large) — Useful for small tattoos once initial scabs form
I recommend artists who actually use Saniderm or Aquaphor over flashy marketing claims—those two consistently come up in conversations I’ve had with pros. Always follow the specific aftercare your artist gives you.
Frequently Asked Questions
Q: How bad does a tattoo actually hurt?
A: Pain depends on placement and your tolerance. Outer arm/bicep = lower, around 2–4/10. Ribs, sternum, and ankle = higher, around 6–8/10. It’s more like a constant scratching or rasp than a single sharp nerve shock. If you’re nervous, ask about a numbing cream 5% lidocaine—I’ve used it on small sessions and it helps take the edge off, but it doesn’t erase feeling completely.
Q: How long does a tattoo take to heal?
A: Surface healing is usually 2–3 weeks; deeper healing can take 2–3 months. The first week is critical—clean gently with a mild soap, apply a thin layer of Aquaphor or follow your artist’s preference, and avoid soaking. Expect peeling around days 3–7; don’t pick or peel.
Q: How do I keep my eagle tattoo from fading?
A: Sunscreen is non-negotiable. From what I’ve seen, UV exposure is the top fading culprit—use a SPF 50 stick on visible tattoos daily. Moisturize with a fragrance-free lotion like CeraVe to keep skin healthy.
Q: Can I work out after getting a tattoo?
A: Wait at least 48–72 hours before heavy exercise, longer if the tattoo is in a high-movement area. Sweating and friction can irritate fresh ink and increase infection risk. For fragile spots like ribs or sternum, I usually advise a week without strenuous movement.
Q: What if my tattoo looks different healed than fresh?
A: That’s normal. Fresh ink is vibrant and raised; healed ink settles and sometimes softens. Fine lines tend to blur more than bold lines. I’ve noticed artists who show healed examples help set realistic expectations—always ask for healed photos during consults.
Q: Do tattoos look different on different skin tones?
A: Yes. Black and gray hold well across tones. Bright colors can appear more muted on deeper skin, and white ink is usually subtle or invisible on darker skin. From what I’ve gathered, finding artists who regularly tattoo your skin tone and can show healed photos matters more than the initial pitch.
Q: Should I use Saniderm or Aquaphor right after getting tattooed?
A: Follow your artist’s instruction—some favor Saniderm for the first 24–72 hours, others prefer Aquaphor for open-air healing. I keep both on hand: Saniderm adhesive bandage for wrap-style protection, and Aquaphor when the artist asks for ointment.
Q: How long before I can sunbathe or swim after a tattoo?
A: Avoid swimming and prolonged sun exposure for at least two weeks, longer for large or sensitive areas. Even after healed, protect the tattoo with high SPF.
