
I spent months stalking tattoo feeds before I realized the trouble wasn't a lack of wave tattoo ideas — it was knowing which ones actually age well and match a real-life vibe. These 23 flowing wave tattoos map out meanings I keep returning to: resilience, change, calm, and the raw pull of nature. I wrote these from conversations with artists, healed tattoos I’ve seen in person, and my own experiments.
This list focuses on minimalist, Japanese, watercolor, and abstract wave tattoo ideas. I pick placements that work for first-timers and collectors—wrist, forearm, ribcage, thigh. From what I’ve seen, the Japanese wave revival and single-line minimalist wave tattoos are trending in 2026 and tend to age very differently.
1. Minimalist Wave Outline on Wrist
Style/Technique: Minimalist / Fine Line
Pain Level: Low (2-3/10)
Session Time: 30–90 minutes, single session
Best For: First wave tattoo, easy to hide
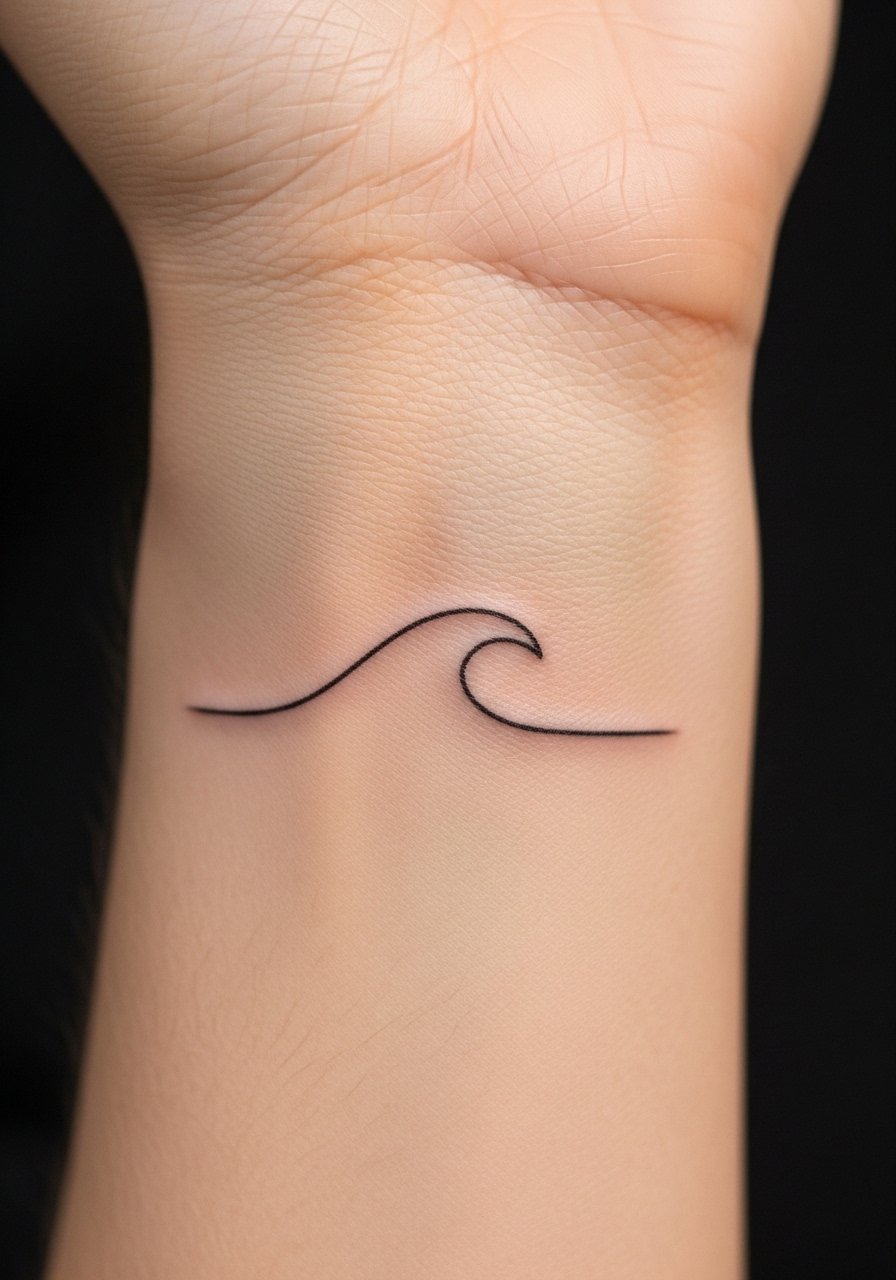
I love this as a first wave tattoo—it's subtle and reads as resilience or calm without shouting. Minimalist wave tattoos work visually because the single curve flows with wrist motion; it looks like movement even when still. Pain is mild on the outer wrist, though the inner wrist is more sensitive. Heals quickly in about 2–3 weeks for surface recovery; keep it moisturized. From what I’ve seen, very fine lines blur faster over years, so ask your artist about slightly bolder fine-line weight. A common mistake: making the line so thin it vanishes after healing. Ask for healed examples and a mockup in Procreate or on-skin stencil.
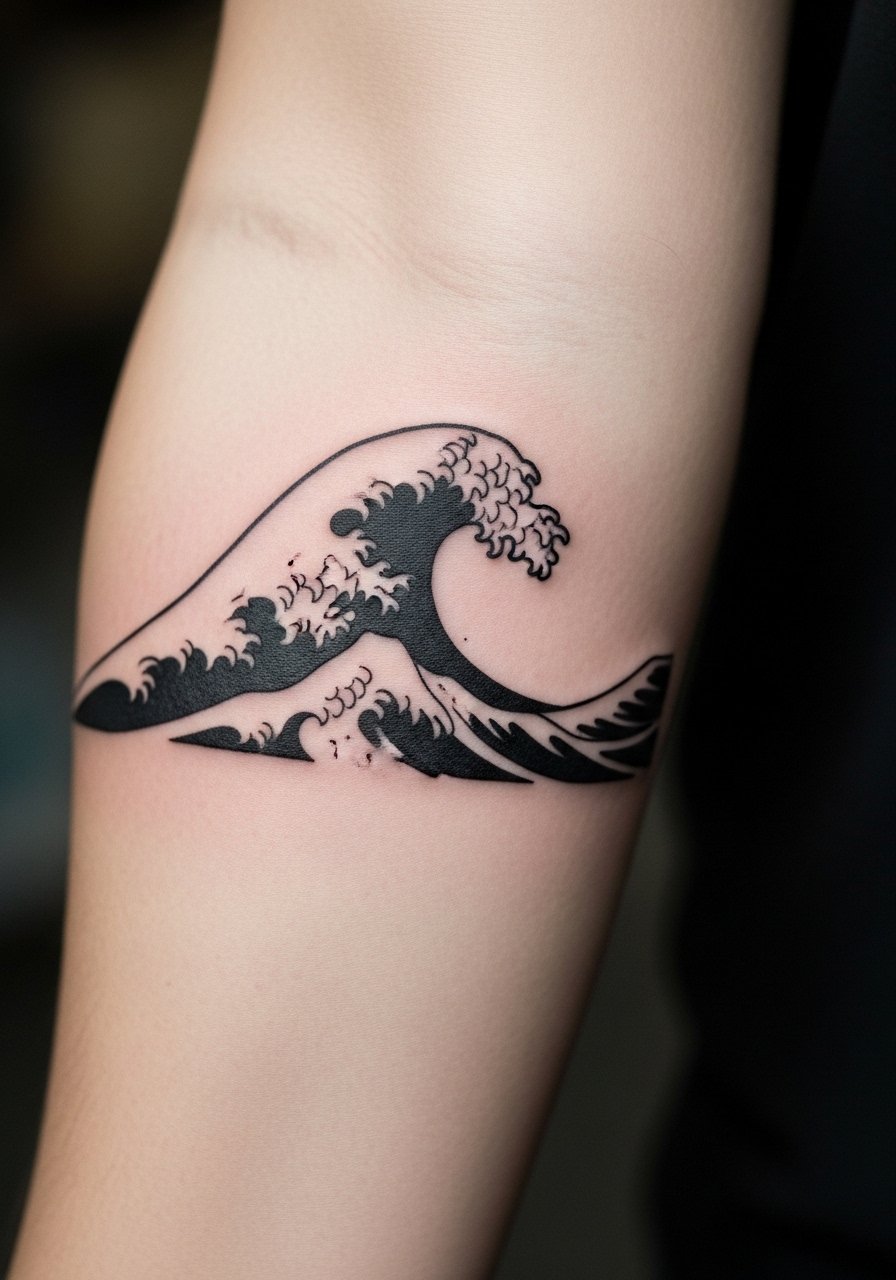
2. Japanese Great Wave on Forearm
Style/Technique: Japanese / Irezumi-Inspired
Pain Level: Medium (4-6/10)
Session Time: Multiple sessions, medium-large piece
Best For: Statement forearm piece, sleeve starter
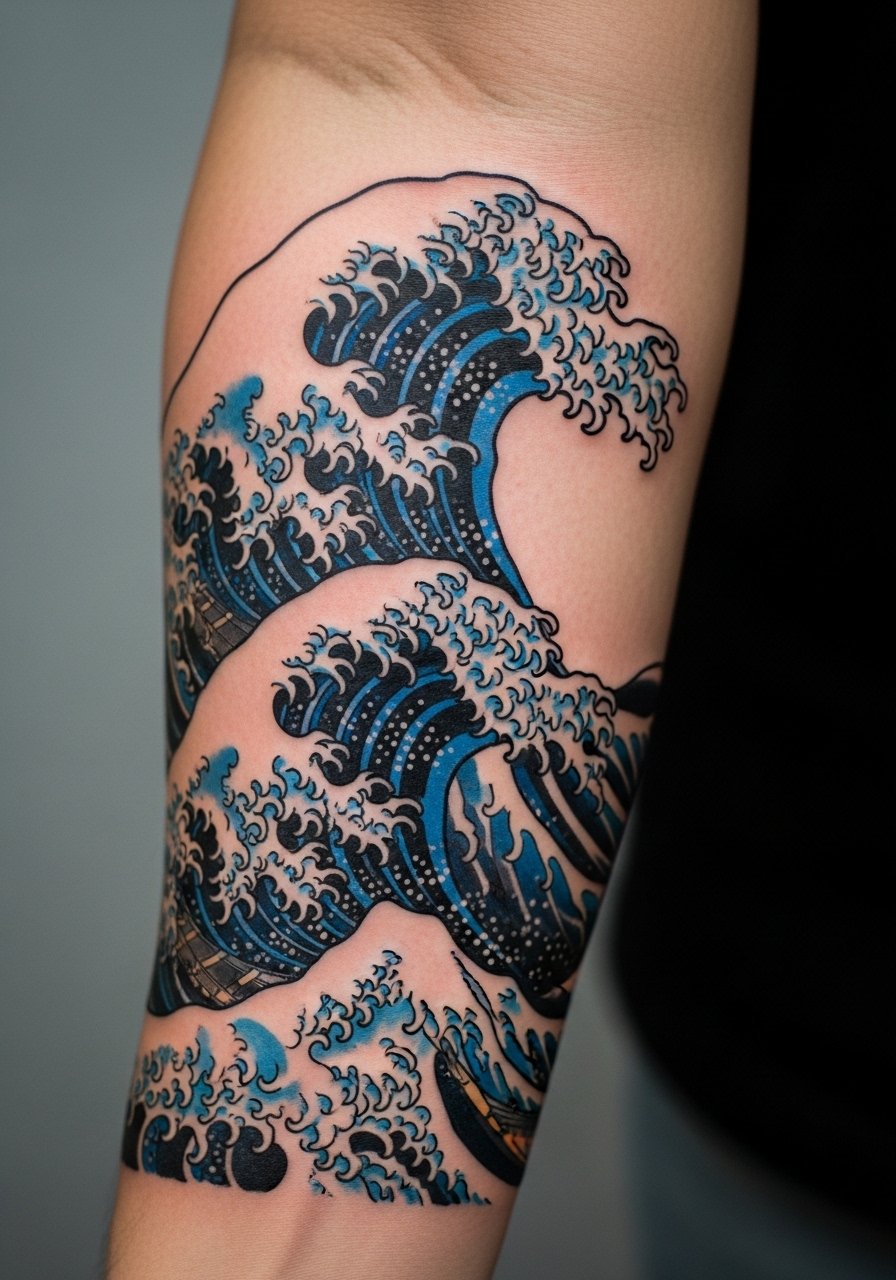
The Great Wave channeling Hokusai is timeless for a reason—it reads as power and the force of nature. A Japanese wave tattoo on the forearm flows with muscle lines and looks striking from every angle. Expect moderate pain on inner forearm, and plan sessions so the artist can layer bold outlines and saturated blues. In my experience, traditional Japanese swirl wave work holds up well because of strong outlines and shading. Avoid copying a print verbatim—talk to the artist about flow and adapting the piece to your arm curvature. If you want a sleeve filler that doesn’t flatten, ask for bold outlines and healed examples on similar skin tones.
3. Wave With Sun And Moon On Shoulder
Style/Technique: Neo-Traditional / Illustrative
Pain Level: Low-Medium (3-5/10)
Session Time: 1–2 sessions, medium size
Best For: Symbolic piece with balance meaning
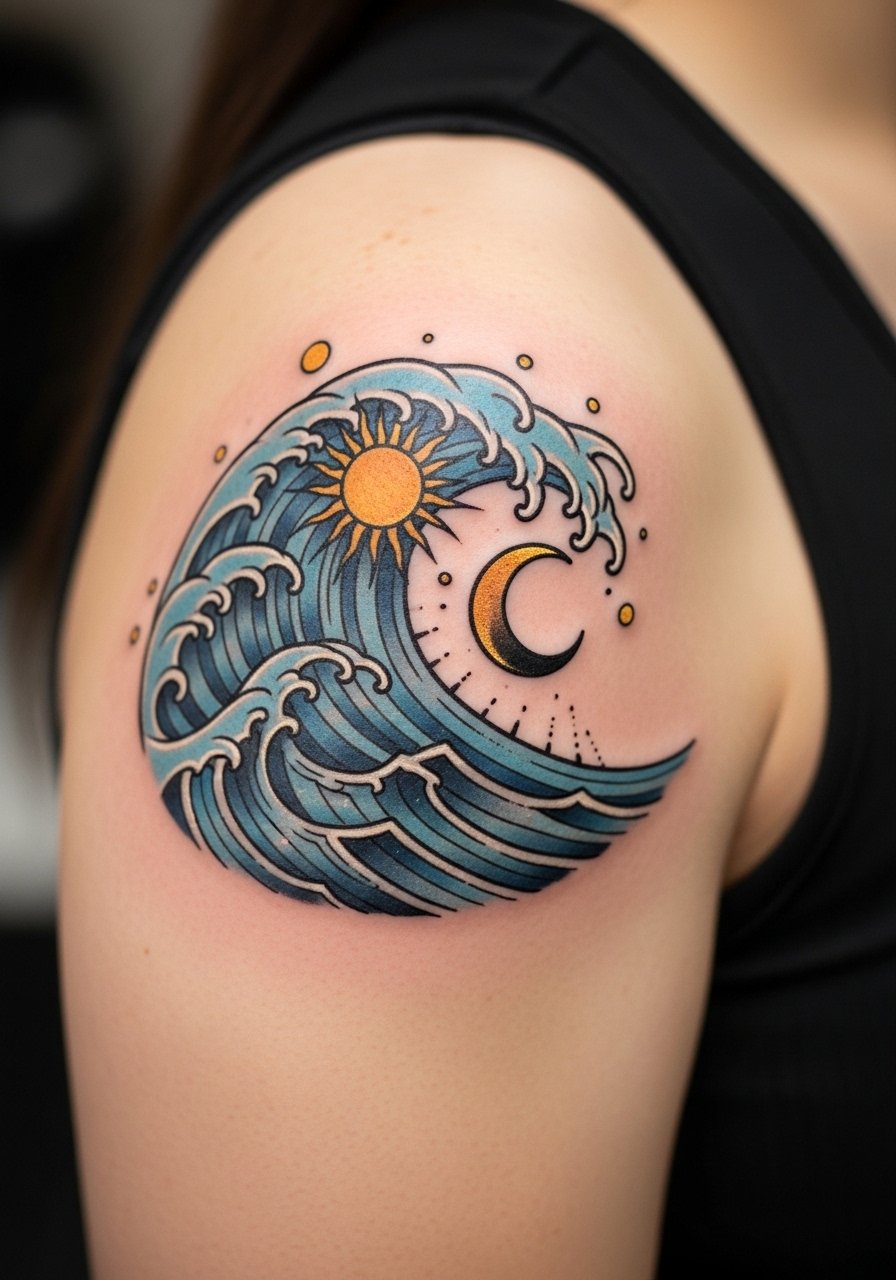
Combining a wave with sun and moon gives the tattoo a balance message—life’s highs and lows. The shoulder is forgiving for this composition because it gives room for a rounded horizon. Pain is manageable and healing is straightforward if you avoid friction from straps. From what I’ve noticed, color placement matters: saturated blues next to warm tones age differently, so ask about color saturation and aftercare. A common mistake is crowding the elements; let the wave breathe so the sun and moon read clearly when healed.
4. Watercolor Wave on Upper Arm
Style/Technique: Watercolor / Painterly
Pain Level: Medium (4/6)
Session Time: 1–2 sessions, medium size
Best For: Expressive statement, color lovers
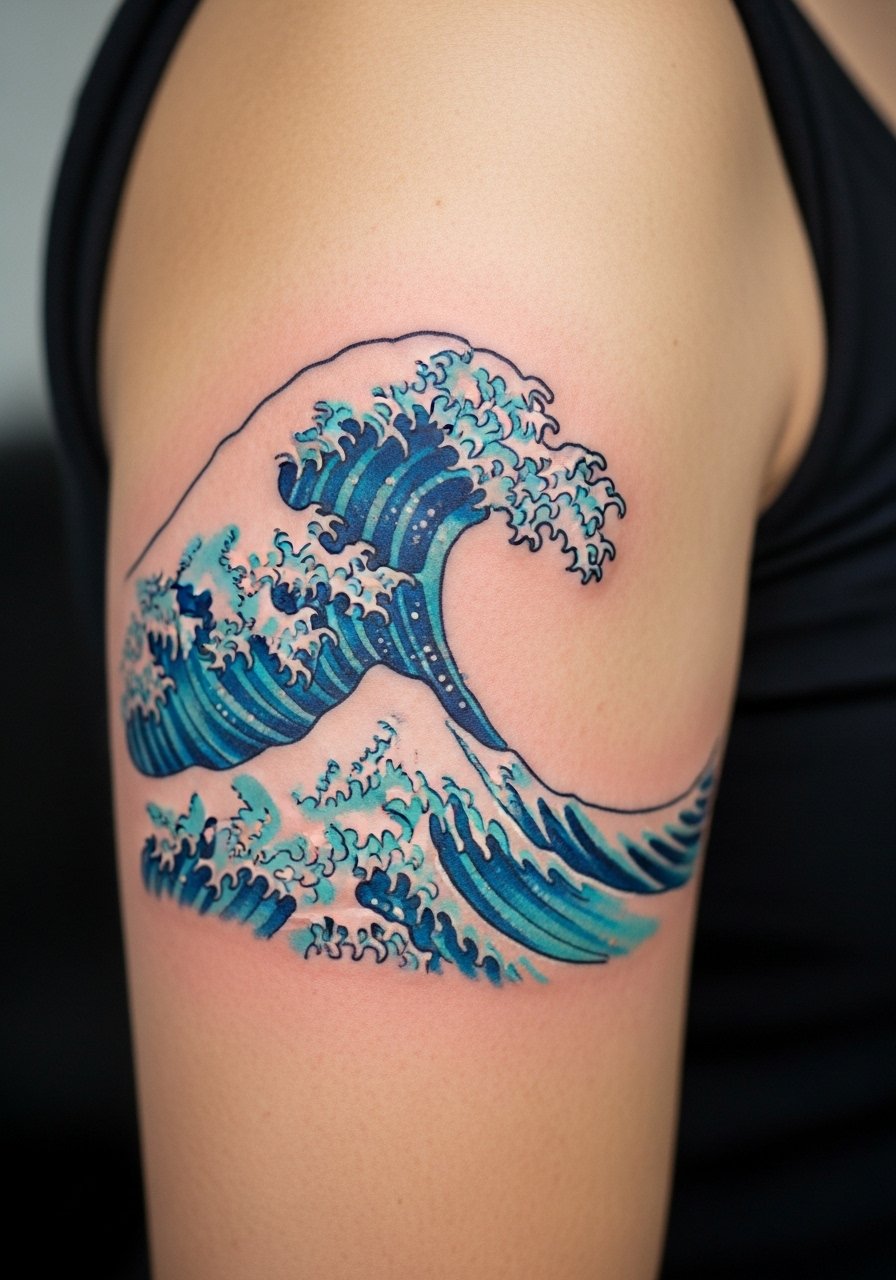
Watercolor wave tattoos feel airy and free—great for someone who wants a less literal ocean. On the upper arm the color fades less quickly than on hands or feet, but from what I’ve seen watercolor edges soften a lot as they heal. Expect medium discomfort during long color fills and plan for touch-ups. The big tip I give friends: ask for a stronger outline or a micro-structure beneath the watercolor—this helps the design age better. Avoid placing pure watercolor on high-friction spots unless you’re okay with faster fading.
5. Geometric Wave On Inner Forearm
Style/Technique: Geometric / Blackwork
Pain Level: Medium (3-5/10)
Session Time: 1–3 hours
Best For: Modern look, structured aesthetic
Geometric wave tattoos give order to chaos—circles, triangles, and repeating lines that form a crest. The inner forearm is ideal because it displays the pattern clearly and sits flat for crisp linework. Pain is moderate but tolerable. From my conversations with artists, blackwork geometric pieces age well if lines are given enough weight—micro thin lines can blur. A frequent mistake: overcomplicating the pattern at tiny sizes; keep shapes readable and ask to see healed blackwork samples.
6. Crashing Wave On Bicep
Style/Technique: Realism / Illustrative
Pain Level: Medium (4-6/10)
Session Time: Multiple sessions for detail
Best For: Resilience symbol, bold visual
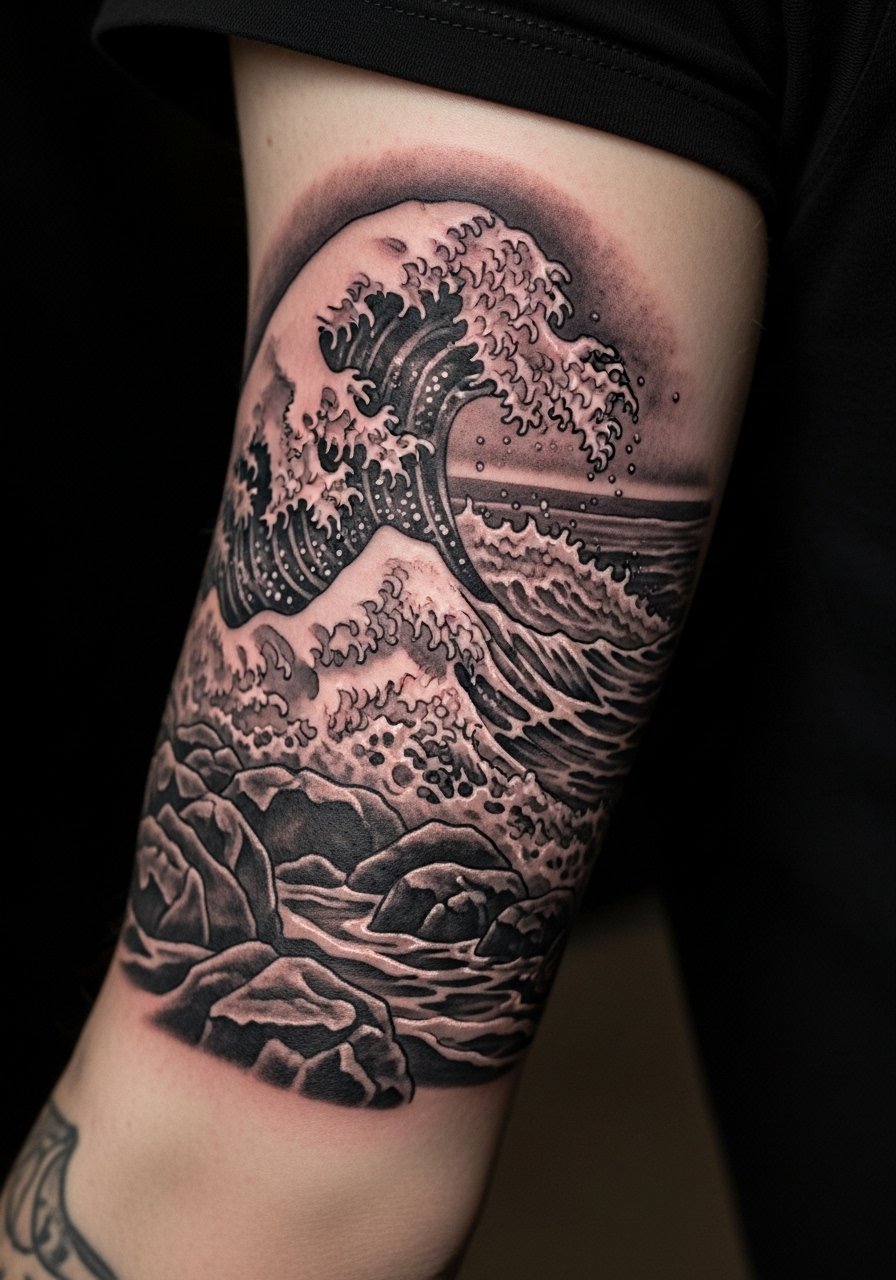
A crashing wave on the bicep reads as overcoming adversity—it’s raw and dramatic. The bicep gives enough canvas for detailed splash and rock texture, and it moves with your arm for dynamic photos. Pain on the outer bicep is milder than ribs; expect longer sessions. From what I’ve seen, realistic water takes good shading to keep depth after healing. Common mistake: asking for tiny realism; detail needs space. Bring reference photos and ask the artist about how highlights will look healed.
7. Mountain And Wave Sleeve Starter On Forearm
Style/Technique: Illustrative / Neo-Traditional
Pain Level: Medium (4-6/10)
Session Time: Multi-session sleeve starter
Best For: Adventurers, balanced elemental design
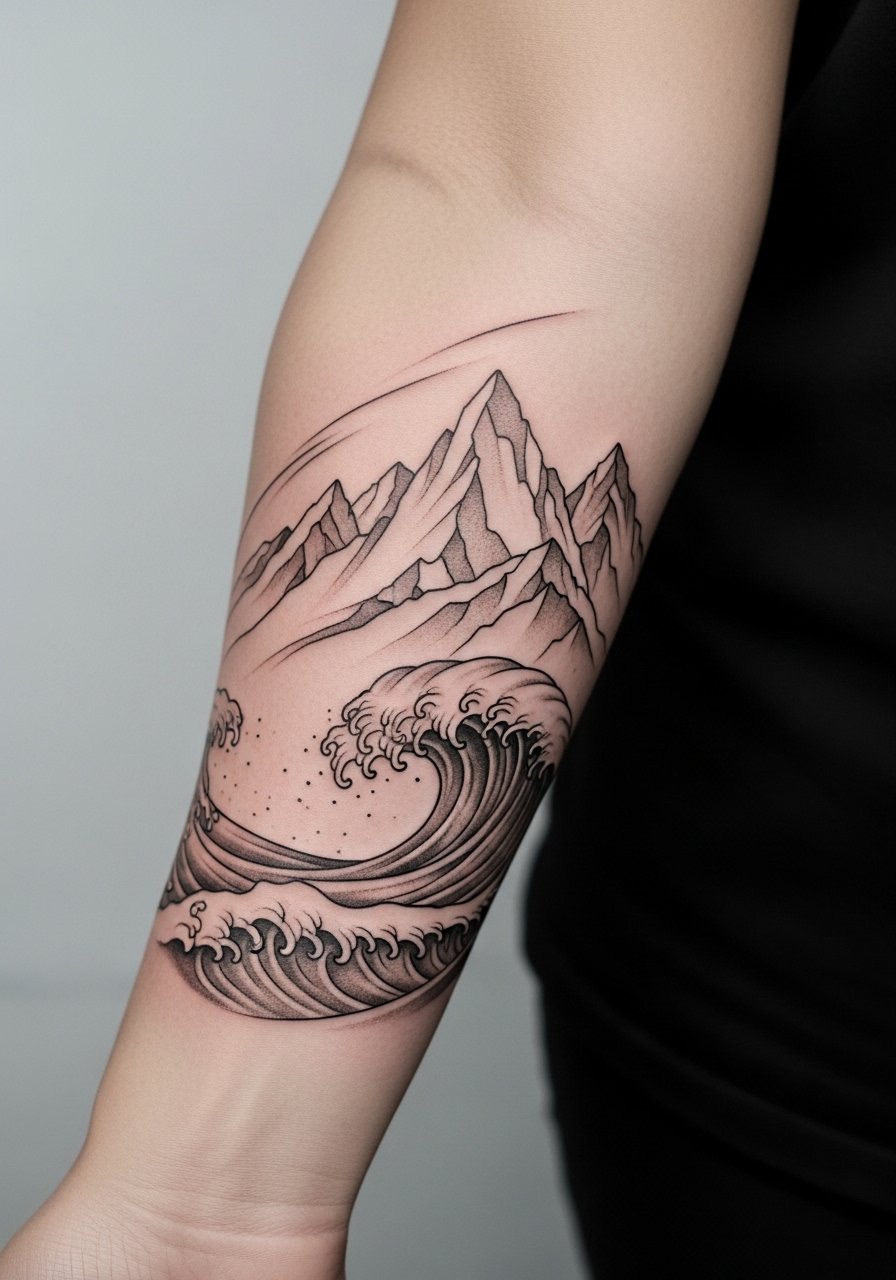
Blending mountains and waves speaks to balance—ground and current. I’ve seen this work beautifully as a forearm sleeve starter because the composition can spiral into a full sleeve. The forearm tolerates shading well. Expect multiple sessions so the artist can plan transitions between land and water. From my experience, ask for mockups to see how the piece hugs your muscles. A mistake is jamming in too many motifs—let negative space act as breathing room.
8. Sound Wave Tattoo Along Collarbone
Style/Technique: Abstract / Linework
Pain Level: Medium (4/6/10)
Session Time: 30–90 minutes
Best For: Musicians, meaningful audio keepsake
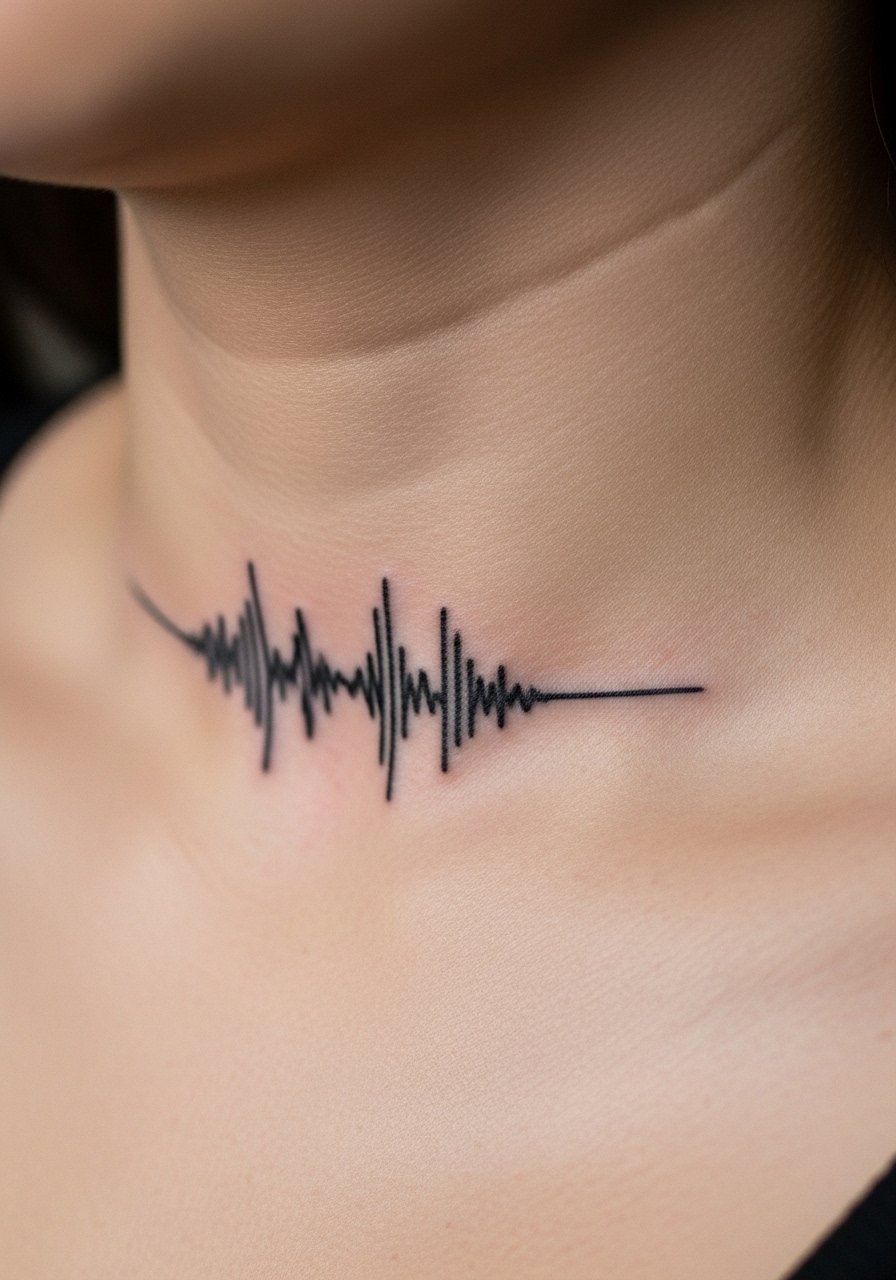
A sound wave tattoo of a favorite song or voice clip is personal and discreet. Placing it along the collarbone looks modern and readable. Collarbone tattoos can be stingy—pain is higher than the forearm but short sessions keep it bearable. From what I’ve gathered, save the actual .wav audio, convert it to a visual waveform, and bring a crisp file to your artist. A common mistake: stretching the waveform so it loses the original shape; keep proportions accurate and ask for a test print.
9. Sine Wave Minimalist On Finger
Style/Technique: Minimalist / Geometric
Pain Level: High for area (6-8/10)
Session Time: 15–45 minutes
Best For: STEM fans, tiny personal symbols
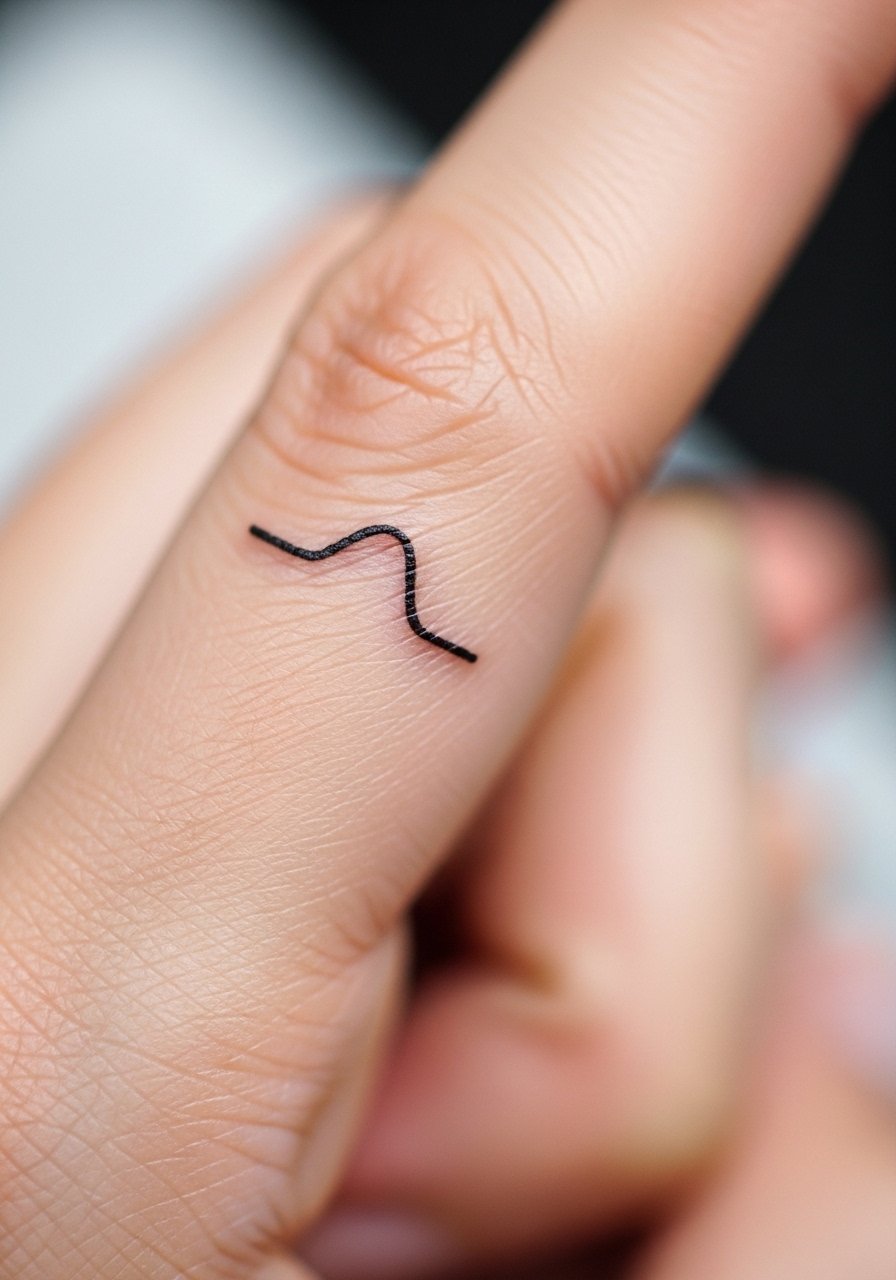
A mathematical sine wave is a neat nod to infinity and patterns. Fingers are tempting for micro designs, but I warn friends: fingers heal oddly and lines fade faster. Pain is higher because skin is thin and sits over bone. From what I’ve seen, finger lines often need touch-ups; consider placing the sine wave on the wrist if you want longevity. Common mistake: expecting finger tattoos to remain crisp without future touch-ups.
10. Traditional Japanese Swirl Wave for Sleeve Filler
Style/Technique: Traditional Japanese / Blackwork Filler
Pain Level: Medium-High (5-7/10)
Session Time: Multiple long sessions for full sleeve
Best For: Sleeve connectors and backgrounds
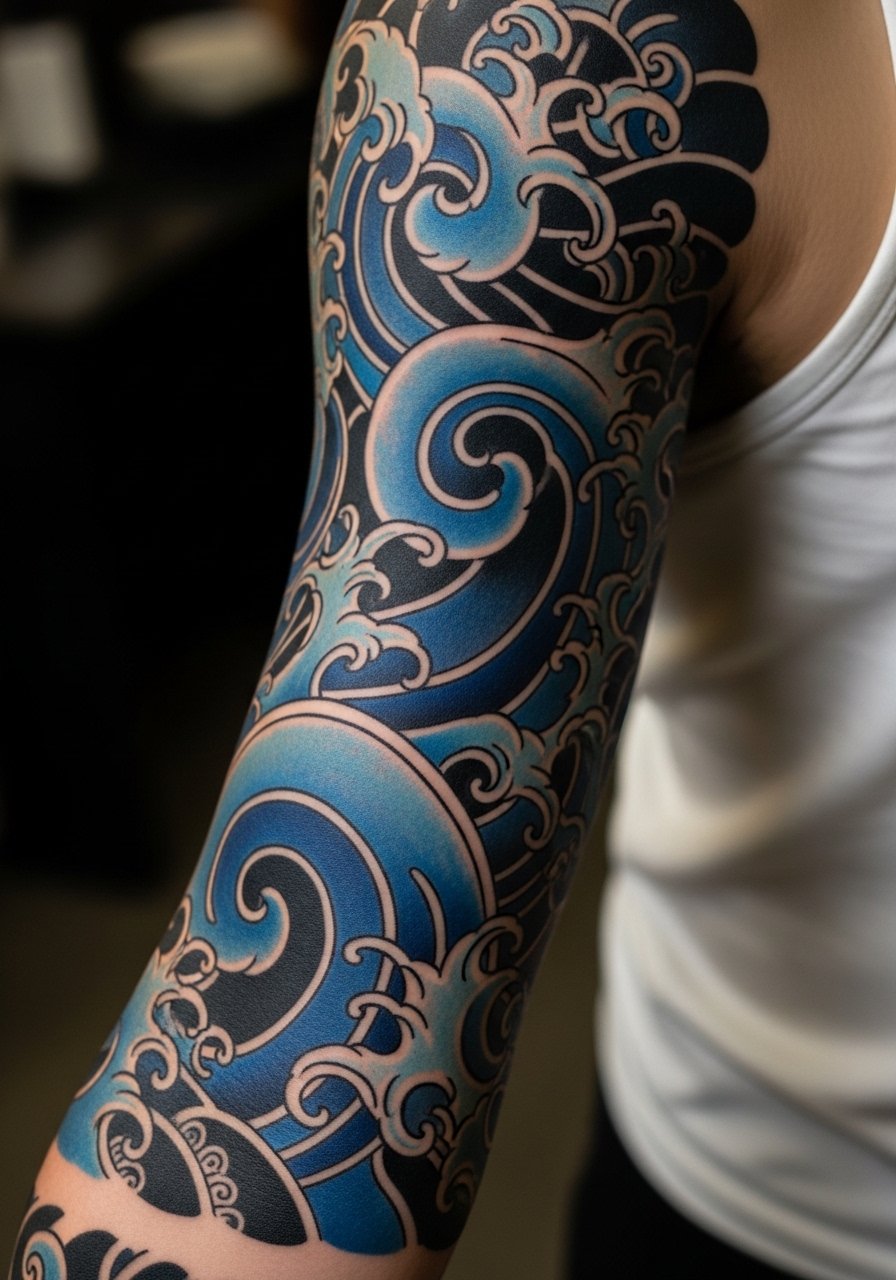
Japanese swirl waves are classic sleeve filler—those repeating curls and foam patterns hold a lot of movement and tie larger compositions together. I recommend them when you want a timeless foundation. Pain varies across the arm but expect longer sessions. From artists I’ve talked to, the bold outlines and consistent shading make this style age predictably. Don’t skimp on contrast in filler work; low-contrast fillers can flatten over time.
11. Calm Wave With Horizon On Ankle
Style/Technique: Fine Line / Landscape
Pain Level: Medium-High (5-7/10)
Session Time: 1–2 sessions
Best For: Calming symbol, low-visibility option
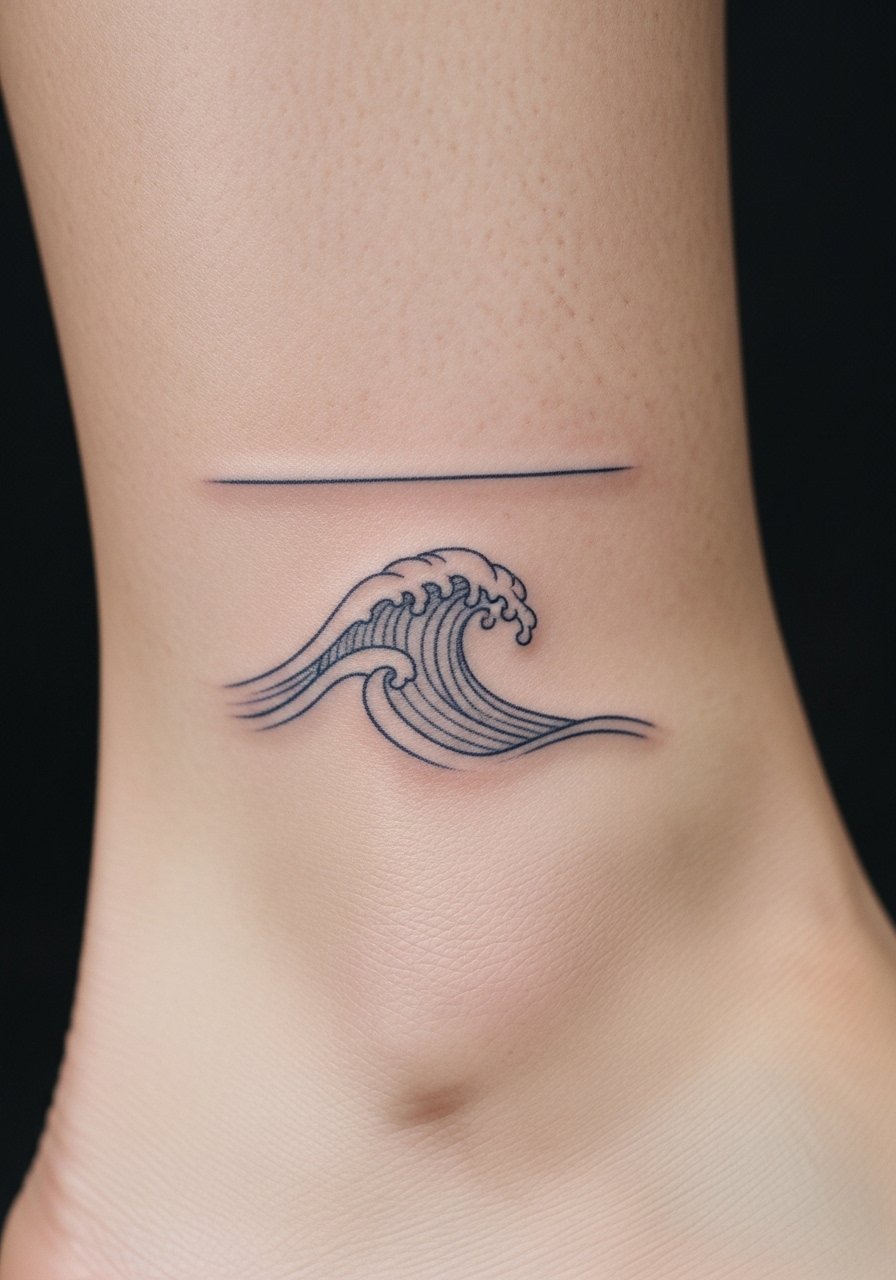
A calm wave with a thin horizon reads like inner peace. The ankle location is discreet and pairs well with shoes and socks. Expect a pinchy session—ankles are bony—but healing for small landscape lines is straightforward. From what I’ve seen, horizon lines must be perfectly straight in the stencil to look right healed. A common mistake: putting too much tiny detail in a small ankle piece—simplicity reads better.
12. Surfer Wave Crest On Shoulder Blade
Style/Technique: New School / Illustrative
Pain Level: Low-Medium (3-5/10)
Session Time: 1–2 sessions
Best For: Coastal lovers, protective totem
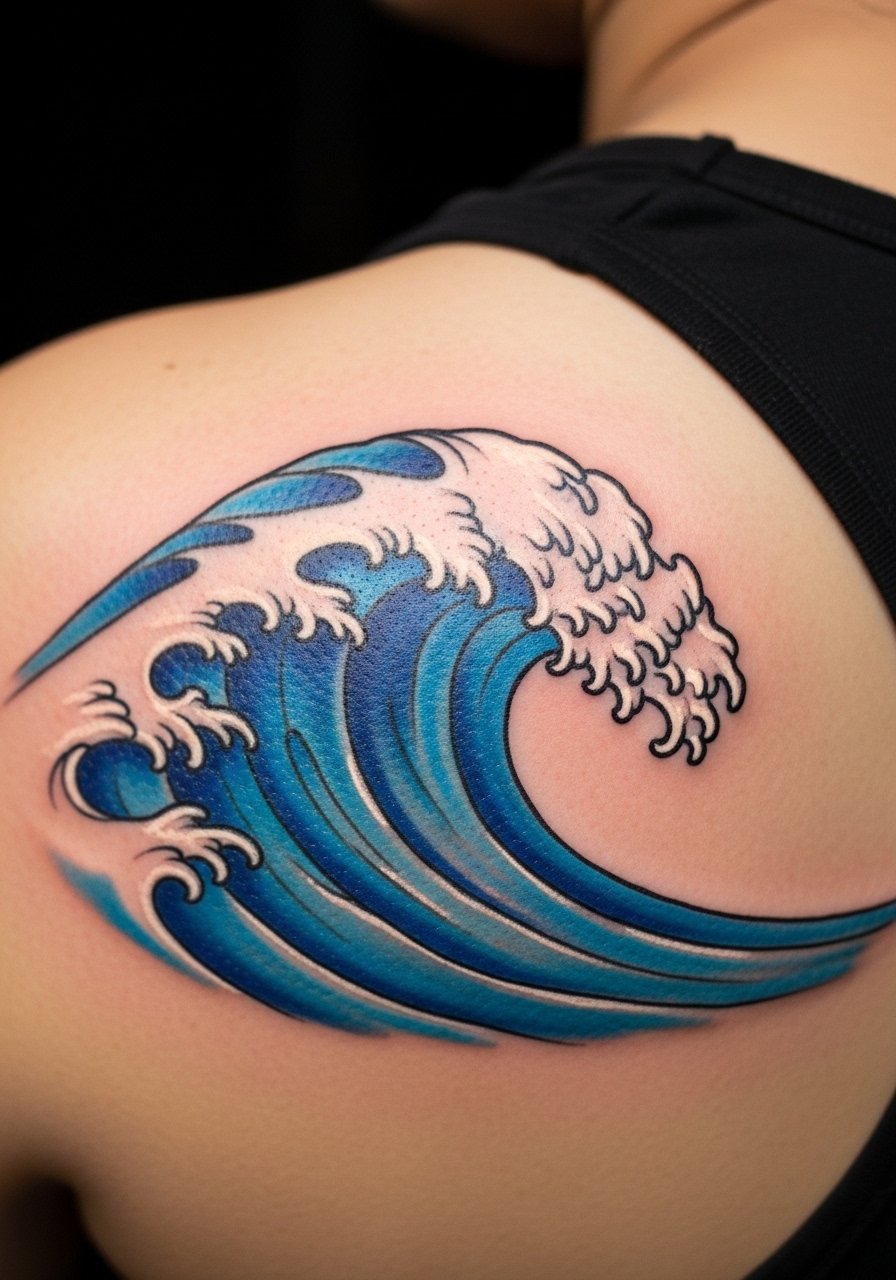
If you live for surf, a cresting wave on the shoulder blade is a natural fit—it peeks out with tank tops and is easy to hide under shirts. Pain is lower on the fleshy shoulder blade area. I’ve seen this style work best with clear, strong highlights so the motion reads long after healing. Avoid overly soft watercolor without linework if you want the design to stay bold; ask for defined highlights and healed samples.
13. Abstract Ocean Wave On Ribcage
Style/Technique: Abstract / Watercolor-Illustrative
Pain Level: High (7-9/10)
Session Time: 1–2 sessions, can be intense
Best For: Emotional pieces, private placement
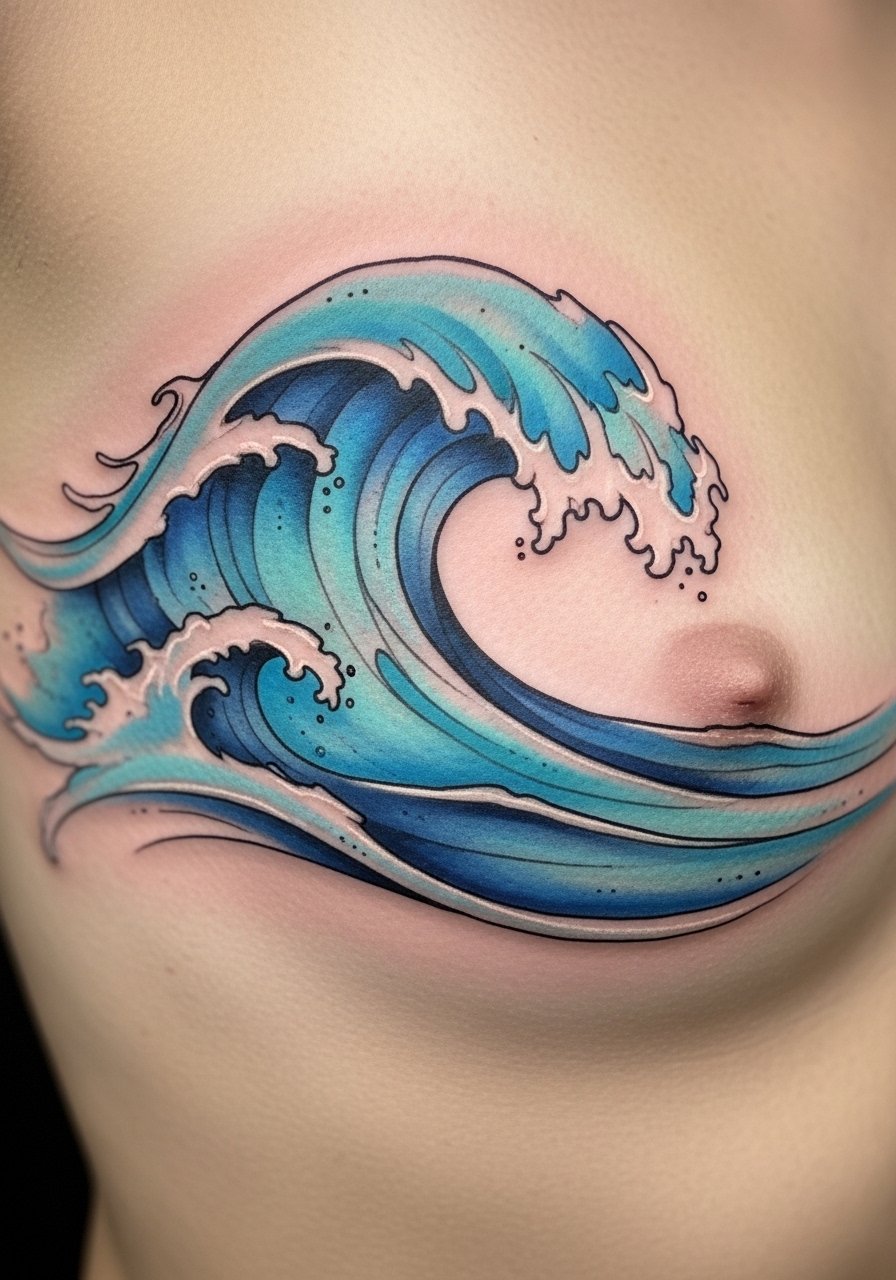
Ribcage placements allow a curving abstract ocean piece that breathes with your torso—visually striking but painful. From my experience, ribs hurt more than arms or legs, and healing needs gentle care. Abstract waves in the ribs can be deeply meaningful—a reminder of emotional tides. A mistake is scheduling a long session without breaks; plan accordingly and discuss numbing options like Hush Anesthetic with your artist if you need it.
14. Micro Minimalist Wave Behind Ear
Style/Technique: Micro Minimalist / Fine Line
Pain Level: Medium-High (5-7/10)
Session Time: 15–30 minutes
Best For: Tiny secret symbols
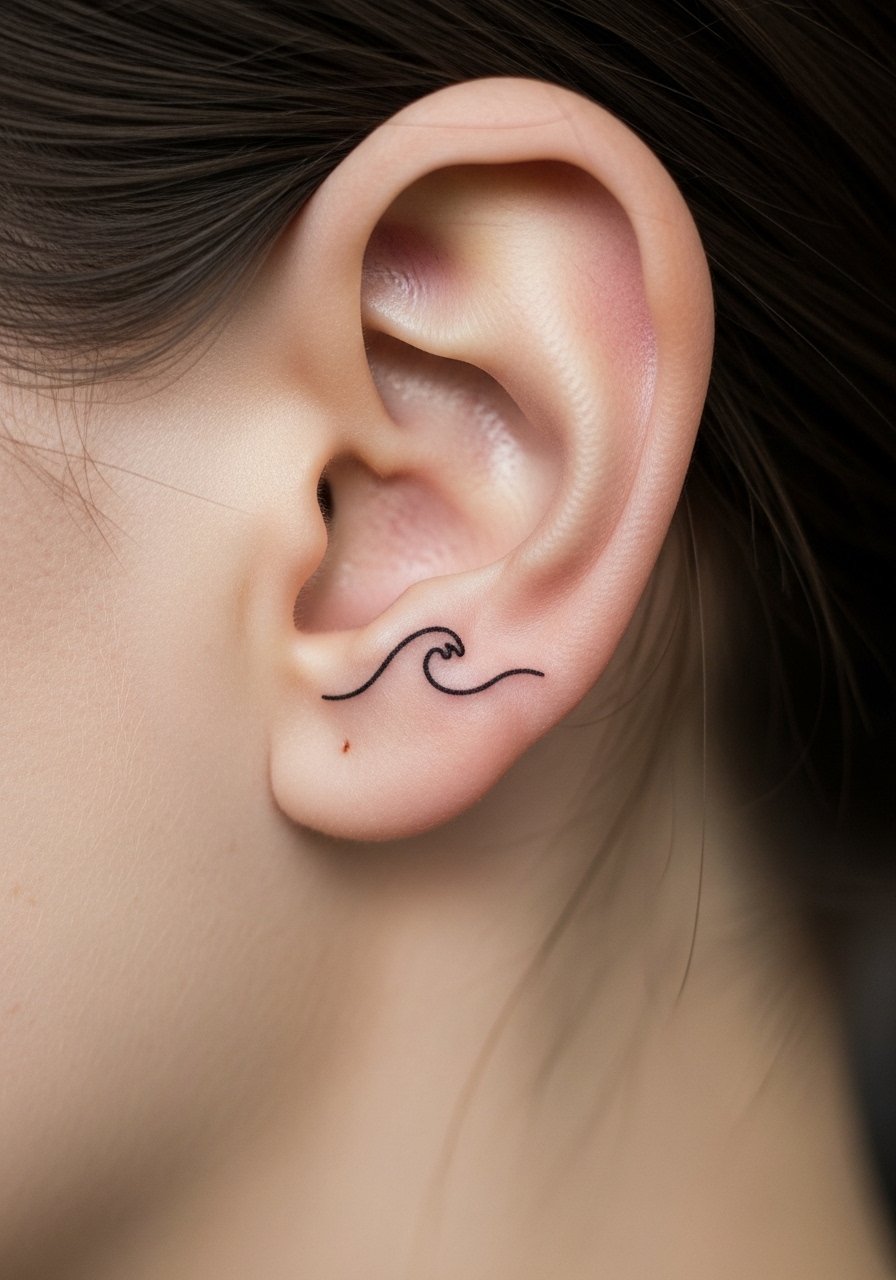
This spot is for someone who wants a secret nod to moving with life. Behind-ear tattoos are tiny and cute but the skin is thin and sensitive—pain is noticeable but brief. From what I’ve seen, these micro lines can blur slightly, so ask for a slightly sturdier line weight. A common mistake: expecting behind-ear pieces to remain ultra crisp forever; grooming and occasional touch-ups may be needed.
15. Wave Band Around Finger
Style/Technique: Minimalist / Band Tattoo
Pain Level: High (6-8/10)
Session Time: 30–60 minutes
Best For: Symbolic rings, commitment-free alternatives

A wave band acts like a ring that symbolizes flow. Fingers are high-maintenance tattoos—lines soften and wear from washing and use. I tell people considering this to expect touch-ups. The visual payoff is strong for something you see daily. Avoid super-thin bands; give the artist enough line weight to last. If you want longevity, consider moving the band to the palm-side of the finger or inner wrist.
16. Double Wave Chest Piece Across Sternum
Style/Technique: Illustrative / Symmetrical
Pain Level: High (7-9/10)
Session Time: Multiple sessions for symmetrical work
Best For: Bold personal statements

A double wave across the chest reads like a heartbeat of motion—very meaningful for survivors or people who want a central reminder. The sternum is painful and sessions should be paced. From what I’ve observed, symmetry is crucial; insist on stencil checks and photos of healed symmetry examples. The chest can be exposed to sun if you wear low tops, so long-term sunscreen matters for color preservation.
17. Wave Mandala Down The Spine
Style/Technique: Blackwork / Mandala-Integrated
Pain Level: High (7-9/10)
Session Time: Multiple sessions for detail
Best For: Centered spiritual statement
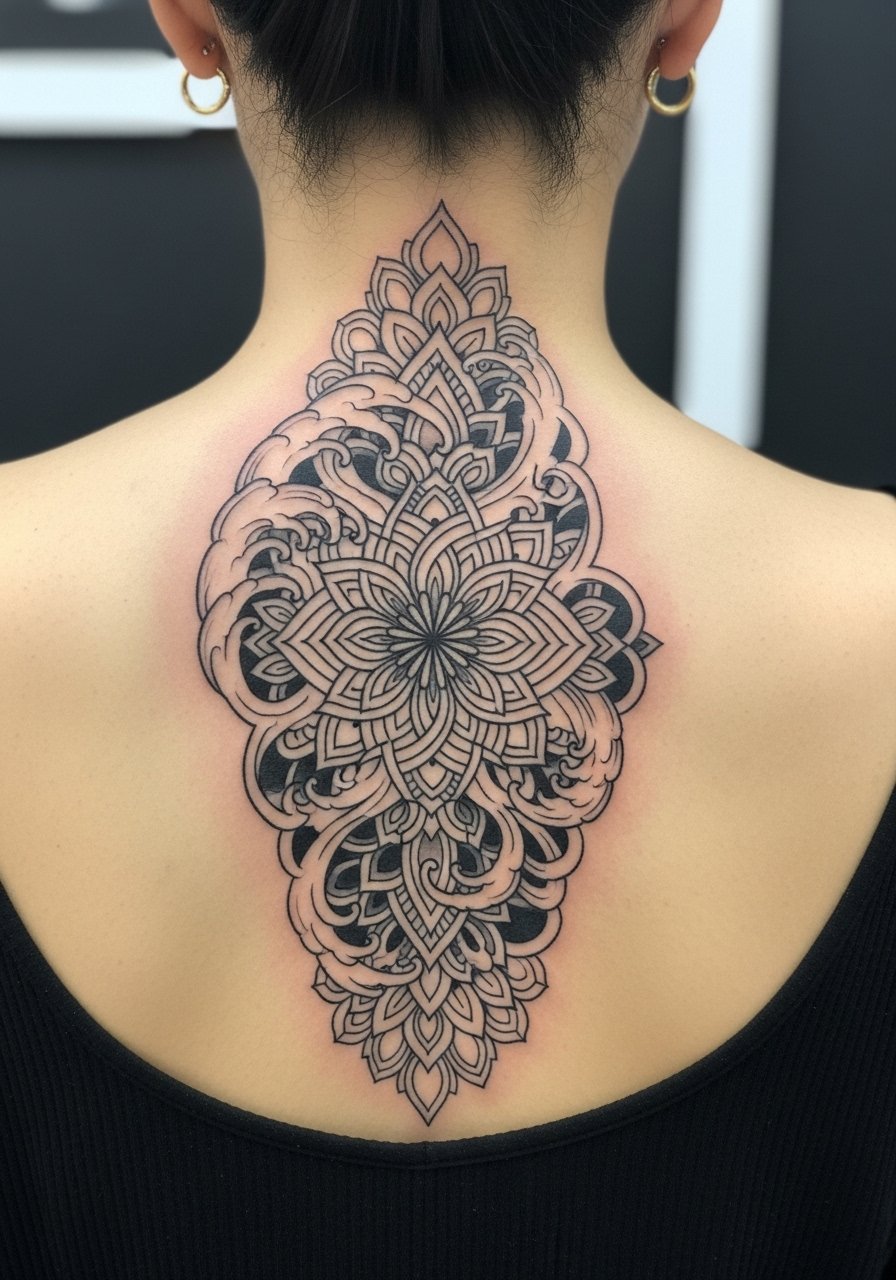
Combining wave motifs with mandala patterns along the spine creates an elemental spiritual piece. Spine tattoos hurt, especially near bone, but the visual is worth it for many. From what I’ve seen, blackwork with negative space holds up well when given strong line weight. Mistake to avoid: crowding too many micro-details in narrow spinal spacing—keep key elements larger for legible healing.
18. Broken Wave Cover-Up On Rib
Style/Technique: Realism / Cover-Up Strategy
Pain Level: High (7-9/10)
Session Time: Multiple sessions, strategic layering
Best For: Concealing old ink with meaningful imagery
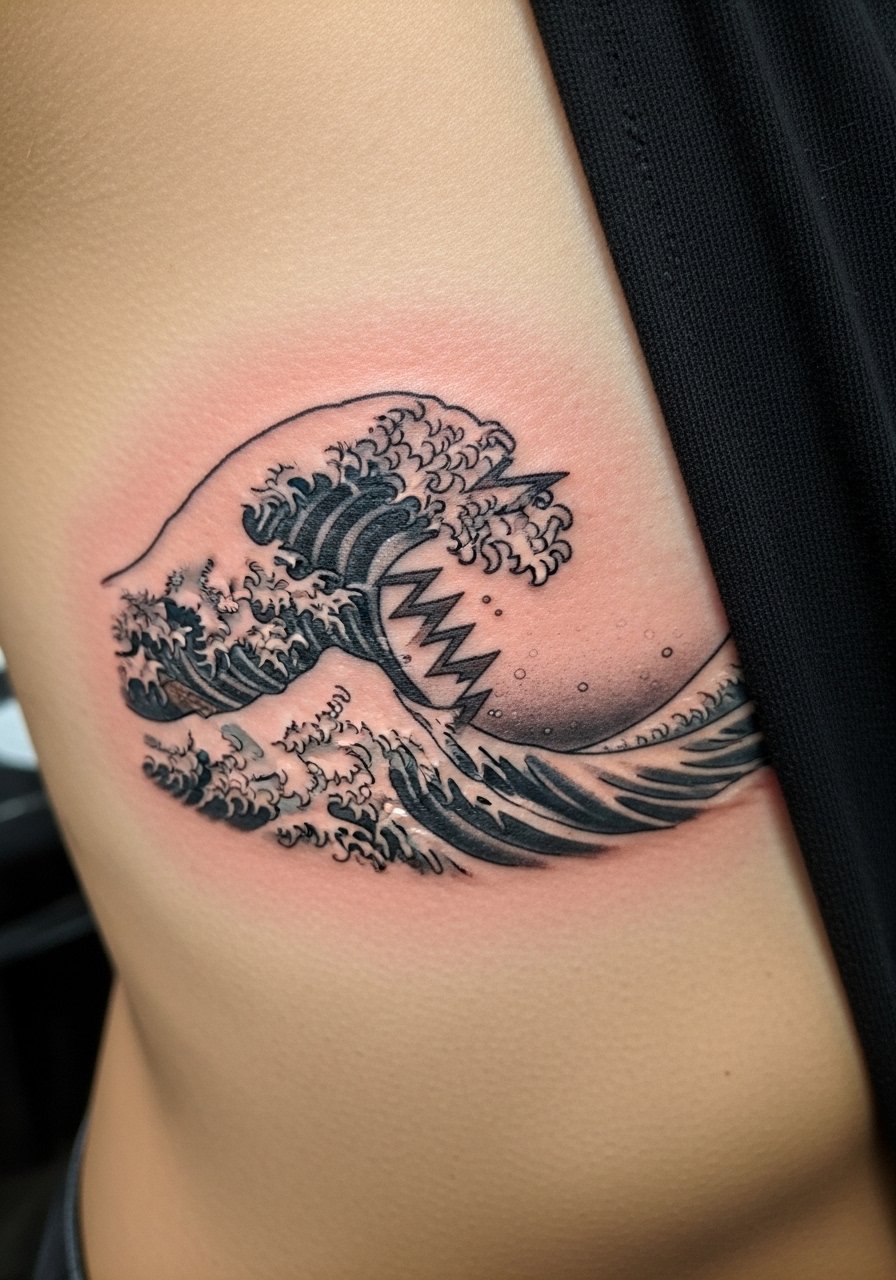
Waves make surprisingly good cover-ups because their motion and shading can mask old marks. On the ribs, the canvas lets you create dynamic cover textures. In my experience, cover-ups often need multiple passes and realistic patience—artists will plan shapes to conceal previous lines. Avoid trying a cover-up with a novice; bring photos of the old tattoo and ask for a plan.
19. Wave Compass On Calf
Style/Technique: Neo-Traditional / Symbolic
Pain Level: Low-Medium (3-5/10)
Session Time: 1–2 sessions
Best For: Travelers, directional symbolism
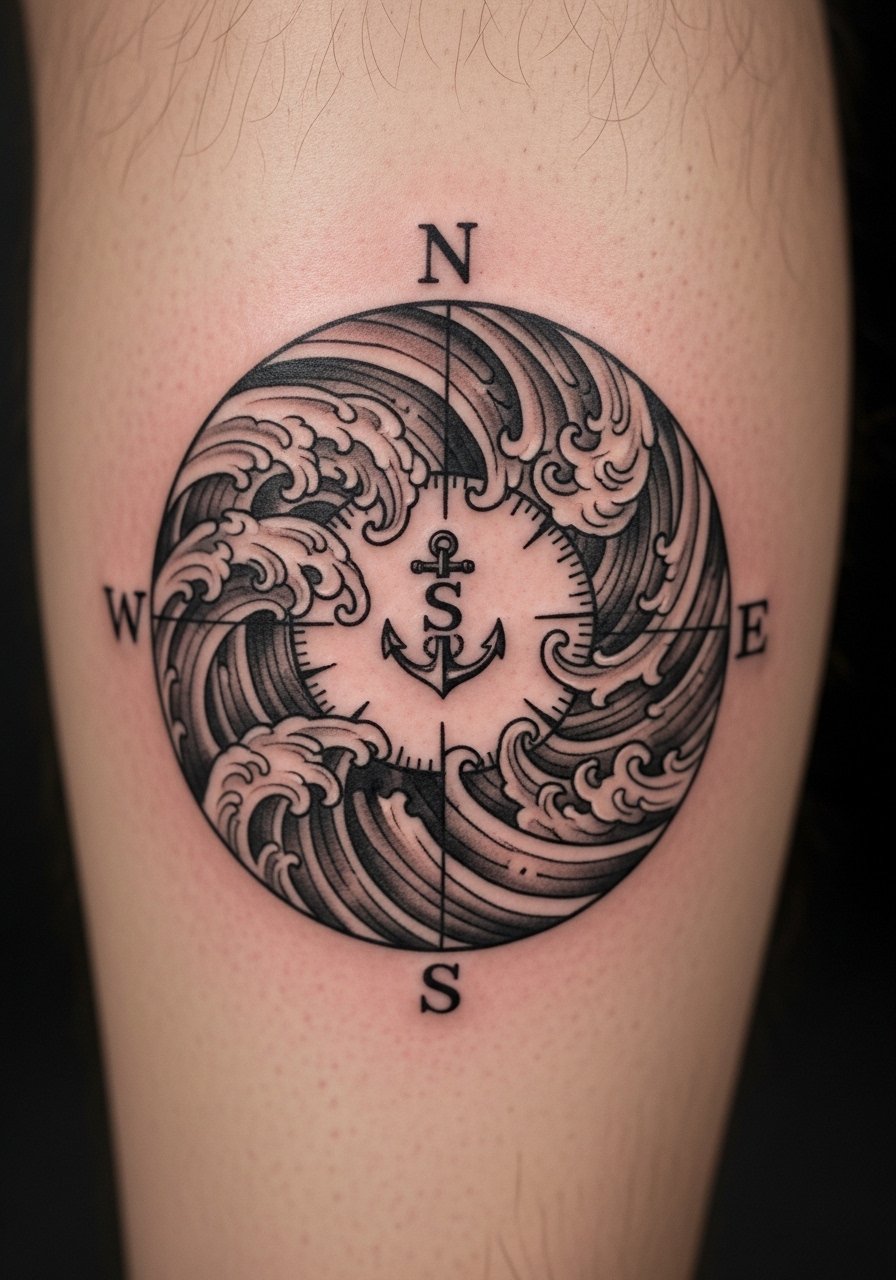
A wave integrated with a compass says "follow the currents"—great for people who travel or moved often. The calf gives good space for detail and is lower pain than shins. From what I’ve seen, this placement lets you show off the piece easily. Common mistake: making compass points too small; keep them readable when healed.
20. Wave And Koi Thigh Piece
Style/Technique: Traditional / Neo-Japanese
Pain Level: Medium (4-6/10)
Session Time: Multiple sessions for scale and color
Best For: Narrative tattoos, cultural blends
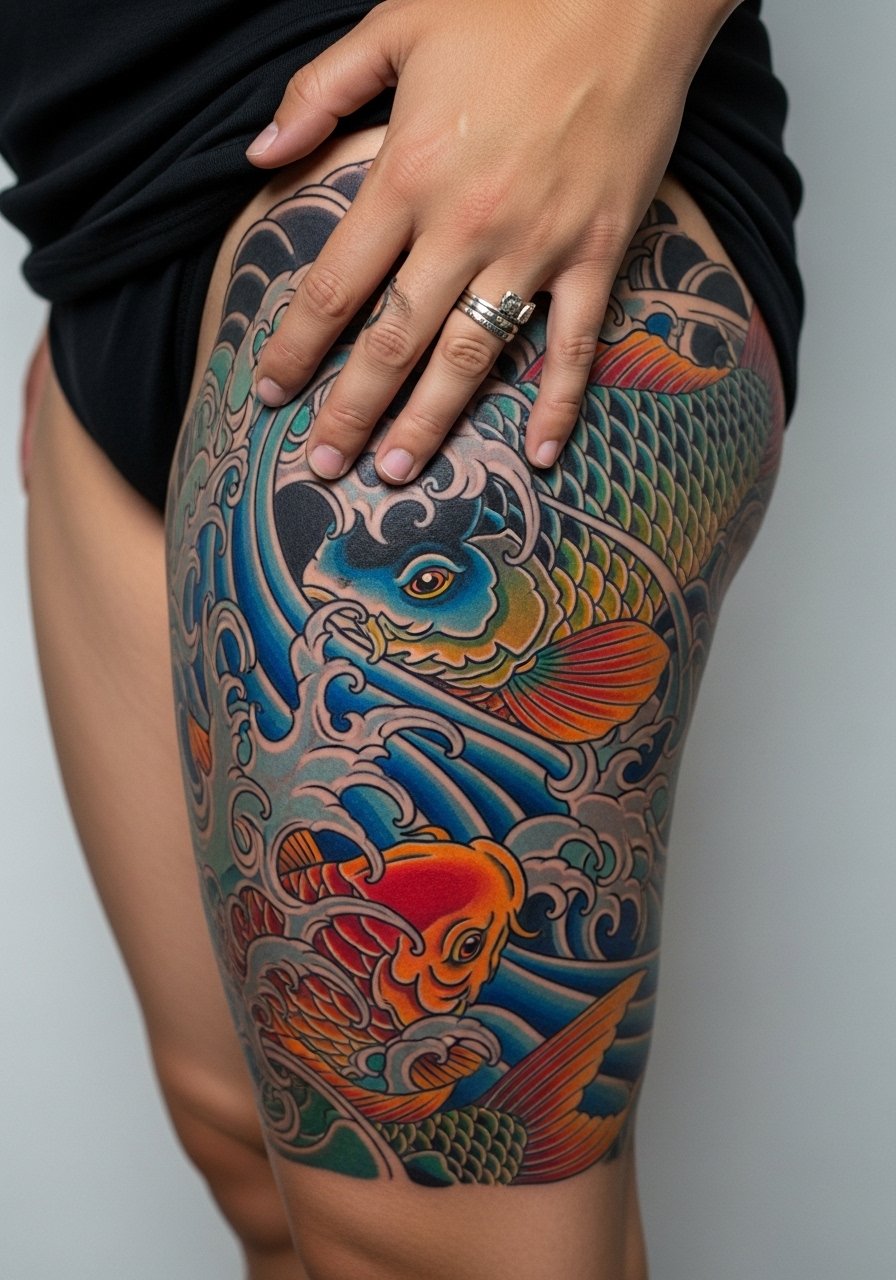
Koi and waves together tell a story—struggle, perseverance, and transformation. The thigh is forgiving and allows large-scale storytelling. Color selection and saturation are key; from what I’ve learned, ask to see healed color work on similar skin tones. A common mistake is over-detailing with tiny scales; let the koi read from a distance.
21. Tiny Wave On Ankle Bone
Style/Technique: Micro Minimalist / Fine Line
Pain Level: Medium-High (5-7/10)
Session Time: 15–30 minutes
Best For: Micro symbol, first-timers wanting small commitment
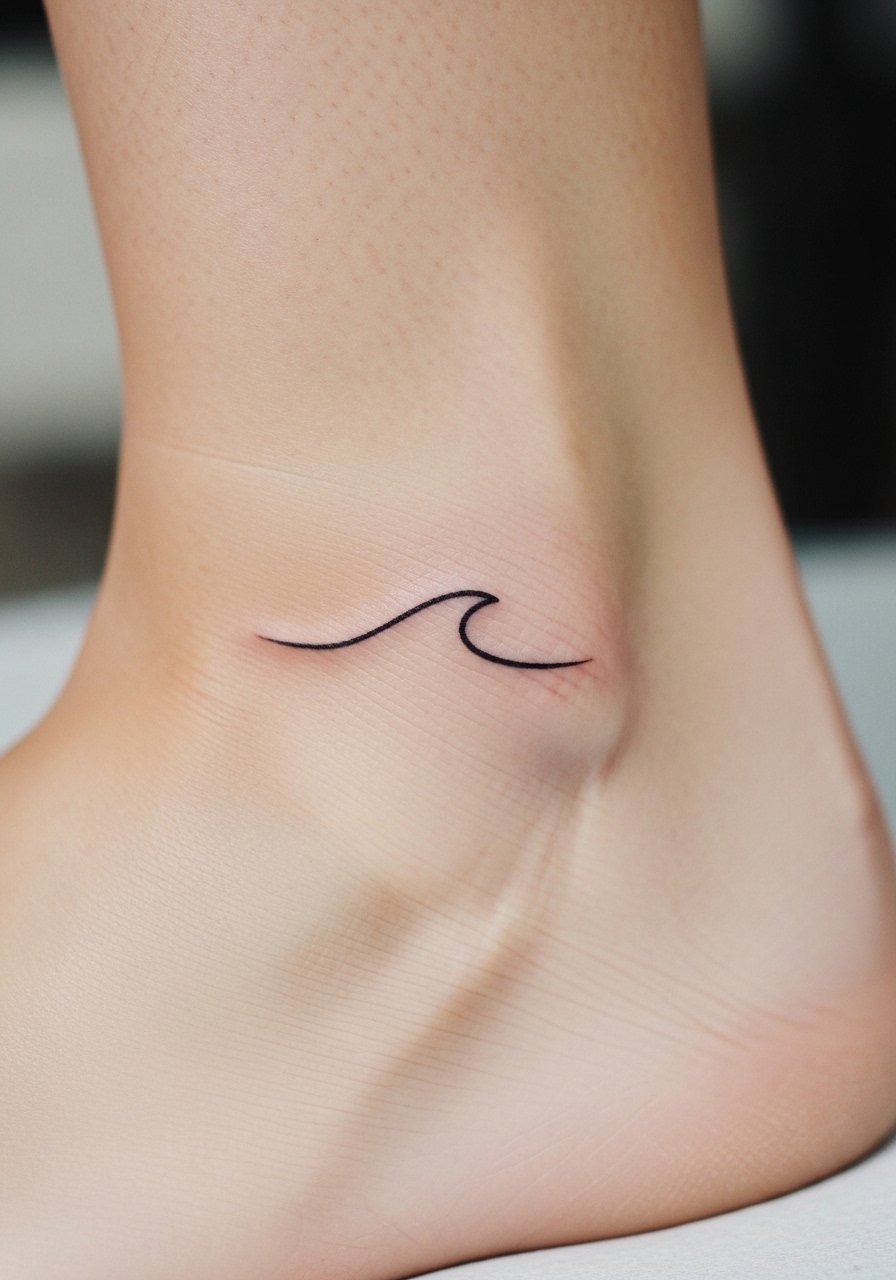
Small ankle waves are discreet and symbolic. Healing is quick but the area sees friction from socks, so be gentle. I’ve noticed tiny ankle lines can fade faster if you don’t protect them—sunscreen and moisturization help. Avoid placing a micro on the absolute ankle edge where shoes rub; move slightly inward.
22. Continuous Wave Sleeve Along Forearm
Style/Technique: Illustrative / Flowing Sleeve
Pain Level: Medium (4-6/10)
Session Time: Multiple sessions for wrap
Best For: Motion-focused collectors
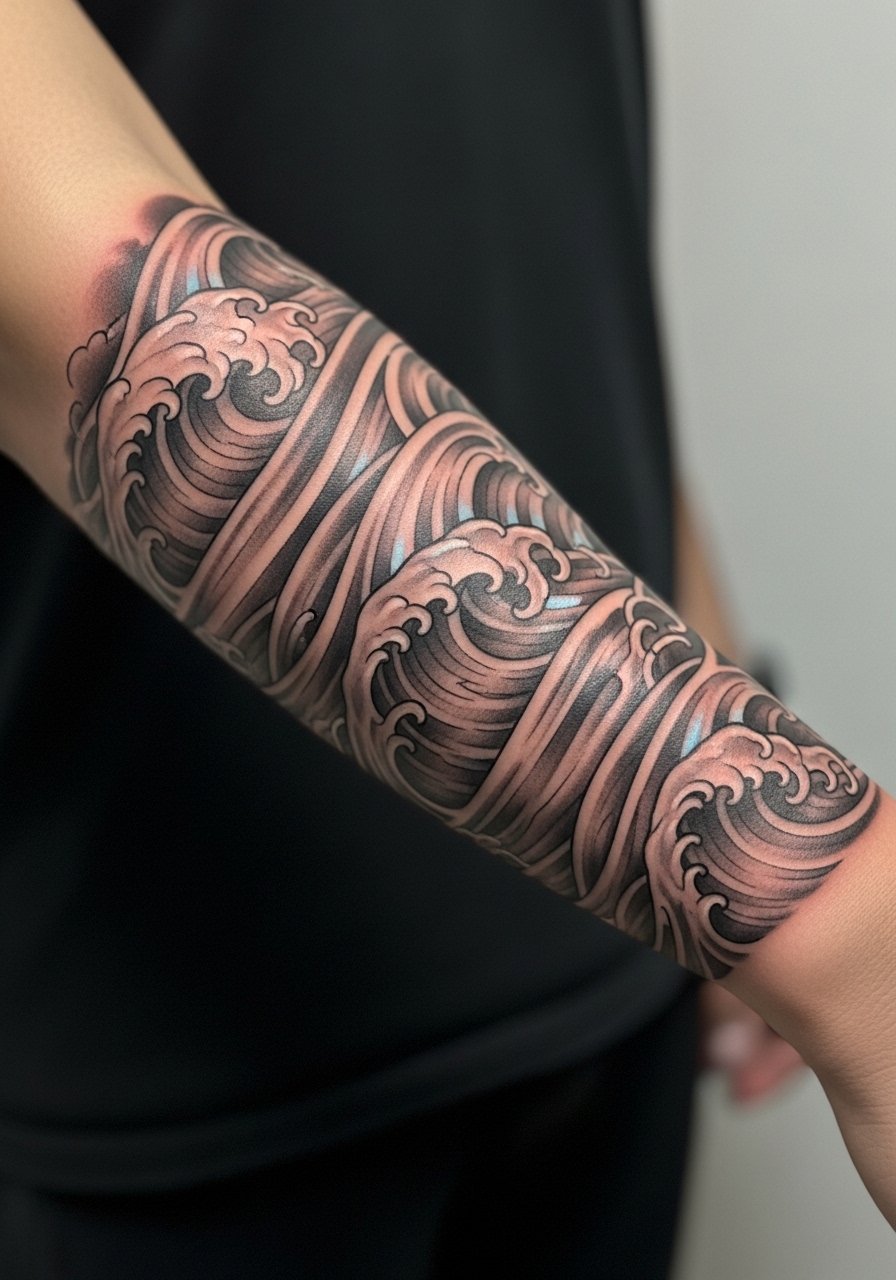
A continuous wave sleeve gives the sense that the ocean never stops. Forearm sleeves are visible and reward people who want a daily reminder of motion. From what I’ve learned, plan the flow with your artist so the design complements muscle lines. Mistake to avoid: starting a repeating pattern without planning how it will end—discuss sleeve anchors and negative space.
23. Seismic/Electromagnetic Wave Forearm Tattoo
Style/Technique: Abstract / Scientific Wave
Pain Level: Low-Medium (3-5/10)
Session Time: 1 session for small-medium size
Best For: Geologists, engineers, science-minded collectors
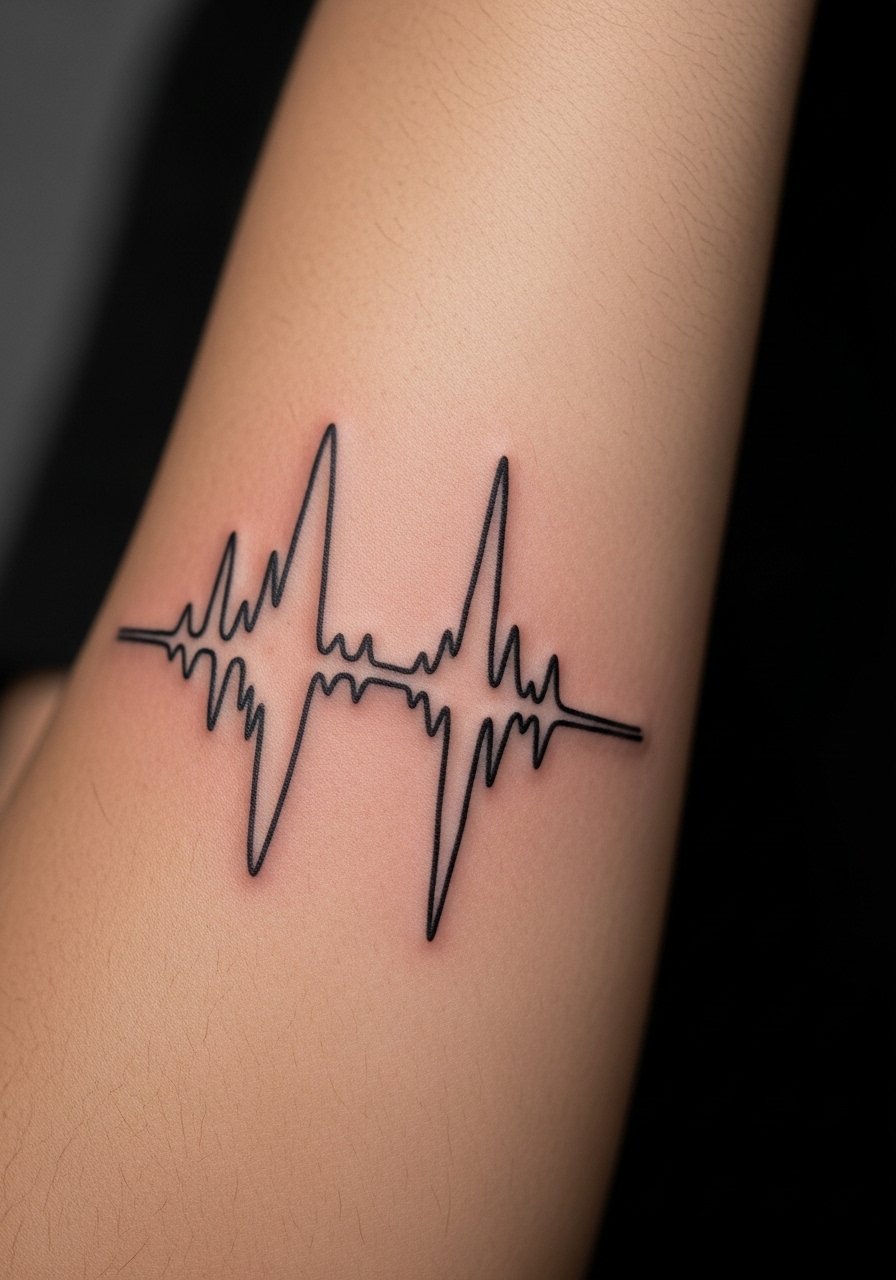
This is one of the under-covered angles I love: treating waves as seismic or electromagnetic patterns. It’s a clever non-ocean take that reads as earth power or measured motion. The forearm makes the waveform visible and flat enough for crisp lines. From my experience, this appeals to STEM folks who want symbolism that’s literal to their field. A common mistake: stretching the waveform so it loses its natural proportions—bring the original data or image for accuracy.
Tattoo Prep and Aftercare Essentials
Aftercare Essentials:
- Aquaphor Healing Ointment, 14oz tube — Use first 3–5 days to keep fresh ink moist and protected.
- Saniderm Transparent Adhesive Bandage, 6-inch roll — For second-skin covered healing days 1–3, as your artist recommends.
- CeraVe Fragrance-Free Moisturizing Lotion, 12oz — Daily moisturizer from day 4–14 to support healed skin.
- Dr. Bronner's Unscented Castile Soap, 8oz — Gentle cleansing during the first week; mild and fragrance-free.
Before Your Appointment:
- Tattoo Numbing Cream 5% Lidocaine — Apply 30–45 minutes before if you and your artist agree; Hush Anesthetic is another option artists mention.
- Tattoo Stencil Transfer Paper, A4 Pack — Handy if you want to test a custom wave layout at home or for artist mockups.
Long-Term Maintenance:
- SPF 50 Sunscreen Stick for Tattoos, 0.85oz — Apply daily to exposed tattoos to prevent fading.
- Mad Rabbit Tattoo Balm, 2oz — For keeping healed tattoos vibrant during maintenance.
- Hustle Butter Deluxe, 4oz — Vegan aftercare alternative for moisturizing healed ink.
Optional Comfort Items:
- Tattoo Numbing Spray — For touch-ups or very sensitive appointments (ask your artist).
- Hydrocolloid Bandages, 10-Pack — For small tattoos as an alternative to Saniderm on high-friction spots.
Frequently Asked Questions
Q: How bad does a tattoo actually hurt?
A: Pain depends on placement and tolerance. Outer forearm or shoulder = lower (around 3–4/10). Ribs, spine, and fingers = higher (7–9/10). It's more a persistent scratching or burning than sharp sudden pain. For sensitive areas, I've used numbing options and asked about Hush Anesthetic or topical 5% lidocaine creams—check with your artist first.
Q: What if I regret the design or its meaning later?
A: I tell people to sit with a design for months if it's very visible. Start with a small minimalist wave if you're unsure. Customize symbolism so it ties to your story—artists can adapt motifs like mountain-and-wave or sun-and-wave to feel personal. Laser removal exists but it's slow; better to plan or pick a place you can hide.
Q: How do I keep wave tattoo colors from fading?
A: Sunscreen is essential. From what I've seen, UV exposure is the biggest ink killer. Use an SPF 50 stick on exposed tattoos and moisturize regularly with fragrance-free options like CeraVe Fragrance-Free Moisturizing Lotion, 12oz. Darker inks tend to last better; watercolor needs more upkeep.
Q: Can I work out right after getting inked?
A: Wait at least 48–72 hours for minimal sweat risk; longer if your tattoo is in a flex area (elbow, knee, ribs). Sweating can irritate a fresh tattoo and increase infection risk. Keep it clean with a gentle soap like Dr. Bronner's Unscented Castile Soap, 8oz during the first week.
Q: Should I get a tiny wave first to test pain?
A: Only if you actually want a tiny wave. Pain varies by placement, not just size—a small rib tattoo can hurt more than a larger forearm piece. If you're anxious, choose a less painful area like the outer arm or thigh for your first piece.
Q: How long does a tattoo take to heal and look final?
A: Surface healing is usually 2–3 weeks; full settling and color return can take 2–3 months. Expect peeling around day 3–7—don't pick. During healing, use Aquaphor Healing Ointment, 14oz tube initially and then transition to a fragrance-free lotion.
Q: Do tattoos look different on different skin tones?
A: Yes. Black and gray show up beautifully across skin tones; some bright colors may read differently on deeper skin. From what I've seen, bold outlines and saturated color choices make designs translate better. Ask to see healed examples on skin tones similar to yours and discuss color adaptation with your artist.
Q: Any aftercare mistakes that ruin wave colors?
A: Skipping sunscreen and over-moisturizing with perfumed creams both matter. I've watched bright blues and turquoises lose pop when people expose healed tattoos to sun. Use a dedicated tattoo balm like Mad Rabbit Tattoo Balm, 2oz for maintenance and an SPF 50 stick when out in daylight.
