
I spent months scrolling through tattoo feeds before I realized the real choice wasn't just a picture of peaks — it was picking a style that actually looked good healed and fit my life. These 24 mountain tattoo ideas I keep coming back to balance meaning, placement, and real-life wear so your next piece still feels like freedom years from now.
This list focuses on fine line, minimalist, geometric, watercolor, and realistic mountain tattoo designs. Most work well on forearm, ankle, bicep, ribs, or thigh. From what I’ve seen in 2026 trends, fine line ranges with sun or moon accents and minimalist peaks hold up best healed.
1. Minimalist Mountain Outline on Ankle
Style/Technique: Minimalist / Fine Line
Pain Level: Low (2-3/10)
Session Time: 1 session, under 1 hour
Best For: First mountain tattoo, easy to hide
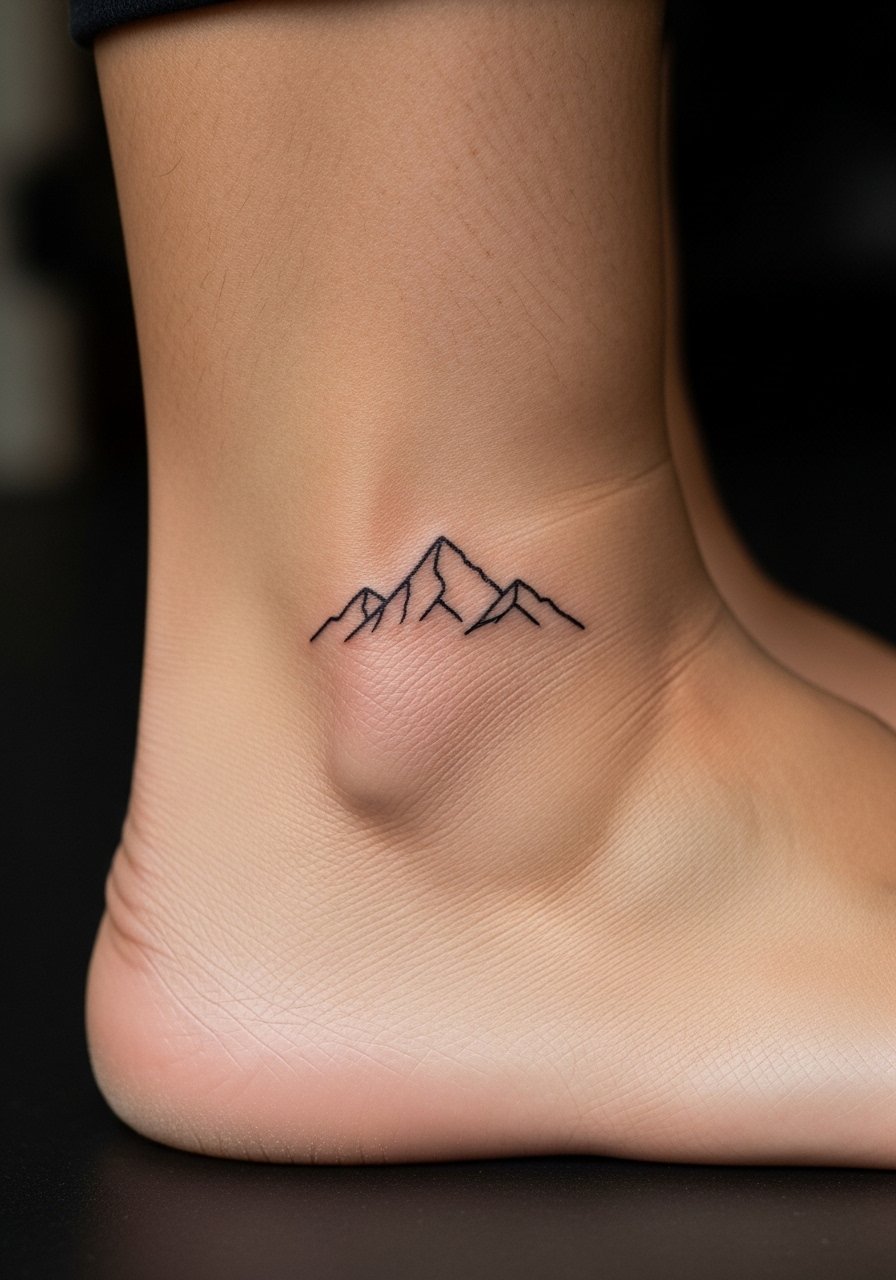
I got a tiny ankle peak when I wanted a subtle nod to travel. Minimalist mountain outlines read as resilience without shouting. They’re ideal for small mountain tattoos or a first mountain tattoo because they’re quick and low-pain. Healing is straightforward — light peeling in week one, then the lines settle. Be careful not to over-detail; too many tiny intersecting lines can blur over time. Ask for a single-needle fine line artist and say you want longevity, not ultra-faint hairlines.
2. Fine Line Mountain Range With Rising Sun on Inner Forearm
Style/Technique: Fine Line / Delicate Shading
Pain Level: Low-Medium (3-4/10)
Session Time: 1–2 sessions, 1–2 hours each
Best For: Visible piece, elongated forearm flow
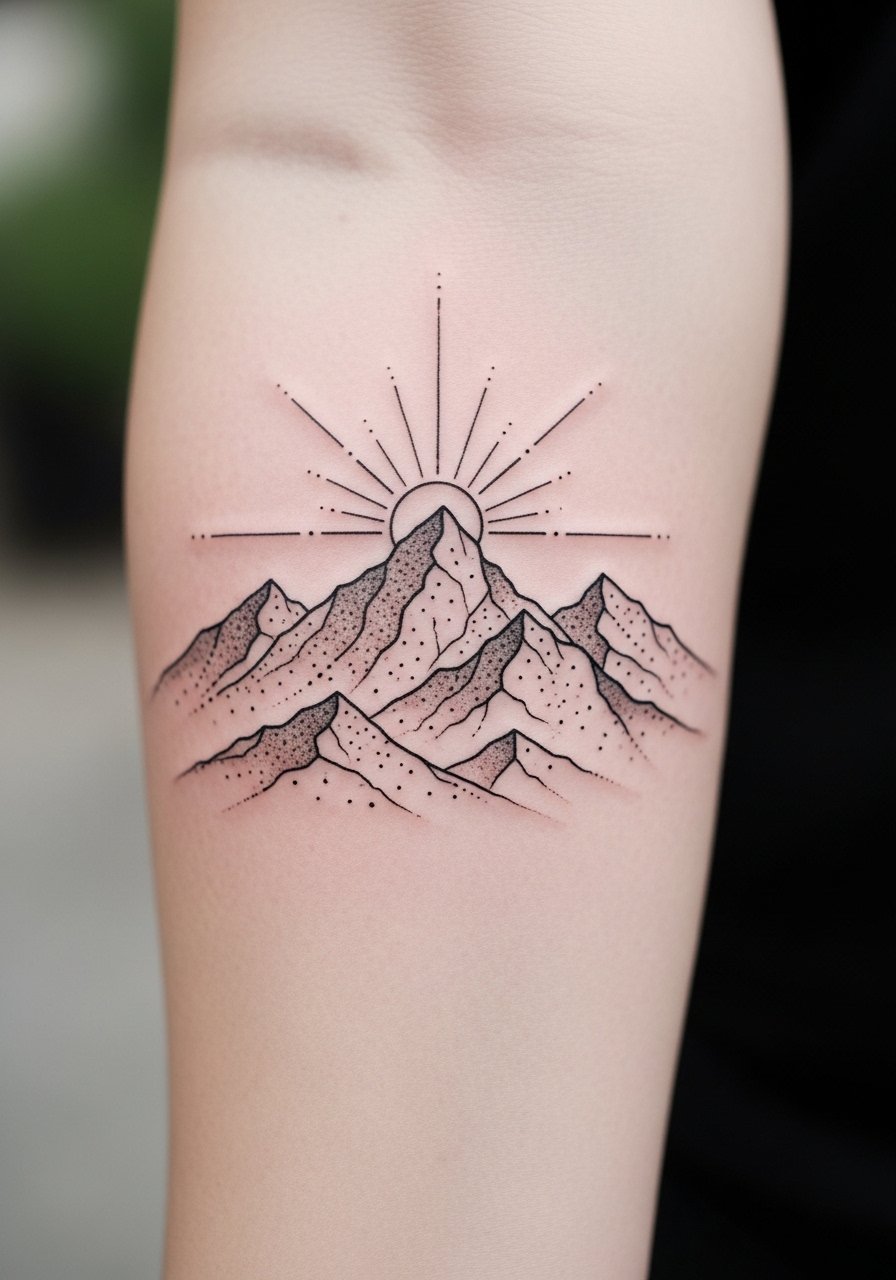
This is a classic I always recommend: a horizontal range that follows the forearm, with a tiny sun or dotwork rays. It reads as a personal journey — sunrise symbolism ties into fresh starts. Forearm placement keeps pain manageable and shows off fine line detail. In my experience, dot accents can soften faster than solid lines, so ask your artist about slightly bolder anchor lines to prevent early blurring. For aftercare, gentle cleansing and fragrance-free lotion keep the thin lines crisp.
3. Simple Black and Gray Mountain Collage on Bicep
Style/Technique: Black & Gray / Illustrative
Pain Level: Medium (4/5/10)
Session Time: 1–2 sessions, 2–3 hours total
Best For: Beginner-friendly, easy to scale
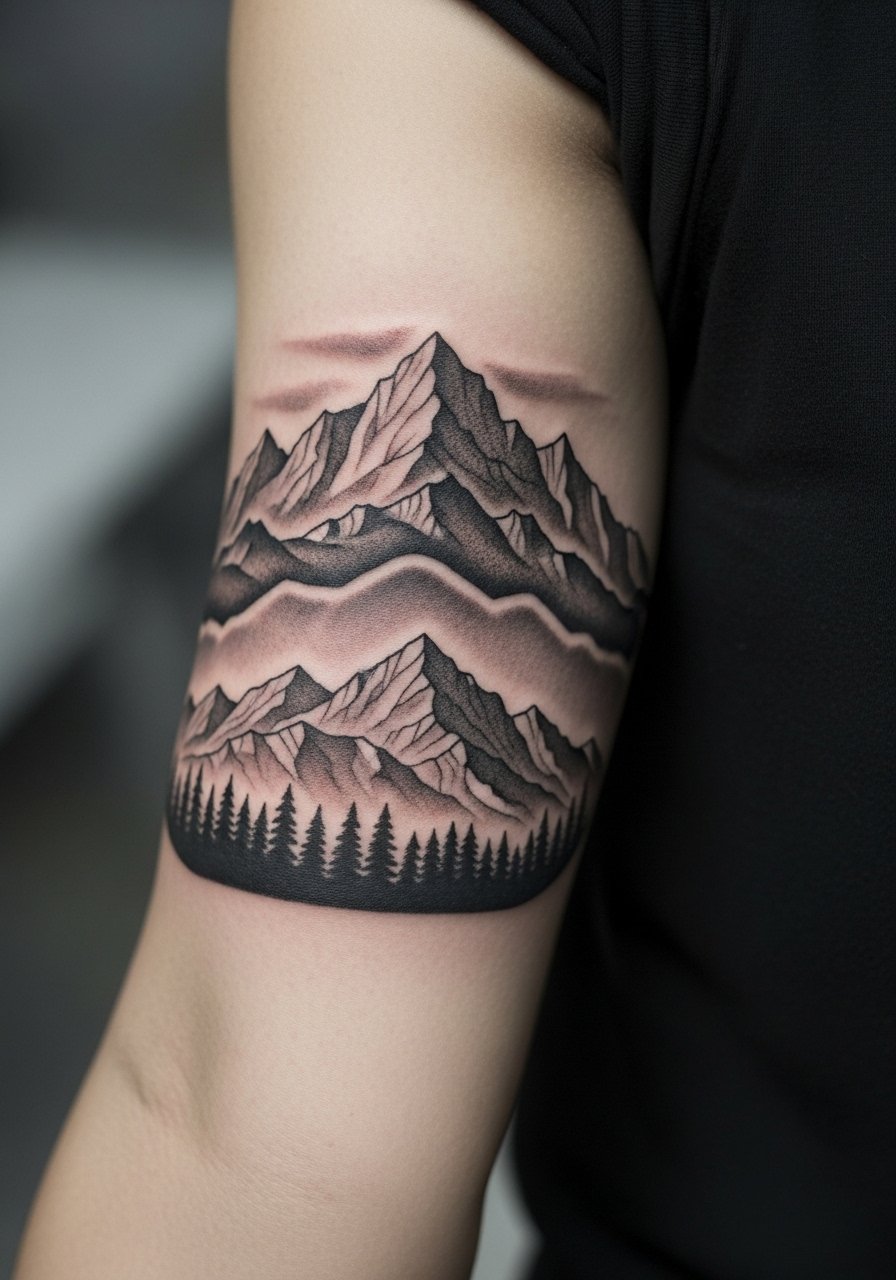
A black-and-gray collage gives that timeless mountain tattoo meaning without the risk of quick color fade. I’ve found these age reliably because artists use contrast over saturated color. Bicep placement is forgiving for first-timers: low movement, decent canvas for layering. Watch out for overly tight shading close to fine lines — it can fill in as it heals. Ask your artist for clear peak separation to keep the design readable for years.
4. Watercolor Mountain Sunset on Forearm
Style/Technique: Watercolor / Painterly Washes
Pain Level: Medium (4/10)
Session Time: 2 sessions, 2–3 hours total
Best For: Color lovers, expressive arm pieces
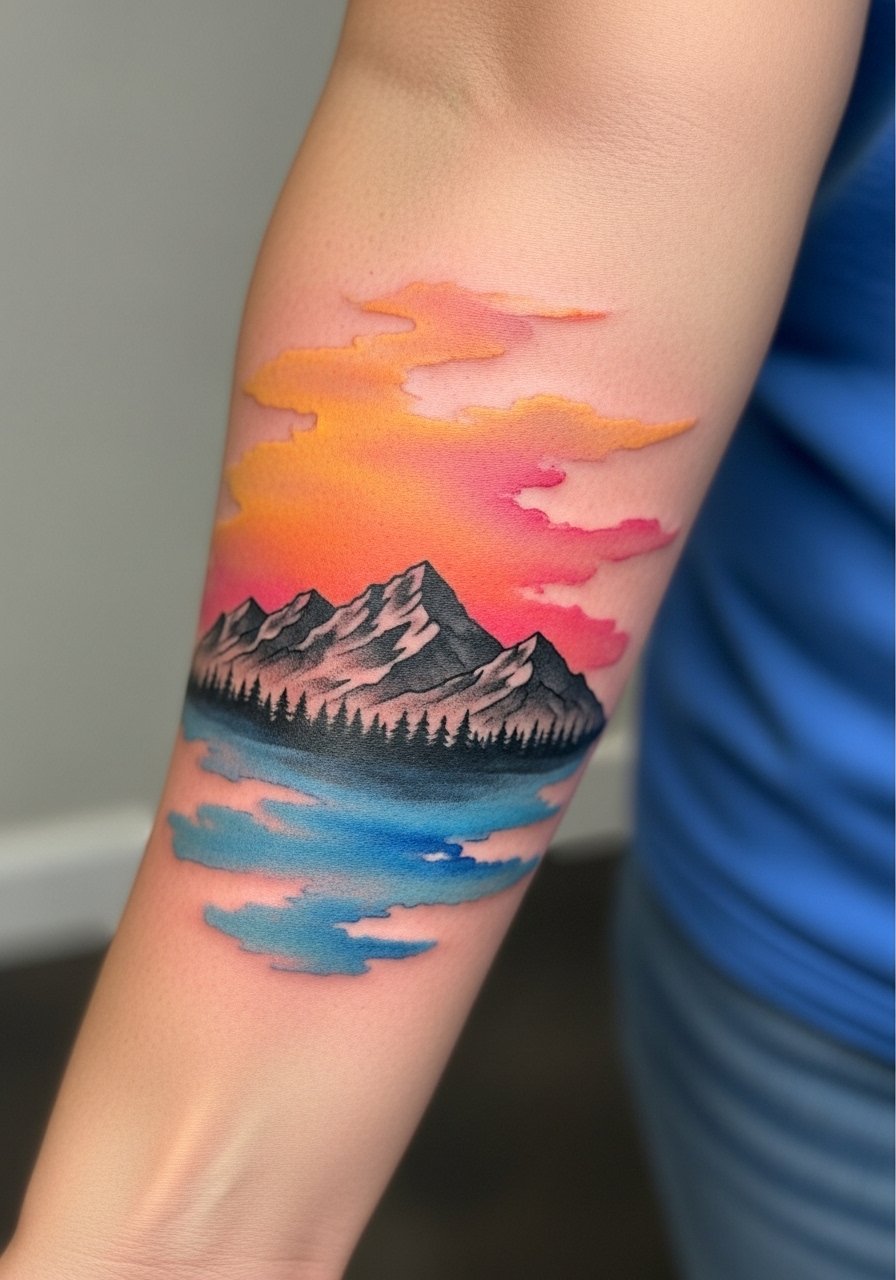
Watercolor mountains are bold visually and great for capturing a specific scene — sunset, dawn, aurora. I love the energy, but from what I’ve seen, color diffusion can soften over time, especially in pastel tones. Choose saturated pigments and ask your artist about touch-up timing. Forearm or thigh are great for showing color transitions. If longevity is a priority, combine watercolor splashes with crisp black line peaks as anchors.
5. Geometric Mountain Peaks on Calf
Style/Technique: Geometric / Blackwork
Pain Level: Low-Medium (3-4/10)
Session Time: 1 session, 1–2 hours
Best For: Modern aesthetic, leg placement
Geometric mountain tattoo designs give nature a modern edge — triangles, stacked polygons, and symmetry. Calf placement lets shapes breathe and stay visible. I like this for people who want structured design without organic shading. A common mistake is using too-thin lines for complex geometry; they can blur and lose definition. Ask your artist for slightly bolder lineweights in key areas to maintain clarity long-term.
6. Fine Line Mountains With Moon and Stars on Upper Arm
Style/Technique: Fine Line / Blackwork Hybrid
Pain Level: Medium (4/10)
Session Time: 1–2 sessions, 1–2 hours
Best For: Symbolic night-sky themes, upper arm visibility
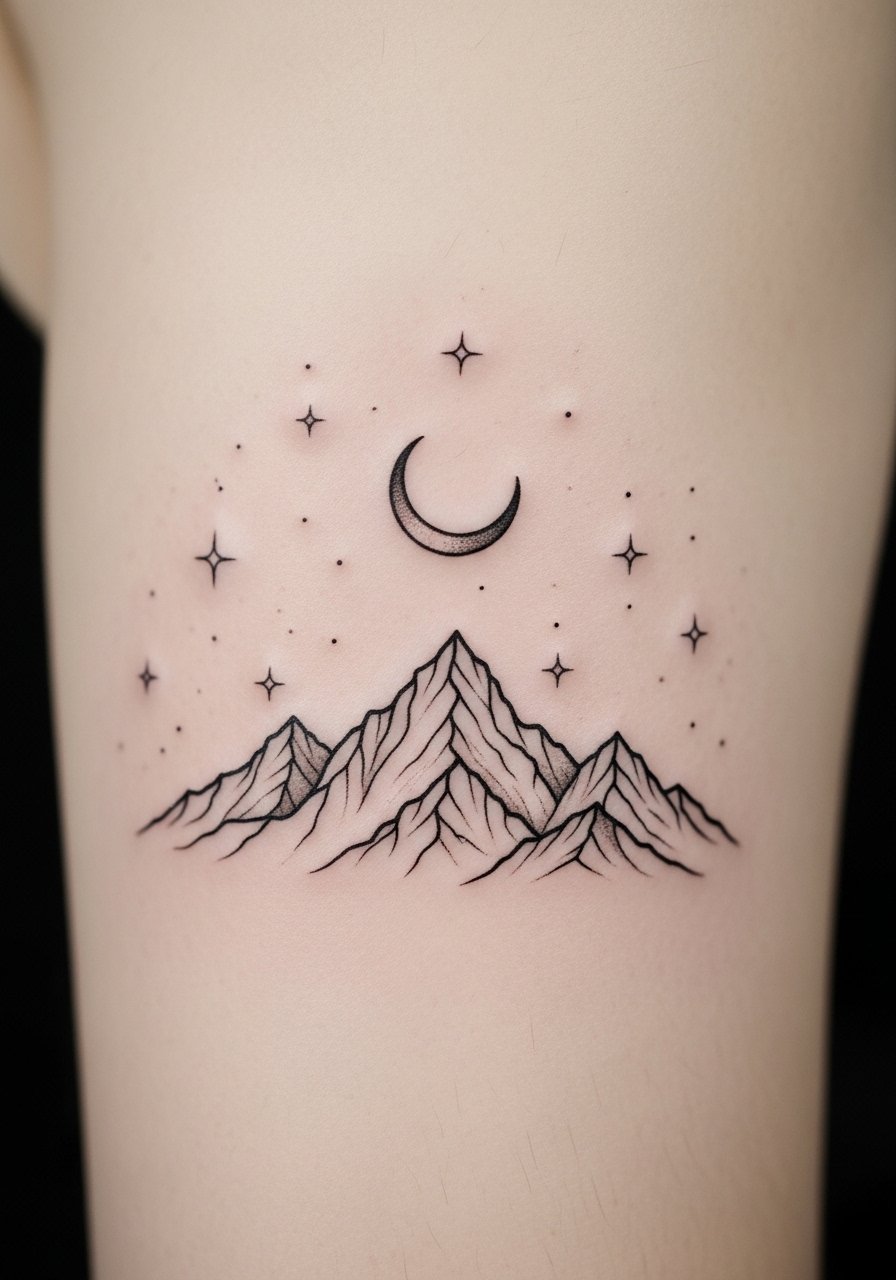
I keep seeing moon-and-star integrations; they lend quiet introspection to mountain tattoo designs. The upper arm accommodates a taller composition and gives artists room for dotwork stars. Pain is tolerable and healing smooth if you avoid tight layering. From chatting with artists, the trick is balancing delicate stars with durable peak outlines so the celestial dots don’t fade into a speckle over time.
7. Realistic Mountain Landscape on Shoulder Blade
Style/Technique: Realism / Black & Gray
Pain Level: Medium-High (5-6/10)
Session Time: Multiple sessions, 3–6 hours total
Best For: Nature lovers, lifelike scenes

A full landscape works great on the shoulder blade — it’s a flat canvas for texture and depth. I opted for one like this after a memorable hike; realism captures those textures. Expect longer sessions and some sore spots. Realistic shading ages well when artists use contrast rather than tiny stipple that can soften. Bring photo references and ask to see healed-realism portfolios, especially on skin tones like yours.
8. Mountain View With Water Reflection on Outer Arm
Style/Technique: Illustrative / Reflective Composition
Pain Level: Medium (4/10)
Session Time: 2 sessions, 2–4 hours total
Best For: Serene scenes, medium-sized arm pieces
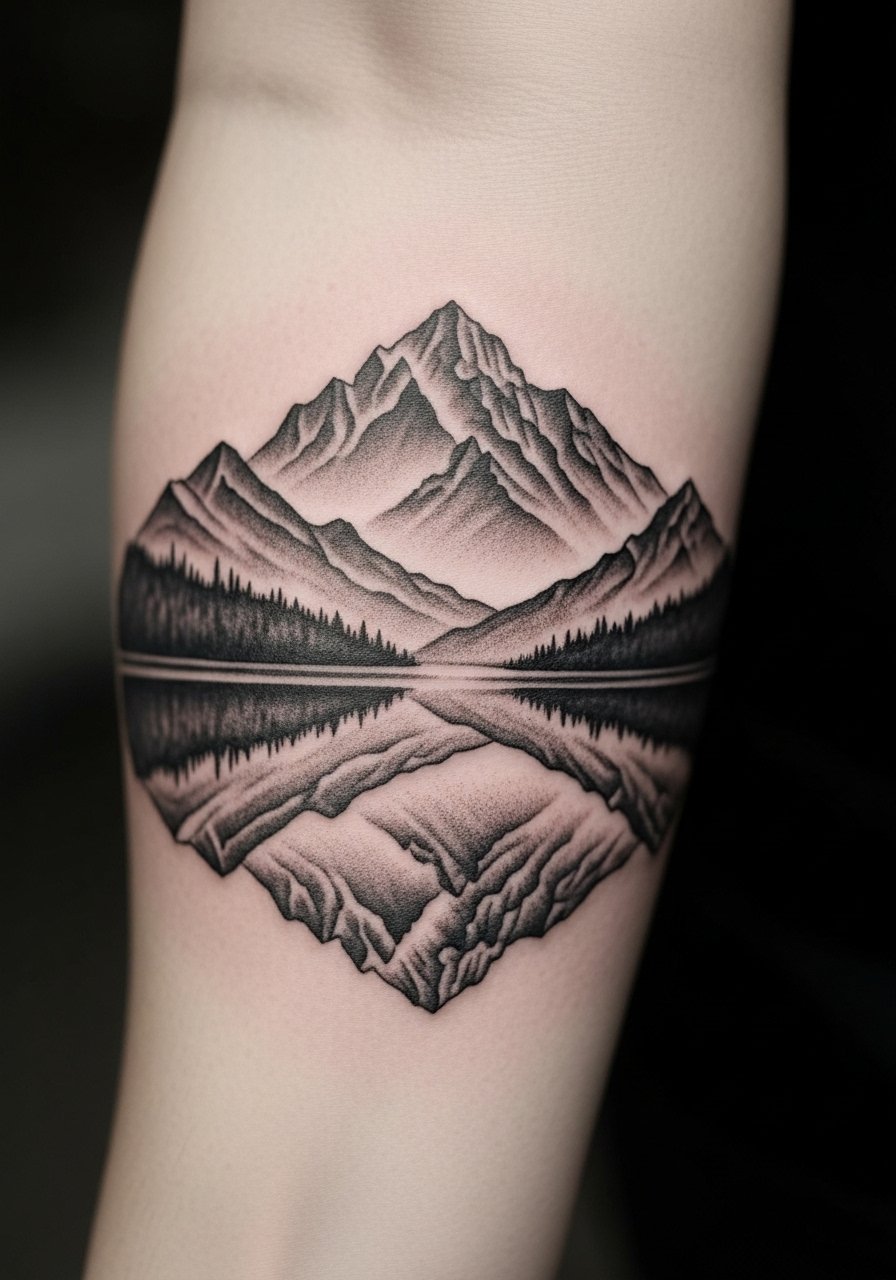
Reflective landscape tattoos add calm — a mirror lake beneath peaks says “peace after climb.” I appreciate how this design balances negative space with detail. Outer arm placement shows off the symmetry and keeps pain moderate. Keep the reflection slightly stylized; perfect photoreal reflection can look muddy on skin after healing. Ask your artist how contrast will be preserved in the reflection area.
9. Aurora Borealis Over Mountains on Back
Style/Technique: Watercolor + Realism Blend
Pain Level: Medium-High (5/10)
Session Time: Multiple sessions, 3–6 hours total
Best For: Large colorful back pieces, statement work

Aurora pieces are show-stoppers — big, colorful, and visually rich. I’ve only recommended this to people ready for a larger commitment because color gradients need space to breathe. The back is ideal; you’ll need multiple sessions and occasional touch-ups as some pigments shift. Artists who mix realism with watercolor techniques manage the vibrancy while keeping line integrity around peaks.
10. Floral Dragon With Mountain Backdrop on Ribs
Style/Technique: Illustrative / Bold Linework
Pain Level: High (7-9/10)
Session Time: Multiple sessions, 3–6+ hours
Best For: Statement, symbolic fusion pieces
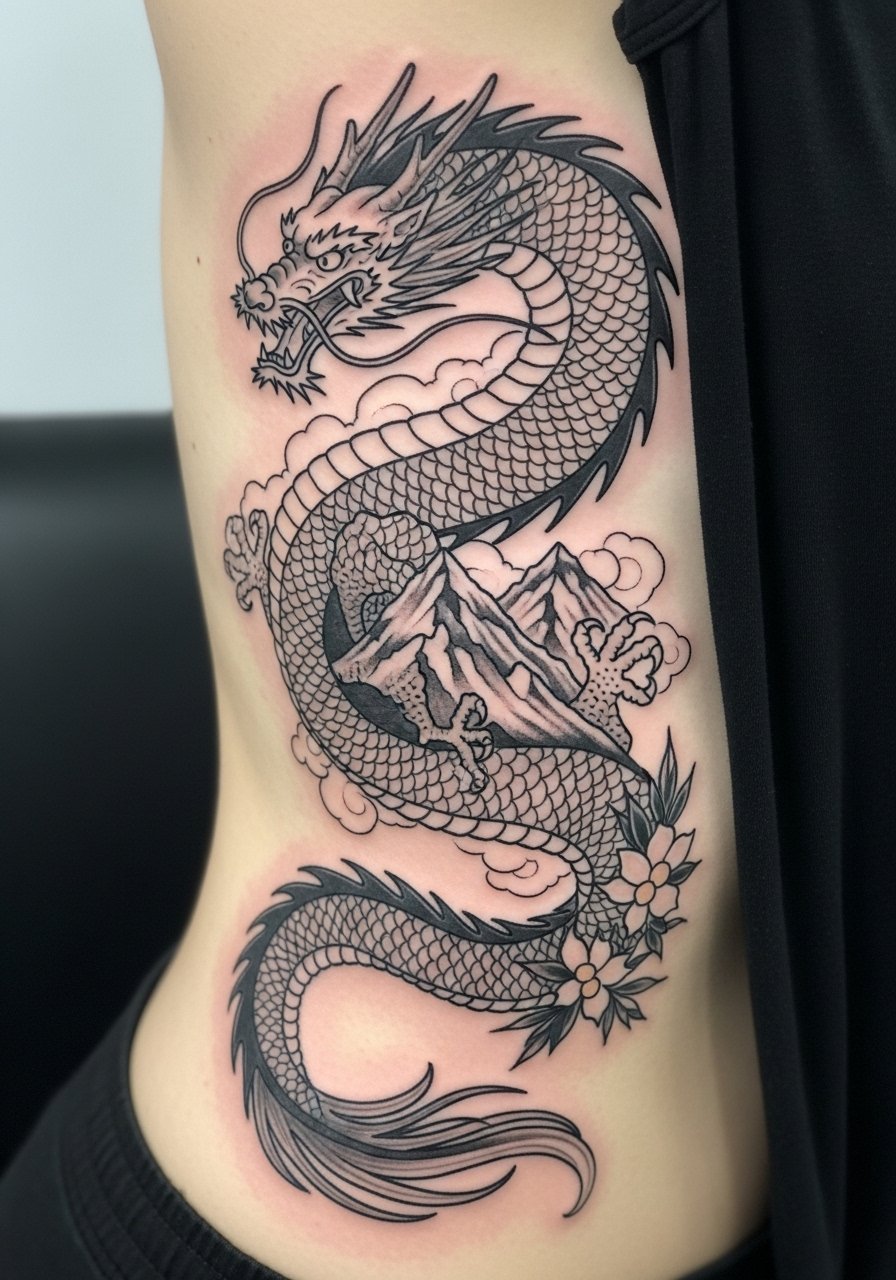
A dragon framed by mountains reads like a personal myth — strength plus the wild. Ribs are painful and healing needs extra care, so I only suggest this if you’re ready for the commitment. Heavy blackwork can preserve better over time than tiny color details on ribs. Make sure your artist plans for movement and breath-induced stretching during the session, and expect longer healing with careful moisturizing.
11. Geometric Realism Mountain Wrap on Bicep
Style/Technique: Geometric Realism / Black & Gray
Pain Level: Medium (4–5/10)
Session Time: 2 sessions, 2–4 hours total
Best For: Mid-sleeve elements, modern collectors
This hybrid balances precision and texture — crisp geometric frames around a realistic peak. I’ve heard artists enjoy these because they let them show both technical linework and shading. Bicep wrapping uses the arm’s curve; ask to preview a stencil while standing to see how peaks flow with muscle. Keep line contrast strong to avoid muddiness where geometry meets realism.
12. Intricate Mountain Hand Tattoo
Style/Technique: Detailed Blackwork / Micro-Shading
Pain Level: High (7-8/10)
Session Time: Multiple sessions, 2–4 hours total
Best For: Statement visibility, bold wrist/hand pieces
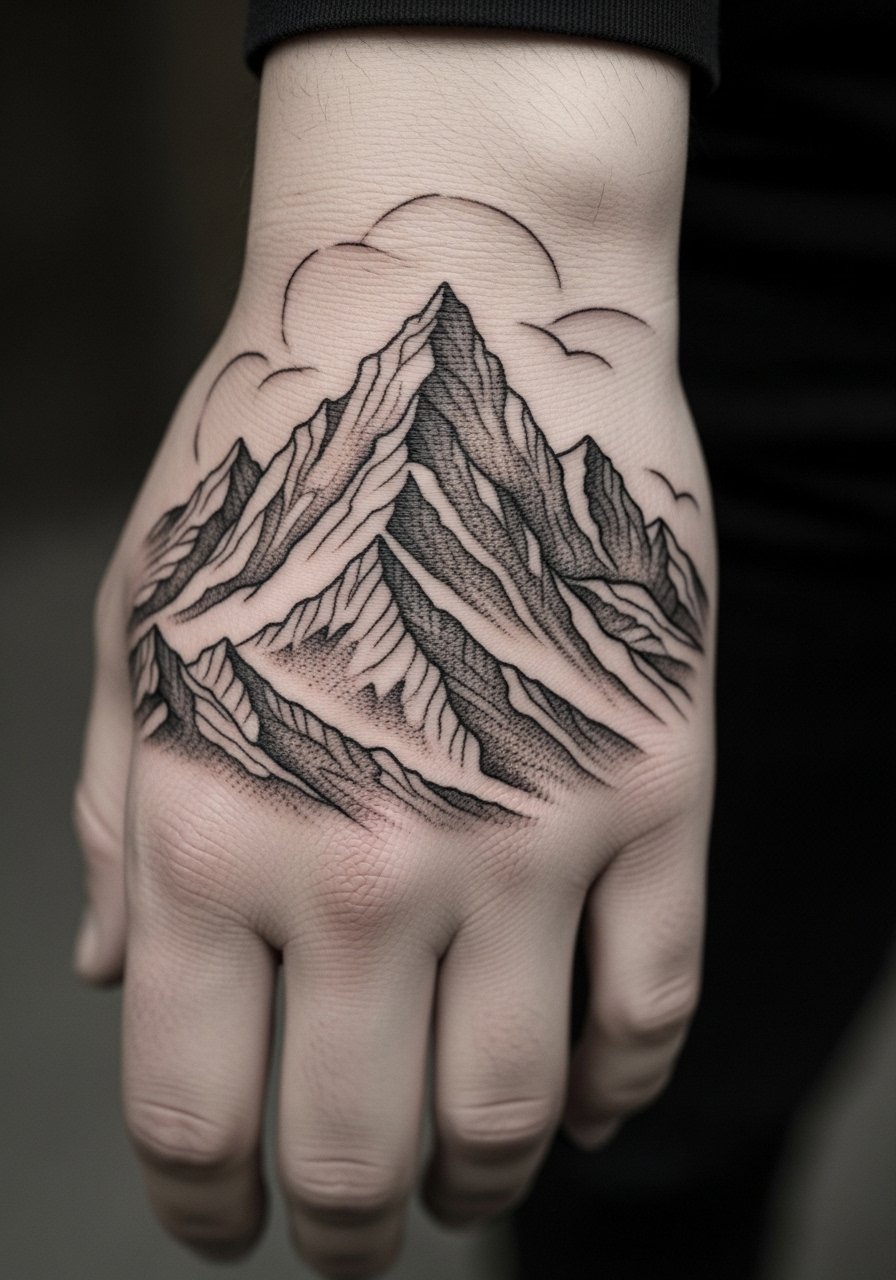
Hands are high-visibility and high-maintenance. I have one on my knuckle-adjacent area and learned that hand tattoos demand regular touch-ups and strict aftercare. Intricate peaks look powerful, but skin there shifts and sheds more; choose strong negative-space composition so important lines don’t disappear. Expect more frequent refresh sessions and commit to sunscreen and balm to preserve contrast.
13. Watercolor Mountain Night Sky on Forearm
Style/Technique: Watercolor / Soft Blending
Pain Level: Medium (4/10)
Session Time: 2 sessions, 2–3 hours total
Best For: Dreamy forearm pieces, color experimentation
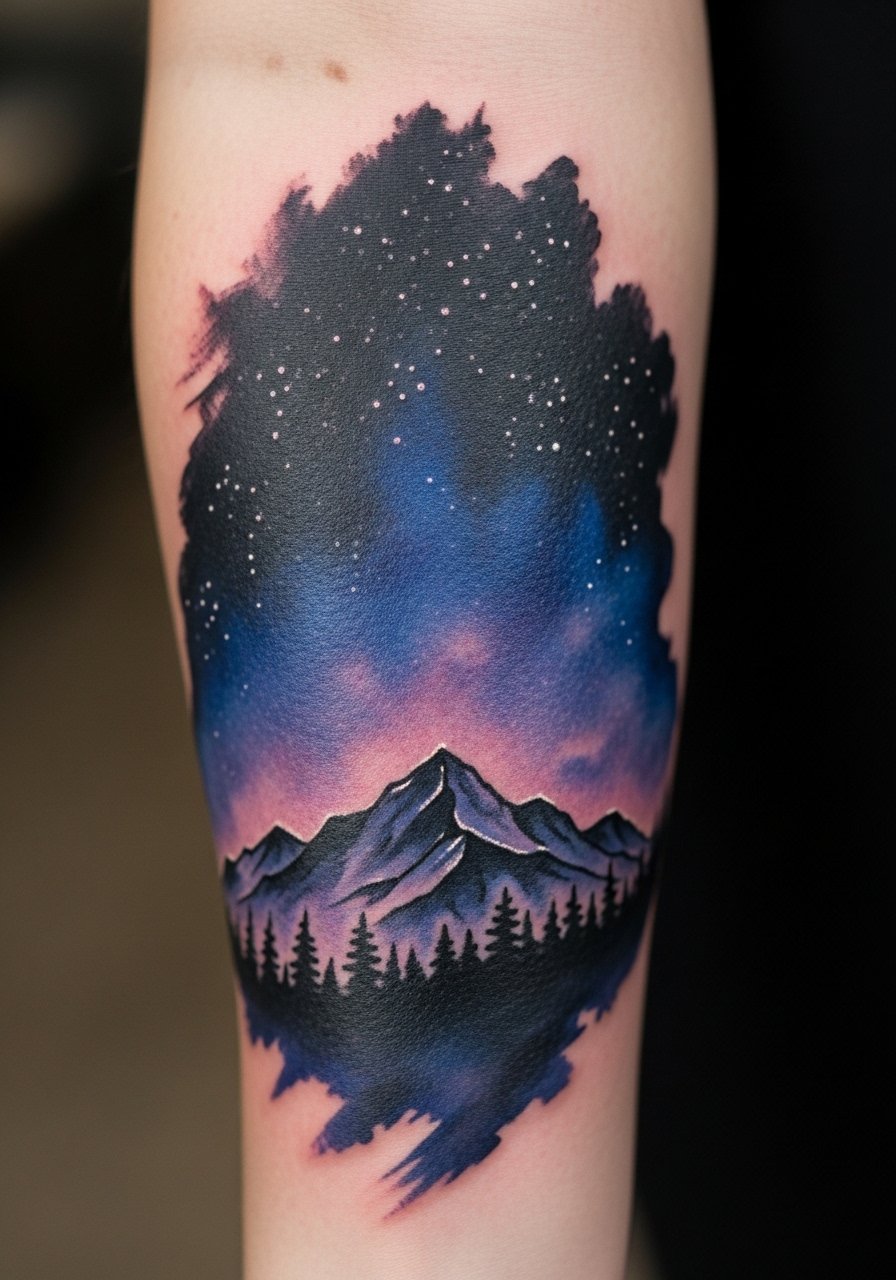
Night-sky watercolor blends give mountain tattoo designs a moody vibe. In my experience, saturated cool tones hold better than pastel washes, but all watercolor needs occasional refresh. Pair the washes with strong black peak outlines to keep the silhouette crisp. Forearm placement helps the piece age evenly; avoid tiny white ink stars if you have deeper skin tones since they can be less visible healed.
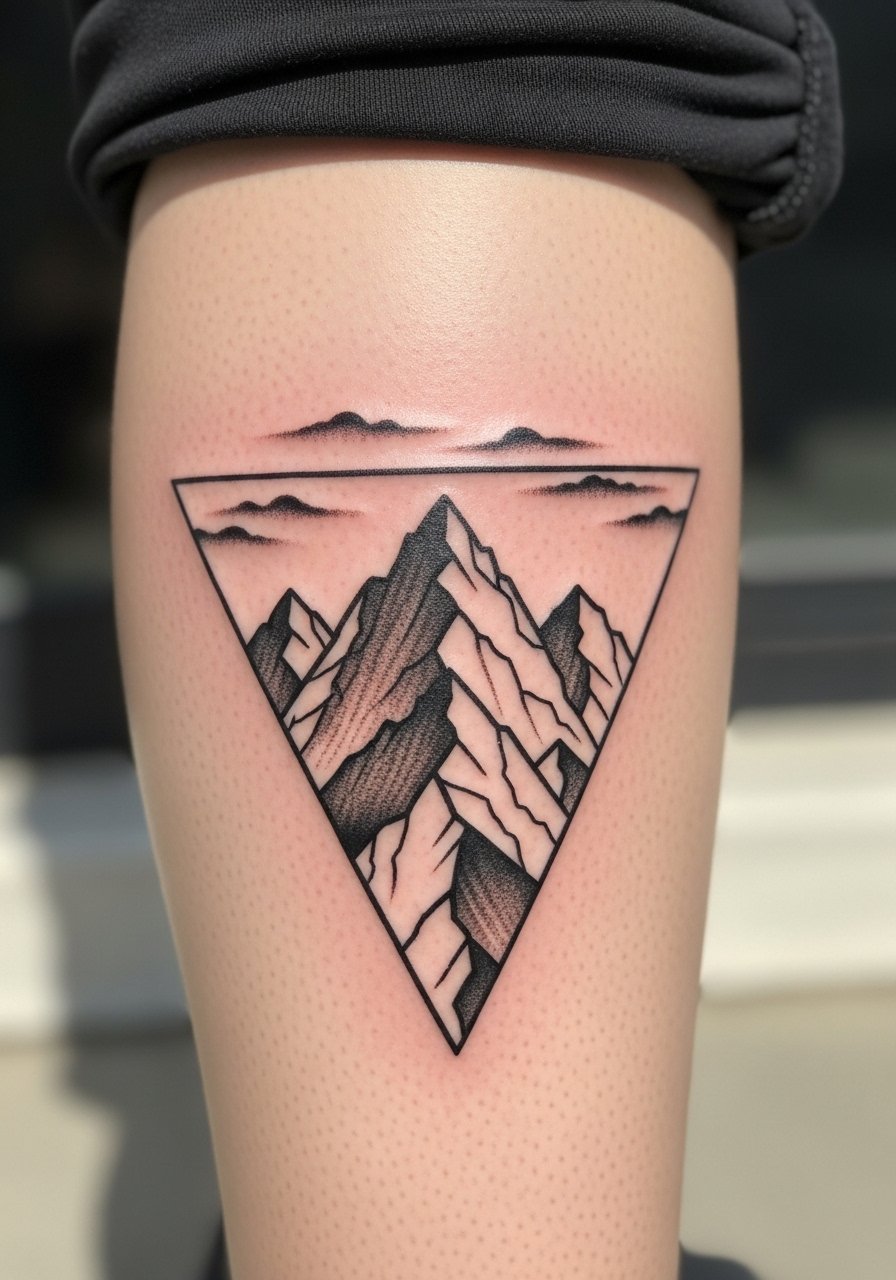
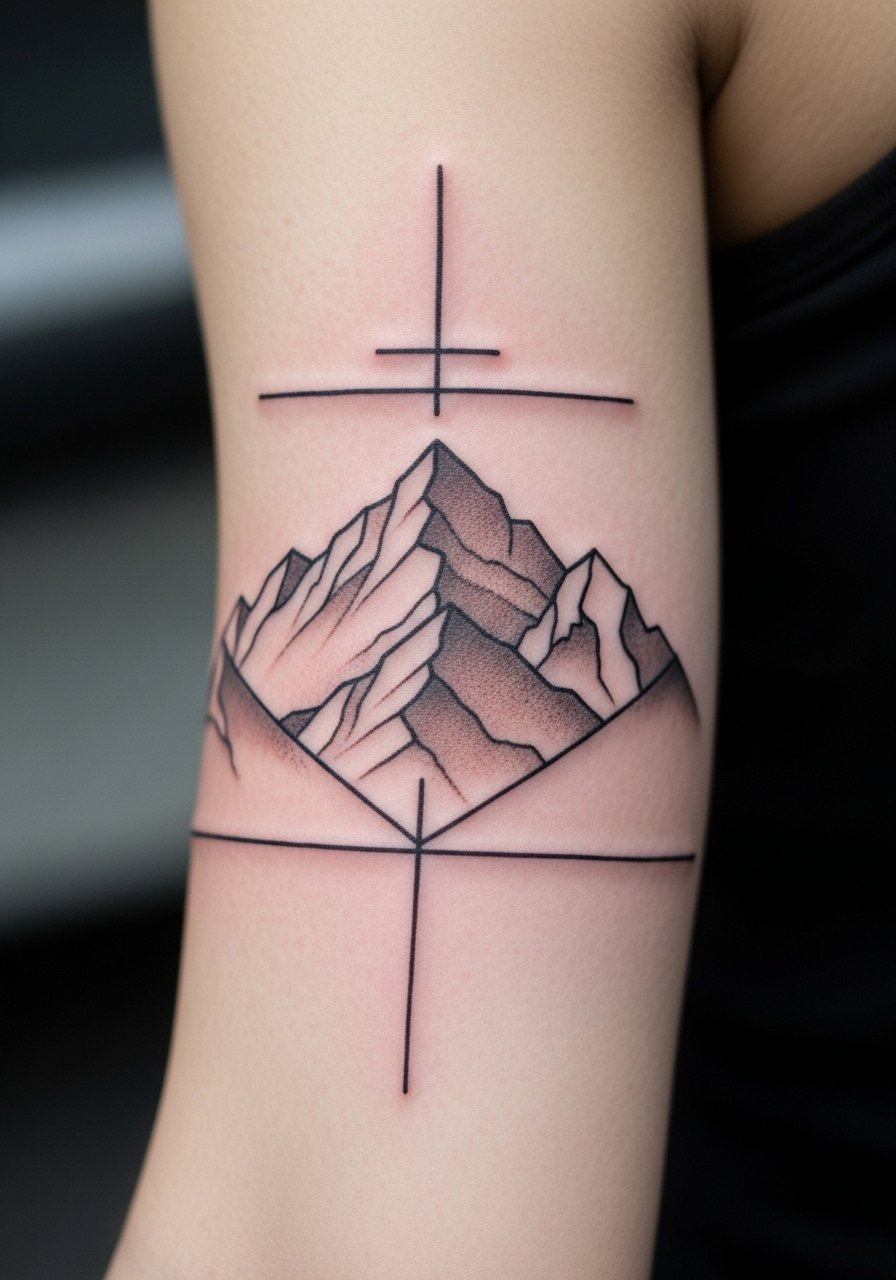
14. Geometrical Mountain in Triangle Frame on Ribs
Style/Technique: Geometric / Minimalist
Pain Level: High (7/10)
Session Time: 1–2 sessions, 1–3 hours
Best For: Structured chest or rib placement, symbolic framing
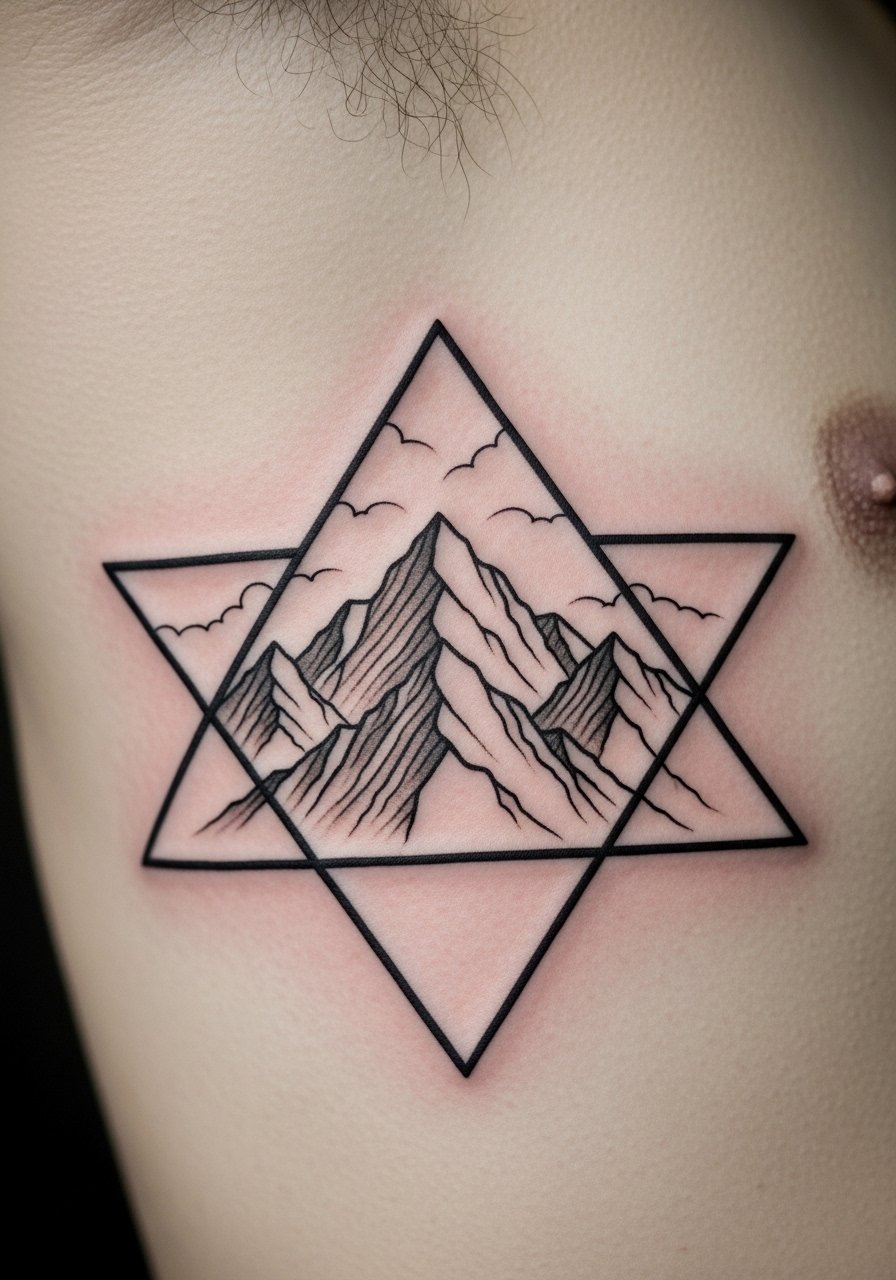
A triangle frame gives focused symbolism and a math-meets-nature vibe. Ribs amplify pain but create a striking placement for framed geometry. I recommend slightly bolder lines for ribs to resist softening during healing. This design is timeless in style terms and reads well as a small chest or rib accent if you want a private symbol that’s visible when you choose.
15. Bear-Framed Mountains on Thigh
Style/Technique: Illustrative / Animal-Nature Fusion
Pain Level: Medium (4/10)
Session Time: 2–3 hours, 1–2 sessions
Best For: Narrative pieces, larger thigh canvases
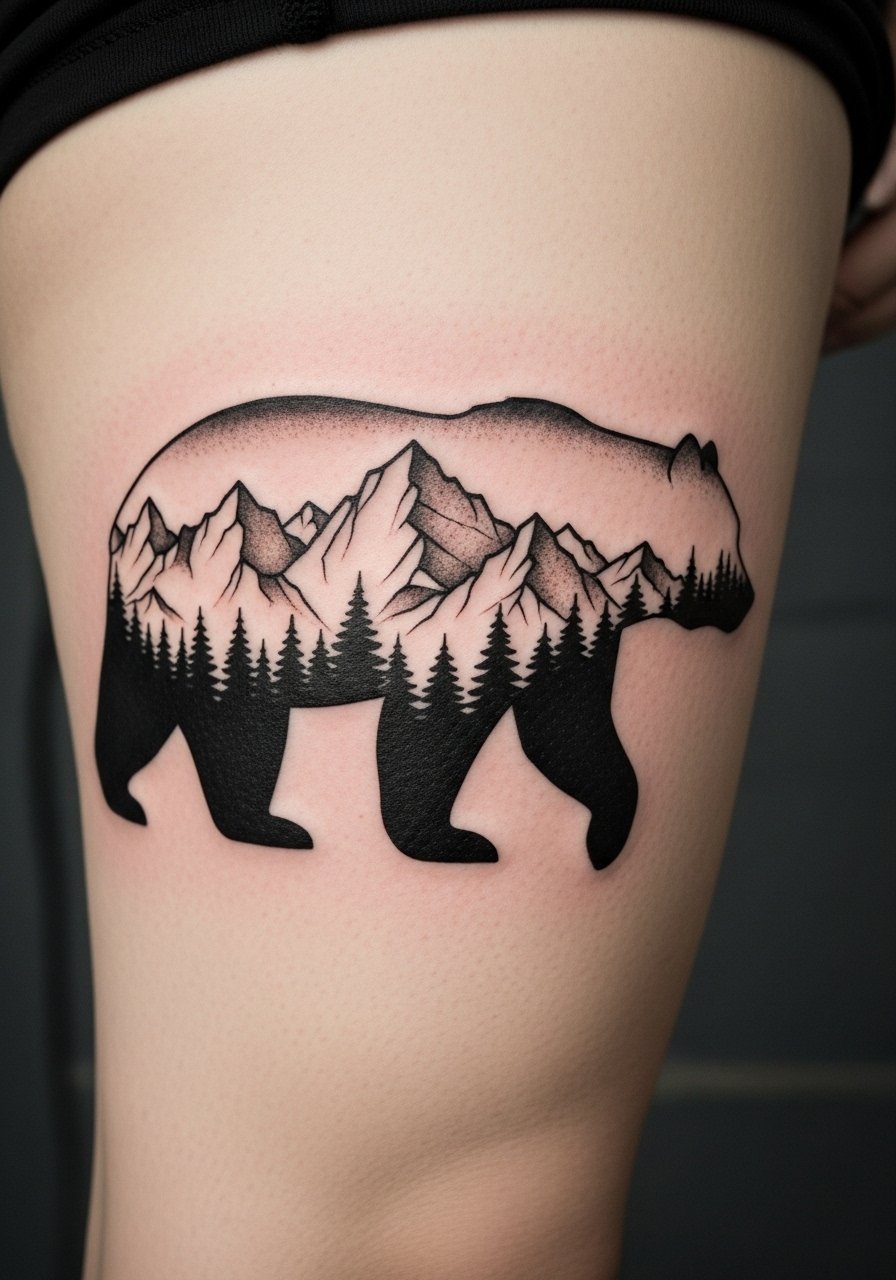
I first saw a bear-framed mountain on an artist’s feed — the negative-space silhouette makes a bold statement. Thigh placement is comfortable for longer sessions and offers space for storytelling elements. This nod to wilderness and protection reads well as a personal emblem. Ensure the bear silhouette has clear edges and internal mountain contrast; otherwise the internal detail can blend together over time.
16. Mountains in a Mug — Tiny Chest or Wrist Nod
Style/Technique: Miniature Illustrative / Cute-Nostalgic
Pain Level: Low (2–4/10)
Session Time: 30–60 minutes
Best For: Subtle memorials or camping nods, small placements
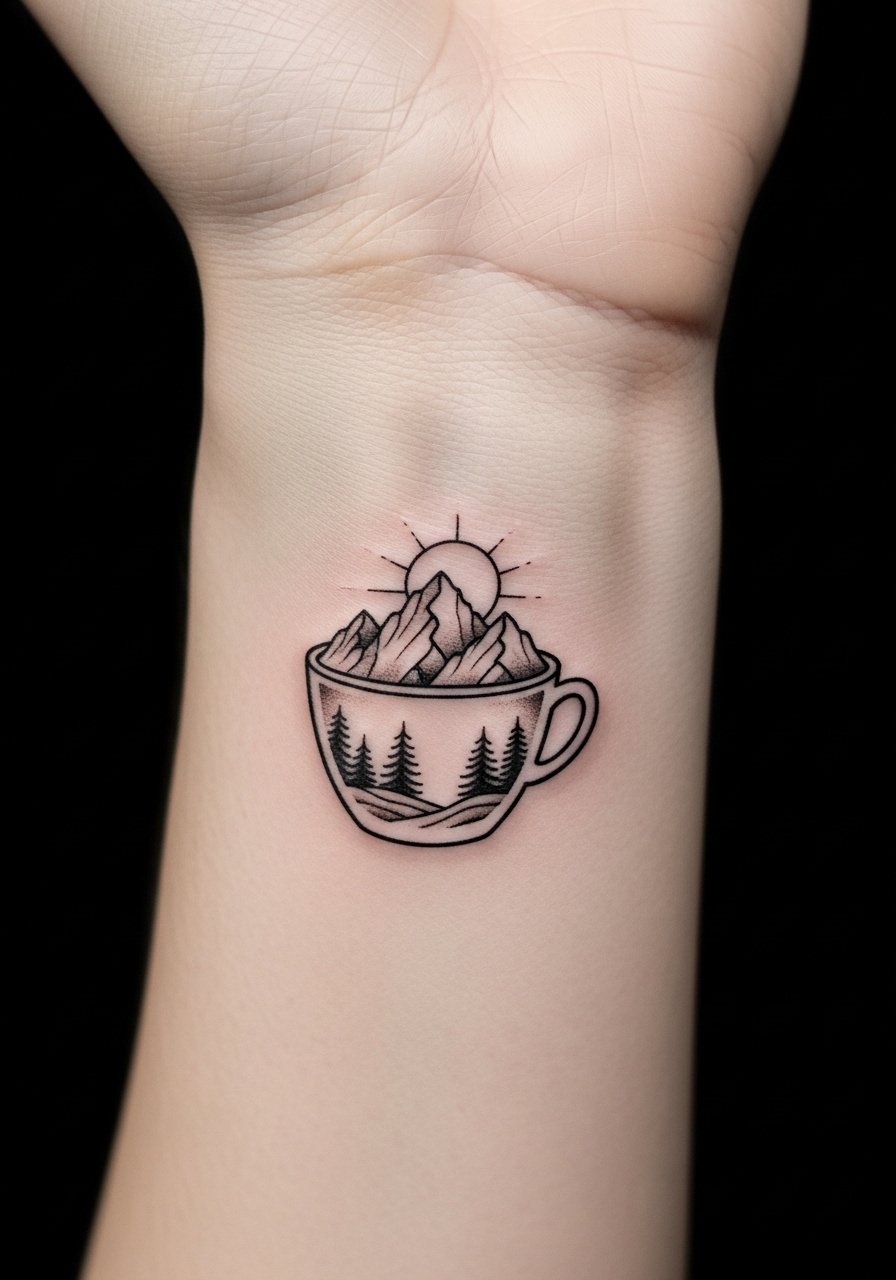
This unique idea — a mountain in a mug — is playful and personal. I’ve noticed it’s popular among campers who want a subtle daily reminder of mornings outdoors. Small mountain tattoos like this sit well on the wrist or chest and are low pain. Because of scale, keep the interior shapes simple so they don’t blur. Use this when you want a meaningful micro tattoo that’s still readable as it ages.
17. Tibetan Prayer Flags With Everest on Upper Arm
Style/Technique: Illustrative / Cultural Motif Integration
Pain Level: Medium (4–5/10)
Session Time: 1–2 sessions, 1–3 hours
Best For: Spiritual meaning, travel tributes

I came across this while researching spiritual travel tattoos; prayer flags add a meditative layer to a peak design. Upper arm placement keeps the flags flowing naturally. If you choose cultural motifs, have a respectful conversation with your artist about symbolism and authenticity. Colors and movement can be stylized, but keep the flag shapes clear so they don’t become indistinct as color weathers.
18. Window-Frame Mountain View on Sternum
Style/Technique: Illustrative / Illusion-Framed
Pain Level: High (7–8/10)
Session Time: 2–3 sessions, 2–4 hours
Best For: Intimate pieces, chest statement
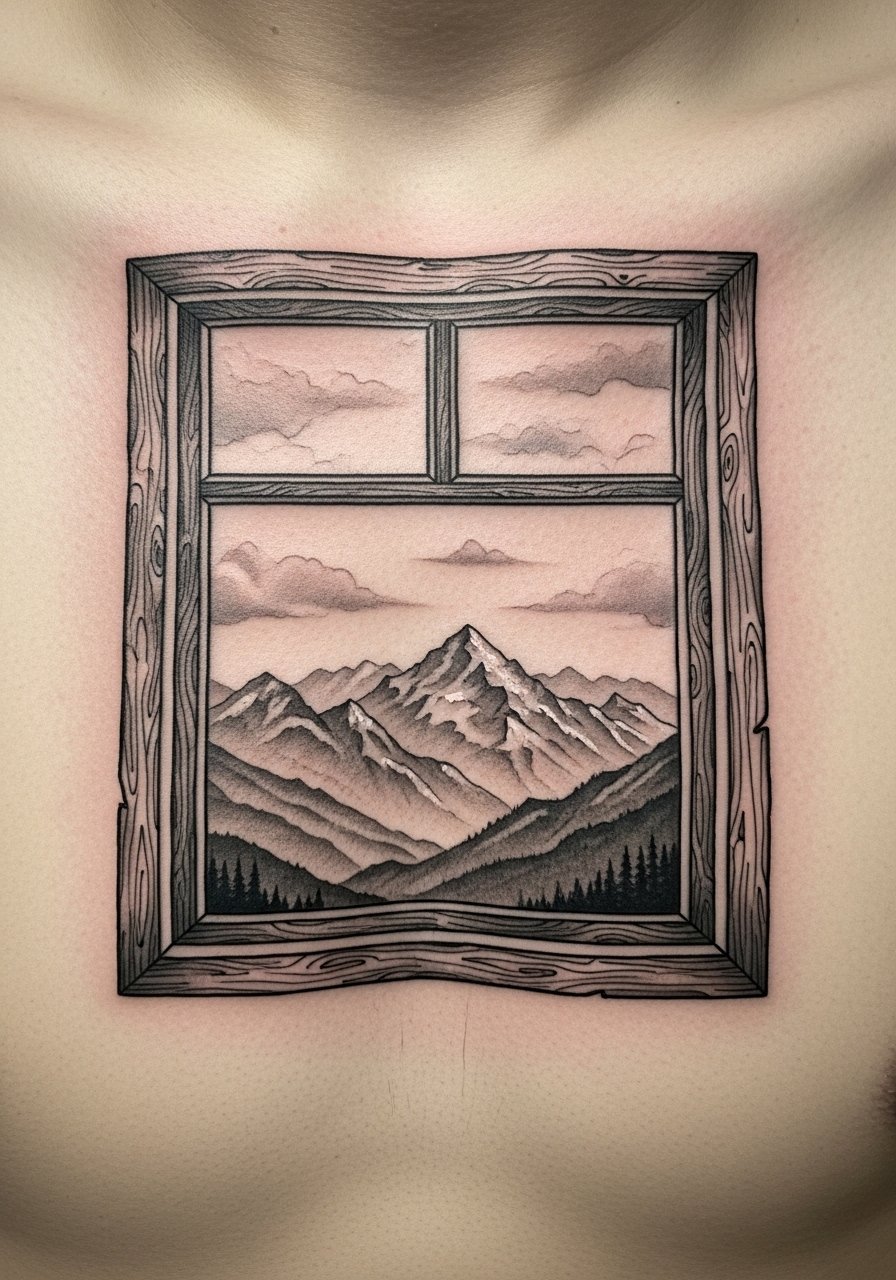
A window-frame mountain gives a sense of looking out from inside — a portable view. Sternum placement creates a centered, intimate piece. I advise testing the placement with a stencil to ensure the frame sits comfortably with your body lines. Because the chest moves a lot, keep critical outlines strong to avoid blurring across the frame edges.
19. Mountain As Rower/Climber Backdrop on Shoulder
Style/Technique: Illustrative / Activity Integration
Pain Level: Medium (4–6/10)
Session Time: 1–3 sessions, variable
Best For: Hobby-based personalization, shoulder or upper arm
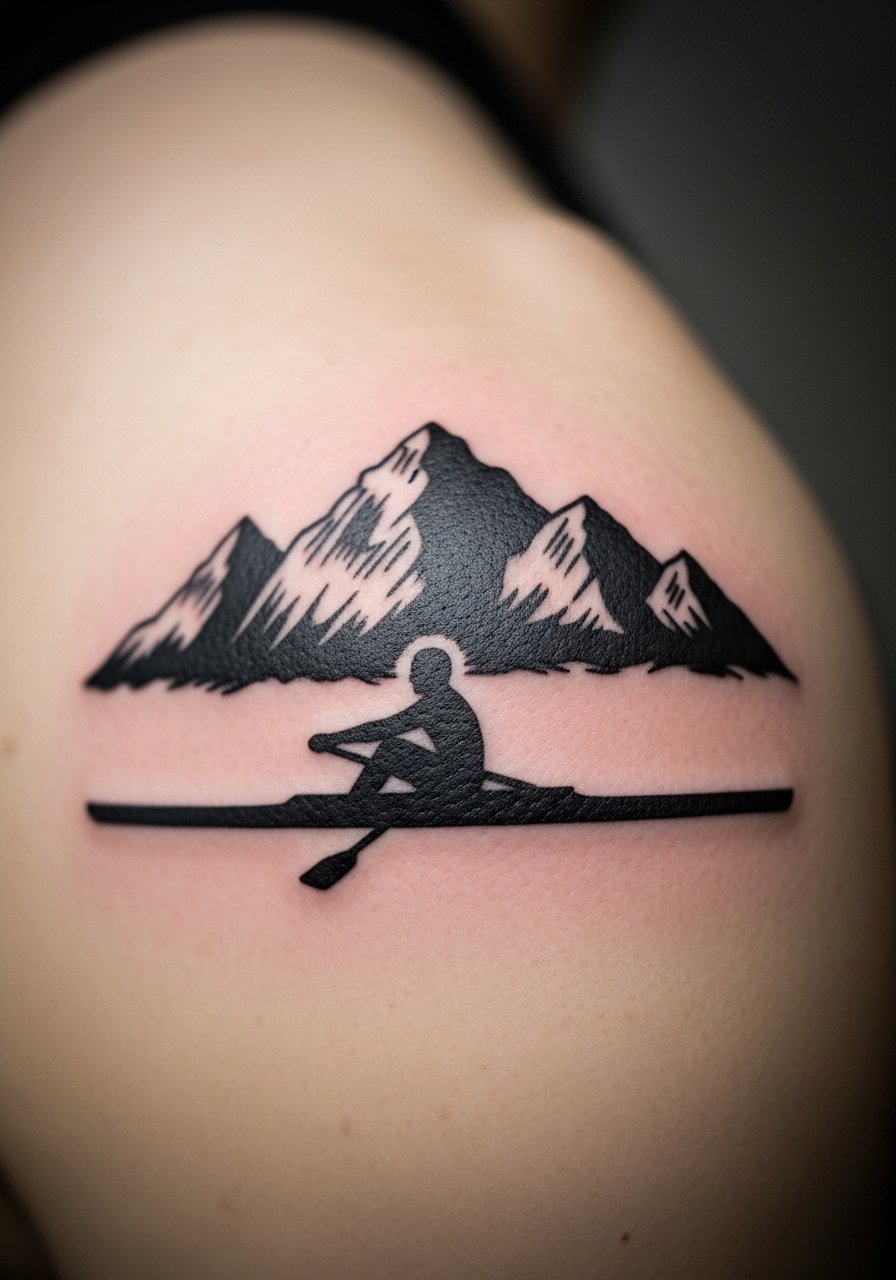
Personalizing a peak with a hobby silhouette — rower, climber, biker — makes an otherwise common motif deeply personal. I recommended this to a friend who climbs; it reads like a life snapshot. Shoulder placement keeps sessions comfortable. Make the hobby element bold and simple so it stays legible as the piece ages.
20. Scarification-Style White Mountain On Upper Arm (Alternative Technique)
Style/Technique: Scarification / White Ink Alternative
Pain Level: High (varies)
Session Time: Single or multiple (different healing)
Best For: Textural, ultra-unique pieces
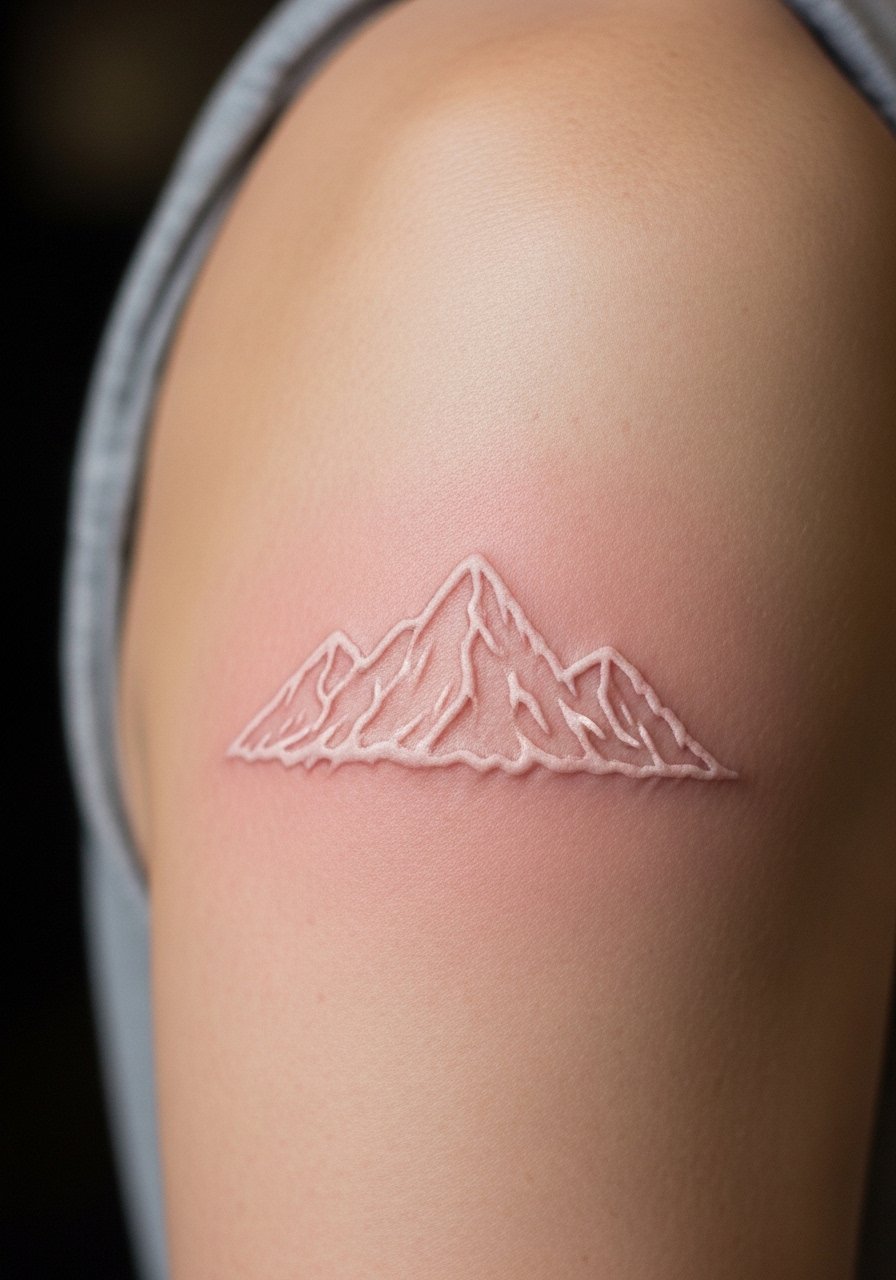
This is niche: some people prefer texture over pigment. Scarification or white-ink mountain motifs create tactile, low-contrast marks. If you’re considering this, speak to a specialist who works with alternative techniques. Healing and long-term visibility vary a lot — some people love the raw texture, others find it fades into the skin. This is one of those rare options that’s highly personal.
21. Mountain Sleeve With Trees and Trails on Full Arm
Style/Technique: Illustrative / Landscape Sleeve
Pain Level: Medium-High (5–7/10)
Session Time: Multiple sessions over weeks/months
Best For: Collectors, full-arm storytelling
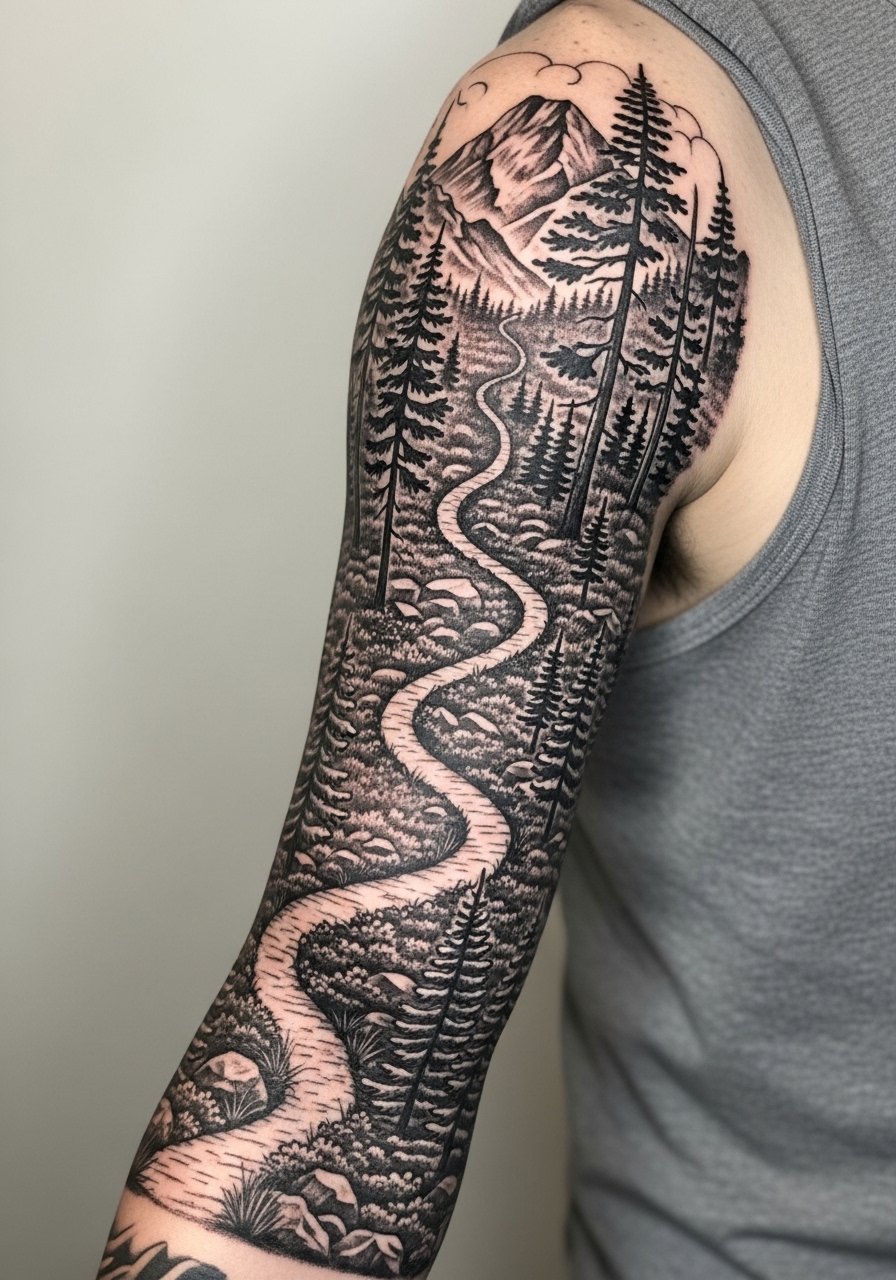
A full sleeve gives you room for a journey — peaks, trails, campsites. I planned a sleeve to capture different seasons, and it became a wearable map. Expect several sessions and a coordinated plan with your artist so peaks flow with muscle movement. Sleeves need long-term upkeep and sunscreen, but they make a continued narrative you can add to over time.
22. Small Line Art Mountain Behind Ear
Style/Technique: Micro Line Art / Minimalist Placement
Pain Level: High (6/10)
Session Time: Under 1 hour
Best For: Hidden small mountain tattoos, subtle placement
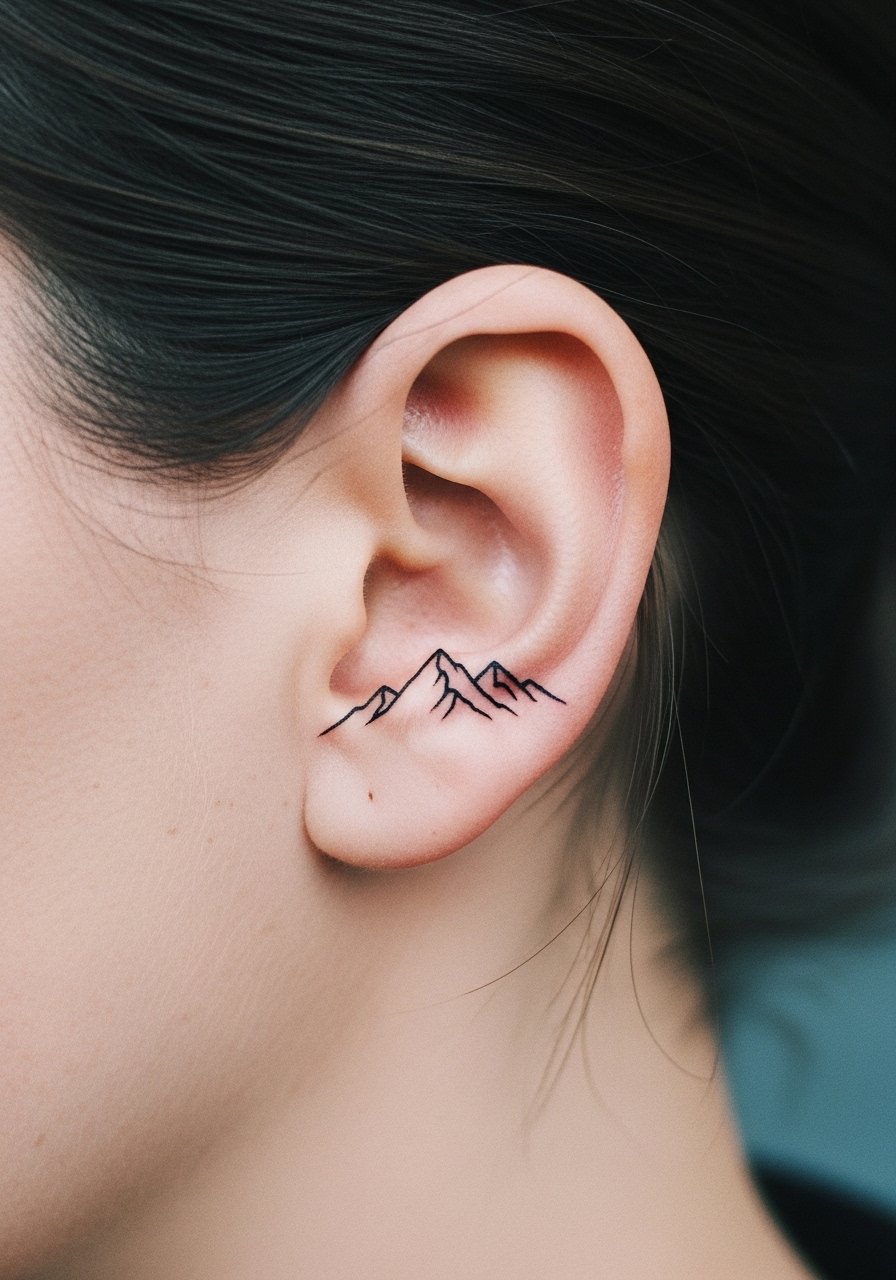
Behind-the-ear placements are small and intimate but surprisingly painful due to thin skin. I like this spot for a tiny mountain tattoo that’s only glimpsed occasionally. Keep designs to 1–3 simple peaks; anything more will blur. For first mountain tattoo nerves, this is a high-pain but low-visibility test — consider whether you want it constantly visible when you move your head.
23. Sunrise Mountains: Dawn Symbolism on Inner Wrist
Style/Technique: Fine Line / Symbolic Sunrise
Pain Level: Low-Medium (3/4/10)
Session Time: 1 session, under 1.5 hours
Best For: Daily visible reminder, small wrist placement
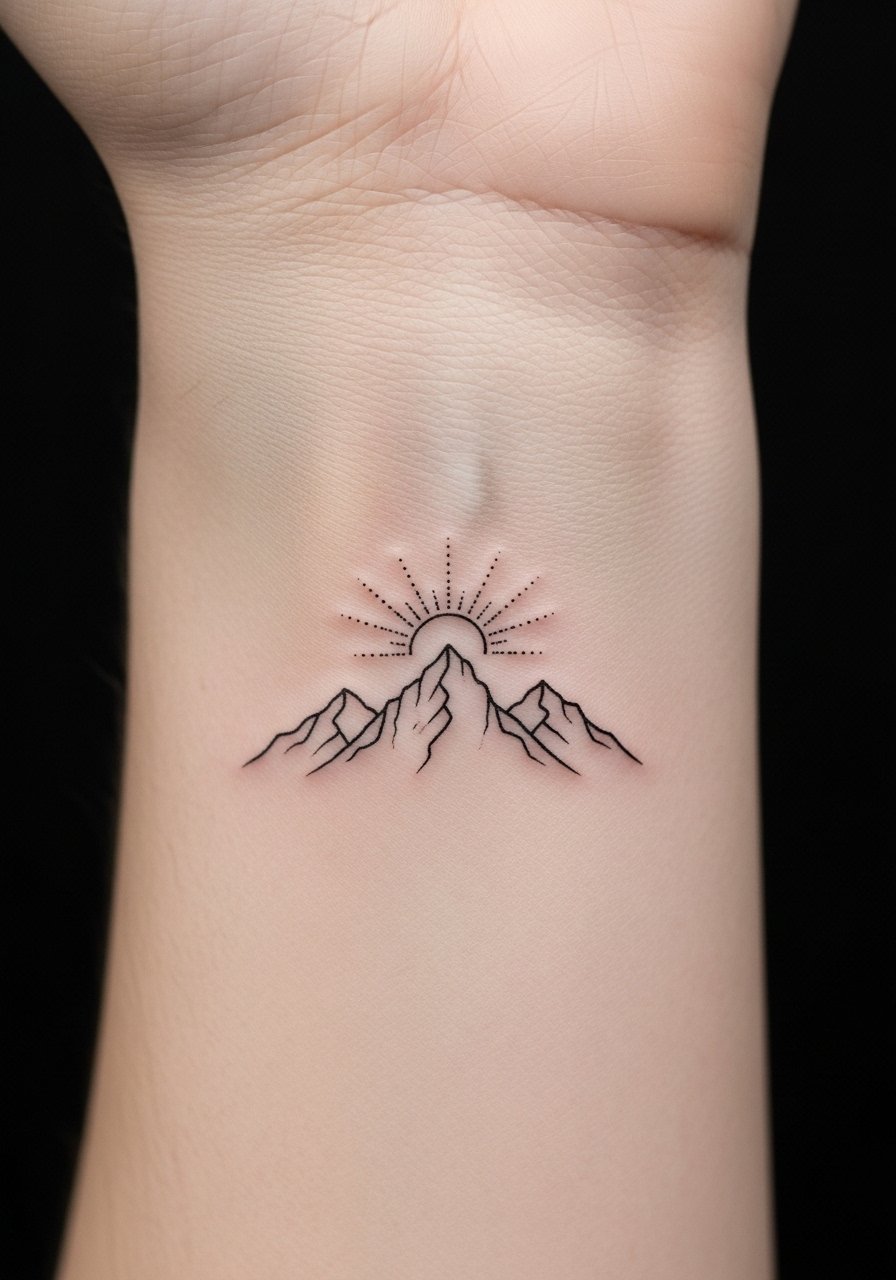
I chose a tiny sunrise on my wrist after a life shift — it’s a visible, everyday affirmation. Inner wrist placement is tactile and visible, so ensure the design is meaningful. Lines on wrists can blur a bit over time with sun and friction; anchor the design with a slightly bolder primary outline to preserve the silhouette.
24. Mountain Silhouette Sleeve on Thigh
Style/Technique: Blackwork Silhouette / Large Placement
Pain Level: Medium (4–6/10)
Session Time: Multiple sessions, 2–4 hours total
Best For: Bold large-area statements, coverable art
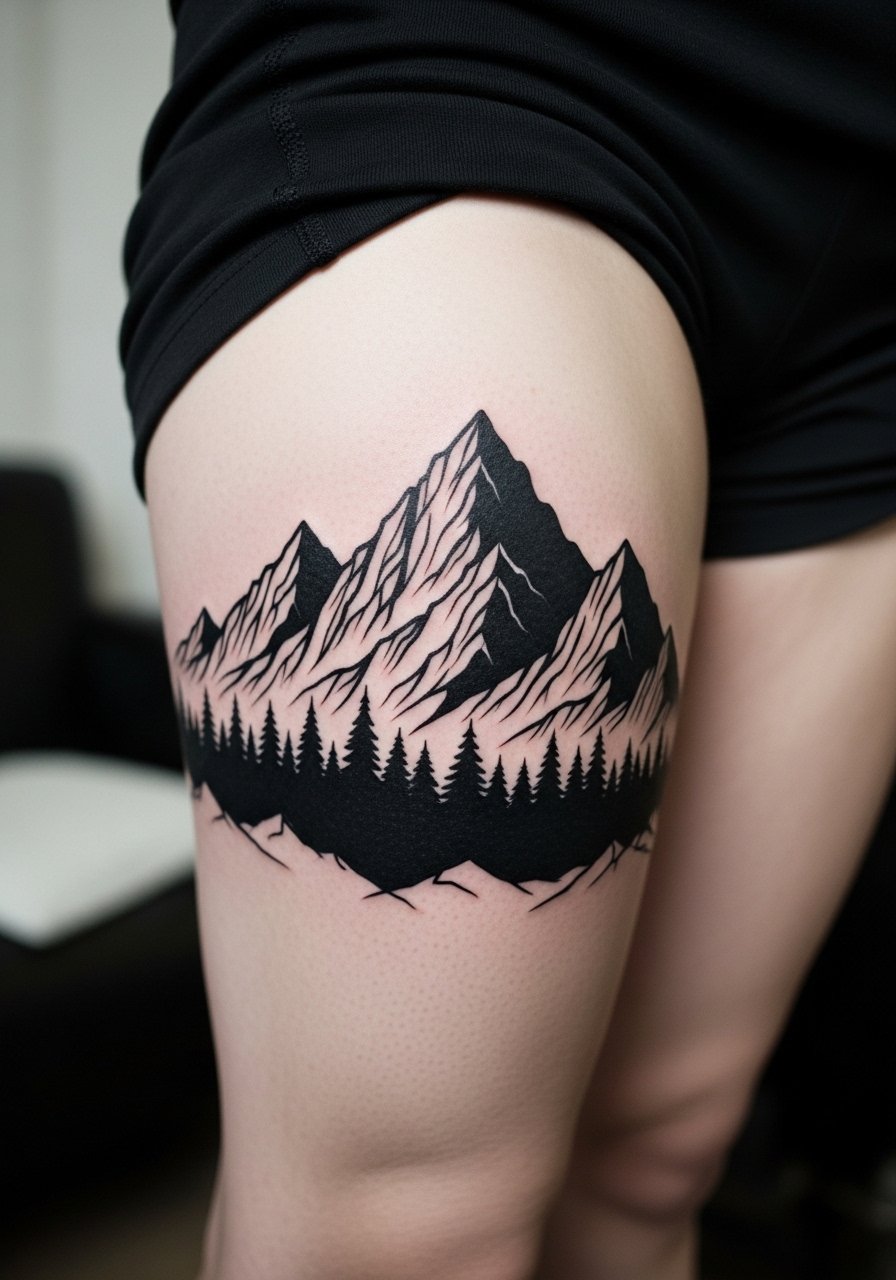
Thighs are underrated: they handle large silhouettes and let you choose how bold to go. A mountain silhouette sleeve is dramatic and easy to hide with clothing. I like how the skin there changes less with sun exposure than forearms, so black silhouettes hold strong. Plan composition so peaks flow with leg musculature — that avoids distortion when you move.
Tattoo Prep and Aftercare Essentials
Aftercare Essentials:
- Aquaphor Healing Ointment, 14oz tube — Common first 3–5 day ointment artists actually recommend for very fresh ink. Use thin layer as instructed.
- Saniderm Transparent Adhesive Bandage, 6-inch roll — Second-skin protection for the first 24–72 hours; many artists use it for the first dressing.
- CeraVe Fragrance-Free Moisturizing Lotion, 12oz — For days 4–14 to keep healed skin supple without irritation.
- Dr. Bronner's Unscented Castile Soap, 18oz — Gentle cleanser for cleaning during the first week; use a small amount and rinse thoroughly.
- Saniderm Individual Tattoo Bandages (Pack) — Handy for travel or single tattoos when you don’t want a full roll.
Before Your Appointment:
- Tattoo Numbing Cream 5% Lidocaine — Ask your artist first; some prefer you not to use it. Useful for sensitive areas.
- Tattoo Stencil Transfer Paper, A4 Pack — If you’re sketching ideas at home to test placement or share with an artist.
- Comfortable Compression Shorts/Pants for Thigh Work — Wear after thigh sessions to protect the area from friction.
Long-Term Maintenance:
- SPF 50+ Sunscreen Stick for Tattoos — From what I’ve seen, sunscreen is the biggest long-term protector against fading; a stick is easy for daily reapplication.
- Mad Rabbit Tattoo Balm, 2oz — Popular tattoo-specific balm for healed tattoos to keep color vibrant.
- Hustle Butter Deluxe, 4oz — A vegan aftercare option many artists mention as a good long-term moisturizer.
Optional Comfort & Touch-Up Aids:
- Hydrocolloid Bandages / Blister Patches — Useful for small tattoos or protecting spots that rub.
- Tattoo Numbing Spray (for touch-ups) — For sensitive touch-up sessions if your artist allows it.
Artists I’ve talked to often recommend Aquaphor or Saniderm for initial care, then switching to a fragrance-free lotion like CeraVe. Be wary of overusing heavy lotions too early — follow the product timing above and your artist’s directions.
Frequently Asked Questions
Q: How bad does a tattoo actually hurt?
A: Pain depends on placement and personal tolerance. Forearm and outer bicep are usually low (around 2–4/10), ribs and hands can be high (7–9/10). I tell nervous friends to pick a less painful spot for a first mountain tattoo, like the outer forearm. For sensitive areas, ask about a numbing cream 5% lidocaine but check with your artist first.
Q: What if I’m worried I’ll regret the design?
A: Sit with the idea for months and test placement with temporary stencils. Choose symbolic elements tied to real memories — sunrise peaks, a favorite trail — and avoid pure trend-only motifs. If visibility is a concern, start with a small mountain tattoo in a hideable spot like the thigh or upper arm.
Q: How do I keep my mountain tattoo from fading?
A: From what I’ve seen, daily sunscreen is essential. Use an SPF 50+ sunscreen stick on exposed ink and moisturize with a fragrance-free lotion like CeraVe. Black and gray holds best; bright watercolors need more maintenance.
Q: When can I exercise after getting inked?
A: Wait at least 48–72 hours before heavy sweating, longer if the tattoo is on a flex area (elbow, knee). Sweat can irritate fresh skin and introduce bacteria. If you’re unsure, give it a week and use a protective covering if needed during light activity.
Q: Should I get a small tattoo first to test pain?
A: Only if you actually want a small tattoo. Pain isn’t strictly about size — location matters more. A tiny wrist tattoo can hurt more than a larger outer forearm piece. Choose a placement you can live with and that won’t regretably limit future additions.
Q: How long does a tattoo take to heal fully?
A: Surface healing is typically 2–3 weeks; full skin regeneration can take 2–3 months. The first week is the most important — keep it clean with gentle soap (I use Dr. Bronner's Unscented Castile Soap sparingly), apply a thin layer of Aquaphor or follow your artist’s recommendation, and don’t pick the peeling skin.
Q: Do tattoos look different on different skin tones?
A: Yes. Black and gray and bold silhouettes translate well across tones. Some bright colors can appear muted on deeper skin tones; white ink is subtle on darker skin. I always advise looking for artists who regularly tattoo your skin tone and showing you healed photos before booking.
