
Someone I know waited months to book a small wrist tree, then discovered the fine line had faded into a gray smudge in under a year, and another friend with darker skin had a delicate branch disappear in photos. Add surprise price spikes and last-minute artist cancellations and it becomes obvious the real problem is matching style, placement, and aftercare to how your life will change. Below are 20 tree tattoo ideas that consider aging, skin tone, pain, and realistic touch-up timelines so you pick a design that actually holds up.
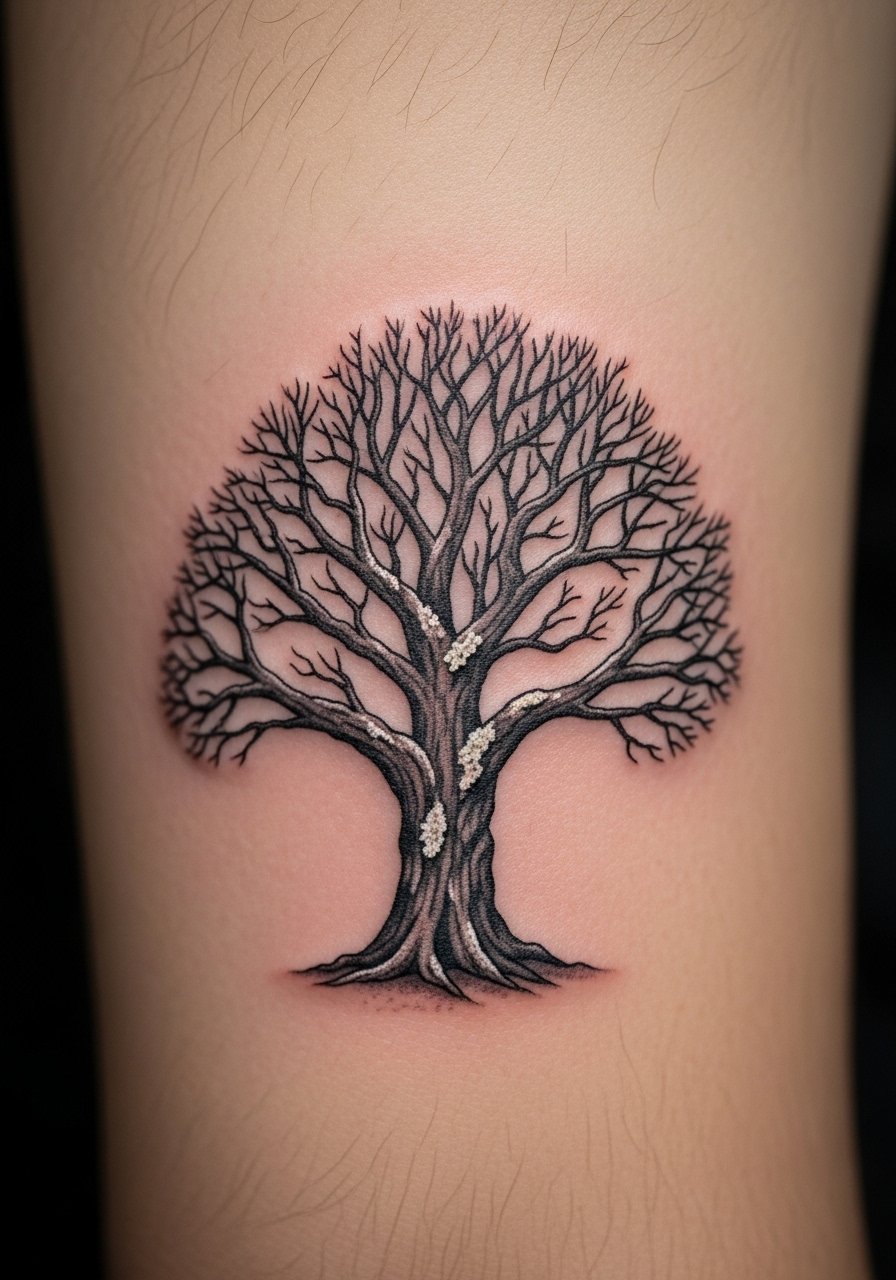
1. Fine line oak on the inner wrist

Someone I know picked a tiny oak on the wrist for a subtle nod to endurance and lost crispness by month eight. For this placement tell your artist you want slightly thicker linework than a needle-skinny single pass so the lines survive daily wear. Expect a 45-minute single session and low pain. Common mistake is making the trunk too narrow which leads to early blurring. At six months the silhouette should still read clean. Expect a touch-up around the 6- to 12-month mark for fine line wrist pieces. This reads best in black only and tests well on forearm mockups before booking.
2. Minimalist interconnected silhouette on the rib

Fair warning: ribs are on the higher end of the pain scale for many people. This silhouette version gives the look of interconnected branches while keeping the linework bold enough to survive skin stretch. On curvier torsos plan placement away from areas you expect to change during pregnancy or major weight shifts. The debate about fine line on ribs comes up here. One camp says ribs blur fast because of movement and thin skin. The other camp says careful depth and spacing will keep lines crisp. Ask the artist where they stand during consultation and request mockups in the exact spot you plan to tattoo.
3. Watercolor cherry blossom branch on the shoulder
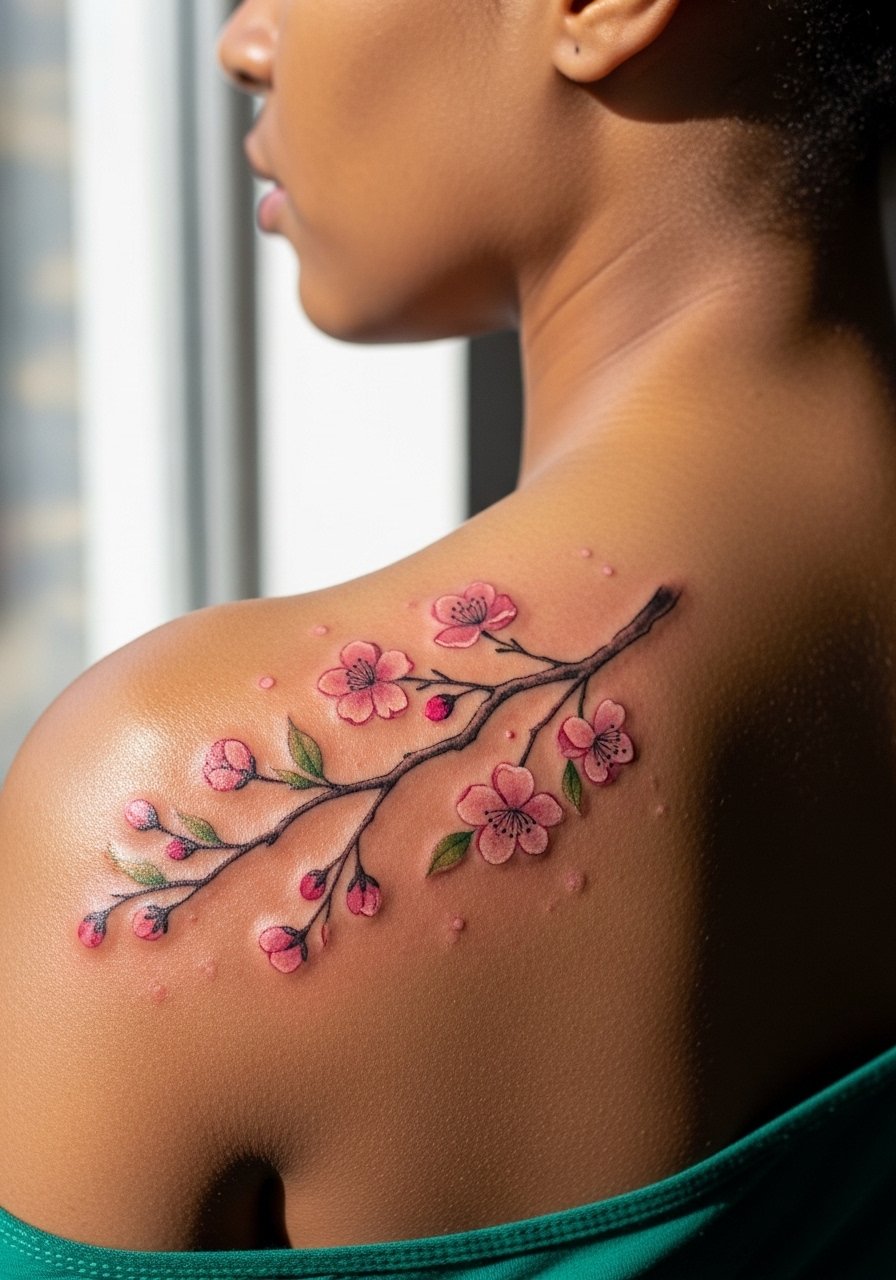
There is real magic in flowing watercolor on the shoulder but expect a different aging arc than blackwork. Watercolor tends to lose vibrancy faster, so book color refreshes if you want the original punch. This piece usually takes two sessions and is moderate pain. Tell your artist to anchor the design with subtle thin black linework so the composition still reads when pigments soften. A common regret is going too pastel at the start; pigments must be laid with enough saturation to last on darker tones. For shoulder placement avoid heavy Saniderm wraps on curved areas unless your artist prefers them.
4. Blackwork Celtic tree on the outer forearm

There's something about solid blackwork that reads clearly on all skin tones and survives photos better than whispery lines. This forearm piece leans into cultural motifs and bold saturation. The session time can span multiple sittings depending on size and usually causes low to moderate discomfort. Tell your artist you want dense saturation and crisp negative-space knots so the design keeps contrast long term. Blowout risk on the forearm is lower than on the fingers but ask about needle depth. A common mistake is shrinking knot details too small which leads to muddled negative space in a year or two.
5. Micro-realism willow at the ankle

Ankle placements read delicate but they demand enough line weight to avoid blurring. Micro-realism here looks graceful and adapts well for first-time clients who want a single-session piece. Pain can spike around the bone. When you consult, bring reference photos that show the branch detail you want at real scale so the artist can adjust spacing. The most common mistake is shrinking realism down too far which makes the texture vanish after a few months. Expect a single session with a possible touch-up at six to eight weeks.
6. Neo-traditional pine with roots on the inner thigh
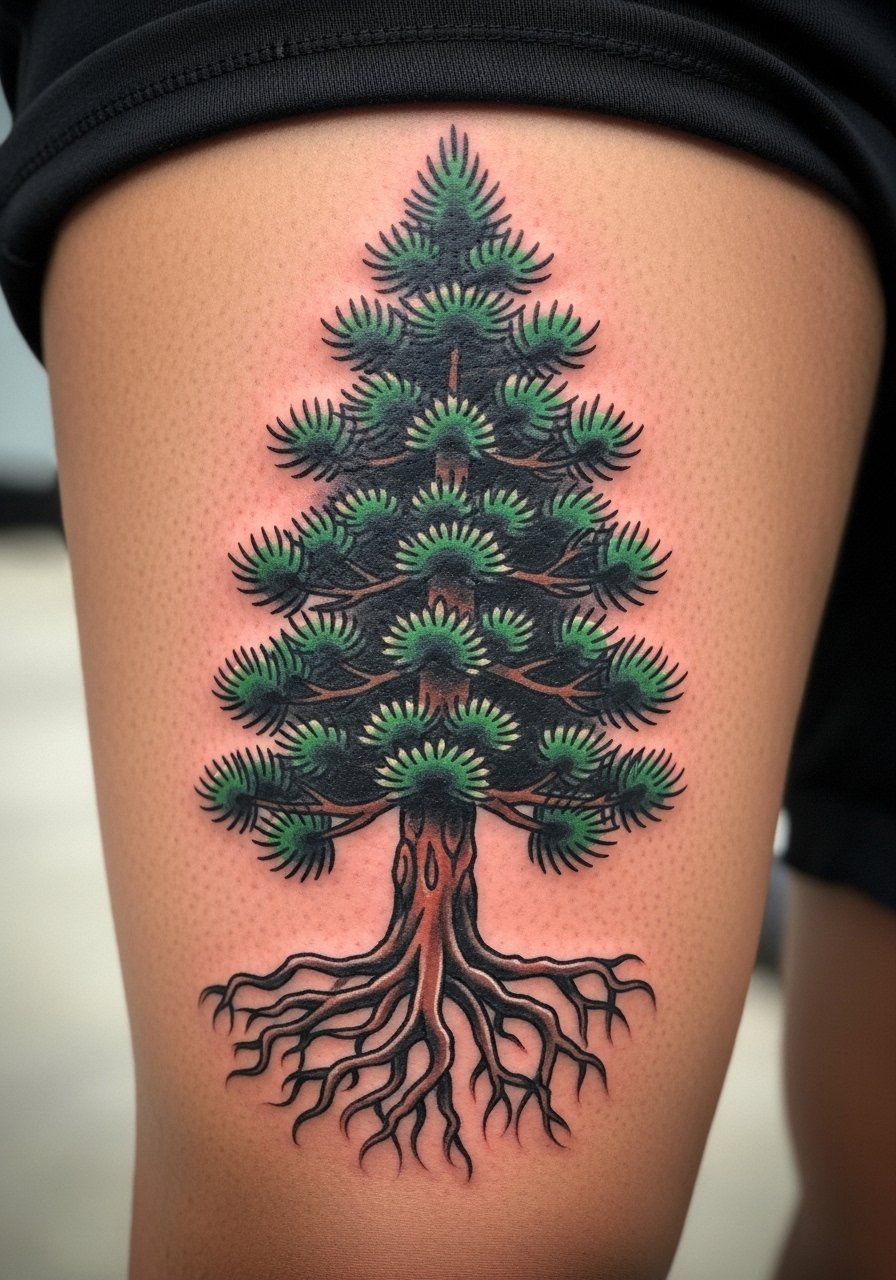
Inner thigh work reads intimate and holds color well away from constant sun exposure. This one is a multi-session commitment and can be tender. I recommend discussing session pacing because thigh flesh tolerates longer sittings but swelling can become an issue. The design does well with bold outlines and saturated fills so the green looks rich on darker tones. A real mistake is underestimating how much coverage you want around roots for future sleeve expansion. If you plan pieces nearby, tell your artist you might build this into a larger patchwork over time.
7. Ornamental mandala-root on the collarbone
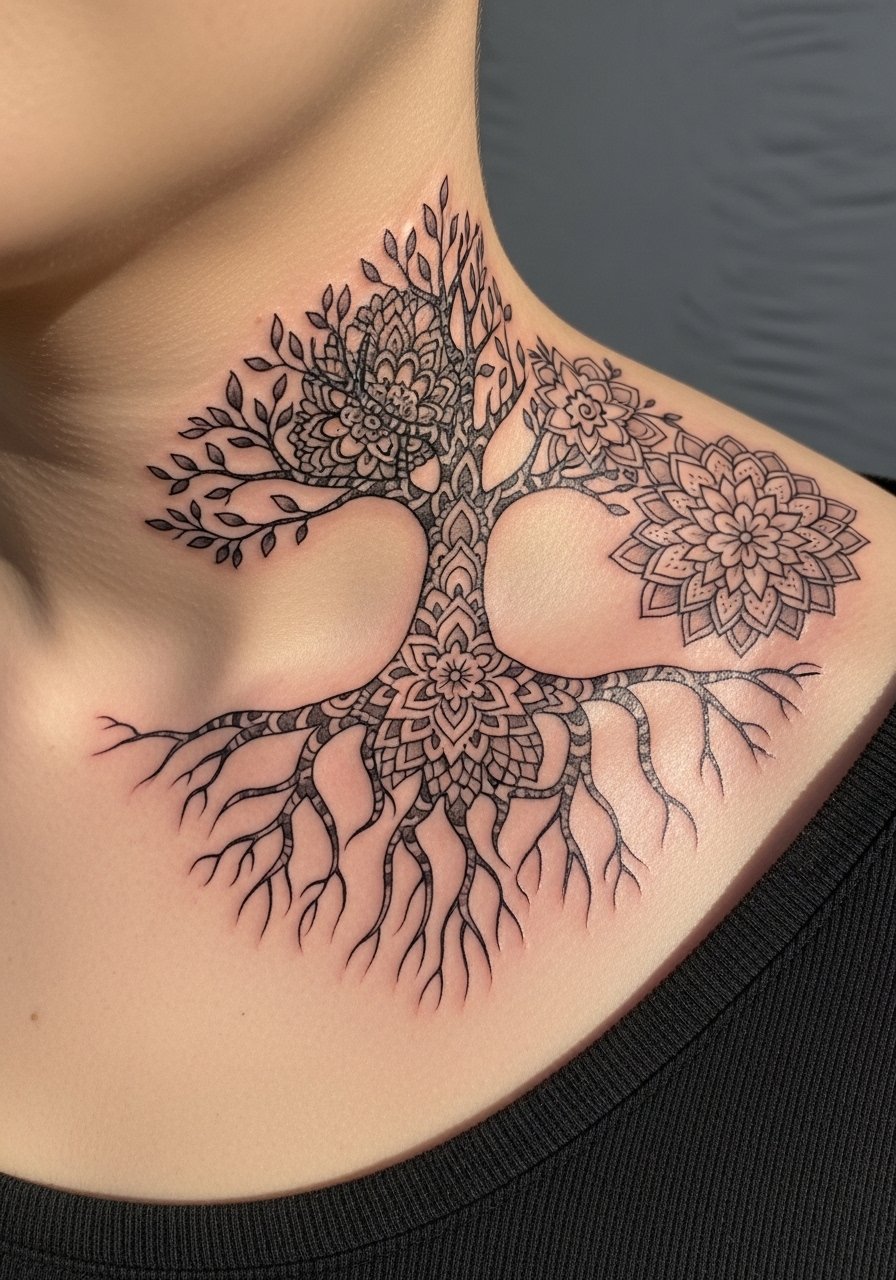
The collarbone curve gives ornamental work a jewelry-like arc but it can be fussy during healing. This style pairs dot work and stipple shading for meditative symmetry. Expect two sessions and moderate pain near bone. Mention origin sensitivity to your artist because mandala patterns trace to sacred geometry in specific traditions. Many people ask for slightly altered motifs rather than direct replicas. A common aging issue is choosing lines too thin over the bone which can break up; ask for medium line weight and plan a touch-up at the 6- to 12-week check.
8. Ignorant-style bare winter branch on the finger
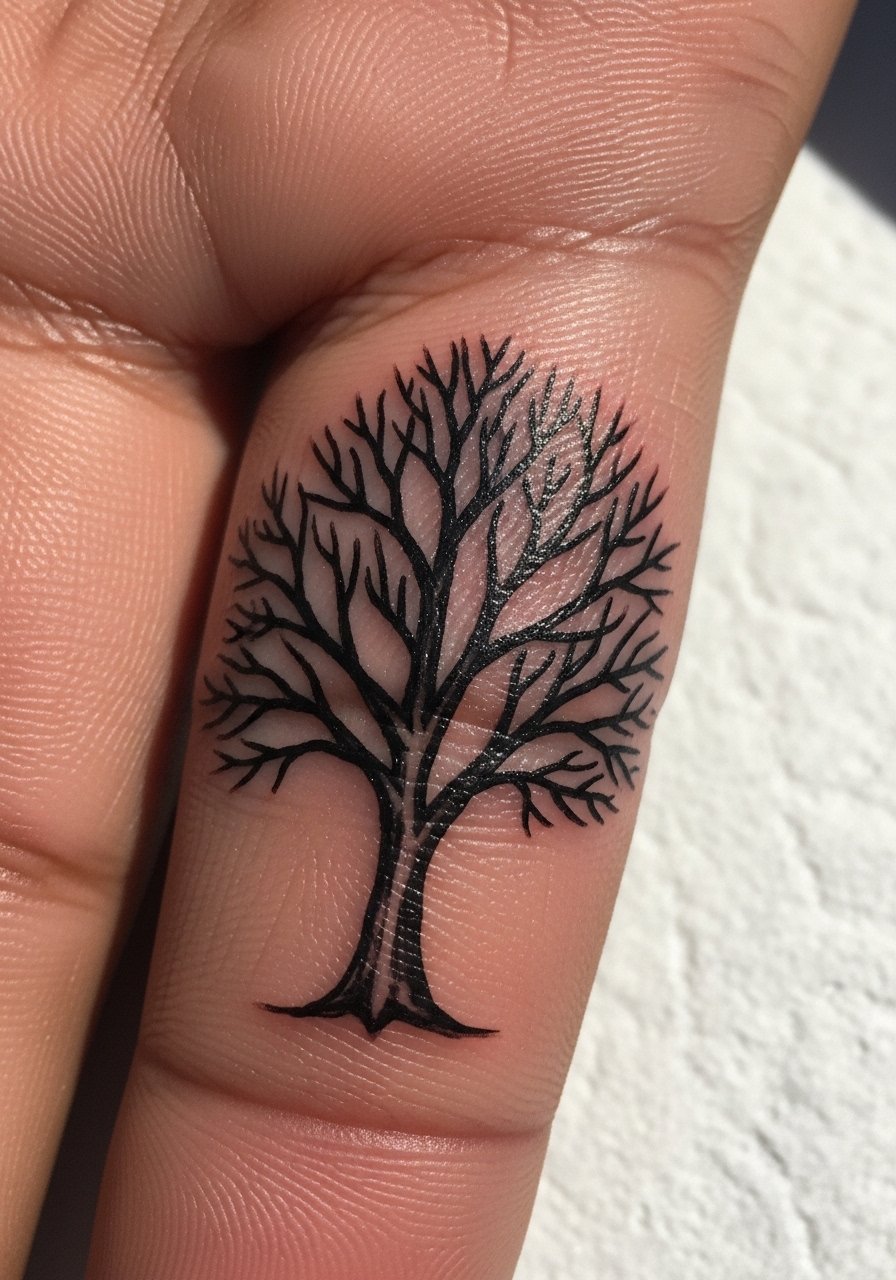
Finger tattoos are notorious for fast fading and early touch-ups. This raw, sketchy winter branch embraces impermanence but still needs thicker strokes to remain visible. Sessions are quick and pain is sharp but short. The biggest mistake is expecting finger work to last like an arm piece. If you want longevity tell the artist to simplify branches and use bold line anchors. Expect touch-ups within months and know that hand and finger work may require annual maintenance. Also consider career visibility when choosing hand placements.
9. Fine line family branching down the spine

The spine offers a dramatic vertical canvas and suits fine line storytelling that includes names or small symbols. Pain climbs with proximity to bone. When booking, be explicit about how many branches and whether you want leaves tied to names. Fine line on the spine sparks the fading debate. One camp warns lines blur with skin movement near the back. The other camp has had success with careful spacing and touch-ups. A common mistake is packing too many tiny elements into a narrow vertical space. Plan for multiple sessions and a touch-up at the six- to eight-week check.
10. Traditional American oak with birds on the calf
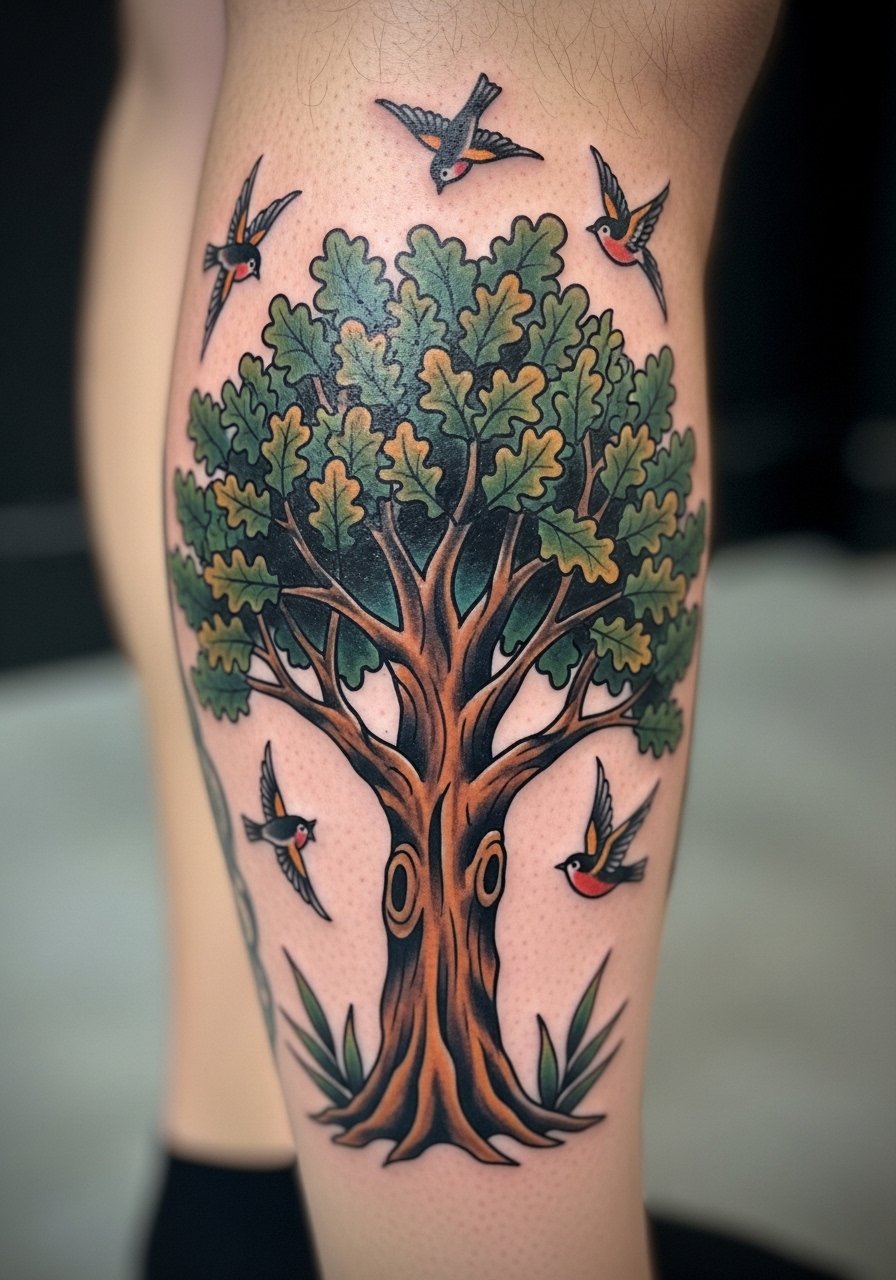
Bold traditional work on the calf reads from a distance and ages predictably. The thicker outlines and saturated fills protect against early softening. Sessions are moderate in length and pain is generally low. Tell your artist you want strong black outlines and color fields that can be refreshed without losing composition. A common mistake is adding tiny detail within large color blocks which can muddy with time. Calf placement is great if you want something visible but still easy to cover at work.
11. Black and gray redwood wrap on the bicep

A bicep wrap gives scale and presence, and black-and-gray realism holds depth through careful saturation. Multiple sessions are normal and pain is moderate. Tell your artist you want layered shading to read in photos and in person. Real risk includes over-detailing small textures at reach when the piece is meant to be seen across the arm. Expect touch-ups during session breaks rather than a separate revisit, and plan on longer sittings with cooling breaks. This one ages well if protected from sun.
12. Minimalist palm outline on the hip

Hip placements are discreet and perfect for seasonal pieces that you can keep private. Minimalist single-line palms look breezy but need a little line weight so they do not fade into runway-thin marks. Expect a quick session and moderate pain over the hip bone. A typical mistake is making the trunk a single hairline. Ask for a finely measured line width and a placement mockup so you see how it curves with clothing lines. For beach season consider a touch-up after a year if you swim often.
13. Inverted finger trees "growing down"

This quirky flip reads like growth inverted and works for people who want a conversation-starting micro tat. Fingers are high-maintenance though, so plan for annual refreshes. Tell the artist you want bold anchor lines and simplified branching. The mistake is asking for too much internal texture on such a small plane. Session time is short and pain is sharp. If you want it to remain visible on darker tones, increase contrast and keep leaves as solid dots rather than thin loops.
14. Hybrid branch jewelry wrapping piercings

Wrap tattoos that integrate piercings are underrated for layering existing jewelry into the design. This placement may require coordination with your piercer so plan ahead. Expect short sessions per area and variable pain depending on cartilage. Be specific in consultation about whether you want the branch to sit above or weave around a piercing. A common error is assuming piercing position does not change; piercings can migrate so ask your piercer about long-term placement before tattooing. This style photographs well but needs bold anchors to stay visible over time.
15. Aging-simulation trees for mature skin
Older skin changes the playbook. I have seen clients in their 50s ask for designs that consider thinning dermis and natural laxity. This approach uses slightly larger elements and more saturation so the tree keeps its shape over years. Sessions are often broken into shorter visits to reduce trauma. A common mistake is copying a youthful micro-design exactly as-is. In consultation discuss how stretch and texture will alter the image and request a test patch or temporary transfer to watch how placement moves with everyday gestures.
16. Patchwork tree sleeve mixing styles

Building a sleeve over years lets you mix styles so each tree reads as a chapter. Expect a multi-year project and alternating session lengths. Planning matters more than a single booking. When you talk to your artist bring references that show scale relationships so later additions do not crowd older pieces. A common mistake is starting with ultra-fine details that block future fill options. I recommend establishing negative-space pathways early so new pieces find room. Touch-ups occur per panel rather than the whole sleeve.
17. Memorial roots with a date integrated

Memorial pieces carry a precise visual and emotional weight. Placing a date within roots is a subtle way to anchor memory. If you include visible text use exact wording in your reference. Pain varies with rib placement and fine detail demands crisp line spacing. A frequent error is choosing tiny numerals that blur; opt for clear numerals and leave room for a touch-up at the six- to eight-week check. If you have future memorial additions in mind, tell the artist so they can leave connective space.
18. Geometric mandala oak on the sternum

Sternum tattoos require an experienced hand. Pain can be intense near bone and breathing affects session flow. The mandala-oak hybrid uses stipple shading to read across curves. Mention origin respect during consultation because mandala elements can have cultural significance. A mistake is packing symmetrical detail too tight for the sternum's movement. Ask for a mockup that moves with breath and for staggered sessions so you can assess healing before committing to more detail.
19. Small micro-outline behind the ear

Behind-ear tats are subtle and heal faster in dry climates. The real risk is visibility and career considerations. Sessions are quick and pain is sharp but brief. Keep the outline slightly bolder than you think so it does not vanish into hairline shadows in photos. A common error is placing it too deep under hairline where touch-ups are awkward. Ask for a temporary transfer and view it in different lighting before committing.
20. Coastal windswept tree on the upper back
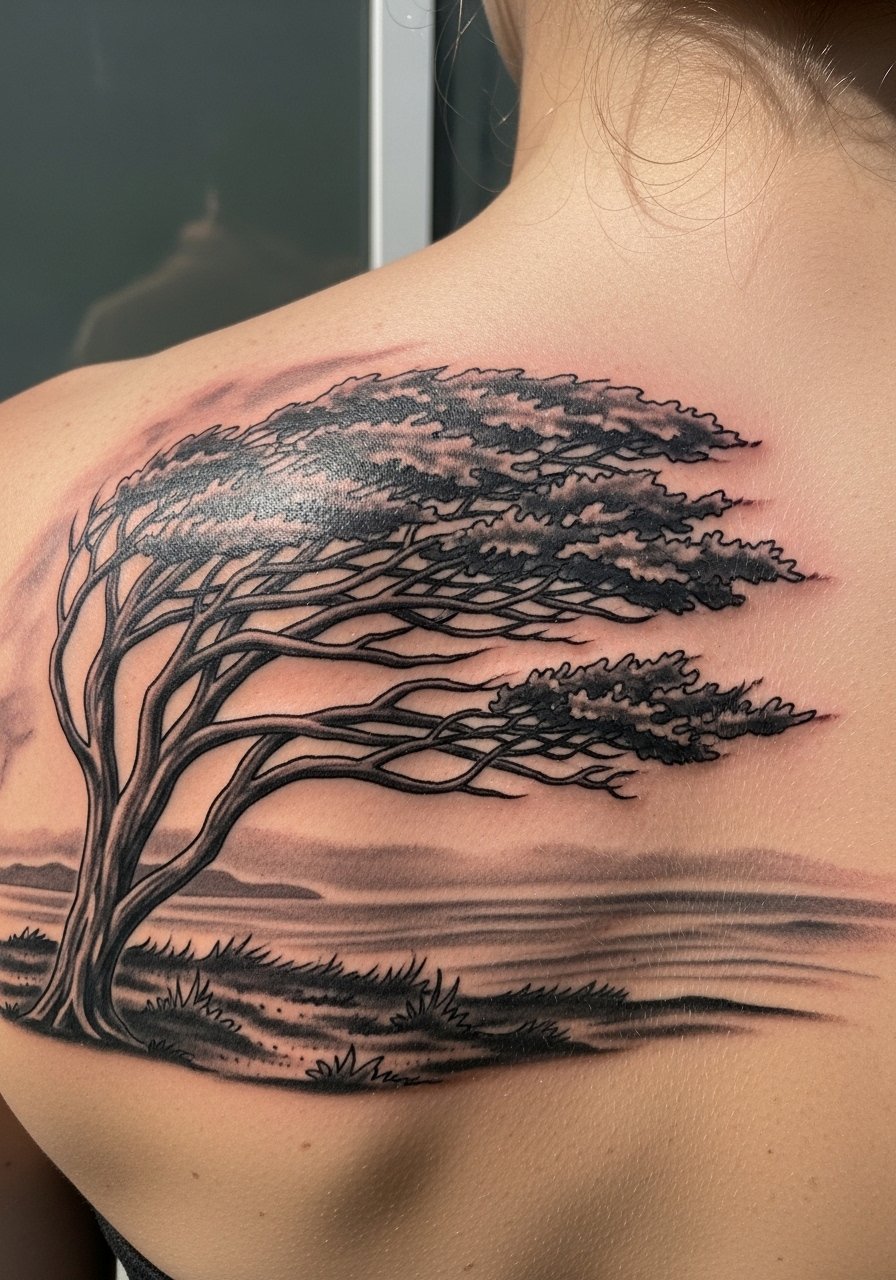
Upper back pieces give you a larger canvas and dramatic silhouette. This windswept composition benefits from directional shading and medium saturation so the motion reads in photos. Sessions may be multiple and pain is moderate. Discuss how clothing and bra straps might rub during healing and plan for loose tops post-session. A common mistake is compressing movement into too small an area which flattens the intended flow. Plan for a six- to eight-week touch-up to rebalance contrast once swelling subsides.
Tattoo Prep and Aftercare Essentials

Below are practical items I recommend for most tree tattoos, covering prep, initial healing, and long-term upkeep. I include a mix of indie favorites and one widely used wrap product so you have choices that suit linework, color, and climate. Replace the search terms in the link bar if you prefer a different scent or size.
Fast-absorbing fine-line healing balm like Dragon Blood Jelly alternative. Good for fine line and micro-realism work because it absorbs quickly and leaves little shine. Use sparingly during the second week.
Fragrance-free lightweight tattoo balm similar to Ink-Ich. Keeps realistic shading intact without clogging pores. Apply 2-3 times daily after the initial crusting phase.
Australian-style tea tree salve alternative for dry winter heals. Helps when climate dries the skin and you need a thinner salve that still soothes.
Hada Labo lightweight hyaluronic lotion. Great for humid climates or when you need low-residue hydration during tattoo healing.
Medical-grade second skin bandage, roll or sheet. Useful if your artist recommends a breathable occlusive on flat areas with lots of movement.
Saniderm or similar transparent healing film. Mentioned here as the mainstream wrap in the debate because it speeds early healing for some people. Follow your artist's guidance on timing.
Fragrance-free gentle foaming cleanser. Use twice daily to remove ointment residue without stripping skin oils.
Sunscreen mineral stick for healed tattoos. Essential for long-term color and line preservation once your tattoo is healed.
Every tattoo is different. Always follow your artist's specific aftercare instructions. Consult a dermatologist if you have skin concerns or unusual healing issues.
Frequently Asked Questions
Q: Will fine line oak wrist tattoos need touch-ups more often than blackwork wrists?
A: In my experience fine line pieces on wrists require touch-ups sooner because of constant movement and friction. If you want fewer touch-ups opt for slightly heavier line weight or small black anchors within the design. Plan to check in at six to eight weeks and again at the one-year mark.
Q: How do I make a watercolor cherry blossom stay visible on darker skin tones?
A: Watercolor needs anchor points to hold color on darker tones. Ask your artist to incorporate thin black linework or small solid dots that keep the shape as pigments soften. Also protect the area from sun and expect a possible color refresh within a year if you want vivid pinks.
Q: Is Saniderm better than dry healing for branch and fine line tattoos?
A: Artists are split on this. One camp prefers Saniderm for less mess and quicker surface healing, while the other warns of maceration on curved branches. It depends on placement and how your skin reacts. If your artist uses Saniderm follow their timing, and if you dry heal ask for a recommended lightweight balm.
Q: Where should I look to find an artist who specializes in micro-realism or blackwork trees?
A: Try style-specific hashtags on Instagram, search "tree tattoo [city]" on TikTok with a location tag, and check threaded recommendations on Reddit r/tattoos. Booksy and local convention listings also help you find guest spots focused on those styles.
Q: Will pregnancy stretch make a rib or side-tree look bad later on?
A: It depends on placement and how much change you expect. Rib and side tattoos are vulnerable to stretch. If you plan pregnancy, choose forearm or upper back placements that age more predictably. If ribs are important to you, accept that touch-ups or minor redesign may be needed after major body changes.
