
I spent months tracing old console art and IRL tattoo portfolios before I realized nostalgia tattoos have a trap. Old pixel designs look charming fresh, but many blur into mush if you pick the wrong scale or placement. These 22 pixel tattoo ideas lean retro, readable, and built to last on real skin, with tips I learned from artists and collectors.
This list leans into pixel, 8-bit, and low-res retro styles. Good placements range from wrist to chest. From what I’ve gathered, artists push slightly larger pixels now so lines don’t clog. I focused on designs that read healed and feel nostalgic rather than just cute when fresh.
1. Fine Line 8-Bit Heart on Inner Wrist

I first noticed this on a friend who wanted a tiny homage to their favorite game. If you want a token of nostalgia that you can hide, inner wrist is perfect. Expect low to medium pain. Ask your artist to size each pixel at least 3.5 mm. Smaller pixels tend to blur into a single blob after a year. Healing usually finishes in two weeks but color settles over 3-6 months. A common mistake is requesting ultra-fine pixels to keep the design tiny. That looks crisp fresh and then softens fast. Tell the artist you want blocky pixels, slightly enlarged, and ask for bold outlines around the heart to hold shape as it ages.
2. Traditional Sprite Character on Outer Forearm
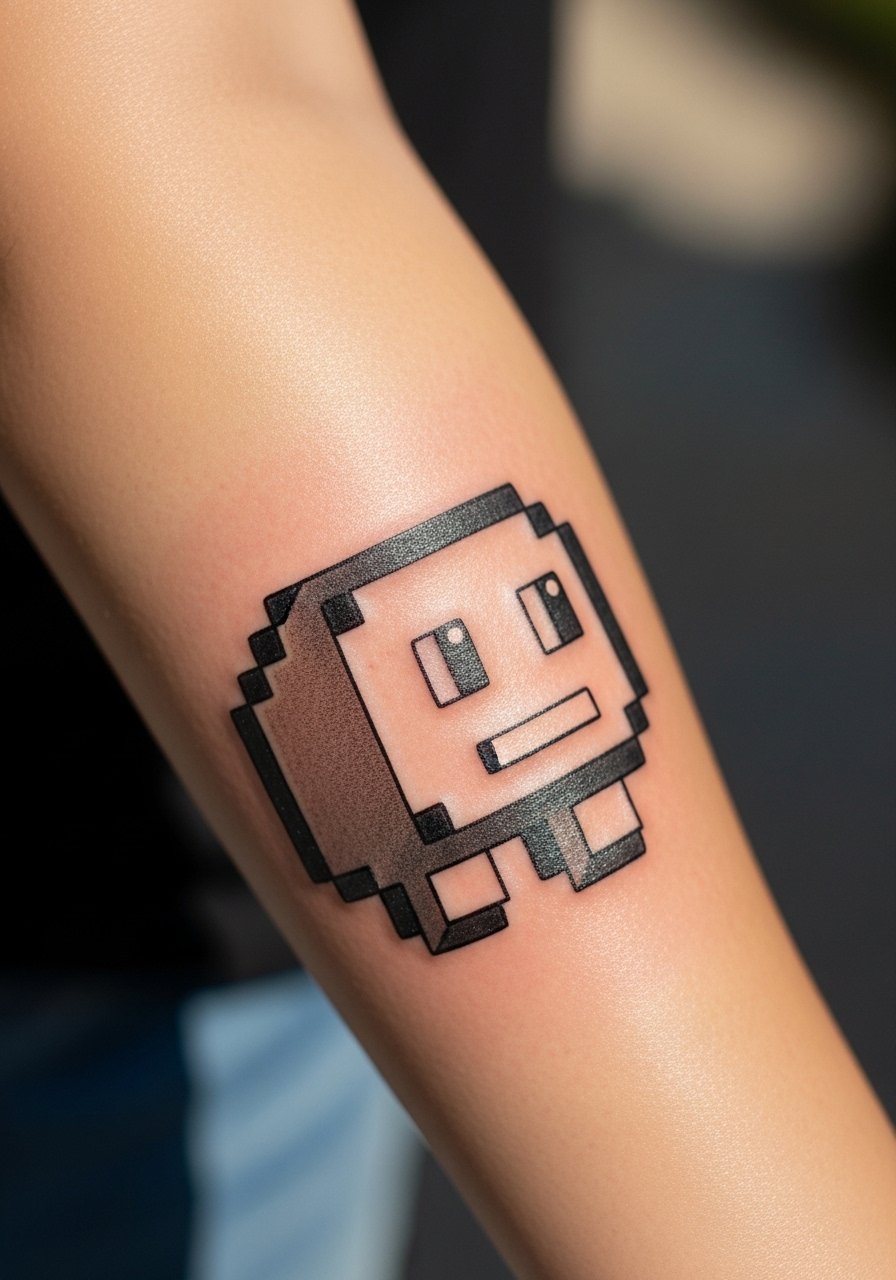
I saw a version of this at a con and loved how readable it stayed on the forearm. Forearm skin is forgiving, so color and blocky pixels keep their form. Pain is mild. Sessions are short, often under an hour for chest-sized sprites. Tell your artist which palette you want and ask them to map pixels onto skin texture. Many people make the mistake of asking for a tiny sprite that looks illegible after a year. If you want a sleeve version, increase pixel size and keep contrast high. Forearm versions also work well as part of a larger retro sleeve later on.
3. Micro-Realism Pixel Portrait on Upper Arm
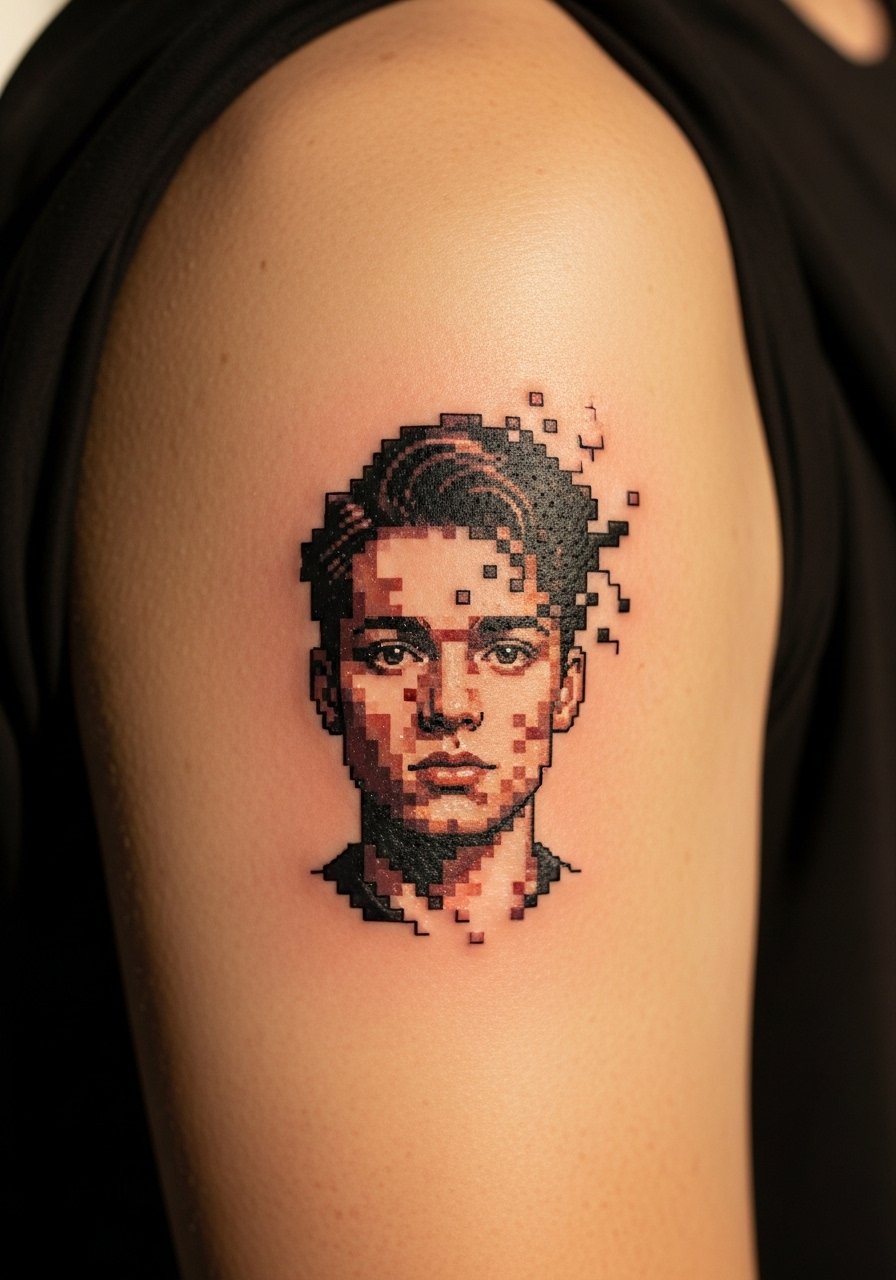
I found this idea on a tattoo forum where someone wanted a loved one drawn in 8-bit. Upper arm handles a bit more detail without painful sessions. Expect medium pain and a one to two hour session. The trick is balancing pixel blocks with softer shading so the face still reads after two years. A common error is trying to cram too much facial detail into a small grid. Ask your artist to test a 1:1 stencil on your arm so you can see scale. In my experience, portraits done with slightly larger pixels age far better than tiny, fussy grids.
4. Blackwork Pixel Skull on Ribcage
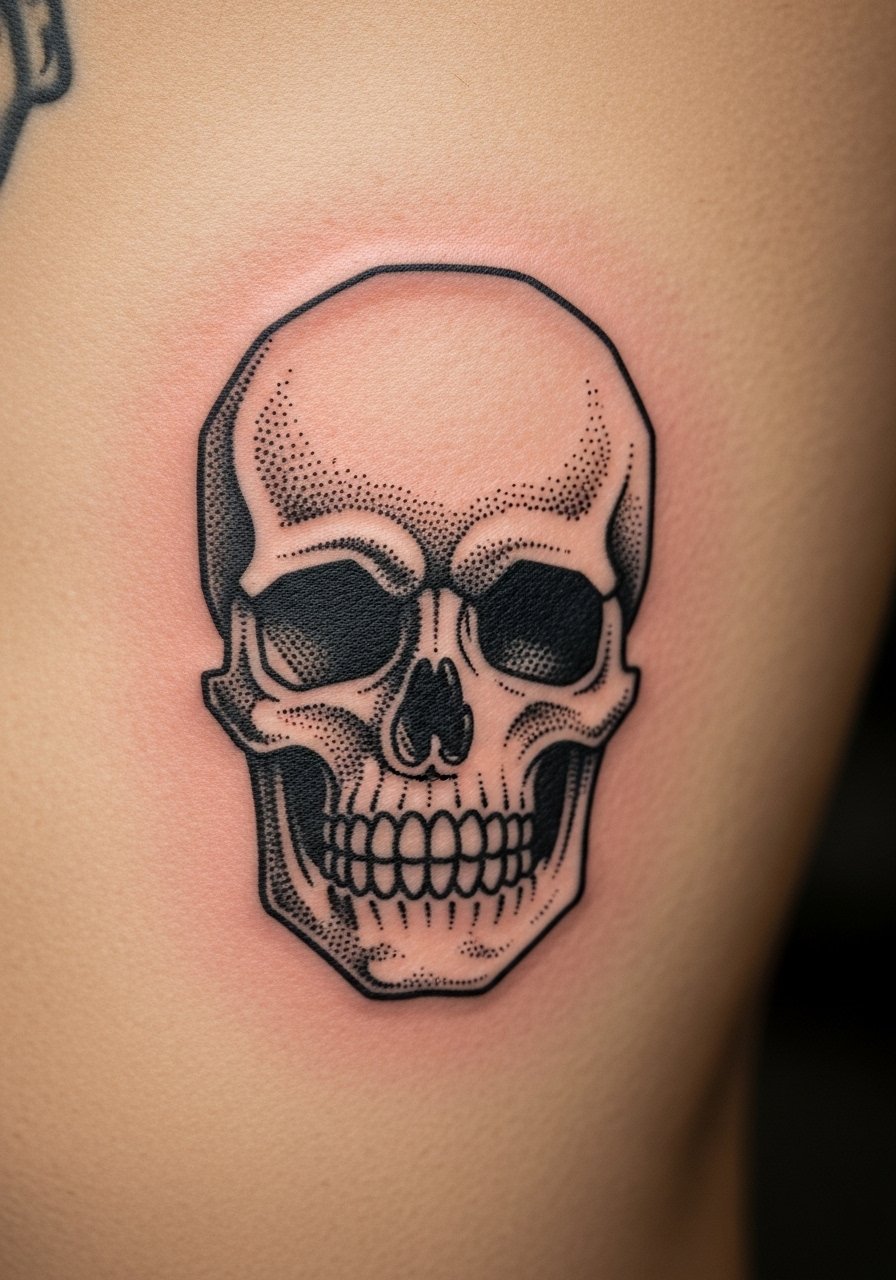
Fair warning, the ribcage is higher pain. I’ve had a couple friends get ribs for dramatic pieces. The result reads well in blackwork because contrast beats color fading. Sessions can be long and split across sittings. For this placement expect redness and a longer first-week care routine. Many people ask for extremely crisp corners that look perfect at the shop and then soften. Ask for thick negative space around the skull so it keeps its pixel silhouette as lines spread. If you want color, plan on touch-ups after a year.
5. Minimalist Pixel Flower Behind Ear
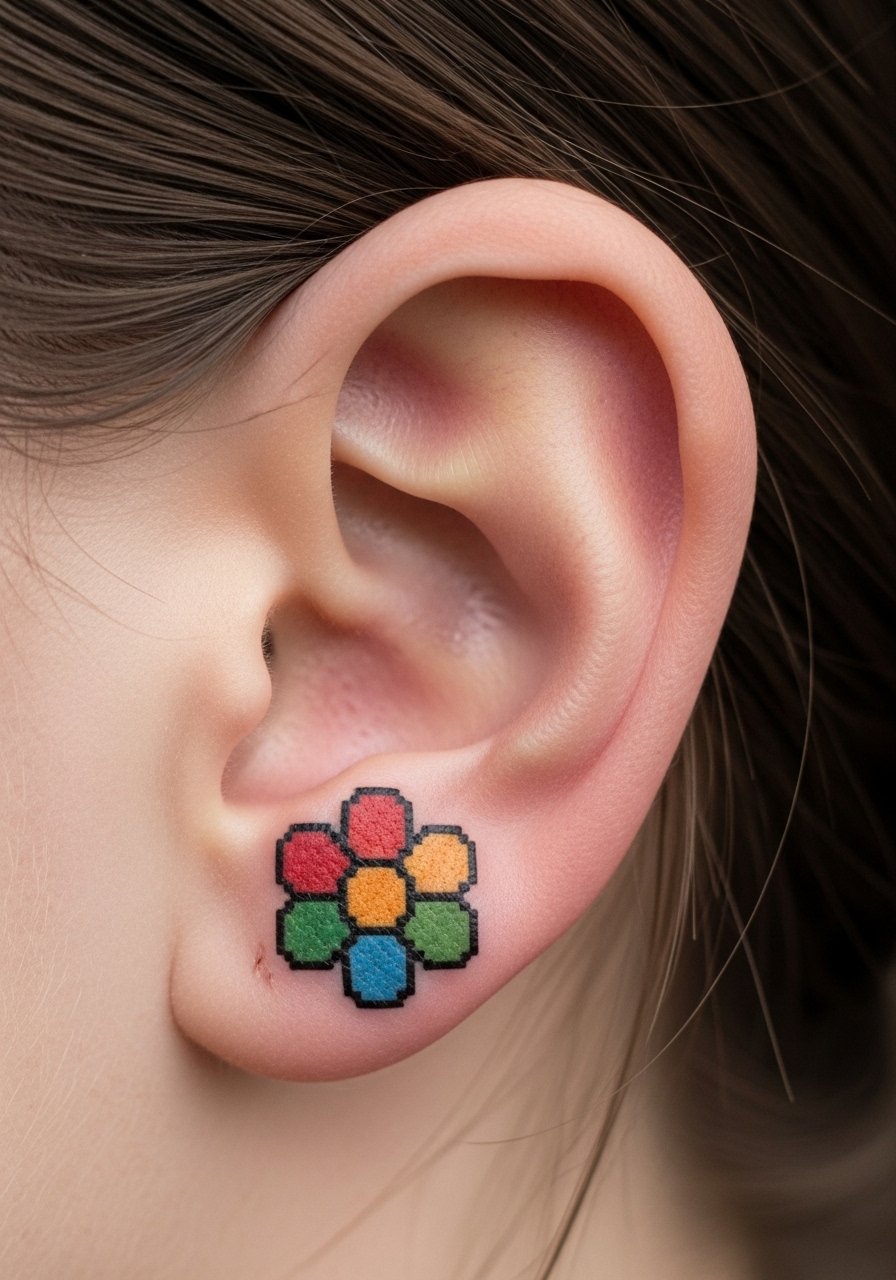
I noticed a spike in behind-ear pixel tattoos in 2025. Pain here is low but the canvas is small. Hairy areas can hide healed fading. This placement needs larger pixel squares to remain readable. Sessions are short, often done in 20-30 minutes. A common mistake is asking for multicolor tiny petals. Those blend together fast. Tell your artist you want single-color petals with spacing. If you need discretion, behind-ear placement hides well and still has nostalgic flair.
6. Retro Console on Chest Sternum
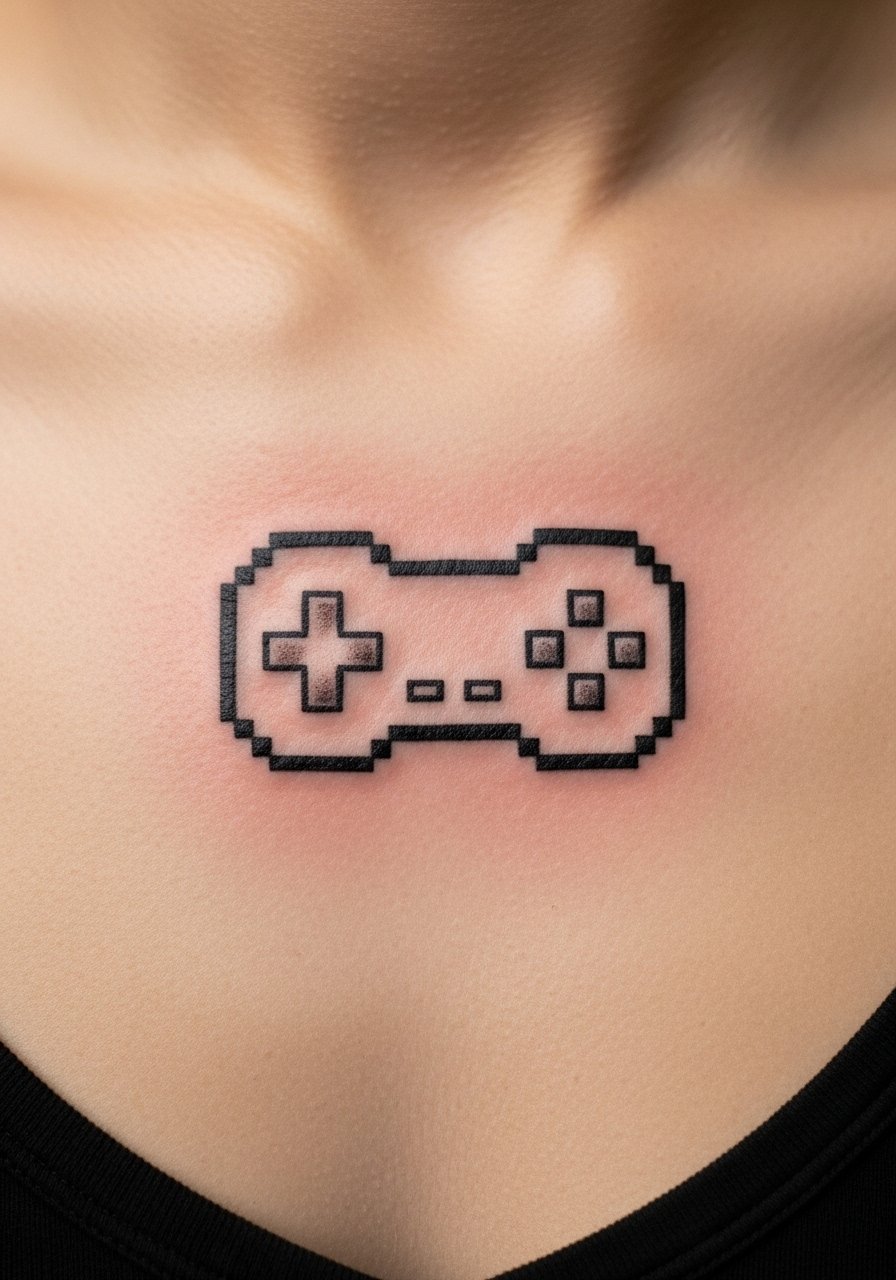
I once saw a chest console piece that looked like an heirloom. Sternum placement has medium to high pain. Healing can be slower because clothing rubs the area. Design works best medium size, about palm-width, so pixels keep separation. Many choose to add thin borders so the icon stays distinct when it softens. Tell your artist you plan to wear looser clothing during healing. I’ve seen versions that needed touch-ups because clients chose a grid that was too fine for chest skin.
7. Neo-Traditional Pixel Ship on Upper Back
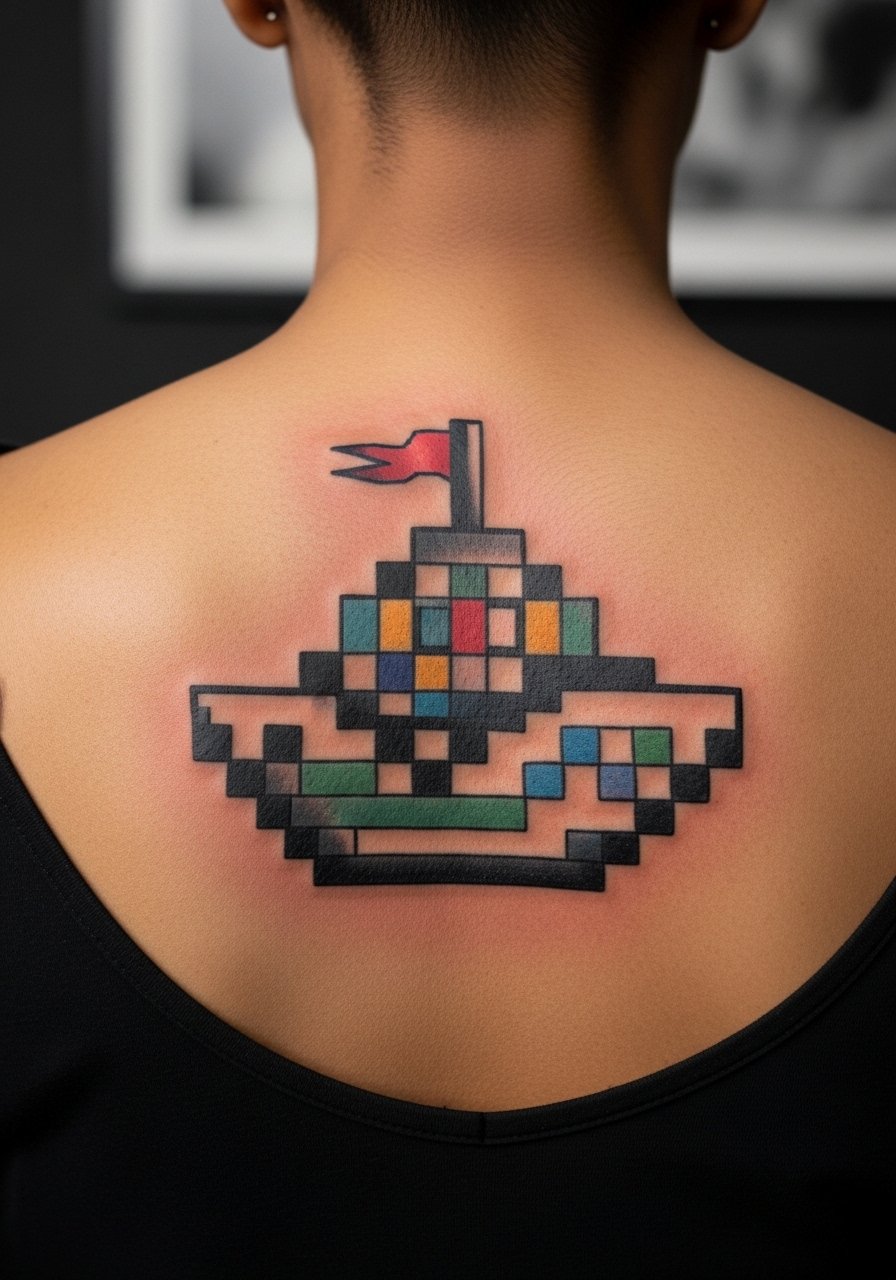
A friend had one of these and liked how it read in social photos. Upper back is low pain and gives a broad canvas for mixed styles. Neo-traditional shading around blocks helps the design stay legible long term. Sessions can be split over two visits. A usual misstep is trying to mimic screen glow with tiny stippling that disappears. Ask for solid blocks with gradual shading outside the pixel grid. That keeps the retro aesthetic but avoids mudding after two years.
8. Linework Pixel Cat on Ankle
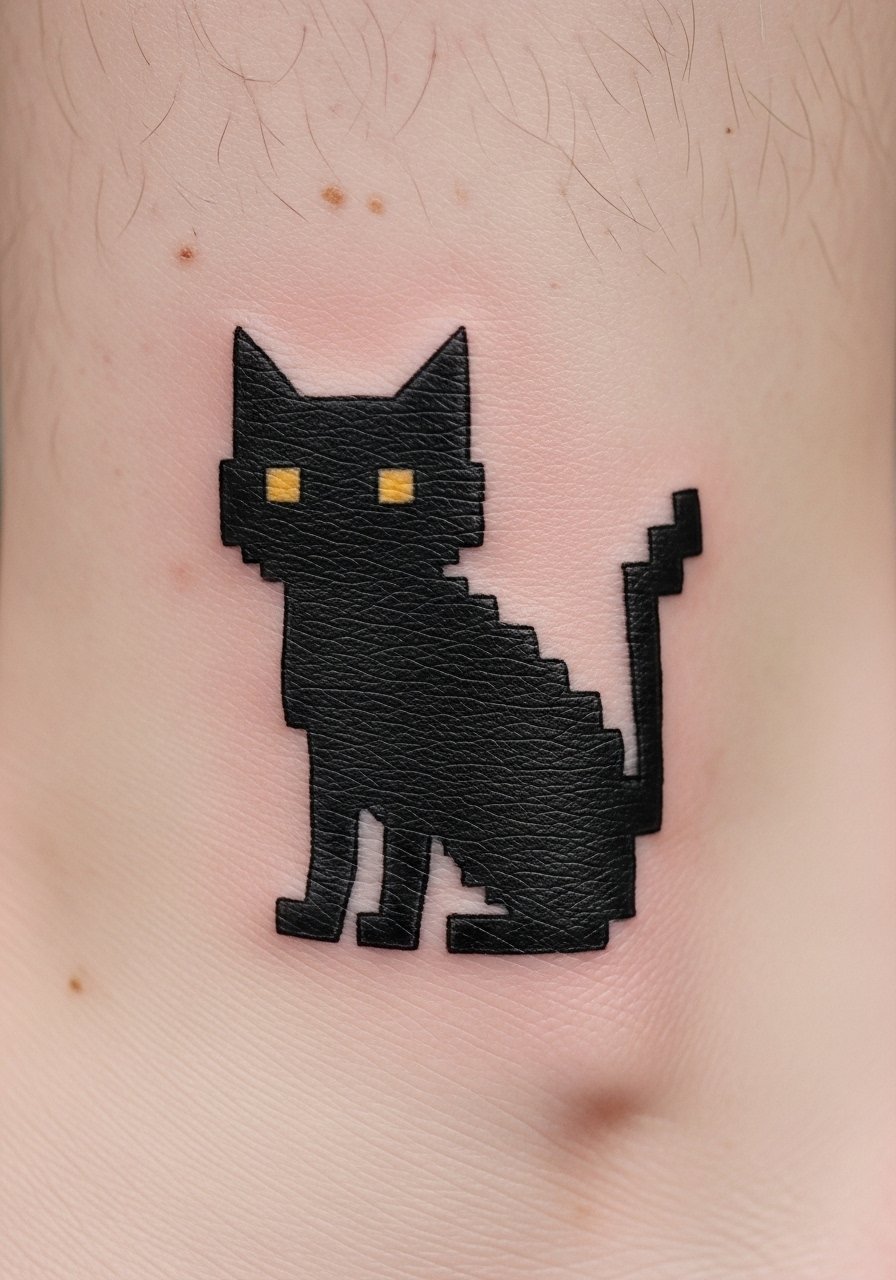
I found this tucked into a street-style portfolio. Ankles are a bit bony and can sting. Expect medium pain and an hour-long session for a small design. The key is to space pixels slightly wider than you think. Tiny designs on ankles often blur and lose character. Ask your artist to stencil the design and check from different distances. If you want the same cat on thigh, it can be much smaller and still read. Placement changes scale needs.
9. Vintage Game Controller on Forearm Band
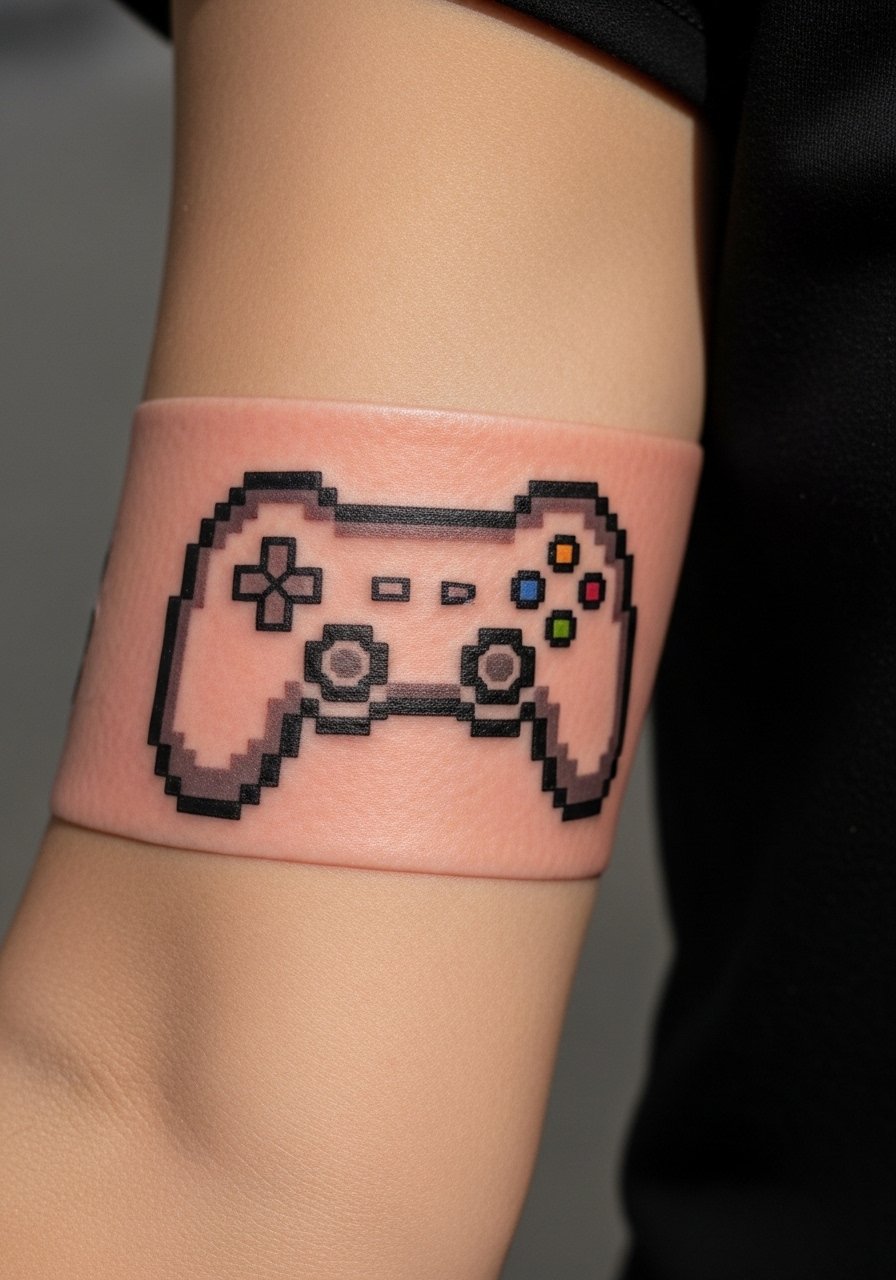
I first saw a forearm band at a meetup and liked how it wrapped the arm. Bands move with muscle and heal predictably. Pain is low. Band tattoos benefit from repeating pixel motifs and higher contrast. A frequent mistake is making the band too thin, which causes breaks in the pattern as skin stretches. Tell the artist you want consistent pixel width around the arm and to check how it reads when you flex. Forearm bands also layer well under shirts for work-friendly looks.
10. Color Block Pixel Landscape on Thigh
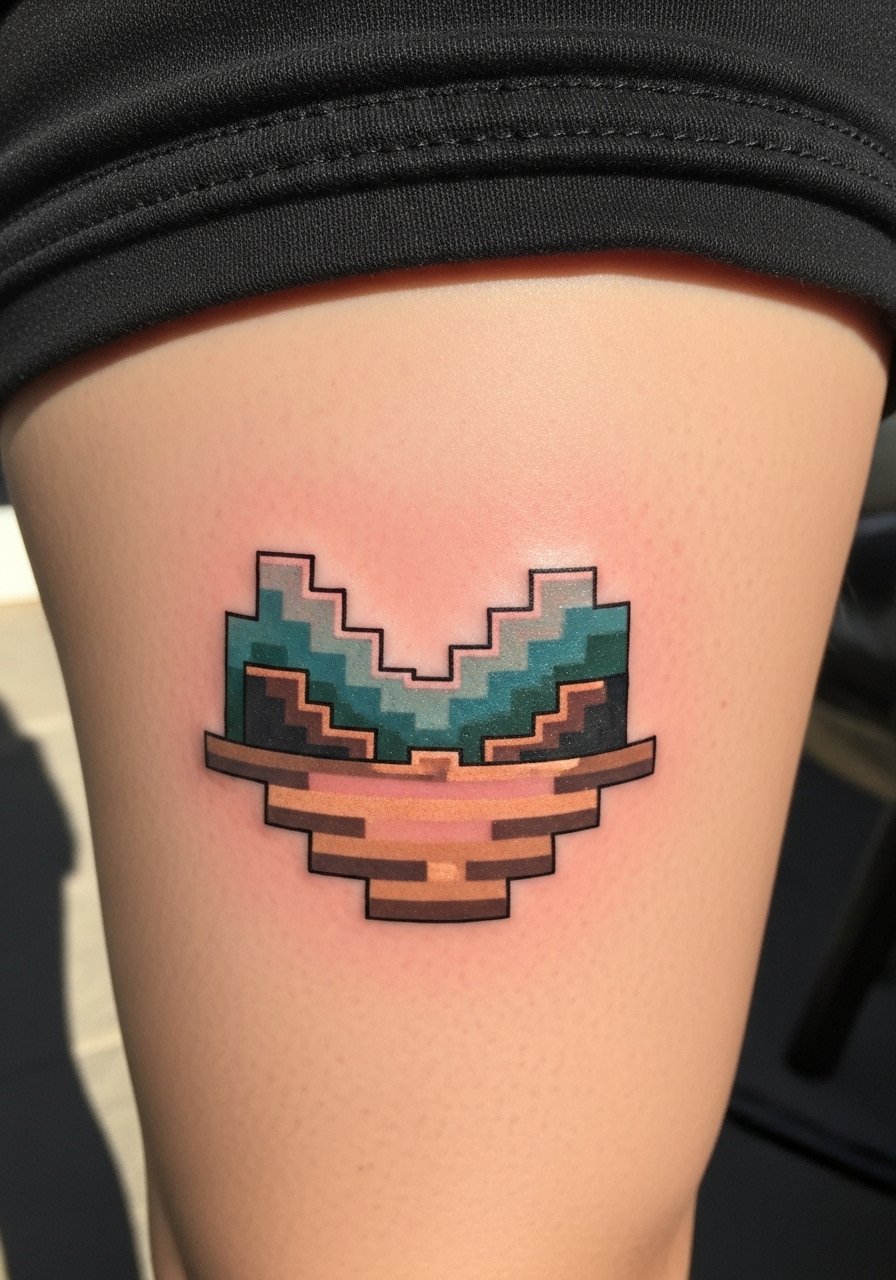
I found this idea on an artist’s reel and loved the cinematic feel. Thighs are low pain and great for larger, colorful pixel art. Healing is straightforward and the skin tolerates saturation well. Big pixel landscapes age gracefully because each block has room to breathe. A common error is packing too many tiny elements into a scene. During consultation, show panoramic references and ask the artist to simplify shapes into larger pixels. That keeps the retro vibe bright for years.
11. Blackwork Pixel Band on Finger
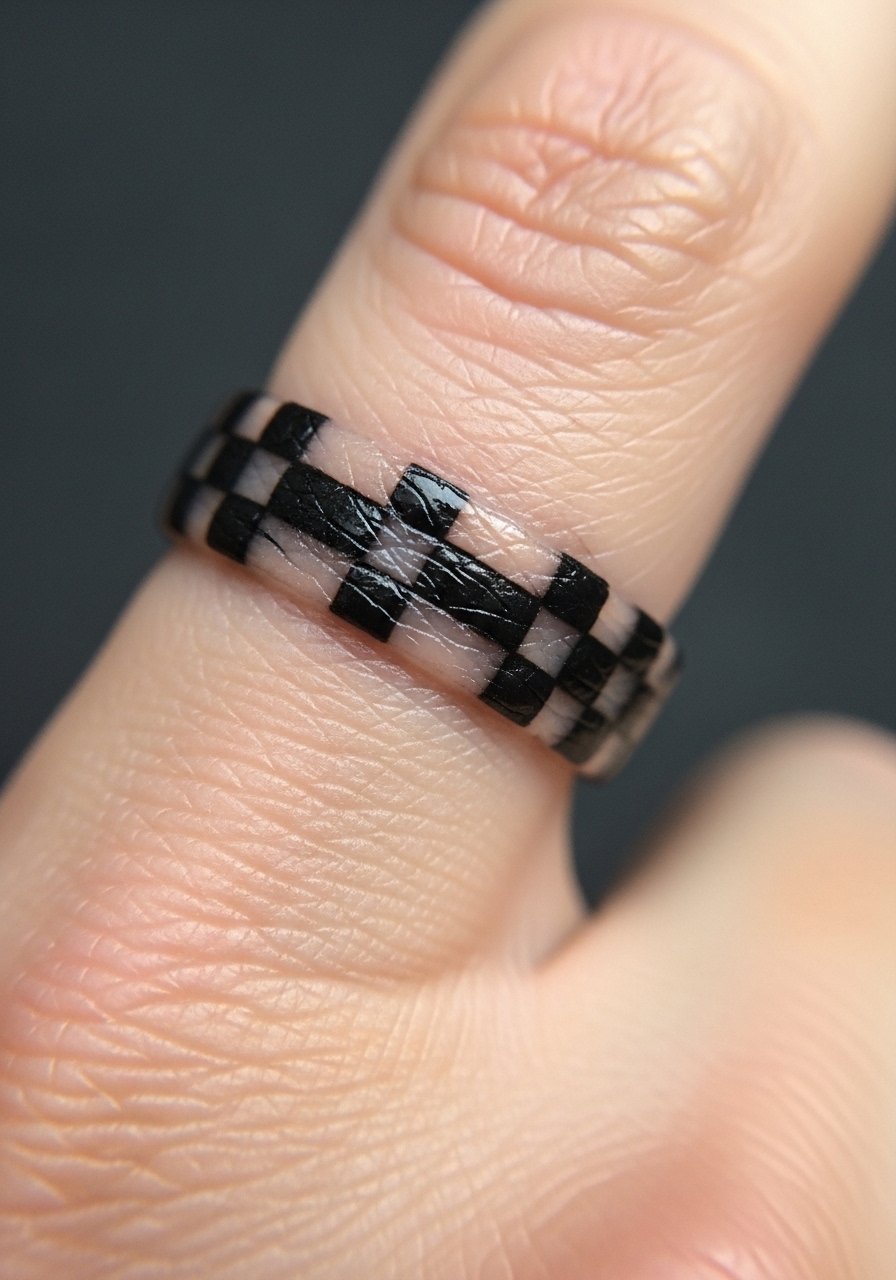
I watched a couple get matching pixel rings and the lines settled differently on each finger. Expect sharp pain. Fingers blur faster than most areas due to constant use. If you want longevity pick a thicker band with a gap to allow touch-ups later. Many couples request ultra-fine rings that vanish in 12 months. Ask for a mock-up that wraps your finger when it’s relaxed and extended. Be prepared for touch-ups after 6-12 months if you want it perfect.
12. Micro Pixel Compass on Collarbone
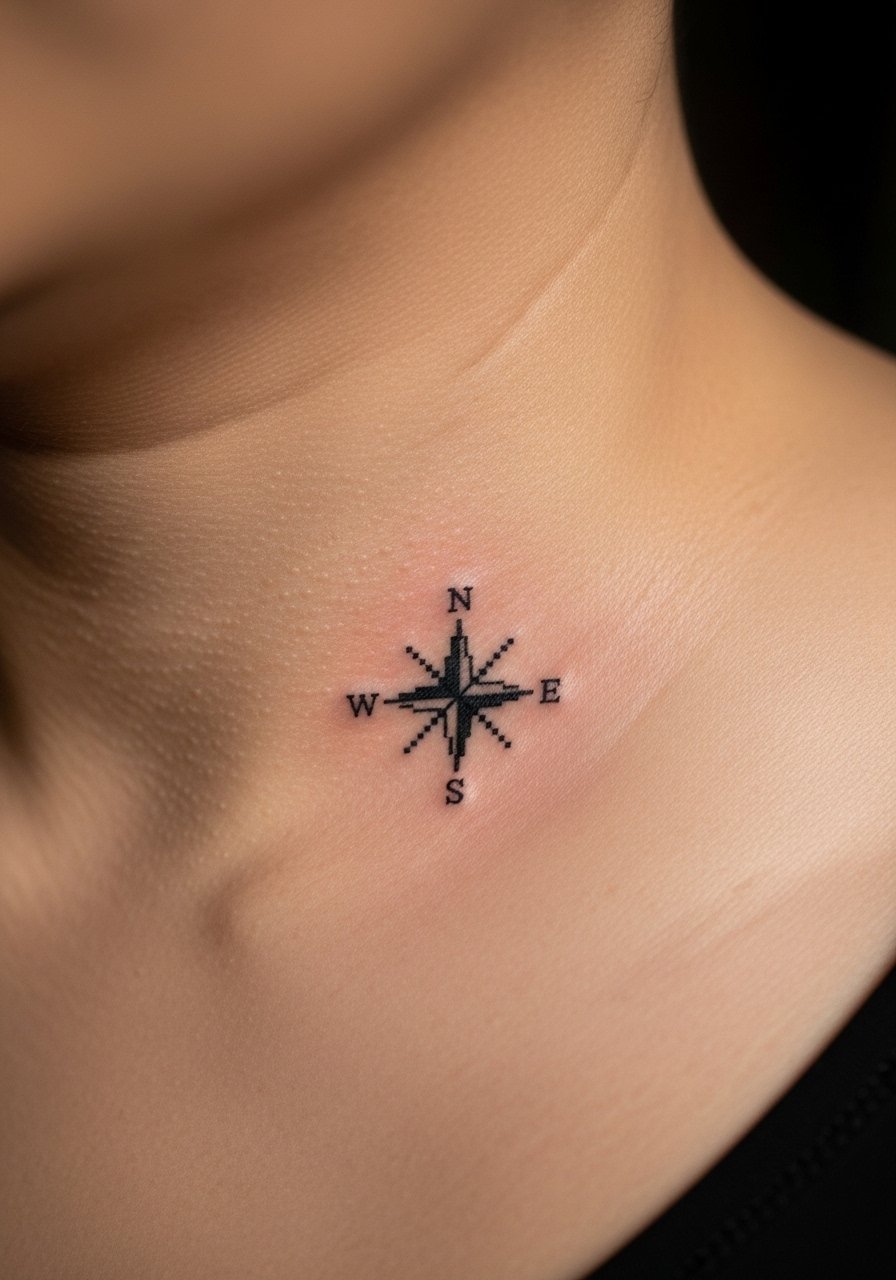
I saw this on a traveler’s feed and loved the symbolism. Collarbone placement is sensitive. Pain ranges medium to high. Small compass designs must use slightly larger pixel squares to stay crisp. Healing takes two weeks for surface healing and up to six months for color settling. People often ask for ultra-detailed cardinal points that melt together. Tell the artist you prefer clear cardinal blocks rather than tiny arrows. The collarbone also shows well in photos so size it for visibility.
13. Low-Res Robot on Calf

I noticed this at a tattoo crawl. Calves are one of my favorite spots for quirky pixel characters. Pain is low. The muscle movement actually helps keep blocks looking natural. Sessions are comfortable and quick. A mistake I see is compressing the robot into a tiny space so details disappear. Ask your artist to draw the robot at the final intended size on your calf while you stand so you can see perspective. If you plan to jog a lot, expect minor touch-ups in high-friction areas.
14. Pixel Wave on Side Rib
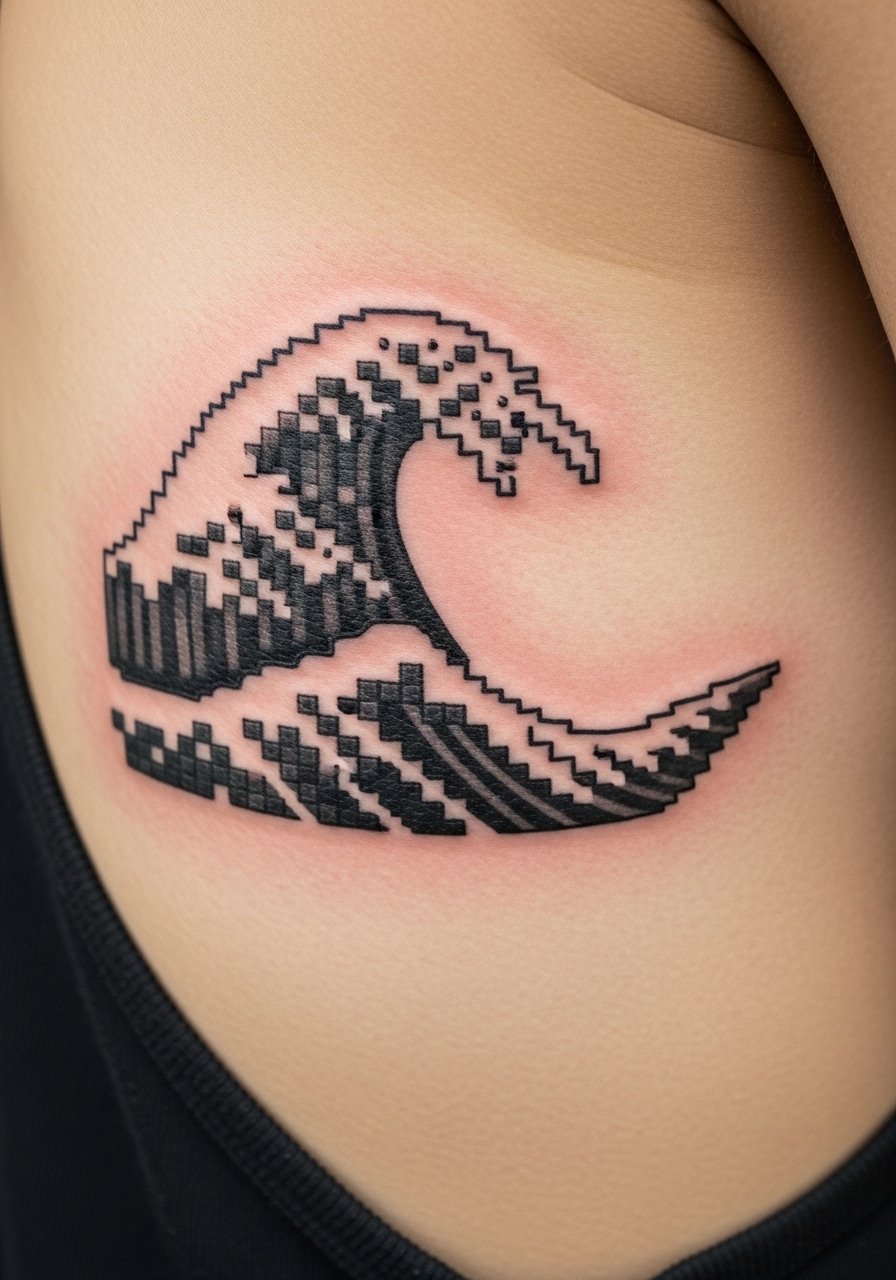
I fell for this because waves in pixel form find a sweet spot between abstract and narrative. Side ribs mean higher pain and slower first-week recovery. The linear flow of a wave helps the eye follow the pixels even as edges soften. Common error is mapping the wave as a thin strip. Give it height so pixels maintain separation. During consultation ask the artist to show movement direction and mark breath positions so the wave sits right when you inhale and exhale.
15. Retro Botanic Pixel Bouquet on Thigh Inner
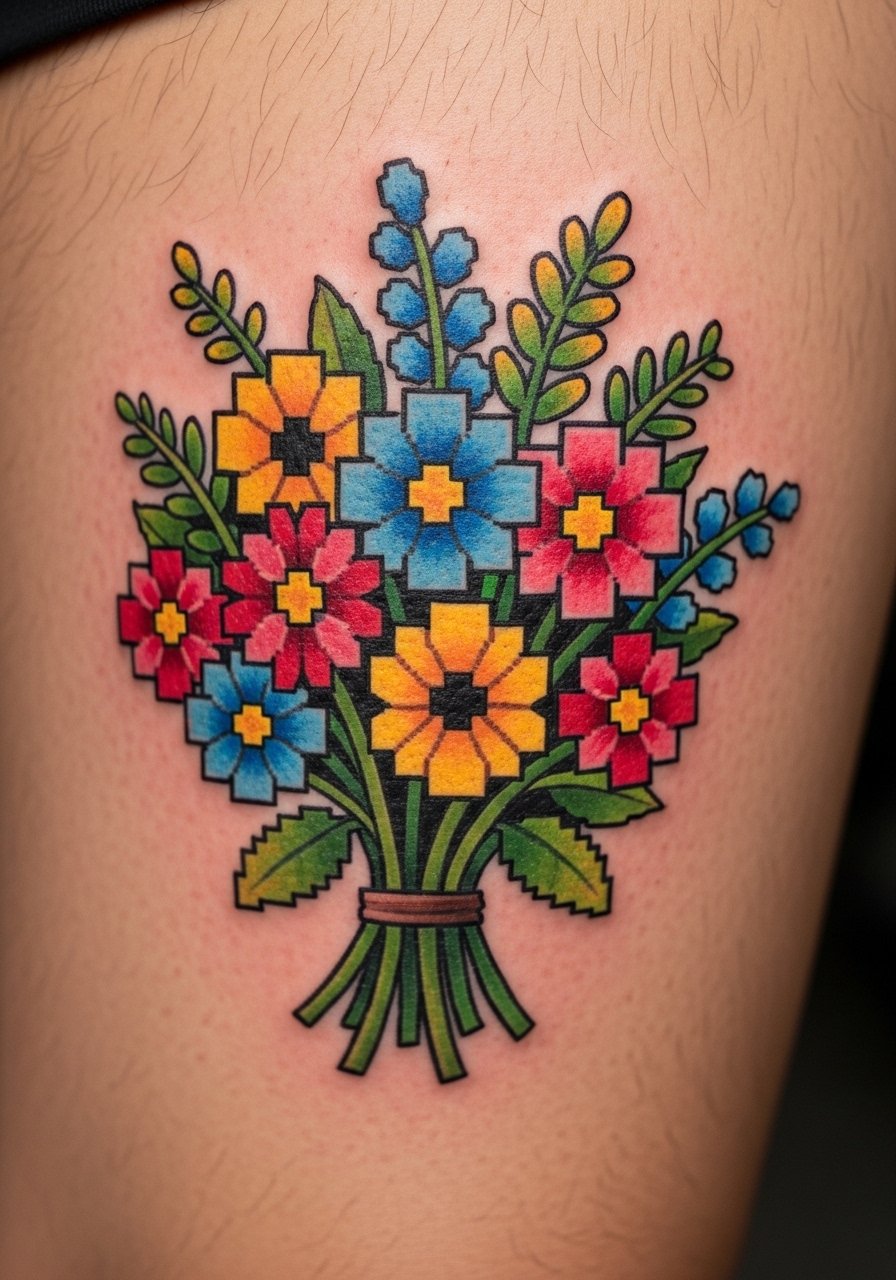
I saw a version of this at a portfolio swap. Inner thigh is tender but forgiving for large color pieces. Healing benefits from looser clothing and more privacy. Pixel bouquets age well if each bloom has room. A common mistake is over-detailing each flower into tiny pixels. Ask for simplified petals and stronger negative space. I’ve noticed that inner thigh pieces keep saturation longer than shins or hands. Sessions may need multiple sittings for larger compositions.
16. Pixel Map Coordinates on Side Wrist
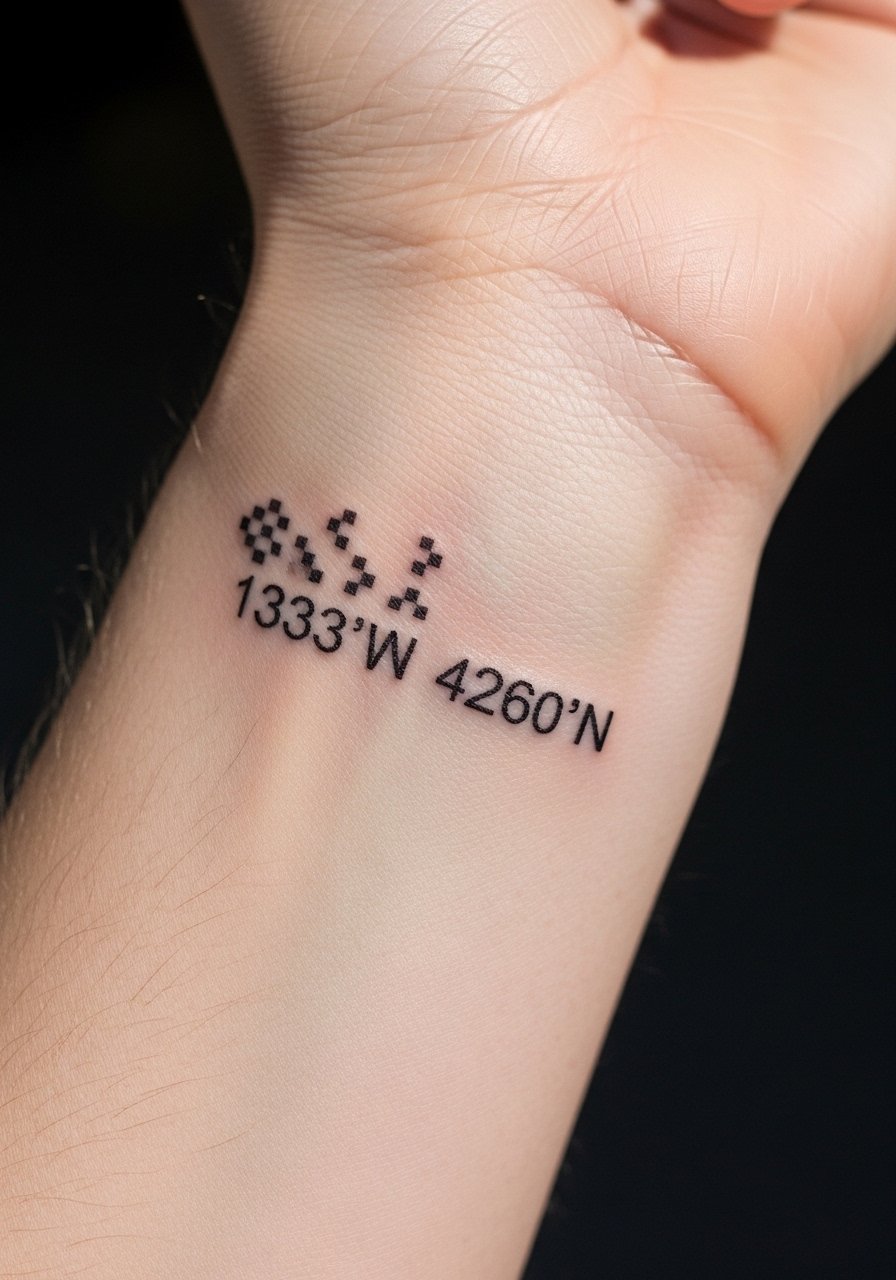
I used this idea to mark a meaningful place. Side wrist is discrete and tender. Small pixel grids work if you increase the pixel block size slightly. Expect short sessions and a week of lighter activity. The main mistake people make is compressing coordinates into tiny prints. Ask your artist to place the stencil and check legibility at a glance. I’ve had mine touch up once after a year because the lines softened from daily wear.
17. Pixel Flame on Finger Webbing

I found this tucked into a sleeve set and liked the motion it implied. Finger webbing hurts. The skin heals irregularly there. Tiny pixel flames look great at first and then blur. I recommend larger single-color blocks with a negative border around the flame. Tell the artist you expect touch-ups and to use a slightly bolder grid. Sessions are brief but the touch-up frequency is higher than other locations.
18. 8-Bit Animal Portrait on Upper Thigh
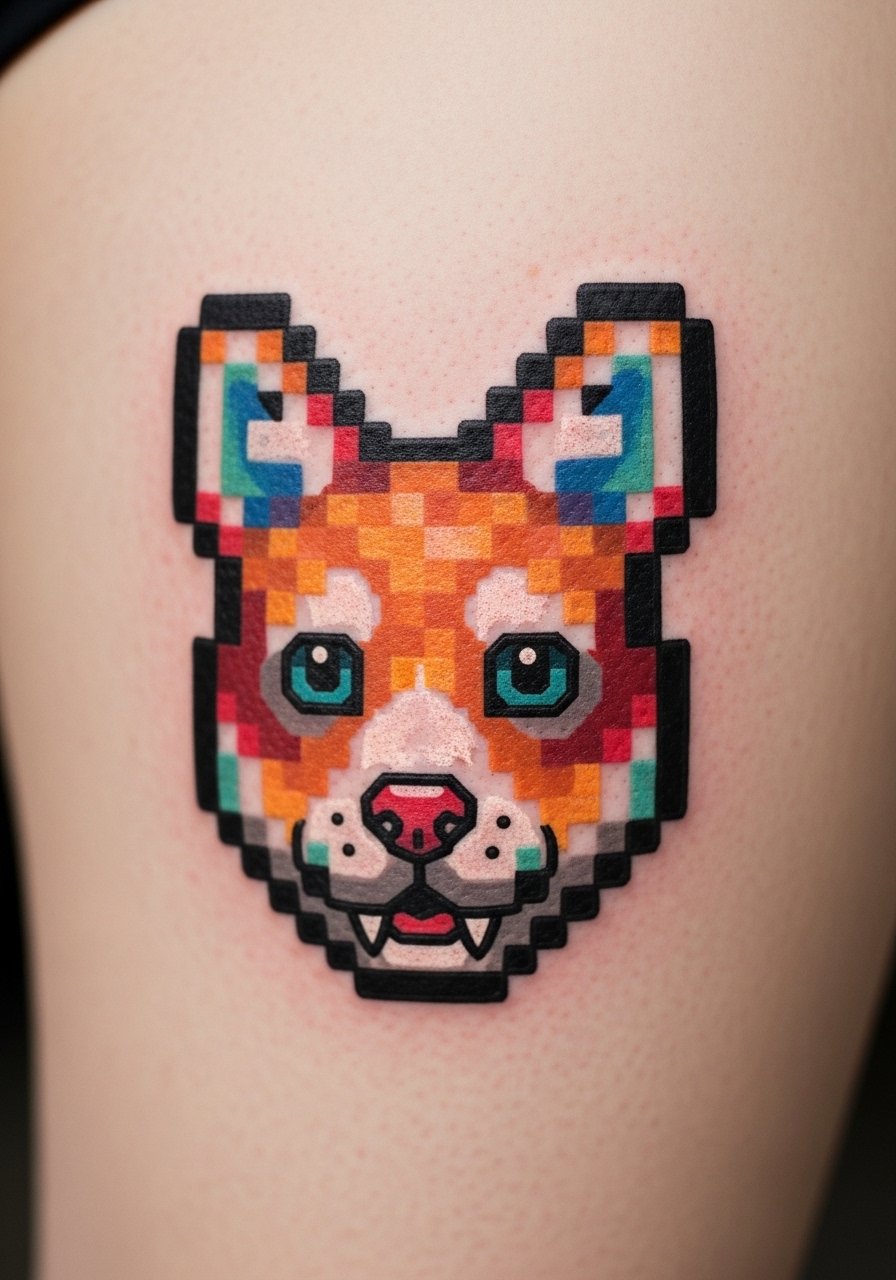
I first fell for a cat portrait like this on a collector’s feed. Upper thigh handles generous scale which helps pixels age nicely. Pain is low. Bigger portraits mean you can capture expression with minimal blocks. A mistake is trying to render fur texture with tiny pixels. Ask the artist to focus on key facial blocks and contrast points. In my experience these hold up beautifully and are easy to conceal for work or family situations.
19. Pixel Planet on Sternum Offset
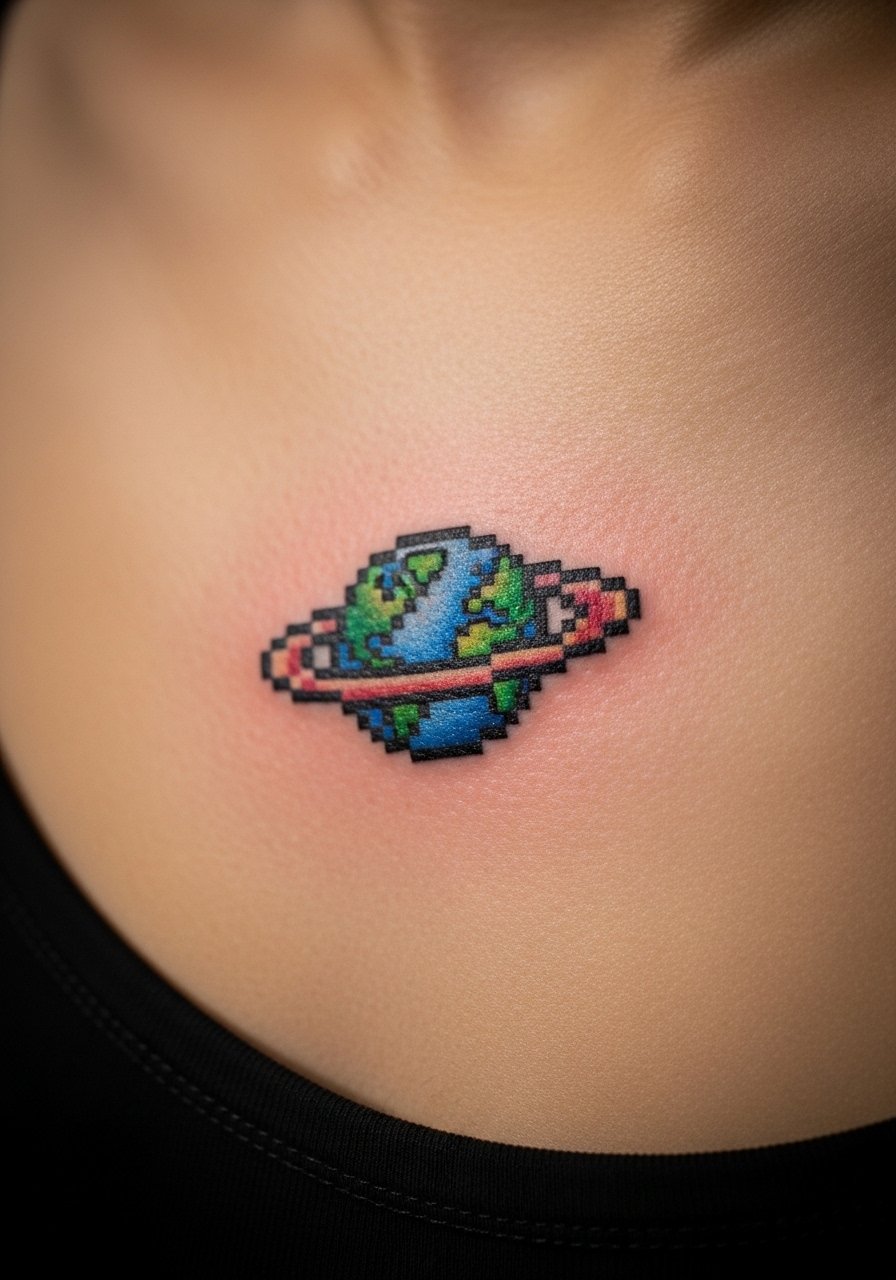
I saw a planetary design that read like a patch. Sternum and offset placements have medium pain. The shape benefits from a ring or halo to stay distinct as lines soften. Many people request minute rings that fuse into a smear. Ask for solid outer pixels and a clear inner core. Expect a couple weeks of careful clothing choices while it seals.
20. Monochrome Pixel Arrow on Foot Top
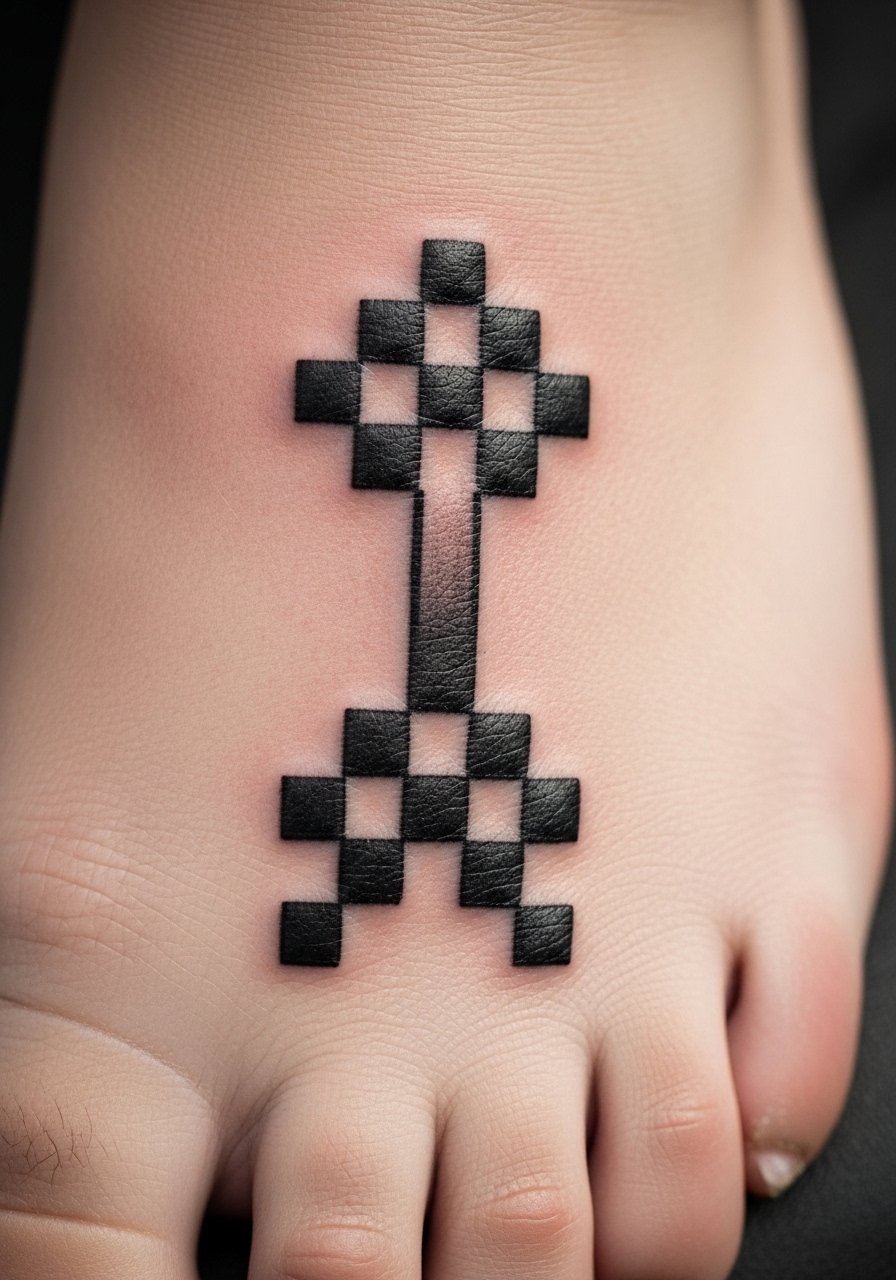
I tried this for a small directional tattoo. Foot tops are painful and can need extra care because shoes rub them. Monochrome works better than delicate color here. A common mistake is requesting a slim arrow that vanishes after a year. Tell the artist you want a bold pixel count with room between squares. Healing can be slower because of walking, so plan sock and shoe choices accordingly.
21. Pixel QR Code Style Grid on Upper Arm
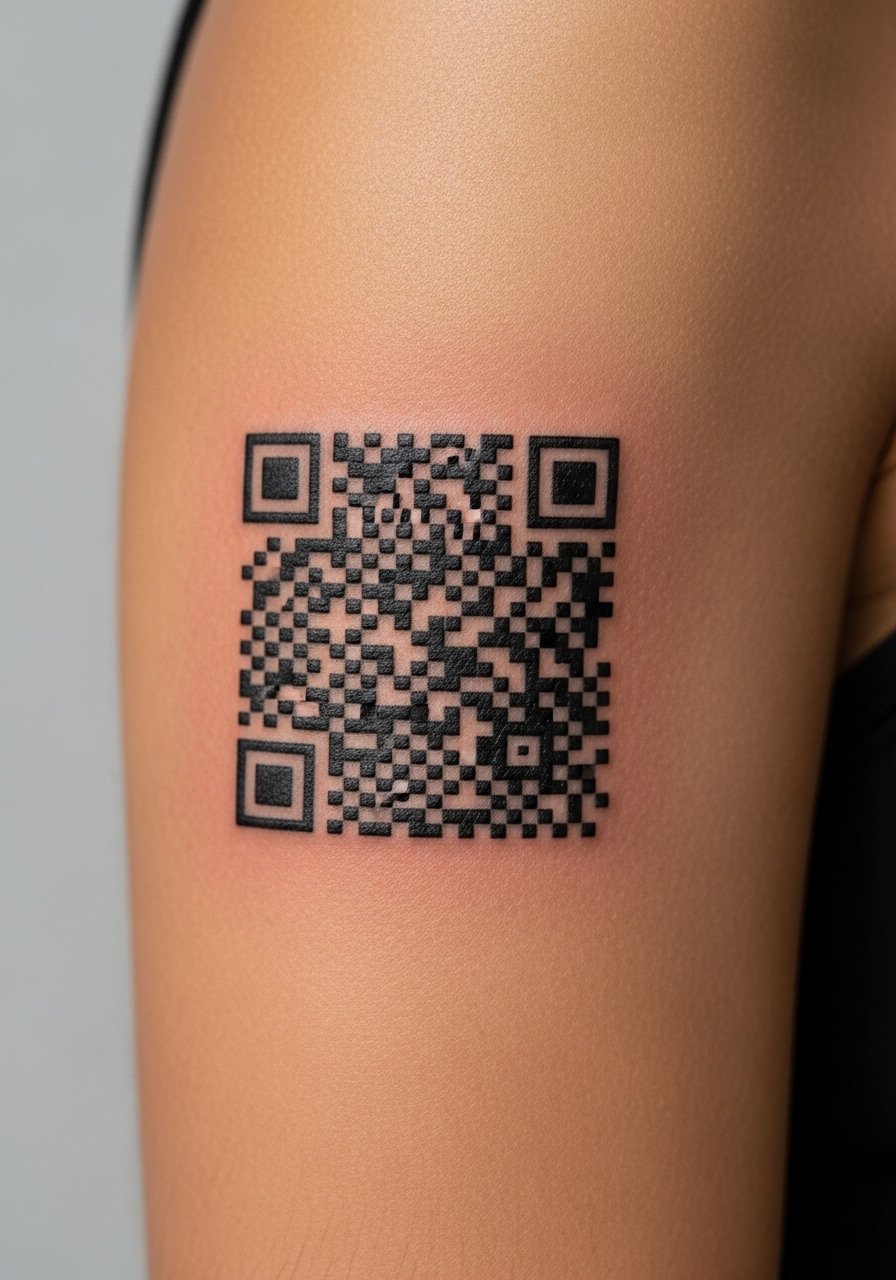
I came across a novelty QR-like grid done in pixels and it read like a badge. Upper arm is low pain and great for grids. The main issue is scale. If pixels are too small the pattern blurs. Ask your artist to print the full-size stencil and check readability from arm distance. Sessions are medium length. This style is great if you want a bold nostalgic statement that can be expanded into a sleeve later.
22. Color Fade Pixel Sunset on Shoulder Cap
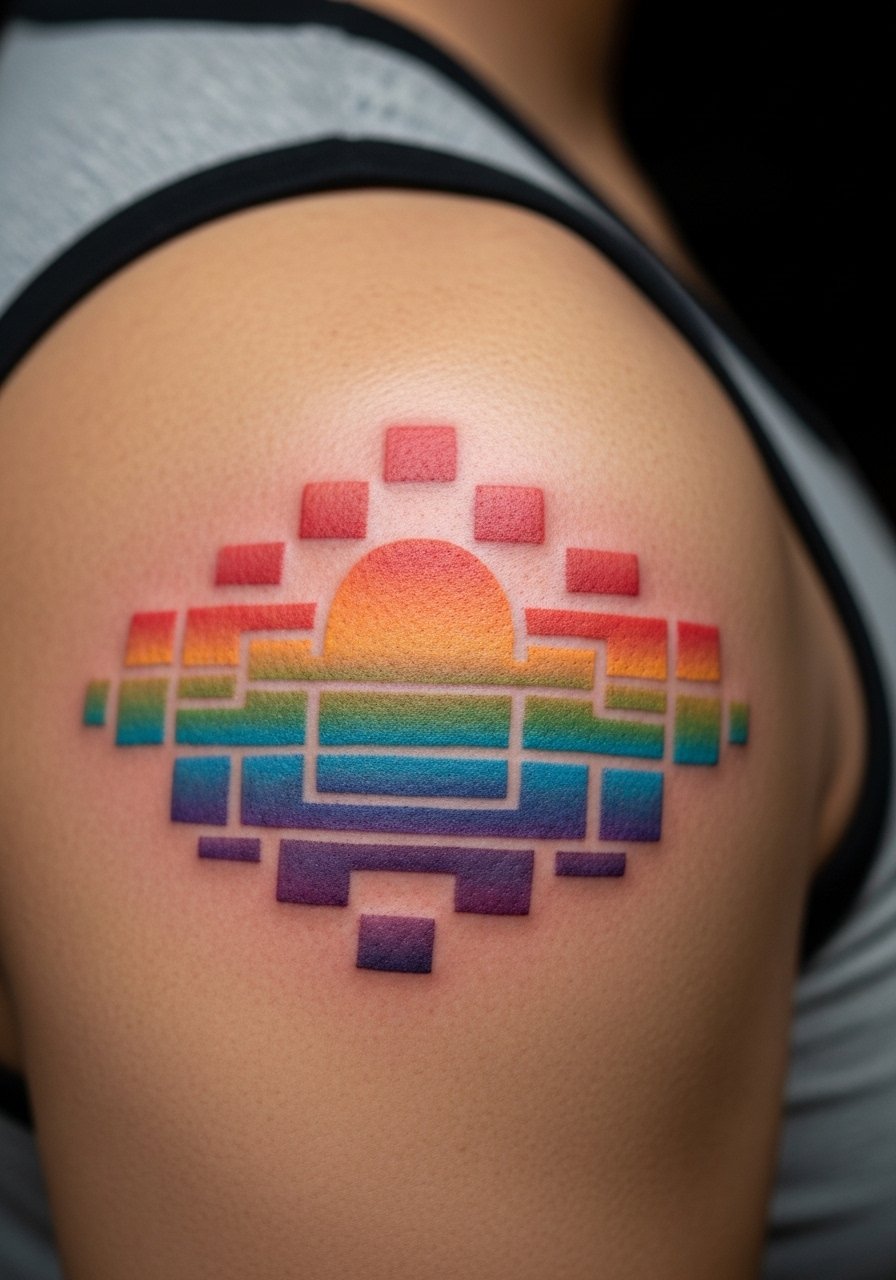
I noticed this on a traveler's feed and liked how the shoulder cap curved the sunset. Shoulders endure mild pain and are forgiving for gradients. Pixel sunsets need clear color blocks and slightly larger pixels to keep the gradient readable after a year. People sometimes ask for ultra-smooth gradients in tiny pixels. Those melt into muddy blends. Ask for distinct color steps and ask your artist to preview the gradient at arm angles. Shoulder pieces are easy to show off and easy to cover when necessary.
Tattoo Prep and Aftercare Essentials
Aftercare Essentials:
- Aquaphor Healing Ointment, 14oz tube — Use first 3-5 days for scabbing control. I’ve seen many artists recommend it for thick, occlusive protection.
- Saniderm Transparent Adhesive Bandage, 6-inch roll — A second-skin method that some artists prefer for initial 24-72 hours.
- CeraVe Fragrance-Free Moisturizing Lotion, 12oz pump — Good for days 4-14 when lighter hydration is needed.
- Dr. Bronner's Unscented Castile Soap, 16oz — Gentle cleanser for daily washing during the first two weeks.
Before Your Appointment:
- Numbing Cream with 5% Lidocaine, 30g — Apply 30-45 minutes before if your artist agrees. I always ask first.
- Tattoo Stencil Transfer Paper, 8.5×11 pack — Useful if you want to test alignment at home before committing.
Long-Term Maintenance:
- SPF 50 Sunscreen Stick for Tattoos, 0.8oz — Sunscreen is the single best Fader prevention. Every artist I’ve talked to recommends daily use.
- Mad Rabbit Tattoo Balm, 2oz tin — Keeps healed tattoos vibrant without heavy residue.
- Hustle Butter Deluxe, 3oz tub — A vegan-friendly moisturizer many artists suggest for long-term care.
Optional Comfort Items:
- Tattoo Numbing Spray, 1oz — Handy for sensitive spots or touch-ups.
- Hydrocolloid Bandages Large, 10 pack — Useful for protecting small healed blisters or localized irritation.
I grouped items by when to use them. From what I’ve seen, Aquaphor and Saniderm are the two products most artists actually recommend, while numbing creams and novelty balms are more personal preference.
Frequently Asked Questions
Q: Will fine line pixel tattoos blur into each other if I get a full sleeve?
A: From what I’ve seen, full-sleeve pixel work needs bigger pixels and deliberate negative space. Fine line pixels that start tiny will merge over 6-24 months. Tell your artist you want a readable grid at arm distance and ask for larger blocks in high-motion areas like the inner arm. For aftercare I use CeraVe Fragrance-Free Moisturizing Lotion, 12oz pump during days 4-14 to keep the sleeve hydrated without clogging pores.
Q: Do watercolor-style pixel tattoos need different aftercare than traditional ones?
A: I’ve noticed watercolor and soft gradients need more careful sun protection because subtle color shifts fade faster. Use a mineral-friendly moisturizer initially and then move to daily SPF. I recommend SPF 50 Sunscreen Stick for Tattoos, 0.8oz once the tattoo is healed. Artists I’ve talked to say consistent sunscreen use preserves delicate fades better than frequent touch-ups.
Q: How painful is a ribcage pixel skull session and how should I prep?
A: Ribs are typically high on pain. From sitting through sessions with friends I know breathing control helps. Prep by getting a good night’s sleep and avoiding alcohol 24 hours prior. Bring loose clothing for post-session comfort. For immediate care consider Saniderm Transparent Adhesive Bandage, 6-inch roll if your artist supports it. Expect slower first-week healing because clothing can rub the area.
Q: My finger pixel ring faded after six months. Is that normal?
A: I’ve seen that a lot. Fingers and hands lose ink faster because of washing and friction. If you want a lasting ring pick a thicker band with space between pixels and budget for a touch-up around 6-12 months. Hydrocolloid dressings can help early healing. For small touch-ups I’ve used Hydrocolloid Bandages Large, 10 pack to protect the area while it reseals.
Q: Can I get a numbing cream for a shoulder pixel sunset?
A: Many artists allow topical numbing if you ask. I always consult my artist first. A cream with 5% lidocaine, applied 30-45 minutes before, can reduce discomfort on sensitive areas even though shoulders are usually low to medium pain. I use Numbing Cream with 5% Lidocaine, 30g on rare occasions. Note that numbing can slightly affect ink uptake in some spots. Talk to your artist about their preference.
Q: How should I describe a pixel portrait to my artist so it looks good healed?
A: Show a reference and ask for a larger pixel grid with defined contrast points. From what I’ve learned, tell your artist you want simplified facial blocks, not tiny detailed pixels. Ask them to print the stencil at the final size and place it on you so you can see real-world scale. If you want extra longevity, plan for a small outline or negative space buffer to keep the portrait readable after a year.
Q: Which products are actually worth buying for long-term tattoo care?
A: In my experience most artists recommend a solid cleanser, a mild moisturizer, and daily sunscreen. My consistent picks are Dr. Bronner's Unscented Castile Soap, 16oz for washing, Mad Rabbit Tattoo Balm, 2oz tin for ongoing care, and SPF 50 Sunscreen Stick for Tattoos, 0.8oz for sun protection. Every artist I’ve talked to emphasizes sunscreen as the most important long-term product.
