
I spent months bookmarking manga tattoos and asking artists which designs actually hold up over time. The problem I kept seeing was not lack of ideas. It was picking a style that stays crisp after a year, not just photogenic the day it’s done. These 23 clean manga tattoos focus on line clarity, bold detail, and placements that let the art breathe while aging well.
This list centers on manga-inspired work, from crisp black line anime faces to micro-realism manga panels. I picked placements that read well at arm’s length, and spots that protect detail, like the outer forearm and upper thigh. From what I’ve seen in 2026, artists keep pushing crisp linework and selective dot-shading for longevity.
1. Fine Line Manga Face on Inner Forearm
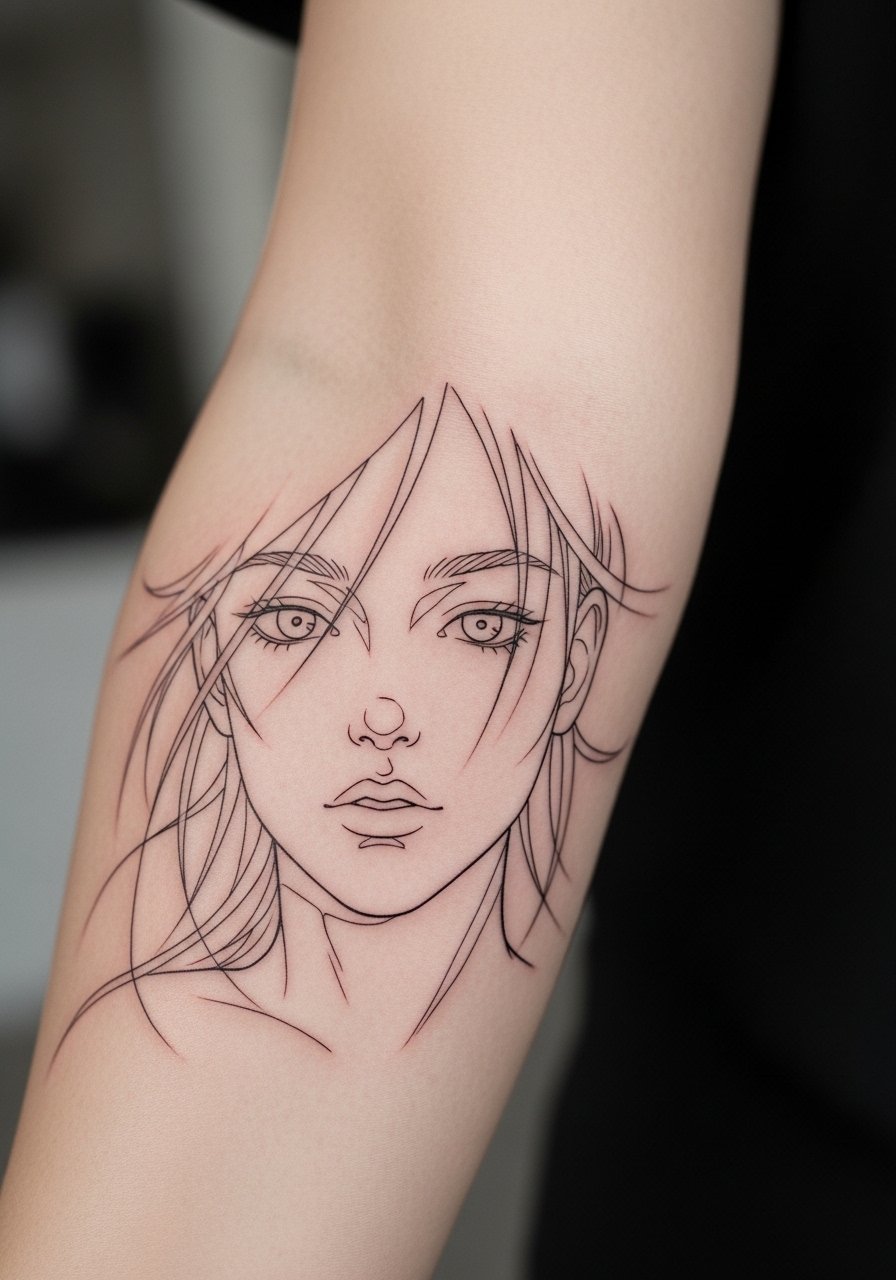
I first noticed this on a friend who wanted subtle fandom without full color. Fine line manga faces work visually because the negative space mimics manga panels. Expect mild pain on the inner forearm. Sessions are short, usually under an hour for a single head. Ask your artist for slightly heavier outer contour lines so the face stays readable after one to two years. A common error I see is asking for ultra-thin single hairlines. Those blur into gray threads after 12 months. For aftercare, I used Aquaphor the first three days, and that helped keep scabs thin. If you want this on the wrist instead, plan for touch-ups sooner since wrist skin shifts and fades faster.
2. Bold Blackwork Chibi on Outer Bicep
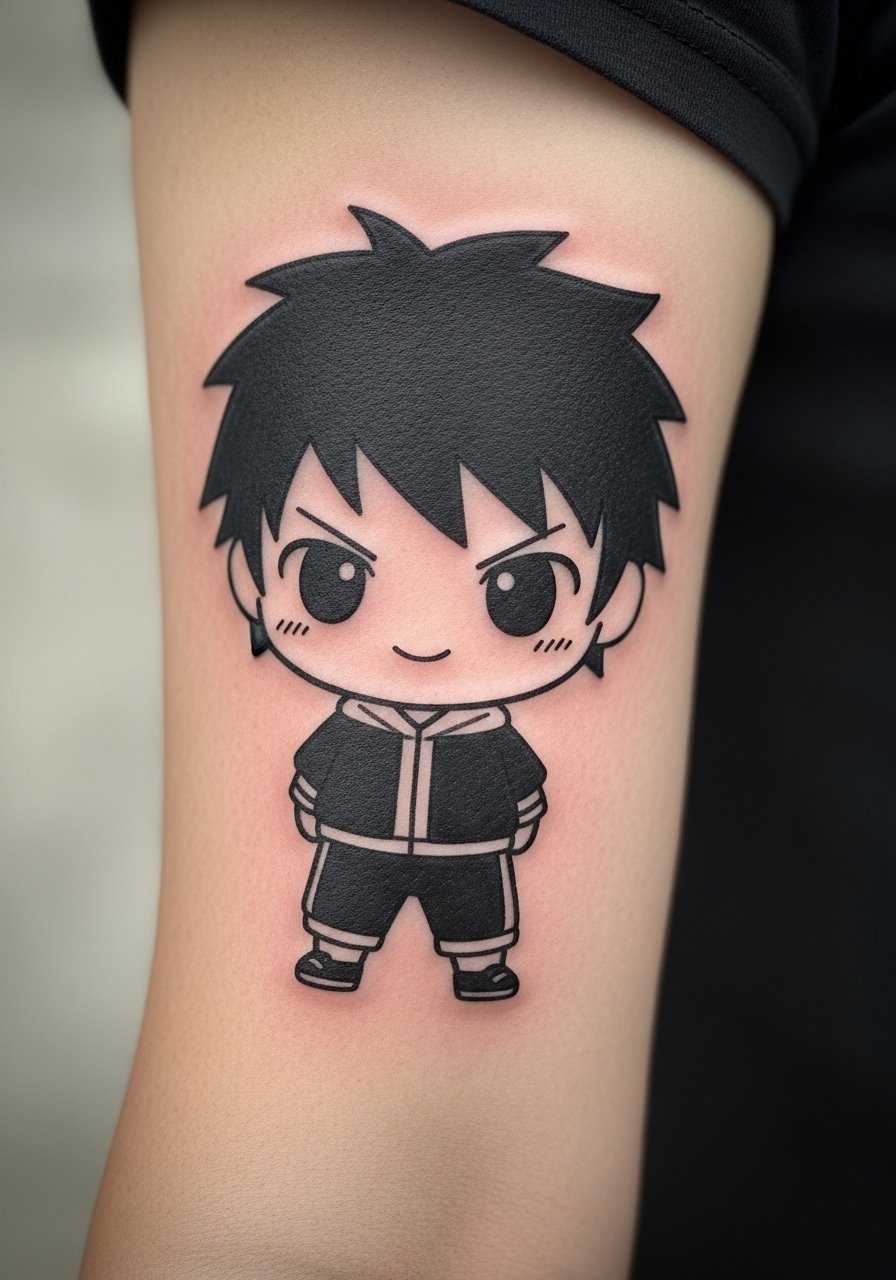
Fair warning, the outer bicep can take dense fills well. The blackwork chibi style reads from across a room because of strong silhouettes. Expect a low to moderate pain level. Sessions often take 1 to 2 hours for clean fills. Tell your artist you want saturated black that reads as a silhouette, not a shaded cartoon. One mistake I see is crowding small facial details into the chibi. Keep features simple so they do not smudge into blobs when healed. Healed tattoos here stay bold for years if you protect them from sun. I recommend a tattoo balm like Mad Rabbit Tattoo Balm for long-term vibrancy.
3. Micro-Realism Manga Eye on Collarbone
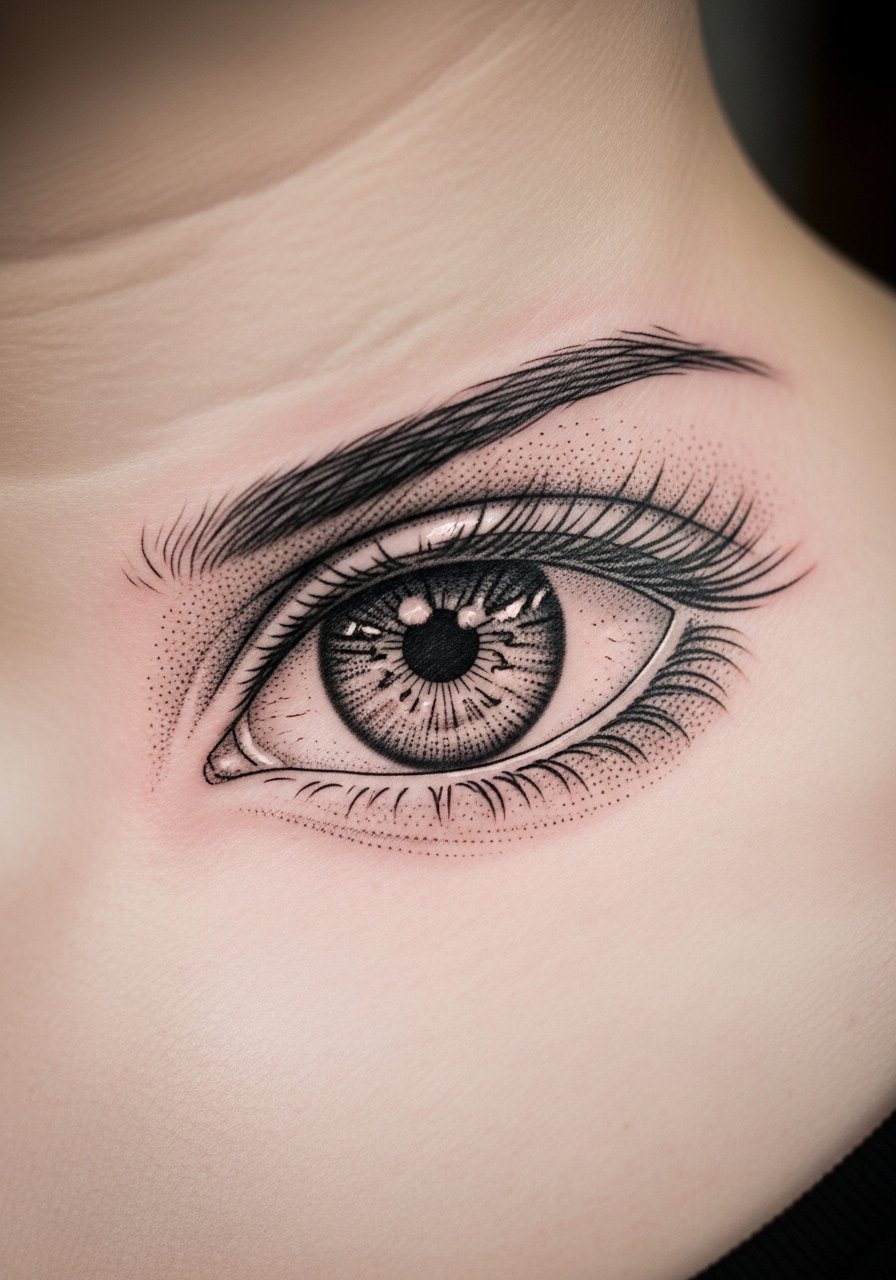
I saw a collarbone eye at a convention and the detail stopped me. Micro-realism manga eyes can capture emotion in a small space, but the collarbone is tender. Pain ranges high for many people. Sessions are usually 1.5 hours for one eye. Ask the artist to plan for slight stippling rather than continuous fine lines, because stippling ages better across moving skin. The common mistake is packing too much tiny highlight detail that fades into gray. Expect the highlights to soften after a year. If you want a larger chest piece instead, the lines can be finer and last longer because of less friction.
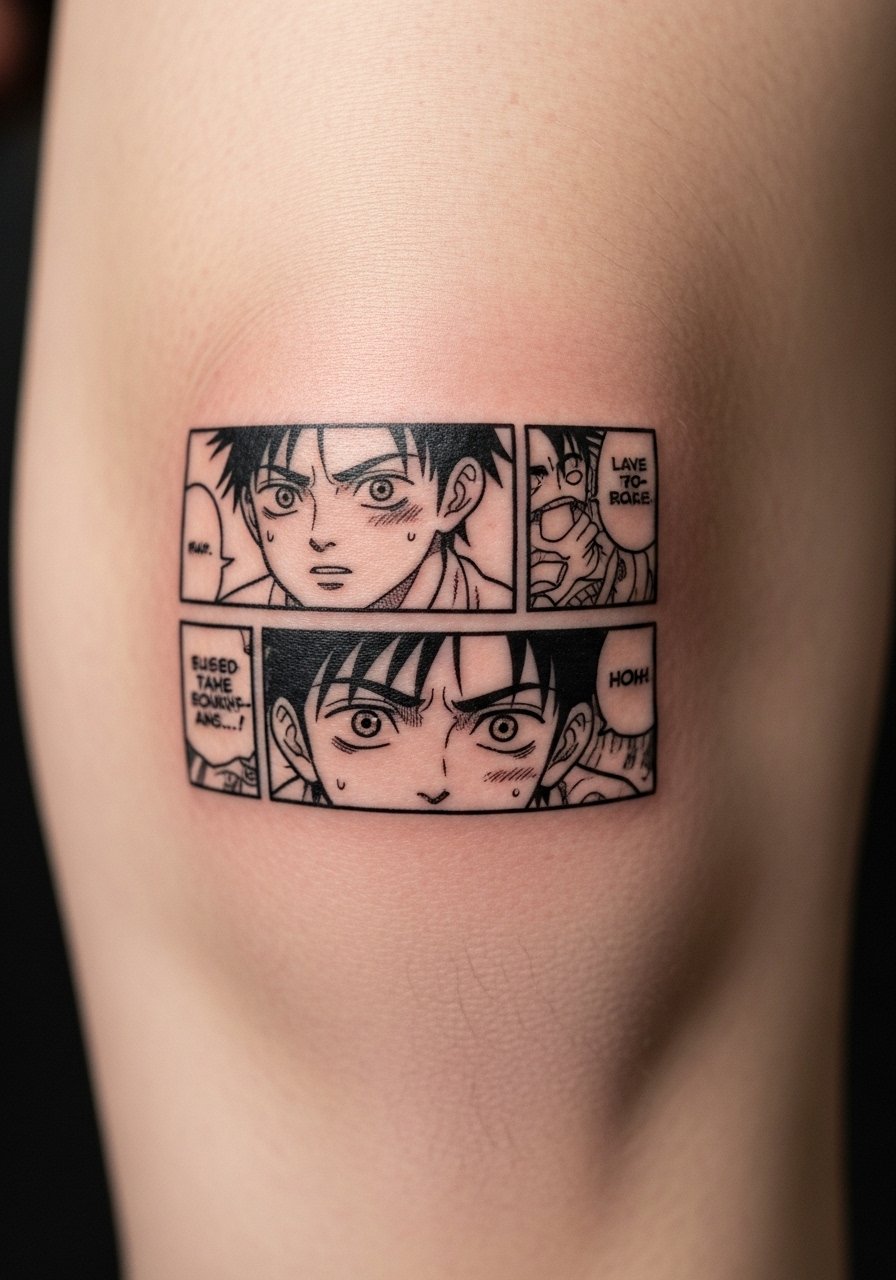
4. Black Outline Panel Sleeve on Outer Forearm
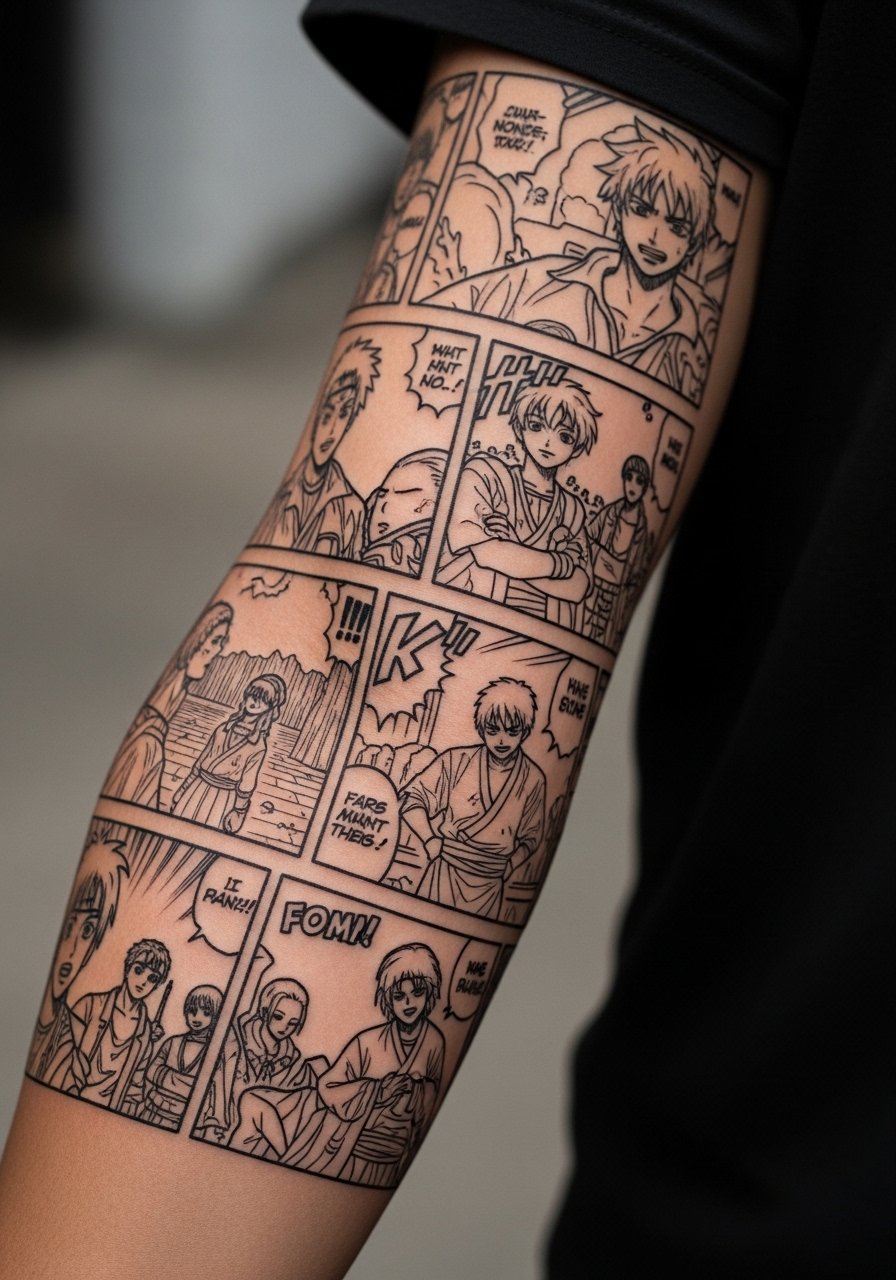
There is a strong visual impact when you turn a forearm into manga panels. I recommend this for people who like storytelling tattoos. Pain is low to moderate on the outer forearm. Plan multiple short sessions, usually two to three, depending on how many panels you want. During your consult, bring screen captures that show panel gutters and lettering style. Artists warn against cramming dozens of tiny panels. Too many small panels blur into a patch. This larger-panel approach avoids that. After six months, panels may soften slightly. Saniderm helps during the initial week to keep edges clean. Consider working with an artist experienced in graphic compositions.
5. Dotwork Oni Mask on Upper Arm
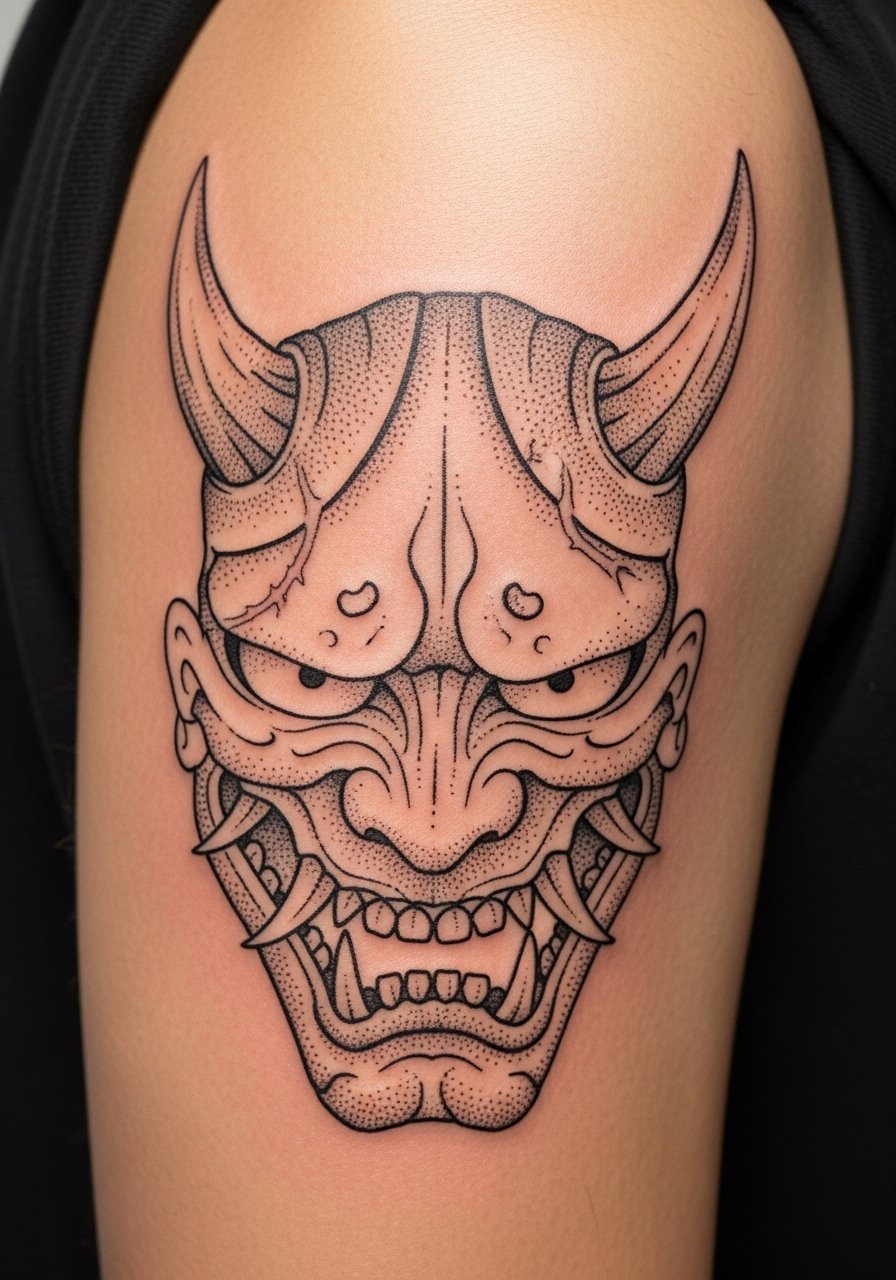
I first saw this in a shop flash book and loved the texture. Dotwork creates depth without heavy lines, so it holds well in areas with thicker skin like the upper arm. Pain is moderate and the session can run two to three hours for a mid-sized piece. Tell your artist you prefer dot gradients for shadows rather than smooth shading. A common mistake is asking for dots that are too small. Tiny dots spread into muddy shading after a couple years. If you move this to the ribcage, expect more pain and faster blurring, because skin there loses contrast over time. Keep the dot spacing slightly larger than what looks perfect fresh.
6. Minimalist Chiaroscuro Head on Behind Ear
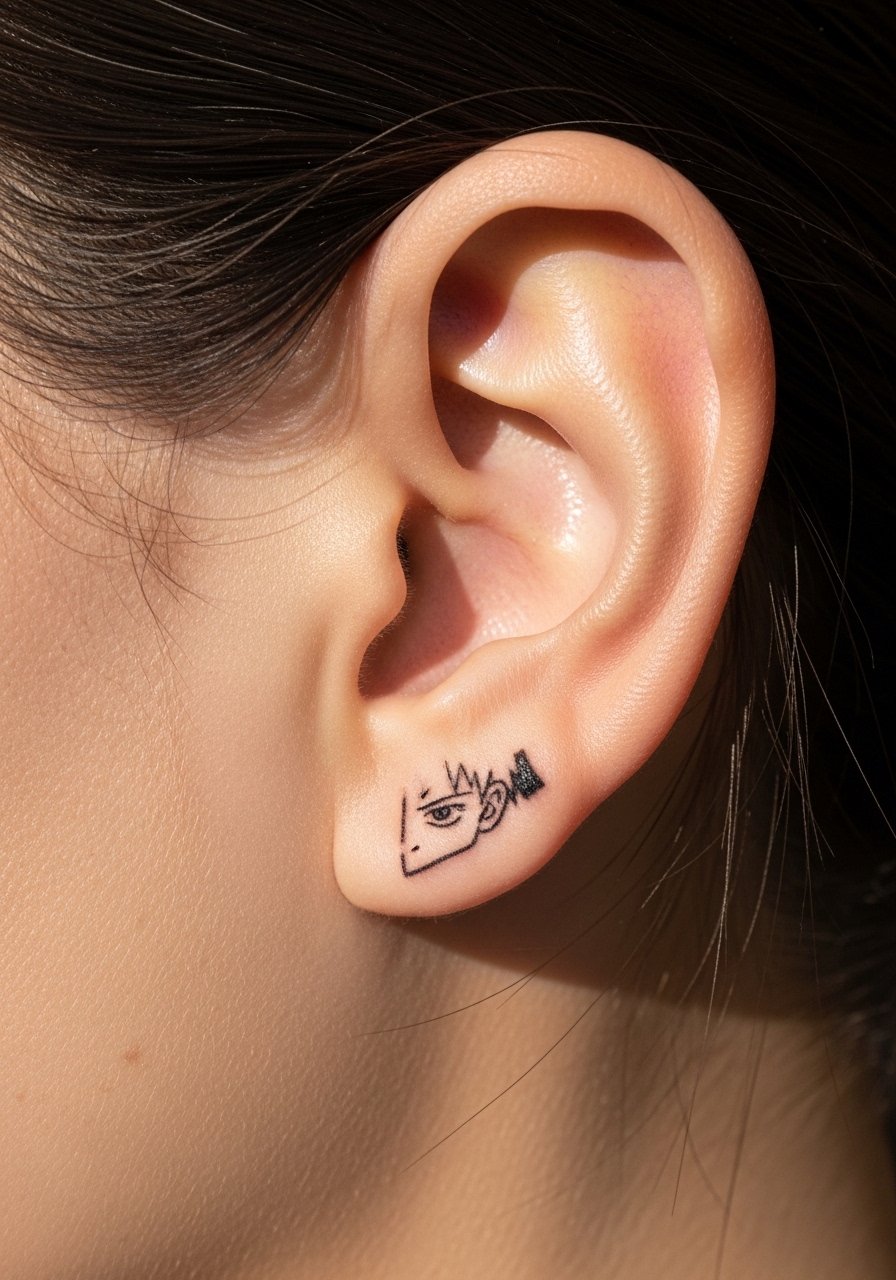
When I saw this, I appreciated the discreet placement. Behind the ear is sensitive and small designs work best. Pain is high for a tiny area. Sessions are under 30 minutes usually. Ask your artist to use a single bold silhouette with one or two fine highlights. The biggest mistake is expecting the crispness of fresh ink to last behind the ear. That area experiences friction and sweat. Healed texture softens quickly, meaning you may need touch-ups every few years. For aftercare, avoid heavy ointments that trap moisture behind the ear. A light lotion like CeraVe Fragrance-Free Moisturizing Lotion after peeling can keep it supple.
7. Micro-Panel Ankle Wrap in Fine Line
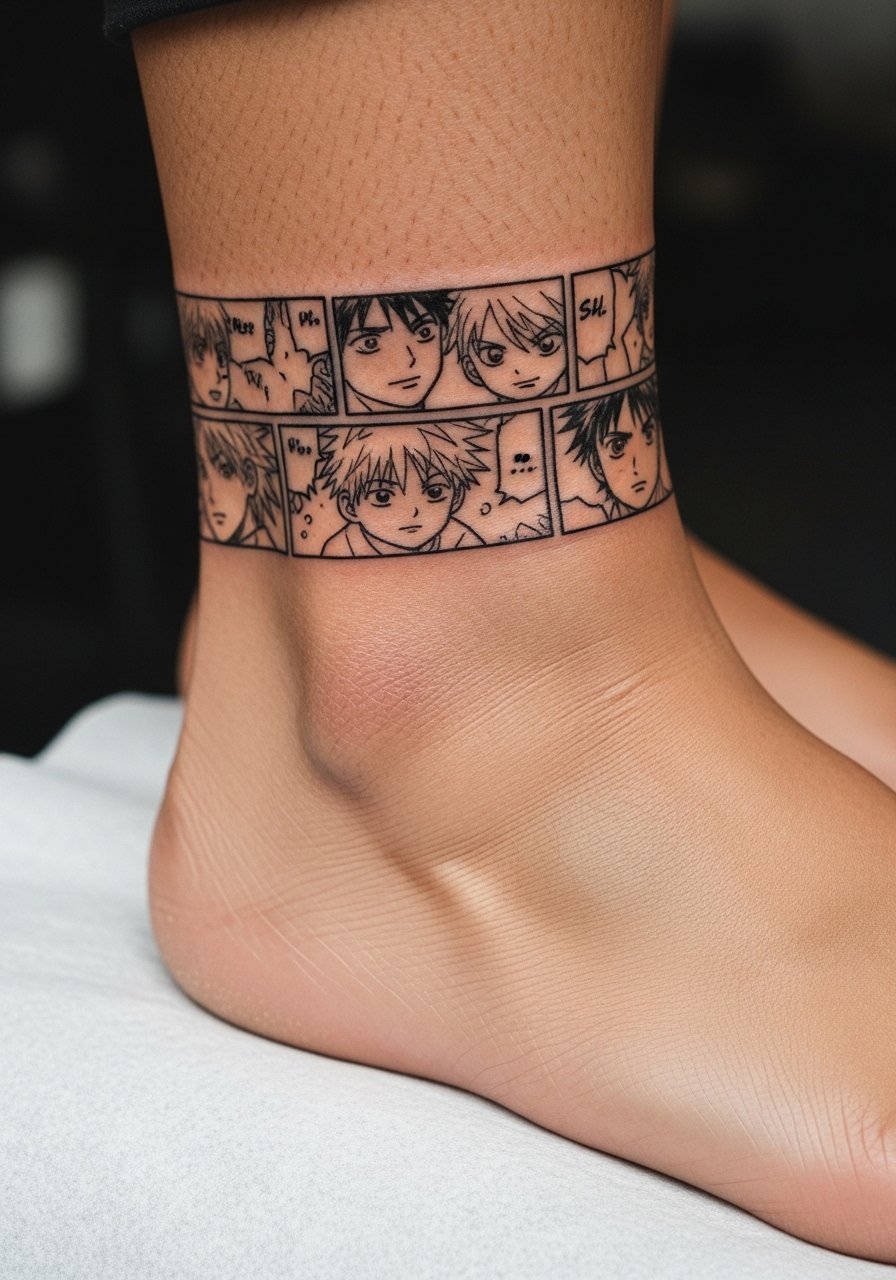
I recommended this to someone who wanted a subtle manga story. The ankle is painful and constricted, but it gives a wrap effect that looks great. Expect a moderate to high pain level when the needle hits bone. Keep sessions short. Tell your artist you want slightly bolder outer lines around each micro-panel. The common error is using ultra-fine internal lines. Those can wash together as the ankle skin moves. At six months, expect slight graying of tight crosshatching. If you want the same design on the calf, lines can be finer and will hold better.
8. High-Contrast Manga Portrait on Upper Thigh
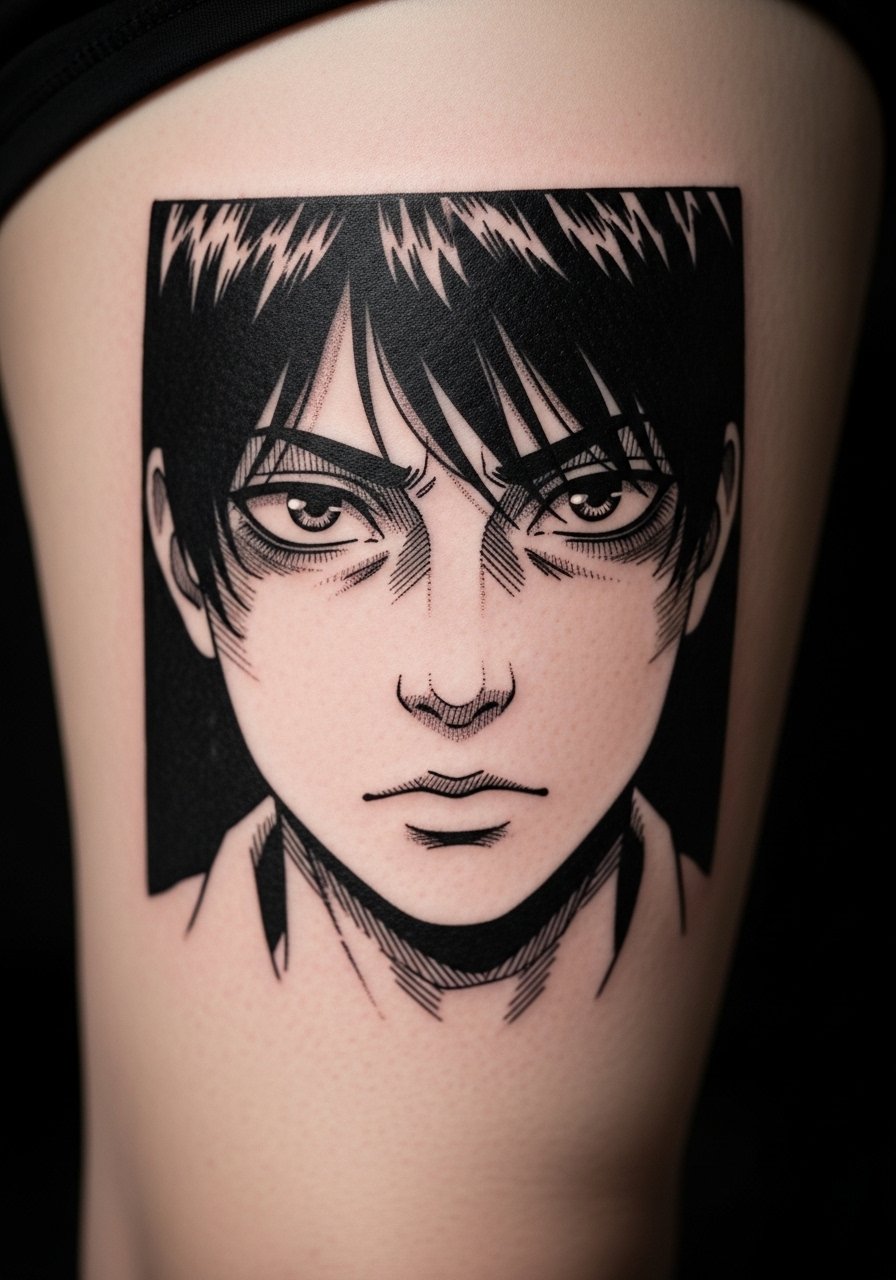
I found thigh portraits are underrated for manga fans. The upper thigh handles larger, high-contrast portraits with minimal distortion. Pain is low to moderate. Sessions often run two to three hours. Ask the artist to plan strong midtones and reserve skin for highlights. One mistake I see is packing tiny facial strokes into the portrait. Those thin strokes merge into gray blocks over time. A thigh piece ages well if the artist uses deliberate strokes and solid blacks. Keep it protected from sun exposure. For long-term care, consider a tattoo balm like Hustle Butter Deluxe after healing.
9. Single-Panel Manga Quote on Sternum
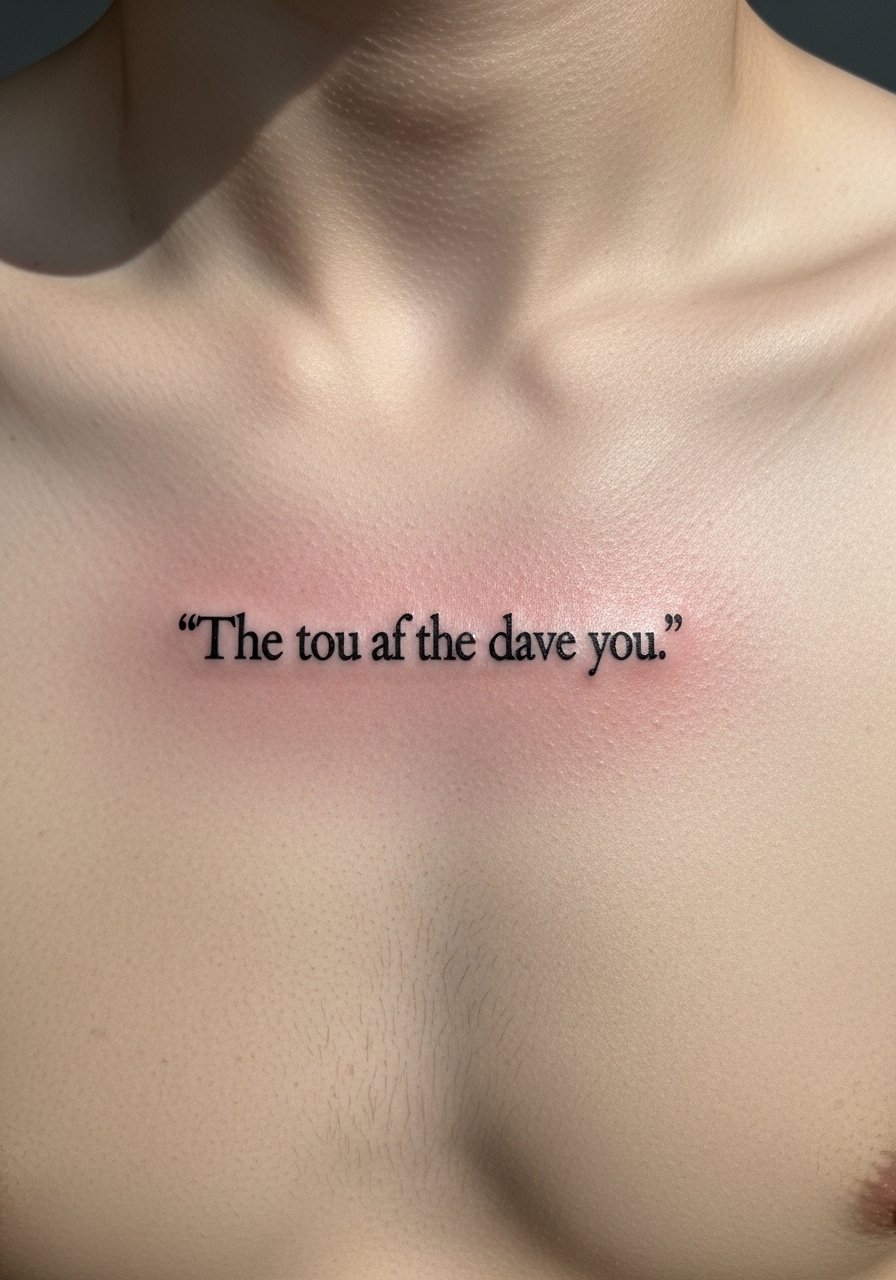
I remember someone telling me they wanted a quote in Japanese kanji with manga linework around it. Sternum placement creates drama but is sensitive. Pain is high. Sessions can be short for small pieces, about 30 to 60 minutes. Ask for larger lettering and slightly heavier strokes. Tiny script on the sternum is a mistake because chest movement and stretching blur detail. Around six months, letters tend to feather. If you prefer the look but want less pain, consider placing the quote on the upper chest near the clavicle where skin is firmer.
10. Neo-Traditional Manga Fox on Calf
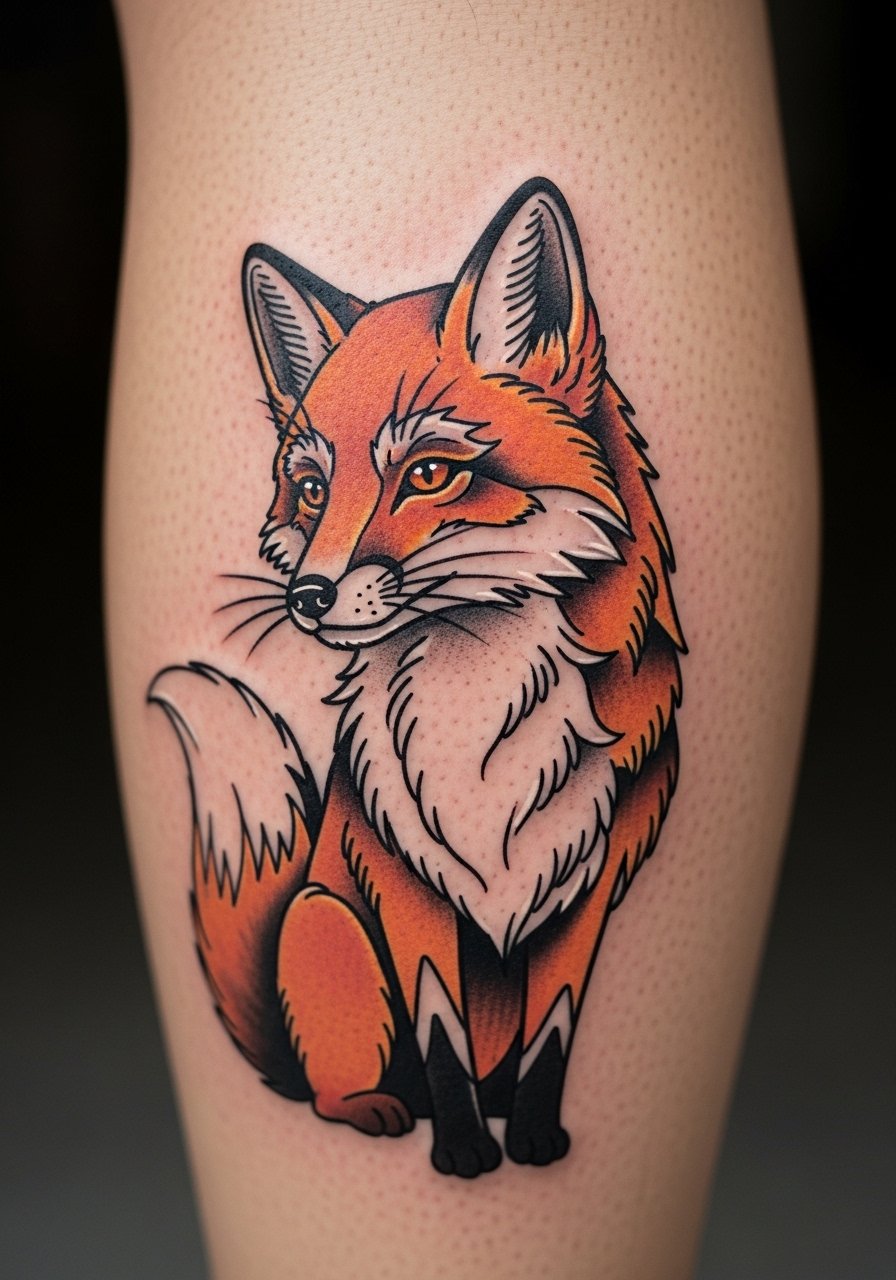
I noticed neo-traditional color blends nicely with manga motifs. The calf is forgiving for saturated color and bolder outlines. Pain is low to moderate. Sessions for a mid-size fox often take two hours. Tell your artist you want bold outlines with selective dot shading to keep a manga feel. The mistake I see is over-detailing the fur with ultra-thin lines. Those lines tumble into textureless patches after a couple years. On the calf, color and line stay readable longer with proper sunscreen. For long-term glow, I recommend Mad Rabbit Tattoo Balm during maintenance.
11. Manga Motion Lines Ribcage Accent
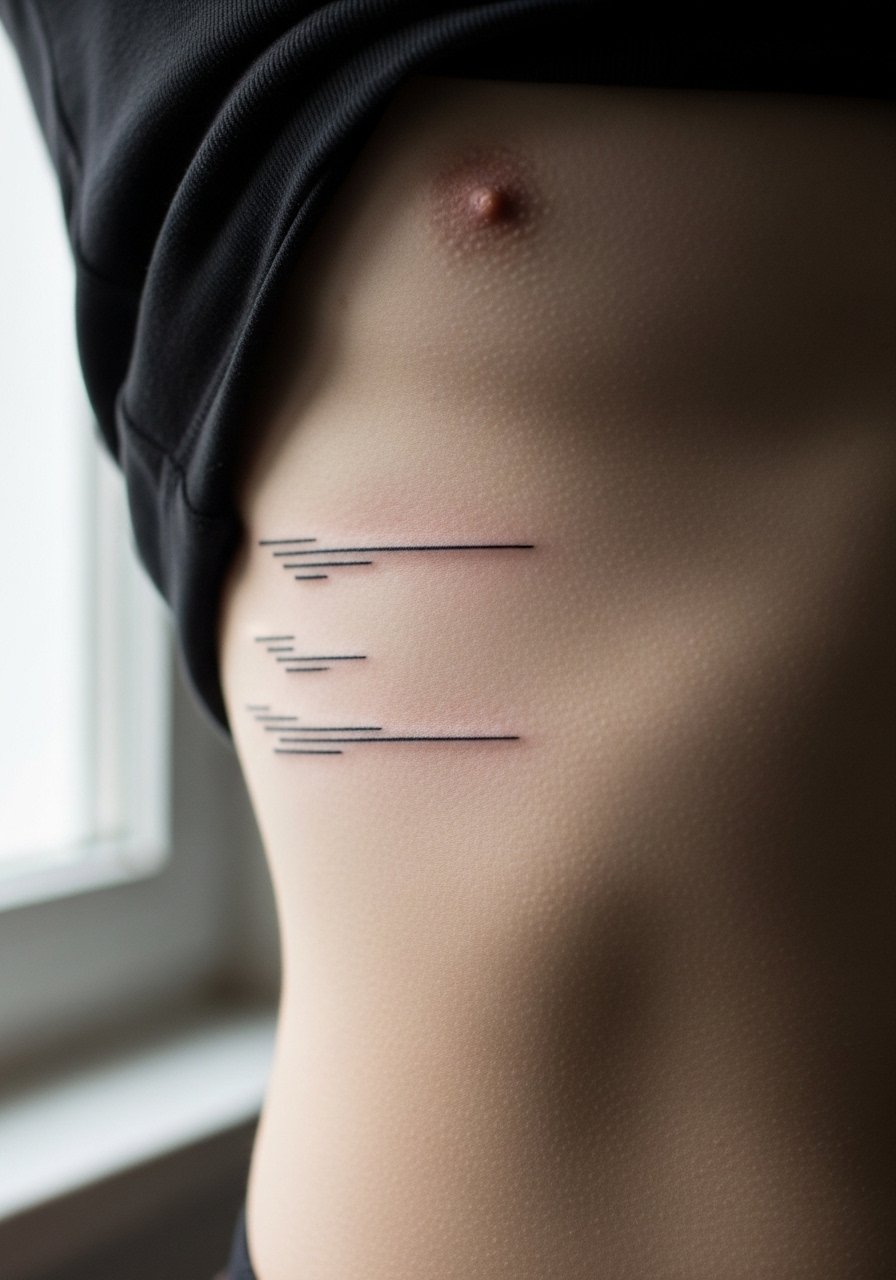
Fair warning, ribcage tattoos hurt. I have one and I will say the motion-line aesthetic is worth the discomfort for some. Pain is high and sessions vary with size. If you want clean motion lines, ask for thicker outer strokes and leave the thinnest inner strokes out. Everybody makes the mistake of demanding extremely tight speed lines that end up looking fuzzy after healing. The ribcage's movement makes those lines migrate. After nine months, they often soften. If you want the same effect with less pain, try the side torso where the skin tends to settle with less distortion.
12. Split-Face Manga/Realism Upper Arm Hybrid
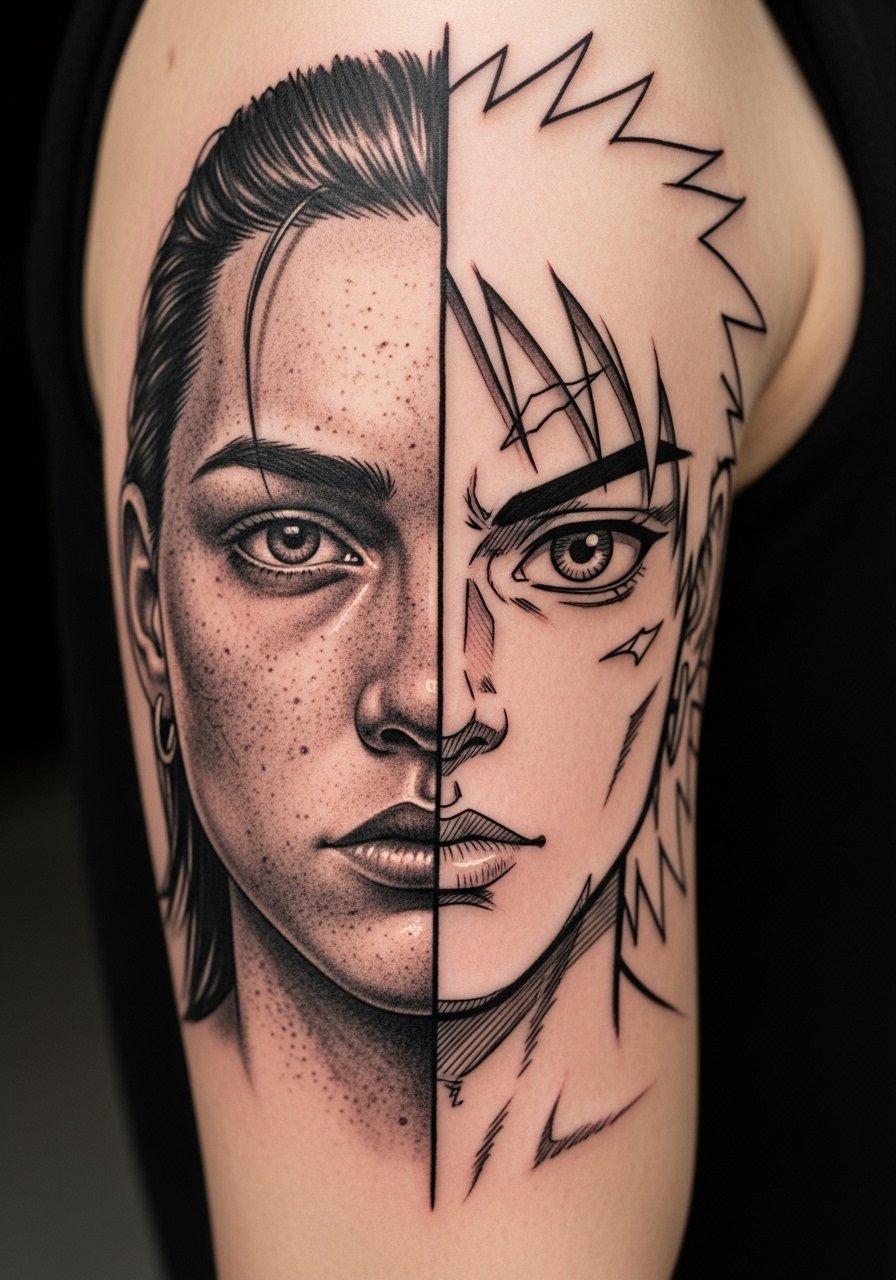
When I saw a split-face piece at a convention, I noted how clean transitions sell the idea. The upper arm is a forgiving canvas for hybrid styles. Pain is moderate. Sessions usually take two major sittings. Tell your artist you want crisp dividing lines and distinct shading languages on each half. A common mistake is blending styles too softly, which leads to a muddled healed outcome. Separate the styles with intentional negative space. After a year, the realism half may need slight touch-up while the manga half holds its graphic edge if the line work was done boldly.
13. Tiny Kawaii Character On Finger
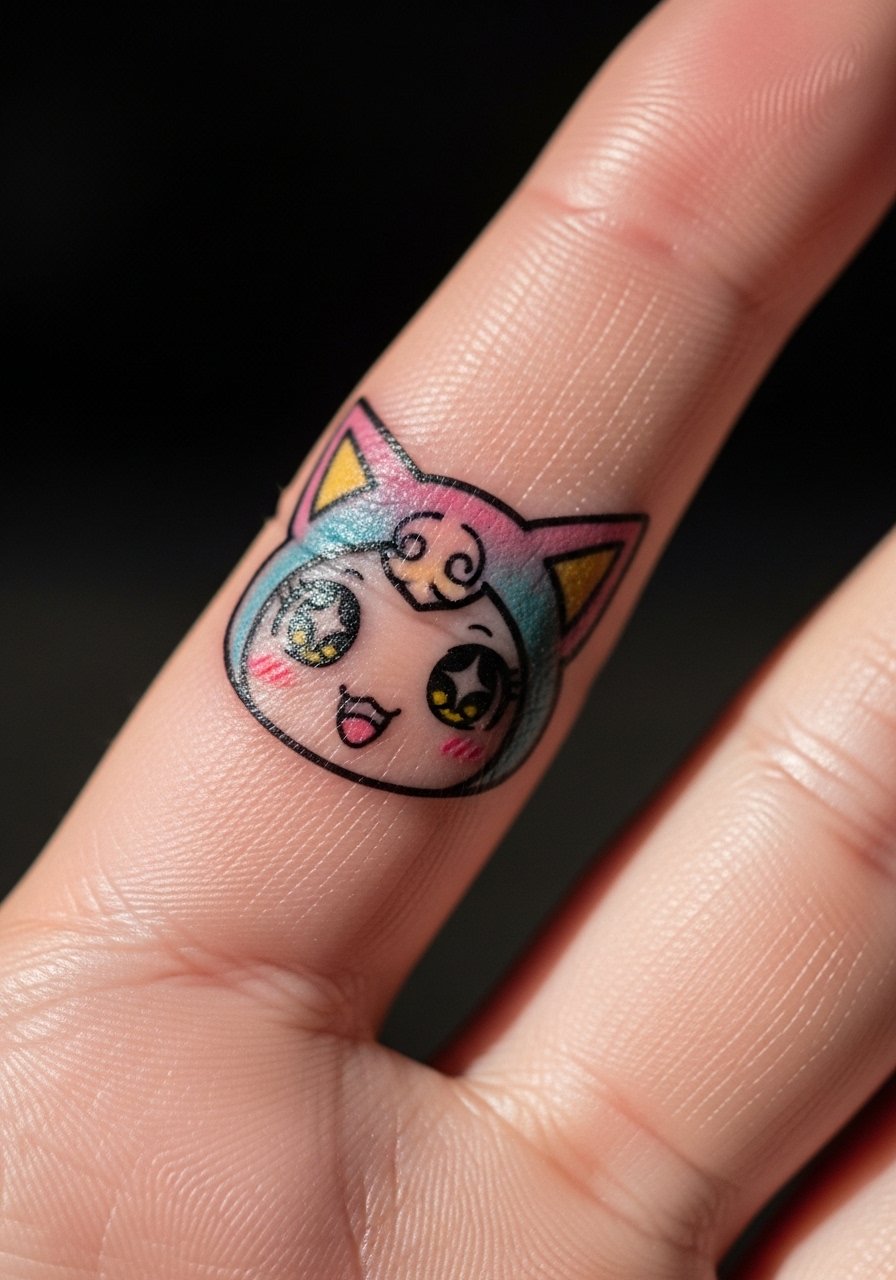
I have clients ask for finger kawaii. Fingers are notorious for fading fast. Pain is moderate to high. Sessions are short, often under 30 minutes. My recommendation is to keep the design extremely simple and accept that touch-ups will be needed yearly. The typical mistake is requesting intricate facial features on a tiny finger. Those vanish quickly. If you want a longer-lasting version, place the kawaii character on the side of the hand or wrist where skin holds pigment better.
14. Manga Panel Back Piece in Blackwork

I once followed the progress of a friend getting a back panel story. Back pieces allow scale and bold blackwork that age well. Pain is moderate and sessions will be several, often spaced weeks apart. Ask the artist to plan the composition with large negative spaces and heavy borders so panels do not merge later. A common error is overfilling small text balloons. Tiny text becomes unreadable after a year. If you want readability long-term, opt for larger lettering and simplified shading.
15. Manga-Inspired Floral Border on Rib
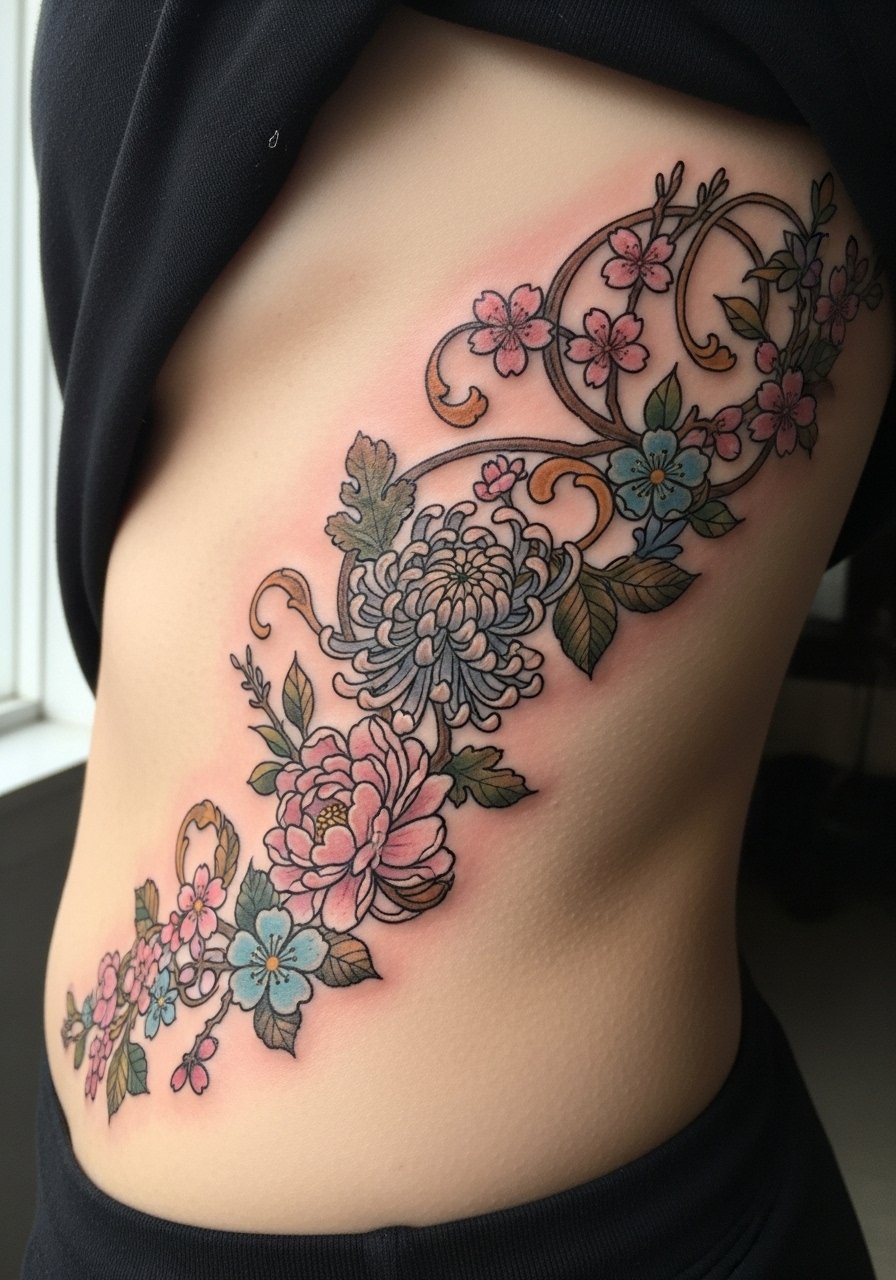
I admired the rhythm of floral borders paired with manga faces at a studio. The rib is painful but it gives a flowing frame. Pain ranges high. Sessions can be one to two hours for a single border. Tell your artist to use medium-weight lines for petals and avoid hairline veins. Many people ask for intricate vein work that blurs. On the rib, detailed veins soften into a wash. If you prefer a less painful spot, the lateral thigh keeps the flow and improves longevity.
16. Manga-Style Geometric Mask at Nape
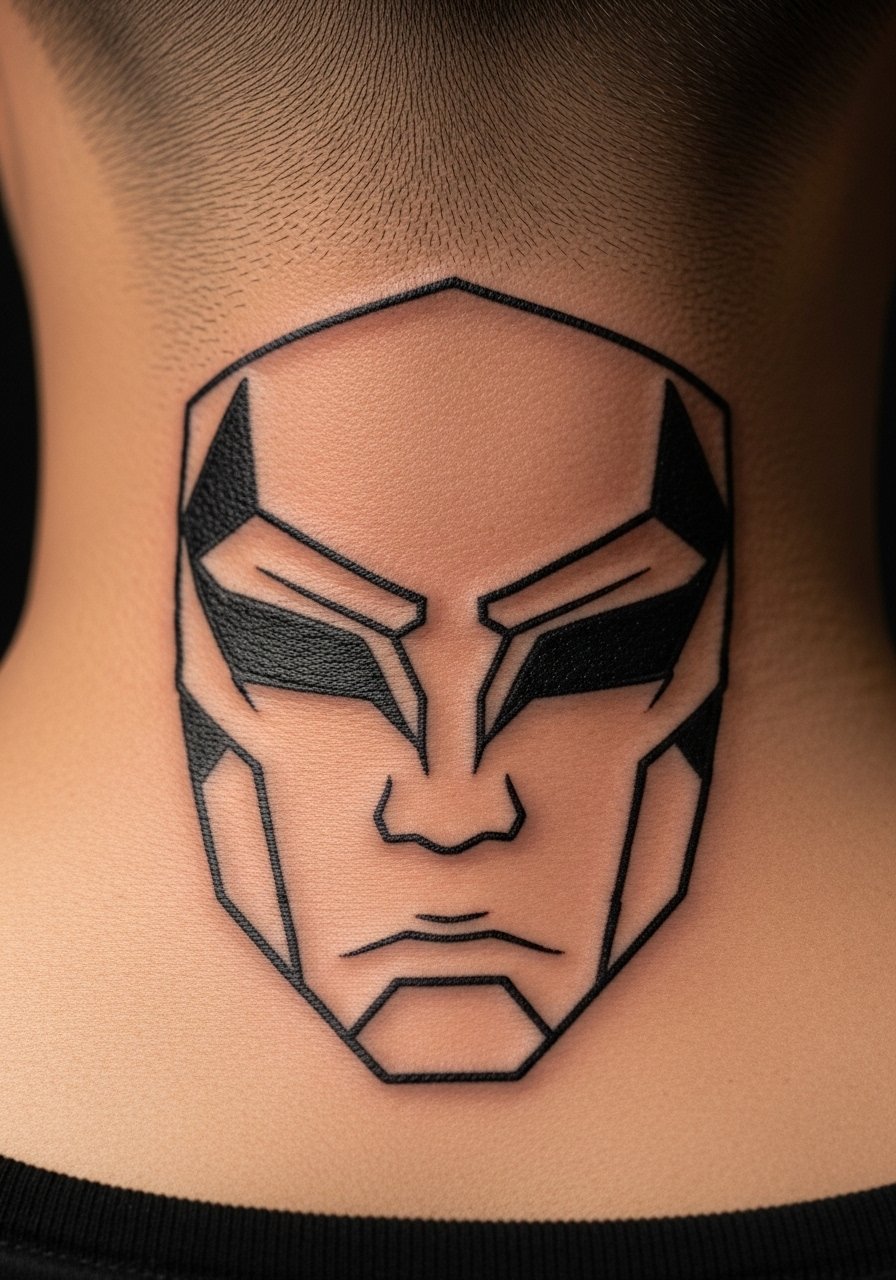
I saw a nape piece that combined geometry with manga masks and it was surprisingly modern. The nape is moderately painful and can be hidden by hair. Sessions are short to moderate. Ask for clear negative space and thicker outer edges so the geometry does not bleed. A mistake is requesting many tiny intersecting lines that lose definition when the neck moves. Over time, expect minimal softening and occasional touch-ups. For longer life, sleep on a silk pillowcase to reduce friction during early healing.
17. Tiny Manga Panel Behind the Knee
I learned quickly that behind the knee is a tricky spot. The skin creases and stretches, accelerating blur. Pain is high and sessions are brief. Bring up concerns about touch-ups during consultation. A common mistake is placing small panels there. They merge as the skin folds. If you love the idea, scale it up to a larger scene that spans the back of the thigh for better longevity. Aftercare must focus on avoiding bending the knee excessively while fresh.
18. Manga-Style Full-Hand Linework
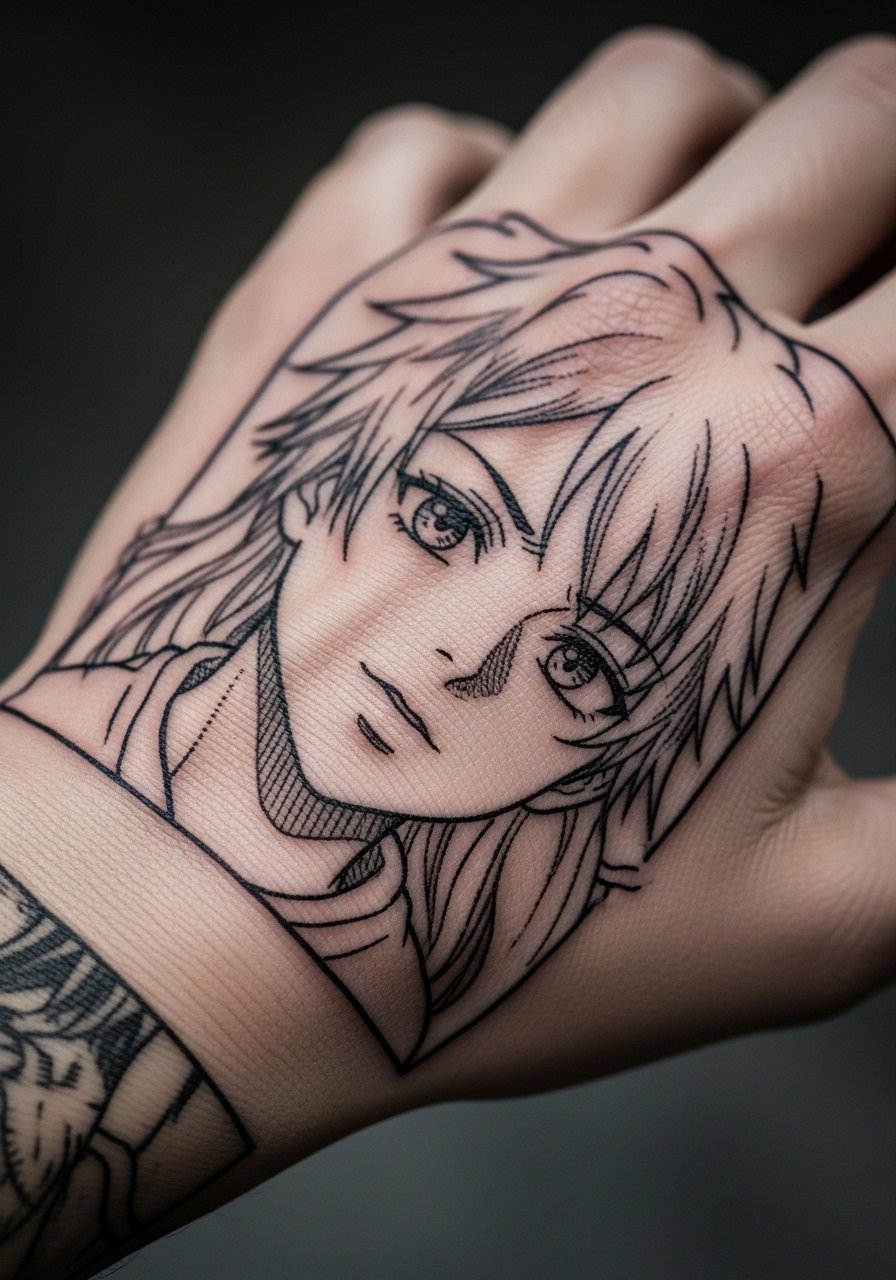
When I watched a hand session, I noticed bands of touch-ups in the first year. Full-hand manga linework looks striking but needs commitment. Pain is moderate. Sessions might be two or three short sittings. Ask your artist about planned yearly maintenance. The biggest mistake is expecting hand ink to behave like forearm ink. Hands face constant washing and friction. Lines tend to blur and sometimes drop out. If you want something hand-size with less upkeep, place a similar design on the lower forearm.
19. Manga Creature Thigh Cap Tattoo

I saw a creature piece that kept tiny scales readable because the thigh gives canvas space. Pain is low to moderate on the thigh. Sessions for a larger creature can be three hours plus. Tell your artist to keep scale patterns larger and avoid micro textures. A common mistake is demanding micro scales. They become visual noise when healed. If you want the creature on the calf, expect slightly faster fading in areas with higher sun exposure.
20. Minimal Manga Speech Bubble on Wrist
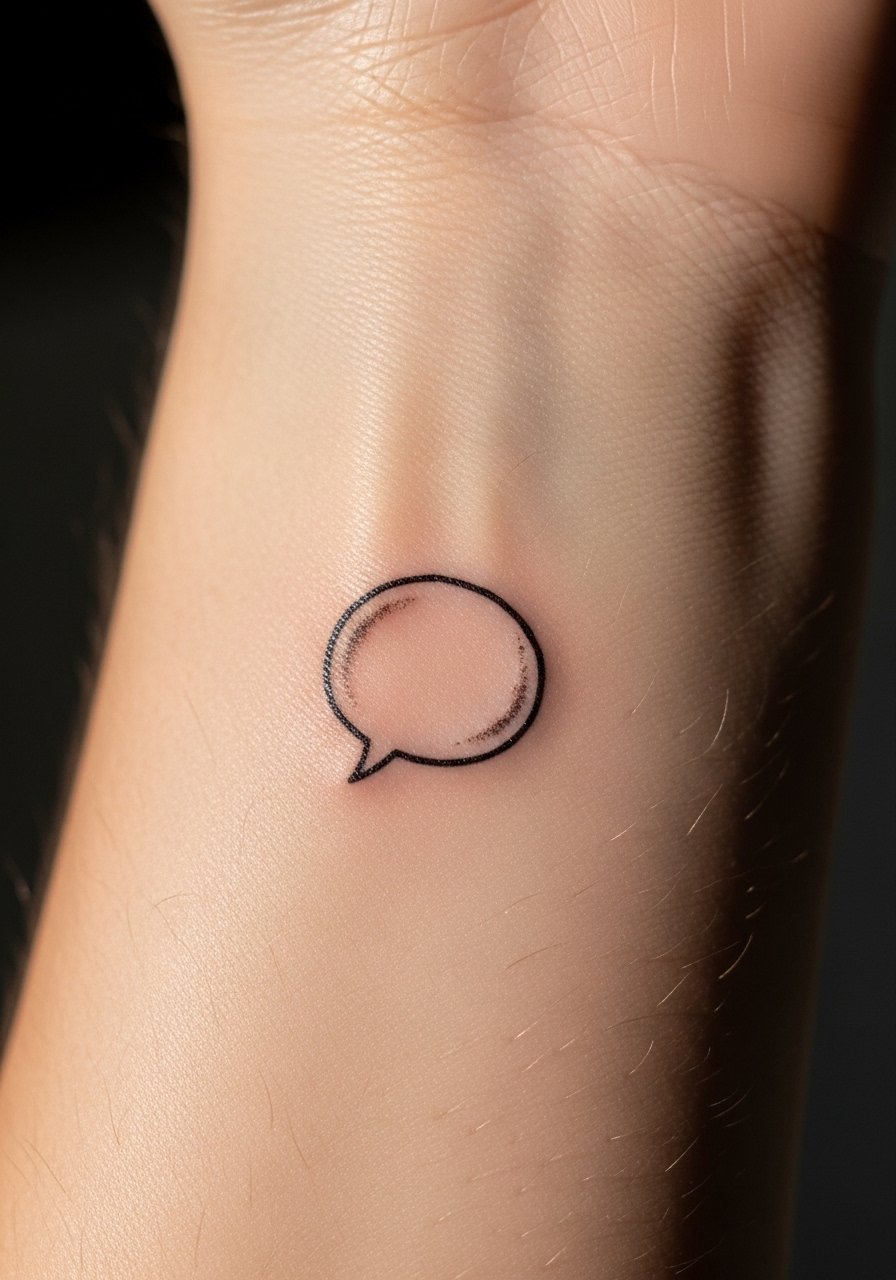
I recommend caution with tiny wrist text or bubbles. The wrist is exposed to sun and motion, which cause lines to soften. Pain is low to moderate. Sessions take under 30 minutes. Ask for bold bubble outlines and simplified text. People often request tiny fonts that blur into an unreadable line. Over the first year the bubble may require touch-up. If you prefer a permanent readable statement, put the speech bubble on the inner forearm.
21. Manga Line Portrait Behind Shoulder Blade
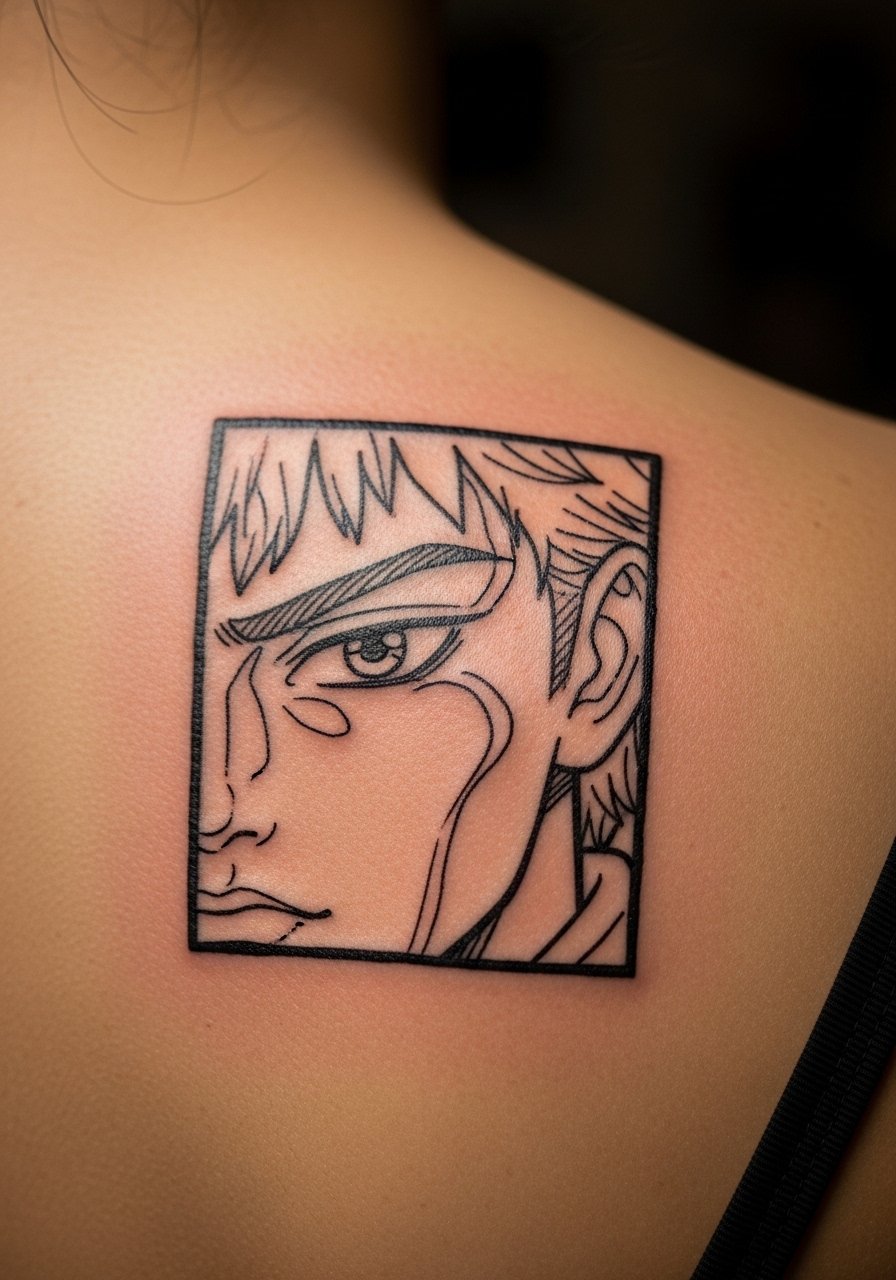
A friend of mine got a portrait here and it stayed crisp. The area has enough thickness to keep lines intact. Pain is moderate. Sessions usually take one to two hours. Ask your artist about line weight progression, meaning heavier outer lines and softer inner lines. The mistake people make is choosing ultra-fine inner lines that fade first. Over a few years, inner details soften but the portrait remains readable if line weights were planned. This placement also hides well under clothes.
22. Manga Storm Cloud Calavera on Elbow Cap

I do not recommend elaborate detail over the elbow unless you accept regular touch-ups. The elbow cap moves and scabs differently. Pain is high. Sessions are short and often sting. For longevity, designers use bold shapes and accept lost micro detail. A frequent mistake is packing intricate facial elements into the calavera. Those lines fade into blotches. If you want similar imagery with less maintenance, move it slightly off the elbow onto the proximal forearm.
23. Negative Space Manga Silhouette on Side Rib
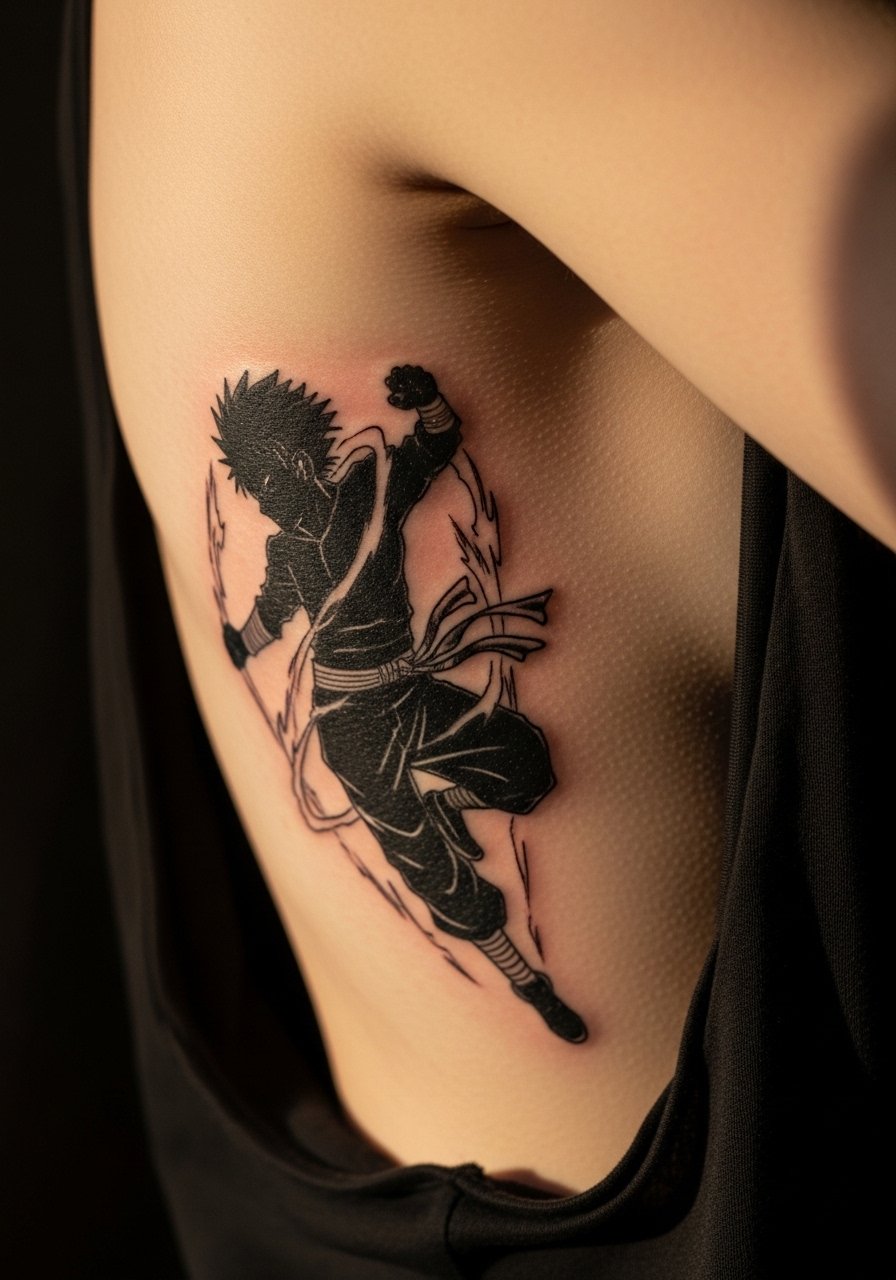
I love using negative space for manga silhouettes, but ribs are one of the most painful spots. Pain is high. Sessions are one to two hours for medium pieces. Tell your artist you want solid blacks framing the silhouette and to avoid tiny inner details. The common mistake is expecting thin internal lines to remain crisp across the rib. Negative space reads well even after softening, because the silhouette holds shape. Protect it from sun and heavy friction to keep the blacks from turning patchy.
Tattoo Prep and Aftercare Essentials
Aftercare choices make or break detail retention. From what I’ve gathered, artists actually recommend a small list of products. Below I grouped essentials for healing, prep, and long-term care. Replace YOURTAG with the tag used in the links. I use these items and recommend them during consults.
Aftercare Essentials:
- Aquaphor Healing Ointment, 14oz tube — For first 3 to 5 days to keep scabs thin. Artists often suggest light application.
- Saniderm Transparent Adhesive Bandage, 6-inch roll — Second-skin method for first 24 to 72 hours, great for linework.
- CeraVe Fragrance-Free Moisturizing Lotion, 16oz — For days 4 to 14, gentle and non-irritating.
- Dr. Bronner's Unscented Castile Soap, 32oz — Mild cleanser for daily washing during healing.
Before Your Appointment:
- Tattoo Numbing Cream with 5% Lidocaine, 30g — Use only if your artist approves, apply 30 to 45 minutes prior.
- Thermal Tattoo Stencil Transfer Paper, 8.5×11 Pack — For checking placement or mockups at home.
Long-Term Maintenance:
- SPF 50 Sunscreen Stick for Tattoos, 0.47oz — Apply daily to exposed tattoos to prevent fading.
- Mad Rabbit Tattoo Balm, 2oz — Artists recommend for long-term vibrancy.
- Hustle Butter Deluxe, 8oz — A vegan moisturizing option favored by many artists.
Optional Comfort Items:
- Tattoo Numbing Spray, 1oz — For touch-ups or sensitive areas, consult your artist first.
- Hydrocolloid Bandages Large, 4-Pack — Small tattoos and blisters, handy alternative to Saniderm.
Frequently Asked Questions
Q: Will fine line manga sleeves blur together after a few years?
A: From what I’ve seen, fine line sleeves that cram tiny crosshatching tend to blur faster. Ask your artist to use varied line weights, heavier outer contours, and dot shading for depth. If touch-ups are part of your plan, a sleeve can stay crisp for years. For protection, use an SPF 50 sunscreen stick on exposed areas after healing.
Q: Do watercolor-style manga tattoos need different aftercare than blackwork?
A: I’ve noticed watercolor and muted color pieces need more attention to sun protection. During healing treat them the same as blackwork, but long term use a dedicated tattoo balm like Mad Rabbit Tattoo Balm and daily SPF. Artists often recommend avoiding heavy exfoliation on colored areas.
Q: How should I tell my artist I want a manga portrait that lasts on the thigh?
A: Tell them you want bold midtones, reserved skin for highlights, and larger strokes rather than micro detailing. I always bring reference images showing healed work, not fresh photos, so the artist understands how the lines should sit after a year. Ask about planned session breakdown and touch-up schedules.
Q: Is Saniderm a good choice for keeping manga line edges sharp?
A: In my experience Saniderm helps keep line edges clean in the first critical days, especially for crisp comic-style lines. Use it as directed, and remove according to your artist’s timeline. If you are allergic to adhesives, consider gentle healing with Aquaphor instead.
Q: Which placements from this list require the most touch-ups?
A: From what I’ve seen, fingers, hands, elbows, and behind the knee require the most maintenance. Those areas have high friction and thin or frequently moving skin. If you want fewer touch-ups, choose forearms, thighs, or upper back for detailed manga work.
Q: Can I use numbing cream for sensitive ribcage or collarbone sessions?
A: I recommend asking your artist first. Some artists allow a 5% lidocaine cream applied 30 to 45 minutes prior. I have used a numbing cream before a rib session with artist approval and it helped, but it did not eliminate all sensation. If you try it, follow product instructions and disclose any allergies to your artist.
