
Floral tattoos continue to draw attention because they feel soft, symbolic, and expressive without being loud. Many people choose flowers to mark a moment, honor someone, or wear something beautiful every day. This list gives you practical ideas, realistic styling tips, and easy ways to personalize your next design—especially if you want something that feels gentle yet full of meaning.
1. Fine-Line Rose on the Wrist
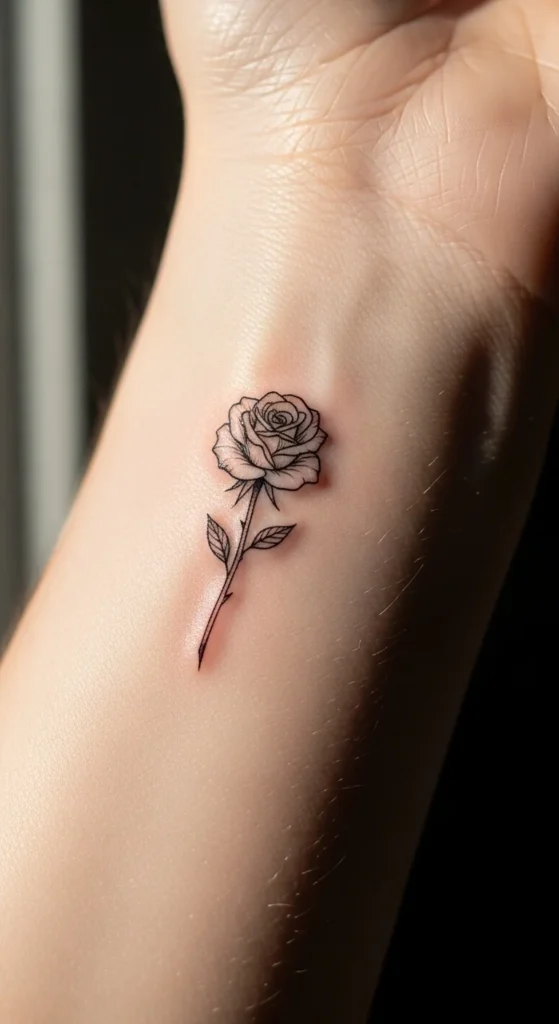
A fine-line rose works well if you want something small but expressive. The simple outline gives the flower a soft mood without looking heavy. It heals quickly on most skin and pairs well with bracelets. A small rose also works as a first tattoo because the placement feels light and the pain level stays low. If you’re unsure about size, sketch a rose on paper using a single continuous line and press it lightly against your wrist to preview the look. You can also use a temporary ink pen to test placement for a day or two. If your budget is tight, choose a micro version with fewer petals, which reduces appointment time. Stick to black ink for longer clarity, especially if you spend time outdoors. Clean lines age better than tiny packed details, so keep the rose open and airy. Add a leaf or a short stem only if you want something slightly longer without making it busy.
2. Watercolor Peony Shoulder Wash
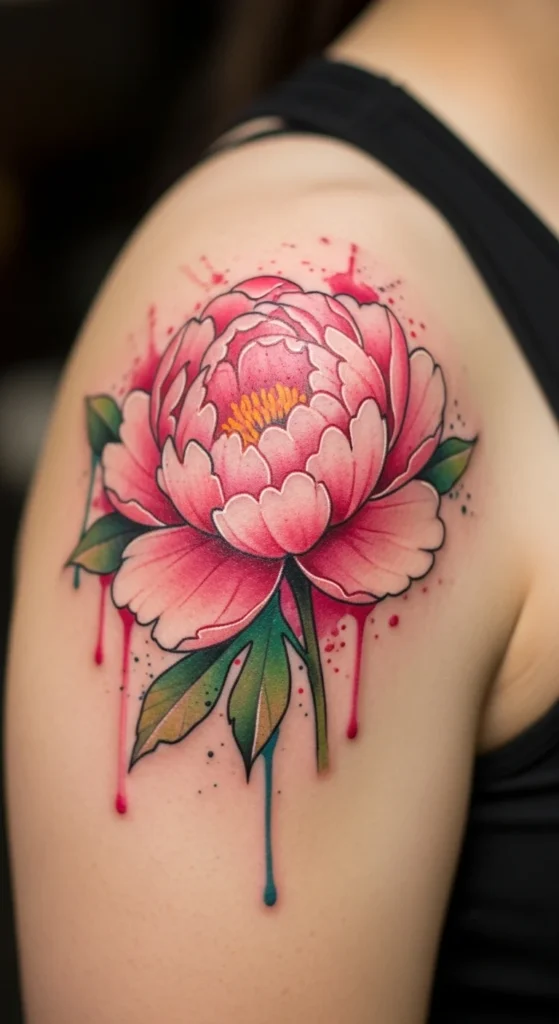
A watercolor peony on the shoulder brings a gentle splash of color without harsh outlines. If you love painterly art, this style gives a soft wash effect that still feels expressive. Shoulder placement also gives the artist more room to create smooth gradients. Before getting it done, test color blends on paper using diluted markers or paint to understand what shades draw your eye. Watercolor pieces look best when the center stays more saturated and the edges fade naturally. If you’re on a budget, choose one flower instead of multiple blooms. Ask your artist for feathered edges instead of many layers—that keeps both time and cost manageable. This spot works well under loose tops, letting the design peek out without feeling overwhelming. Keep sunscreen handy since watercolor pigments fade faster. A photo of your shoulder in natural light can help the artist map the curve and adjust the flow.
3. Birth Month Carnation on the Collarbone
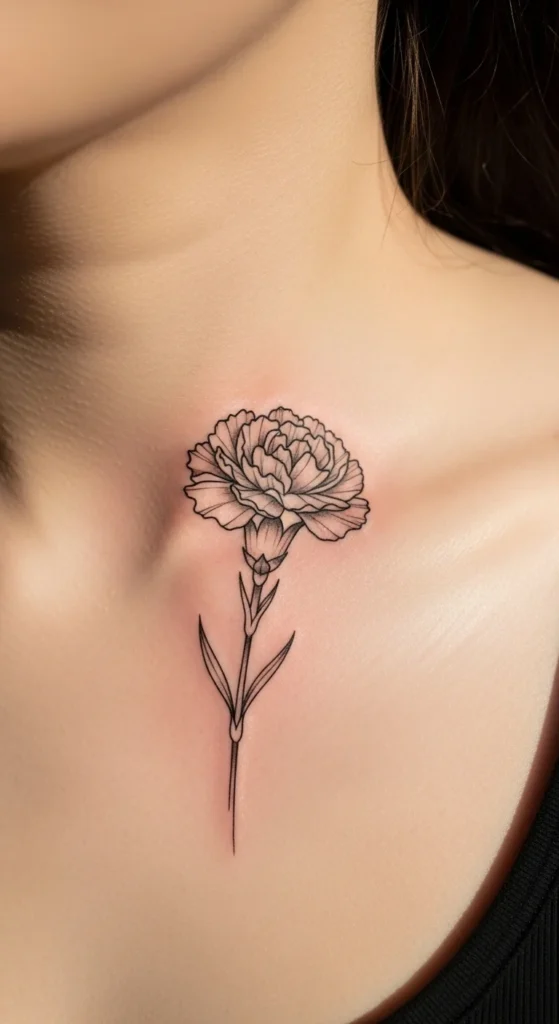
Birth month flowers feel personal, and carnations bring a warm touch for anyone born in January. The collarbone fits this style because the bloom can follow the bone’s curve. Start by tracing your collarbone lightly with eyeliner, then sketching a small carnation outline to see how it sits. If you like symmetry, mirror a smaller leaf on the opposite side. This area allows for slightly larger flowers without looking heavy. For a budget-friendly option, stick to black and grey; carnations look clear even without color. You can also shorten the stem to keep the design small and clean. This spot heals smoothly as long as you avoid tight straps for a few days. If you want symbolism, pair the carnation with one tiny dot above it, representing a milestone or someone special. Keep lines spaced comfortably to help them age gracefully.
4. Tiny Lotus on the Ankle

A lotus ankle tattoo gives a quiet spiritual touch without taking much space. The ankle works well for designs under two inches, especially if you like fine lines. To test placement, wrap a thin paper band around your ankle and draw the lotus on it. Wear it for an hour to see how it feels with shoes. Keep the design simple—three to five main petals are enough. If you’re watching your budget, skipping shading makes the session faster. A lotus also pairs well with a tiny crescent or dot cluster if you want light personal symbols. The ankle moves often, so keep the size slightly larger than you think to prevent blur as it ages. Moisturize the skin for a week before your appointment for smoother lines. This tattoo sits well with sandals and works year-round with subtle visibility.
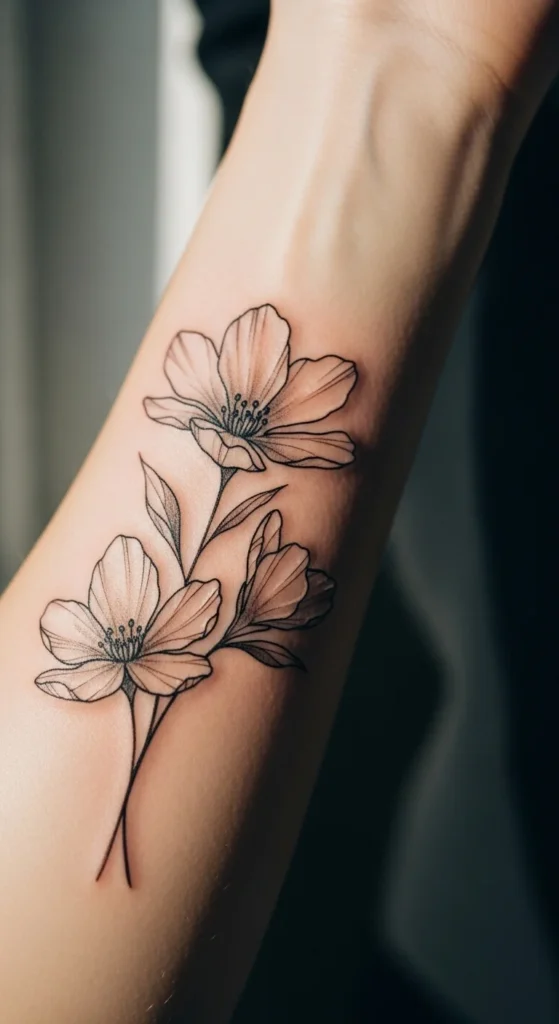
5. Wildflower Mix on the Outer Arm
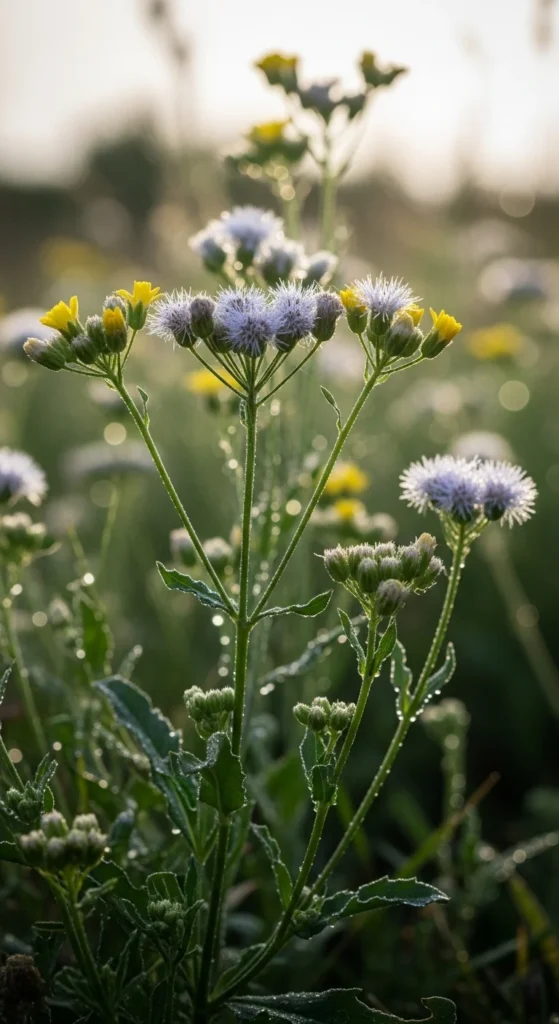
Wildflowers give a free-spirited feel without needing perfect symmetry. The outer arm is spacious enough for a mixed cluster without looking crowded. Start by gathering pictures of daisies, tiny buds, and leafy sprigs you like. Print them small and arrange them on your arm to find a layout that flows with the curve. For a simple approach, choose three flowers: one bigger bloom and two small accents. If you’re keeping costs lower, avoid heavy shading and stick to outlines. The charm of wildflowers comes from loose shapes, so no need for complex detail. These designs look lovely when they climb subtly toward the elbow, giving a soft upward motion. Negative space helps each flower stand out, so let the skin breathe between stems. If you like color, try muted earth tones rather than bright pigments for slower fading. Keep lotion handy for the first month as this area sees sun often.
6. Water Lily Back-of-Shoulder Glow
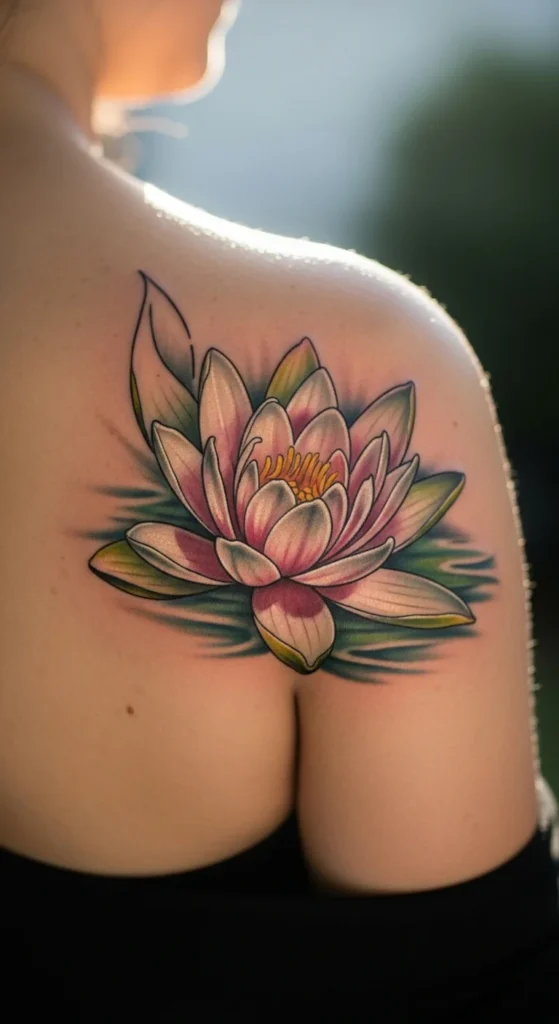
Water lilies feel peaceful and gentle, making them a sweet pick for the back of the shoulder. This spot holds medium-sized designs without feeling heavy. Sketch two lily shapes on paper and place them on your shoulder blade to see the angle you prefer. Many people tilt the bloom toward the arm so it peeks under straps. For an affordable session, focus on the main bloom and skip additional leaves. Black and grey works beautifully for lilies because the petal layers create natural depth. If you like more softness, ask for light gradient shading instead of detailed texture. To test movement, rotate your shoulder in the mirror while holding the sketch in place—you’ll see how the design shifts with motion. This placement heals well, though sleeping on your back might feel tricky for a week. Keep loose shirts nearby to avoid rubbing.
7. Minimalist Single-Line Tulip
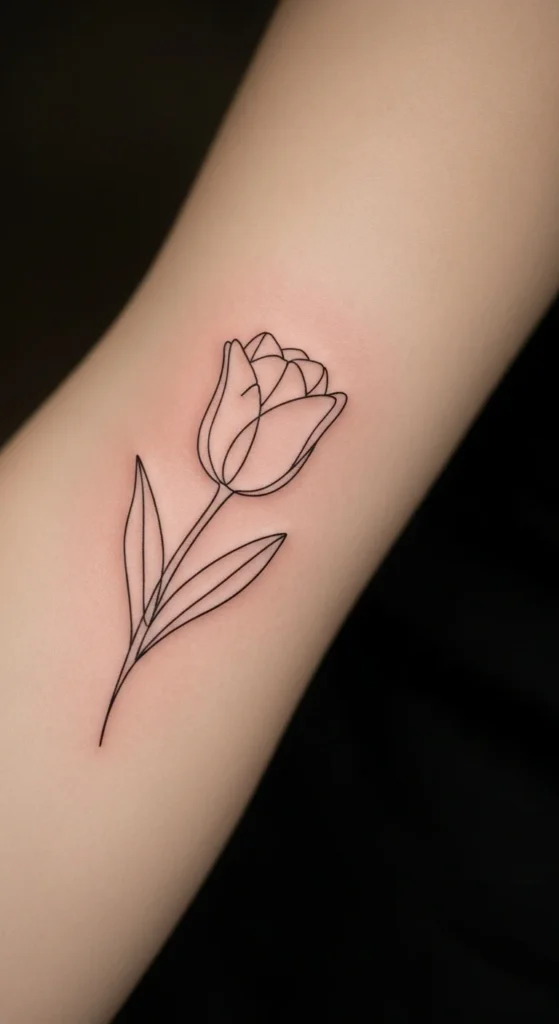
A single-line tulip offers clean simplicity while still holding meaning. The tulip shape works perfectly for a continuous stroke, making the design soft but expressive. To plan the look, draw the tulip using one motion on scrap paper until the curve feels natural. Hold it against your arm to preview flow. These tattoos fit well on the inner forearm or upper arm. They look timeless in black ink and take less time to finish, which helps keep the price low. Avoid adding many leaves or loops; a small curve under the bloom is enough. The beauty of this style comes from the clean gesture. If you want to personalize it, add one short dot line near the stem to mark a special year or memory. Once healed, apply a thin layer of unscented lotion to maintain softness. Simple designs tend to age clearly, especially when spaced well.
8. Sunflower Shoulder Ring
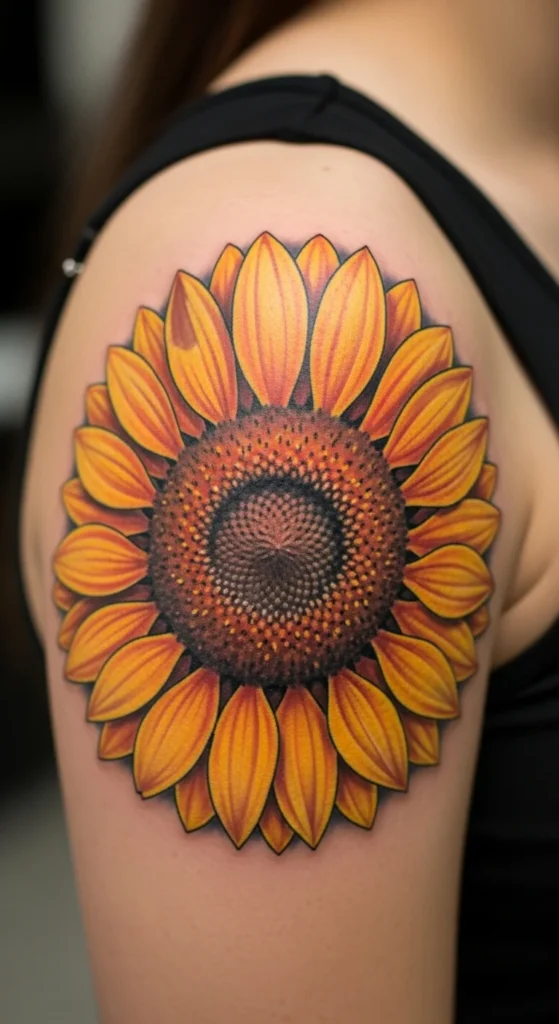
A sunflower brings warmth and a bright mood to the shoulder. The round shape sits naturally on the shoulder cap, making it a popular pick. To try the layout, trace a circle on paper and draw petal tips around it, then tape it to your shoulder. This helps you see whether you want a full ring or half circle. Sunflowers work well in black and grey if you’re watching your budget, since the petal shapes create enough texture. Keep the center slightly larger so it doesn’t blur over time. If you want a little color, choose soft yellows but keep them minimal to limit fading. Ask your artist to angle a few petals outward to create light motion. This area heals easily under loose tops. Because the shoulder sees sun often, carry sunscreen in your bag to keep the ink steady.
9. Forget-Me-Not Memory Band
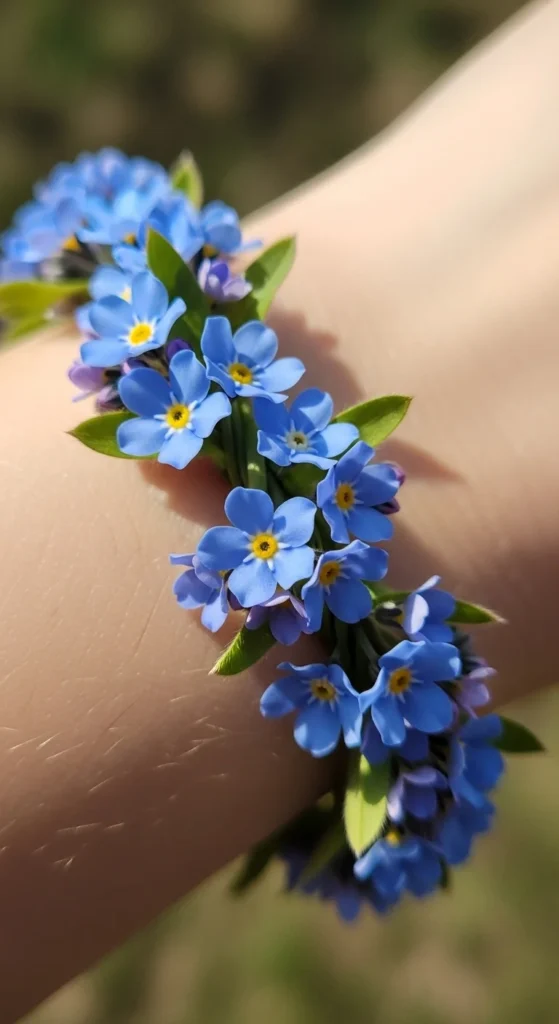
Forget-me-nots offer a tender way to honor someone or mark a memory. A thin band around the wrist makes it feel like a delicate bracelet. To test the width, use a thin colored pencil and draw a faint line around your wrist, then place tiny flower stickers along it. This shows how spaced the flowers should be. Keeping them slightly larger than a grain of rice helps them stay clear long-term. If you’re on a budget, use simple outlines instead of blue pigment. A band of five to seven flowers usually looks balanced without being too busy. If you want more symbolism, add one slightly larger bloom to represent someone special. Wrist tattoos fade faster, so moisturizing regularly helps keep edges crisp. Wear a loose watch for the first few days to protect the area from bumping.
10. Abstract Floral Spine Line
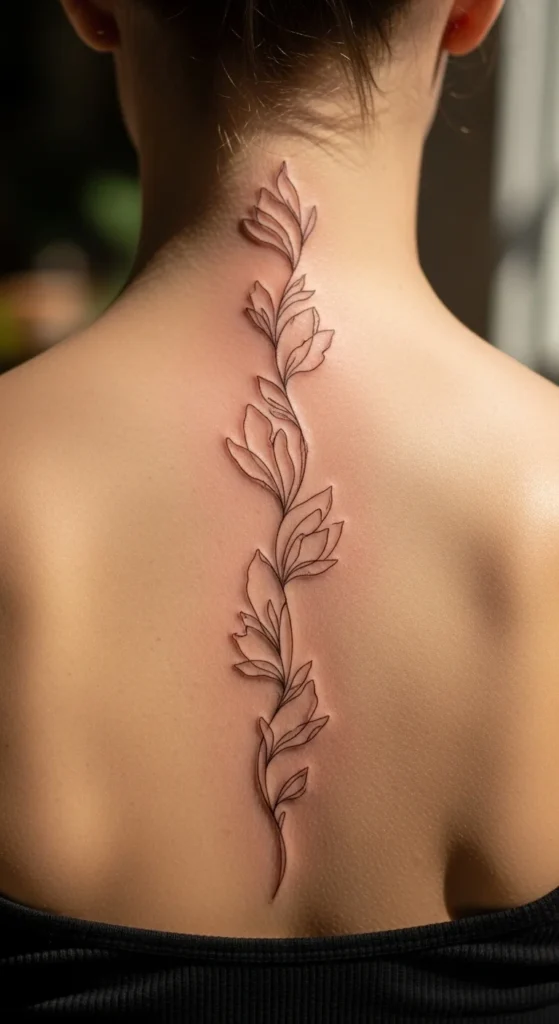
An abstract floral line down the spine creates a flowing vertical story without feeling crowded. This trend is growing fast for 2026 as more people choose freehand shapes instead of strict realism. Before booking, ask your artist for a simple pencil sketch that follows your spine’s natural curve. Tape the sketch to your back and take photos to see where the line should start and end. If you want to keep costs down, stick to a single continuous line with small curves suggesting petals. You don’t need detailed blooms for it to look expressive. These designs age well because they rely on movement rather than tiny details. Wear loose clothing for a few days after your session. If you want a symbolic touch, ask for three curved segments to represent past, present, and future. Keep spacing generous to help the design stay clear.
11. Botanical Illustration-Style Daisy
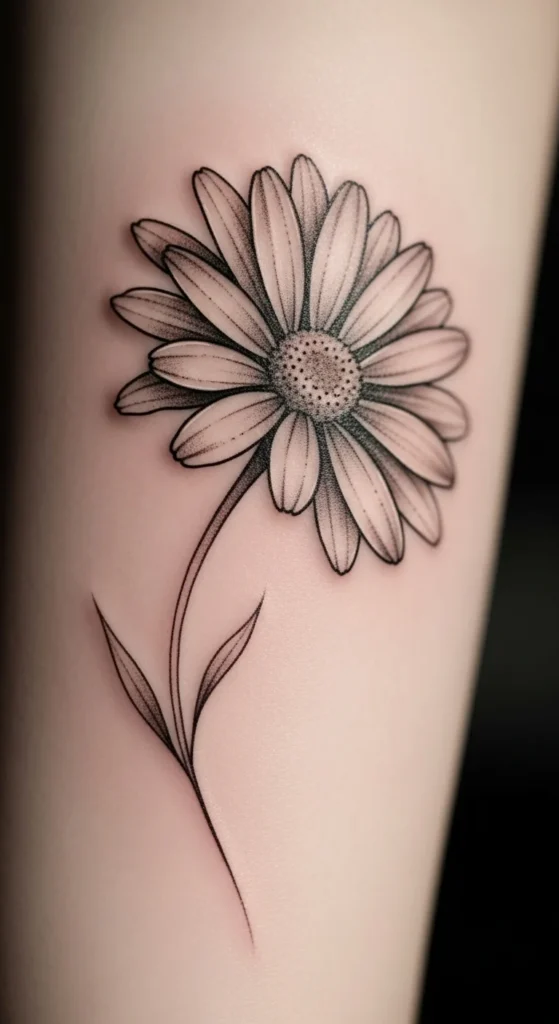
A botanical daisy suits anyone who loves scientific-style art. The daisy shape holds detail without looking overwhelming. Choose the inner arm or calf for this design since the surface stays flatter for fine lines. To plan your piece, print a botanical reference and trace it using a fine pencil. This helps you understand how the petals stack. If you’re watching your budget, simplify the center by using dot shading instead of dense texture. These designs look clear when placed vertically with the stem running down. To personalize, you can add a Latin name below it in tiny script. Keep aftercare simple—just clean, moisturize, and avoid pulling clothing. Botanical designs age nicely when spaced well, so leave extra room around the petals.
12. Cherry Blossom Trail on the Shoulder Blade
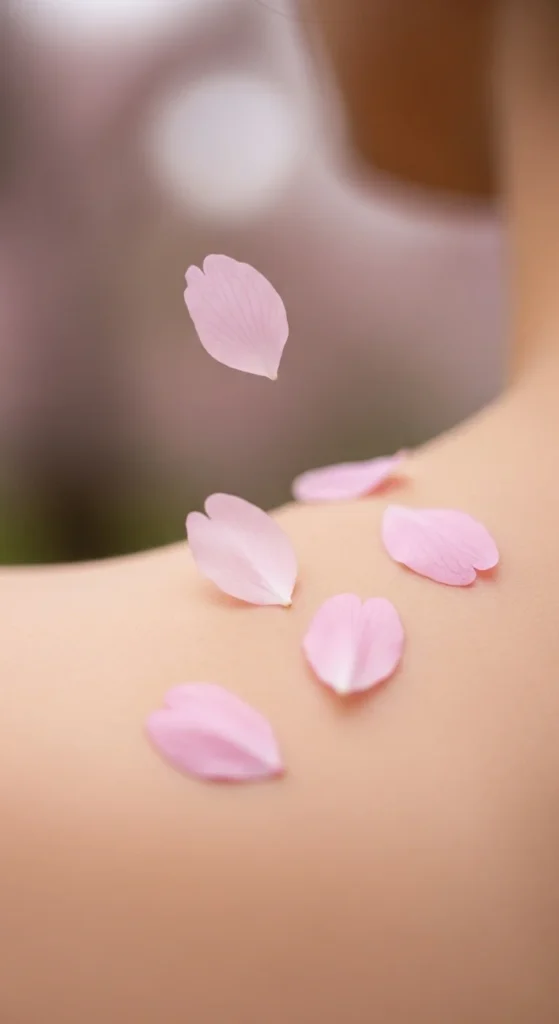
Cherry blossoms give a gentle sense of impermanence and calm. A scattered trail across the shoulder blade creates natural movement. To check your layout, cut out small pink paper petals and arrange them loosely across your shoulder in front of a mirror. This helps you decide whether you want a branch or only floating blooms. If you’re keeping the session short, skip branches and focus on three to five blossoms. Soft pink shading works well, but the design still looks beautiful in black and grey. This area handles medium designs nicely and heals quickly. If you want symbolism, place one petal drifting lower to represent change or time passing. Keep petals spaced well to avoid merging lines later. A loose top helps the tattoo breathe during healing.
13. Lotus + Geometry Hybrid
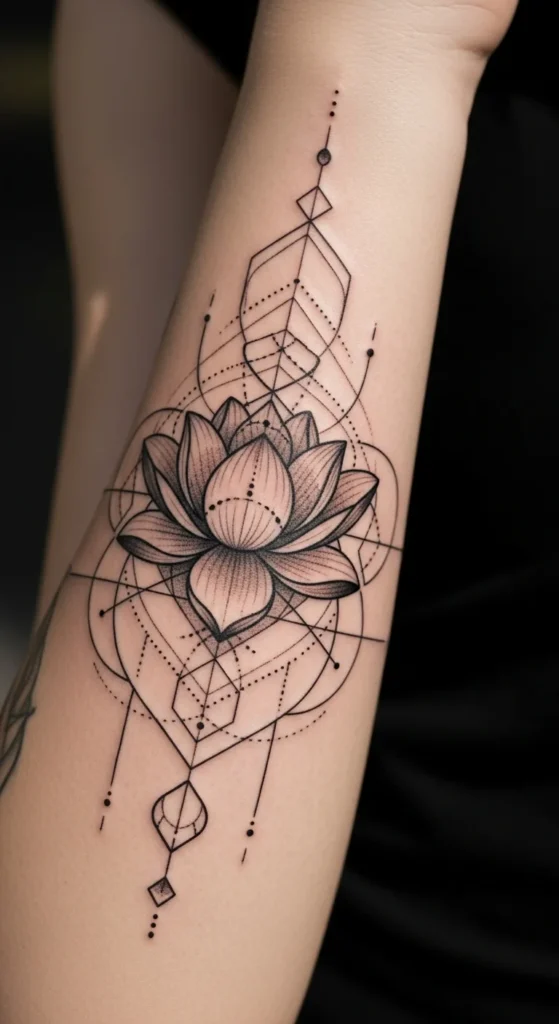
A lotus paired with geometric shapes gives a clean, modern feel. The petals contrast nicely with sharp lines. Forearms work best because the straight forms sit well on flat surfaces. To try the design at home, draw a lotus and overlay it with simple shapes like triangles or thin arcs. You can test combinations by printing them on transparent sheets and layering them. For a budget-friendly option, keep the shapes minimal and avoid solid black fills. Thin lines age better and cost less time. If you want meaning, assign each shape a purpose—such as a triangle for direction. Keep everything balanced so the lotus stays the focal point. This design works in black ink but also pairs well with soft shading if your artist specializes in clean geometry.
14. Lavender Stem on the Ribcage
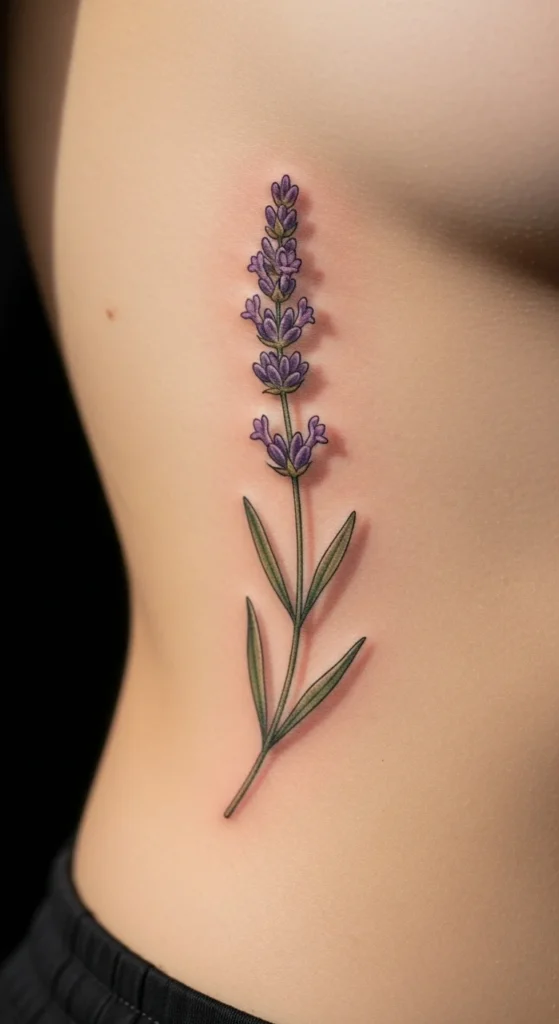
A lavender stem feels calming and elegant. The ribcage suits long, slender designs and allows the flower to stretch naturally. Before committing, draw a thin lavender sprig on a strip of paper and tape it along your side. Move and bend slightly to see how it shifts. Lavender looks lovely in both black ink and soft purple, though purple may fade faster. If you’re hoping to save money, go with outlines only. The rib area can feel tender during the session, so keep the design simple to limit time. Moisturize the skin well before your appointment for smoother lines. Wear loose, soft tops for a few days. A long single stem gives a peaceful look without taking over your torso.
15. Protea on the Thigh
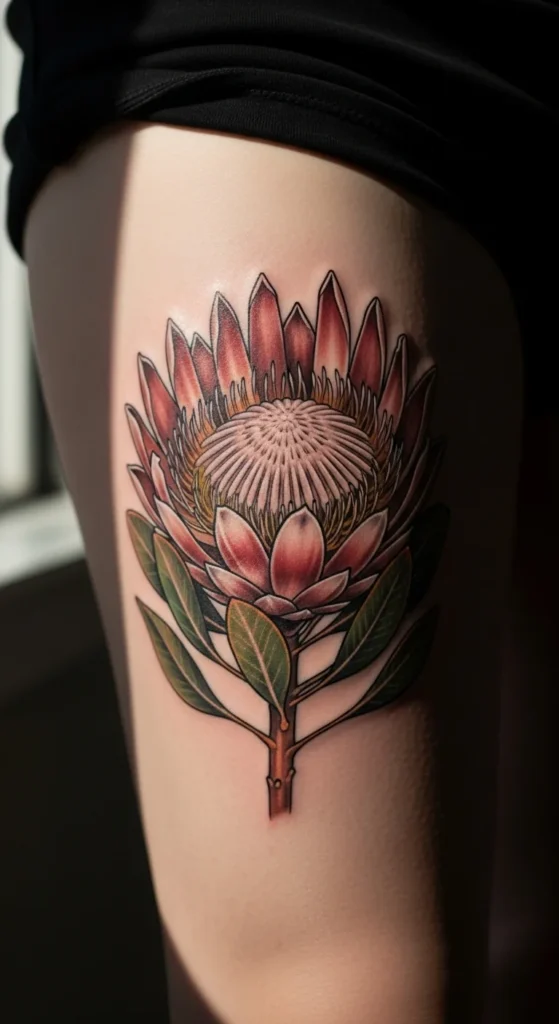
Protea flowers bring a sense of strength and individuality. A thigh placement gives enough space for the textured petals without feeling crowded. To plan the size, sketch a rough shape on paper and hold it against your thigh while sitting and standing—this helps you see how the bloom shifts with movement. Proteas look great in black and grey because the layered petals naturally create depth. If you want to save time, ask your artist to focus on outer petals and simplify the center. This area heals well due to soft skin and limited friction. Add a single leaf if you want a longer shape without adding much detail. A protea stands out even alone, making it a strong centerpiece tattoo.
16. Garden Vine Wrap Around the Forearm
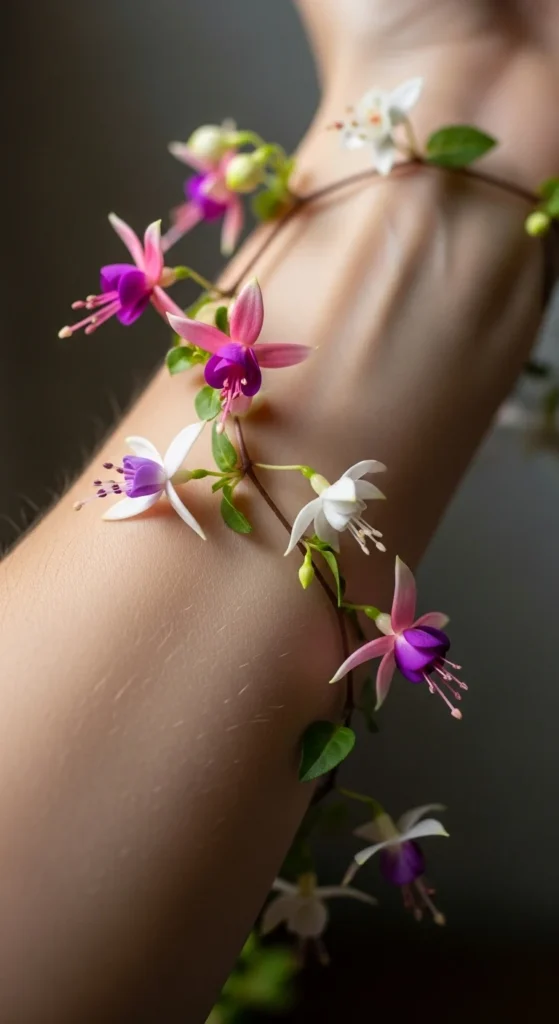
A floral vine around the forearm creates a gentle wrap-around effect. It works well if you enjoy designs that feel like jewelry. To test the motion, draw a light line around your arm using a washable marker, then sketch tiny leaves along it. A vine looks best when it angles diagonally rather than straight across. For a budget-friendly approach, limit yourself to three or four small blooms and keep the rest leaves. These tattoos age well when lines are slightly thicker than micro-line width. If you want a touch of realism, add soft shading to one side of the leaves. Keep lotions handy, as forearms see sunlight often. A vine wrap is perfect for anyone who wants something visible but still soft.
17. Magnolia Over the Heart
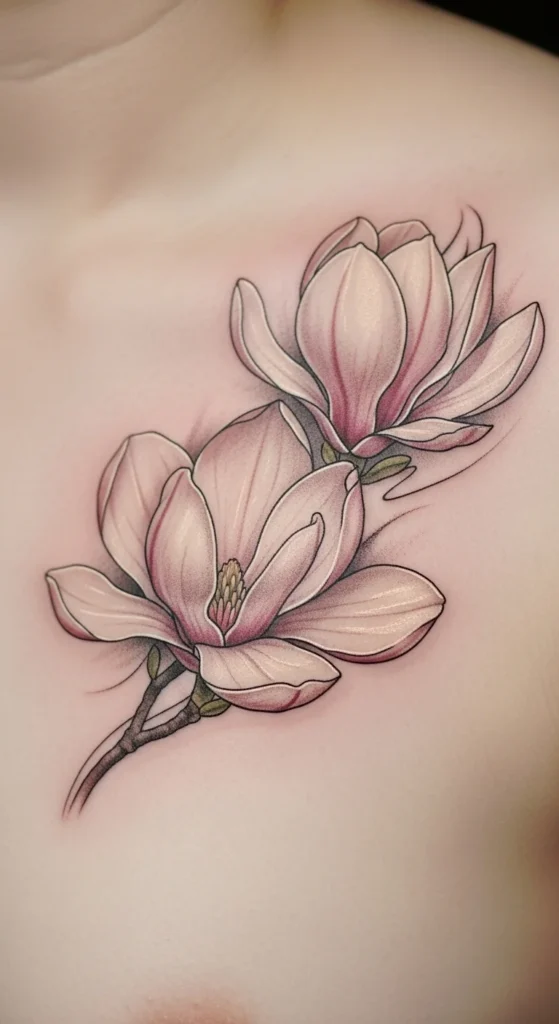
Magnolias carry a gentle sense of inner calm and clarity. Placing one over the heart area adds quiet symbolism. Use a small sketch cutout to test how far you want it toward the center. Many people choose a single bloom for simplicity. If you’re keeping your budget lower, skip heavy shading and rely on petal outlines. This spot stays covered most of the time, so fading stays minimal. Wear soft fabric for the first few days as the area can feel tender. To personalize it, add a single falling petal to represent change. Magnolias look beautiful in slightly larger sizes because their wide petals need room to breathe. Keep the lines gently spaced for a clear long-term look.
18. Dahlia on the Calf
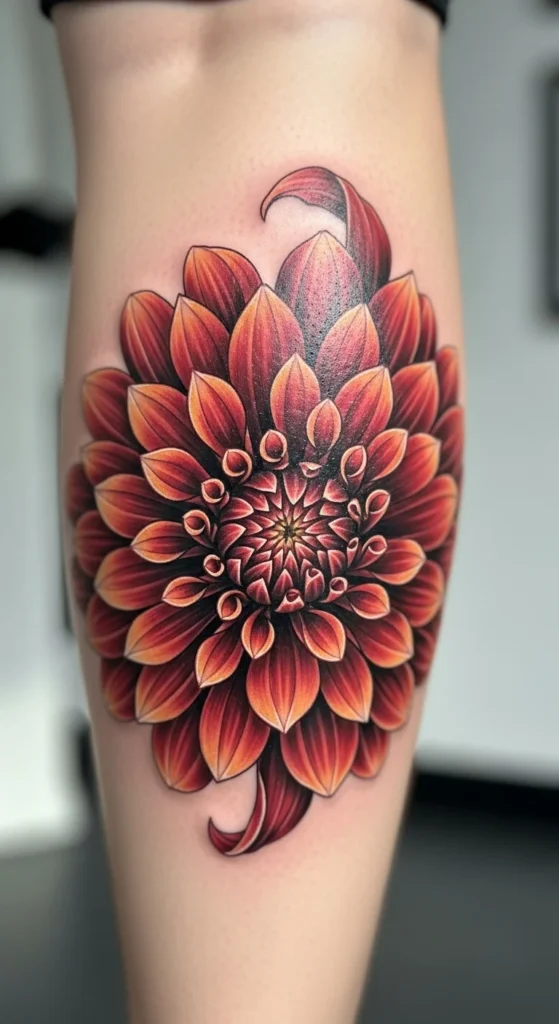
Dahlias give a full, rounded look thanks to their layered petals. The calf is perfect because it offers space and stays relatively stable. Start by sketching a circle and marking simple petal layers to see if you prefer a dense or loose style. For a more affordable session, choose fewer petals or ask the artist to soften the center details. Dahlias look lovely in black ink with dot shading. If you want personality, tilt the flower slightly to follow your calf’s curve. This area heals smoothly and stays protected by clothing. Lotions help maintain shading clarity. A dahlia works well as a standalone feature, so you don’t need additional leaves unless you want extra length.
19. Tiny Floral Cluster on the Hip
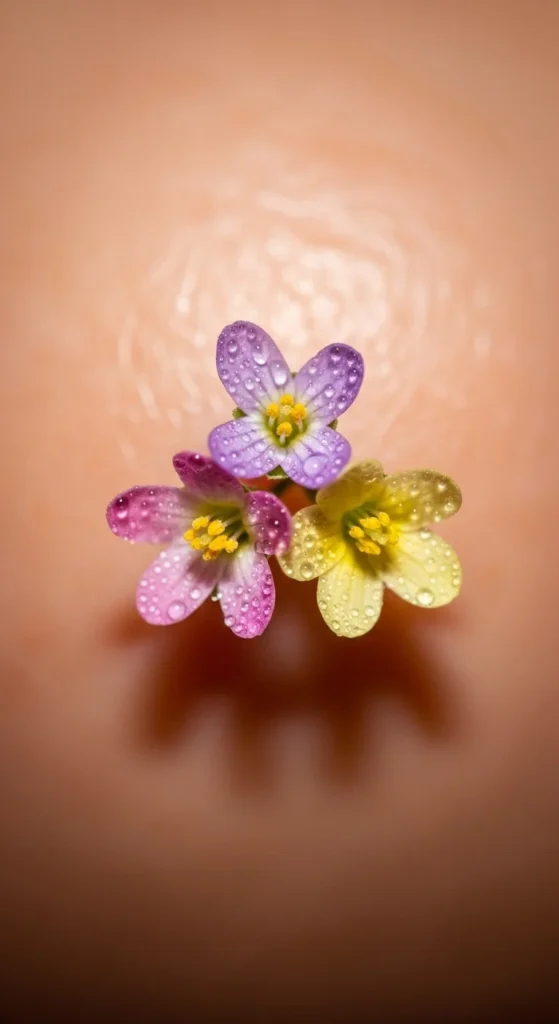
Tiny floral clusters look sweet on the hip, especially for those who want something personal and tucked away. The hip allows for small designs that still feel expressive. Arrange three tiny silhouettes on paper and place them along the curve of your hip to see which direction you like—upward or sideways. For a budget-friendly session, stick to simple outlines. Choose flowers with recognizable shapes, like tiny daisies, so they stay clear over time. The hip area can feel tender during healing, so wear loose waistbands for a few days. If you want a symbolic touch, place the largest flower closest to the center of your body. Tiny clusters make great additions later if you want to add more blooms.
20. Orchid Shoulder Drop

Orchids bring an elegant vertical flow that suits the shoulder drop beautifully. Their long petals guide the eye downward. To test flow, cut out orchid shapes and tape them from your shoulder down your upper arm. Orchids look best slightly larger so the petal shape stays clear. If you’re watching your budget, choose a single orchid instead of a chain. Black ink works well, though a soft lavender tone can add warmth. Keep spacing loose to help each petal stand out. This area heals quickly and sits nicely under tank tops or wide straps. If you want symbolism, tilt the flower downward for a gentle, reflective mood. Use light aftercare since shoulder areas can rub against clothing.
21. Wild Rose Ring on the Finger
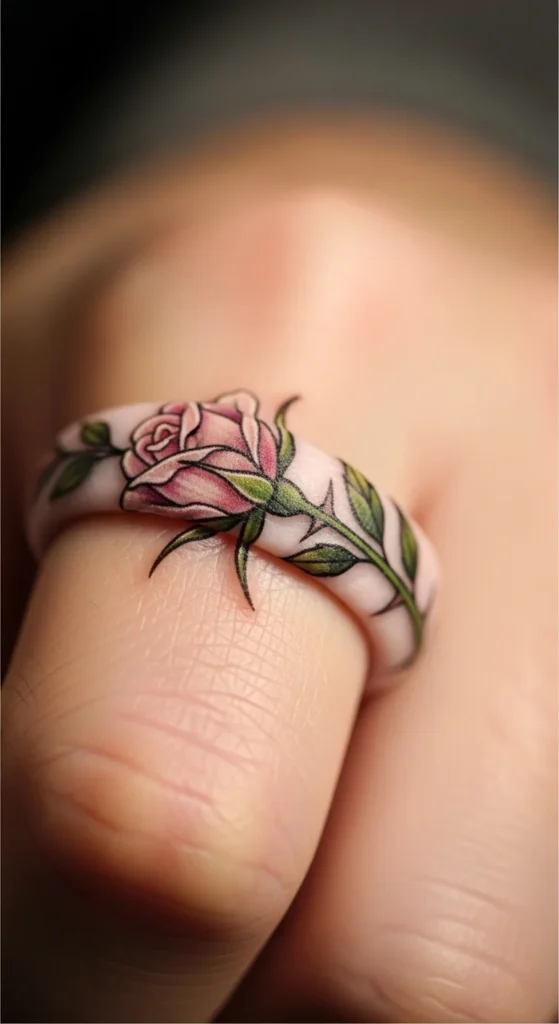
A wild rose ring offers a charming everyday look. Because fingers fade faster, choose a slightly thicker line weight. Try drawing a thin outline on your finger with a fine marker to preview the wrap. Keep the rose small and simple, with just a few petals. This helps it age clearly. If you’re budget-conscious, choose a single bloom with two small leaves. Finger tattoos heal quickly but can flake more, so moisturize gently. Avoid heavy water contact for the first week. A wild rose ring pairs well with minimal jewelry and feels personal without being loud.
22. Hibiscus on the Side Thigh

A hibiscus gives a tropical feel with bold petals. The side thigh handles larger designs comfortably. To plan size, place a floral cutout on your thigh in front of a mirror. Hibiscus flowers look beautiful in black and grey, though soft pinks also work if you don’t mind future touch-ups. If you’re keeping the session shorter, simplify the center details. This area heals well because clothing protects it from sun. If you want a longer flow, add one leaf trailing downward. A hibiscus also works nicely with a crescent shape if you want movement without overfilling the space.
23. Cluster of Baby’s Breath on the Upper Arm
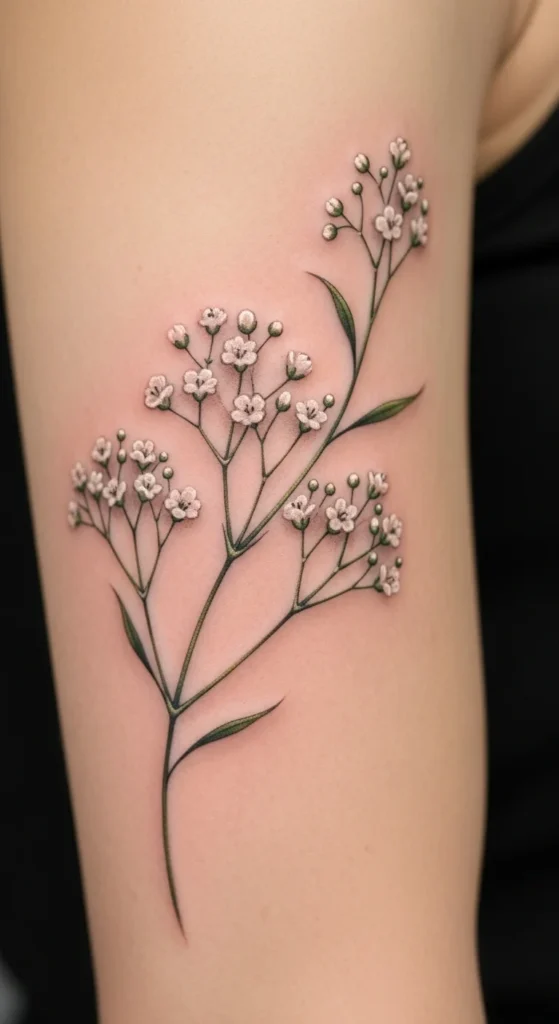
Baby’s breath gives a soft, airy feel. It pairs well with upper arm placement because the shape can spread gently without taking over. Sketch small dot clusters and connect them with thin stems to see how they curve. Keep clusters spaced out for clarity. For a budget-friendly session, stick to outlines or light dot shading. Baby’s breath looks lovely as a filler piece if you plan a larger collection later. This area provides a smooth canvas, helping fine lines stay crisp. If you want symbolism, arrange three clusters to represent important people or moments. Soft aftercare helps the thin lines stay clear during healing.
24. Meadow Field Scene on the Rib Flank
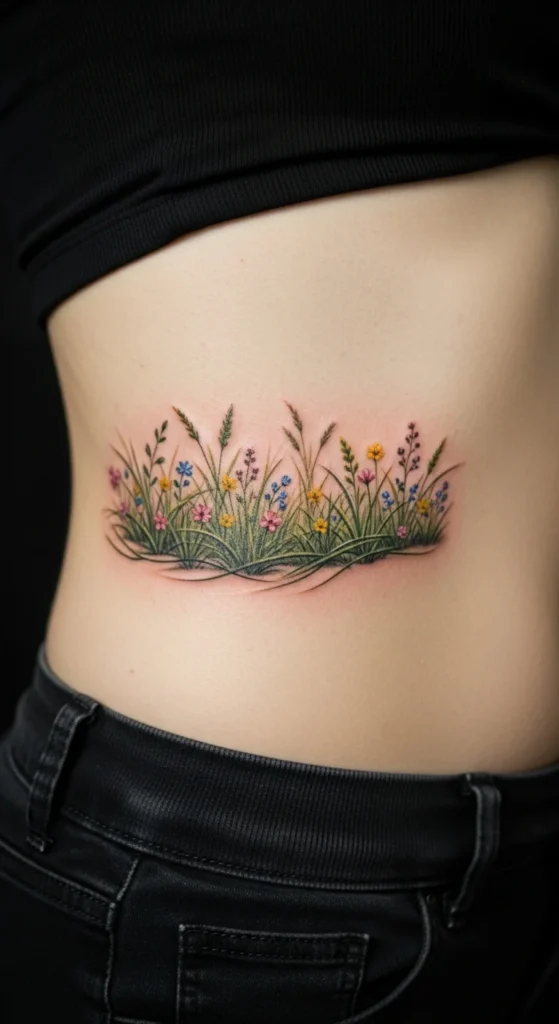
A meadow scene brings a peaceful feel, especially on the rib flank where long shapes flow naturally. Start with a simple sketch of three or four flower types and light grass strokes. Tape the sketch to your side and breathe deeply to see how it moves. These designs look best when kept minimal rather than dense. If you want to save money, choose fewer flower types. Stick to black ink for clarity. Meadows look lovely with gentle upward motion. The rib area can be sensitive, so keeping the design light makes the session shorter. Loose tops help during healing. This tattoo suits anyone who loves nature-inspired pieces that feel soft and personal.
25. Marigold on the Outer Shoulder
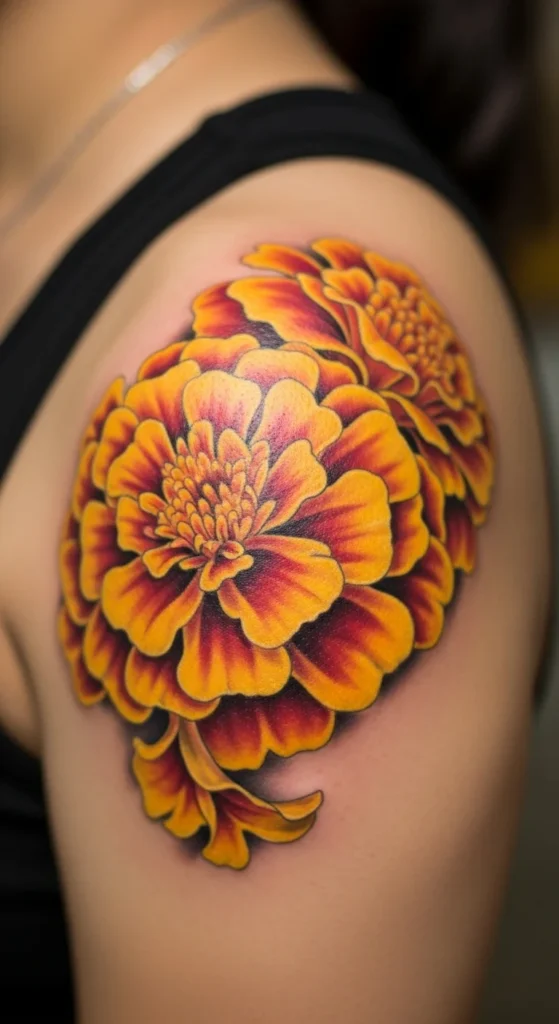
Marigolds symbolize warmth and remembrance. The outer shoulder gives enough space for the layered petals. Sketch a simple marigold shape and place it on your shoulder to test how the round form sits. If you’re on a budget, limit shading to the outer petals. Marigolds look balanced with one or two leaves. Keep petal edges slightly separated to prevent merging as they age. This placement sees sunlight, so apply sunscreen often. The marigold works well alone or as part of a future sleeve. It’s a good pick for people who want something expressive but still soft.
26. Floral Crescent Moon on the Upper Back

A floral crescent moon blends symbolism with beauty. The upper back offers enough room for the curved shape. Cut a paper crescent and place small flower stickers along it to preview your layout. Keep flowers evenly spaced to maintain the arc. If you’re watching your budget, choose two or three flower types rather than many. Leave small gaps of negative space for clarity. This tattoo works best in black ink if you want long-lasting crispness. Wear loose tops during the first week. If you want meaning, place the crescent slightly off-center for a personal touch.
27. Stem Trio on the Inner Forearm

A trio of stems gives a clean, elegant look. The inner forearm provides a smooth surface for long designs. Begin by drawing three lines of different heights and adding simple blooms at the top. Tape the sketch to your arm to see whether you prefer them close together or spaced apart. These tattoos work well in black ink with minimal shading. If you’re keeping the cost lower, stick to outlines only. The trio can represent three personal milestones or people. This area heals easily and stays mostly protected. Use a non-scented lotion to maintain softness after healing.
28. Small Floral Heart Near the Hip Bone

A floral heart near the hip bone brings a soft, intimate feel. Choose small flowers that hold shape clearly, like daisies or tiny buds. To preview, draw a heart outline and place tiny floral stickers around it. If you want a simple session, keep the heart open with only a few blossoms. This design suits black ink well and holds up better than using many colors. The hip bone area may feel tender, so keep the design light. Wear soft waistbands during healing. A floral heart works beautifully alone or as a future expansion piece.
29. Floating Petal Trail Down the Arm
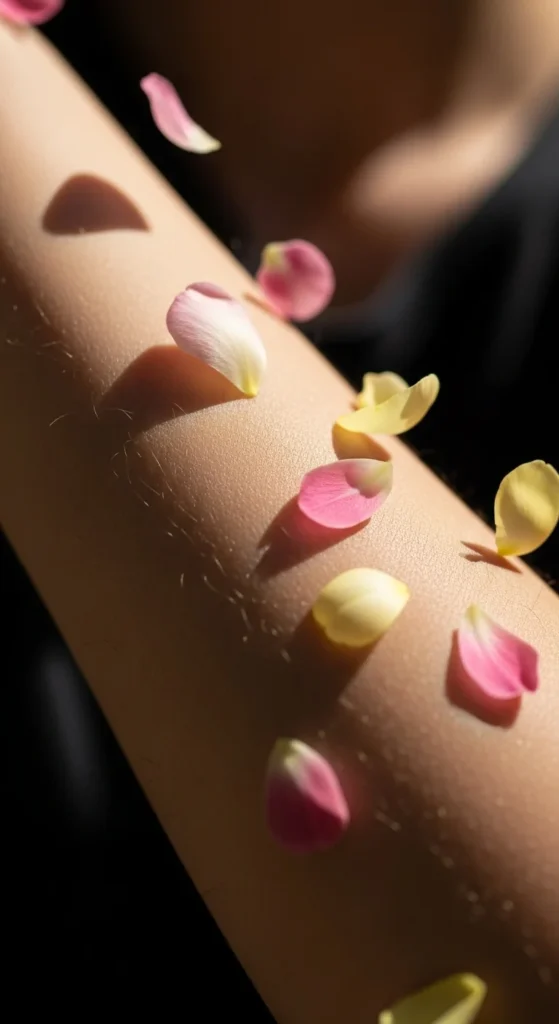
Floating petals give a gentle sense of movement. A diagonal trail down the arm works best because it follows natural curves. Cut out small petal shapes and arrange them along your arm to find the flow you like. Keeping them spaced helps each shape stay clear long-term. For a budget-friendly session, use simple outlines. Choose petals from your favorite flower for a personal touch. This design heals quickly since it’s made of small shapes. Keep moisturizer handy, especially during warm weather. A petal trail is perfect if you want something subtle that still carries meaning.
Conclusion
Floral tattoos stay popular for good reason—they carry stories, memories, and beauty in a soft but expressive way. Whether you prefer tiny blooms or sweeping shapes, each idea here offers simple ways to plan your design, save money, and personalize meaning. Take your time exploring what feels right for your style, then choose a flower that reflects your story in the clearest and most natural way.
